How to Install ArgoCD on an AKS Cluster and Sync Cluster Status With a Kubernetes Manifest Repository
 Joel Oduyemi
Table of contents
- 👨💻 Introduction
- 🔔 Prerequisites:
- 📝 Plan of Execution
- 🐧 Step 1: Generating the Kubeconfig File
- 👨🏽💻 Step 2: Creating an ArgoCD Namespace and Installing ArgoCD
- 🛠️ Step 3: Patching ArgoCD Server to use a load balancer and Obtain the Server IP and Password
- ✍🏽 Step 4: Creating and Applying the ArgoCD Sync Manifest File
- 🧪 Step 5: Checking Sync Status and Confirming Access To Application
- Resources

👨💻 Introduction
Welcome to the fourth part of the step-by-step implementation guide for deploying a Dockerized application on Azure Kubernetes Service (AKS) using ArgoCD and Azure DevOps. In this project series, We're on a journey of breaking down the complex process of creating a robust and efficient Kubernetes deployment pipeline into manageable steps.
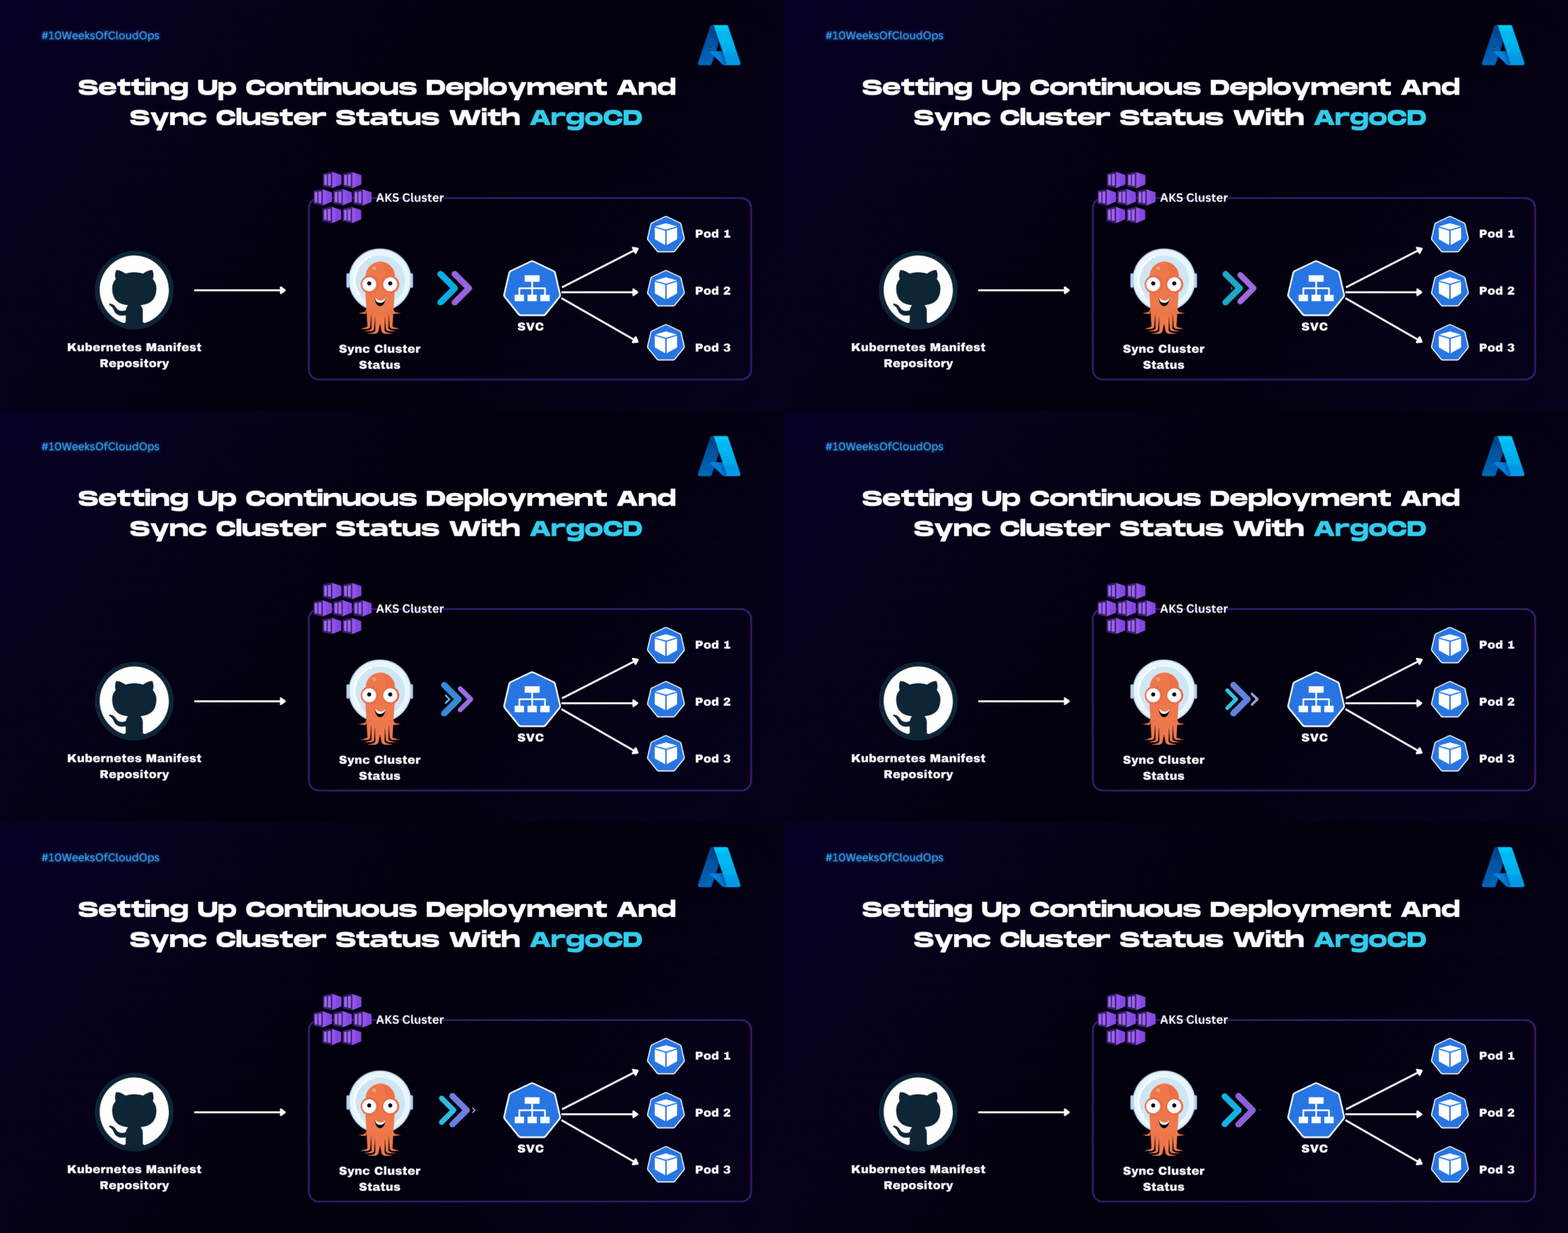
In Part 4, we'll embark on a journey to install ArgoCD on your AKS cluster and ensure synchronization of the cluster's status with a Kubernetes manifest repository.
🔔 Prerequisites:
Before we dive into setting up ArgoCD on your AKS cluster, ensure that you have the following in place:
Azure Kubernetes Service (AKS) Cluster - refer to Part 2 of this project series for instructions on how to provision one using Terraform.
Kubernetes Manifest Repository - You should have a dedicated GitHub repository where your Kubernetes manifest files are stored. This repository will serve as your single source of truth for cluster configurations.
AZ CLI and Kubectl Installed
It will be great to check out part 1 of this project series where I've provided the project's architecture and details about this series - Link Here
📝 Plan of Execution
Generating the Kubeconfig File
Creating an ArgoCD Namespace and Installing ArgoCD
Patching ArgoCD Server to use a load balancer and Obtaining the Server IP and Password
Creating and Applying the ArgoCD Sync Manifest File
Checking Sync Status and Confirming Access To Application
🐧 Step 1: Generating the Kubeconfig File
If you provisioned your AKS cluster using Terraform in Part 2 of this project series, you probably might have observed that I included a local resource in the main.tf file at the root directory. This resource automatically fetches and saves the content of the kubeconfig file into a new file named kubeconfig. To utilize this configuration file, please run the following command inside your Terraform project directory:
sudo mkdir -p ~/.kube/
sudo mv ./kubeconfig ~/.kube/config
Alternatively, if you don't want to use the file generated by Terraform or perhaps you created your Terraform project and it doesn't include the local resource, you can follow these steps after successfully creating your AKS cluster with terraform apply:
az aks get-credentials --resource-group AKSCluster_RG --name AKSCluster_NAME
👨🏽💻 Step 2: Creating an ArgoCD Namespace and Installing ArgoCD
Here, we'll create a dedicated namespace for ArgoCD and proceed with the installation of ArgoCD on your AKS cluster using the following command:
kubectl create namespace argocd
kubectl apply -n argocd -f https://raw.githubusercontent.com/argoproj/argo-cd/stable/manifests/install.yaml
🛠️ Step 3: Patching ArgoCD Server to use a load balancer and Obtain the Server IP and Password
By default, the Argo CD API server is not exposed to an external IP. To access the API server, you need to change the argocd-server service type to LoadBalancer using the command below:
kubectl patch svc argocd-server -n argocd -p '{"spec": {"type": "LoadBalancer"}}'
After modifying the service type to LoadBalancer, the next step is to retrieve the API server public IP address and the server password using the following command:
export ARGOCD_SERVER=`kubectl get svc argocd-server -n argocd -o json | jq --raw-output '.status.loadBalancer.ingress[0].ip'`
echo "ARGOCD_SERVER IP: $ARGOCD_SERVER"

export ARGOCD_PASSWORD=`kubectl -n argocd get secret argocd-initial-admin-secret -o jsonpath="{.data.password}" | base64 -d`
echo "ARGOCD_SERVER PASSWORD: $ARGOCD_PASSWORD"
The command above might require you to install jq, a versatile tool used for manipulating and parsing JSON data.
✍🏽 Step 4: Creating and Applying the ArgoCD Sync Manifest File
The ArgoCD Sync manifest serves a crucial purpose in our deployment process. It helps to define how ArgoCD should synchronize the desired state of your AKS cluster with the configurations stored in your Kubernetes manifest repository.
This ensures that your applications and configurations remain consistent and up to date with your desired specifications. Below is a snippet of what this file should look like:
apiVersion: argoproj.io/v1alpha1
kind: Application
metadata:
  name: todo-app-argo
  namespace: argocd
spec:
  project: default

  source:
    repoURL: https://github.com/Joelayo/Week_4-Kubernetes-Manifests.git
    targetRevision: HEAD
    path: kube-manifest
  destination:
    server: https://kubernetes.default.svc
    namespace: todo-app

  syncPolicy:
    syncOptions:
    - CreateNamespace=true

    automated:
      selfHeal: true
      prune: true
To apply this file to your cluster and initiate the synchronization process, run the command below:
kubectl apply -f=argocd-sync.yaml
Remember to edit the file as per your specific application and cluster requirements before applying it.
🧪 Step 5: Checking Sync Status and Confirming Access To Application
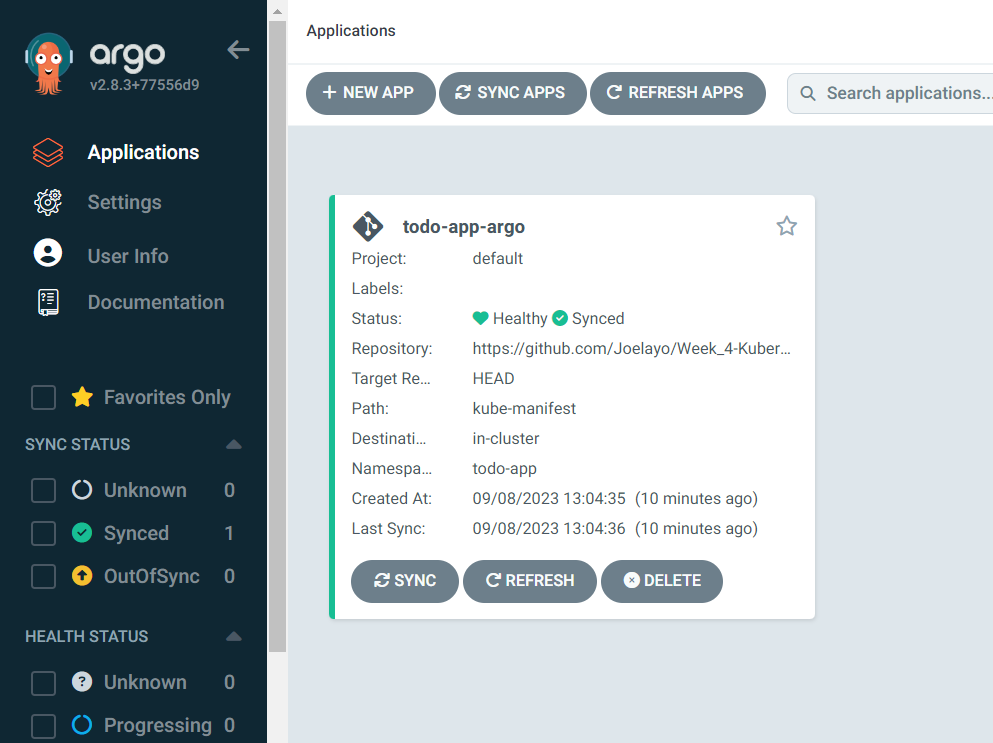
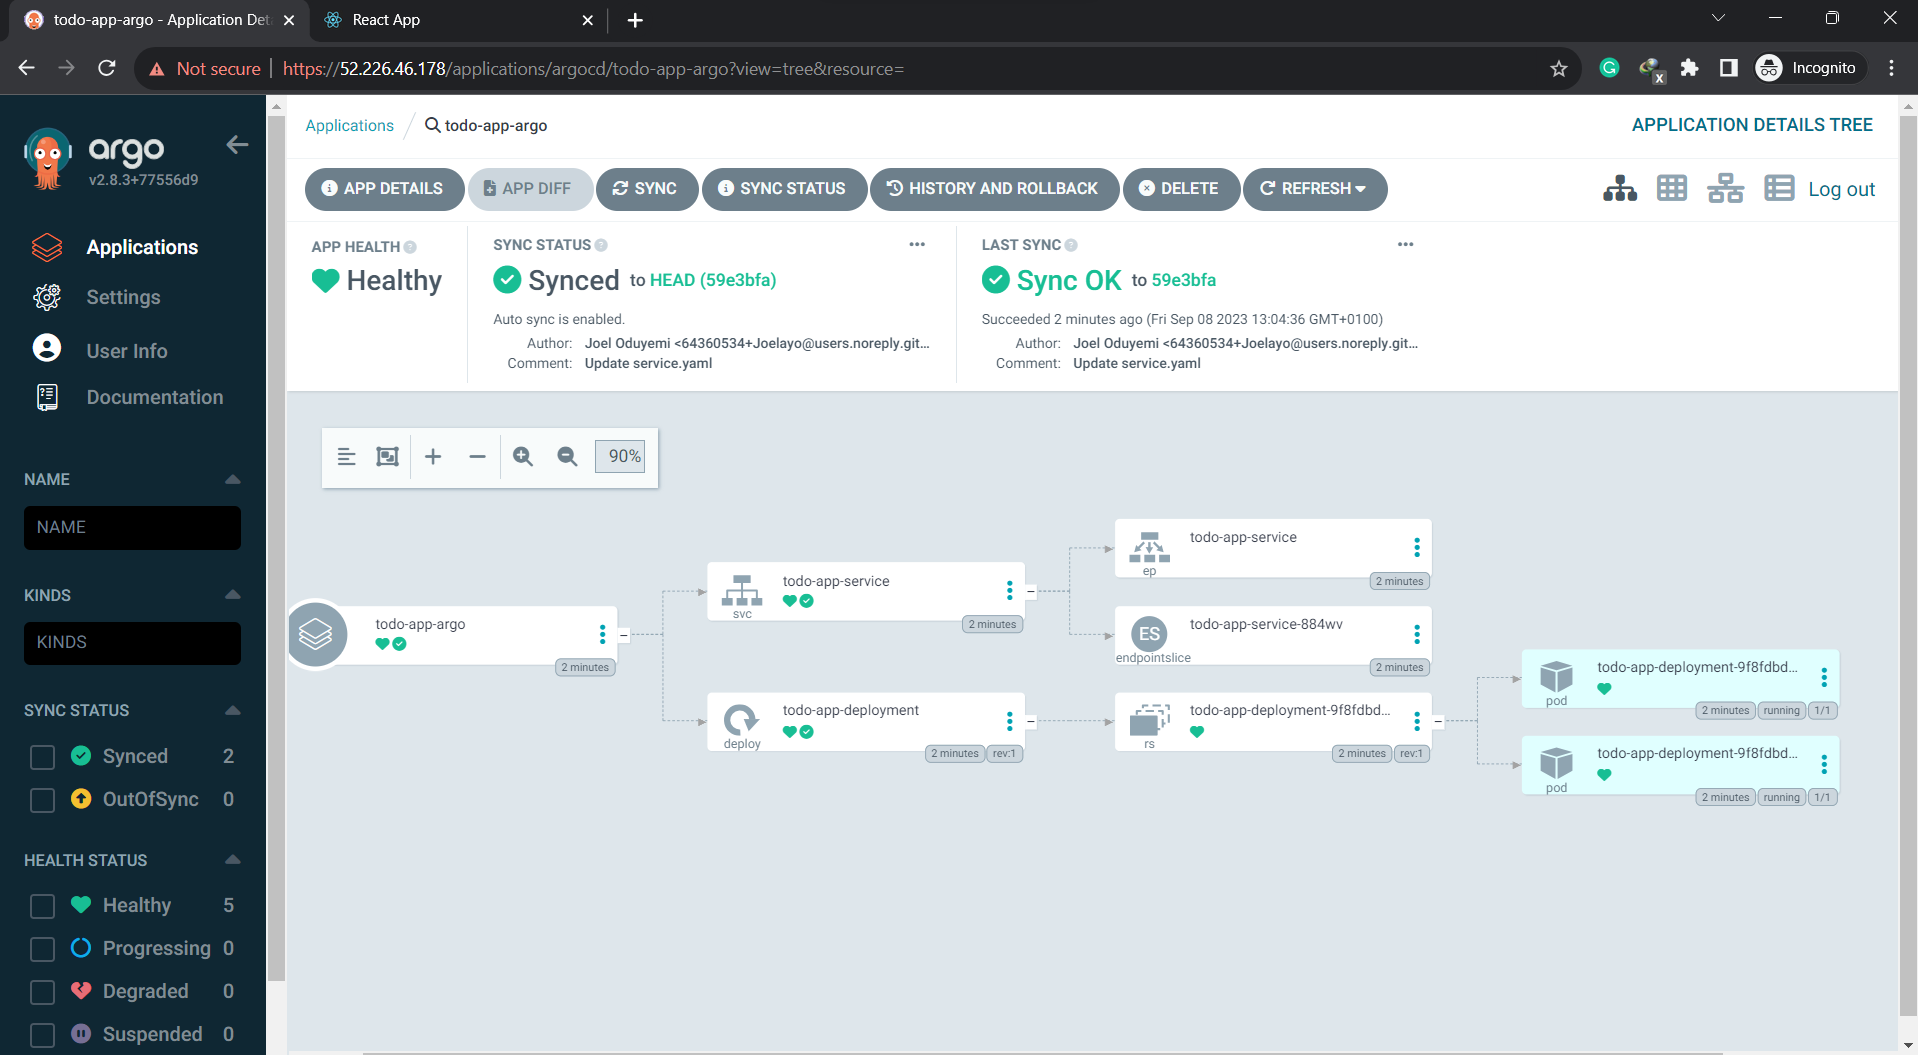
Now, utilizing the ArgoCD server IP and the server password, we can access the ArgoCD user interface (UI) to check the synchronization status and confirm successful access to your application.
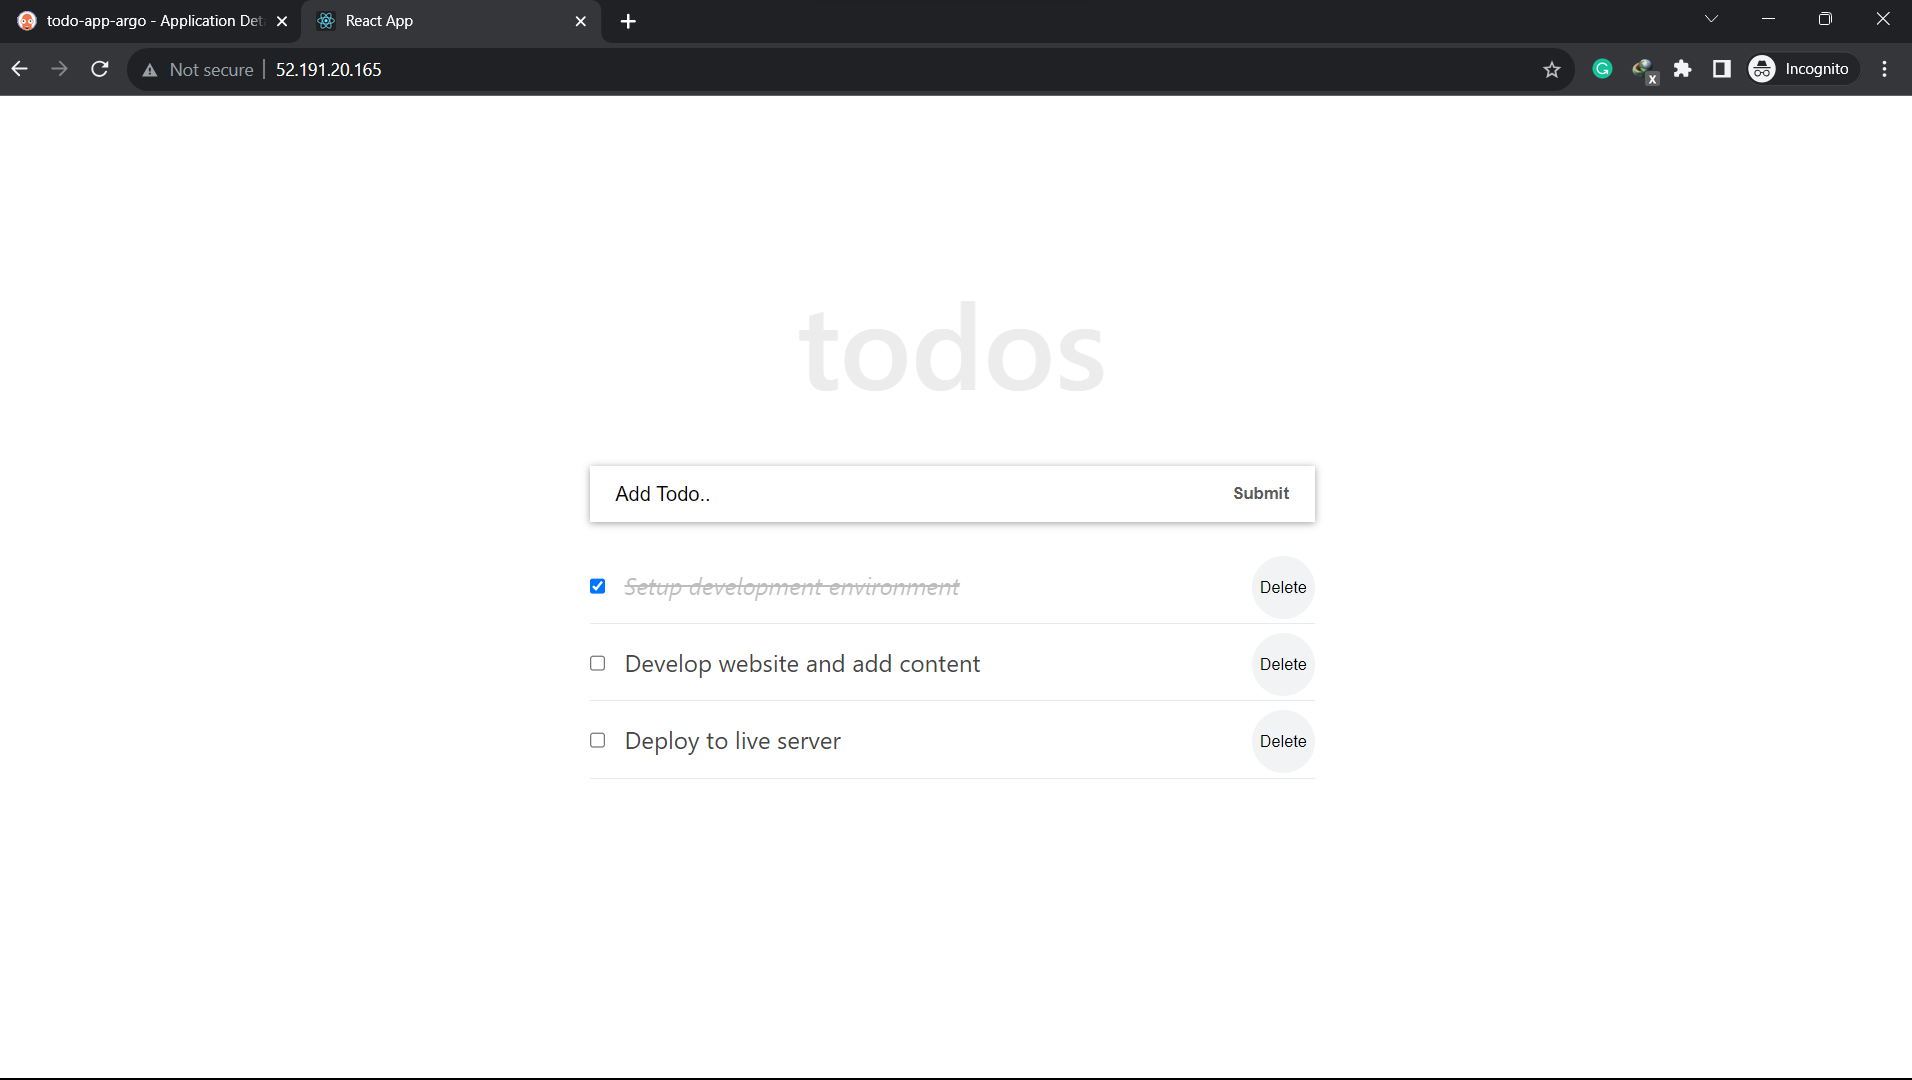
When accessing the server using the provided IP address, you will be prompted to log in. The default username for ArgoCD is "admin." After a successful login, you will be able to access and interact with the ArgoCD user interface. Here are some images illustrating the successful access and synchronization of my applications:


To access the application that's running in your cluster, execute the following command:
kubectl get svc -n todo-app
This will provide you with a list of services in the todo-app namespace, including the IP addresses associated with those services. This will allow you to identify the IP address of your application service for access.


We've now successfully walked through the process of setting up ArgoCD on your Azure Kubernetes Service (AKS) cluster embracing the powerful principles of GitOps. This methodology empowers you to efficiently manage and synchronize your applications and configurations with ease, all while maintaining version control and collaboration through Git repositories.
As you continue to explore ArgoCD and its capabilities, you'll discover its value in simplifying complex deployment workflows and maintaining the reliability of your AKS-based applications. Stay tuned for further guides and enhancements to your Kubernetes journey.
Resources
https://argo-cd.readthedocs.io/en/stable/getting_started/
https://argo-cd.readthedocs.io/en/stable/user-guide/sync-options/
Subscribe to my newsletter
Read articles from Joel Oduyemi directly inside your inbox. Subscribe to the newsletter, and don't miss out.
Written by

Joel Oduyemi
Joel Oduyemi
I'm a detail-oriented and innovative Solutions Architect / DevOps engineer, a team player, and solution-driven, with a keen eye for excellence and achieving business goals. I have repeatedly demonstrated success in designing and launching new cloud infrastructure throughout Azure workloads. I'm passionate about the Cloud, DevOps, Well-Architected Infrastructure, Automation, Open-source, Collaboration, Community building, and knowledge sharing.