A Beginner's Guide to Setting Up RDS PostgreSQL and Connecting with DBeaver(Privetly through SSH tunnel)🌐
 Chetan Sharma
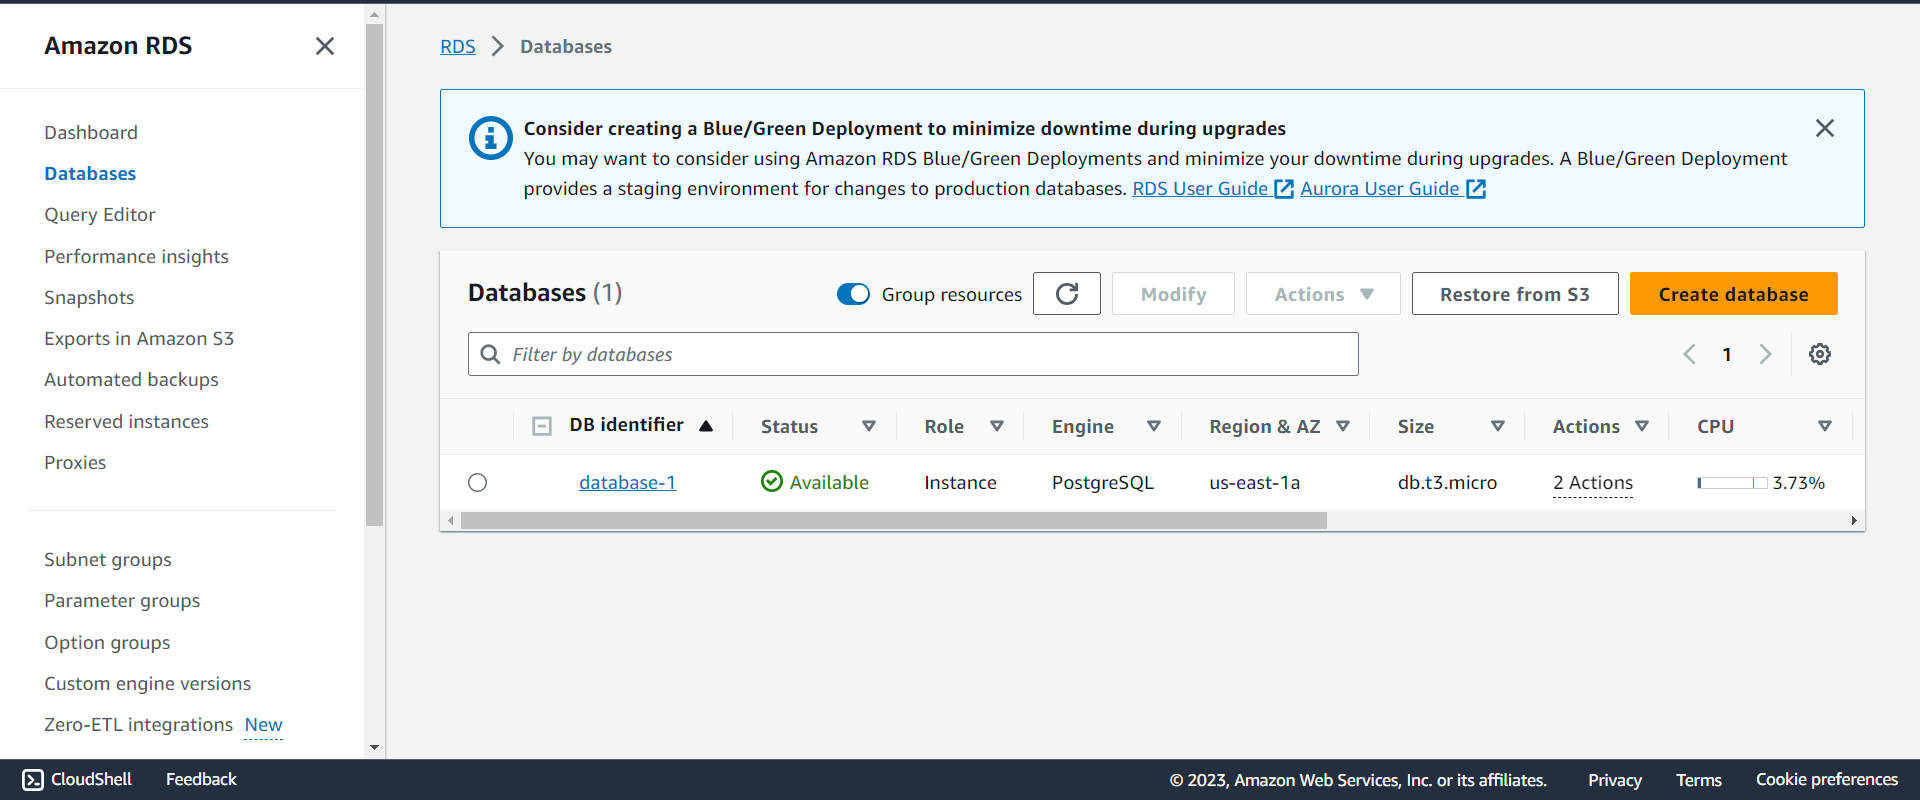
Step 1: Create Database in AWS RDS
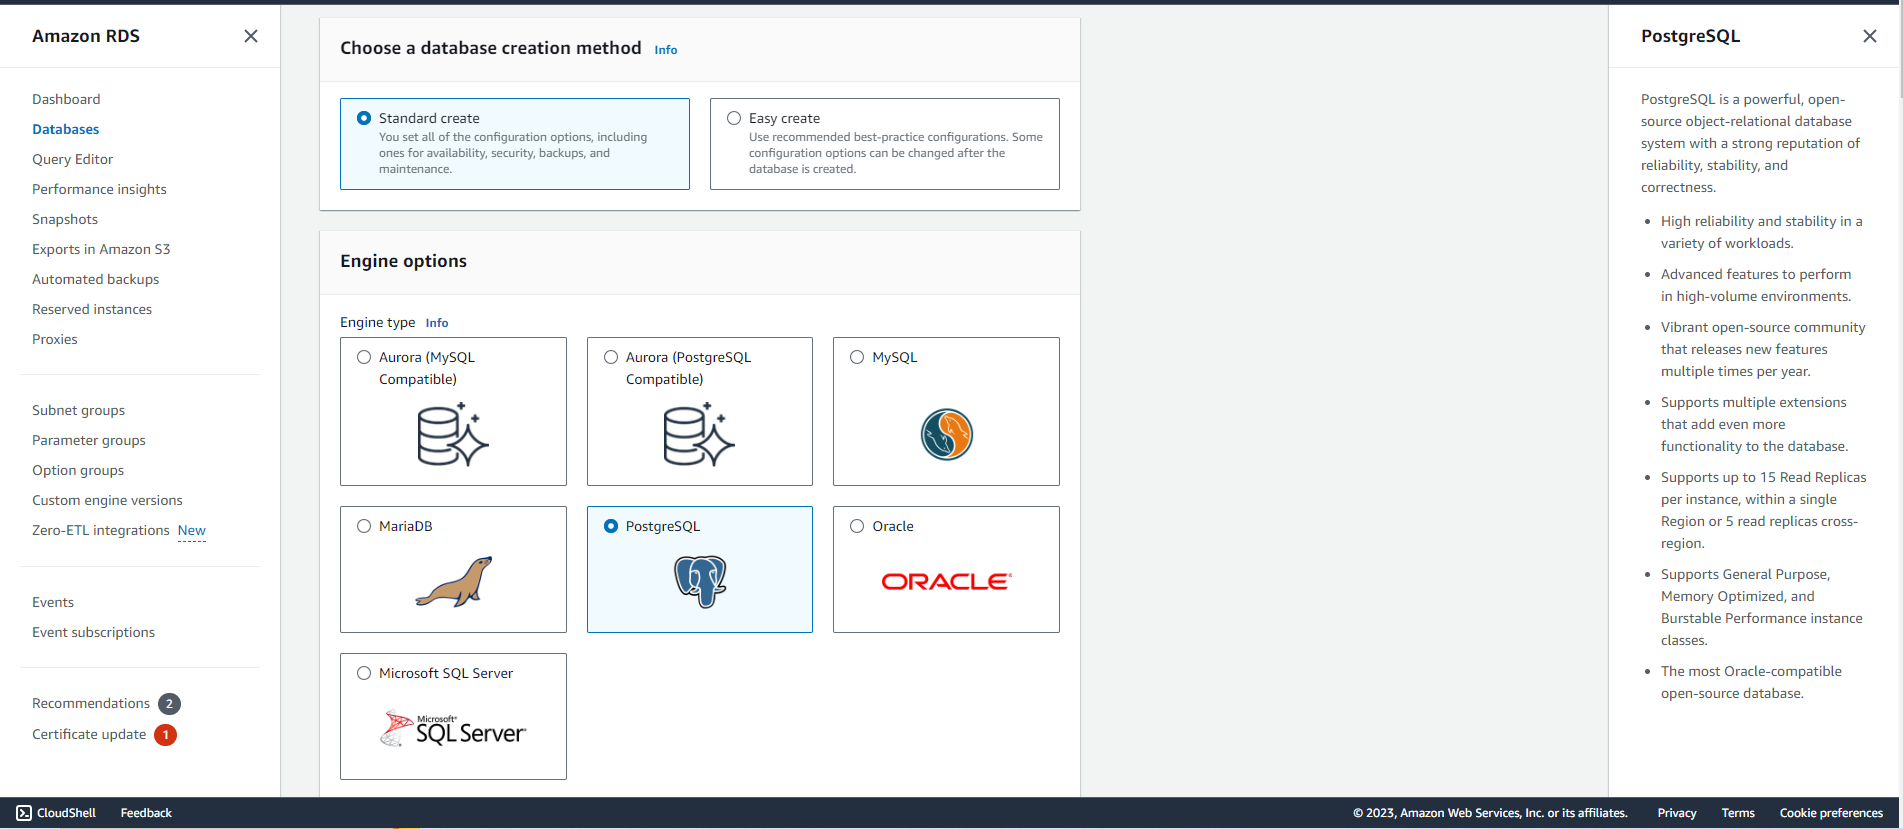
Choose the Standard Create option and the database you want to integrate with. I'll choose PostgreSQL for this hands-on. Do read the information provided on the right side.
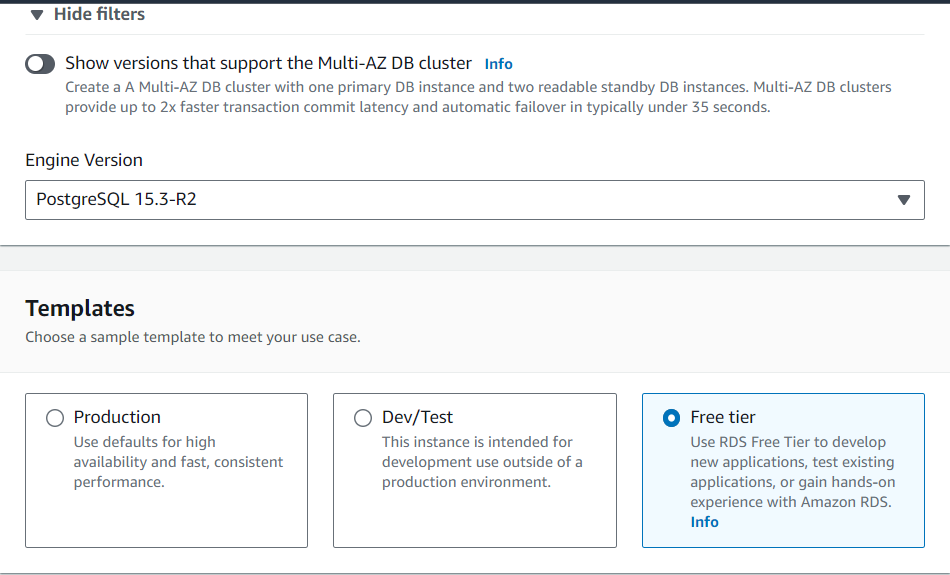
Choose the PostgreSQL version you want to use, then select Free Tier. The other options would incur costs.
Note: Availability and durability will be auto-filled for us since we were using the free tier
Next, name your DB instance. It can be anything you want, then proceed to create a username and password for it.
Note: We will be covering Secret Manager as well in the upcoming hands-on, meanwhile you guys can choose the default settings.
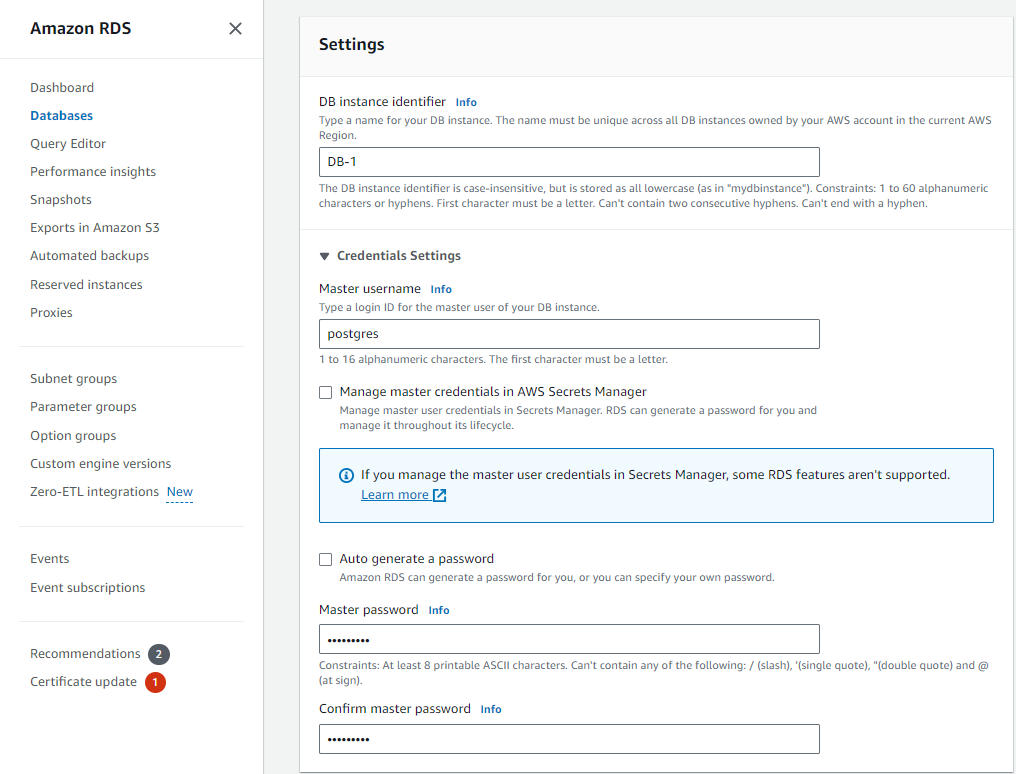
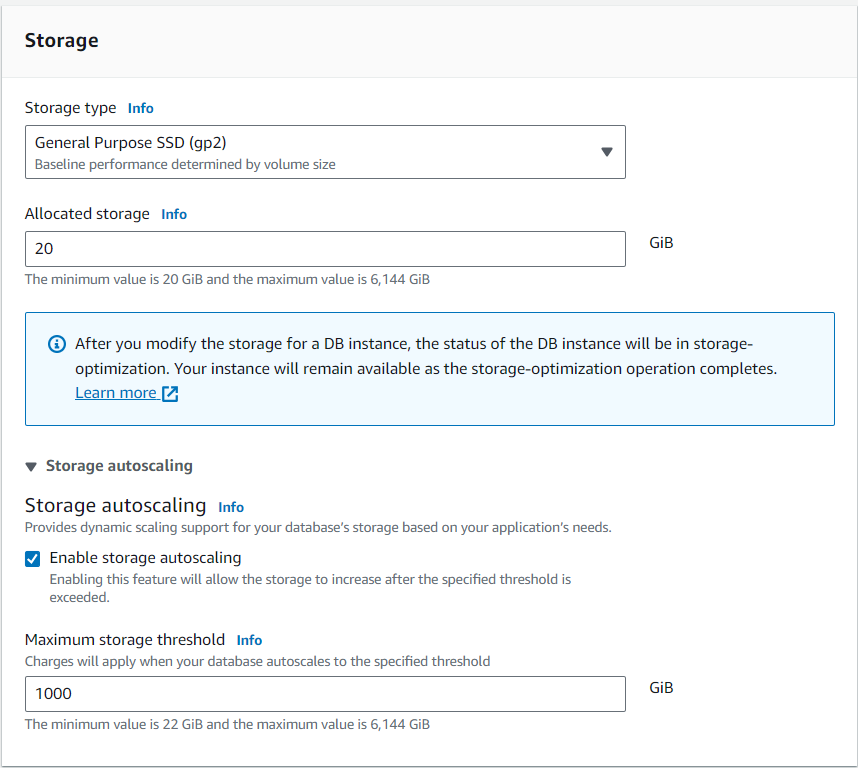
Leave the rest of the settings below as it is.
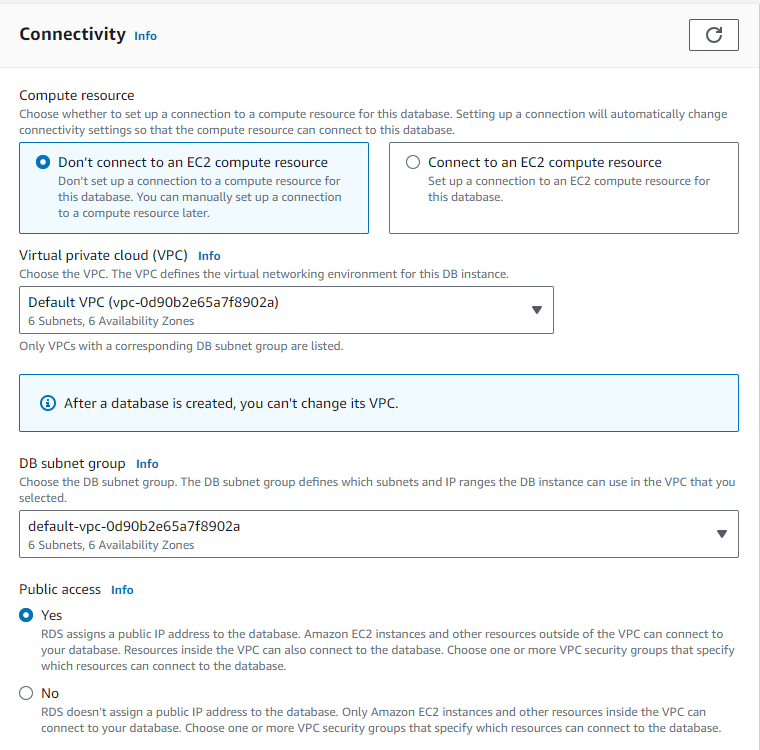
Connectivity section Set Public access to No and select Choose Existing for our Virtual Private Cloud (VPC). This will set it to the default.
Public Access should be NO ideally and must be handled by Bastion Host
Creation of Bastion Host (Jump-Server)
Create Amazon Linux EC2 instance with primary key and ssh enables security group.

Add your IP address here(search ip4.me)
Open dbeaver and go to SSH tab
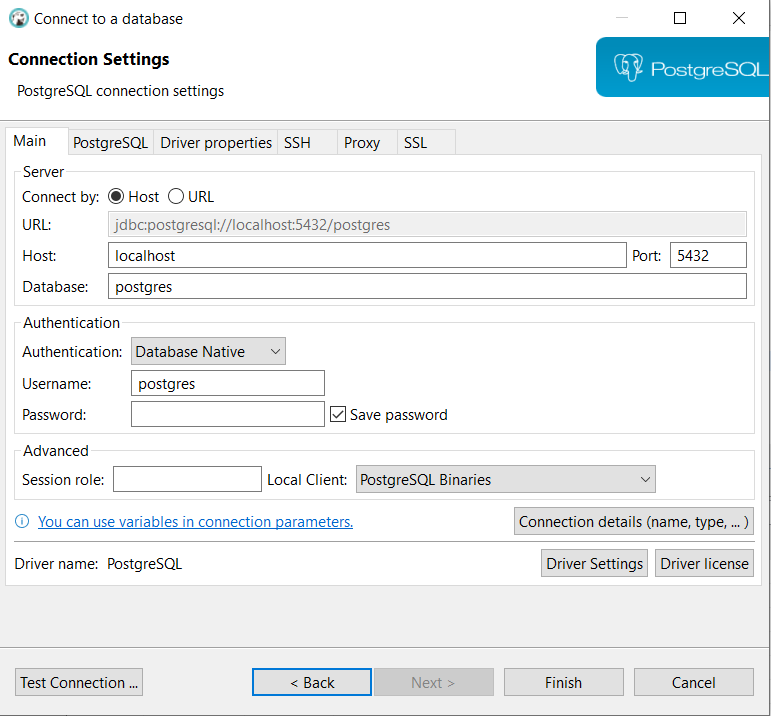
Navigate to the SSH Tab and click on use SSH tunnel. Paste the copied IP address then enter ec2-user for username. For the authentication method, choose a public key and for the private key, select your per file. Click on test tunnel configuration then click yes to add this host to the known host file and you should see the connected message. Now, let's go back to the RDS window and grab the database endpoint. Navigate to the main Tab and paste the database endpoint in the server host text box.
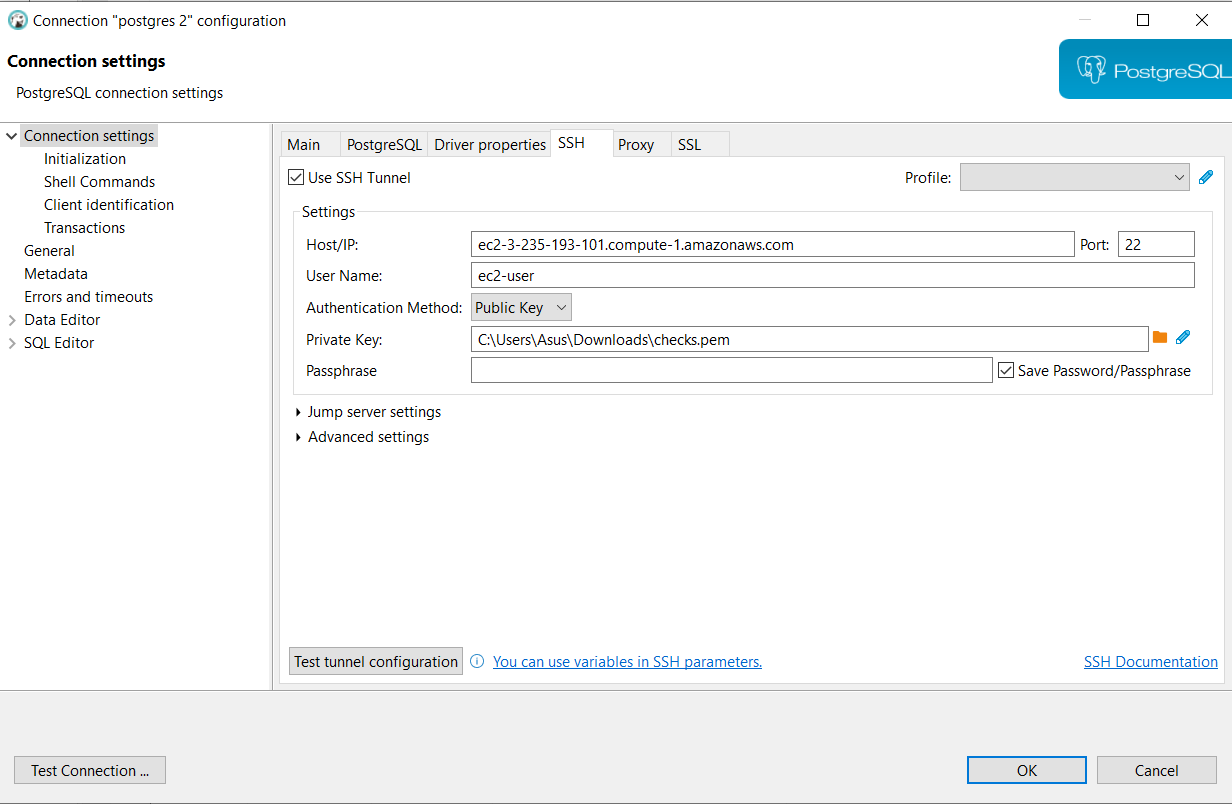
Click on Test Tunnel configuration, you will be seeing below message
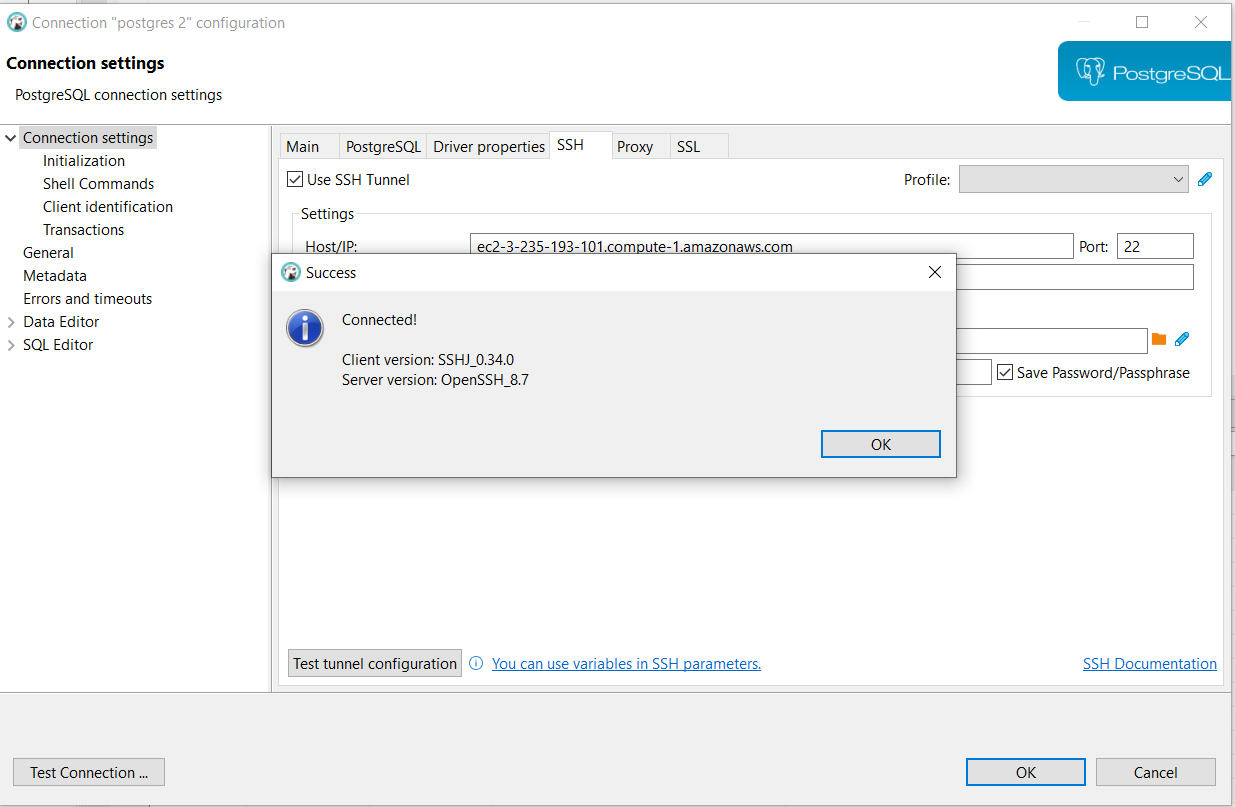
Now continuing our other steps
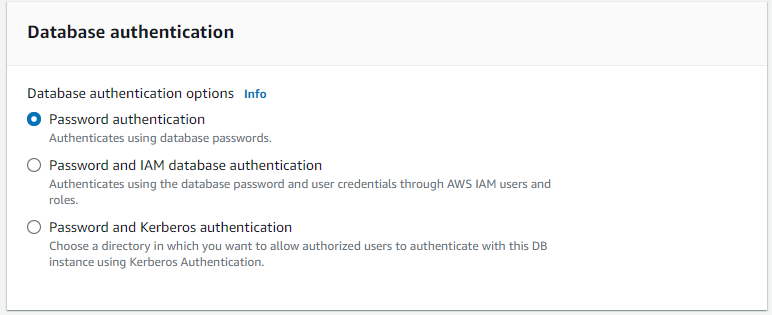
Under Database Authentication, select Password Authentication, and you're done. Click Create Database at the bottom of the page to continue.
Step 2: Edit Inbound Rules
Our database is now all setup! Let's make sure we can access it from our local Dbeaver by editing the inbound rules. To do that, head to your RDS Console and navigate to Databases on the left panel.
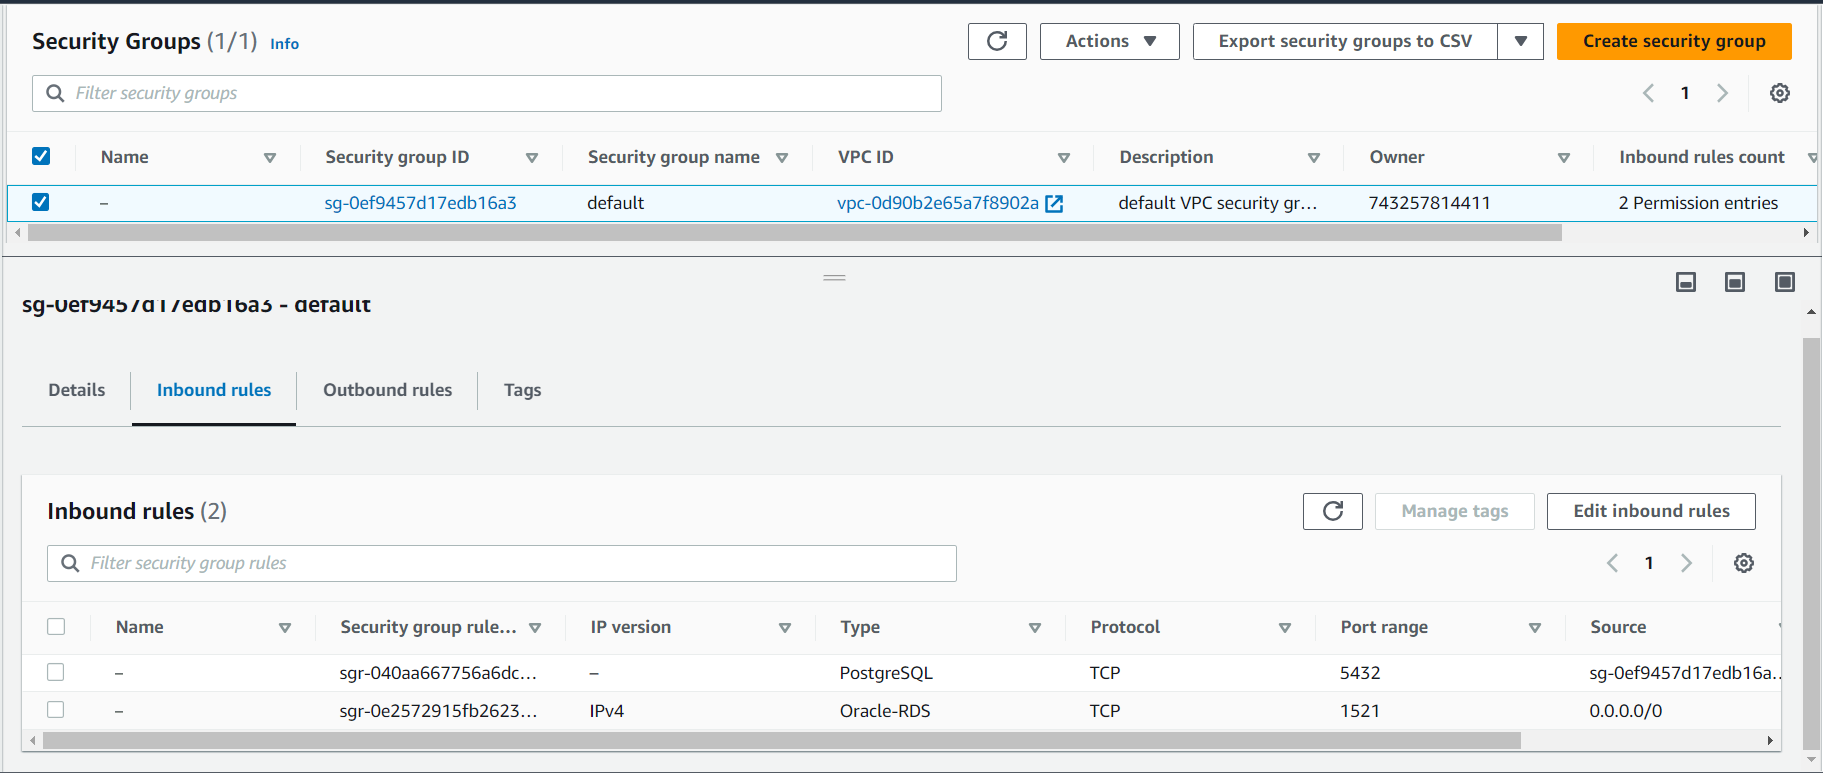
So after the creation of RDS is completed redirect again to database > Connectivity and security > scroll below > go to VPC security groups
it redirects you to the attached security group.
Then, under Security Group Rules click on the Security Group that has the Type column as Inbound.
Note: Port might differ, you need to check your port in the database option of RDS.
Now, we need to make our RDS connect with our Jump server.
In Connectivity & security tab, if we scroll below , we will find set up EC2 connection Option

After that, it automatically takes the security group for connection purposes
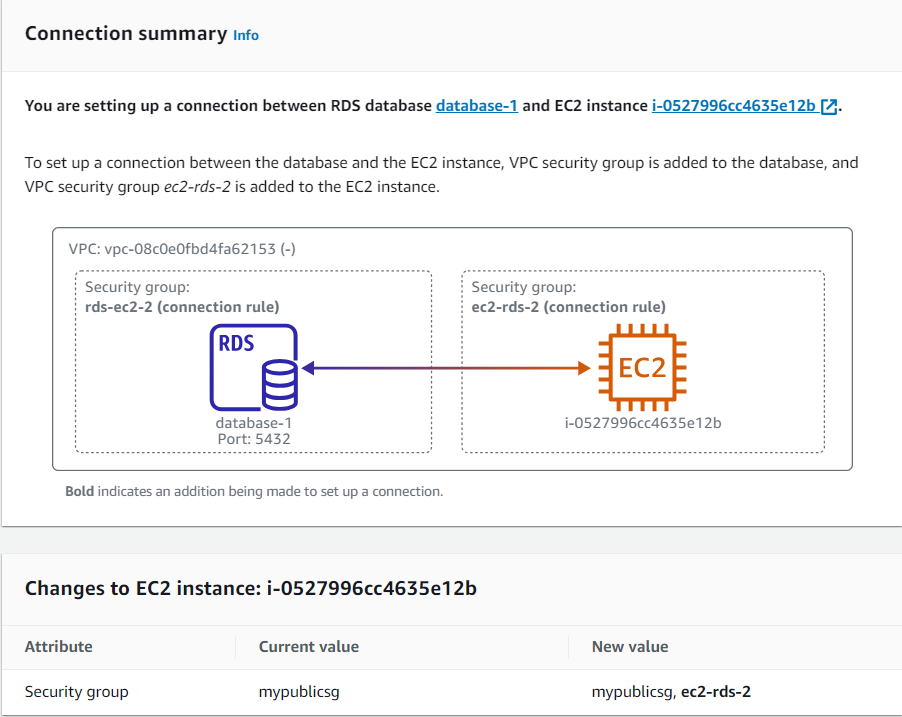
Click on Create and your connection will be established.
Prerequisites 🛠️
Dbeaver installation.
Basic understanding of SQL queries and CRUD operations.
Step 3: Set Up Dbeaver
All we need to do now is to create a new connection on Dbeaver. If you haven't already, install Dbeaver.
After installation of Dbeaver click on a new connection, choose PostgreSQL, and click on next.
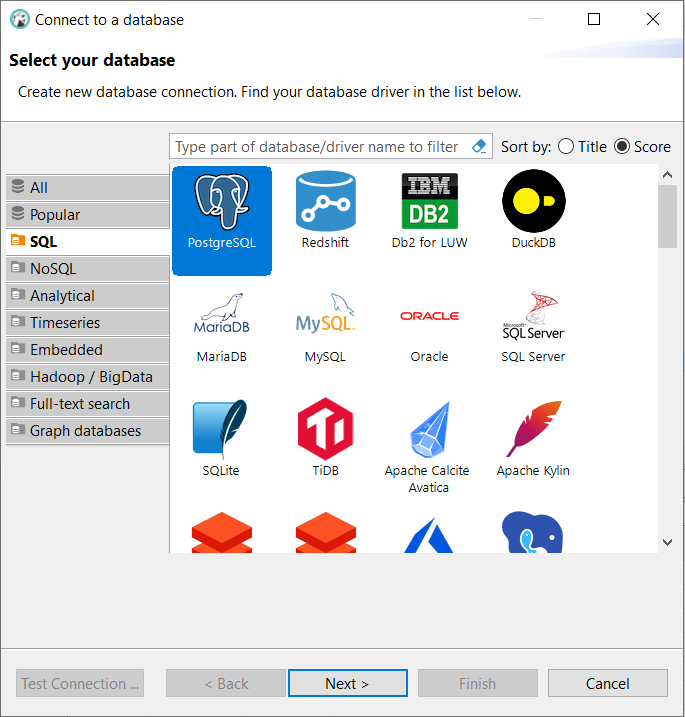
Fill in your username and password according to the RDS Database you've just created.
Enter the hostname and port number according to the values from your RDS Console under Databases > Connectivity & Security.

Once that's done, you can click on the Test Connection button to see if it can connect to the RDS Database successfully. Click OK once successful.
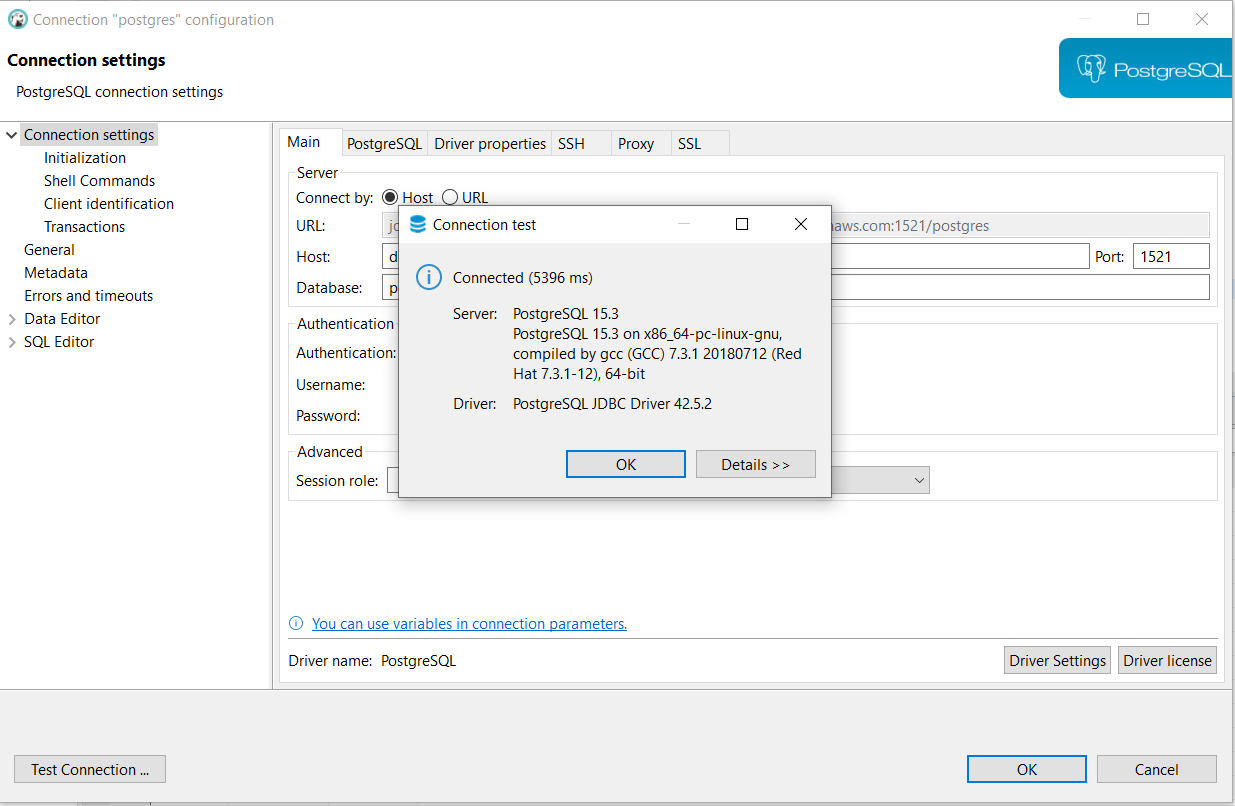
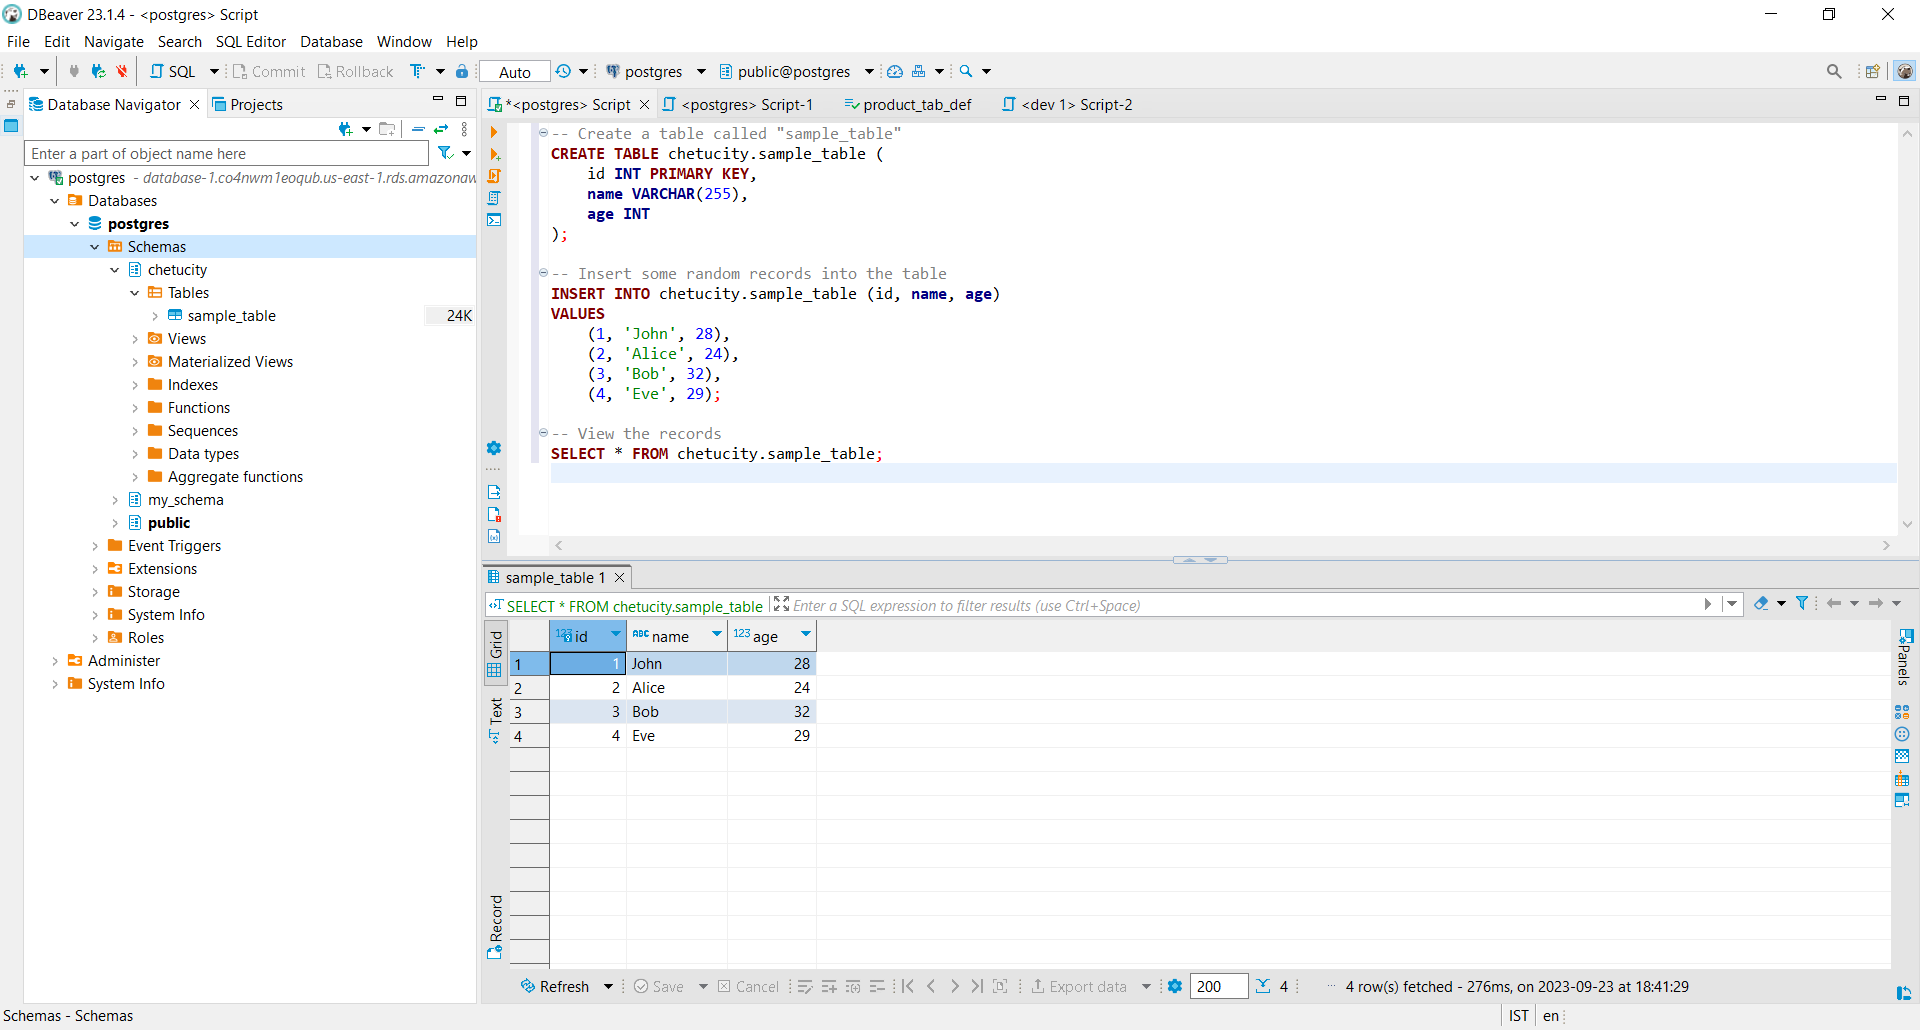
Step 4: Create a schema/table, insert your records and display them through select statements.

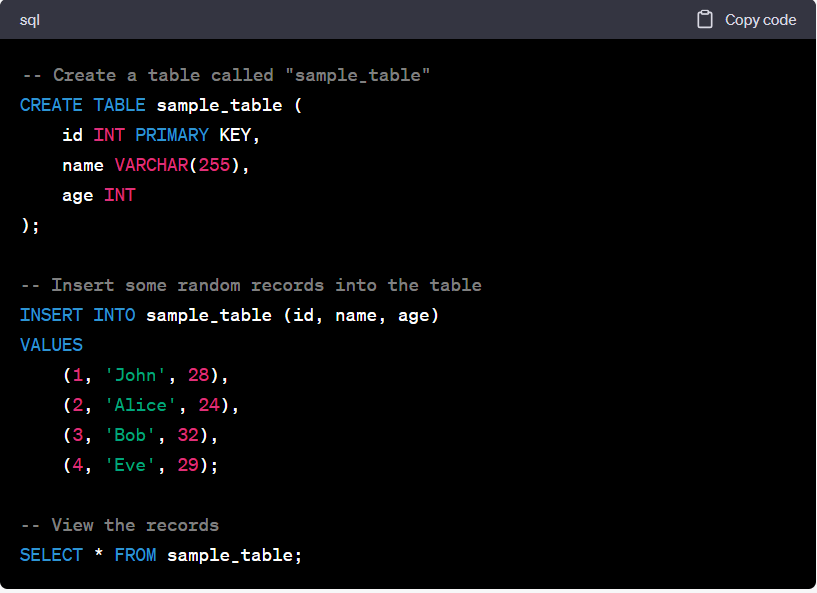
"Thank You for Reading!"
We sincerely appreciate you taking the time to read our blog. We hope you found the information valuable and that it helped you in your journey. Your interest and engagement mean a lot to us.
If you have any questions, feedback, or if there's a specific topic you'd like us to cover in the future, please don't hesitate to reach out. We're here to assist and provide you with the necessary knowledge and insights.
Remember, your support is what keeps us motivated to continue creating content. Stay curious, keep learning, and thank you for being a part of our community!
Warm regards,
Chetan Sharma
Subscribe to my newsletter
Read articles from Chetan Sharma directly inside your inbox. Subscribe to the newsletter, and don't miss out.
Written by

Chetan Sharma
Chetan Sharma
I am a highly motivated professional with a strong background in AWS, databases, and Tableau. My expertise in AWS spans cloud infrastructure management, while my database skills encompass both SQL and NoSQL systems. I excel at transforming complex data into actionable insights using Tableau. A problem-solving mindset and a commitment to continuous learning drive my work.