Transferring On-Premise Data to S3
 Chetan Sharma
Problem Statement
We will read data from an on-premise DBeaver Server database and automatically load it to Amazon object storage S3 using Python. We will use the AWS S3 API to achieve this. The idea here is that we have data in our premise database. We are moving to Cloud and we want to build a database in AWS Redshift for analytics. We will use Python to connect to our on-premise database, read the data into DataFrames for each table and write this data to S3 in a separate folder for each table.
Note: This hands-on will be covering the migration till S3 and we will be covering redshift in an upcoming article. So stay tuned ✨
Prerequisites 🛠️
You must have one server where you store your database to start from the initial please follow my previous article below
Dbeaver installation.
Basic understanding of Python.
Awesome! We have met the prerequisites. Now, let's get started...
Step 1: Create S3 Bucket where you want to store your data.
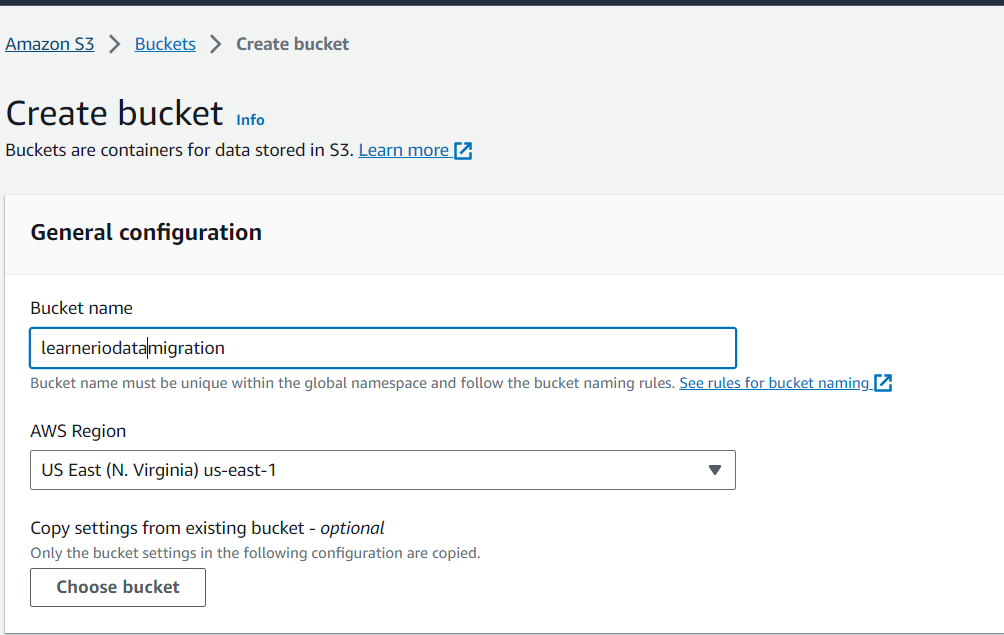
To create a S3 bucket we head to S3 service. We create a bucket unique with default settings. We will reference this bucket by name in our code.

leave rest setting as default...
Step 2: Setting up the user
The next resource required in AWS is a user with API keys to access S3. We grant full access to S3 resources for this user, and subsequently, we copy both the access and secret keys into a JSON configuration file, which we later import into our Python script

{
  "access_key" : "",
  "secret_access_key" : "",
  "db_endpoint" : "",
  "db_port" : 5432,
  "db_name" : "",
  "db_user" : "",
  "db_password" : ""
}
Please enter your access_key and secret access_key from the user that you have created.
Step 3: Write a Python script that loads your on-premise data to a designated S3 bucket.
Firstly we will be requiring our API keys
# Get API Keys
content = open('config.json')
config = json.load(content)
access_key = config['access_key']
secret_access_key = config['secret_access_key']
Our config file will look like this
{
  "access_key" : "",
  "secret_access_key" : "",
  "db_endpoint" : "",
  "db_port" : 5432,
  "db_name" : "",
  "db_user" : "",
  "db_password" : ""
}
after parameterizing (configuring) our credentials we will be using them in our main.py file
Now, we will be adding our database connection details.
# PostgreSQL database connection details
db_endpoint = config['db_endpoint']  # Replace with your RDS endpoint
db_port = config['db_port']          # PostgreSQL default port
db_name = config['db_name']          # Replace with your PostgreSQL database name
db_user = config['db_user']          # Replace with your PostgreSQL username
db_password = config['db_password']  # Replace with your PostgreSQL password
Note: You can visit this link to know your connection details in depth thechetansharma.com
Importing libraries
from sqlalchemy import create_engine
import pandas as pd
import json
import io
import boto3
import os
sqlalchemy.create_engine: This module is used for creating a connection to a PostgreSQL database.
pandas as pd: The Pandas library is used for data manipulation and analysis.
json: This module is used to handle JSON configuration data.
io: The
iomodule provides functions for working with input and output streams.boto3: Boto3 is the Amazon Web Services (AWS) SDK for Python and is used for interacting with AWS services.
os: The
osmodule is used for basic operating system interactions.
Extract Data from PostgreSQL
# Extract data from PostgreSQL
def extract():
    try:
        engine = create_engine(f"postgresql://{db_user}:{db_password}@{db_endpoint}:{db_port}/{db_name}")

        table_name = "my_table"  # Your table name

        # Query and load data to a DataFrame
        df = pd.read_sql_query(f'SELECT * FROM {table_name}', engine)
        load(df, table_name)
    except Exception as e:
        print("Data extract error: " + str(e))
The script defines a function extract() that performs the following tasks:
Establishes a connection to the PostgreSQL database using SQLAlchemy.
Specifies the name of the table (
table_name) from which data should be extracted.Executes a SQL query to retrieve data from the specified table and loads it into a Pandas DataFrame.
Calls the
load()function to upload the extracted data to Amazon S3.
Load Data to S3:
# Load data to S3
def load(df, table_name):
    try:
        print(f'Importing data for table: {table_name}')

        # Save to S3
        s3_client = boto3.client('s3', aws_access_key_id=access_key, aws_secret_access_key=secret_access_key, region_name='us-east-1')

        upload_file_bucket = 'learneriodatamigration'
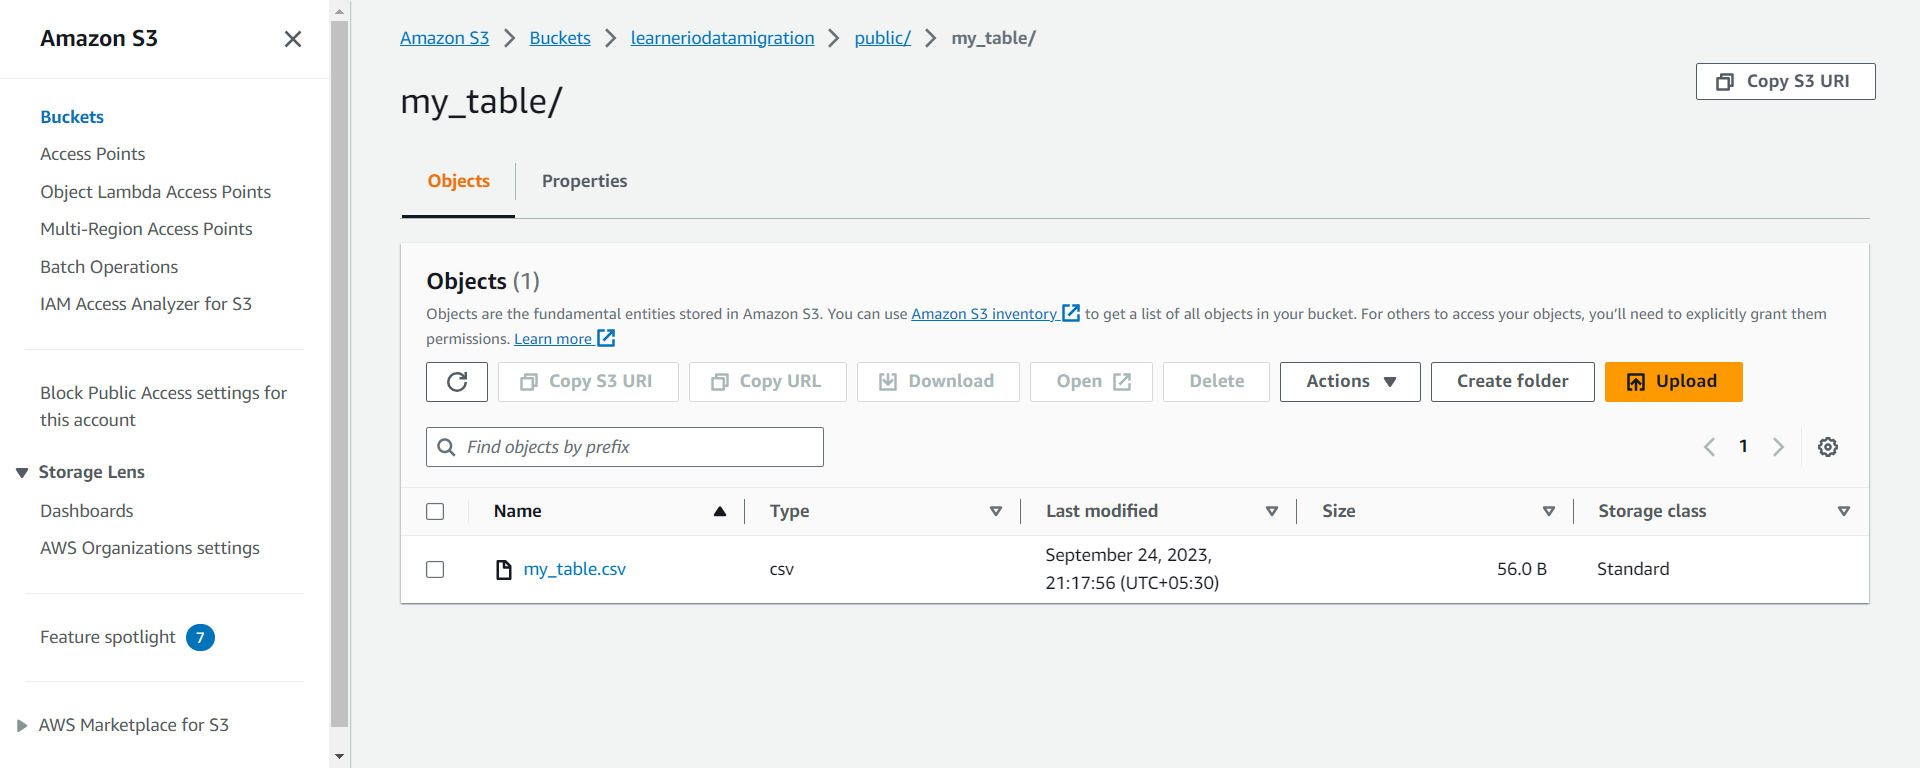
        upload_file_key = f'public/{table_name}/{table_name}.csv'

        with io.StringIO() as csv_buffer:
            df.to_csv(csv_buffer, index=False)

            response = s3_client.put_object(
                Bucket=upload_file_bucket,
                Key=upload_file_key,
                Body=csv_buffer.getvalue()
            )

            status = response.get("ResponseMetadata", {}).get("HTTPStatusCode")

            if status == 200:
                print(f"Successful S3 put_object response. Status - {status}")
            else:
                print(f"Unsuccessful S3 put_object response. Status - {status}")

        print("Data import successful")
    except Exception as e:
        print("Data load error: " + str(e))
The load() function is defined to upload data from a Pandas DataFrame to an Amazon S3 bucket. It performs the following tasks:
Initializes an S3 client using Boto3 with AWS access keys and region.
Specifies the S3 bucket name (
upload_file_bucket) and key (upload_file_key) where the data will be stored.Converts the Pandas DataFrame to a CSV format using
df.to_csv()and stores it in a temporary buffer (csv_buffer).Uses the S3 client to upload the CSV data to the specified S3 bucket and key.
Checks the response status to confirm the success or failure of the upload.
Main Execution:
try:
    # Call the extract function
    extract()
except Exception as e:
    print("Error while extracting and loading data: " + str(e))
The script includes a try block that calls the extract() function to start the data extraction and loading process. Any exceptions raised during this process are caught and printed as error messages.
Note: This script essentially connects to a PostgreSQL database, extracts data from a specified table, and uploads it to an Amazon S3 bucket, making use of AWS credentials stored in the config.json file. Make sure to replace the placeholder values in config.json with your actual database and AWS access credentials before running this script.

"Thank You for Reading!"
We sincerely appreciate you taking the time to read our blog. We hope you found the information valuable and that it helped you in your journey. Your interest and engagement mean a lot to us.
If you have any questions, feedback, or if there's a specific topic you'd like us to cover in the future, please don't hesitate to reach out. We're here to assist and provide you with the necessary knowledge and insights.
Remember, your support is what keeps us motivated to continue creating content. Stay curious, keep learning, and thank you for being a part of our community!
Warm regards,
Chetan Sharma
Subscribe to my newsletter
Read articles from Chetan Sharma directly inside your inbox. Subscribe to the newsletter, and don't miss out.
Written by

Chetan Sharma
Chetan Sharma
I am a highly motivated professional with a strong background in AWS, databases, and Tableau. My expertise in AWS spans cloud infrastructure management, while my database skills encompass both SQL and NoSQL systems. I excel at transforming complex data into actionable insights using Tableau. A problem-solving mindset and a commitment to continuous learning drive my work.