Crafting Mazes
 Anton Yarkov
In our previous post, we delved into problems of pathfinding in graphs, which are inherently connected to solving mazes.
When I set out to create a maze map for the Wall-E project, I initially expected to find a quick and easy way to accomplish this task. However, I quickly found myself immersed in the vast and fascinating world of mazes and labyrinths.
I was unaware of the breadth and depth of this topic before. I discovered that mazes can be classified in seven different ways, each with numerous variations and countless algorithms for generating them.
Surprisingly, I couldn't find any algorithmic books that comprehensively covered this topic, and even the Wikipedia page didn't provide a systematic overview. Fortunately, I stumbled upon a fantastic resource that covers various maze types and algorithms, which I highly recommend exploring.
I embarked on a journey to learn about the different classifications of mazes, including dimensional and hyperdimensional variations, perfect mazes versus unicursal labyrinths, planar and sparse mazes, and more.
How To Create a Maze
My primary goal was to generate a 2D map representing a maze.
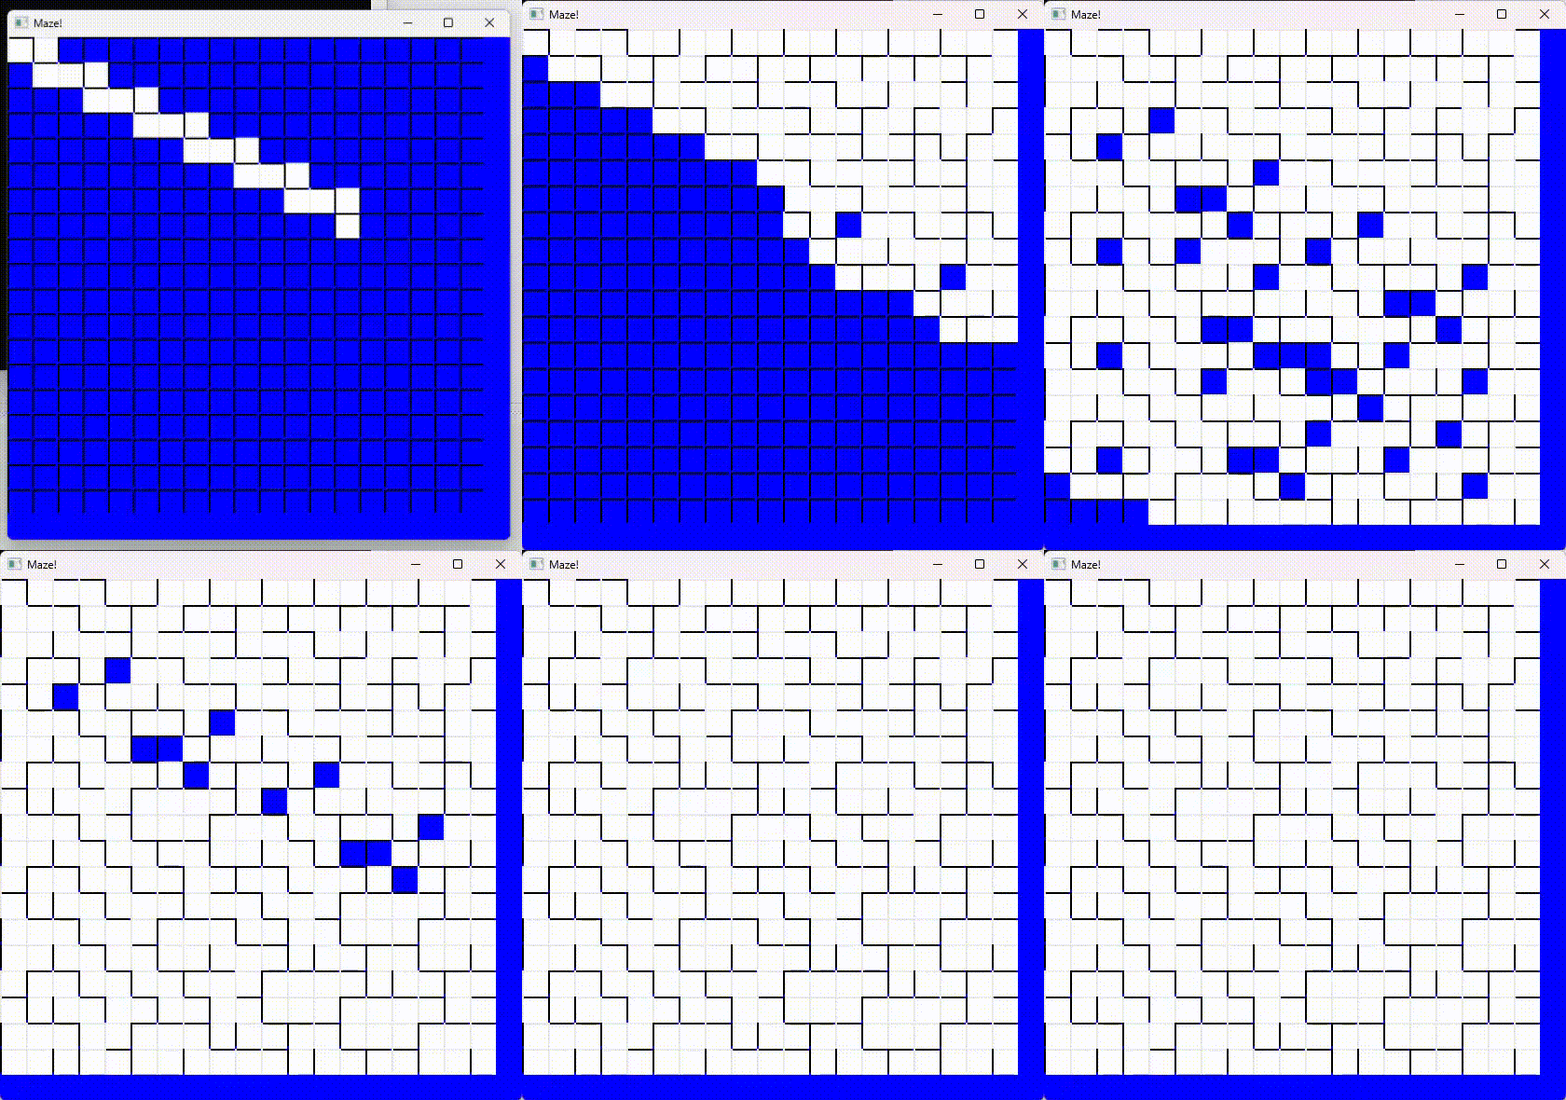
While it would have been enticing to implement various maze-generation algorithms to compare them, I also wanted a more efficient approach. The quickest solution I found involved randomly selecting connected cells. That's precisely what I did with mazerandom. This one-file application creates a grid table of 20 x 20 cells and then randomly connects them using a Depth-First Search (DFS) traversal. In other words, we're simply carving passages in the grid.
If you were to do this manually on paper, it would look something like this:

To achieve this algorithmically, we apply Depth-First Search to the grid of cells. Let's take a look at how it's done in the Main.cpp.
As usual, we represent the grid of cells as an array of arrays, and we use a stack for DFS:
vector<vector<int>> maze_cells; // A grid 20x20
stack<Coord> my_stack;      // Stack to traverse the grid by DFS
my_stack.push(Coord(0, 0)); // Starting from very first cell
We visit every cell in the grid and push its neighbors onto the stack for deep traversal:
...
while (visitedCells < HORIZONTAL_CELLS * VERTICAL_CELLS)
{
    vector<int> neighbours;
    // Step 1: Create an array of neighbour cells that were not yet visited (from North, East, South and West).
    // North is not visited yet?
    if ((maze_cells[offset_x(0)][offset_y(-1)] & CELL_VISITED) == 0)
    {
        neighbours.push_back(0);
    }
    // East is not visited yet?
    if ((maze_cells[offset_x(1)][offset_y(0)] & CELL_VISITED) == 0)
    {
        neighbours.push_back(1);
    }
    ... // Do the same for West and South...
The most complex logic involves marking the node as reachable (i.e., no wall in between) with CELL_PATH_S, CELL_PATH_N, CELL_PATH_W, or CELL_PATH_E:
...
    // If we have at least one unvisited neighbour
    if (!neighbours.empty())
    {
        // Choose random neighbor to make it available
        int next_cell_dir = neighbours[rand() % neighbours.size()];

        // Create a path between the neighbour and the current cell
        switch (next_cell_dir)
        {
        case 0: // North
            // Mark it as visited. Mark connection between North and South in BOTH directions.
            maze_cells[offset_x(0)][offset_y(-1)] |= CELL_VISITED | CELL_PATH_S;
            maze_cells[offset_x(0)][offset_y(0)] |= CELL_PATH_N;
            //
            my_stack.push(Coord(offset_x(0), offset_y(-1)));
            break;

        case 1: // East
            // Mark it as visited. Mark connection between East and West in BOTH directions.
            maze_cells[offset_x(1)][offset_y(0)] |= CELL_VISITED | CELL_PATH_W;
            maze_cells[offset_x(0)][offset_y(0)] |= CELL_PATH_E;
            my_stack.push(Coord(offset_x(1), offset_y(0)));
            break;
        ... // Do the same for West and South...
        }
        visitedCells++;
    }
    else
    {
        my_stack.pop();
    }
...
Finally, it calls the drawMaze method to draw the maze on the screen using the SFML library. It draws a wall between two cells if the current cell isn't marked with CELL_PATH_S, CELL_PATH_N, CELL_PATH_W, or CELL_PATH_E.

However, this maze doesn't guarantee a solution. In many cases, it will generate a map with no clear path between two points. While this randomness might be interesting, I wanted something more structured.
The only way to ensure a solution for the maze is to use a predetermined structure that connects every part of the maze in some way.
Creating a Maze Using Graph Theory
Well-known maze generation algorithms rely on graphs. Each cell is a node in the graph, and every node must have at least one connection to other nodes.
As mentioned earlier, mazes come in many forms. Some, called "unicursal" mazes, act as labyrinths with only one entrance, which also serves as the exit. Others may have multiple solutions. However, the process of generation often starts with creating a "perfect" maze.
A "perfect" maze, also known as a simply-connected maze, lacks loops, closed circuits, and inaccessible areas. From any point within it, there is precisely one path to any other point. The maze has a single, solvable solution.
If we use a graph as the internal representation of our maze, constructing a spanning tree ensures that there is a path from the start to the end.
In computer science terms, such a maze can be described as a spanning tree over the set of cells or vertices.
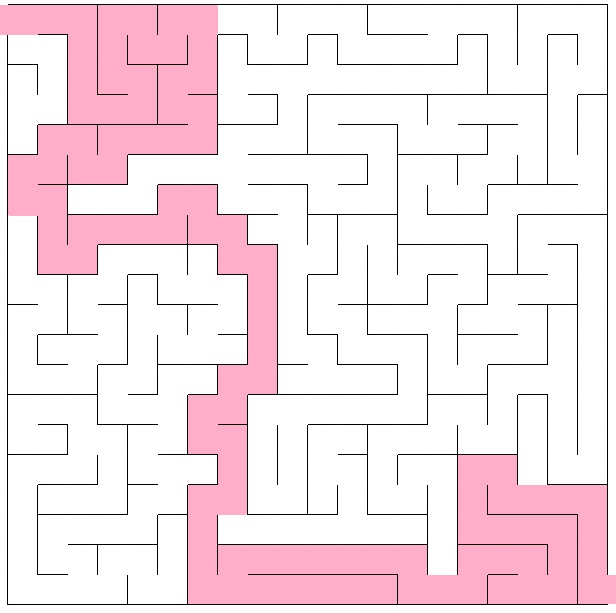
Multiple spanning trees may exist, but the goal is to ensure at least one solution from the start to the end, as shown in the example below:

The image above depicts only one solution, but there are actually multiple paths. No cell is isolated and impossible to reach. So, how do we achieve this?
I discovered a well-designed mazegenerator codebase by @razimantv that accomplishes this, generating mazes in SVG file format.
Therefore, I forked the repository and based my solution on it. Kudos to @razimantv for the elegant OOP design, which allowed me to customize the results to create visually appealing images using the SFML library or generate a text file with the necessary map description for my Wall-E project.
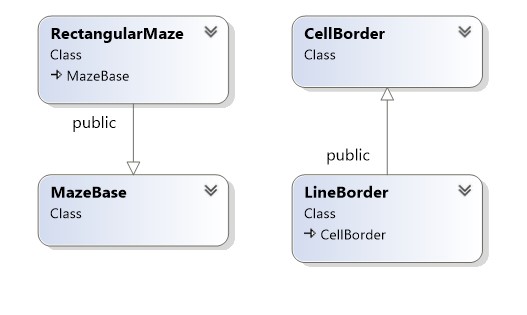
I refactored the code to remove unnecessary components and focus exclusively on rectangular mazes.

However, I retained support for various algorithms to build a spanning tree.

I also added comments throughout the codebase for easier comprehension, so I don't need to explain it in every detail here. The main pipeline can be found in \mazegenerator\maze\mazebaze.cpp:
/**
 * \param algorithm Algorithm that is used to generate maze spanning tree.
 */
void MazeBase::GenerateMaze(SpanningtreeAlgorithmBase* algorithm)
{
    // Generates entire maze spanning tree
    auto spanningTreeEdges = algorithm->SpanningTree(_verticesNumber, _edgesList);

    // Find a solution of a maze based on Graph DFS.
    _Solve(spanningTreeEdges);

    // Build a maze by removing unnecessary edges.
    _RemoveBorders(spanningTreeEdges);
}
I introduced visualization using the SFML graphics library, thanks to a straightforward Draw function.
While DFS is the default algorithm for creating a spanning tree, there are multiple algorithms available as options.
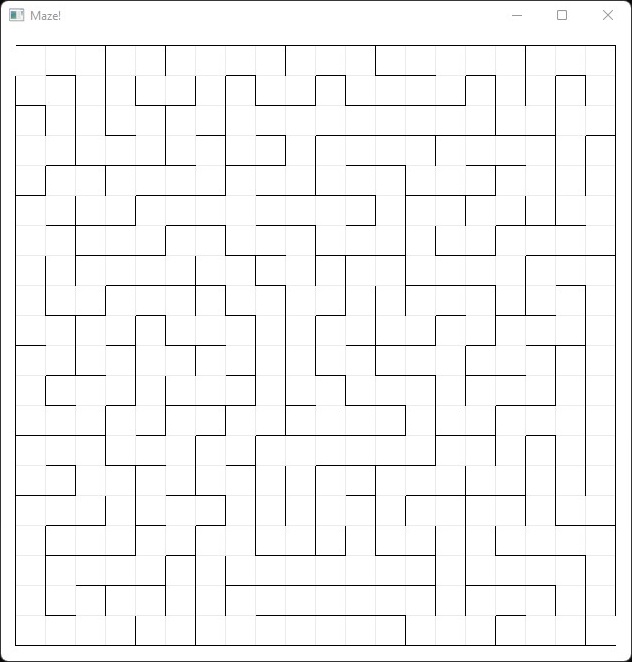
The result is a handy utility that generates rectangular "perfect" mazes and displays them on the screen:

As you can see, it contains exactly one input and one output at the left top and right bottom corners. The code still generates SVG file, which is a nice addition (though, it is the core function of the original codebase).
Now, I can proceed with my experiments in the Wall-E project, and I leave you here, hoping that you're inspired to explore this fascinating world of mazes and embark on your own journey.
Stay tuned!
Subscribe to my newsletter
Read articles from Anton Yarkov directly inside your inbox. Subscribe to the newsletter, and don't miss out.
Written by
