Launching Kubernetes Cluster with Deployment😊🚀🌟
 Achyut Das
✅Introduction 🌟
A Kubernetes cluster is a collection of interconnected computing resources (such as servers or virtual machines) that work together to run containerized applications orchestrated by Kubernetes. Kubernetes is an open-source container orchestration platform that automates the deployment, scaling, management, and monitoring of containerized applications.
Kubernetes clusters can vary in size and complexity, from small clusters running on a few virtual machines to large-scale, multi-node clusters deployed across multiple data centers or cloud providers. The goal of Kubernetes is to abstract the underlying infrastructure, making it easier to manage containerized applications, ensure high availability, and scale applications up or down as needed.
✅Create one Deployment file to deploy a sample todo-app on K8s using "Auto-healing" and "Auto-Scaling" features.
In this project, we will deploy Django-todo-app using Kubernetes by following the steps-:
Step 1: set up AWS instances for Kubernetes.
Step 2: install docker in AWS instances.
sudo apt-get install docker.io
Step 3: create Dockerfile for django-app.
# base image for the Docker image

FROM python:3

#sets the working directory within the container to /data.all subsequent commands will be executed in the context of this directory.

WORKDIR /data

#This command is used to run a shell command within the container during the image building process. It installs Django version 3.2 using the pip package manager. Django is a popular Python web framework.

RUN pip install django==3.2
#This command copies the contents of the current directory (where the Dockerfile is located) into the /data directory within the container.

COPY . .
#This command runs the Django management command migrate within the container. This is typically used to apply database migrations, ensuring that your database schema is up to date.

RUN python manage.py migrate

#This instruction indicates that the Docker container will listen on port 8000.

EXPOSE 8000
#sets the default command to run when a container based on this image is started. It runs the Django development server, instructing it to listen on all available network interfaces (0.0.0.0) on port 8000.
CMD ["python","manage.py","runserver","0.0.0.0:8000"]
Step 4: Build the container from dockerfile.
docker build -t achyut197/django-app:latest
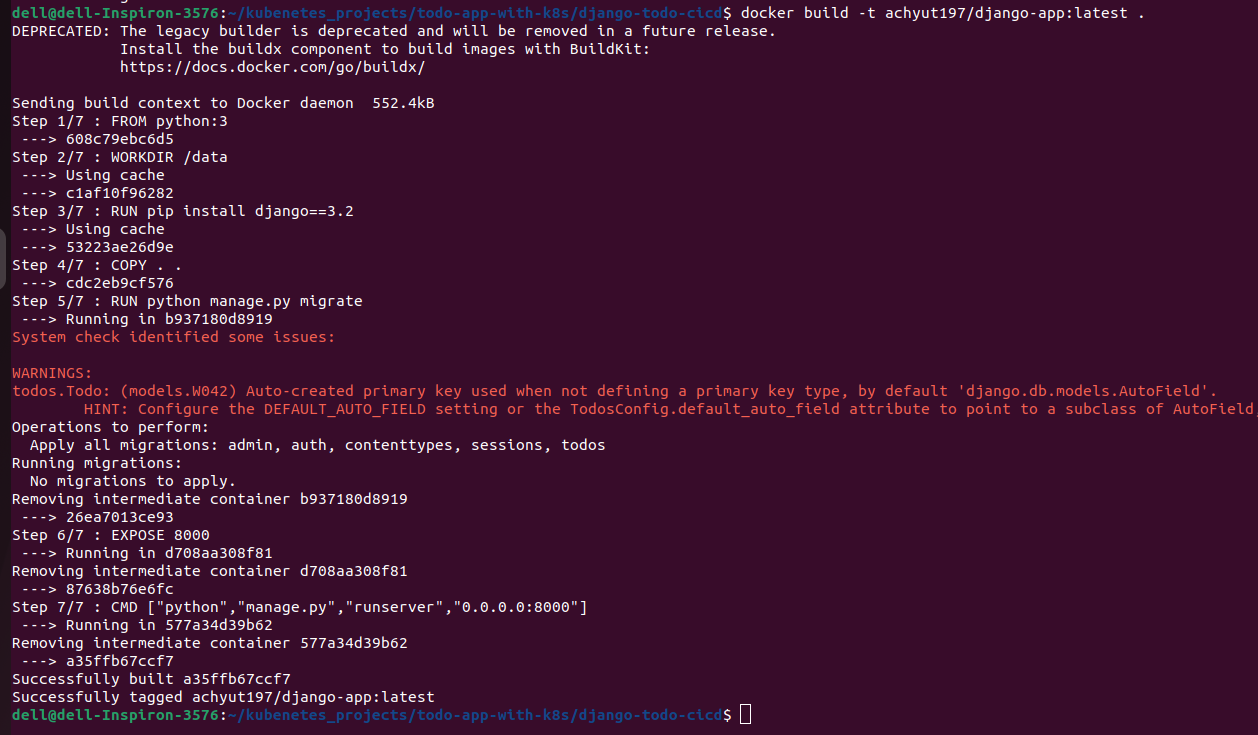
Step 5: push the container to docker hub.
docker push achyut197/django-app:latest

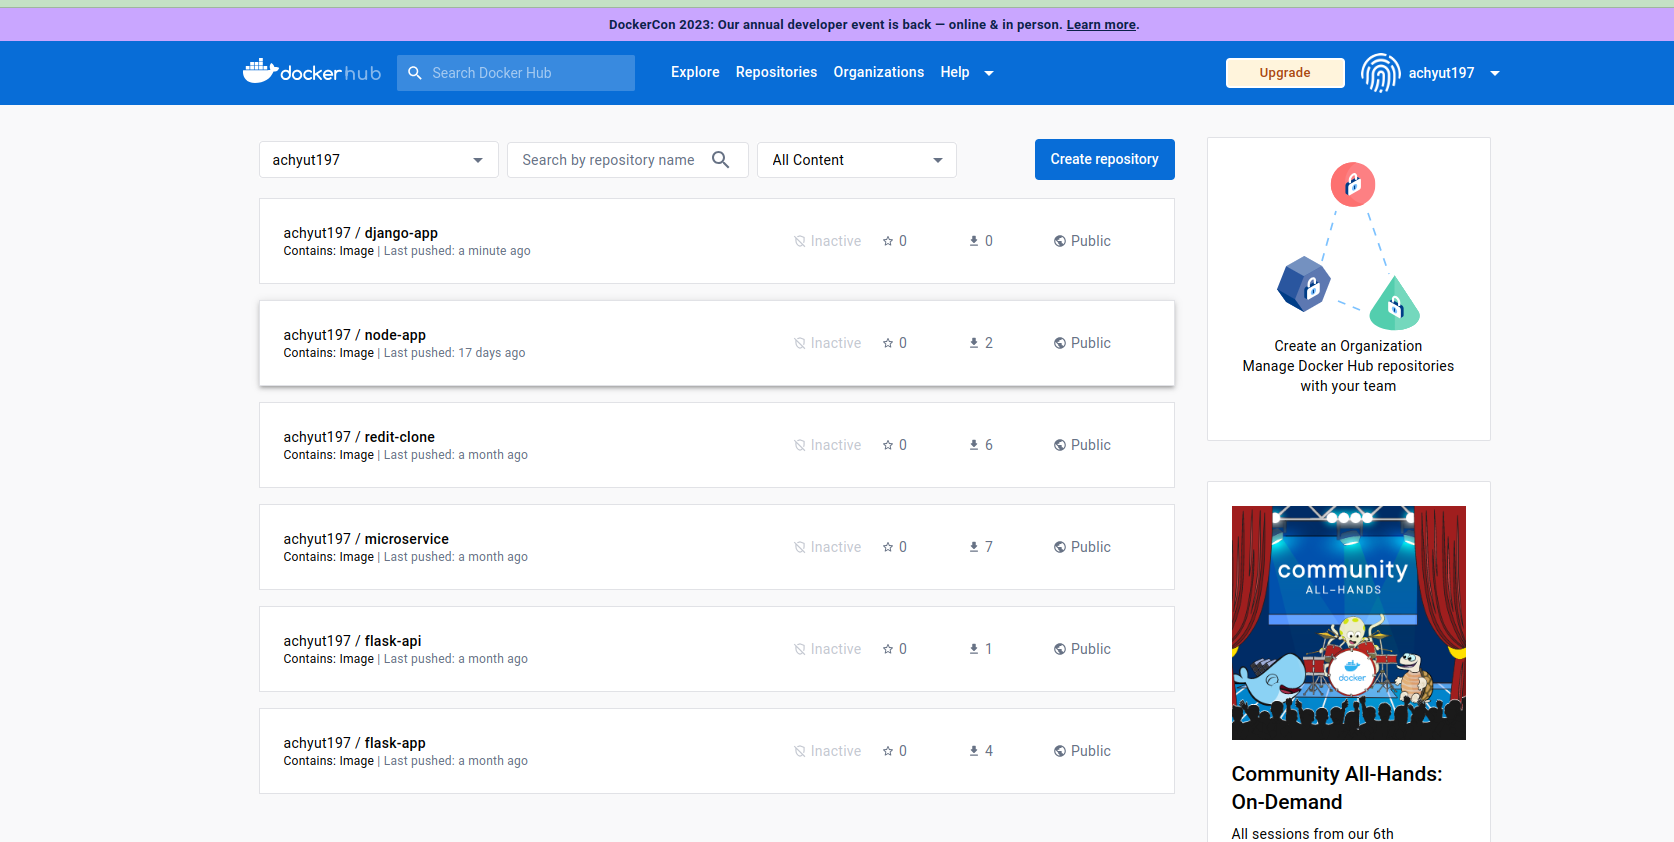
Step 6: Create one YAML file(manifest file) to fetch the django-app container from dockerhub.
pod.yaml:
#apiversion specifies the Kubernetes API version for this manifest.t's using the core/v1 API, which is the most basic and widely used API version for creating resources like Pods.
apiVersion: v1

# kind indicates that you are defining a Kubernetes resource.
kind: Pod

#This section contains metadata about the Pod, including its name.
metadata:
  name: django-app-pod
#spec describes the desired state of the Pod.
spec:
#This is an array of containers that should run inside the Pod.
  containers:
#This specifies the name of the container.

  - name: django-app

#The image is hosted on Docker Hub and is named "achyut197/django-app." The ":latest" tag specifies that the latest version of the image should be used.

    image: achyut197/django-app:latest

#This section allows you to specify which ports from the container should be exposed and mapped to the Pod's network
    ports:
#containerPort is set to 8000, indicating that the application inside the container is listening on port 8000.
    - containerPort: 8000
#used to create or apply a Kubernetes resource defined in a YAML file named "pod.yaml" to your Kubernetes cluster.
kubectl apply -f pod.yaml

Step 7: Deploy the application using manefest file.
deployment.yaml:
apiVersion: apps/v1

kind: Deployment

metadata:

  name: django-app-deployment

  labels:

    app: django-app

spec:

  replicas: 1

  selector:

    matchLabels:

      app: django-app

  template:

    metadata:

      labels:

        app: django-app

    spec:

      containers:

      - name: django-app

        image: achyut197/django-app:latest

        ports:

        - containerPort: 8000
apiVersion: apps/v1: This field specifies the Kubernetes API version for this manifest. In this case, it's using the apps/v1 API, which is typically used for resources like Deployments.
kind: Deployment: This field indicates that you are defining a Kubernetes Deployment resource. A Deployment is a higher-level abstraction that manages the desired number of replicas of a Pod and provides features like scaling, rolling updates, and rollback capabilities.
metadata: This section contains metadata about the Deployment, including its name and labels.
name: django-app-deployment: This specifies the name of the Deployment resource, which is "django-app-deployment."
labels: Labels are key-value pairs used to organize and select resources. In this case, the Deployment is labeled with "app: django-app," which can be used for selecting or grouping resources.
spec: This section describes the desired state of the Deployment.
replicas: 1: This field specifies that the desired number of replicas (Pods) managed by this Deployment should be 1. You can scale this number up or down to control the number of replicas.
selector: This field defines how the Deployment selects which Pods to manage.
matchLabels: This specifies that the Deployment should manage Pods whose labels match the key-value pair "app: django-app." This matches the labels of the Pods created by this Deployment.
template: This section defines the Pod template, which specifies how the Pods created by the Deployment should be configured.
metadata: Similar to the Deployment metadata, this metadata section contains labels.
labels: it labels the Pods with "app: django-app."
spec: This part of the template describes the containers that should run inside the Pods.
containers: This is an array of containers that should be part of the Pod. In this case, there is one container named "django-app."
name: django-app: This specifies the name of the container, which is "django-app."
image: achyut197/django-app:latest: This field defines the Docker image that should be used for the "django-app" container. The image is hosted on Docker Hub and is named "achyut197/django-app" with the ":latest" tag, which indicates the latest version of the image.
ports: This section allows you to specify which ports from the container should be exposed and mapped to the Pod's network. In this case, the container port is set to 8000, indicating that the application inside the container is listening to port 8000.
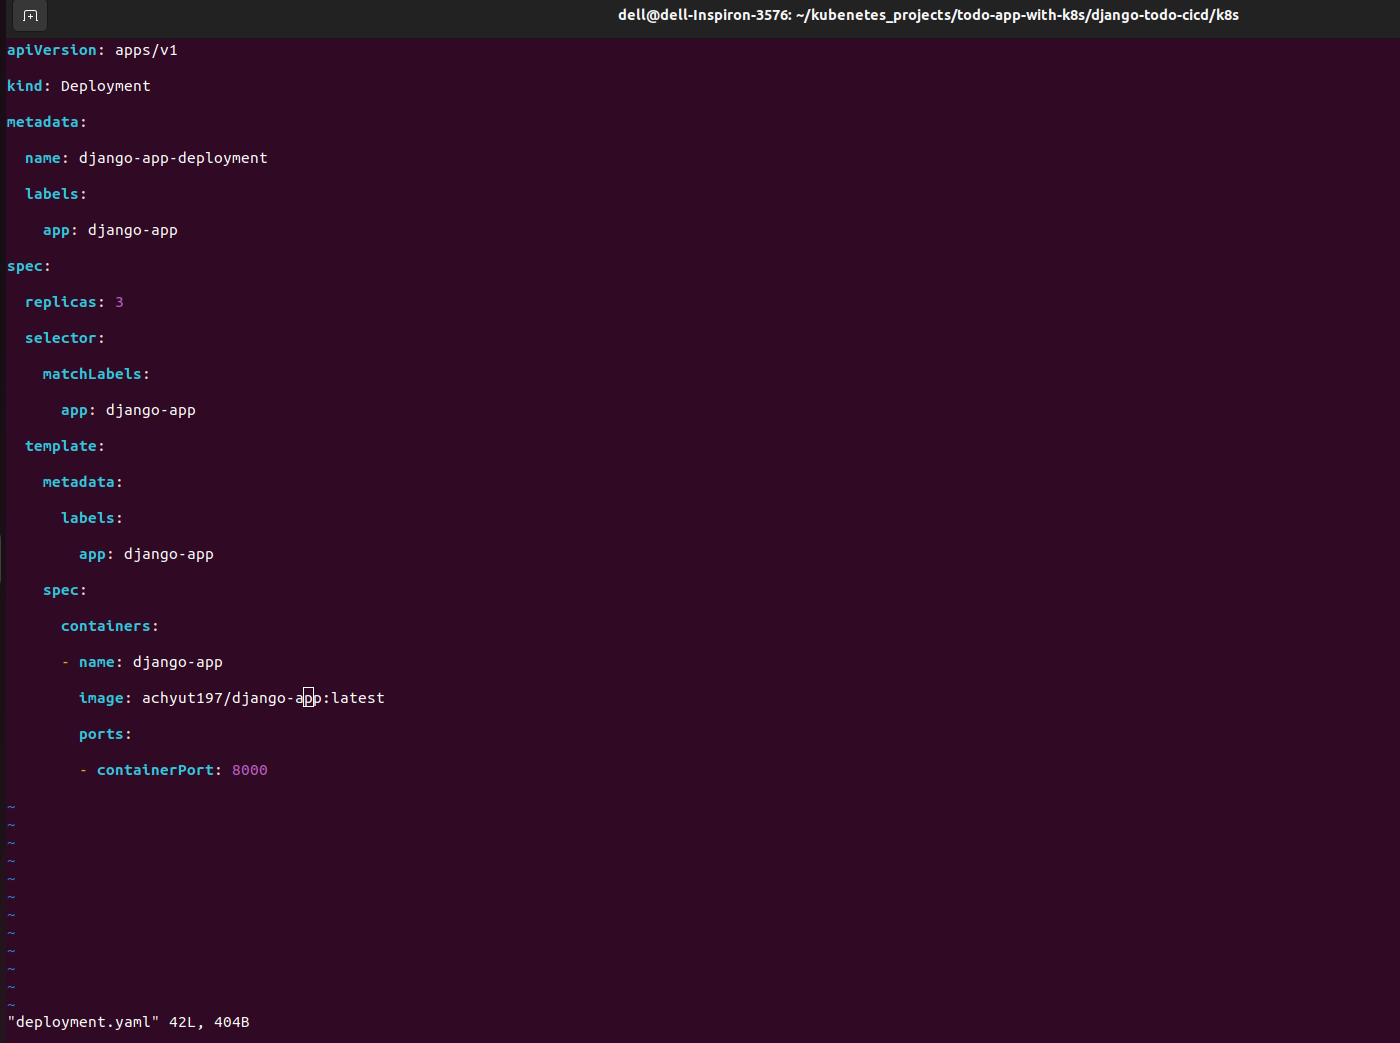
kubeclt apply -f deployment.yamlhere three replicas of the deployment pod were created. this feature is called as "auto-scaling"

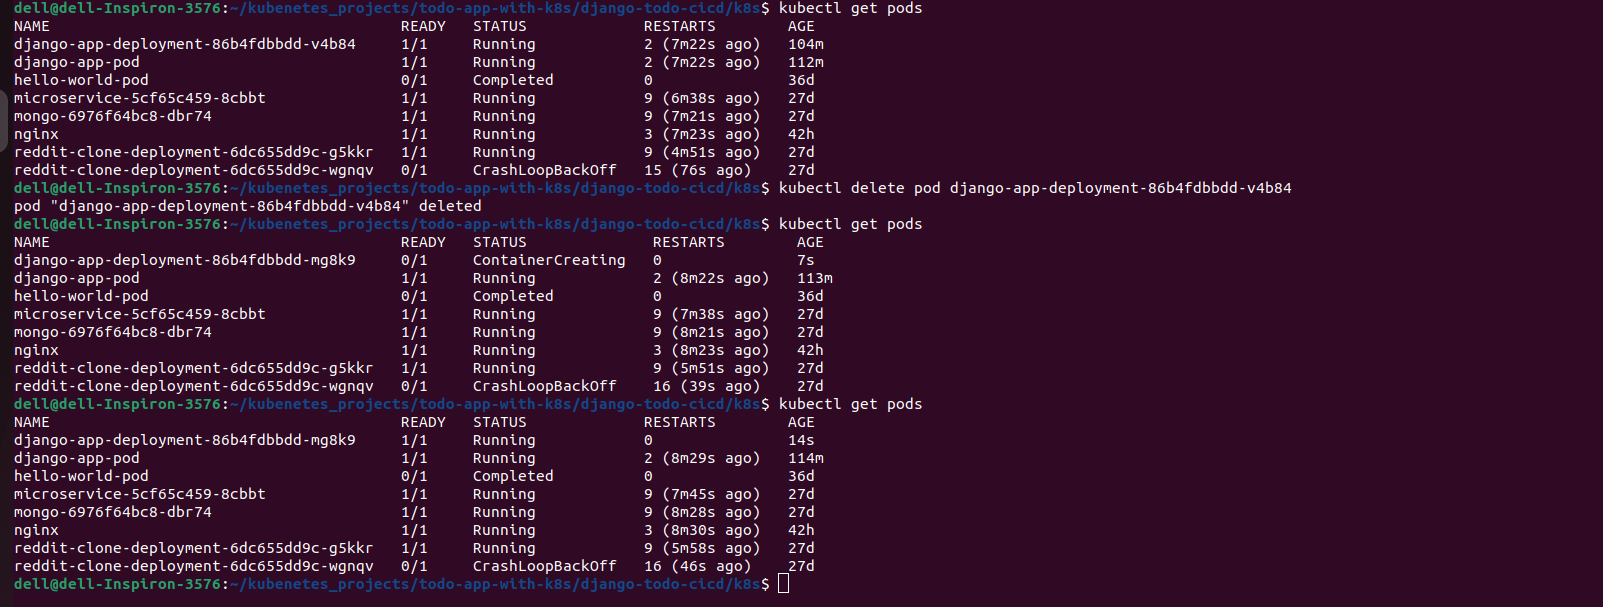
if we delete any deployment pod Kubernetes will generate another deployment pod this feature is called as "auto-healing".
Step 8: manage network and services.
create another manifest file for services.
service.yaml:
  apiVersion: v1
  kind: Service
  metadata:
    name: django-app-service
  spec:
    type: NodePort
    selector:
      app: django-app

    ports:
      - port: 80
        targetPort: 8000
        nodePort: 30007
The Kubernetes YAML manifest you provided defines a Service resource named "django-app-service" with the following characteristics:
Metadata:
- name: django-app-service: This specifies the name of the Service resource, which will be used to identify and access the Service within the Kubernetes cluster.
Service Specification:
type: NodePort: This field specifies the type of Service. A NodePort Service type exposes the Service on a specific port on all nodes in the cluster, allowing external access to the Service via the node's IP address and the specified NodePort.
selector: This section determines which Pods the Service should route traffic to. In this case, the Service will direct traffic to Pods with the label
app: django-app. This label-based selection ensures that only Pods with this label will be associated with the Service.ports: This section defines the ports used by the Service.
port: 80: This is the port number that the Service will listen on internally within the Kubernetes cluster. Incoming traffic to this port will be directed to the Pods specified by the selector.
targetPort: 8000: This specifies the target port on the Pods that the Service should forward traffic to. In this case, it forwards traffic to port 8000 within the Pods. This is typically set to match the port on which your application inside the Pods is listening.
nodePort: 30007: This field specifies the NodePort number. Each node in the cluster will listen on this port, and incoming traffic to this port on any node will be routed to the Service. In this example, the Service will be accessible from outside the cluster on port 30007 on any node.
we can access this django-app outside of the Kubernetes cluster using service.yaml file.
kubeclt apply -f service.yamlStep 9: get external IP from minikube.
        minikube service django-app-service --url
        sudo vim /etc/host(add the external IP address and bind it with suitable name).
        curl -L django-app.com:30007
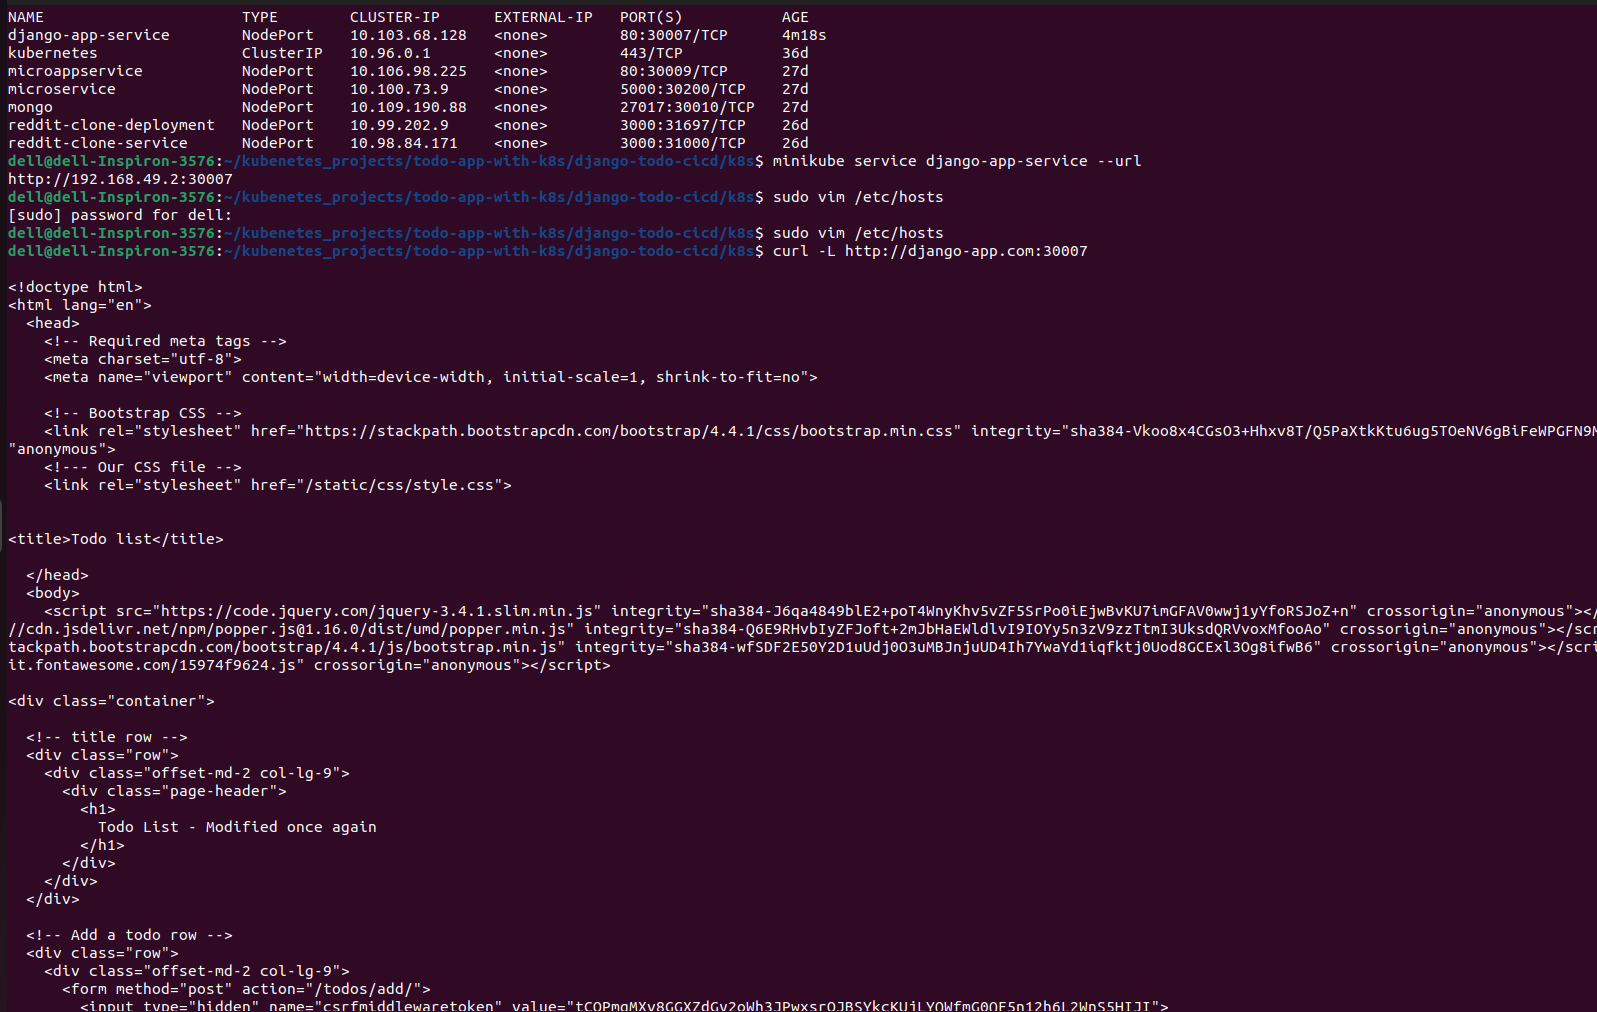
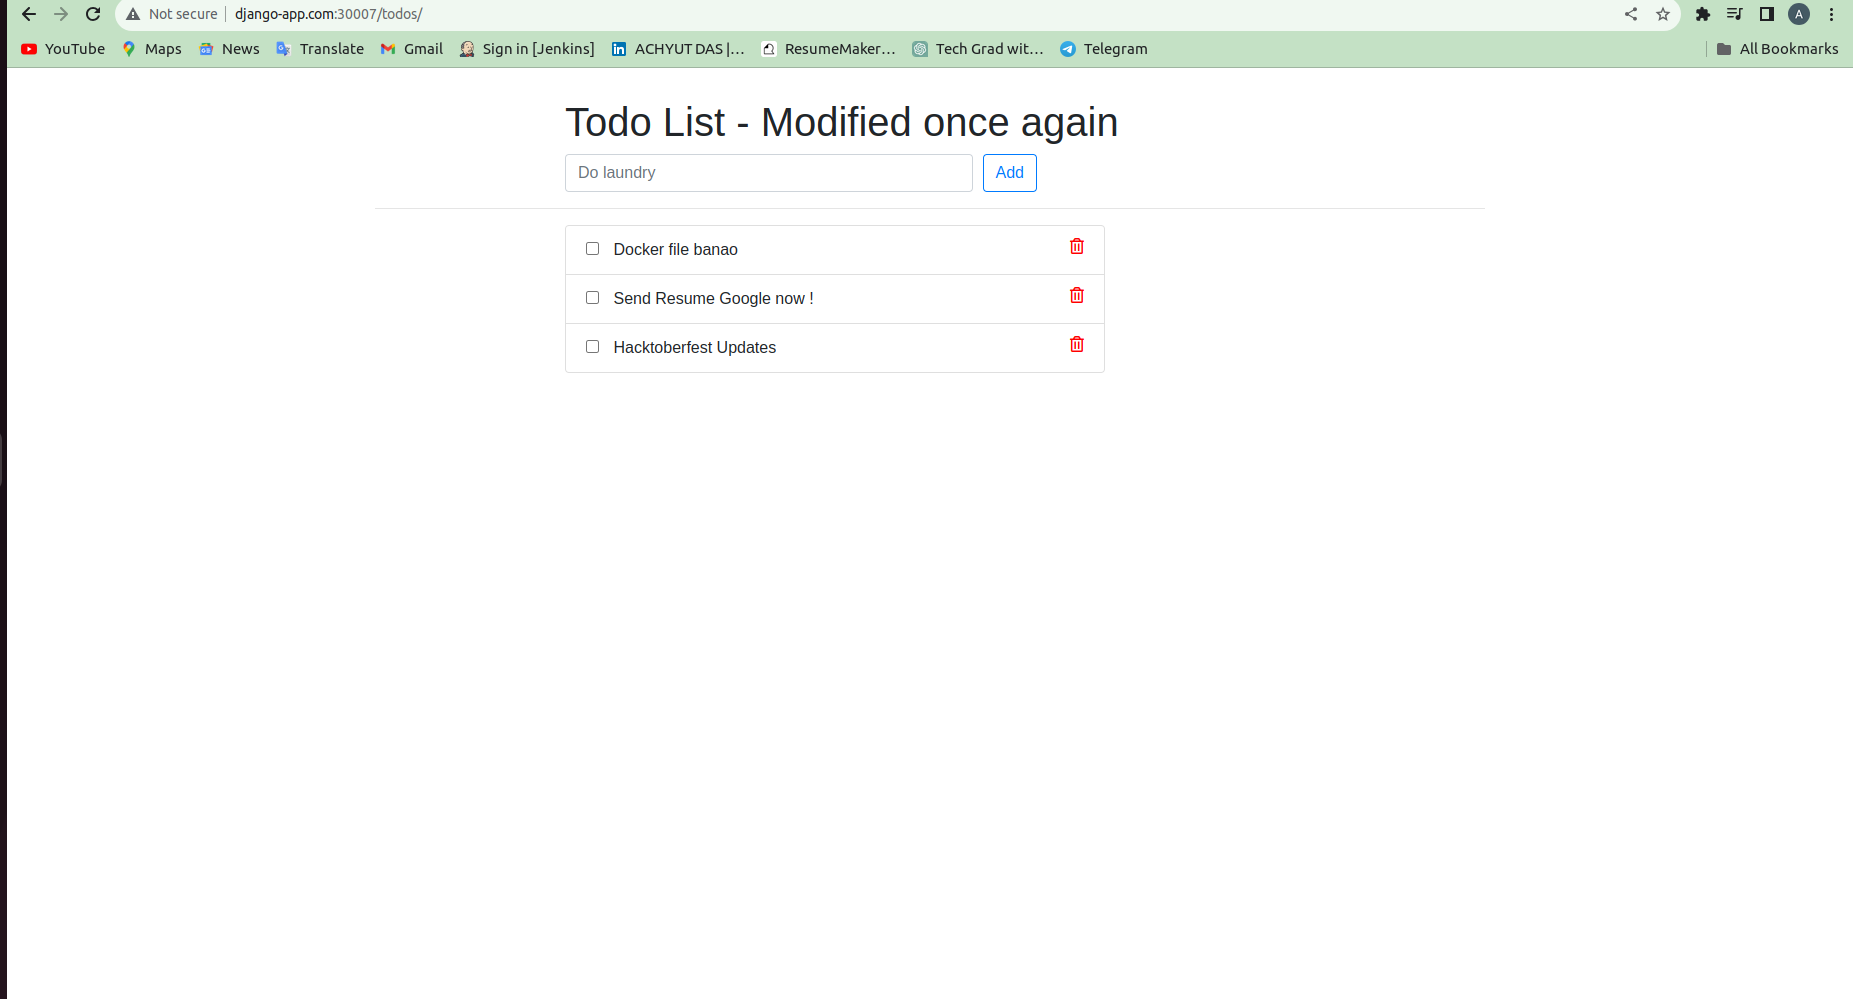
so the Django app was deployed successfully.
Subscribe to my newsletter
Read articles from Achyut Das directly inside your inbox. Subscribe to the newsletter, and don't miss out.
Written by
