How To Configure an External Hard Drive as Local Storage on XCP-ng
 Tanner
Introduction
In my lab, I have jacked up some of my virtual machines while making a configuration or a change and accidentally forgot to take a snapshot. In this scenario, restoring to a recent backup would be helpful so I could revert to the working state of the machine. Unfortunately, I did not have any automated backups for my virtual machines. So, I had to manually rebuild the machine which can be a long, tedious, and defeating process.
Since I still haven’t bit the bullet to invest in a NAS, I will be using a Western Digital external hard drive as storage to hold my backups to my virtual machines. This process wasn’t as straightforward as I thought it would be for plug-and-play.
Why are backups important?
Backups are essential for recovering from hardware failures, accidental deletions, misconfigurations, malware, and the list can go on. Backups give your IT departments a little peace of mind knowing they have a means of recovery in case of disaster. Periodically, you should test your backups to ensure that they are recoverable.
Configure External Hard Drive on XCP
Step 1 – XCP-ng Console work
Here is what my local storage repository looks like before adding the storage device.
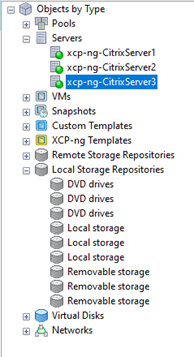
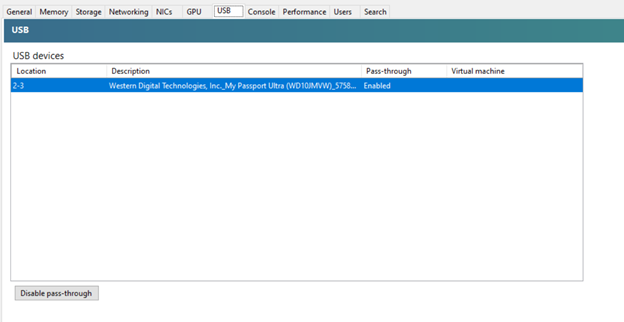
Plug your hard drive into your machine and then head over to XCP-ng. Go to the USB tab and ensure USB pass-through is enabled.
Go to the console. Type fdisk -l. This command is used to list the partitions on your server's hard drives.
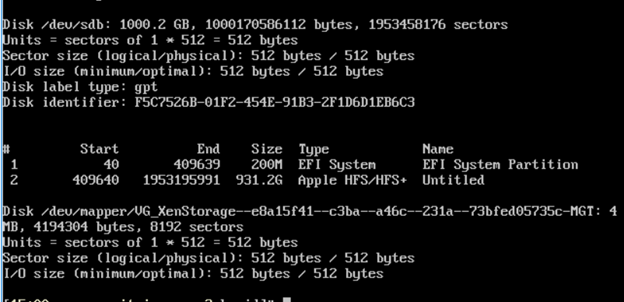
From this output I know that my Western Digital hardrive is disk /dev/sdb.
Type in the cmd cd /dev/disk/by-id and then ls
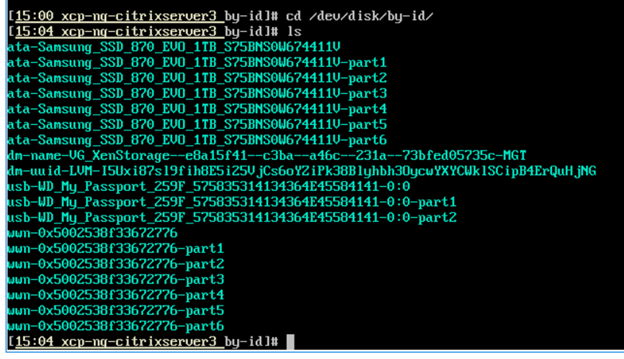
You will see all the current disks and partitions on your server. I will be using the usb-WD_My_Passport_259F_575835314134364E45584141-0:0. You will input that in the /dev/disk/by-id/<insert your storage here>. Make sure to also grab your hosts UUID.
We will use the following cmd to create a storage repository for your external storage.
xe sr-create type=lvm content-type=user device-config:device=/dev/disk/by-id/usb-USB_Flash_Drive_AA04012700007933 name-label=”Local USB Storage” host-uuid=<UUID of the host> shared=false

Now check your Local Storage Repositories
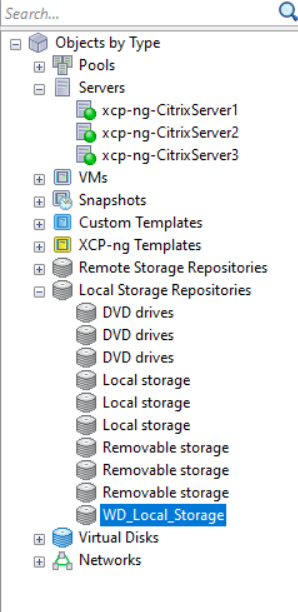
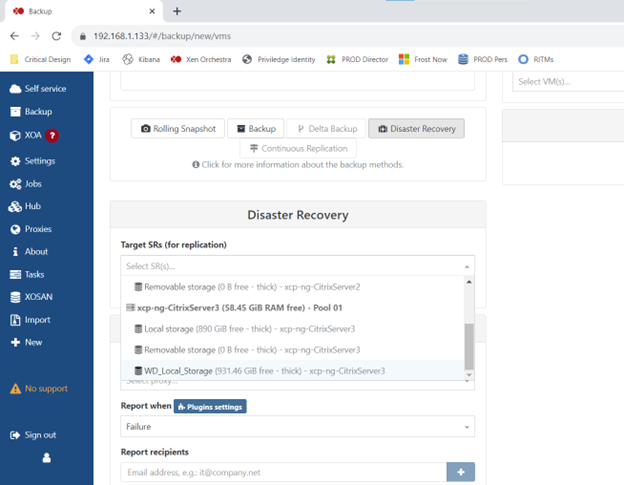
Now I can use Xen Orchestra to automate backups to my VMs using my new storage device. I will most likely make another article in the future and go through Xen Orchestra and how to configure backups.
Subscribe to my newsletter
Read articles from Tanner directly inside your inbox. Subscribe to the newsletter, and don't miss out.
Written by
