Building a Chrome Extension for Endless Laughter
 kunal gavhane
Table of contents
- Building the LaughLink Chrome Extension: Part 1 - HTML Structure
- Building the LaughLink Chrome Extension: Part 2 - Styling with CSS
- Building the LaughLink Chrome Extension: Part 3 - JavaScript Logic
- Building the LaughLink Chrome Extension: Part 4 - Creating the Manifest File
- Building the LaughLink Chrome Extension: Part 5 - Testing Your Extension
- Wrapping Up
Hey there.... I'm Kunal Gavhane, a Software Engineer and Web Developer with a background in Computer Science Engineering. I've had the privilege of working on some exciting web development projects, and I'm here to share my knowledge with you.
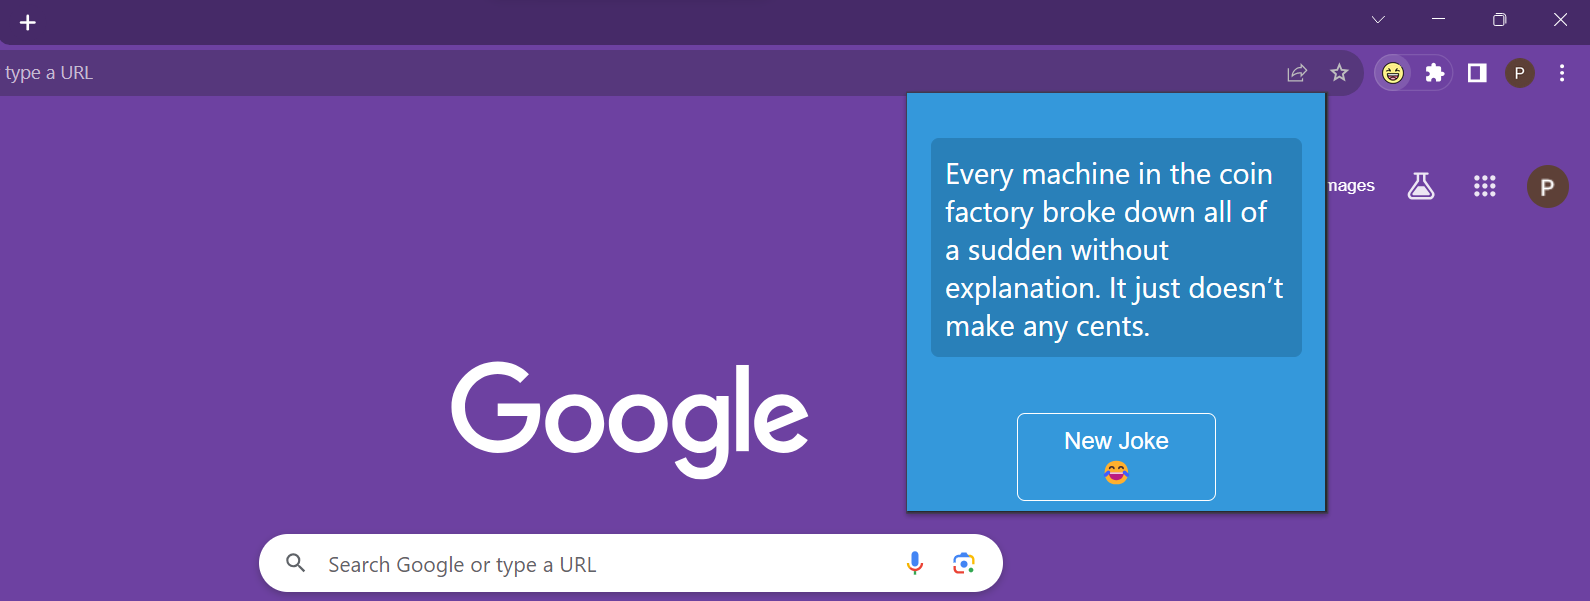
Extension preview :
Building the LaughLink Chrome Extension: Part 1 - HTML Structure
Welcome to the first part of our step-by-step guide on building the "LaughLink" Chrome Extension.
In this guide, I will walk you through the process of creating a Chrome extension that displays random jokes.
Prerequisites
Before we get started, make sure you have the following:
A text editor (e.g., Visual Studio Code, Sublime Text, or any other of your choice).
Basic knowledge of HTML, CSS, and JavaScript.
Google Chrome browser installed on your computer.
Project Overview
In this part of the guide, we'll create the basic HTML structure for our Chrome extension. The extension will consist of a simple webpage that displays a random joke when you click a button.
HTML Structure
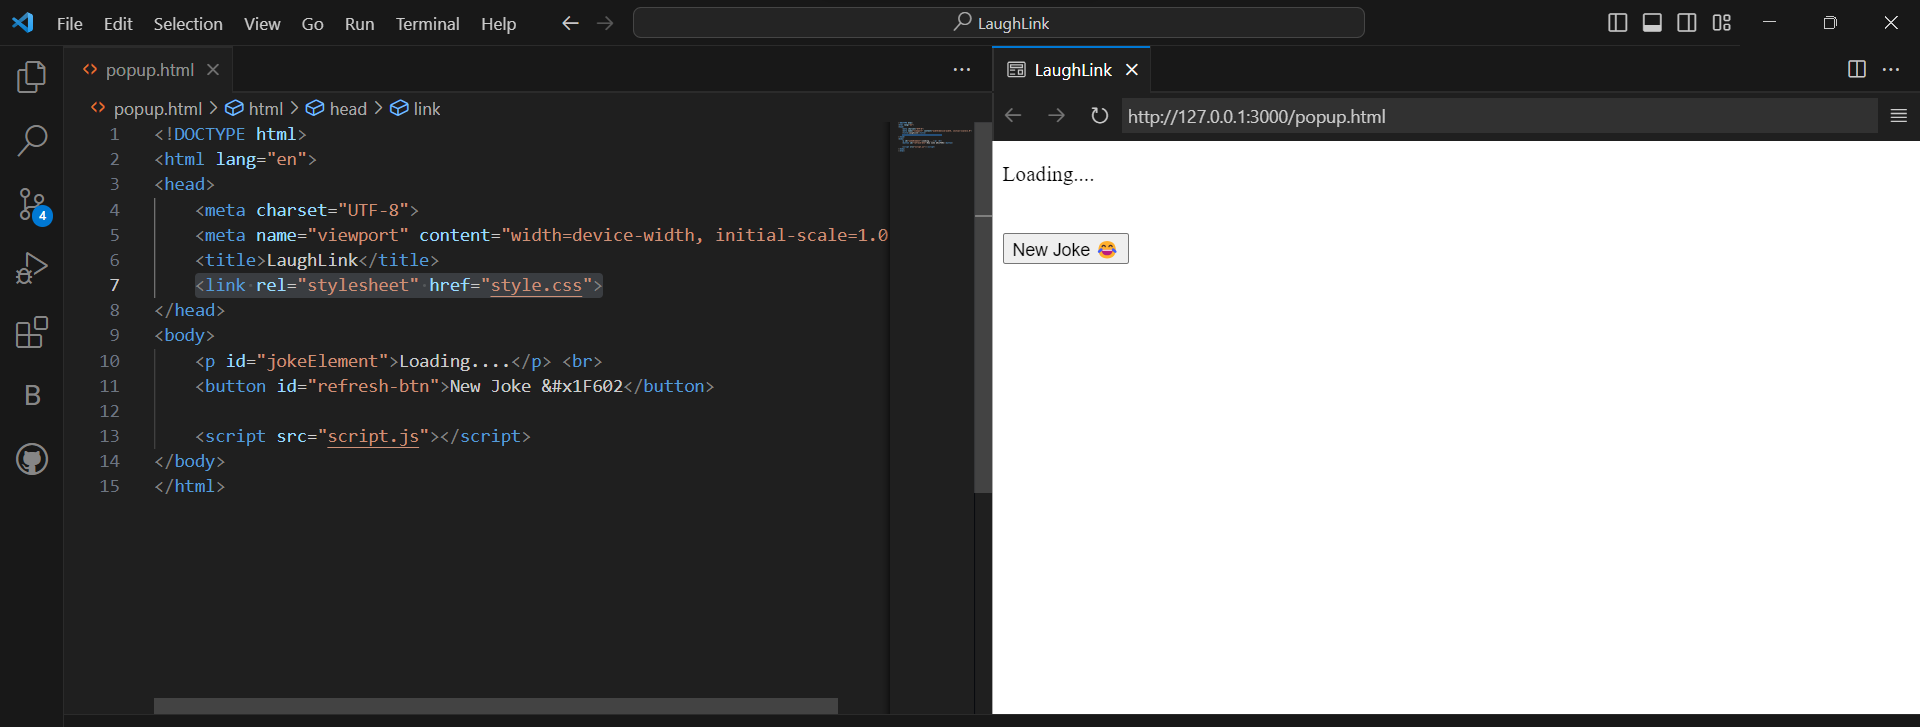
Let's start by setting up the HTML structure for our extension:
<!DOCTYPE html>
<html lang="en">
<head>
<meta charset="UTF-8">
<meta name="viewport" content="width=device-width, initial-scale=1.0">
<title>LaughLink</title>
<link rel="stylesheet" href="style.css">
</head>
<body>
<p id="jokeElement">Loading....</p> <br>
<button id="refresh-btn">New Joke 😂</button>
<script src="script.js"></script>
</body>
</html>
Let's break down what each part of this HTML code does:
<!DOCTYPE html>: This declaration defines the document type and version of HTML being used (HTML5).<html lang="en">: This sets the document's language to English.<head>: This section contains metadata about the document, including character encoding and the page title.<meta charset="UTF-8">: Specifies the character encoding as UTF-8.<meta name="viewport" content="width=device-width, initial-scale=1.0">: This meta tag ensures the page is responsive and adjusts to different screen sizes.<title>LaughLink</title>: Sets the title of the extension's popup window.<link rel="stylesheet" href="style.css">: Links to an external CSS file (which we'll create later) for styling.
In the <body> section, we have:
<p id="jokeElement">Loading....</p>: This paragraph element will display the joke. Initially, it shows "Loading...."<button id="refresh-btn">New Joke 😂</button>: This button, when clicked, will trigger the display of a new joke.<script src="script.js"></script>: Links to an external JavaScript file (script.js), where we'll write the code to fetch and display jokes.
Output Preview:
Building the LaughLink Chrome Extension: Part 2 - Styling with CSS
CSS Styling
First, create a file named style.css in the same directory as your HTML file. This CSS file will contain the styles for our extension.
Here's the CSS code:
body {
    width: 300px;
    height: 300px;
    background-color: #3498db;
    display: flex;
    justify-content: center;
    flex-direction: column;
}

p {
    display: inner-flex;
    margin: auto 10px;
    color: #ffffff;
    font-size: 22px;
    border-radius: 6px;
    border: 1px solid #2980b9;
    padding: 10px;
    background-color: #2980b9;
}

button {
    width: 50%;
    align-self: center;
    background-color: #3498db;
    color: #ffffff;
    border: 1px solid;
    border-radius: 6px;
    padding: 10px 20px;
    font-size: 18px;
    cursor: pointer;
    transition: background-color 0.3s ease;
}

button:hover {
    background-color: #2980b9;
}
In this CSS code, we define styles for various elements in our extension:
body: Sets the background color, layout, and size.p: Styles the paragraph element that displays jokes.button: Styles the button for fetching new jokes, including hover effects.
To link this CSS file to your HTML document, ensure that the <link> tag in your HTML file points to style.css.
Let's go through each of the CSS properties used :
body: This selector targets the<body>element, which represents the entire webpage. The properties applied tobodycontrol the overall layout and background color of the extension's popup.width: 300px;andheight: 300px;: Sets the width and height of the extension's popup to 300 pixels, defining its dimensions.background-color: #3498db;: Sets the background color of the popup to a shade of blue (#3498db).display: flex;: Turns the flexbox layout on for the body element, allowing you to use flexbox properties to control the layout of its child elements.justify-content: center;: Horizontally centers the child elements within the body element.flex-direction: column;: Arranges the child elements vertically, stacking them on top of each other.
p: This selector targets the<p>(paragraph) element within the body of the extension, which displays jokes.display: inner-flex;: This is not a standard CSS property. It seems to be a typo. It should bedisplay: inline-flex;to make the paragraph element behave as an inline flex container.margin: auto 10px;: Sets the margin around the paragraph, automatically adjusting the top and bottom margins and setting the left and right margins to 10 pixels.color: #ffffff;: Defines the text color for the paragraph as white (#ffffff).font-size: 22px;: Sets the font size of the text inside the paragraph to 22 pixels.border-radius: 6px;: Applies rounded corners to the paragraph element, creating a subtle border radius.border: 1px solid #2980b9;: Adds a 1-pixel solid border around the paragraph with a blue color (#2980b9).padding: 10px;: Provides internal spacing of 10 pixels within the paragraph element.background-color: #2980b9;: Sets the background color of the paragraph to a darker shade of blue (#2980b9).
button: This selector targets the<button>element within the body, which allows users to fetch new jokes.width: 50%;: Sets the button's width to 50% of its containing element's width, making it responsive.align-self: center;: Horizontally centers the button within its container.background-color: #3498db;: Defines the button's background color as the same blue used for the body.color: #ffffff;: Sets the text color of the button to white.border: 1px solid;: Adds a 1-pixel solid border around the button.border-radius: 6px;: Applies rounded corners to the button.padding: 10px 20px;: Sets the padding inside the button, providing both horizontal and vertical spacing.font-size: 18px;: Sets the font size of the button text to 18 pixels.cursor: pointer;: Changes the cursor to a pointer when hovering over the button, indicating it's clickable.transition: background-color 0.3s ease;: Defines a smooth transition effect for the button's background color when hovered over. It takes 0.3 seconds to change, creating a smooth visual effect.
button:hover: This is a pseudo-class selector that targets the button when it's hovered over by the mouse cursor.background-color: #2980b9;: Changes the button's background color to a slightly darker blue (#2980b9) when hovered over, creating a visual feedback effect.
These CSS properties collectively style the extension's popup, making it visually appealing and user-friendly.
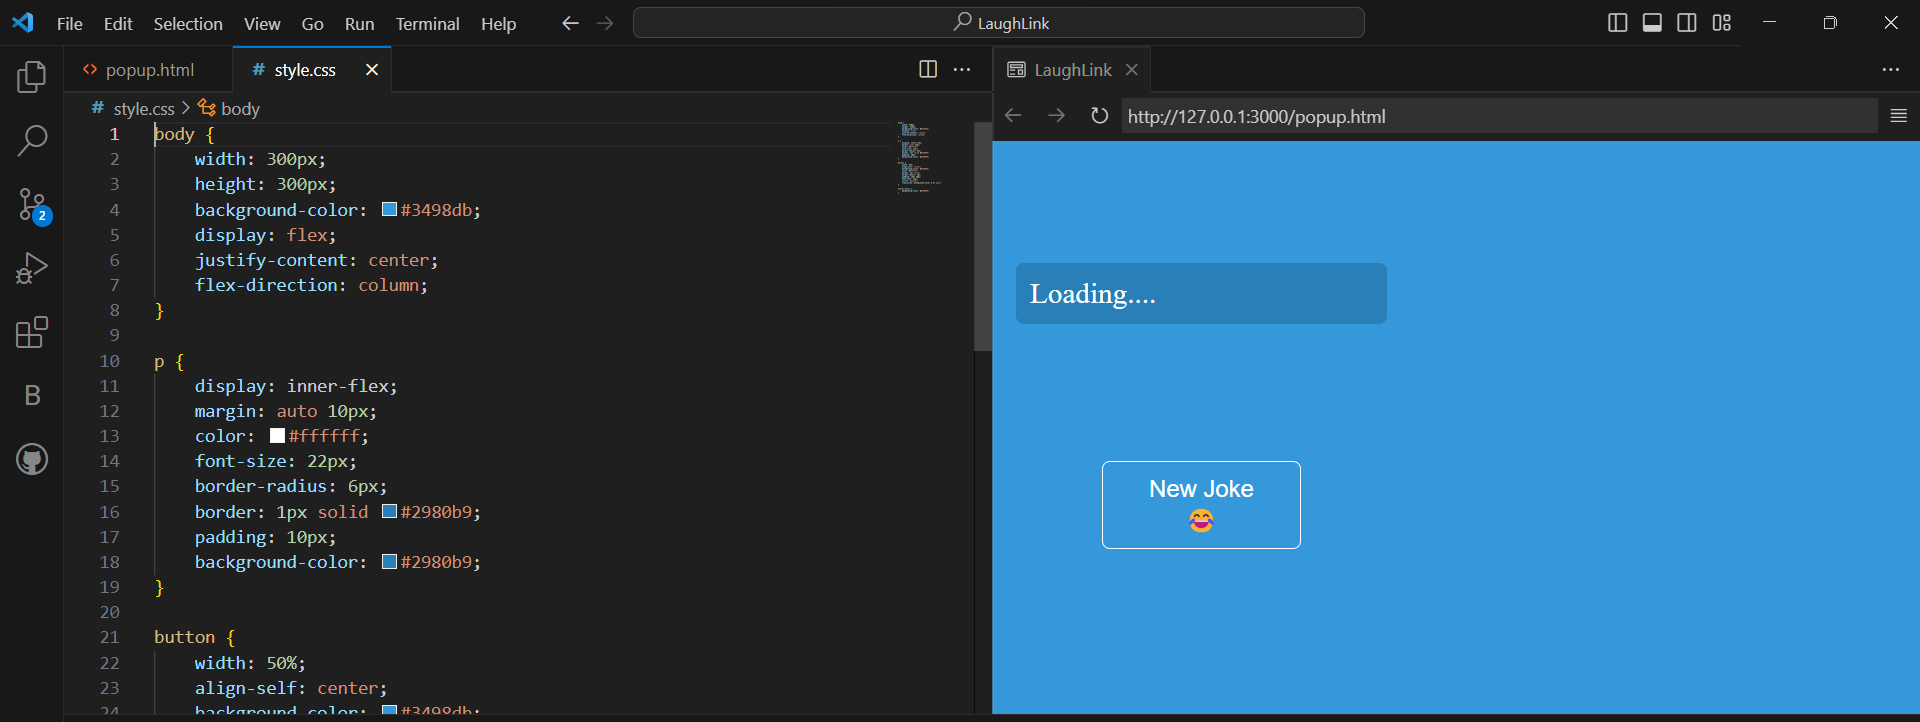
Output Preview :
Building the LaughLink Chrome Extension: Part 3 - JavaScript Logic
JavaScript Logic
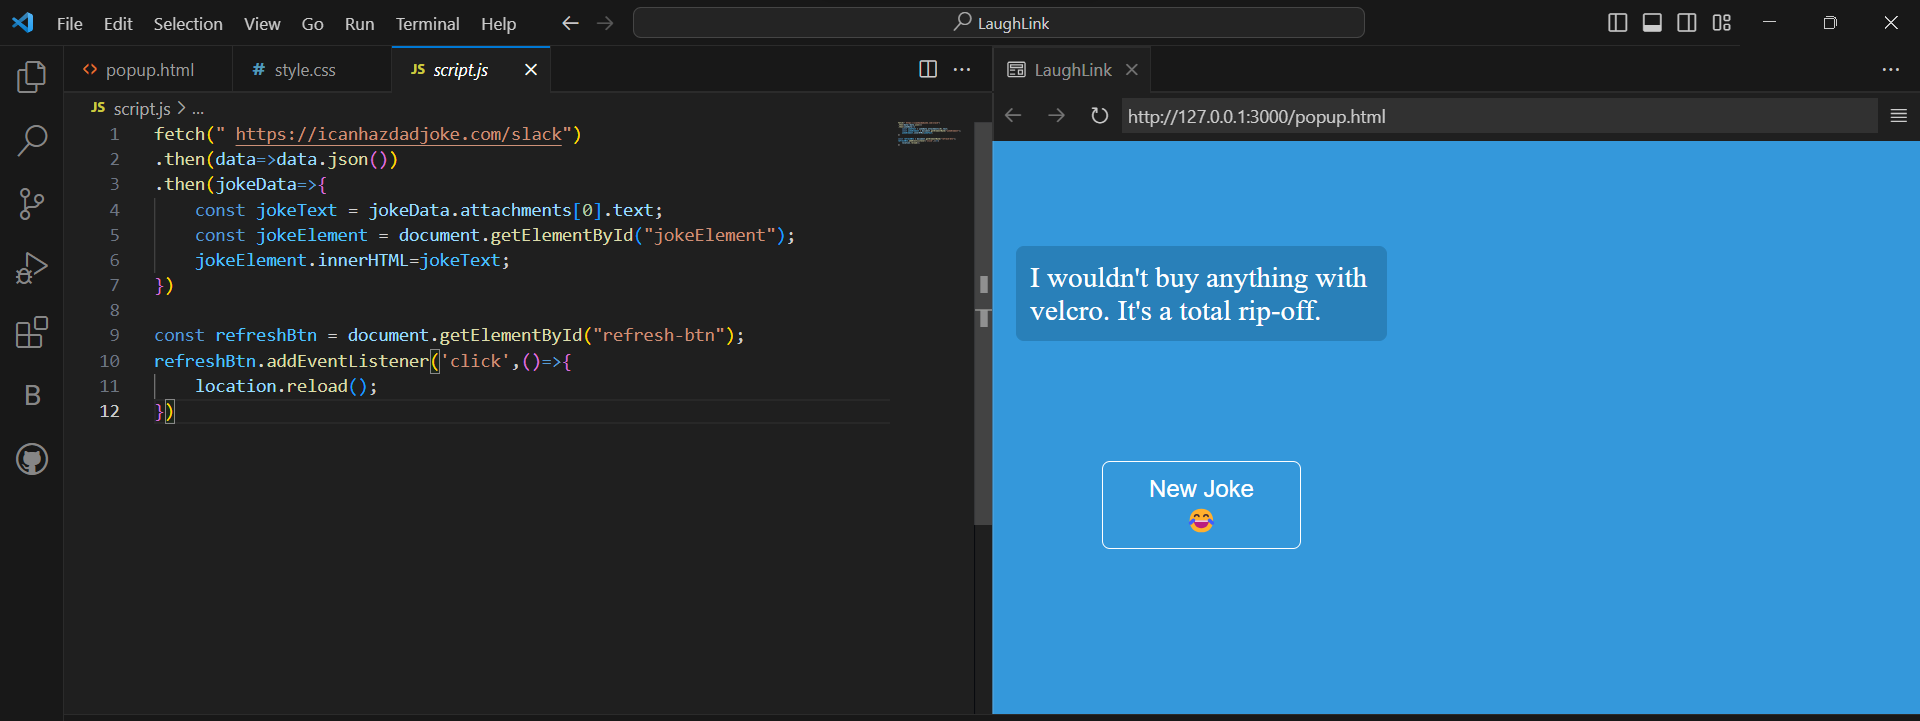
First, create a file named script.js in the same directory as your HTML file. This JavaScript file will contain the code that makes the extension functional.
Here's the JavaScript code:
// Fetch a random joke from the API
fetch("https://icanhazdadjoke.com/slack")
    .then(data => data.json())
    .then(jokeData => {
        // Extract the joke text from the API response
        const jokeText = jokeData.attachments[0].text;

        // Get a reference to the HTML element where the joke will be displayed
        const jokeElement = document.getElementById("jokeElement");

        // Update the content of the HTML element with the fetched joke
        jokeElement.innerHTML = jokeText;
    });

// Get a reference to the "New Joke" button
const refreshBtn = document.getElementById("refresh-btn");

// Add a click event listener to the button
refreshBtn.addEventListener('click', () => {
    // Reload the extension popup to fetch a new joke
    location.reload();
});
Let's break down what this JavaScript code does:
We use the
fetch()function to make a request to the "icanhazdadjoke.com" API, which provides random jokes in the Slack format.The
.then()method is used to handle the JSON response from the API. We extract the joke text from the response and store it in thejokeTextvariable.We get a reference to the HTML element with the
idof "jokeElement," which is the paragraph where we'll display the joke.We update the content of the
jokeElementwith the fetched joke text usinginnerHTML.We get a reference to the "New Joke" button with the
idof "refresh-btn."We add a click event listener to the button. When the button is clicked, the extension popup is reloaded (
location.reload()), which fetches and displays a new joke.
With this JavaScript code, our extension can fetch and display random jokes, providing users with a source of laughter and entertainment.
Output Preview :
Building the LaughLink Chrome Extension: Part 4 - Creating the Manifest File
Manifest.json
Create a file named manifest.json in the same directory as your HTML, CSS, and JavaScript files. The manifest file should contain the following code:
{
    "name": "LaughLink",
    "version": "0.0.1",
    "manifest_version": 2,
    "browser_action": {
        "default_popup": "popup.html",
        "default_icon": "logo.png"
    },
    "icons": {
        "128": "logo.png"
    },
    "permissions": ["activeTab"]
}
Here's an explanation of the key properties in the manifest file:
"name": This is the name of your extension, which will be displayed in the Chrome extension menu."version": Specifies the version number of your extension."manifest_version": Indicates the manifest file format. Version 2 (2) is the format used in modern Chrome extensions."browser_action": This section defines how the extension interacts with the browser's user interface."default_popup": Specifies the HTML file that serves as the extension's popup when the extension icon is clicked. In this case, it's set to"popup.html"."default_icon": Specifies the default icon for the extension.
"icons": This section specifies the icons used for the extension. The"128"property indicates the size of the icon (128x128 pixels), and"logo.png"is the file name of the icon image."permissions": Specifies the permissions required by the extension. In this case, we have"activeTab", which allows the extension to interact with the currently active tab in the browser.
With the manifest.json file in place, your extension is now fully defined, and its behavior is configured.
Building the LaughLink Chrome Extension: Part 5 - Testing Your Extension
Congratulations on creating your "LaughLink" Chrome Extension. In this final part, I will walk you through the process of loading and testing your extension in your Chrome browser.
Testing Your Extension
Follow these steps to test your extension:
Open Chrome: Make sure you have the Google Chrome browser installed on your computer. If you don't, download and install it from the official website.
Access Extensions: Open Chrome, click on the three dots (menu) in the upper-right corner, and select "Extensions" from the dropdown menu.
Enable Developer Mode: In the Extensions page, enable "Developer mode" by toggling the switch in the upper-right corner of the page. This mode allows you to load and test your custom extensions.
Load Your Extension:
Click on the "Load unpacked" button.
Navigate to the directory where your extension files (HTML, CSS, JavaScript, and manifest.json) are located.
Select the folder containing your extension files and click "Select Folder" (or equivalent, depending on your operating system).

Extension Icon: You should now see your "LaughLink" extension icon in the Chrome toolbar.
Test Your Extension:
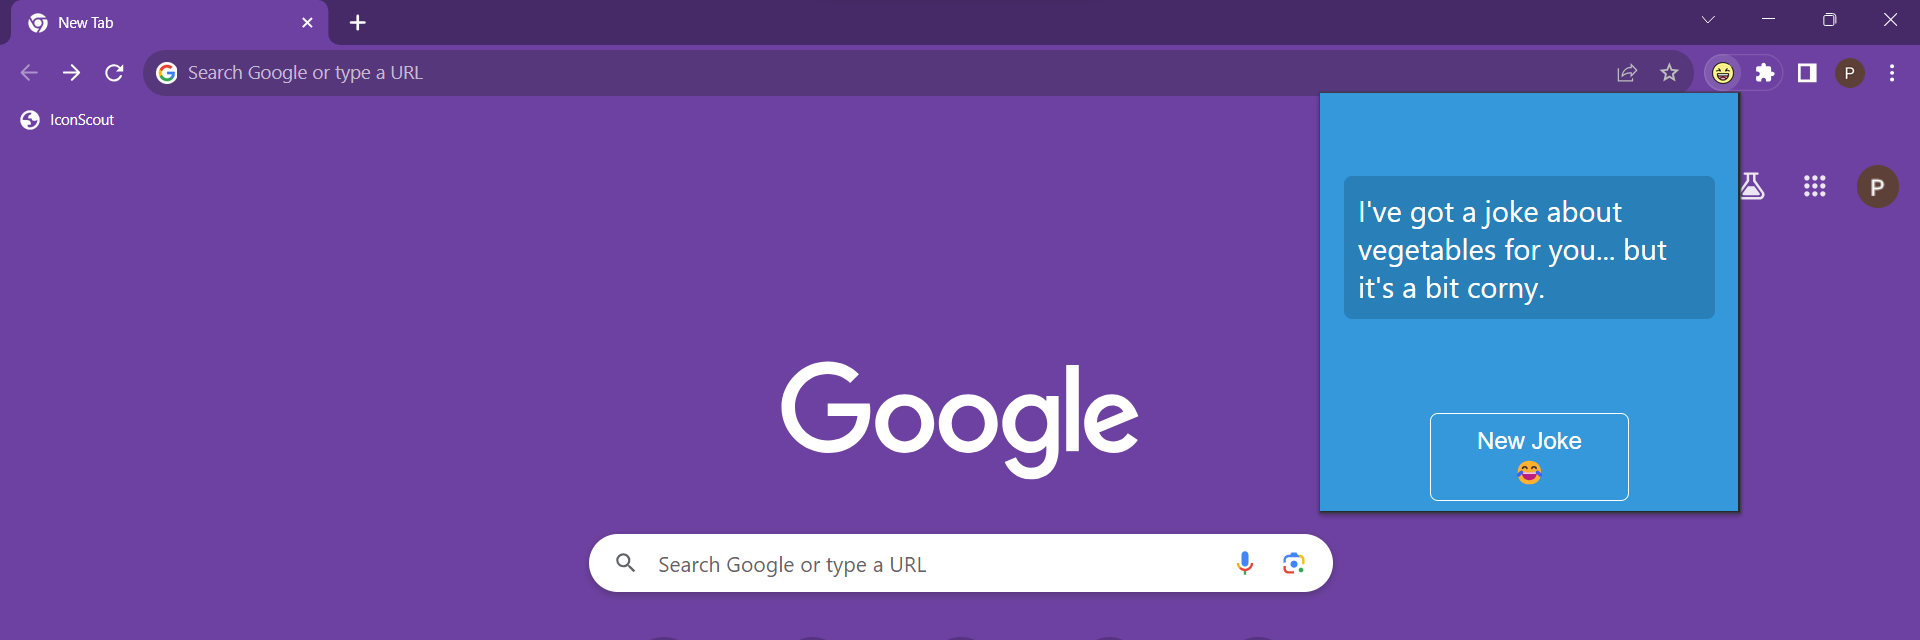
Click the "LaughLink" extension icon in the Chrome toolbar to open the popup.
You should see "Loading...." and a "New Joke" button.
Click the "New Joke" button to fetch and display a random joke.
Verify that the extension displays a new joke each time you click the button.
Inspect Your Extension: To debug and inspect your extension's background scripts, right-click on the extension icon in the toolbar and select "Inspect." This will open the Chrome Developer Tools for your extension.
Adjust Permissions: Depending on your extension's functionality, you may need to adjust permissions in the
manifest.jsonfile. Make sure the permissions are correctly set for your extension's requirements.Testing in Different Tabs: Ensure your extension works as expected in different tabs and pages by opening multiple tabs and testing the extension in each of them.
Publish Your Extension (Optional): If you're satisfied with your extension and want to share it with others, you can publish it on the Chrome Web Store.
That's it...You've successfully built, loaded, and tested your "LaughLink" Chrome Extension. You can continue to refine and enhance your extension's functionality, style, and features to make it even better.
Wrapping Up
Thank you for joining me on this journey...I hope you found this guide both informative and inspiring.
If you're hungry for more coding tricks, tips, and tech insights, don't forget to follow me on Twitter https://twitter.com/iam_kgkunal. I regularly share exciting discoveries, code snippets, and updates on my latest projects.
Additionally, if you enjoyed exploring the "LaughLink Chrome Extension" project or found it useful, please consider following me on GitHub https://github.com/Kgkunal.
You can also show your support by starring the repository for this project {https://github.com/Kgkunal/Laughlink-Chrome_extension}. Your feedback and engagement mean the world to me, and they motivate me to keep creating and sharing more tech magic with you.

Keep coding, keep learning........
Subscribe to my newsletter
Read articles from kunal gavhane directly inside your inbox. Subscribe to the newsletter, and don't miss out.
Written by

kunal gavhane
kunal gavhane
Where people see a problem, we see an opportunity and a new project! Hello, I am an Engineer;
