Building Map Based Apps - The Camino Part 3
 AndrewC
Bringing it together as a map
Continuing on from Building Map Based Apps - The Camino Part 2 (circumblue.com)
At this point we have :
Photos stored on an Azure Blob storage account as JPEGs
A unique SQL record for each photo with longitude, latitude, date and the filename.
That's all we need to start on the front end.
Querying the metadata - Another Azure function
We need a method for a user (or more specifically their browser) to get a list of the unique locations. Directly querying SQL from a browser is not a good plan, so let's proxy that with an Azure function.
This is the main body of the function with the HTTP trigger. Note this also provides the ability to pass a date range to restrict the time period of the photos shown.
public static class GetAllImages
{
    [FunctionName("GetAllImages")]
    public static async Task<IActionResult> Run(
        [HttpTrigger(AuthorizationLevel.Function, "get", "post", Route = null)] HttpRequest req,
        ILogger log)
    {
        string datelower = req.Query["datelower"];
        string dateupper = req.Query["dateupper"];
        DateTime l = DateTime.Parse(datelower);
        DateTime h = DateTime.Parse(dateupper);

        String responseMessage = ReadDatabase(l,h);
        return new OkObjectResult(responseMessage);
     }
}
Querying the database is done in a similar way to inserting the record.
private static String ReadDatabase(DateTime l , DateTime h)
{
   String Connstring = Environment.GetEnvironmentVariable("SQLConnString");
   string format = "yyyy-MM-dd HH:mm:ss";
   string queryString = "SELECT * from photolocations where photodate > '"
        + l.ToString(format) + "' and photodate < '" + h.ToString(format)
        + "' order by photodate DESC FOR JSON AUTO";

   String result = "";
   using (SqlConnection connection = new SqlConnection(Connstring)) {
      SqlCommand command = new SqlCommand(queryString, connection);
      connection.Open();
      SqlDataReader reader = command.ExecuteReader();
      try {
         while (reader.Read()) {
            result = result + reader[0];
         }
      }
      finally {
         reader.Close();
      }
   }
   return result;
}
The little bit of magic on the end of the query string "order by photodate DESC FOR JSON AUTO" does two things :
The records are returned in chronological order, so the front end can simply draw a line between each one and show the path taken.
FOR JSON AUTO structures the return output in a way that the client can process with little further parsing.
The return results look like this :

Once published, the function will wait quietly (and at $0) for requests.
Finally, the map itself
The basic HTML structure of the web page is :
<!DOCTYPE html>
<html>
<head>
    <title>WalkWithMe</title>
    <meta charset="utf-8" />
    <script type='text/javascript' src='https://www.bing.com/api/maps/mapcontrol?callback=GetMap&key=REPLACEWITHYOURKEY' async defer></script>

    <script>
    <!-- Map rendering code to be added here -->
    </script>
</head>

<body bgcolor="#333333" text="white">
    <div id="myMap" style="width: auto; height:100%;margin-right:300px">
    </div>
    <div id="right" style="width: 300px;float: right;">
        <input type="date" id="lowerdate" name="lowerdate" value="2023-01-01">
        <br />
        <input type="date" id="upperdate" name="upperdate" value="2023-12-12">
        <br />
    </div>
</body>
</html>
In this case I am using BING maps. Check here: Building map based apps and websites for the basic structure of the HTML if using Azure og Google Maps.
The HTML above creates the page, loads in the bing map rendering engine and call the Javascript function GetMap once it is loaded.
The GetMap function:
Creates the map with a default centre point (more on the view later).
Adds two layers to the map to hold the points and the lines.
Calls CreateBox to set up a floating placeholder for the images
Then populates all this with a call to GetPhotoLocationsWithTrack
function GetMap() {
   map = new Microsoft.Maps.Map('#myMap', { center: new Microsoft.Maps.Location(-37.82, 144.95) });

   photolayer = new Microsoft.Maps.Layer();
   map.layers.insert(photolayer);
   tracklayer = new Microsoft.Maps.Layer();
   map.layers.insert(tracklayer);
   photolayer.setVisible(1);
   CreateBox();
   GetPhotoLocationsWithTrack();
}
The GetXXX function handles the call to Azure :
function GetPhotoLocationsWithTrack() {
   function reqListener() {
      var myObj = JSON.parse(this.responseText);
      AddImages(myObj);
      DrawTrack(myObj);
      SetView(myObj);
   }

   var input = document.getElementById("lowerdate").value;
   var datelower = new Date(input);
   input = document.getElementById("upperdate").value;
   var dateupper = new Date(input);

   var oReq = new XMLHttpRequest();
   oReq.addEventListener("load", reqListener);
   url = "https://walkwithme.azurewebsites.net/api/GetAllImages?code=ReplaceWithYourFunctionCode&datelower=" + datelower.toJSON() + "&dateupper=" + dateupper.toJSON();

    oReq.open("GET", url);
    oReq.send();
}
After this call, the myObj variable has a representation of the data returned by the Azure function that is ready to use.
The track (red line) is added with :
function DrawTrack(obj) {
   tracklayer.clear();
   var coords = [];

   for (var key in obj) {
      var unit = obj[key];
      if (unit.hasOwnProperty('latitude')) {
         if (unit.latitude != 0) {
            point = new Microsoft.Maps.Location(unit.latitude, unit.longitude);
            coords.push(point);
         }
      }
   }

   var line = new Microsoft.Maps.Polyline(coords, {strokeColor: 'red',strokeThickness: 3 });
   tracklayer.add(line);
}
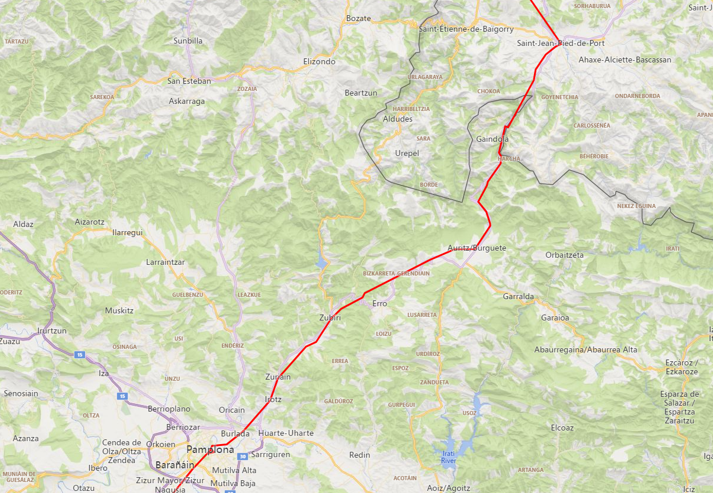
As the Azure function returns the points in chronological order, I do not need to do any special sorting or processing. Simply drawing a line from first point to last and adding to the map layer generates this:

The points images are setup with the functions below. AddImages simply iterates through each point in the JSON. AddImage then takes that point and :
Adds a pin to the map at that coordinate
Adds a piece of metadata to the pin holding the filename of the image
Sets up two event handlers that fire when the mouse hovers over the pin and then leaves it.
function AddImage(filename, hlong, hlat) {
   var loc = new Microsoft.Maps.Location(hlat, hlong);
   var pin = new Microsoft.Maps.Pushpin(loc, {anchor: new Microsoft.Maps.Point(10, 10)});
      pin.metadata = {
         filename: filename
      };

      Microsoft.Maps.Events.addHandler(pin, 'mouseover', ImageClicked);
      Microsoft.Maps.Events.addHandler(pin, 'mouseout', ImageLeft);
      photolayer.add(pin);
}

function AddImages(obj) {
   photolayer.clear();
   photocount = 0;

   for (var key in obj) {
      var unit = obj[key];
      if (unit.hasOwnProperty('latitude')) {
         AddImage(unit.filename, unit.longitude, unit.latitude);
         photocount = photocount + 1;
      }
   }
}
Finally, the image popups are handled with the event handlers below. The image filename, which was stored as a piece of metadata in the pin is simply added to the blob storage root path to generate a full URL. This image is then loaded and displayed as a fixed size.
function ImageClicked(e) {
   var infoboxTemplate = '<div class="customInfobox"><div class="title"></div><img src="{filepath}" width="300"></div>';
   if (e.target.metadata) {
      //Set the infobox options with the metadata of the pushpin.
      html = infoboxTemplate.replace('{filepath}', "https://mystorageaccount.blob.core.windows.net/images/" + e.target.metadata.filename)
      infobox.setOptions({
         location: e.target.getLocation(),
         title: e.target.metadata.filename,
         description: e.target.metadata.filename,
         visible: true,
         htmlContent: html
      });
   }
}

function ImageLeft(e) {
   infobox.setOptions({
       visible: false
   });
}
Finally, some crude enumeration works out the range of coordinates being displayed and auto-resizes the map so that they all fit.
function SetView(obj) {
   var minlong = 180
   var minlat = 180
   var maxlong = -180
   var maxlat = -180

   for (var key in obj) {
      var unit = obj[key];
      if (unit.hasOwnProperty('latitude')) {
         if (unit.latitude > maxlat) { maxlat = unit.latitude }
         if (unit.latitude < minlat) { minlat = unit.latitude }
         if (unit.longitude > maxlong) { maxlong = unit.longitude }
         if (unit.longitude < minlong) { minlong = unit.longitude }
      }
   }

   var rect = Microsoft.Maps.LocationRect.fromEdges(maxlat, minlong, minlat, maxlong)
   map.setView({ bounds: rect });
}
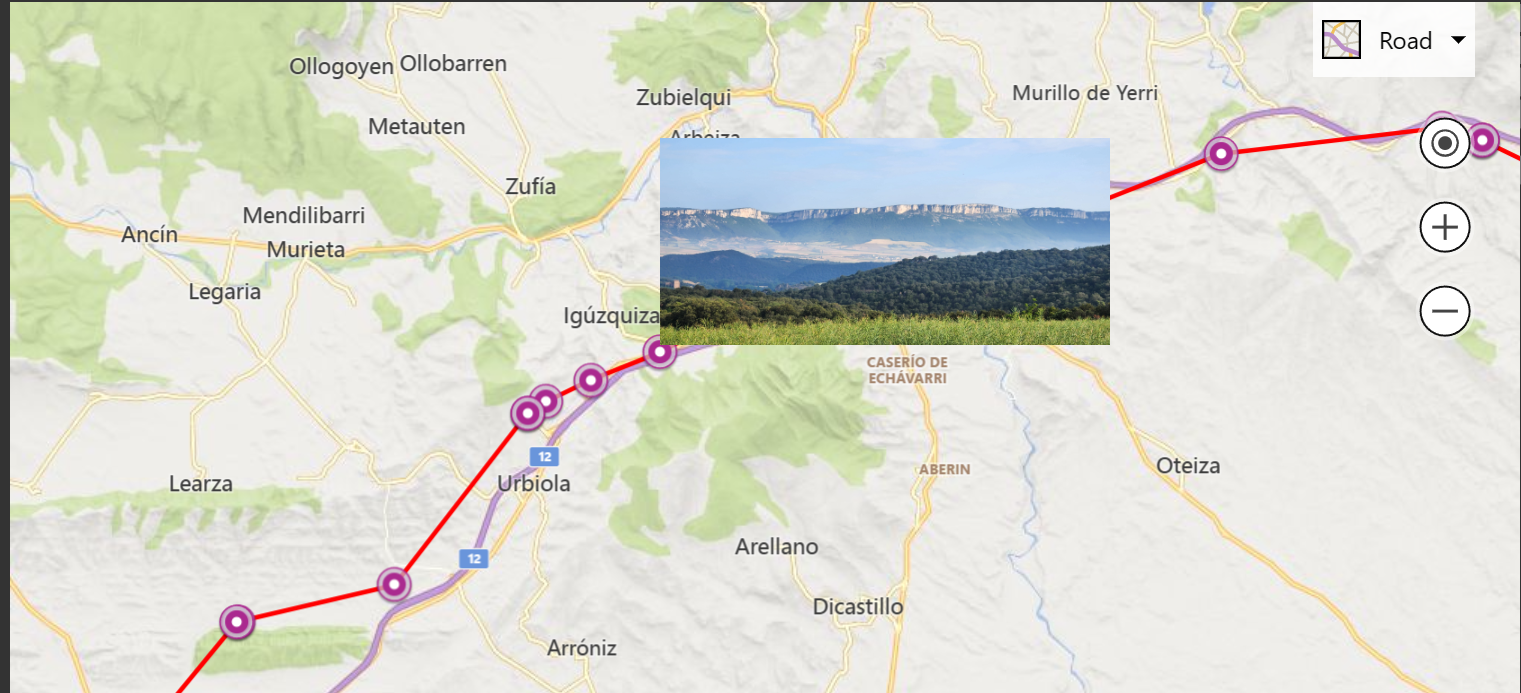
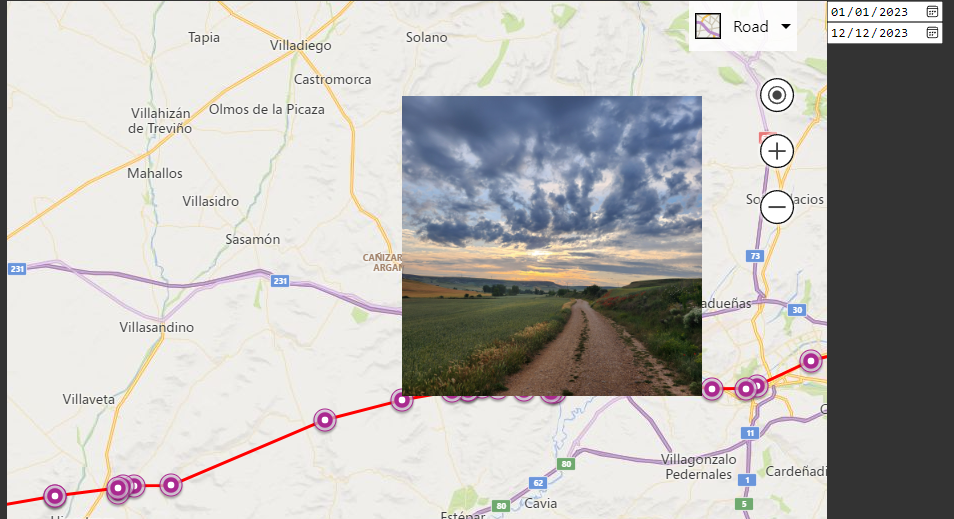
The final result of all this is:

What next? Going forward I'll be adding :
The ability of the client to define a 'trip' and each point is tagged with this.
The map webpage itself will then let individual trips be selected and shown.
Adding a user login mechanism and more security to the Azure functions and back ends.
The same solution using Azure and Google Maps. (and maybe OpenStreetMaps).
Exploring different back end architectures and storage.
Summary
The goal of this was not a fancy UI/HTML/Javascript. Nor was it necessarily the most elegant code.
Rather the simplicity of the code and architecture was designed to show how straightforward yet powerful a cloud (Azure) based and event-driven architecture can be be for this type of application.
Subscribe to my newsletter
Read articles from AndrewC directly inside your inbox. Subscribe to the newsletter, and don't miss out.
Written by
