Generating AI Images from your own PC
 Jeremy Morgan
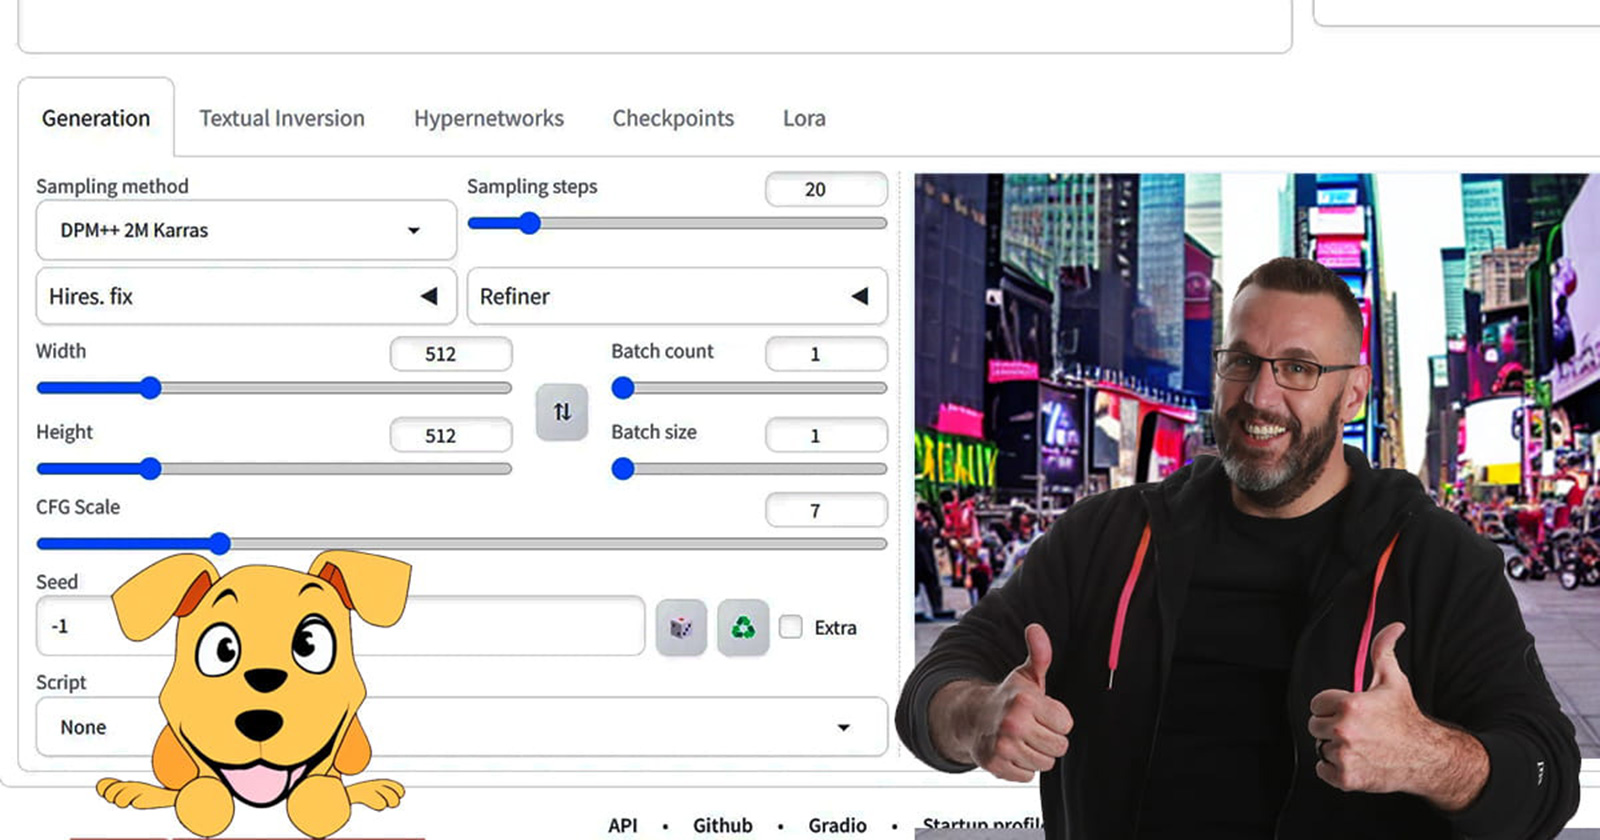
You want to create AI-generated images. You’ve probably signed up with Dall-E, or Bing, or Midjourney. You’ve created some cool stuff. If you’re reading this, you want to generate those images on your own computer. There is no website or discord to deal with. Running locally on your machine.
Why would anyone do this? Here are a few reasons:
It’s educational
You can generate as many images as you want
It’s free
With this tutorial’s help, you can generate images with AI on your own computer with Stable Diffusion.
Let’s get started.
Step 1: Requirements
There are some requirements for doing this on your own machine. It must have:
Hardware:
A modern AMD or Intel CPU
16 Gigabytes of RAM
SATA or NVMe solid state drive
NVidia GeForce GPU with at least 8 gigabytes of GDDR6 RAM
Software:
You must have Python installed (How to install Python in Windows 11).
You can use Anaconda if you want (How to install Anaconda in Windows 11).
You must have Git Installed (How to install Git in Windows 11).
You need an account at HuggingFace (it’s a free account)
Check your Python version to make sure it’s up to snuff:

And make sure Git is installed:

And you’re ready to go.
Step 2: Install Stable Diffusion Web UI
Create a folder somewhere where you want the software to live. Go to that folder:
cd /your/project/directory
(for me it’s C:\Users\jerem\Projects)
Then clone the repository:
git clone https://github.com/AUTOMATIC1111/stable-diffusion-webui.git stable-diffusion-demo

You should see the folder you just created:
stable-diffusion-demo
Now we need to go into the models folder:
cd stable-diffusion-demo\models\Stable-diffusion
It should look like this:

This is where we’ll put the Stable Diffusion models when we download them.
Step 3: Download the Model from Hugging Face
Next, we need a stable diffusion model, and we can get one from Hugging Face.
Let’s try the v1-5-pruned-emaonly.ckpt model. Download it to the stable-diffusion-demo/models/Stable-diffusion folder:
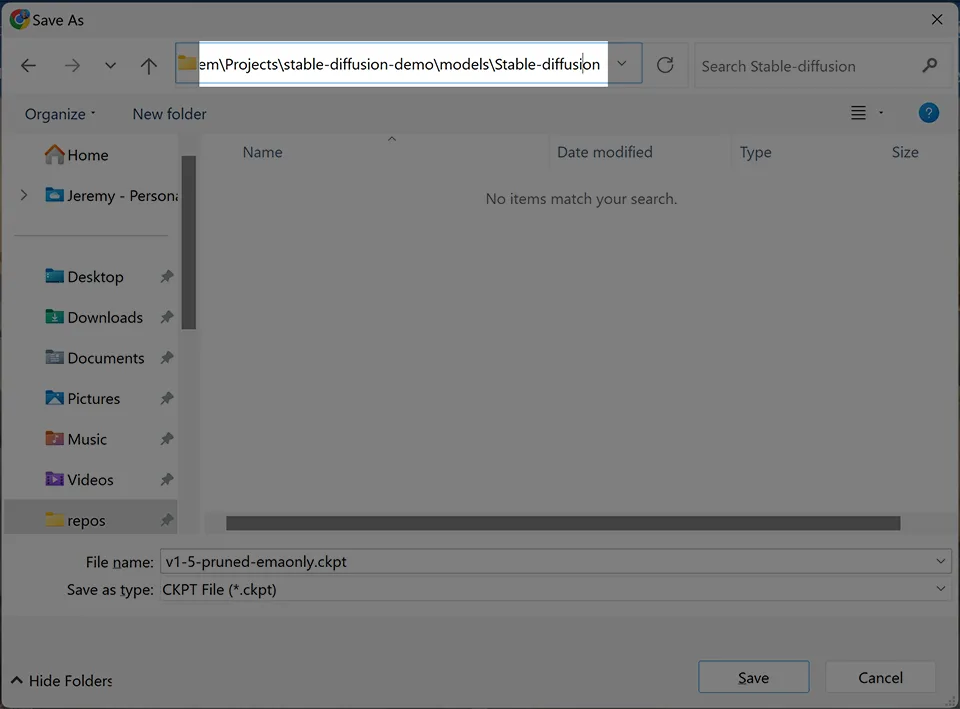
It might take a while to download (4GB at the time of this article).
Ok, now.. you’re ready to run the web app!
Step 4: Run the Stable Diffusion Web UI
At your command prompt, make sure you’re in the folder you created in step 2.
cd stable-diffusion-demo
Then run webui-user.bat
The first time you do this, it will install everything needed, so it may take a few minutes.

Once it’s completed, your command prompt will look something like this:
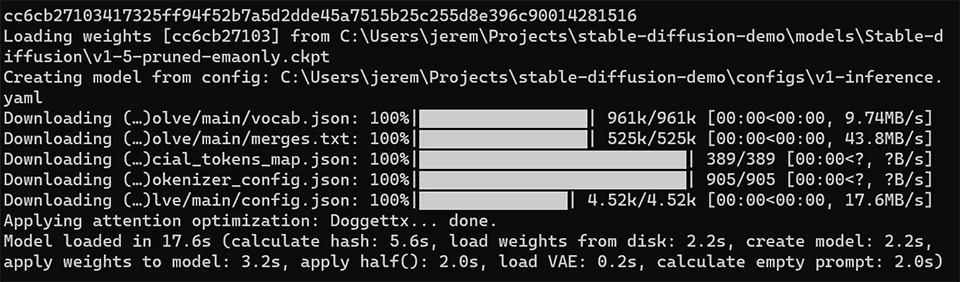
And the web server will be up and running.
Step 5: The Web Interface
Load up the following URL in your web browser:
It may load up automatically in the browser as well. But you’ll see a full web interface you can use to generate images:

Awesome! Let’s try it out!
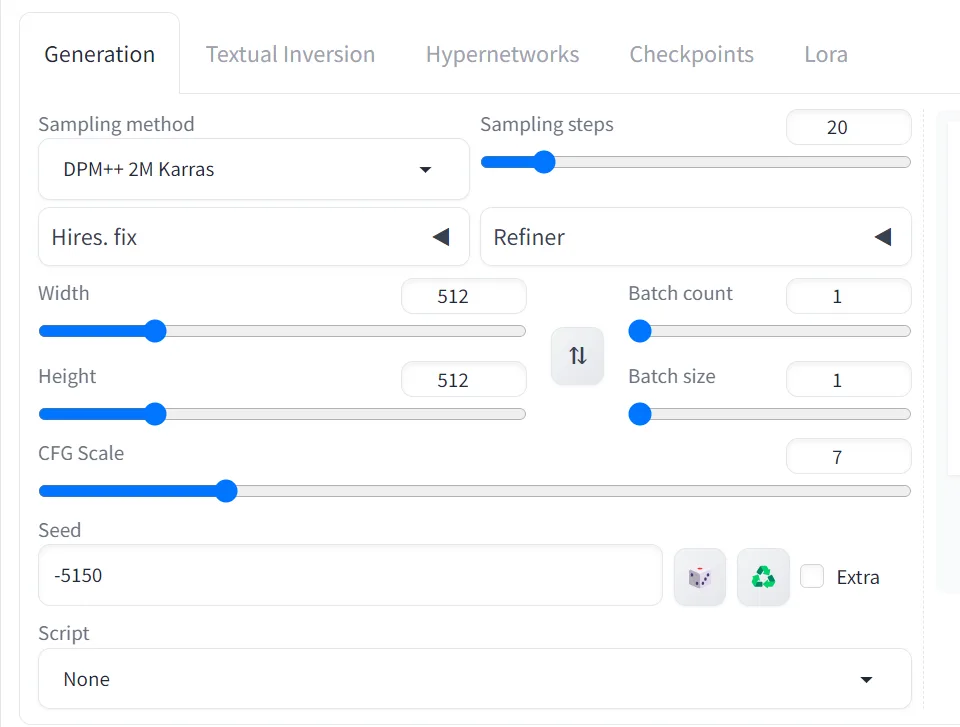
The sampling method is the first thing you might notice in the generation tab. There are a LOT of them:
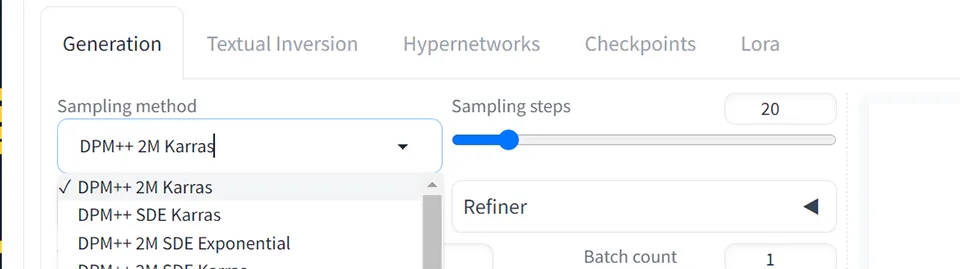
I suggest spending some time adjusting and playing with this. But for now, we’ll use DPM++ 2M Karras that’s selected as default.
Here are some settings to pay attention to:
Sampling steps - This will repeatedly try to improve the image as it generates. Low values will be low quality, but fast. High values will be higher quality and slower to generate.
Width and height - These will control the size of the generated image. Like above, larger images will look better and take longer.
CFG Scale - This will change how “random” the result is. A higher value will attempt to take the prompt as literally as possible. Lower values will produce more creative results.
Seed - This value determines the output of the random number generator. You can use it as a key. If you use the same prompt with the same seed, you’ll get the same image. You can create many variations from the same “key”.
So today, I will leave everything at the default settings. The only thing I will do is create a seed to progressively improve the same image as we go.
And I’ll add in a prompt to make something silly.
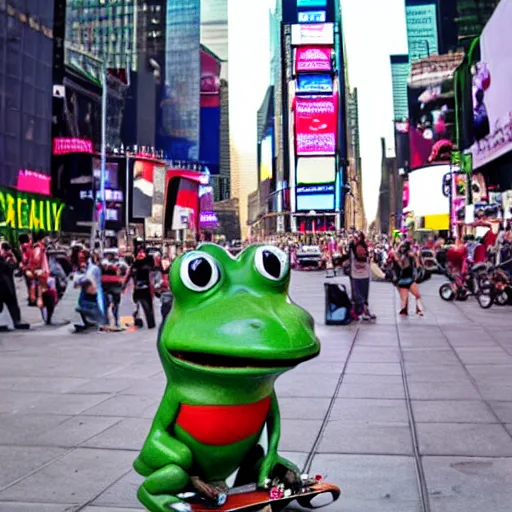
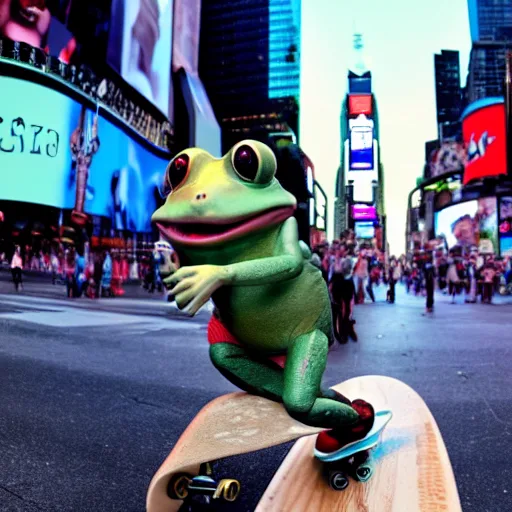
‘a photo of an anthropomorphic frog riding a skateboard in Times Square`
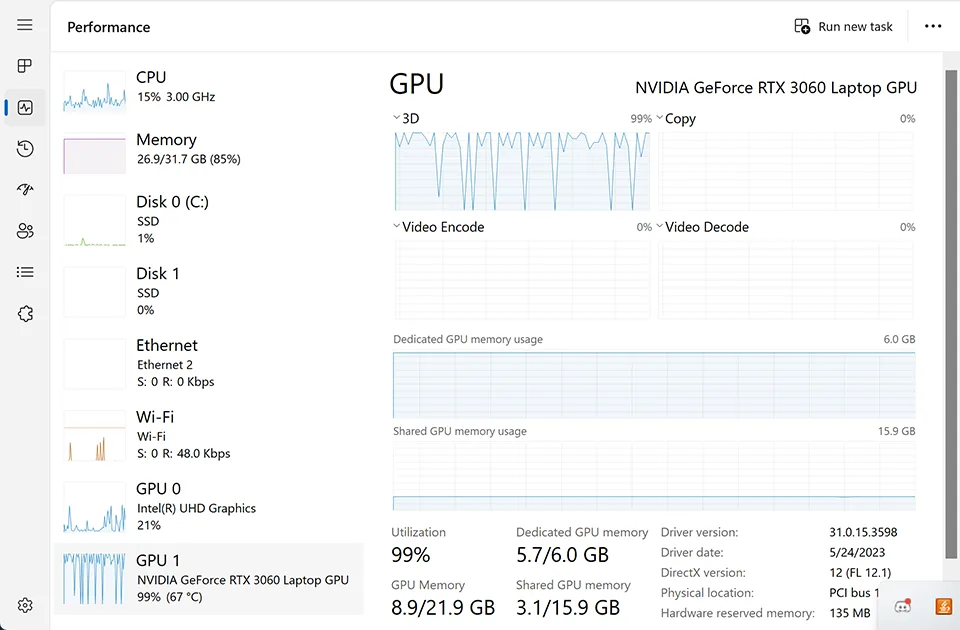
It took about a minute to generate this image. (Laptop with RTX 3060)
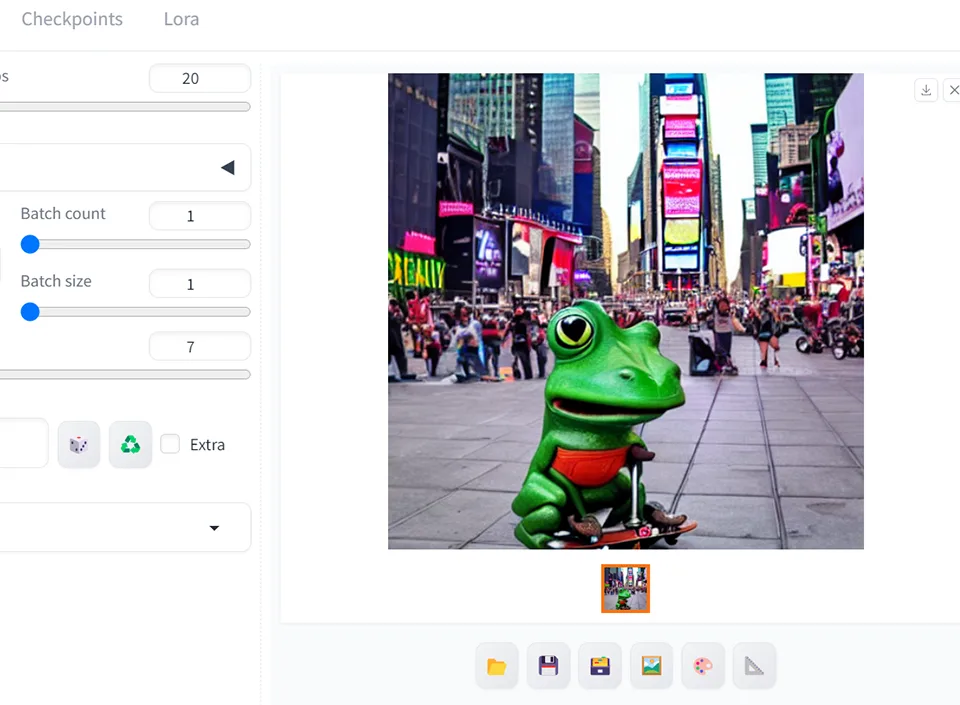
And it’s pretty cool! It’s impressive, considering it’s being run on my local machine. Let’s improve this image!
Step 6: Improving Images
Here’s the actual image I produced:
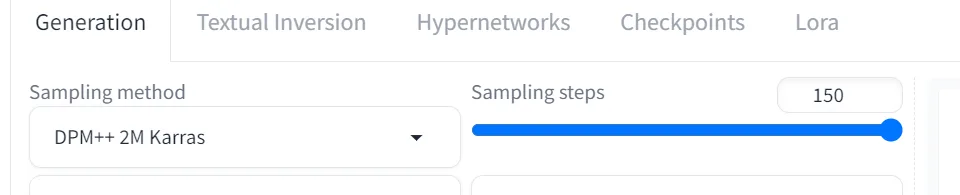
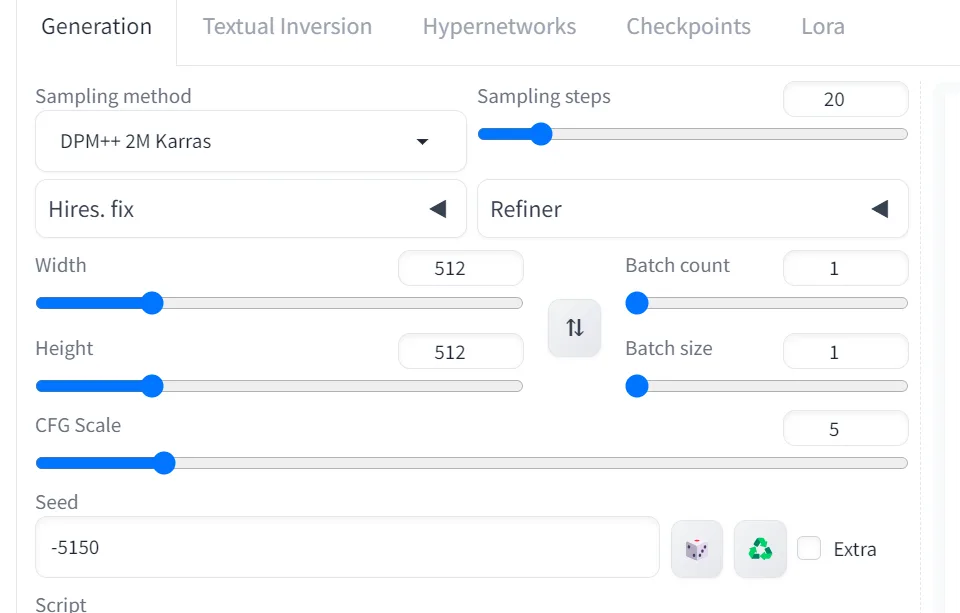
Let’s mess with the settings to see what we can improve. Let’s change the Sampling steps. This is how often it goes through the image and tries to improve it. The default setting is 20. Let’s set it to the maximum number of 150. This will take more than a minute to produce now.
I will leave the prompt and the seed the same and click “Generate” again.
I’ll warn you: it can work the GPU when you do this.
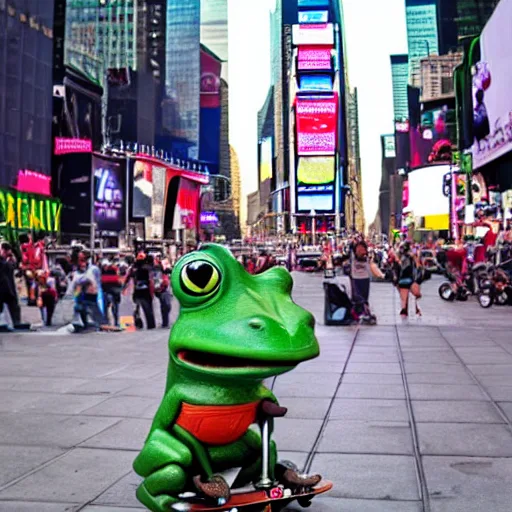
Here is the result after 150 sampling steps:
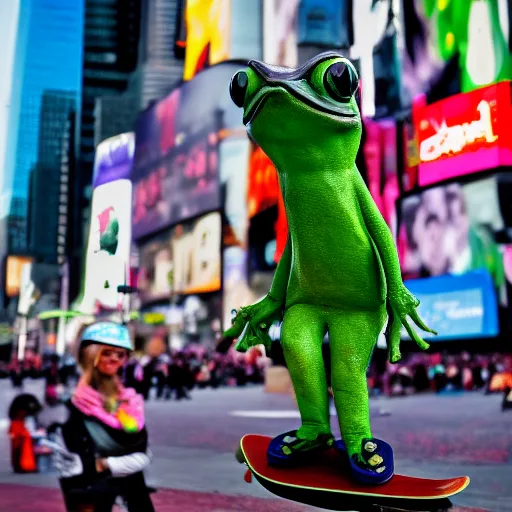
So it’s certainly different, but not in a significant way. We don’t want to scale up our generating time by 10x for this small change. I’ll change it back to 20 and change CFG Scale to 5. This will make the model more “creative”.
Here are the settings:
And here is the result:
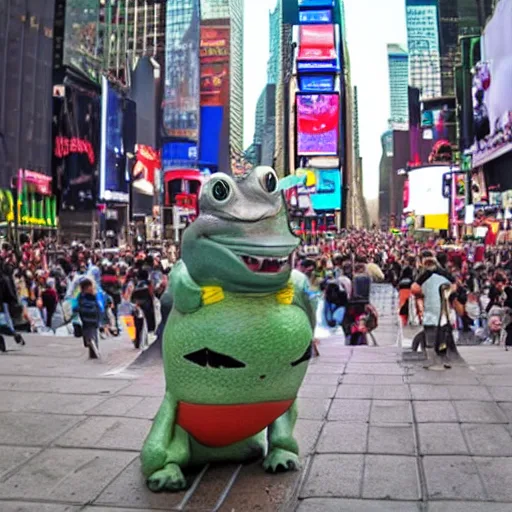
Ok, that’s too creative. But you can see the changes that occur when you adjust it. You can also use different sampling methods as well:
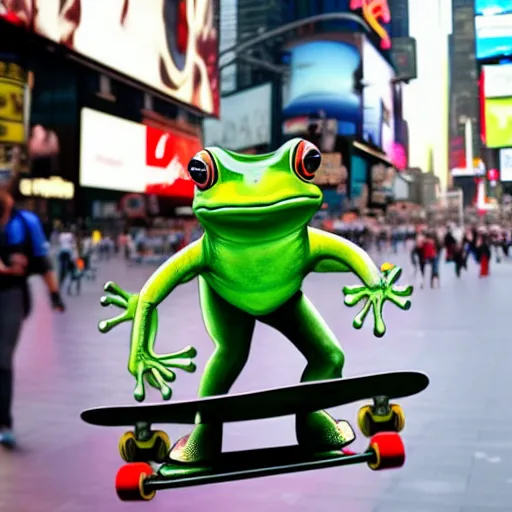
DPM++ SDE Karras
This model’s output is kind of neat because it shows the frog skateboarding better.
Euler
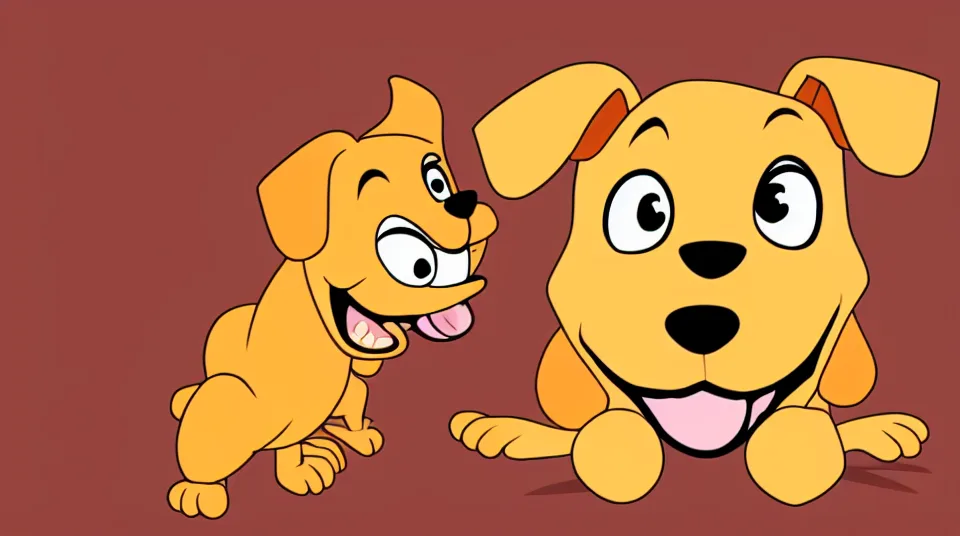
DPM++ 3M SDE
When attempting to draw things in cartoon, especially anthropomorphic models, it can come out very bizarre.
But that’s all there is to it!
Conclusion
In this tutorial, we:
Installed the Stable Diffusion Web UI
Downloaded a model
Generated AI images
Modified the output
All from our local machine! Here are the benefits and downsides of this method compared to something like Midjourney:
Pros:
It’s free!
Generate as many images as you like
Runs locally and is not dependent on an internet connection
Cons:
Nowhere near the level of quality as Midjourney and others
You need a good machine to run this
It may take longer to generate images
So there you have it! Now, you can generate images on your machine and show your creations to the world. We are barely getting started with the possibilities available from this model. We’ll explore it more in the coming weeks.
If you have any questions, feel free to reach out!
– Jeremy
Questions? Comments? Yell at me!
If you're into Computer Vision and other cool AI tech, you should subscribe to my AI Architect Newsletter to keep up with the latest stuff!
Subscribe to my newsletter
Read articles from Jeremy Morgan directly inside your inbox. Subscribe to the newsletter, and don't miss out.
Written by
Jeremy Morgan
Jeremy Morgan
I'm a coder, blogger, and training architect for Kode Kloud. Follow me for content related to development and cloud.