Boosting AEM Website Performance with Smart Imaging
 Raushan Jaiswal
Page load time is one of the critical factors that significantly impacts the customer experience on your website, mobile site, or app. Customers will often abandon a site or app if a page takes too long to load.
This can have a significant impact on key business metrics such as conversion rates, time spent on a site, and lower bounce rates, as images are often a major contributor to page load time.
Smart Imaging in Dynamic Media Classic enhances image delivery performance by automatically optimizing image format and quality based on client browser capabilities. It reduces image sizes by 30 percent or more.
If you are using AEM Sites and have Dynamic Media available to you, you can take advantage of Smart Imaging.
Smart Imaging technology applies Adobe Sensei AI capabilities and works with existing "image presets".
How does Smart Imaging Operate?
When an image is requested by a consumer, Smart Imaging checks the user characteristics and converts it to the appropriate image format based on the browser in use. These format conversions are done in a manner that does not degrade visual fidelity. Smart imaging automatically converts images to different formats based on browser capability in the following manner.
Automatically convert to AVIF if the browser supports the format.
Automatically convert to WebP if AVIF conversion is not beneficial or the browser does not support AVIF.
Automatically convert to JPEG2000 if Safari does not support WebP.
Automatically convert to JPEGXR for IE 9+ or if Edge does not support WebP.
Steps to How To Use Smart Imaging
Step 1:- Enable Smart Imaging
You need to create an Adobe support ticket to enable Smart Imaging on your account. More details on the support ticket
Adobe support person will enable a domain for like as mycompany.scene7.com or images.company.com and not a generic domain, such as s7d1.scene7.com, s7d2.scene7.com, s7d13.scene7.com
Step 2: Verify Domain
To find your domains, open the Dynamic Media Classic desktop application, then sign in to your company account or accounts. Go to Setup > Application Setup > General Settings.
Look for the field labeled Published Server Name. If you are currently using a generic Dynamic Media Classic domain, you can request moving over to your own custom domain as part of this transition.
Step 3: Re-Configure Dynamic Media General Settings
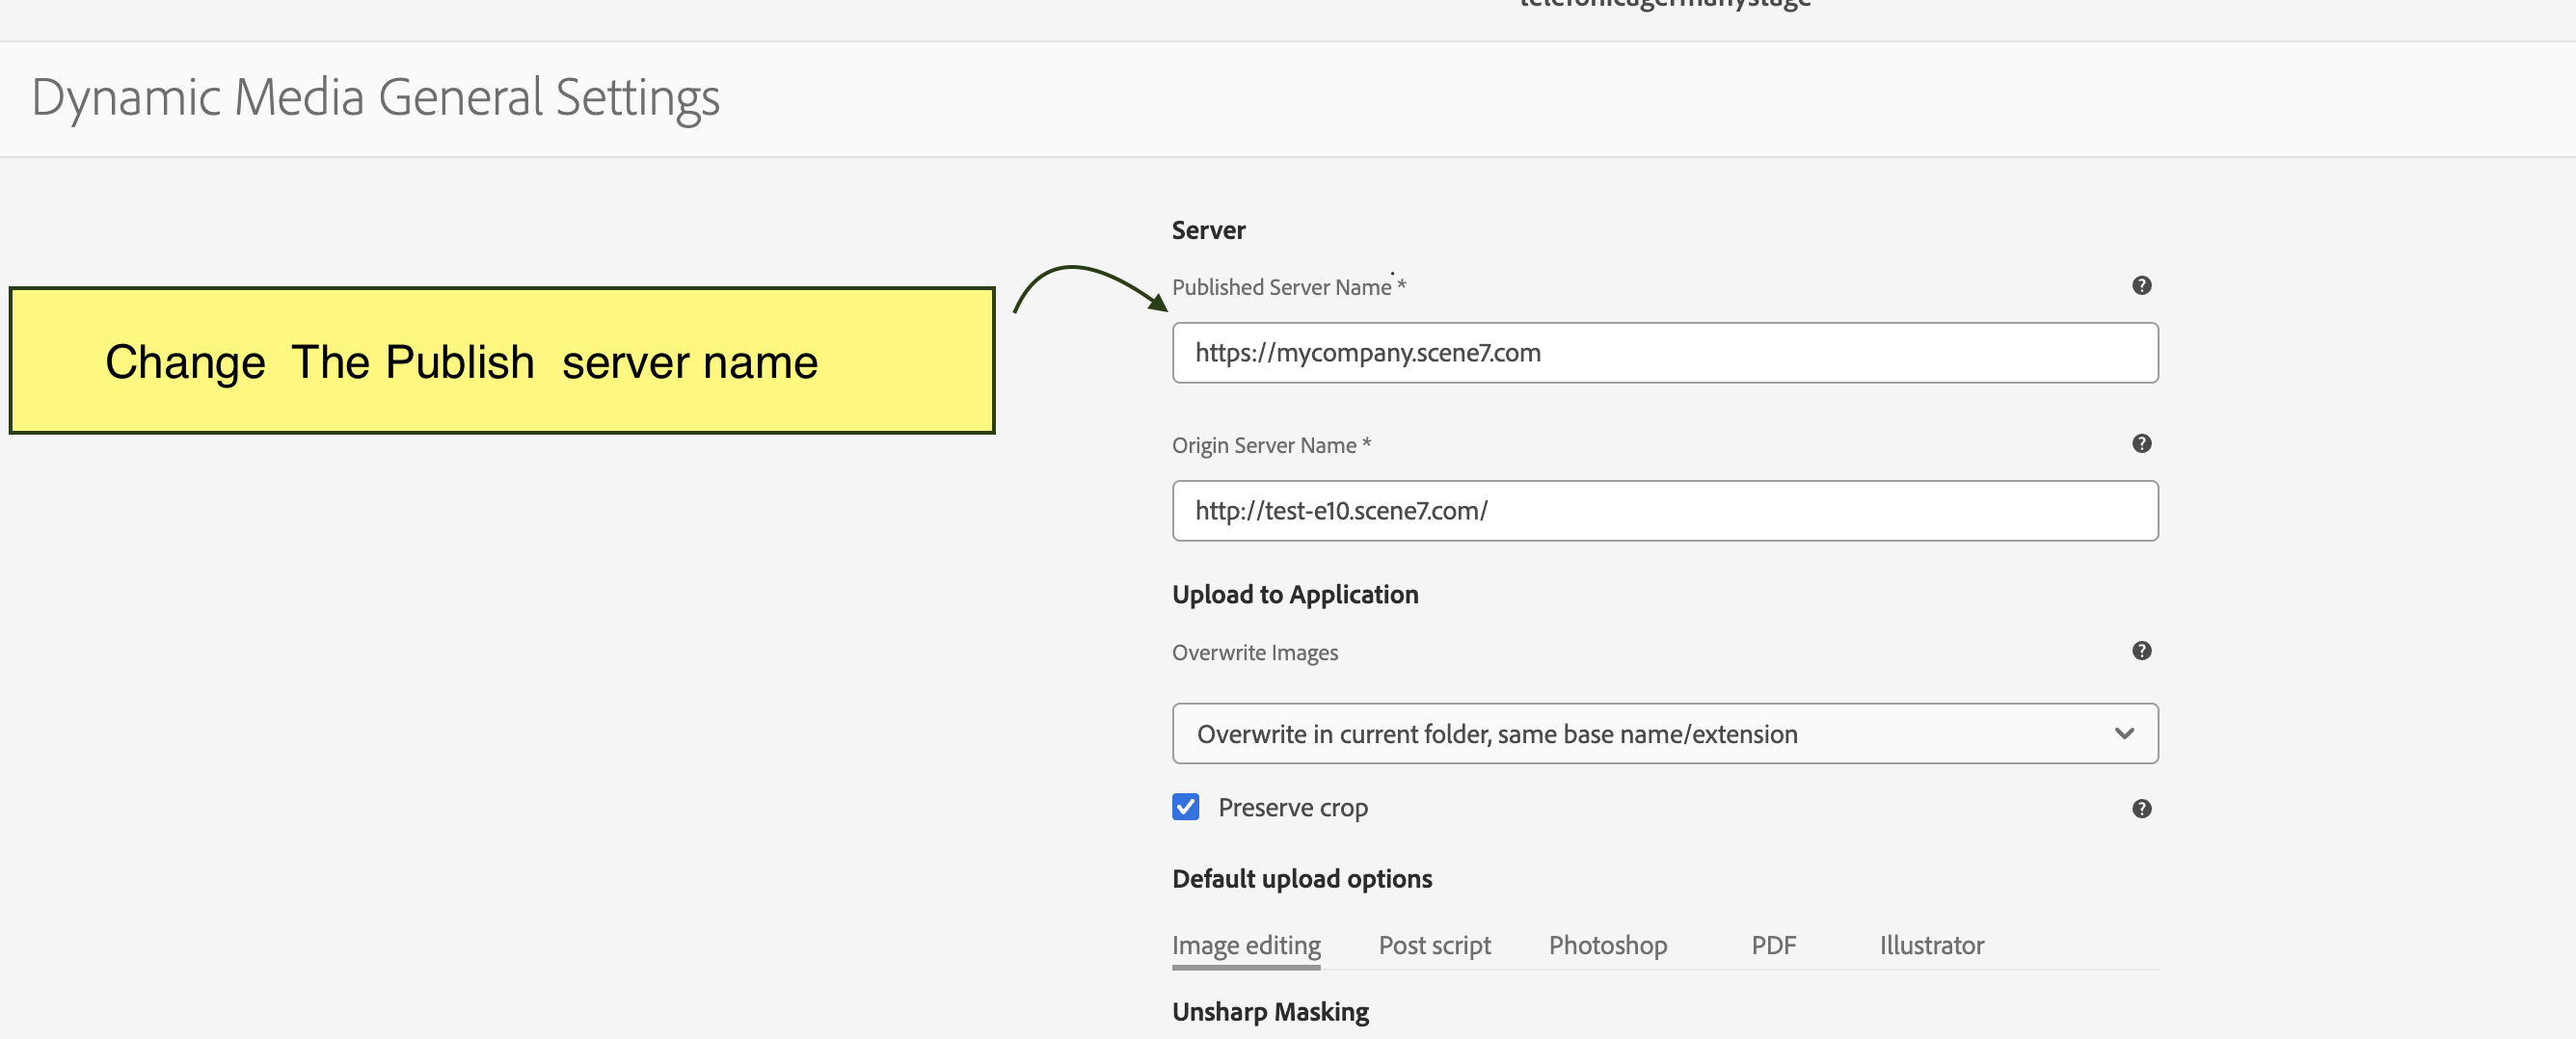
To utilize the smart image domain within AEM. You have to change the Published Server Name in Dynamic Media General Setting.
Go to aem/start.html > Tools > Assets >Dynamic Media General Settings\> change the Publish server Name to smart image domain.

Note: You need to reprocess your assets to utilize this smart image domain
Step 4: Validation
After your account is configured with Smart Imaging, load the Dynamic Media image URL on the browser.
Open the Chrome developer pane by going to View > Developer > Developer Tools in the browser. Or, choose any browser developer tool of your choice.
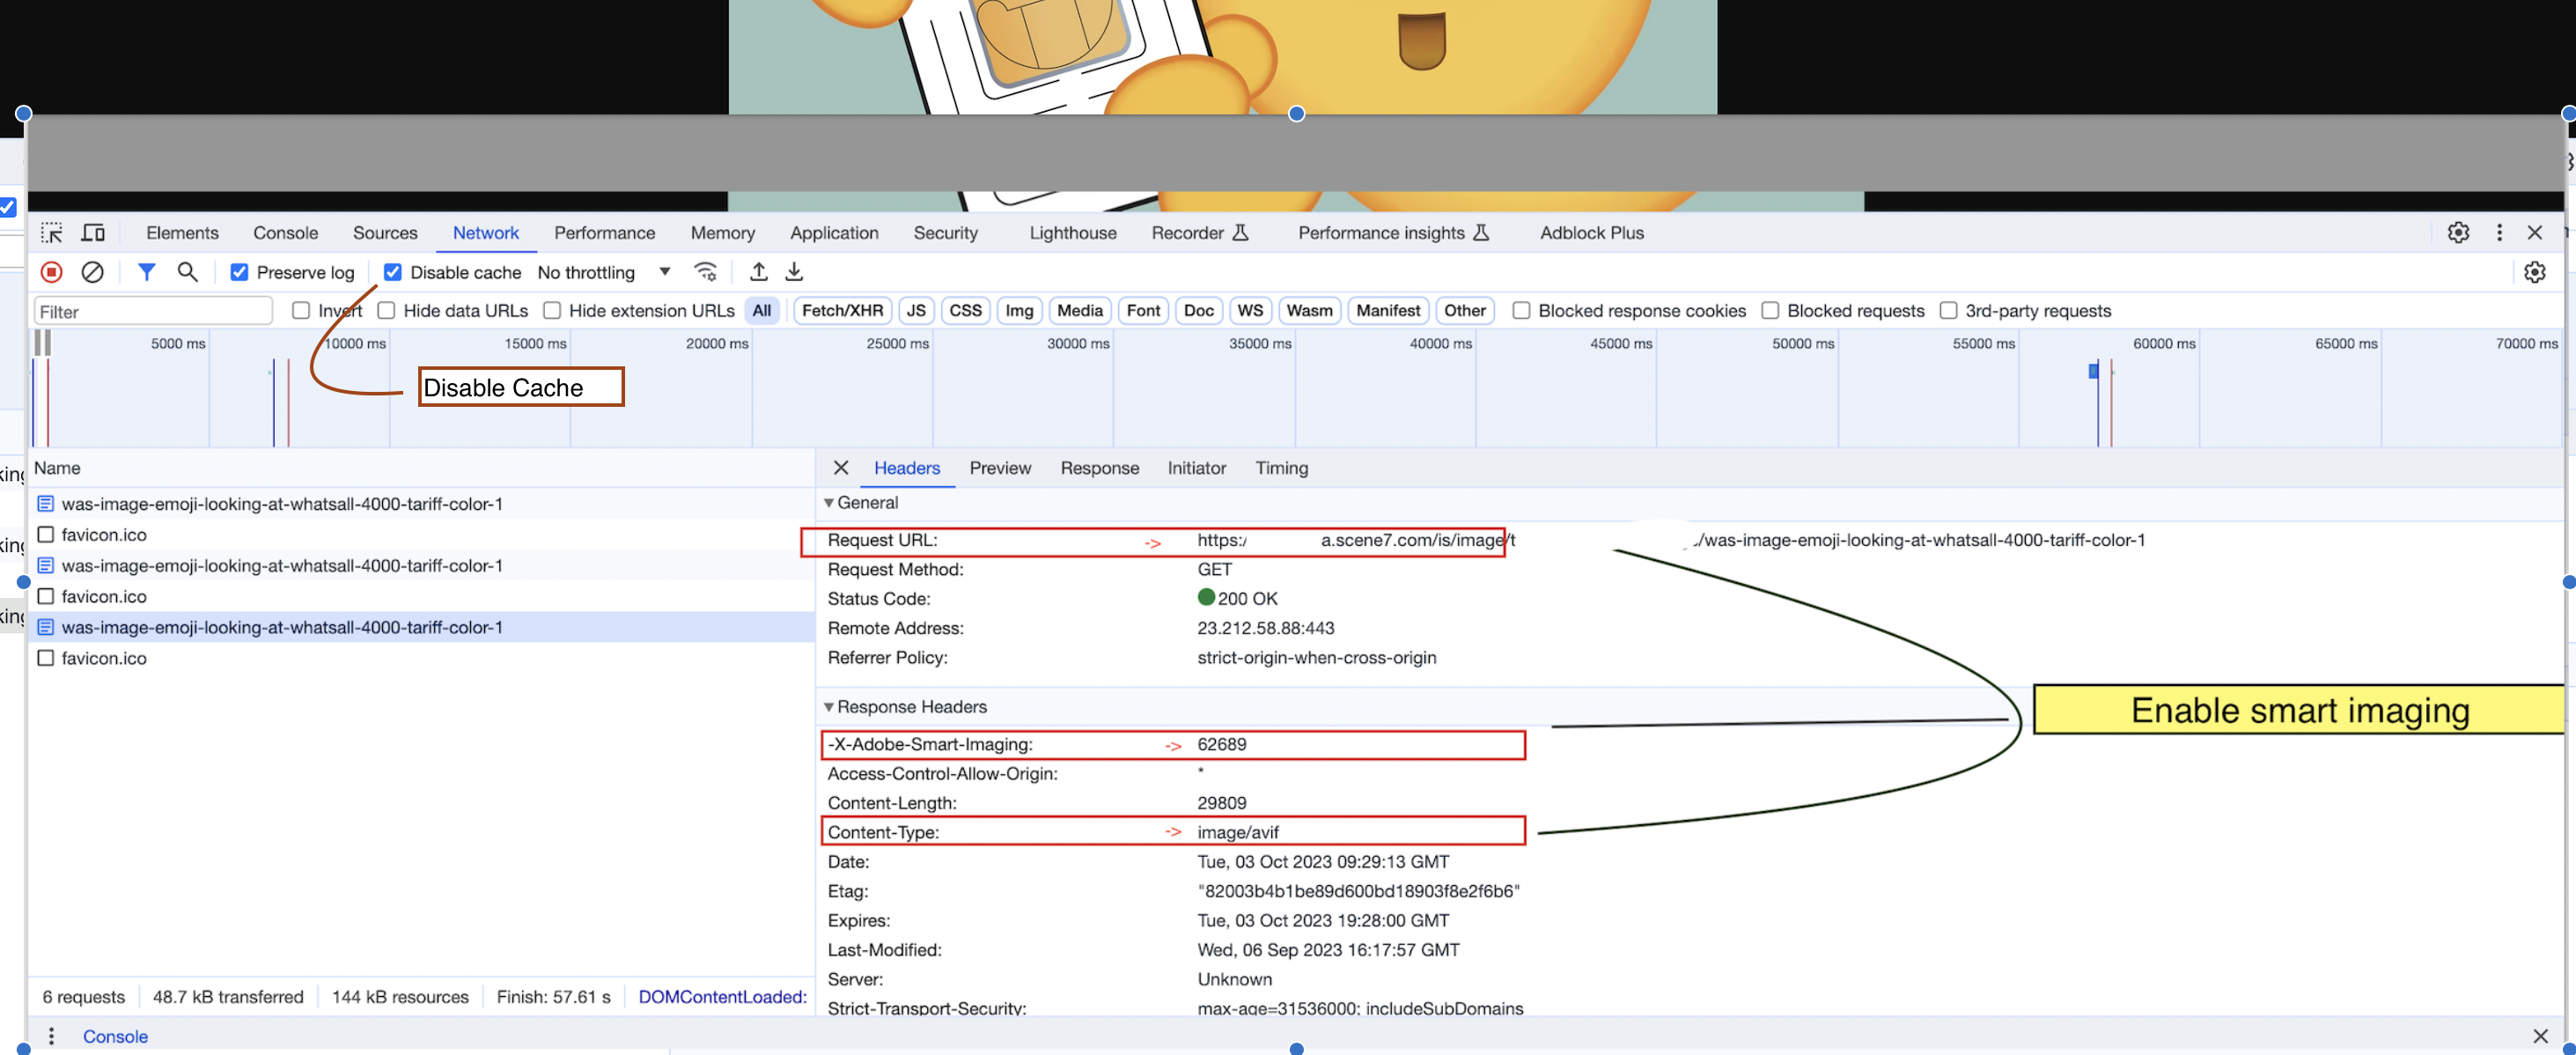
Ensure that the cache is disabled when developer tools are open.
On Windows®, navigate to settings in the developer tool pane, then select the Disable cache (while devtools is open) check box.
On macOS, in the developer pane, under the Network tab, select disable cache.

Once Smart Imaging is enabled, after you request an image, under the Response Headers you will see the Request URL and -X-Adobe-Smart-Imaging as seen in the above highlighted example:
This response header tells you the following
Smart Imaging is working.
A positive value means that the conversion is successful. In this case, a new WebP image is returned.
A negative value means that the conversion is not successful. In such a case, the original requested image is returned (JPEG by default, if not specified).
A positive value shows the difference in bytes between the requested image and the new image. In the example above, the bytes saved is
62689or approximately 62 KB for one image.A negative value means that the requested image is smaller than the new image. The negative size difference is shown, but the image served is the original requested image only.
Key benefits of Smart Imaging?
Image Optimization: Smart imaging technologies can automatically optimize images for various factors like size, format, and quality. This leads to improved website and app performance, faster loading times, and reduced bandwidth usage.
Enhanced User Experience: Optimized images ensure a better user experience by reducing page load times and providing visually appealing content, which can increase user engagement and reduce bounce rates.
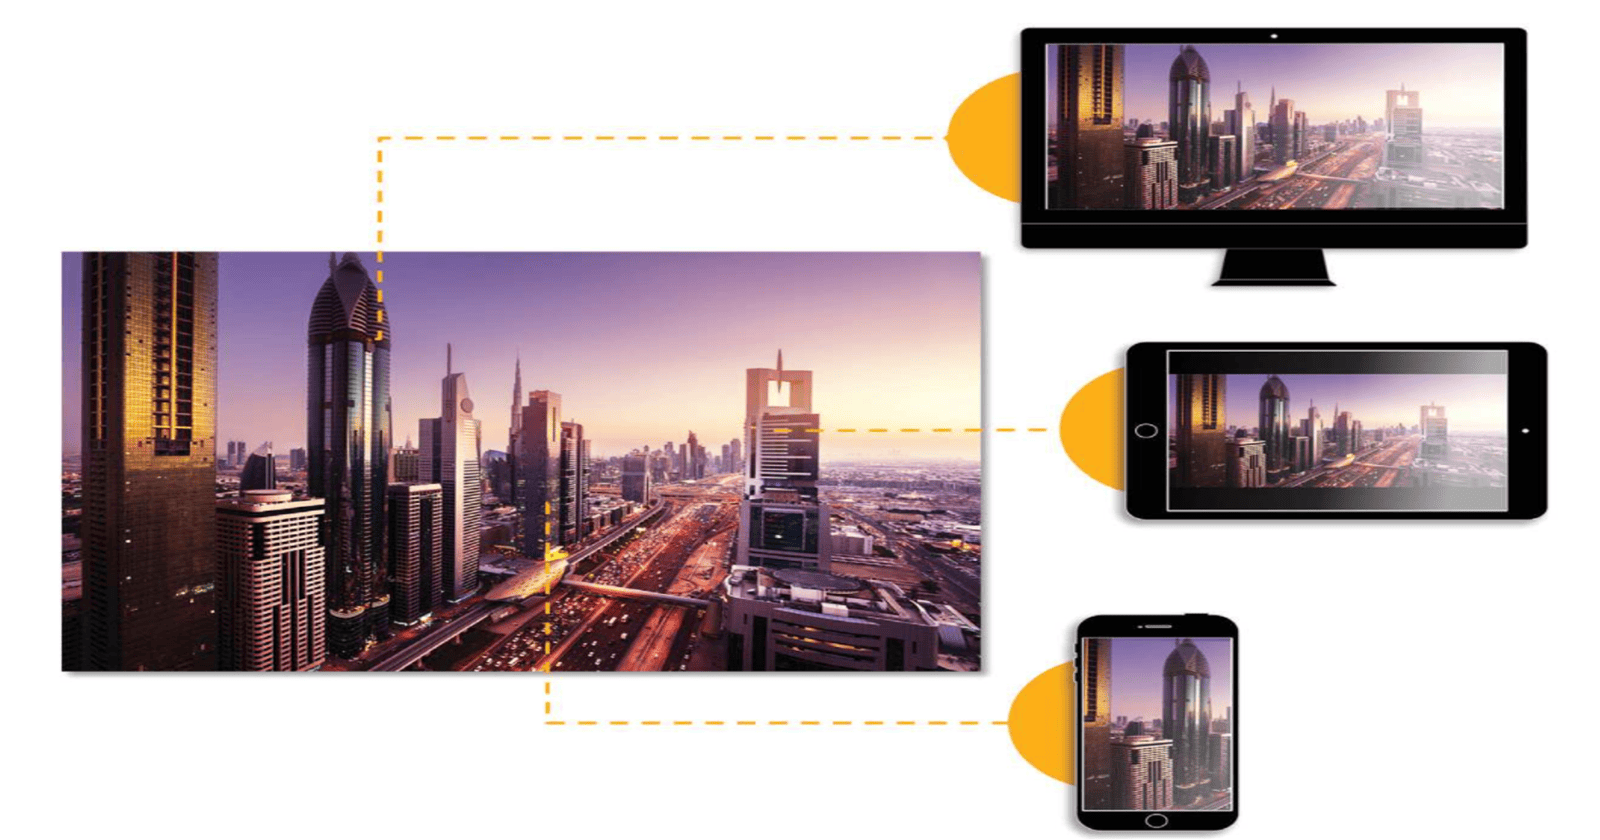
Responsive Design: Smart imaging can adapt images to fit different screen sizes and resolutions, making websites and apps more responsive and accessible across a wide range of devices.
Improved SEO: Optimized images with proper metadata and alt tags can enhance search engine optimization (SEO) efforts, leading to better visibility and rankings in search results.
Bandwidth Efficiency: By reducing image sizes, smart imaging minimizes data consumption, benefiting users with limited bandwidth or on slower networks. This can be especially crucial in mobile applications.
Quality Retention: Despite image compression and optimization, smart imaging technologies aim to maintain image quality, ensuring that visuals remain sharp and clear.
It Serves optimized content immediately (at runtime).
In summary, smart imaging plays a crucial role in optimizing digital content, improving user experiences, reducing costs, and enhancing various aspects of web and app development and management.
It's impressive how Smart Imaging does all the work on its own, and consumers don't need to do anything—it's effortless and smooth.
Note: Smart Imaging requires that you use the out-of-the-box CDN (Content Delivery Network) that is bundled with Adobe Experience Manager - Dynamic Media. Any other custom CDN is not supported with this feature.
If you have any questions, please don't hesitate to ask! Linkedin
Subscribe to my newsletter
Read articles from Raushan Jaiswal directly inside your inbox. Subscribe to the newsletter, and don't miss out.
Written by

Raushan Jaiswal
Raushan Jaiswal
AEM Enthusiast