How to Create an Impressive GitHub Profile
 Ekaterine (Catherine)
If you have joined GitHub recently I am sure you have noticed some awesome profiles that grab your attention you had the desire to have such an awesome profile yourself!
Having an impressive GitHub profile is vital not only because you think it’s awesome or to get some attention from fellow developers but it can potentially help you to stand out when you start your job hunt as a junior developer!
Reasons to have an impressive GitHub profile
1. First of all, it is a good way to introduce yourself to potential visitors. If you are shy, don’t worry, you don’t have to share your private life! Potential visitors can be other developers who might want to collaborate with you or recruiters who want to check your projects.
2. Secondly, it’s a way to create a small summary of your projects, what you are working on, what you have done, and so on. When someone visits your profile, they are not going to go through all your repositories to understand what you are up to.
3. Besides the summary, you can also highlight the most important project you have done and are proud of. If you have done many small projects recently but you have some awesome big projects which you have not edited recently, they might end up at the end of the list and the visitor will never see them.
4. Finally, it’s a great way to not only show your skills but describe them. You can include things like what languages you use, what you enjoy or are learning, share your social media, and on.
To summarize, your GitHub profile is almost like a resume but where you can control the style and the design. Resumes have some standards and are more professional when with a GitHub profile you can open up more and be more creative.
How to create an impressive GitHub profile?
To start styling your GitHub profile, you need to create a repository with the exact username as on GitHub and create a special file which is called README.
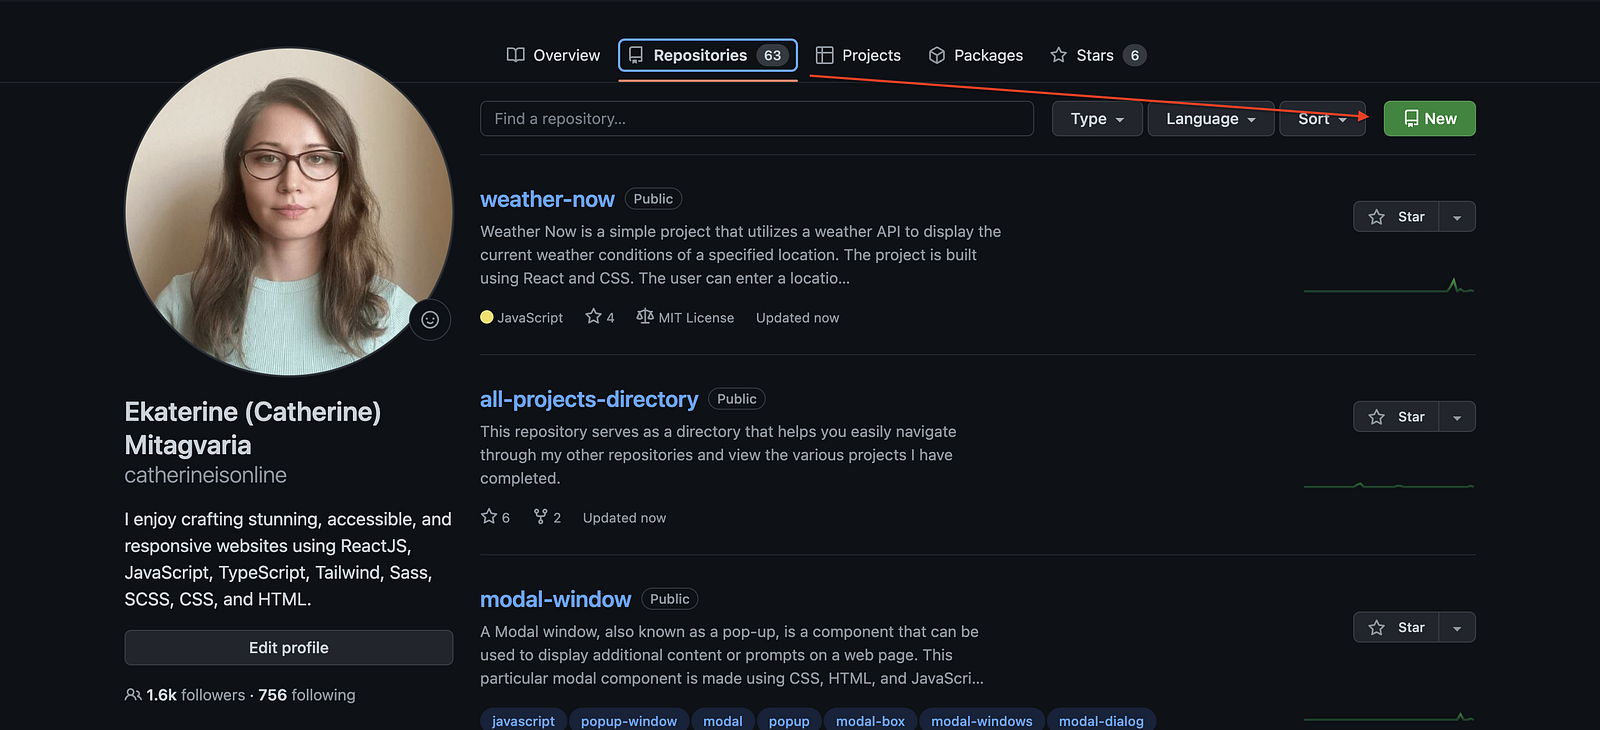
1. Go to your profile ⏭️ Repositories tab ⏭️ Click the New button ⏭️ Name your repository the same name as your GitHub username.
2. Create a file name README.md by selecting either a checkbox called “Add a README file” while creating a repository (when you write a name for it) or you can add one later by clicking “ include a README” text which will appear at the top once you are done creating the repository.
3. You can now edit this new README file which will be displayed on your main GitHub profile!
4. Also, make sure that the repository is set to Public.
How to style GitHub profile README?
Once we understand why we need a nice profile and how to create the files, we can now start designing and being creative! To start styling however it’s important to understand GitHub syntax. Please, read more about GitHub syntax before you start styling, it’s very easy.
There are a lot of things you can add to your profile but you can follow some structure.
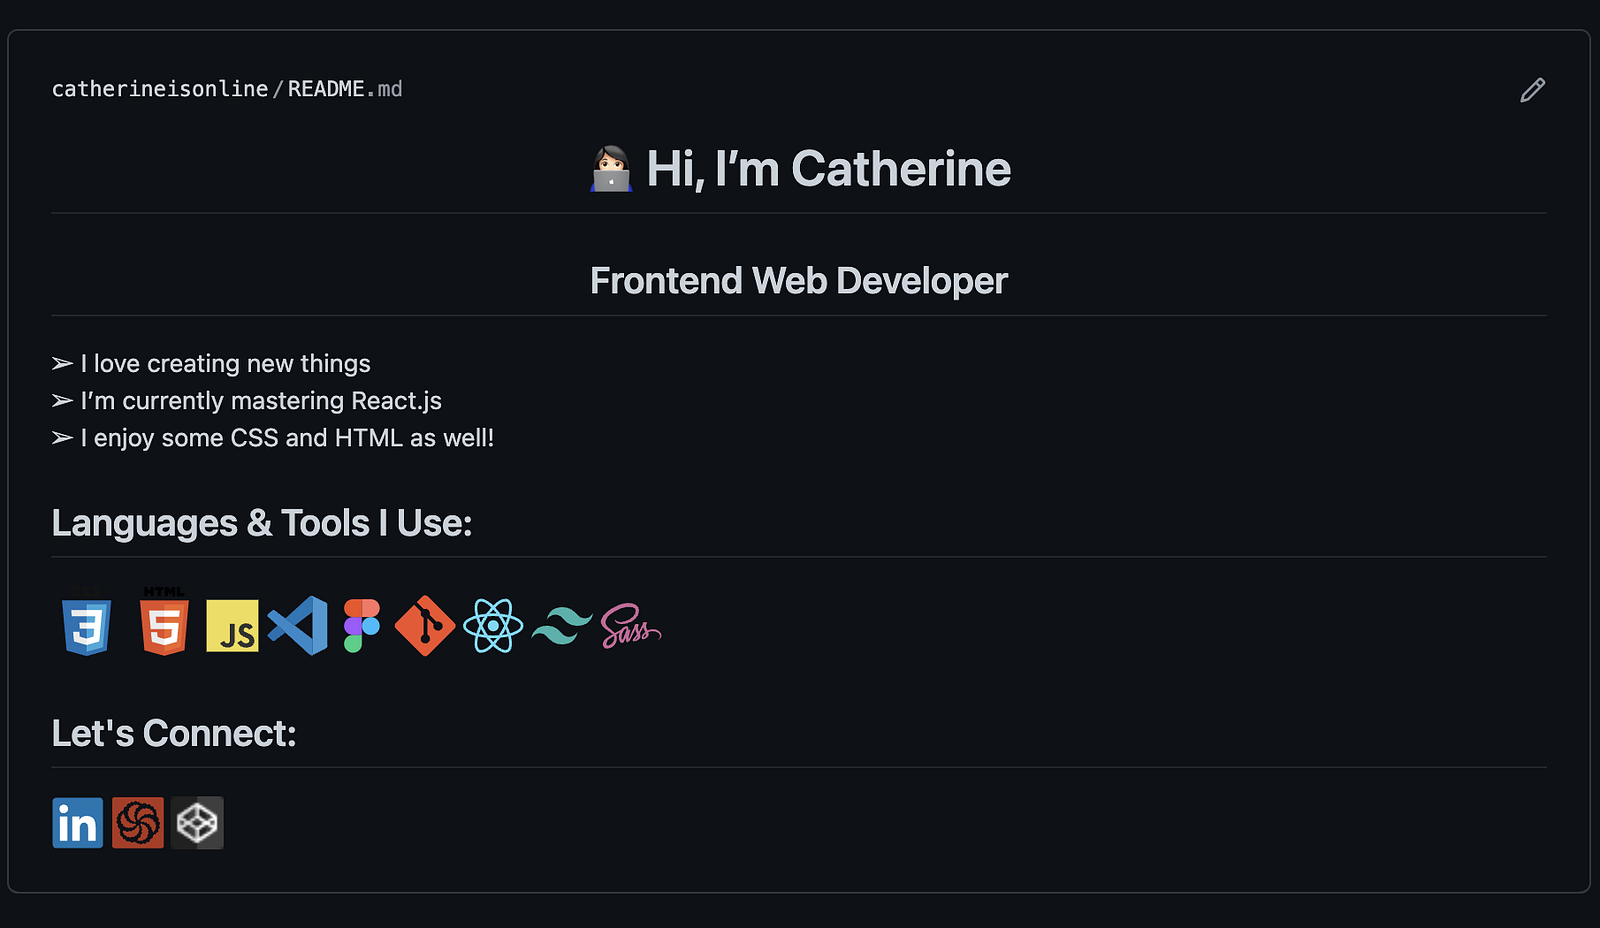
I have not edited my profile for a while so let’s try to re-create my GitHub profile and compare it to the previous version.
I will create a simple list that you can follow later on.
1️⃣ Introduction
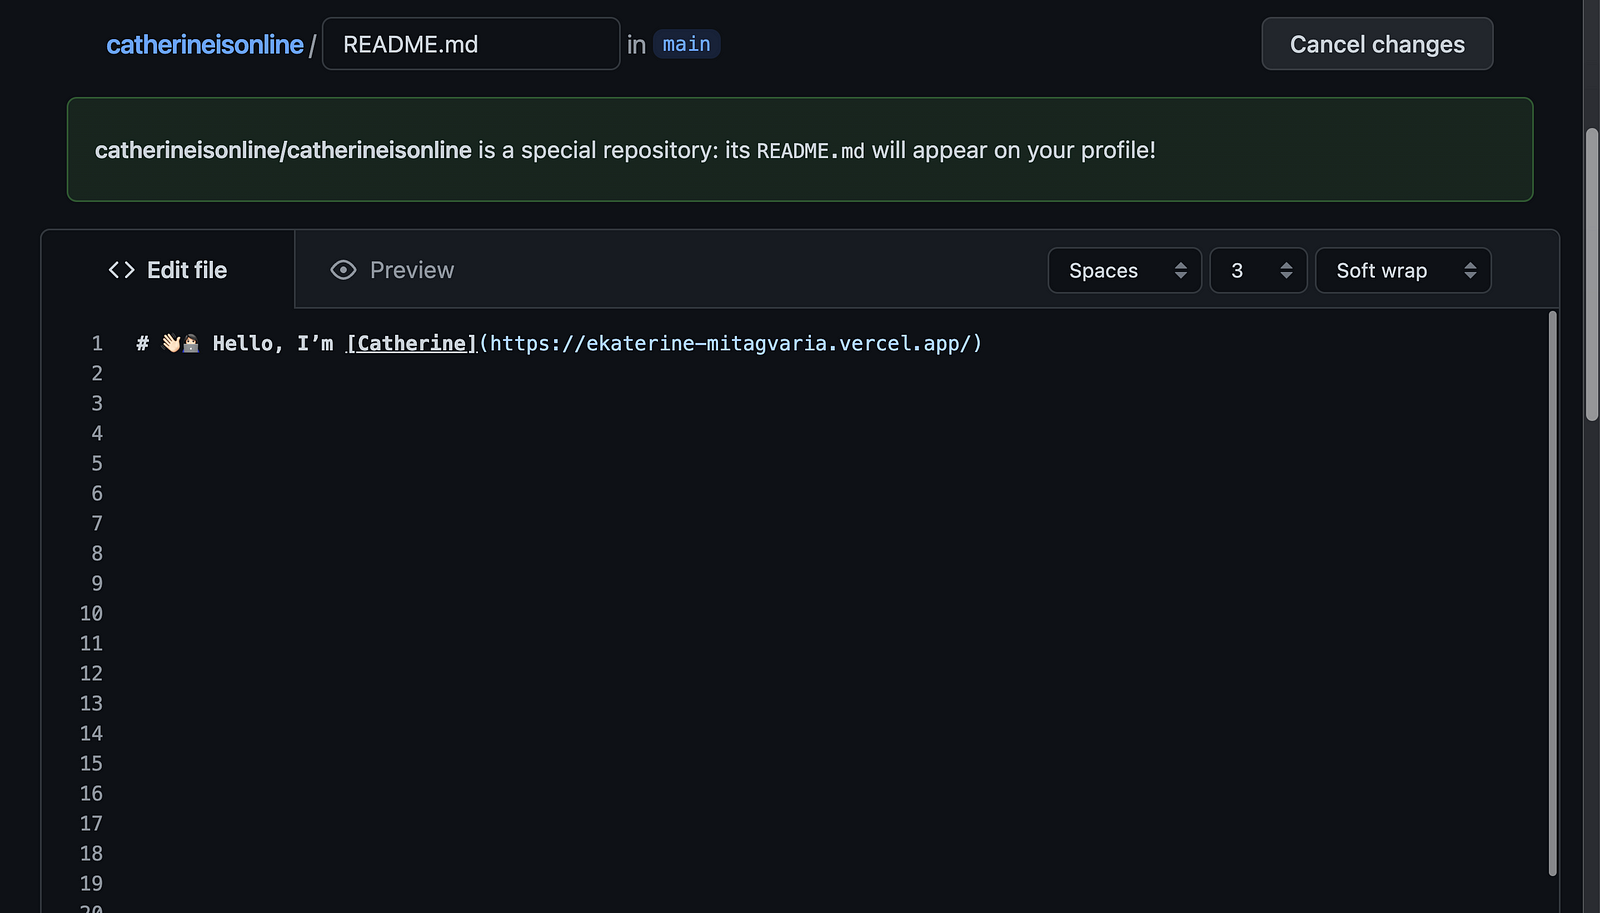
On the first line, we usually start by saying hello to the visitor and introducing our name. Also, when you write your name you can add a link to your name which will redirect to your portfolio.
However, the options are endless. You can also add a banner with the same text and some awesome styles. I think I will use a banner this time! To create a banner you can use different tools online, I am using Canva.
2️⃣ About me
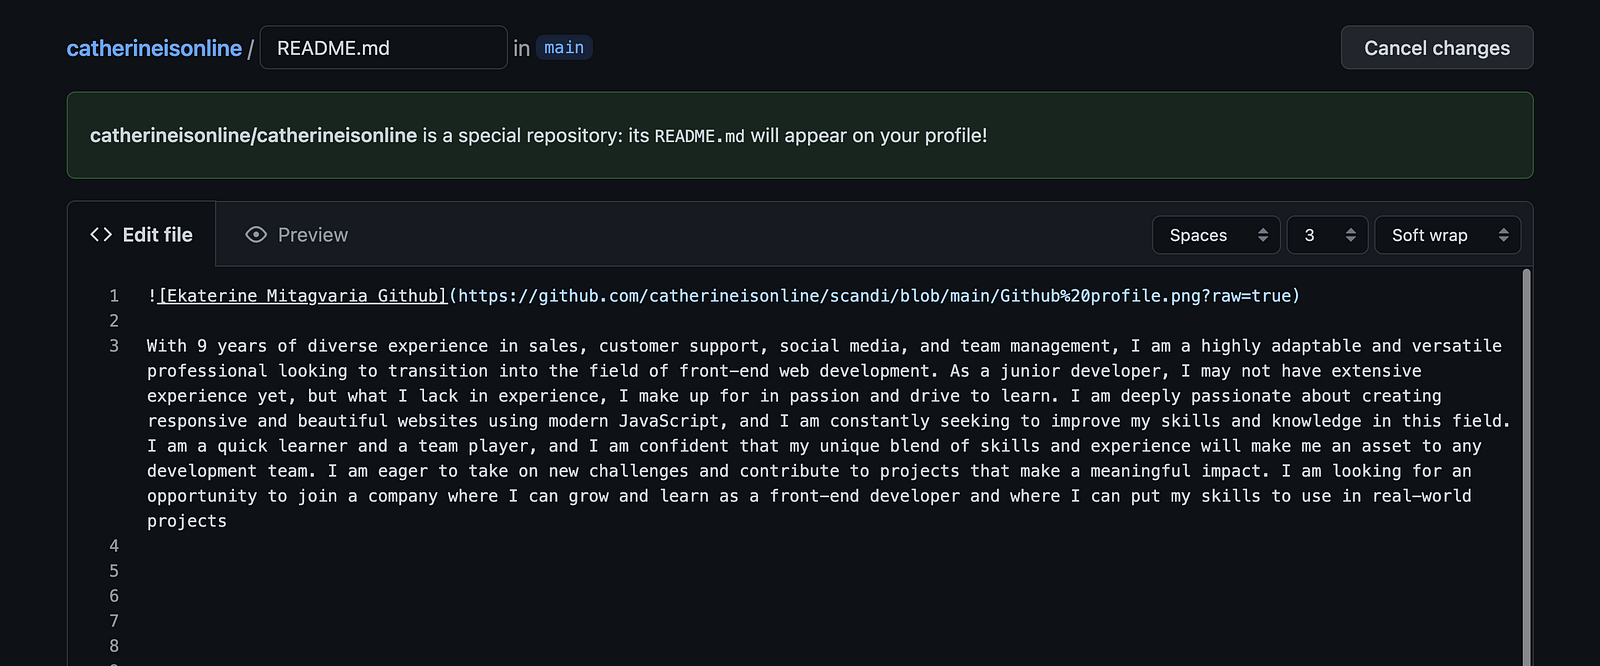
Next, you can add a short about me text to briefly describe yourself or explain what motivates you, what you are working on, and so on. The options are endless and it’s all up to you. Just be yourself but don’t share too personal details, stay professional but not too much! Just try not to copy the same from others. I have seen the same copy of README on beginner’s README and it’s not a good sign, trust me. Try to add something to yours.
I am going to add my LinkedIn profile description as I like to keep it the same across platforms.
3️⃣ Your knowledge
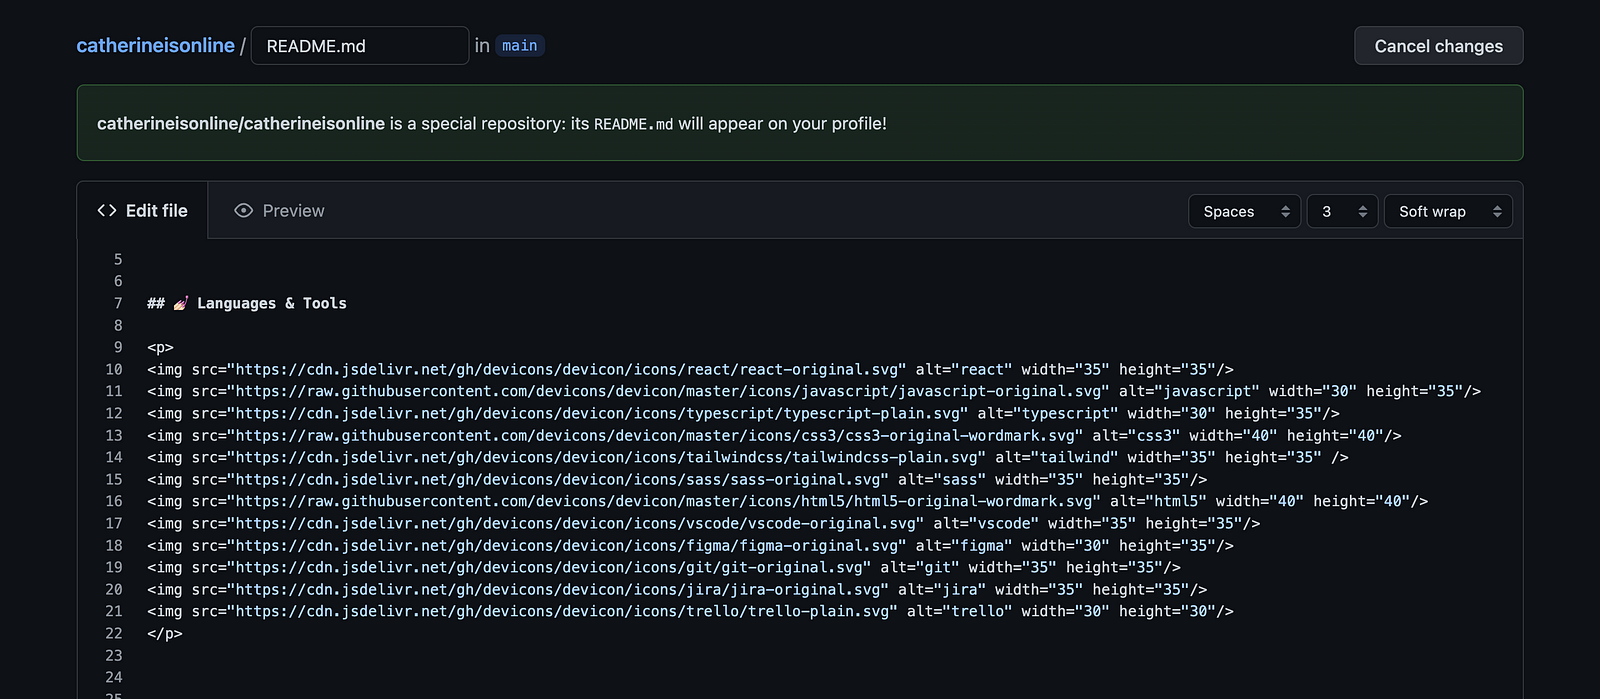
Once you introduced yourself a little bit, you can now share which programming languages you know or you are currently learning. You can create a written text or you can create a list of the programming language icons. I like using icons personally. Instead of trying to search for each image, you can use online tools to find the icons you need, I have been using Devicon and love it!
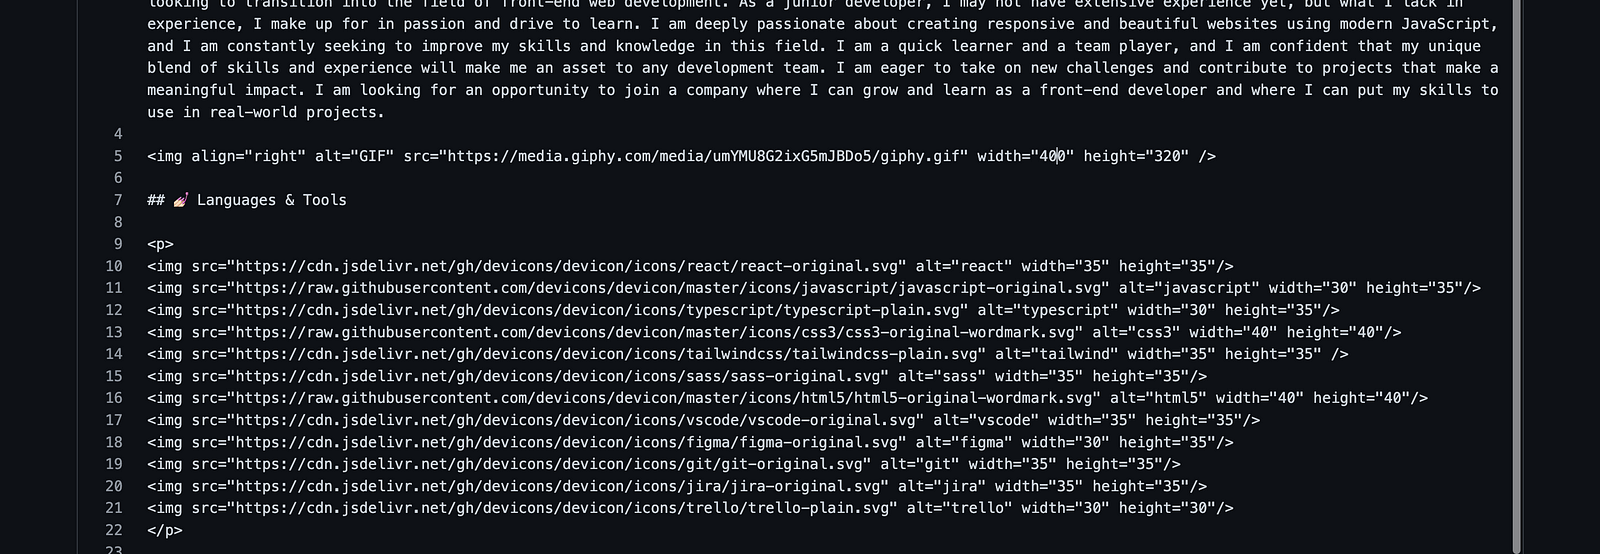
I am going to keep the same icons I already had and add some new skills! You can add icons in the image tag to add the width and height and place the same in one tag so they are aligned horizontally.
4️⃣ Social media
Next, you can also add your social media links along with the icons if you want people to connect with you on another platform. If you have a blog or anything else you want to share, you can also add everything. However, do not add anything that you never use and it’s all empty. I have seen people adding their blog links but they don’t have a single post. Just like for the programming languages, you can also use icons instead of just text, I think visually it looks really awesome!

5️⃣ Styling
Next, you can add some more styling to fill up some empty spaces. When you create a list and you choose to align them vertically, for example, you might have some extra space left. If you align it horizontally though, you can align it to the center. You add some custom images or you can add some gifs for fun! I decided to add some cool gif and align it to the right side, so it fills up some space.
6️⃣ Statistics
To grab some attention, you can also add some additional statistics widgets to your README. There are different statistics that you can add.
- Amount of visitors on the profile, which you can generate here.
- Another awesome stats generator for different things like languages used, total commits, and so on. You can check it out here.
- Also, you can add streak stats to show how active you are. Check it out here.
Let me add some to my README as well. I am going to add a stats card and then I will also add another GitHub stats for the current streak and other info by using the resources I mentioned earlier.

7️⃣ Other details
I decided to create a shorter README however you can add a lot of additional stuff.
- For example, if you have a blog, you can add your top posts and add links.
- You can also add your top repositories or your favorite projects with a title, description, preview, and link. However, there is another way you can do this without README which I will explain very soon. You can add custom styling for repositories, check it out here.
- You can also add some statistics like dev metrics on which days you code the most or what times, check it out here.
You can be as creative as you can and do tons of interesting stuff!
I have followed all the steps I have written previously and let’s see what I have as a result!
📛 BEFORE
✅ AFTER
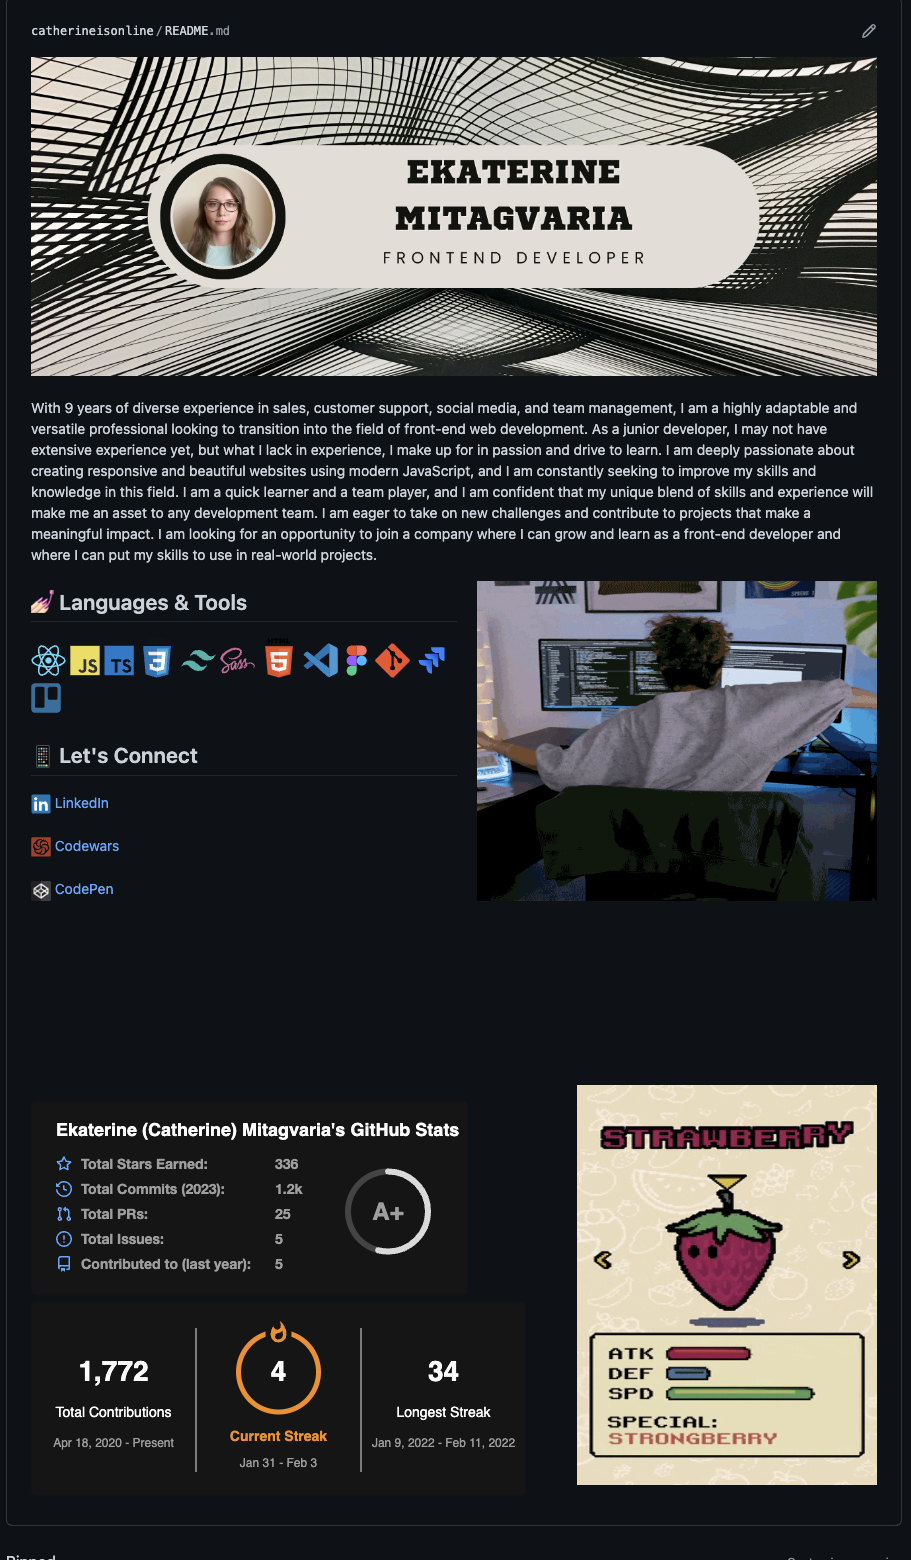
Looks awesome, right? I have just improved my own README using my guide!
There is much more!!
The GitHub profile is not only the README there are some other details you should add!
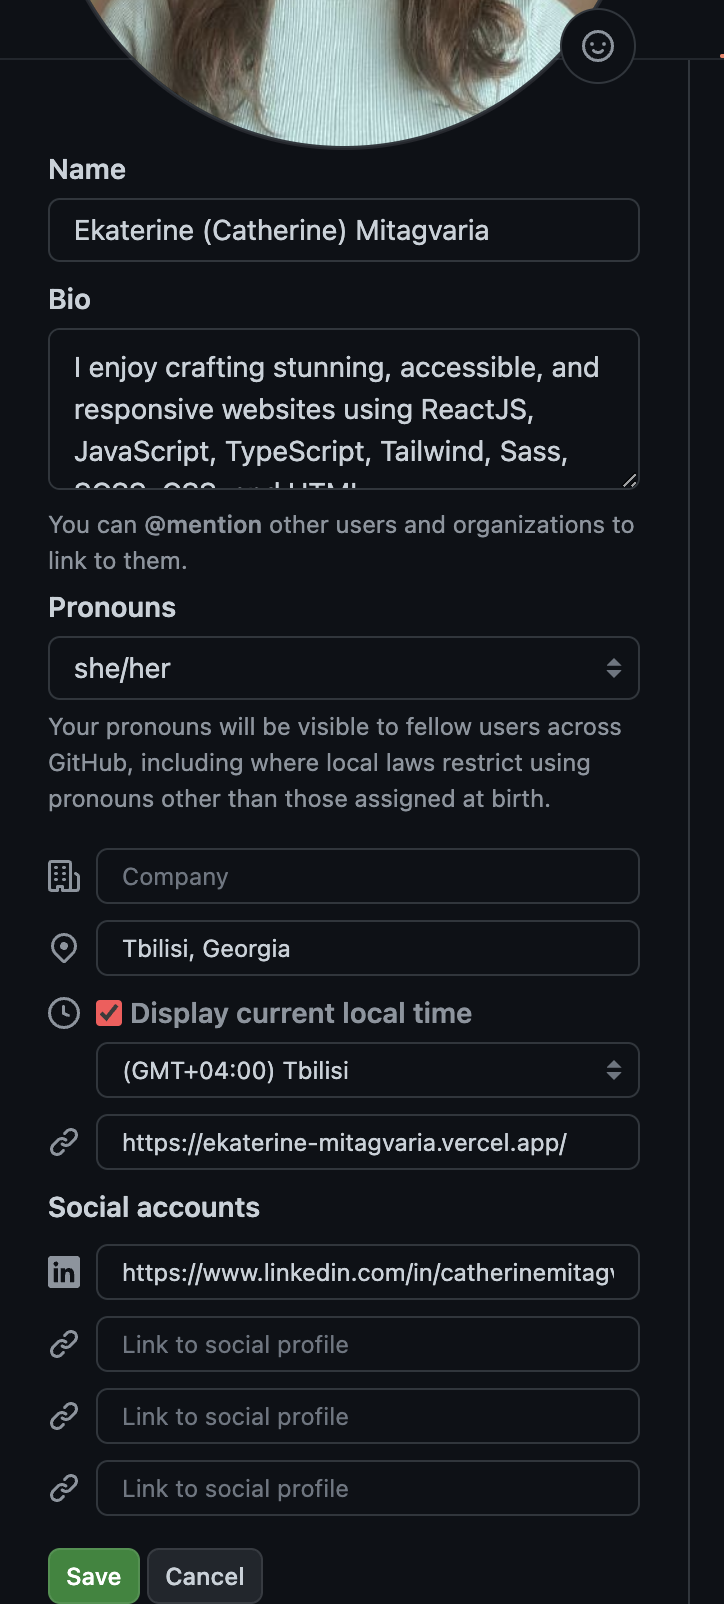
1️⃣ Profile details
Make sure to fill out as much as you can in your profile details. It will help your visitors to quickly understand who you are as well as help them to understand when and how to contact you easier!
2️⃣ Pinned repositories
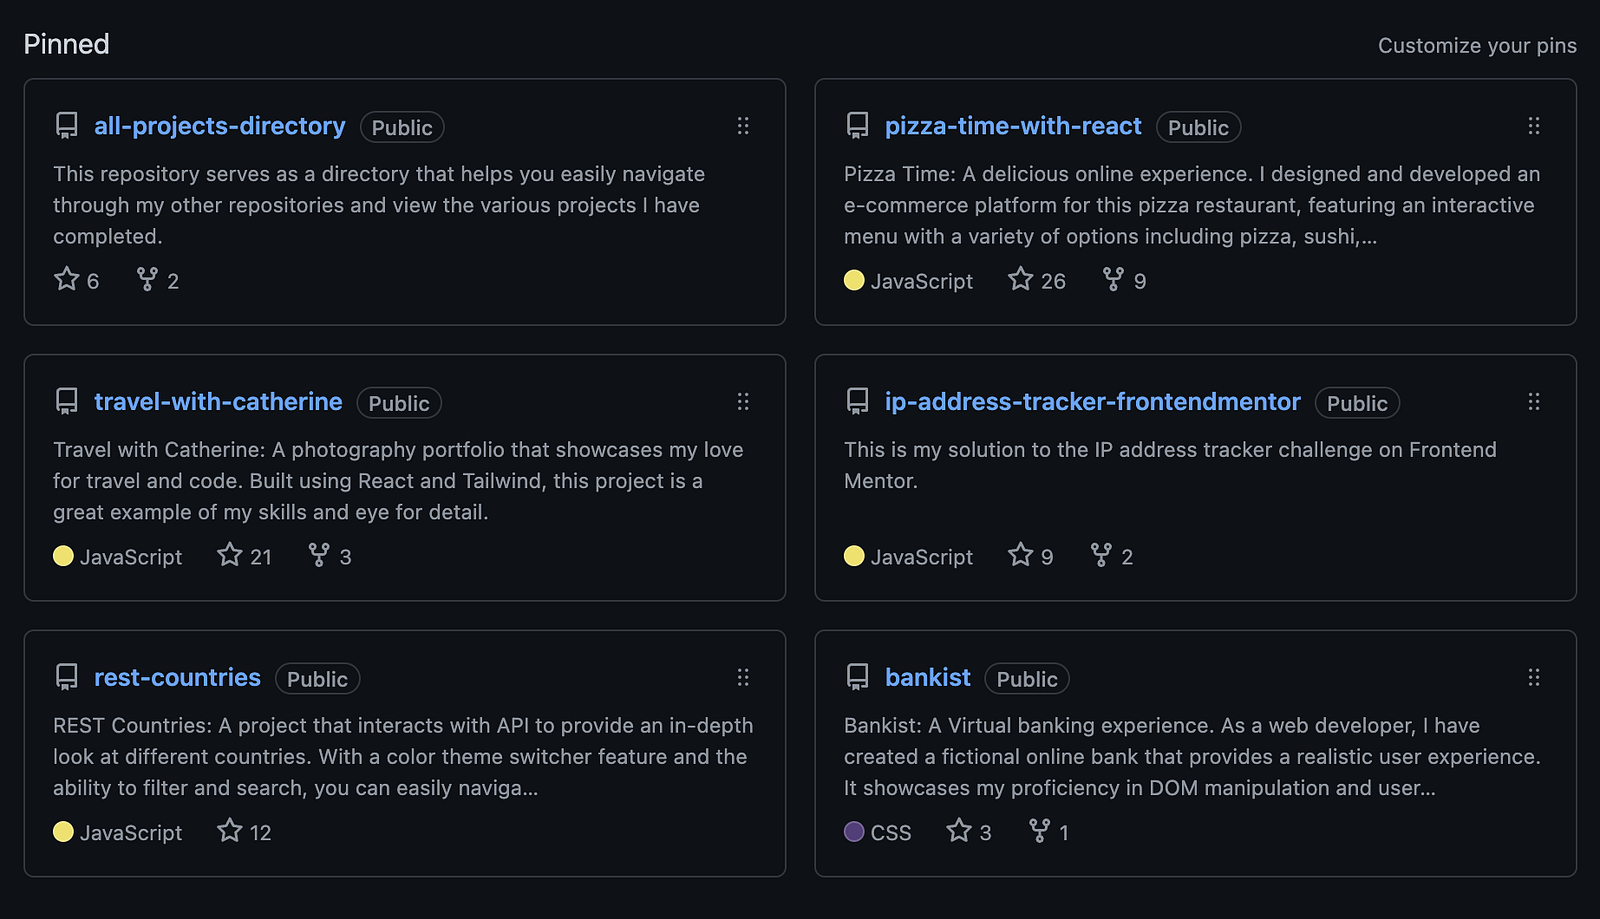
Instead of adding highlighted repositories to your README, you can also just pin them however you can pin only 6 of them. It’s a great way to show your top repositories and make them more noticeable than other projects. You can pin and unpin them anytime you want!
3️⃣ Repository description
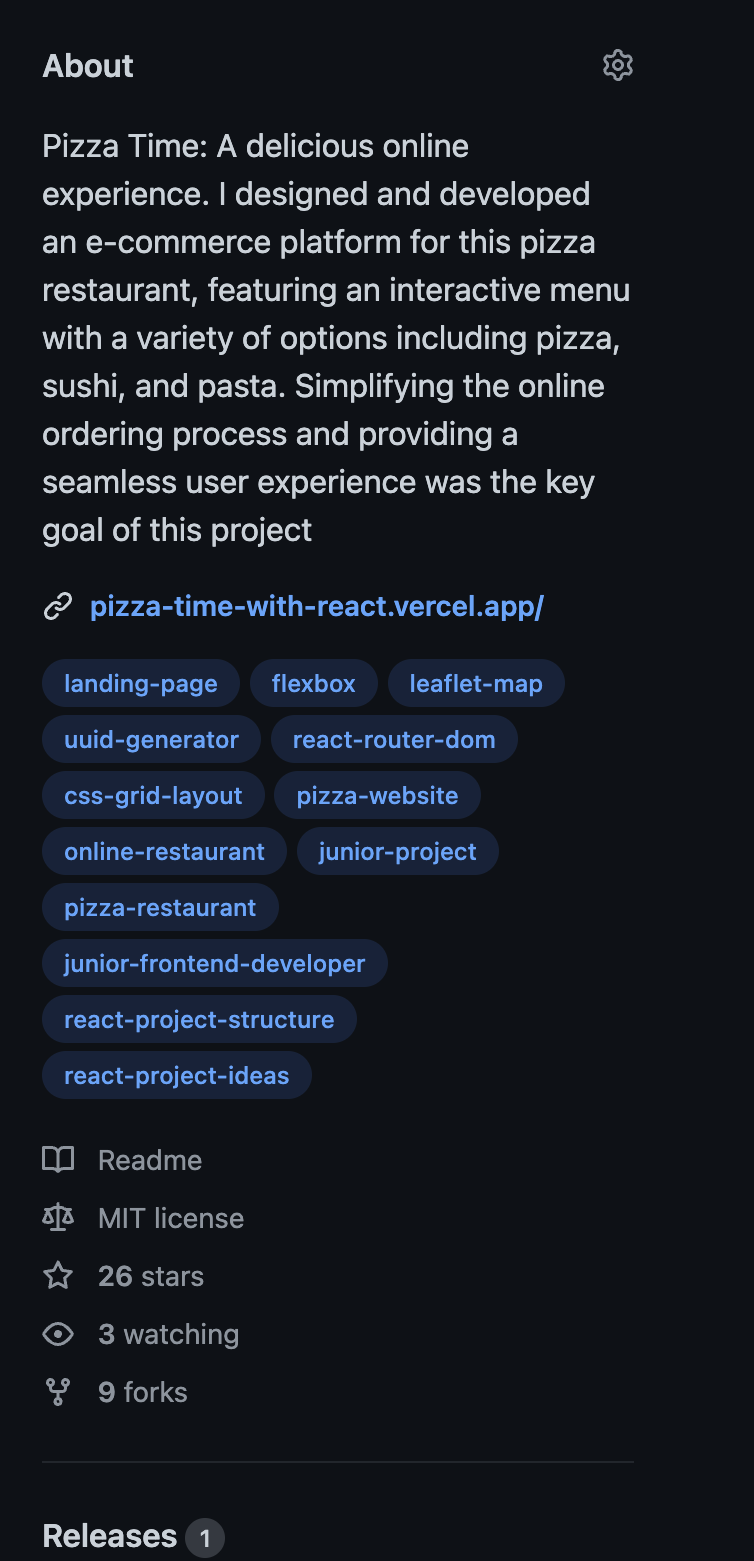
When you create projects and someone visits your repository not everyone is going to start going through each file of each project and check every single file.
At first, they will have a brief look at the project and it is definitely going to be more interesting for them to check it if you have some description of what it is. If you have some tags and you have a website link they will be able to check it out much faster. If you have an app or it’s something only backend and you don’t show any website, for example, at least try to explain in detail what it is so they get interested and want to go further into the details. You have to do a kind of advertisement because your project is showcasing you and your skills.
4️⃣ Repository README
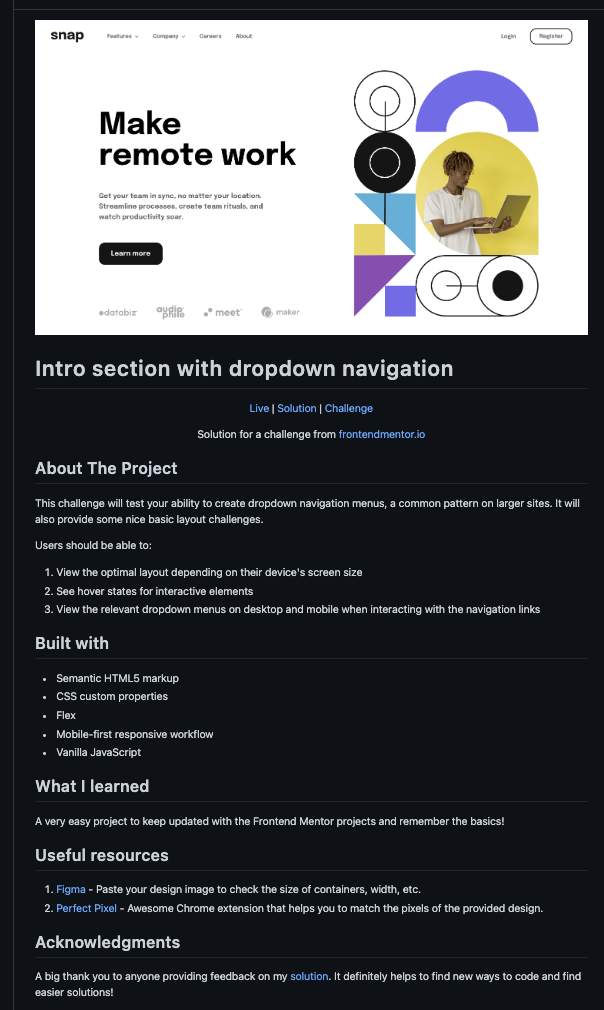
And lastly, a good README is not only important for your profile but also for every single project! First, it’s important for other developers as well who might want to learn from you, to check what you have been using and how. Why? Because they might want to use your project and they might want to know what things you used in the project and what they might need to install to use your project. README is kind of a documentation for your project.
Maybe you are a beginner and you wonder, who even needs my project? If no one is going to use your project, then trust me, your potential employee might check your repository. This person needs to understand what you have done and README can create some basic understanding. Just like profile README introduces you, so does it introduce your project to other non-technical people.
Personally, I usually add a quick description of what it is, what libraries I have added, and maybe what languages I used or what I have learned.
Phew, this was a long one! If you spend a little time and effort you can make from an empty and boring GitHub really really impressive profile!
Too lazy?
If you are too lazy to do any of these and don’t enjoy creativity then you can just use standard README generators which will save you a lot of time. These generators are free and awesome people contributed a lot to make it look cool, so it’s not a bad option!
I have not used one ever but there are several ones I have found.
1. Rahul Jain
2. GPRM
3. Profilinator
4. Arturs Smirnovs
If you have just started using GitHub this is all you need to know to create an impressive GitHub profile!
Subscribe to my newsletter
Read articles from Ekaterine (Catherine) directly inside your inbox. Subscribe to the newsletter, and don't miss out.
Written by

Ekaterine (Catherine)
Ekaterine (Catherine)
Writing helps me to understand things better