Ubuntu on Windows with Hyper-V
 Felipe Faraguti
Introduction
In our last blog post, we talked about using Linux on Windows through WSL2. Today, we're going to explore another way: using Hyper-V, a powerful tool by Microsoft. This gives you two options to choose from and makes it easier to understand how to run Linux alongside Windows on your computer.
Why Use Hyper-V After WSL2?
Before we get started, let's understand why Hyper-V is a good choice after learning about WSL2.
Hyper-V is like a strong and safe container for your operating systems. It works well with Windows and offers a stable place for Linux. Whether you're a tech lover, a developer, or someone who works with computers, using Linux on Hyper-V gives you a stable and reliable setup. Learning both WSL2 and Hyper-V, will give you a good grasp of how Windows can work smoothly with Linux, giving you a more versatile computer experience.
What You Need
Before we begin, make sure you have these things:
A computer running Windows.
Enough memory (RAM), processor power, and storage space for both Windows and Linux.
A Linux system file (called an ISO file) that you can download from the Linux website.
Setting Up Hyper-V
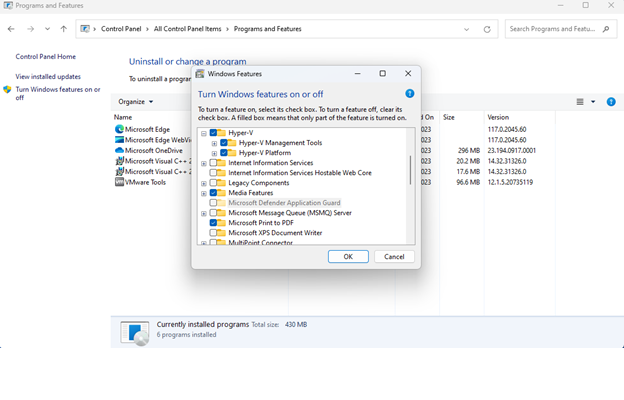
- Turning On Hyper-V: First, you need to make sure Hyper-V is active on your Windows computer. Go to Control Panel > Programs and Features > Turn Windows features on or off. Look for Hyper-V, tick the box, and click OK. Your computer might ask you to restart.
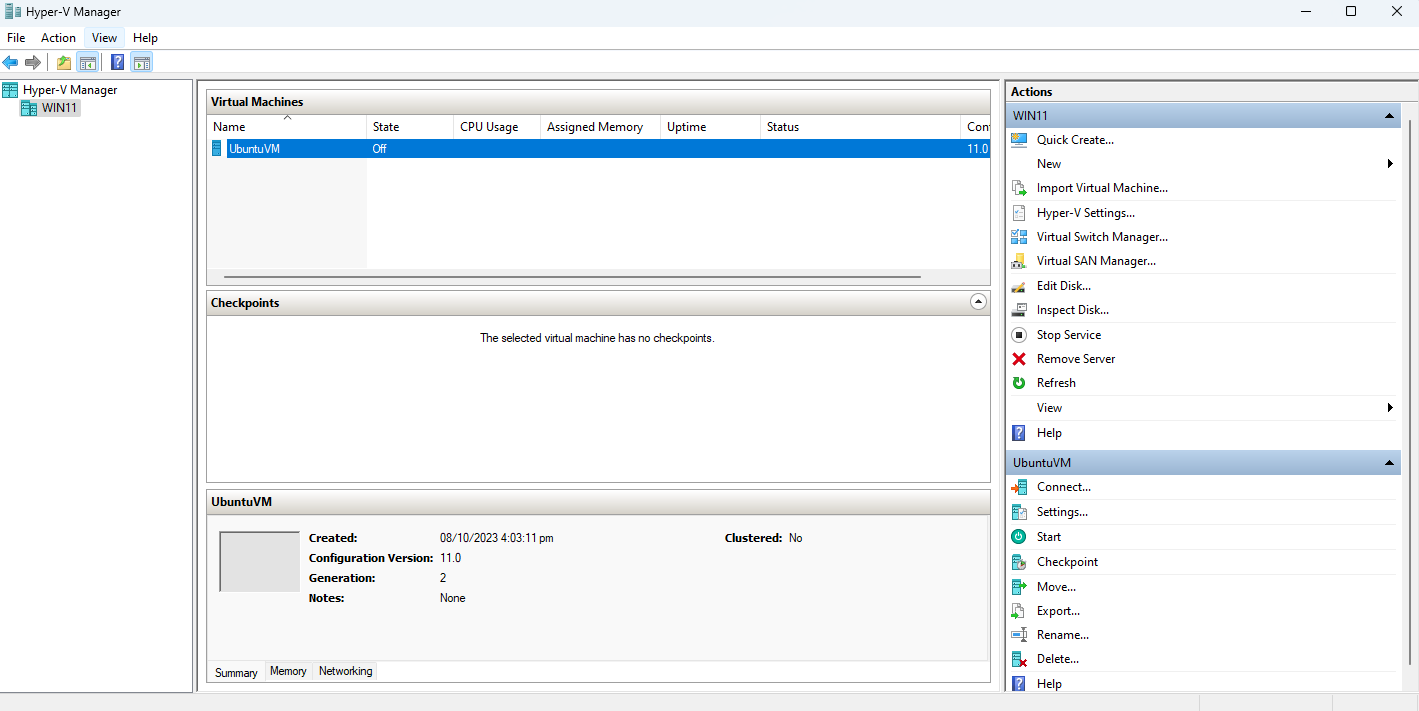
- Opening Hyper-V Manager: After your computer restarts, find Hyper-V Manager in your Start menu and open it. This is where you control and manage your virtual machines.
Creating Your Linux VM
Starting a New Virtual Machine: In Hyper-V Manager, select your computer under Hyper-V Manager and click "Action" at the top, then choose "New" > "Virtual Machine". This starts a setup wizard to help you create your Linux computer.
Setting Up Your Virtual Machine: Follow the wizard's instructions. First, provide a name for your virtual machine, such as "UbuntuVM". Click Next. When prompted to choose a generation, select Generation 2 for optimized performance. Next, allocate 4096 MB of memory, which is more than enough for Ubuntu. For the network connection, choose the default switch. Choose to create a virtual hard disk and when asked about the installation method, select "Install an operating system from a bootable image file (ISO)". Browse and select the Ubuntu ISO file you downloaded earlier. Review the summary to ensure all settings are correct and click Finish to create your Ubuntu virtual machine.
After the Setup
Installing Linux: Start your virtual machine. It will guide you to install Linux. Choose your language, keyboard settings, and how you want to divide the hard disk space.
Updates and Software: After installing Linux, make sure to update it and add any software you need. You can do this using the terminal and specific commands for your Linux system.
Making It Work Well: To make your virtual machine work better with your computer, install Hyper-V Integration Services on your Linux virtual machine. This helps your mouse work smoothly and improves the display.
Troubleshooting
If you get this error (Failed to Start) when starting your VM, run the following command in Powershell with Administrator rights to enable all features of Hyper-V (Restart required):
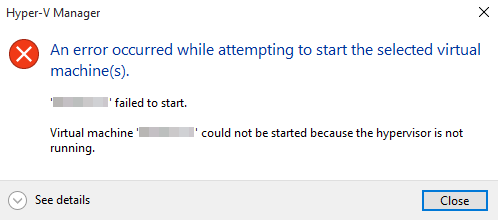
- Solution:
dism /online /enable-feature /featurename -All
For this other common error (Start PXE over IPv4), just make sure that you got the correct Boot Order and disabled Secure Boot:
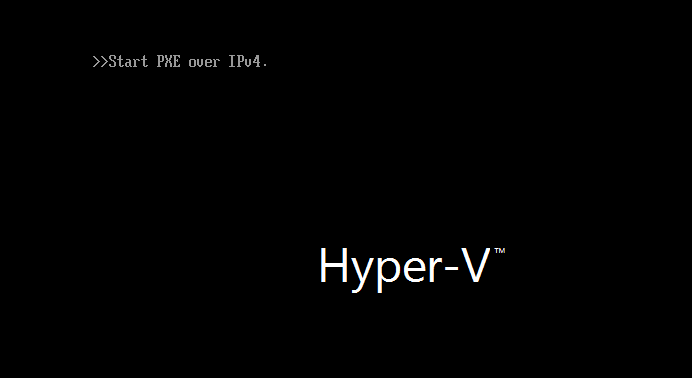
- Solution:


Conclusion
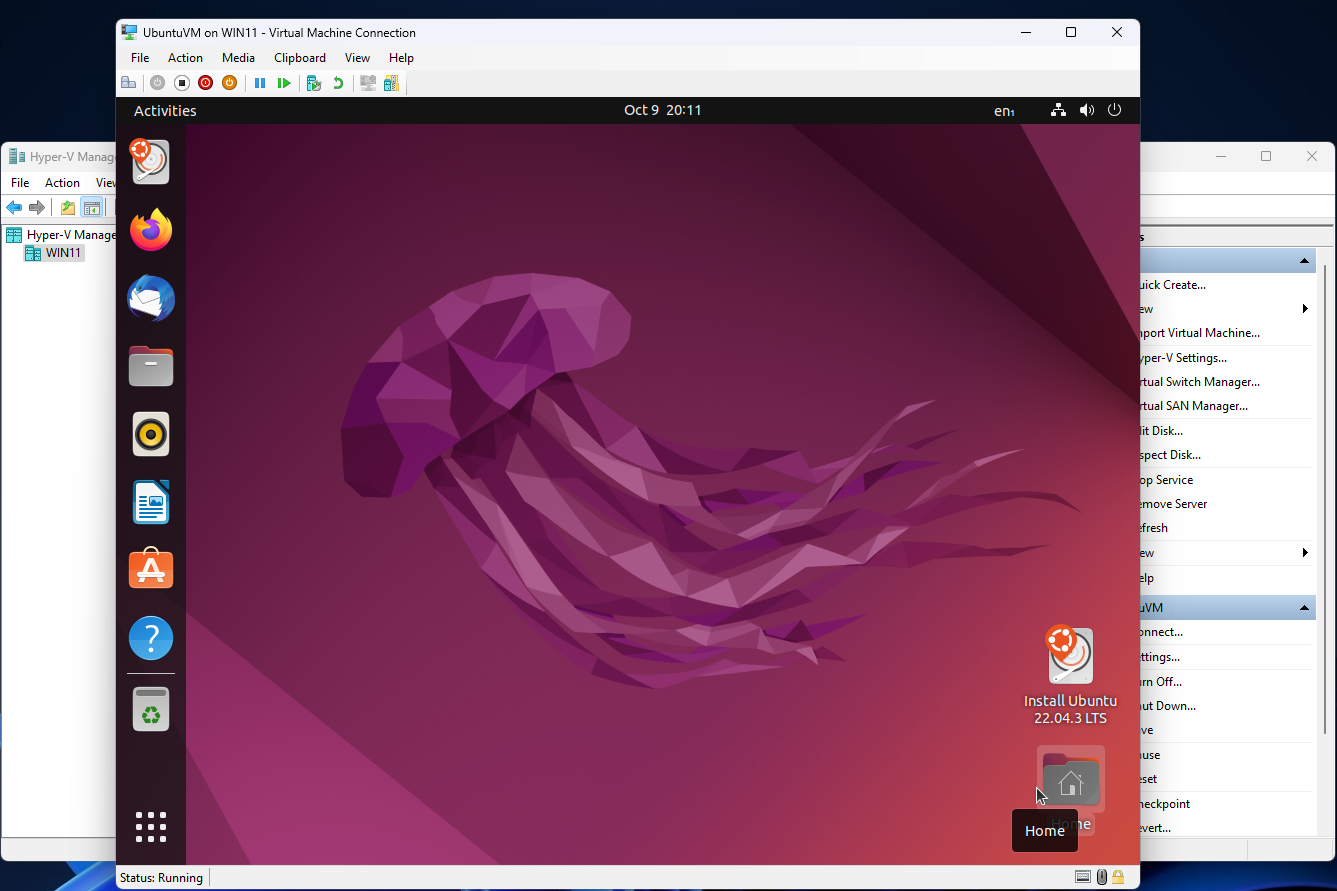
Great job! Now you have Linux running on your Windows computer, using both WSL2 and Hyper-V. Having these options means you can pick what works best for you. Don't forget to save your virtual machines and keep your computer updated for a smooth experience. Now you can explore, learn, and enjoy the best of both worlds on your computer. Happy computing!
Subscribe to my newsletter
Read articles from Felipe Faraguti directly inside your inbox. Subscribe to the newsletter, and don't miss out.
Written by

Felipe Faraguti
Felipe Faraguti
Tech enthusiast and recent graduate with a B.S. in Computer Information Technology. Specialized in AWS and Azure Cloud Computing, Database Management, and DevOps. Eager to contribute to innovative projects. Let's connect and explore tech's endless possibilities!