📲 Building a decentralized Mobile Application on Solana
 Anam Ansari
What to expect?
Let's embark on an exciting journey into the realm of the Solana Mobile Stack (SMS). Together, we'll craft an Android Application that incorporates the Mobile Wallet Adapter from the SMS. Even if you've just made a simple to-do list Android app, you're good to go!
Solana
Solana is a blockchain built for mass adoption. It's a high-performance network that is utilized for a range of use cases, including finance, NFTs, payments, and gaming. Solana operates as a single global state machine and is open, interoperable, and decentralized.
Solana Mobile Stack
The Solana Mobile Stack (SMS) is a collection of key technologies for building mobile applications that can interact with the Solana blockchain.
Developing for the Solana Mobile Stack essentially means developing for Android. The software toolkit equips developers with essential libraries for creating wallets and applications, enabling them to design immersive mobile experiences for the Solana network. Whether you're working on a web app that's mobile-friendly, a React Native app for Android, or a dedicated mobile wallet app, these resources including libraries, examples, and model implementations will guide you in utilizing the Solana network on Android devices.
Mobile Wallet Adapter
Mobile Wallet Adapter (MWA) is a protocol specification for connecting mobile dApps to mobile Wallet Apps, enabling communication for Solana transactions and message signing. dApps that implement MWA are able to connect to any compatible MWA Wallet App and request authorization, signing, and sending for transactions/messages.
| Mobile Platform | Is MWA Supported? | Notes |
| Android | ✅ | Full support for dApps and Wallet apps. |
| Mobile Web - Chrome (Android) | ✅ | Automatic integration if using @solana/wallet-adapter-react. |
| iOS | ❌ | MWA is not currently available for any iOS platform (app or browser). |
| Mobile Web - Safari, Firefox, Opera, Brave | ❌ | These browsers currently do not support MWA on Android (or iOS). |
If you're developing an MWA-compatible wallet app, see the
walletlibAndroid Library that implements the wallet side of the MWA protocol.
Seed Vault
The Seed Vault is a system service providing secure key custody to Wallet apps. By integrating with secure execution environments available on mobile devices (such as secure operating modes of the processor and/or secure auxiliary coprocessors), Seed Vault helps to keep your secrets safe, by moving them to the highest privileged environment available on the device. Your keys, seeds, and secrets never leave the secure execution environment, while UI components built into Android handle interaction with the user to provide a secure transaction signing experience to users.
Solana dApp Store
The Solana dApp Store is an alternate app distribution system, well suited to distributing apps developed by the Solana ecosystem.
It will provide a distribution channel for apps that want to establish direct relationships with their customers, without other app stores’ rules restricting the relationship or seeking a large revenue share. The goal of the Solana dApp Store is to empower the Solana community to eventually play a key role in managing the contents of this app store.
Let's build an Android dApp
We will be using MWA to implement two functionalities in our Android app:
1. Connect to the wallet
2. Sign a message
Pre-requisites
To get started, make sure you have the necessary tools and devices set up.
Android Studio: Giraffe | 2022.3.1
Emulator or Mobile Device (used to test the app) should have a wallet application (Solfare recommended) installed with a wallet setup
Setup
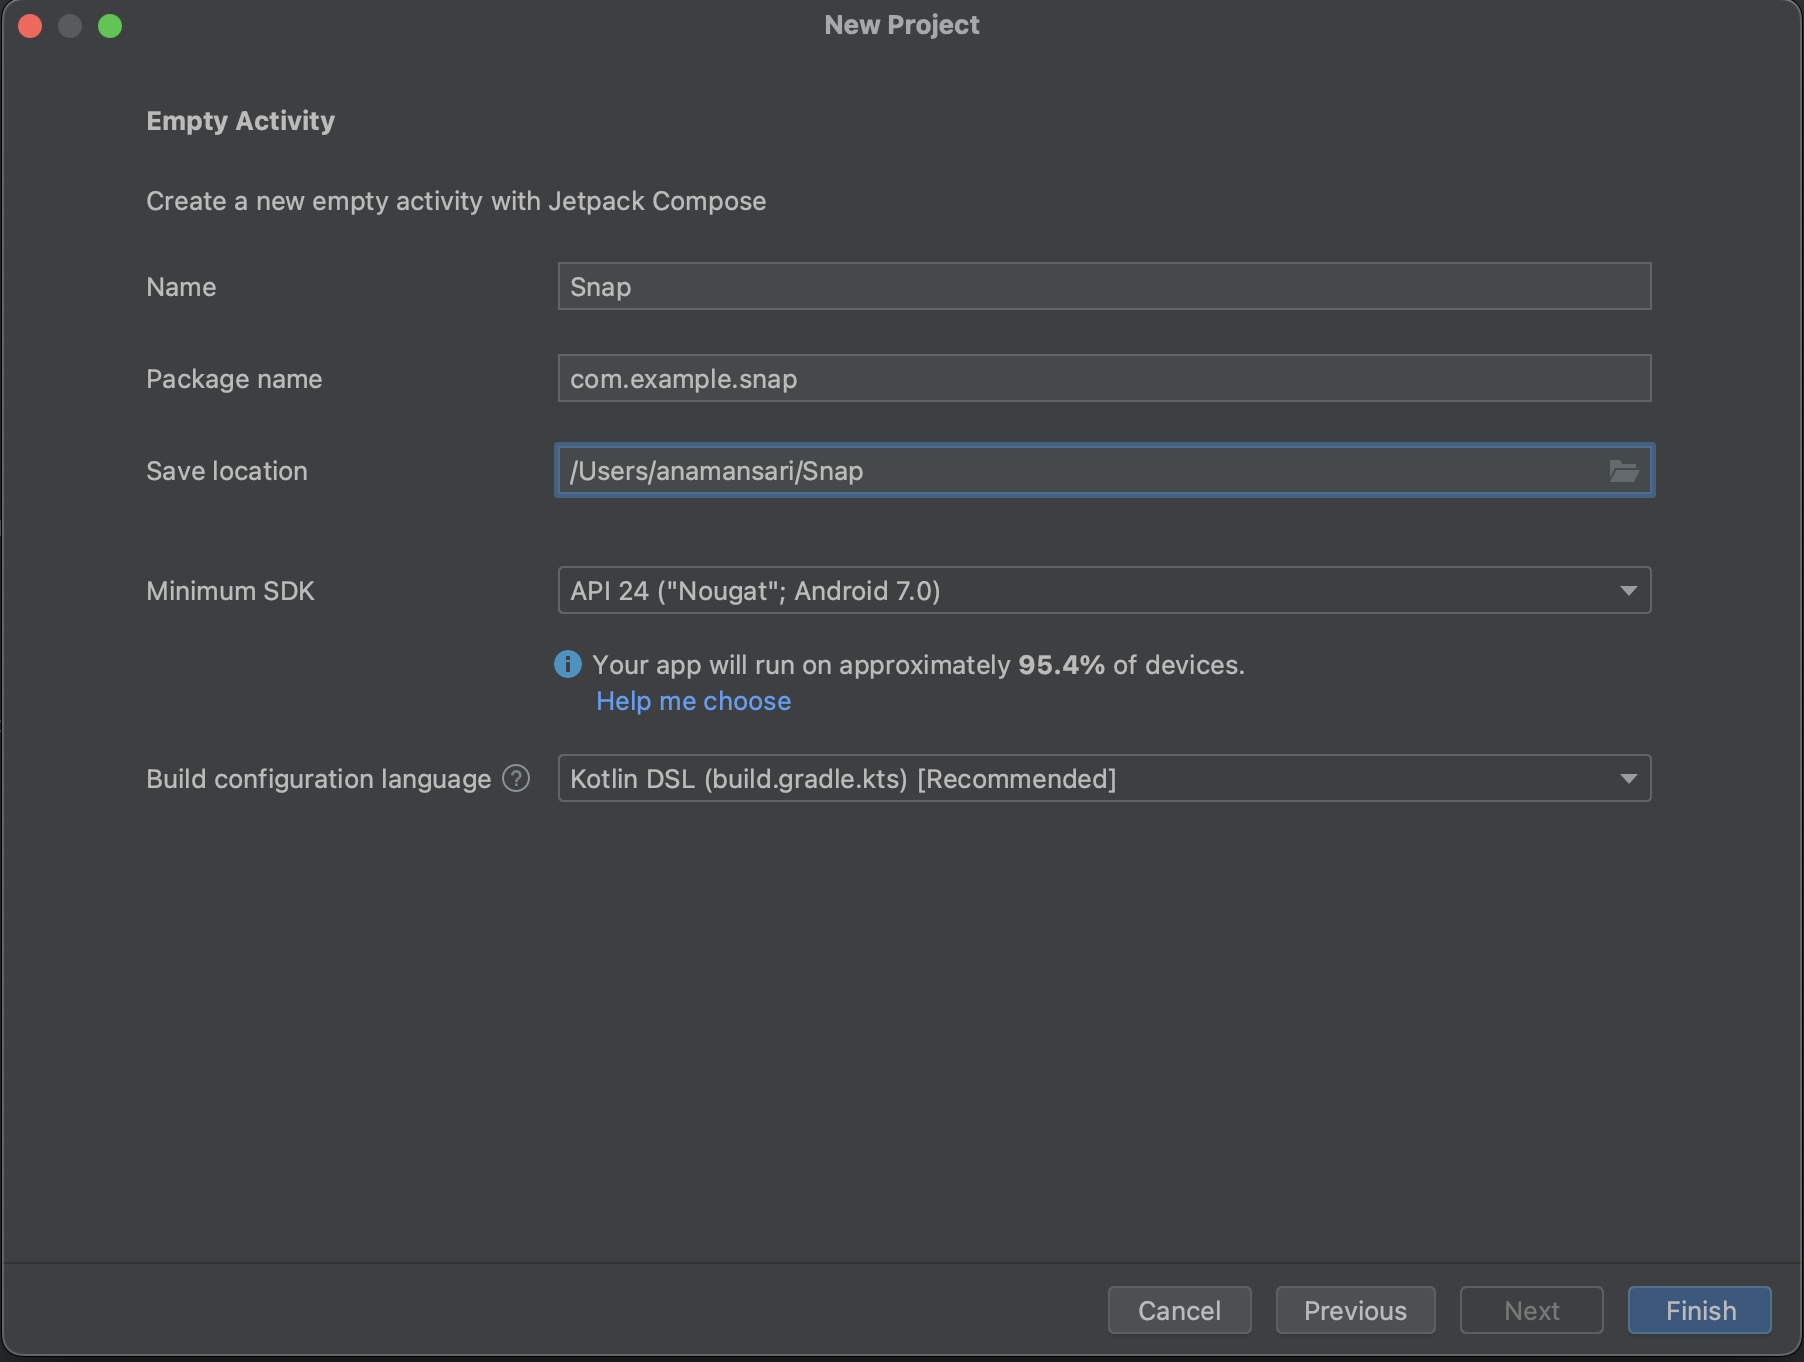
Open Android Studio and Create a new Project. Select “Empty Activity”.
Enter the application name as “Snap” and click on continue.
UI
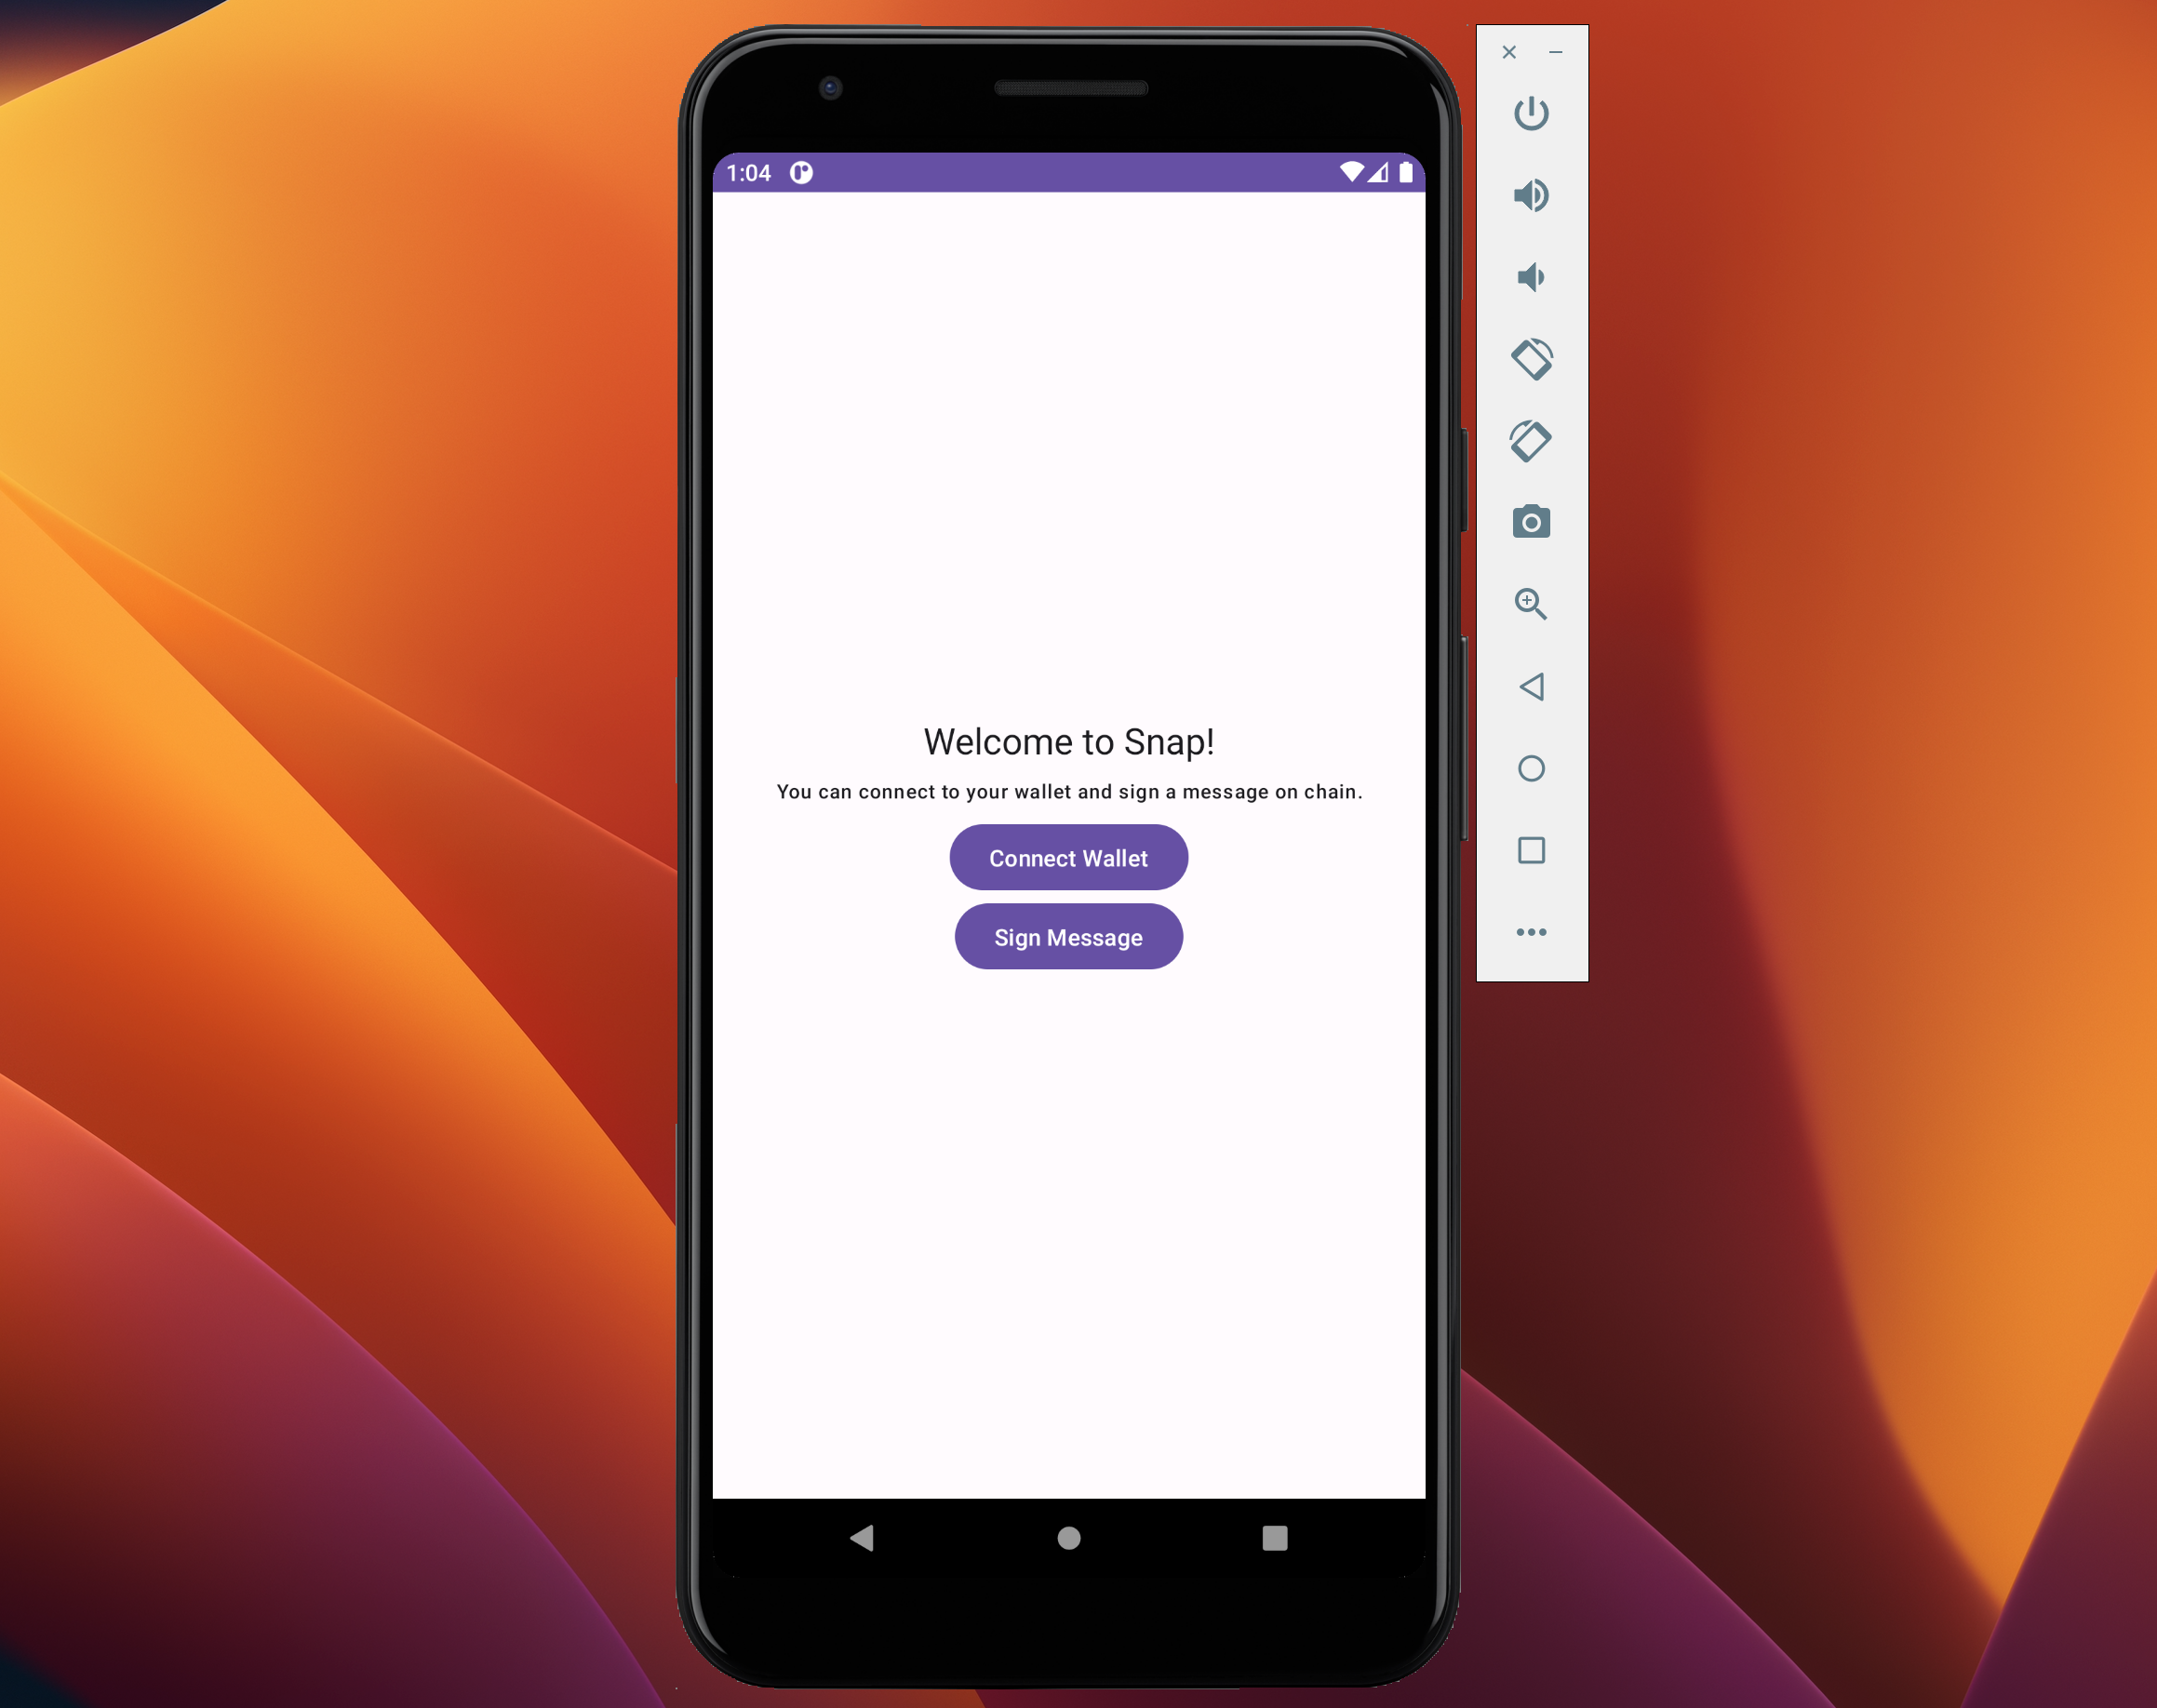
We will create a simple UI containing some text description and two buttons. One is for connecting to a wallet and the other is to sign a message. In MainActivity inside the Greeting composable, add the following code:
@Composable
fun Greeting(modifier: Modifier = Modifier) {
    Column(
        verticalArrangement = Arrangement.Center,
        horizontalAlignment = Alignment.CenterHorizontally
    ) {
        Text("Welcome to Snap!", style = MaterialTheme.typography.titleLarge)
        Spacer(modifier = Modifier.height(8.dp))
        Text(
            text = "You can connect to your wallet and sign a message on chain.",
            style = MaterialTheme.typography.labelMedium,
            textAlign = TextAlign.Center
        )
        Spacer(modifier = Modifier.height(8.dp))
        Button(onClick = { /*TODO*/ }) {
            Text(text = "Connect Wallet")
        }
        Button(onClick = { /*TODO*/ }) {
            Text(text = "Sign Message")
        }
    }
}
Connect wallet
Add the following dependencies in build.gradle.kts. We are importing MWA and Web3 Library by Portto, it is a similar implementation of web3js library but for Android. Click on "Sync Now" after this.
dependencies {

    ...

    implementation("com.solanamobile:mobile-wallet-adapter-clientlib-ktx:1.1.0")
    implementation ("com.portto.solana:web3:0.1.3")

}
Create a ViewModel Class in com/example/snap/SnapViewModel.kt. This class will contain all the logic for our Greetings composable. We create a SnapViewState which will be used to create data flow between the ViewModel and the UI. It contains wallet details and some booleans. These will be updated when the wallet is connected/disconnected. We have also created a MutableStateFlow for this inside the ViewModel Class.
package com.example.snap

import androidx.lifecycle.ViewModel
import kotlinx.coroutines.flow.MutableStateFlow
import kotlinx.coroutines.flow.StateFlow
import kotlinx.coroutines.flow.update

data class SnapViewState(
    val canTransact: Boolean = false,
    val userAddress: String = "",
    val userLabel: String = "",
    val authToken: String = "",
    val noWallet: Boolean = false
)

class SnapViewModel: ViewModel() {

    private fun SnapViewState.updateViewState() {
        _state.update { this }
    }

    private val _state = MutableStateFlow(SnapViewState())

    val viewState: StateFlow<SnapViewState>
        get() = _state

    init {
        viewModelScope.launch {
            _state.value = SnapViewState()
        }
    }


}
To kick off the protocol, a dApp makes the initial connection with a mobile wallet and sets up an MWA session. Using the latest SDKs, this session is started through Android intents. In this process, the dApp sends out a message with the 'solana-wallet://' code.

Let's create connect function inside SnapViewModel. This function will be responsible for handling wallet connections. We first create an instance of MobileWalletAdapter provided by MWA Library. We then call the function transact which requires ActivityResultSender , as it opens the MWA-compatible wallet. Within the transact function, we'll initiate the authorize process by passing the required arguments.
fun connect(
    identityUri: Uri,
    iconUri: Uri,
    identityName: String,
    activityResultSender: ActivityResultSender
) {
    viewModelScope.launch {
        val walletAdapterClient = MobileWalletAdapter()
        val result = walletAdapterClient.transact(activityResultSender) {
            authorize(
                identityUri = identityUri,
                iconUri = iconUri,
                identityName = identityName,
                rpcCluster = RpcCluster.Devnet
            )
        }

}
After this, we will check if the result is a Success, Failure or No Wallet Application was found in the device. If the connection is successful, we update the _state value. Here, PublicKey is provided by the web3 library. We use it to first convert the ByteArray to PublicKey then use toBase58() to get the public key as String . In the other cases, we update the _state booleans accordingly.
when (result) {
    is TransactionResult.Success -> {
        _state.value.copy(
            userAddress = PublicKey(result.payload.publicKey).toBase58(),
            userLabel = result.payload.accountLabel ?: "",
            authToken = result.payload.authToken,
            canTransact = true
        ).updateViewState()
        Log.d(TAG, "connect: $result")
    }

    is TransactionResult.NoWalletFound -> {
        _state.value.copy(
            noWallet = true,
            canTransact = false
        ).updateViewState()
    }

    is TransactionResult.Failure -> {
        _state.value.copy(
            canTransact = false
        ).updateViewState()
    }
}
The MWA session is closed as soon as the wallet is closed, we just fetch the important details such as the user public key, auth token, etc and then save it in our view state. So to disconnect, we simply have to update _state to its default values. Add this function to the SnapViewModel:
fun disconnect() {
    viewModelScope.launch {
        _state.update {
            _state.value.copy(
                userAddress = "",
                userLabel = "",
                authToken = "",
                canTransact = false
            )
        }
    }
}
We are all set with the ViewModel functions. Back to our Greeting composable in MainActivity, we the required arguments and create an instance of the view state.
@Composable
fun Greeting(
    identityUri: Uri,
    iconUri: Uri,
    identityName: String,
    activityResultSender: ActivityResultSender,
    snapViewModel: SnapViewModel = SnapViewModel()
) {

    val viewState by snapViewModel.viewState.collectAsState()

    ...

}
Then we edit the "wallet connect" button, starting with the onClick handler, here we call the connect() and disconnect() function that we previously wrote based on the viewState.userAddress. We also change the button text accordingly.
Button(onClick = {
    if (viewState.userAddress.isEmpty()) {
        snapViewModel.connect(identityUri, iconUri, identityName, activityResultSender)
    } else {
        snapViewModel.disconnect()
    }
}) {
    val pubKey = viewState.userAddress
    val buttonText = when {
        viewState.noWallet -> "Please install a wallet"
        pubKey.isEmpty() -> "Connect Wallet"
        viewState.userAddress.isNotEmpty() -> pubKey.take(4).plus("...").plus(pubKey.takeLast(4))
        else -> ""
    }

    Text(
        modifier = Modifier.padding(start = 8.dp),
        text = buttonText,
        maxLines = 1,
        )
}
Lastly, in the MainActivity we create an instance of activityResultSender and pass the arguments in the Greeting. (At this point, feel free to remove the @Preview section of Greeting)
class MainActivity : ComponentActivity() {
    override fun onCreate(savedInstanceState: Bundle?) {
        super.onCreate(savedInstanceState)

        val activityResultSender = ActivityResultSender(this)

        setContent {
            SnapTheme {
                // A surface container using the 'background' color from the theme
                Surface(
                    modifier = Modifier.fillMaxSize(),
                    color = MaterialTheme.colorScheme.background
                ) {
                    Greeting(
                        identityUri = Uri.parse(application.getString((R.string.id_url))),
                        iconUri = Uri.parse(application.getString(R.string.id_favicon)),
                        identityName = application.getString(R.string.app_name),
                        activityResultSender = activityResultSender,
                    )
                }
            }
        }
    }
}
Also, add the string resource values in values/strings.xml
<resources>
    <string name="app_name">Snap</string>
    <string name="id_url" translatable="false">https://snap.com</string>
    <string name="id_favicon" translatable="false">favicon.ico</string>
</resources>
Wallet Connection completed, Awesome!
Sign a message
A Solana dApp will have some kind of transaction signing required. So to give an overview let's use the Memo Program from the Solana Program Library, to call a transaction.
Back in SnapViewModel create a new function sign_message. This function will create the transaction and send it for signing. We first require the latest Blockhash. To get it, we declare api which is the Connection Cluster (here we are using Devnet). We then call the function getLatestBlockhash.
class SnapViewModel: ViewModel() {

    private val api by lazy { Connection(Cluster.DEVNET) }

    ...

    fun sign_message(
        identityUri: Uri,
        iconUri: Uri,
        identityName: String,
        activityResultSender: ActivityResultSender

    ){
        viewModelScope.launch {
            withContext(Dispatchers.IO) {
                val blockHash = api.getLatestBlockhash(Commitment.FINALIZED)

            }
        }
    }
}
Now, we create the Transaction object, and pass the recent Blockhash. We also add an instruction from the MemoProgram (This is from the web3 library). We then set the fee payer as the user. We accomplished this because the user had previously linked their wallet, allowing us to store the PublicKey in the view state. Lastly, we serialize the transaction object.
fun sign_message(
    identityUri: Uri,
    iconUri: Uri,
    identityName: String,
    activityResultSender: ActivityResultSender

){
    viewModelScope.launch {
        withContext(Dispatchers.IO) {
            val blockHash = api.getLatestBlockhash(Commitment.FINALIZED)

            val tx = Transaction()
            tx.add(MemoProgram.writeUtf8(PublicKey(_state.value.userAddress), "memoText"))
            tx.setRecentBlockHash(blockHash!!)
            tx.feePayer = PublicKey(_state.value.userAddress)

            val bytes = tx.serialize(SerializeConfig(requireAllSignatures = false))


        }
    }
}
The transaction object is all set, now we send it using the MobileWalletAdapter object again.

This time we perform two operations inside the transact scope. First, we reauthorize the user, this is done using the authToken we had saved before.
Then we call signAndSendTransaction this function, as the name suggests, sign the transactions from the user and then send it to the chain.

    fun sign_message(
        identityUri: Uri,
        iconUri: Uri,
        identityName: String,
        activityResultSender: ActivityResultSender

    ){
        viewModelScope.launch {
            withContext(Dispatchers.IO) {

                ...

                val walletAdapterClient = MobileWalletAdapter()
                val result = walletAdapterClient.transact(activityResultSender) {
                    reauthorize(identityUri, iconUri, identityName, _state.value.authToken)
                    signAndSendTransactions(arrayOf(bytes))
                }

            }
        }
    }
The result which will be received, if successful, it will contain the transaction signature. To decode it, we first need to import another library. Add this inside build.gradle.kts (Don't forget to click on "Sync Now")
dependencies {

    ...

    implementation ("org.bitcoinj:bitcoinj-core:0.16.2")


}
Back to the sign_message function, we extract the signature from the result. Make it in a readable format using Base58.encode() by the library we just imported. We then log the transaction link, so that after we run, we can check the transaction from the logs.
fun sign_message(
    identityUri: Uri,
    iconUri: Uri,
    identityName: String,
    activityResultSender: ActivityResultSender

){
    viewModelScope.launch {
        withContext(Dispatchers.IO) {

            ...

            result.successPayload?.signatures?.firstOrNull()?.let { sig ->
                val readableSig = Base58.encode(sig)
                Log.d(TAG, "sign_message: https://explorer.solana.com/tx/$readableSig?cluster=devnet")
            }

        }
    }
}
Finally, in the Greetings composable, we add the function sign_message when "Sign Message" button is clicked.
Button(
    onClick = {
        snapViewModel.sign_message(identityUri, iconUri, identityName, activityResultSender)
    },
) {
    Text(text = "Sign Message")
}
Transaction signing completed, Awesome!
Build and Run
Everything is set, let's run the app now🤞
Click on "Connect Wallet"
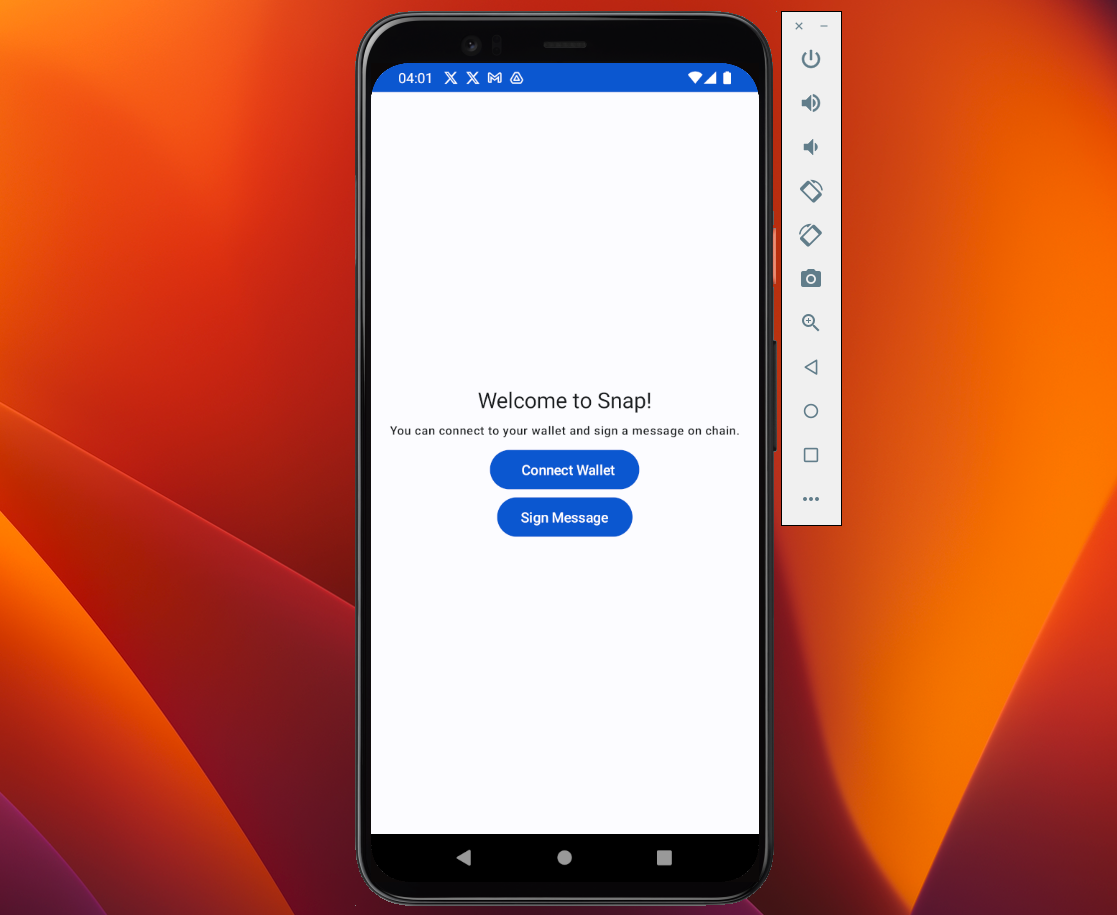
You will be redirected to an MWA-compatible wallet (If you have installed it, lol).
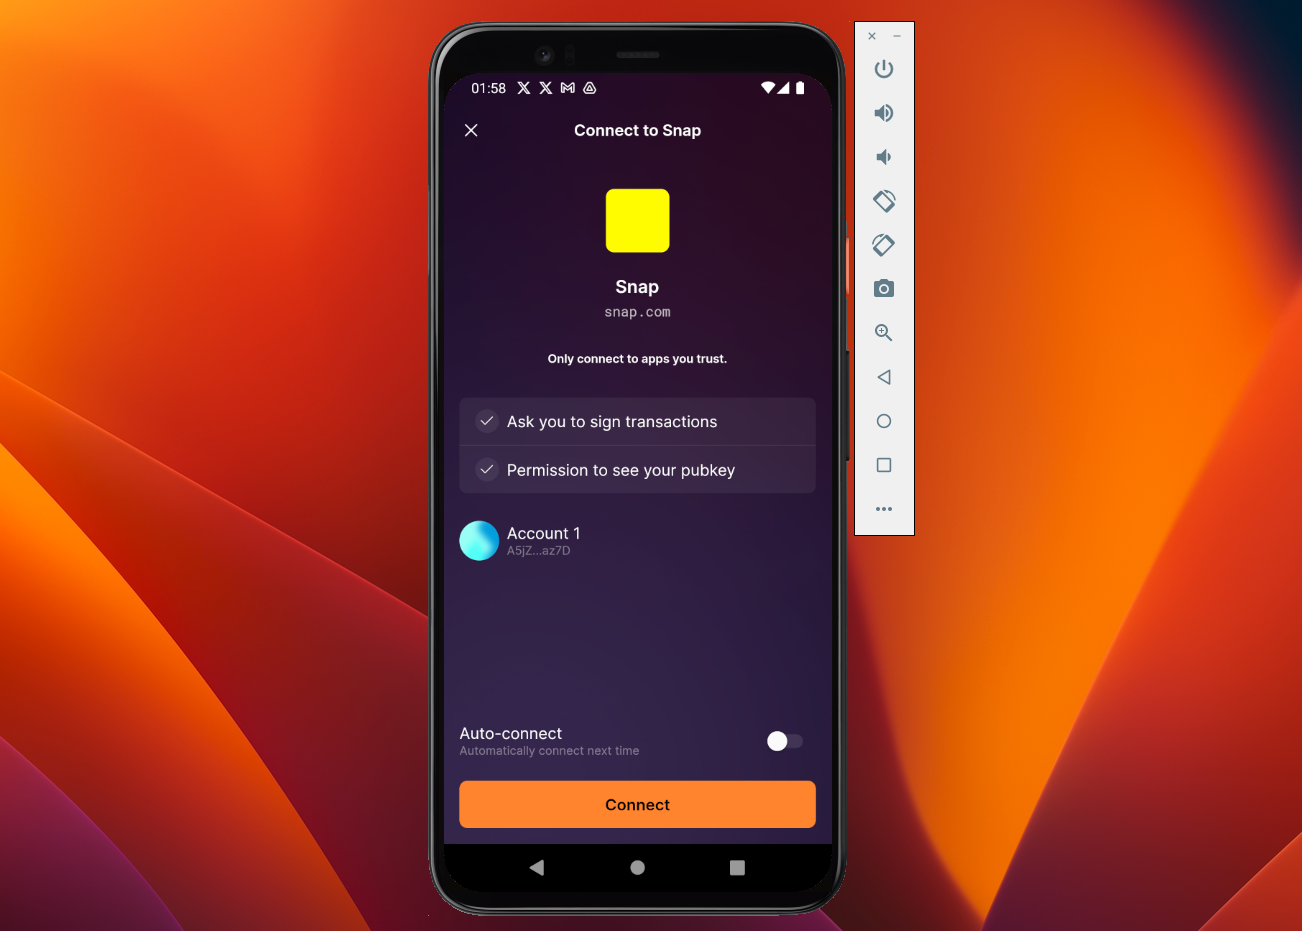
After the wallet connection is successful, click on "Sign Message"

Again, it will open the wallet, and confirm the transaction.

And, done!
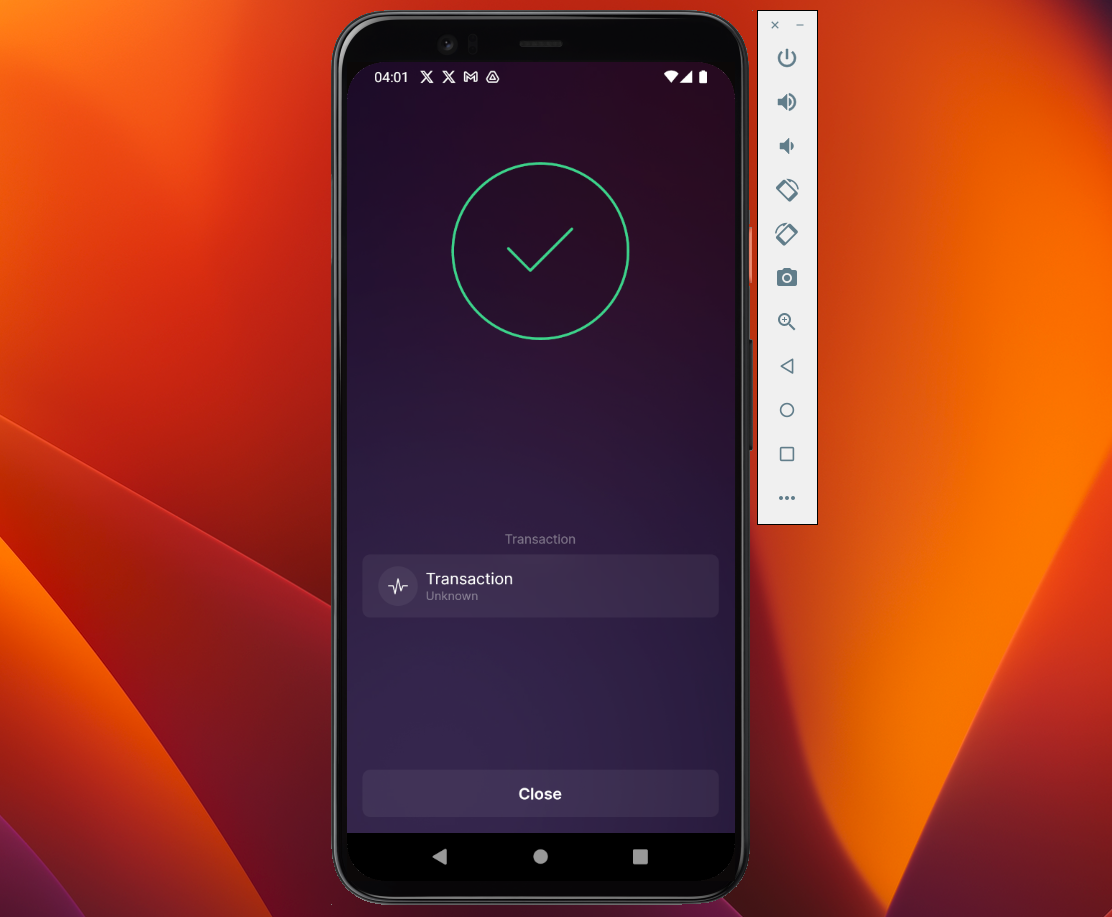
You can check the transaction link, in the Logcat.

What's next?
This brings us to the end of this blog. We started with Solana Mobile Stack, exploring what it offers. We then created an Android Application using a Mobile Wallet Adapter provided by SMS, to connect a wallet and sign transactions. The codebase is available on GitHub. I highly recommend the docs to get a deep-level understanding of the Solana Mobile Stack.
Before you go, these are the things I will recommend to explore after this:
- Proper Implementation: Right now, if we close the app, or if the UI refreshes the wallet details will be back to default. Implement a proper architecture with Data persistence and Data injection.
SolanaKT: This is an open-source library on Kotlin for Solana protocol. Leverage it to integrate your own Smart Contract in the code.
SolanaPay: This protocol was developed independently of the Solana Mobile Stack, but combining payments with a mobile device is a natural fit for Solana Pay.
Minty Fresh: A Kotlin Android app where you can take a picture and mint it into NFT.
Subscribe to my newsletter
Read articles from Anam Ansari directly inside your inbox. Subscribe to the newsletter, and don't miss out.
Written by
