Day18-Docker Compose & YAML for DevOps Engineers
 Siri Chandana
Table of contents
- What is YAML?
- What is Docker Compose?
- Benefits of Docker Compose:
- Basic Commands in Docker Compose:
- Install Docker Compose:
- Task-1
- Learn how to use the docker-compose.yml file, to set up the environment, configure the services and links between different containers, and also to use environment variables in the docker-compose.yml file.
- Task 2
- Pull a pre-existing Docker image from a public repository (e.g. Docker Hub) and run it on your local machine.
What is YAML?
YAML is a data serialization language that is often used for writing configuration files. Depending on whom you ask, YAML stands for yet another markup language or YAML ain’t markup language (a recursive acronym), which emphasizes that YAML is for data, not documents.
YAML is a popular programming language because it is human-readable and easy to understand. YAML files use a .yml or .yaml extension.
Here's an example of a simple YAML file for a student record that demonstrates the syntax :
#Comment: Student record
#Describes some characteristics and preferences
---
name: Martin D'vloper #key-value
age: 26
hobbies:
  - painting #first list item
  - playing_music #second list item
  - cooking #third list item
programming_languages:
  java: Intermediate
  python: Advanced
  javascript: Beginner
Below are some of the benefits of YAML:
It is portable across most programming languages.
YAMLsupports representing sequences as lists and mappings as dictionaries (hashes in some languages) in a language-independent manner.It is friendly to version control. YAML stores plain text; it can easily be added to a version control like Git or Subversion repository.
It supports one-pass or one-direction processing. Parsing YAML is linear, and there are no forward or backward pointers to deal with.
It has secure implementations.YAML is designed to prevent these types of exploits by specifying what type of data each part of the YAML stream must consist of.
It has strict syntax. The YAML specification has flexibility, which increases its robustness. It has a simple and clean syntax and is easy to learn. It can express a wide variety of different native data structures and allows for custom extensions.
What is Docker Compose?
Docker Compose is a tool that allows you to define and manage multi-container Docker applications. It is a separate command-line tool that works in conjunction with Docker Engine to simplify the process of running and managing multiple containers as a single application.
With Docker Compose, you can define the relationships and dependencies between containers, allowing you to easily spin up an entire application stack with a single command.
It simplifies the process of deploying complex applications that consist of multiple interconnected components, such as web servers, databases, message brokers, and more.

- Docker Compose uses a YAML file (usually named
docker-compose.yml) to define the services, networks, and volumes required for your application. In thedocker-compose.ymlfile, you can specify the configuration for each container, including the base image, environment variables, exposed ports, and volume mounts.
For example:
If you have an application that requires an NGINX server and a Redis database, you can create a Docker Compose file that can run both containers as a service without the need to start each one separately.
Benefits of Docker Compose:
- Single host deployment - This means you can run everything on a single piece of hardware
Quick and easy configuration - Due to YAML scripts can be configured easily
High productivity - Docker Compose reduces the time it takes to perform tasks
Security - All the containers are isolated from each other, reducing the threat landscape.
Basic Commands in Docker Compose:
Start all services:
Docker Compose upconfig: Validate and view the Compose file
docker compose config [OPTIONS] [SERVICE...]
Stop all services:
Docker Compose down- Install Docker Compose using pip:
pip install -U Docker-compose
Check the version of Docker Compose:
Docker-compose-vRun Docker Compose file:
Docker-compose up -dList the entire process:
Docker psScale a service :
Docker Compose up -d -scale
Install Docker Compose:
- We need to have Docker Engine installed remote or locally to be able to install Docker Compose.
Docker Compose comes pre-installed on desktop platforms like Docker Desktop for Windows and Mac.
Install the Docker Engine for your operating system as indicated on the Get Docker page on Linux systems, then return here for Docker Compose installation instructions on Linux systems.
The following steps need to be followed to get Docker Compose up and running.
Step 1 − Download the necessary files from GitHub using the following command
curl -L "https://github.com/docker/compose/releases/download/1.10.0-rc2/dockercompose
   -$(uname -s) -$(uname -m)" -o /home/demo/docker-compose
Step 2 − Next, we need to provide execute privileges to the downloaded Docker Compose file, using the following command.
chmod +x /root/docker/docker-compose
Step 3 - We can then use the following command to see the compose version.
docker-compose version
Task-1
Learn how to use the docker-compose.yml file, to set up the environment, configure the services and links between different containers, and also to use environment variables in the docker-compose.yml file.
Certainly! Let's dive into using the docker-compose.yml file to set up environments, configure services, establish links between containers, and utilize environment variables.
Setting up the Environment:
Create a new file called
docker-compose.ymlin your project directory.Start by defining the version of Docker Compose syntax you want to use. For example, version 3:
version: '3'Define the services you want to run as separate sections under the
serviceskey. Each service represents a container in your application stack. Here's an example with two services:services: web: # Configuration for the 'web' service db: # Configuration for the 'db' serviceConfiguring Services:
Within each service, you can define various properties, including the image to use, ports to expose, environment variables, volume mounts, and more. Here's an example configuration for a web service:
 services:
   web:
     image: nginx:latest
     ports:
       - 80:80
     volumes:
       - ./app:/usr/share/nginx/html
In this example, we're using the
nginx:latestimage, exposing port 80 on the host and mapping it to port 80 in the container. Additionally, we're mounting the local./appdirectory into the container's/usr/share/nginx/htmldirectory.Networks: If you want your containers to communicate with each other, you can define a custom network:
networks: mynetwork: services: webapp: image: nginx:latest networks: - mynetwork- Using Environment Variables:
You can use environment variables in the docker-compose.yml file to provide dynamic configuration to your services. You can define it like this:
             services:
               webapp:
                 image: nginx:latest
                 environment:
                   - MY_VARIABLE=my_value
Putting It All Together:
Your final
docker-compose.yamlfile may look something like this:version : "3.3" services: web: image: nginx:latest ports: - "80:80" db: image: mysql ports: - "3306:3306" environment: - "MYSQL_ROOT_PASSWORD=test@123"Running up docker-compose:
To bring up the services defined in the docker-compose.yml file, navigate to the directory containing the file and run the following command:
docker-compose up
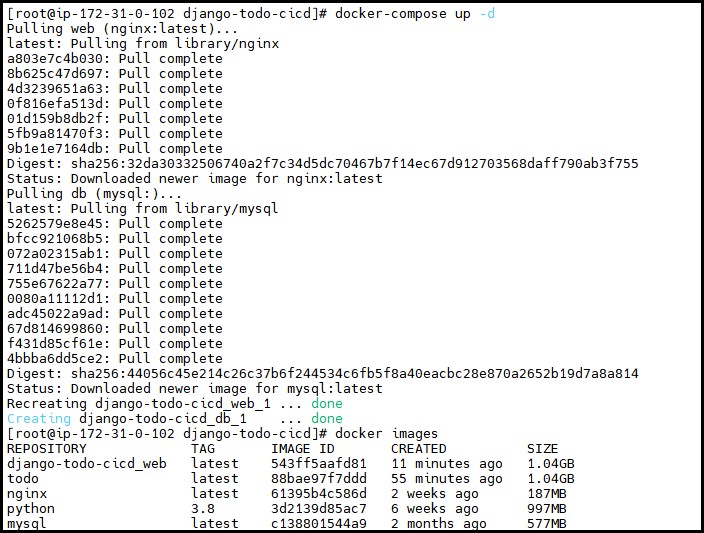
Docker Compose will create and start the containers defined in the file, configure the environment variables, establish the defined links, and set up the specified volumes.
- To check the containers:
docker-compose ps -a

- Verify the nginx service in the browser :
http://18.225.254.252:80

Task 2
Pull a pre-existing Docker image from a public repository (e.g. Docker Hub) and run it on your local machine.
Run the container as a non-root user (Hint- Use
usermodcommand to give the user permission to docker).Make sure you reboot the instance after permitting the user. - Inspect the container's running processes and exposed ports using the docker inspect command.
Use the docker logs command to view the container's log output.
Use the docker stop and docker start commands to stop and start the container.
Use the docker rm command to remove the container when you're done.
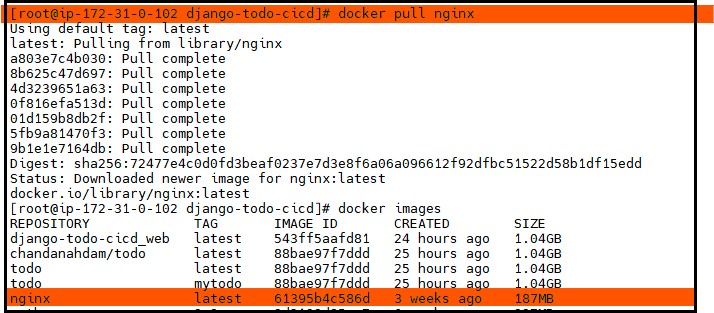
- Pull a pre-existing Docker image from a public repository (e.g. Docker Hub) and run it on your local machine
I am pulling the Nginx image. and running the container.
- Run as a Non-Root User:
            usermod -aG docker your_username
            # Reboot your machine
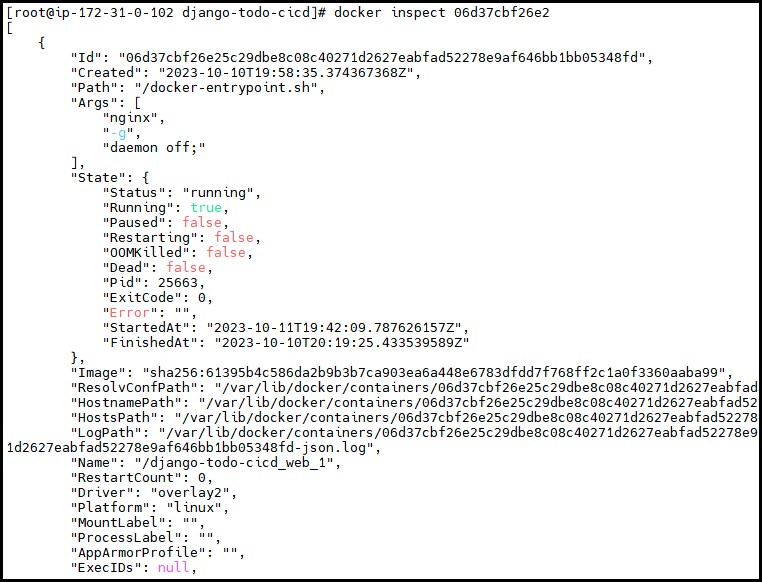
- Inspect Container: View detailed information about the container.
Here, I am using the container-id of nginx to view details.
docker inspect <container id>
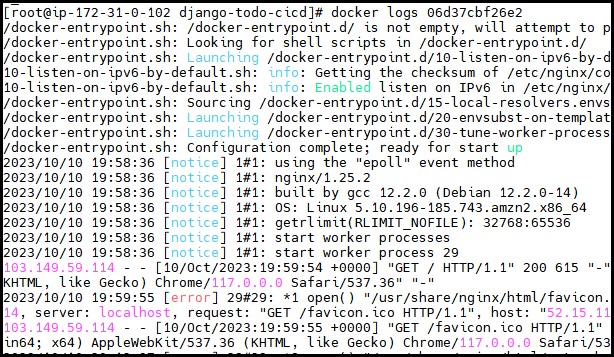
- View Logs: Check container log output
docker logs <container-id>
- To Stop and Start Container: Using
docker stopanddocker startas needed.
            docker stop nginx
            docker start nginx

- Remove Container: Cleanup with
docker rmwhen done.
docker rm nginx

That's it for today's journey into YAML and Docker Compose.
Thank you for reading my blog, Like it and share it with your friends if you find it knowledgeable. Keep DevOps learning!!!!!!!!
Subscribe to my newsletter
Read articles from Siri Chandana directly inside your inbox. Subscribe to the newsletter, and don't miss out.
Written by
