Title: Building a Simple To-Do List App with JavaScript: A Beginner's Guide
 RuchikaRawani
Introduction
In the vast realm of programming, learning to build simple applications can be a rewarding and educational experience. One of the classic beginner projects is creating a to-do list application, which not only hones your coding skills but also provides a practical utility. In this blog post, we'll guide you through the process of building a basic to-do list app using JavaScript. By the end of this tutorial, you'll have a functional application that allows users to add tasks, list tasks, delete tasks, and quit the application.
Getting Started
To start, open your favorite code editor and create a new JavaScript file. You can name it todo-app.js. In this file, we will begin by initializing an empty array to store our tasks and capturing user input using the prompt function.
let todo = [];
let req = prompt("Please enter your request");
Why is let todo empty?
In the provided code, the variable todo is initialized as an empty array (let todo = [];) to create an empty to-do list at the beginning of the program. This empty array serves as the starting point for storing tasks that the user will add to the to-do list during the execution of the program.
By initializing todo as an empty array, the code provides a clean slate for users to add tasks. As users interact with the application and choose to add tasks, these tasks are appended to the todo array using the push method. For example:
let task = prompt("add task");
todo.push(task);
This way, the todo array starts empty but dynamically grows as users add tasks to the to-do list during the program's execution.
The Main Loop
The heart of our application is a while loop that continues running until the user decides to quit. Within this loop, we process user input and perform corresponding actions.
while (true) {
    if (req == "quit") {
        console.log("Quitting app");
        break;
    } else if (req == "list") {
        // Code to list tasks
    } else if (req == "add") {
        // Code to add tasks
    } else if (req == "delete") {
        // Code to delete tasks
    } else {
        console.log("Wrong request");
    }
    req = prompt("Please enter your request");
}
Listing Tasks
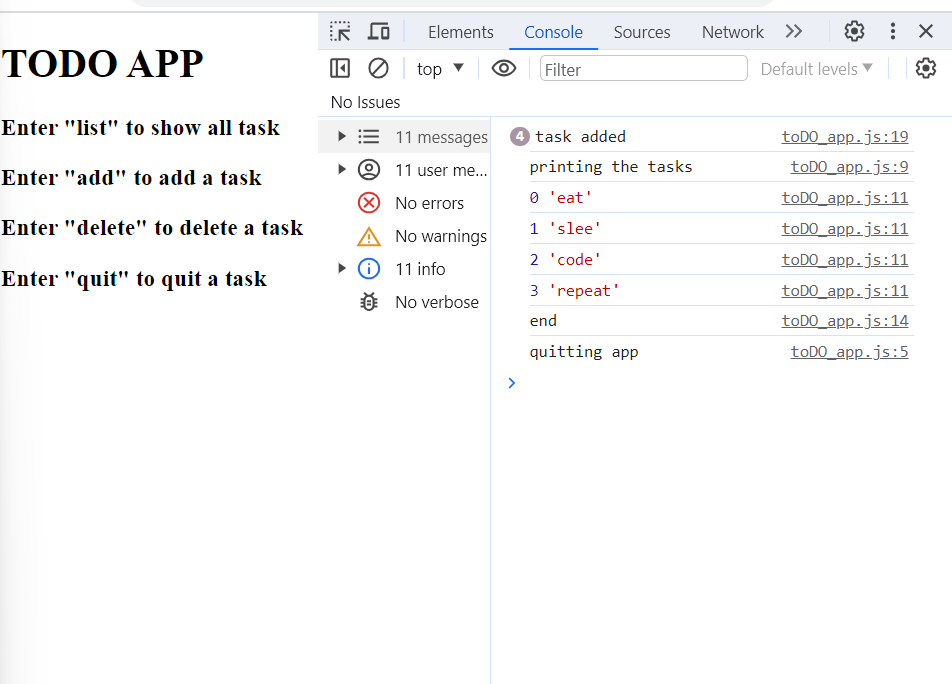
When the user inputs "list," the application displays all the tasks stored in the todo array.
if (req == "list") {
    console.log("Printing the tasks");
    for (let i = 0; i < todo.length; i++) {
        console.log(i, todo[i]);
    }
    console.log("End");
}
Adding Tasks
When the user inputs "add," the application prompts the user to enter a new task, which is then added to the todo array.
if (req == "add") {
    let task = prompt("Add task");
    todo.push(task);
    console.log("Task added");
}
Deleting Tasks
If the user inputs "delete," the application prompts the user to enter the index of the task they want to delete, and that task is removed from the todo array.
if (req == "delete") {
    let idx = prompt("Enter task to delete");
    todo.splice(idx, 1);
    console.log("Task deleted");
}
Below is the full JavaScript code for building a simple to-do list app, as discussed in the blog post.
javascriptCopy code
let todo = [];
let req = prompt("Please enter your request");

while (true) {
    if (req == "quit") {
        console.log("Quitting app");
        break;
    } else if (req == "list") {
        console.log("Printing the tasks");
        for (let i = 0; i < todo.length; i++) {
            console.log(i, todo[i]);
        }
        console.log("End");
    } else if (req == "add") {
        let task = prompt("Add task");
        todo.push(task);
        console.log("Task added");
    } else if (req == "delete") {
        let idx = prompt("Enter task to delete");
        todo.splice(idx, 1);
        console.log("Task deleted");
    } else {
        console.log("Wrong request");
    }
    req = prompt("Please enter your request");
}
To use this code, you can create an HTML file with an embedded <script> tag, or run it in an environment that supports JavaScript execution, such as a web browser console. When the code runs, it will prompt users for input and perform the respective actions based on their requests.
Conclusion
Congratulations! You've just built a simple to-do list application using JavaScript. This project serves as a solid foundation for understanding basic programming concepts like loops, conditional statements, and arrays. You can further enhance this application by adding features such as task prioritization, due dates, or even a user interface for a more interactive experience.
Building small projects like this not only reinforces your programming skills but also boosts your confidence. So, keep coding, keep building, and don't hesitate to explore more complex projects as you progress in your coding journey. Happy coding!
Feel free to customize and expand upon this blog post to suit your needs. Happy coding!
Subscribe to my newsletter
Read articles from RuchikaRawani directly inside your inbox. Subscribe to the newsletter, and don't miss out.
Written by

RuchikaRawani
RuchikaRawani
Hey there! I'm Ruchika Rawani, a second-year student at LPU Punjab, pursuing BCA. Currently immersed in the world of Data Structures and Algorithms (DSA), I am also exploring the realms of web development. As a fellow beginner, I channel my learning journey into insightful blogs tailored for beginners. Writing not only serves as a means of sharing knowledge but also acts as a powerful tool for solidifying my own understanding of complex topics. Stay tuned as I continue to unravel the mysteries of coding and web development through my engaging and beginner-friendly blogs.