A SIMPLIFIED GUIDE TO KUBERNETES. Part 1.
 OBUMNEME ANTHONY IKECHEBELU
Table of contents
We will explore various ends of Kubernetes as the objective of this article is to help community members eliminate the fear of getting started with Kubernetes. This article will run in various parts/series. Part 1 will extensively cover the basics / fundamental requirements for easy navigation in Kubernetes. Also, how to set up Minikube in your local environment along with a few hands-on / labs to show the Kubernetes status [is it up and running].
Part 2 will guide you through the deployment of a sample Kubernetes application. Finally, Part 3 will focus on how to deploy a sample application with Azure Kubernetes Service.
WHAT IS AZURE KUBERNETES SERVICE [ AKS]?
Azure Kubernetes Service (AKS) is a managed container orchestration service provided by Microsoft Azure. It simplifies the deployment, management, and scaling of containerized applications using Kubernetes. Here are some key features and information about AKS:
1). Kubernetes Management: AKS allows you to deploy and manage Kubernetes clusters without the need for deep expertise in Kubernetes. Microsoft handles the underlying infrastructure, making it easier to focus on your applications.
2). Scalability: AKS provides automated scaling capabilities, allowing you to scale your applications up or down based on demand. This ensures your applications are always available and responsive.
3). Integration with Azure Services: AKS seamlessly integrates with other Azure services like Azure Container Registry, Azure Monitor, and Azure Active Directory. This makes it easier to build comprehensive and secure applications.
4). Security: AKS offers built-in security features, such as network policies, Azure Policy, and role-based access control (RBAC), to help secure your containerized applications.
5). CI/CD Integration: You can easily set up continuous integration and continuous deployment (CI/CD) pipelines with tools like Azure DevOps, Jenkins, or others to automate application deployment to AKS.
6). Monitoring and Logging: AKS includes monitoring and logging capabilities, allowing you to gain insights into the health and performance of your applications and clusters.
7). Cost Management: It provides cost management tools to help you optimize and control your spending on containerized applications.
8). Hybrid Cloud: AKS enables hybrid and multi-cloud scenarios, allowing you to run applications consistently across on-premises, multi-cloud, and edge environments.
9). Linux and Windows Containers: You can run both Linux and Windows containers on AKS, giving you flexibility in your choice of container technology.
Overall, Azure Kubernetes Service is a powerful platform for managing containerized applications using Kubernetes, making it easier to deploy, scale, and manage your applications in the Azure cloud environment.
A more detailed practical approach to Kubernetes handling is well explained below as we cover these key vital steps. [Let’s navigate].
1). Update your package index [VMware].
2). Install VirtualBox driver.
3). Install Docker.
4). Download / install Minikube.
5). Install Kubectl on Ubuntu.
6). Start Minikube.
7). Kubernetes Cluster Deployment.
Let’s dwell on the basic prerequisite needed first before going through the steps listed above for the creation of Kubernetes.
PREREQUISITE:
Your Local Machine / PC required properties [2GB memory, 20G or more of free disk space, 2 CPUs or higher].
Your PC with reliable online access [internet connection].
Download and Install VMware workstation Pro 17 Key https://gist.github.com/PurpleVibe32/30a802c3c8ec902e1487024cdea26251
Download and Install UBUNTU https://ubuntu.com/download/desktop
Download and Install DOCKER https://docs.docker.com/engine/install/ubuntu/
Follow the below steps to create Kubernetes.
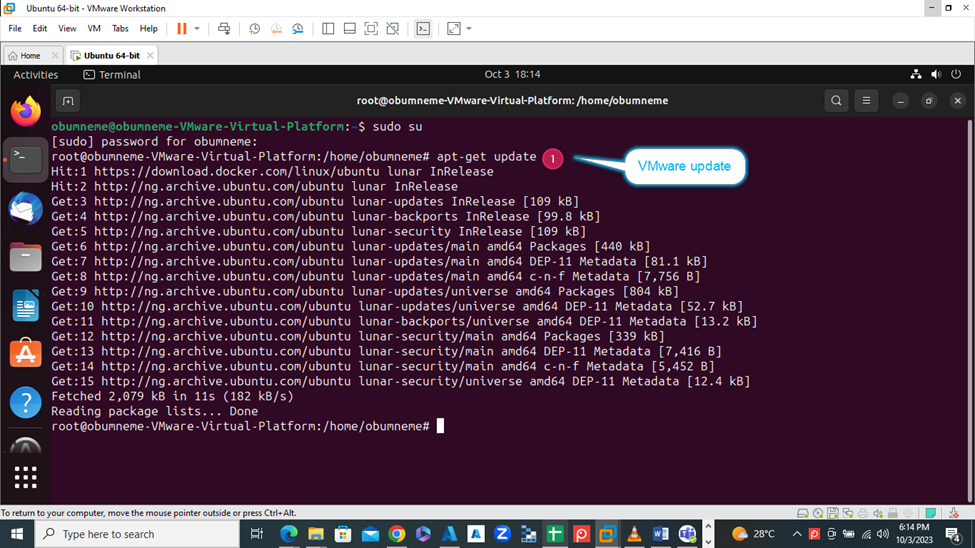
STEP 1: UPDATE YOUR PACKAGE INDEX [VMWARE].
Login to your local machine [PC].
1). Launch your VMware on a local machine [PC] [authentication Password will be required for access/confirmation].
2). Run Sudo su to be on the root and apt-get update.
STEP 2: INSTALL VIRTUALBOX DRIVER.
VirtualBox is a virtualization platform developed by Oracle that allows you to run multiple guest operating systems on a host machine. It is typically used for local virtualization on individual computers or servers.
Oracle VM VirtualBox, commonly referred to as VirtualBox, is an open-source virtualization platform that allows you to run multiple operating systems on a single physical computer. It provides a way to create and manage virtual machines (VMs) where you can install and run different guest operating systems within your primary host operating system. Here are some key features and use cases for VirtualBox:
1. Operating System Virtualization: VirtualBox allows you to run multiple guest operating systems simultaneously on a single host machine. This is useful for various purposes, including software development, testing, and running legacy or different operating systems on the same hardware.
2. Cross-Platform: VirtualBox is available for multiple host operating systems, including Windows, macOS, Linux, and more. It supports a wide range of guest operating systems as well, making it a versatile virtualization solution.
3. Snapshot and Cloning: You can take snapshots of a virtual machine at different points in time, allowing you to create backups and revert to previous states. Cloning VMs is also possible, making it easy to replicate configurations.
4. Virtual Networking: VirtualBox provides a range of networking options, including NAT (Network Address Translation), bridged networking, and host-only networking, enabling you to create complex network setups for your VMs.
5. Resource Management: You can allocate specific amounts of CPU, memory, and storage to each virtual machine, giving you control over resource usage and performance.
6. Guest Additions: VirtualBox offers guest additions or extensions for guest OSs, which enhance the integration between the host and guest systems. This includes improved graphics, mouse and keyboard integration, and shared folders.
7. USB Device Support: You can connect USB devices to your virtual machines, allowing you to work with a wide range of hardware within your VMs.
8. Open Source: VirtualBox is open-source software, which means it's free to use and has an active community of developers contributing to its development and support.
VirtualBox is a popular choice for developers, testers, and IT professionals who need to work with multiple operating systems on a single computer. It's also a valuable tool for creating and testing software in isolated environments or for running older applications that may not be compatible with modern operating systems.
The original driver for Minikube is VirtualBox. It can be installed with the command:
1). Run the command: sudo apt install virtualbox virtualbox-dkms virtualbox-qt Virtualbox-ext-pack
A).
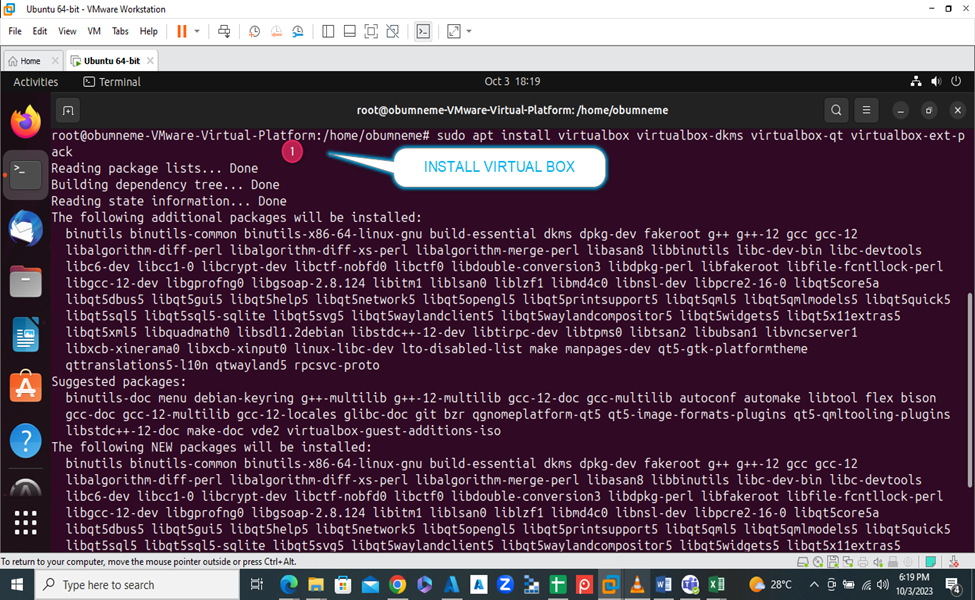
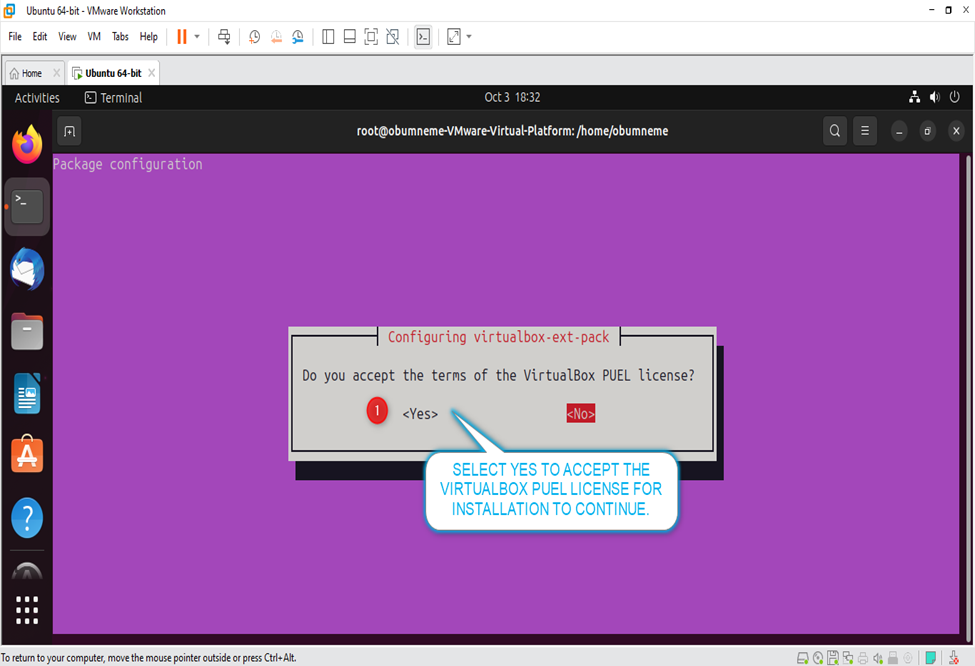
B). Package config:
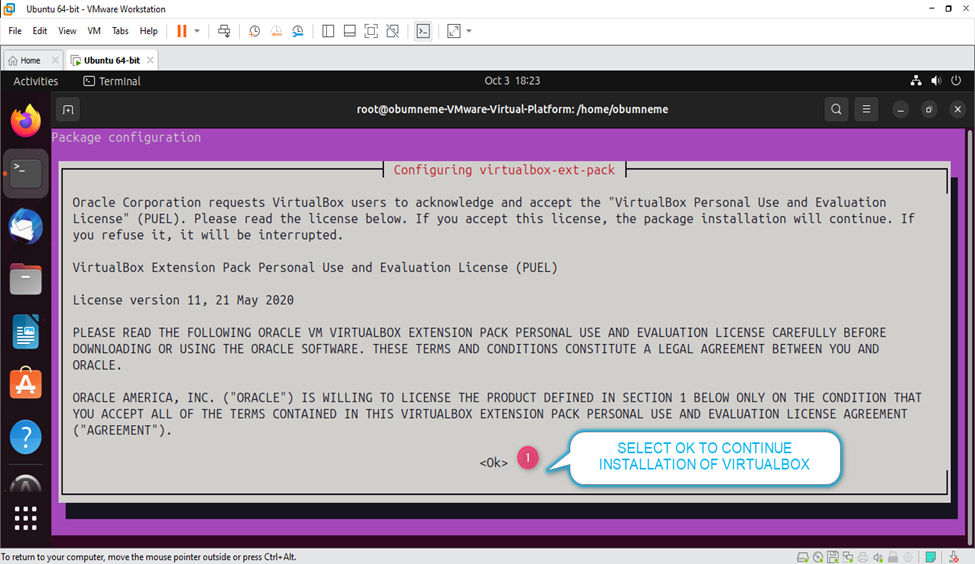
C). To Accept the VirtualBox Extension Pack License, Select Yes and Press Enter.
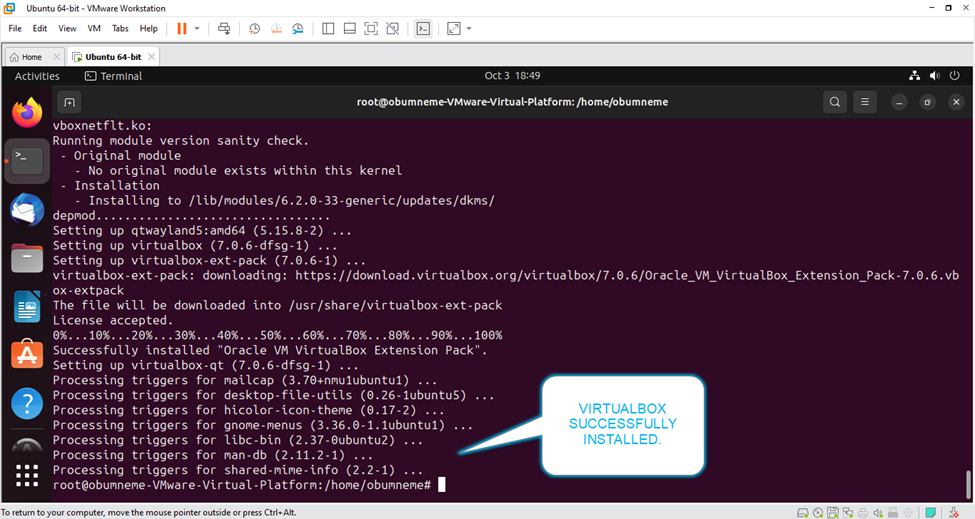
D). Finally downloaded and installed successfully.
STEP 3: INSTALL DOCKER.
Azure Docker can refer to the usage of Docker containers within the Microsoft Azure cloud platform. Docker is a popular platform for developing, shipping and running applications in containers, which are lightweight, portable, and consistent environments. Here's how Docker is used in the context of Azure:
1). Azure Container Instances [ACI]: Azure provides a service called Azure Container Instances, which allows you to run Docker containers in the cloud without the need to manage the underlying virtual machines. You can deploy individual containers or multiple containers as a group using Docker Compose.
2). Azure Kubernetes Service [AKS]: AKS is a managed Kubernetes service in Azure. You can use AKS to orchestrate and manage your Docker containers within Kubernetes clusters. This allows you to scale, manage, and deploy containerized applications efficiently.
3). Azure Container Registry [ACR]: Azure provides a container registry service, ACR, which is used for storing and managing Docker container images. It's a private registry that enables you to manage and distribute container images securely.
4). Docker on Azure VMs: You can also create Azure Virtual Machines (VMs) and install Docker on them. This allows you to run Docker containers on Azure VMs, giving you more control over the environment and configuration.
To work with Docker on Azure, you typically follow these steps:
1). Create or use Docker images for your applications.
2). Store these images in an Azure Container Registry or a public container registry like Docker Hub.
3). Use Azure services like Azure Container Instances, Azure Kubernetes Service, or Azure Virtual Machines to deploy and run your containers in the cloud.
It is key to enable virtualization on your PC BIOS for you to run the docker
1). Run this command to download and install docker:
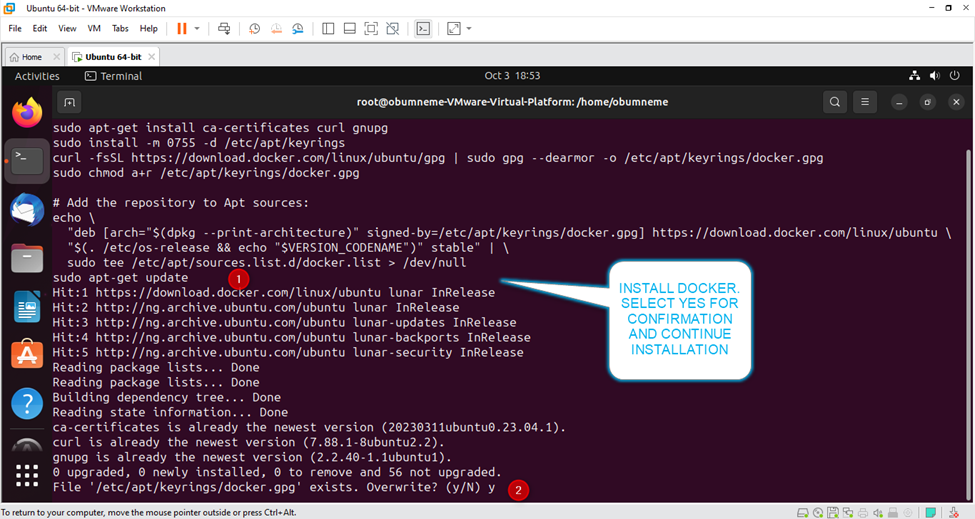
# Add Docker's official GPG key: sudo apt-get update sudo apt-get install ca-certificates curl gnupg sudo install -m 0755 -d /etc/apt/keyrings curl -fsSL https://download.docker.com/linux/ubuntu/gpg | sudo gpg --dearmor -o /etc/apt/keyrings/docker.gpg sudo chmod a+r /etc/apt/keyrings/docker.gpg
Next command:
# Add the repository to Apt sources: echo \ "deb [arch="$(dpkg --print-architecture)" signed-by=/etc/apt/keyrings/docker.gpg] https://download.docker.com/linux/ubuntu \ "$(. /etc/os-release && echo "$VERSION_CODENAME")" stable" | \ sudo tee /etc/apt/sources.list.d/docker.list > /dev/null
sudo apt-get update
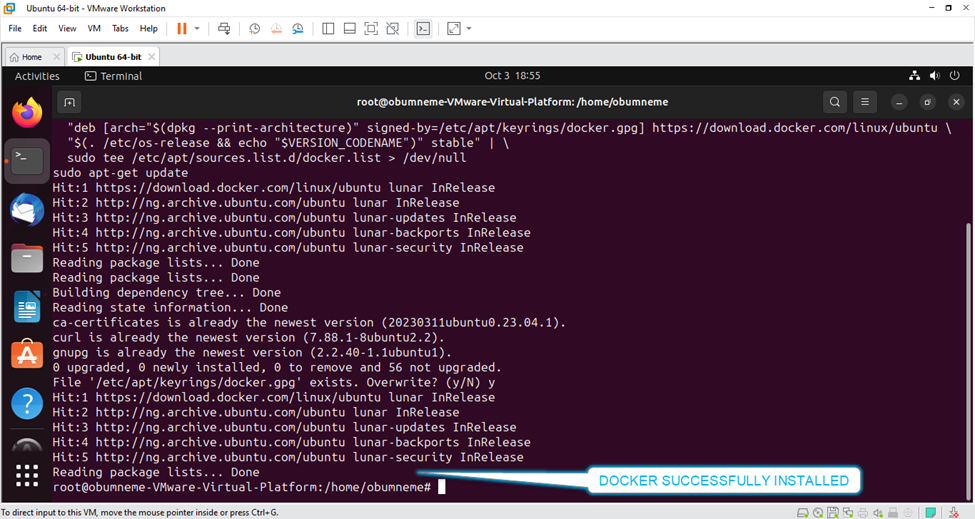
A). Docker Successfully Installed.
2). Run Docker Plugin: sudo apt-get install docker-ce docker-ce-cli containerd.io docker-buildx-plugin docker-compose-plugin
A).
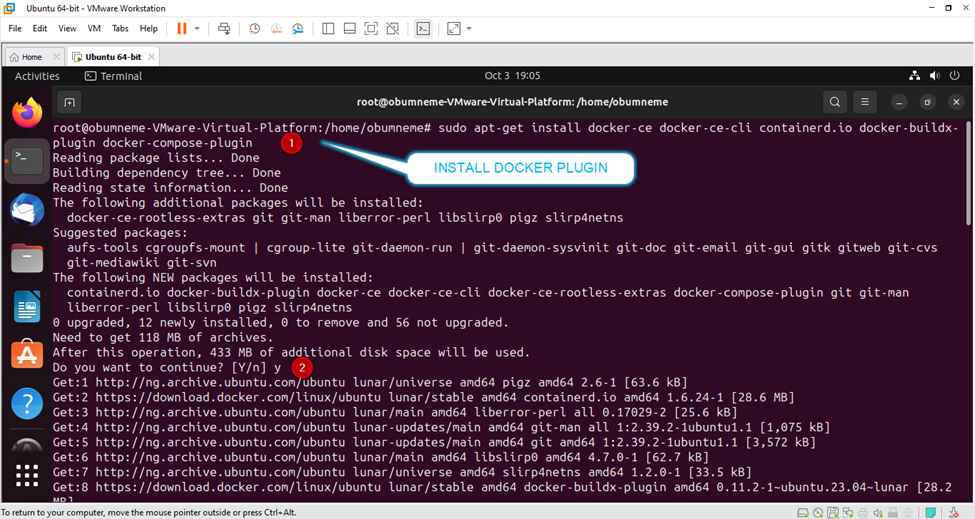
B).
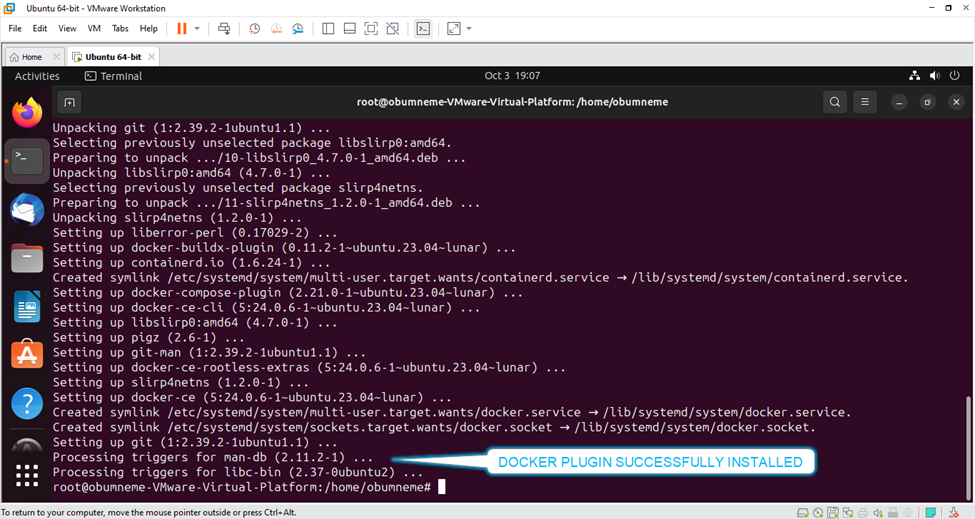
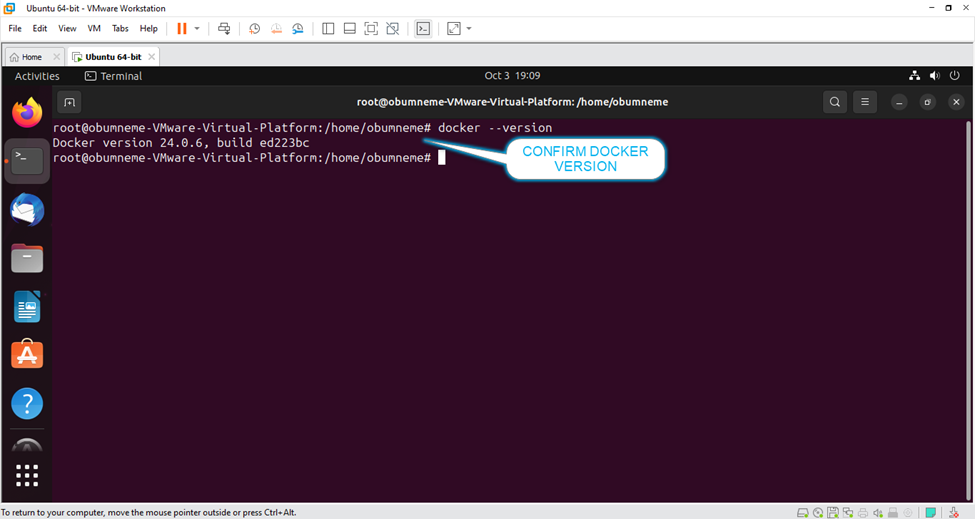
3). Confirm the Docker version. Type: docker - - version
4). Run the following commands to enable and start docker respectively.
A). systemctl enable docker
B). systemctl start docker
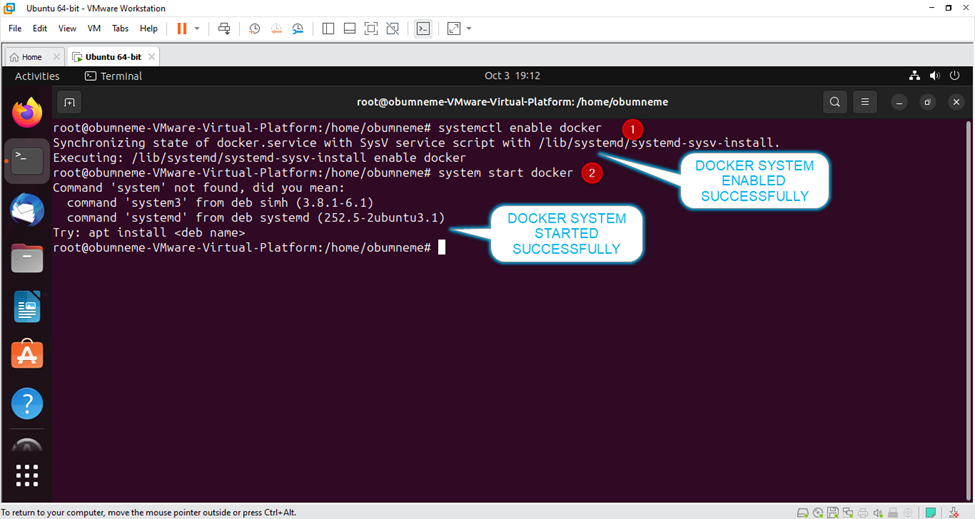
5). Confirm Docker status. Run: systemctl status docker
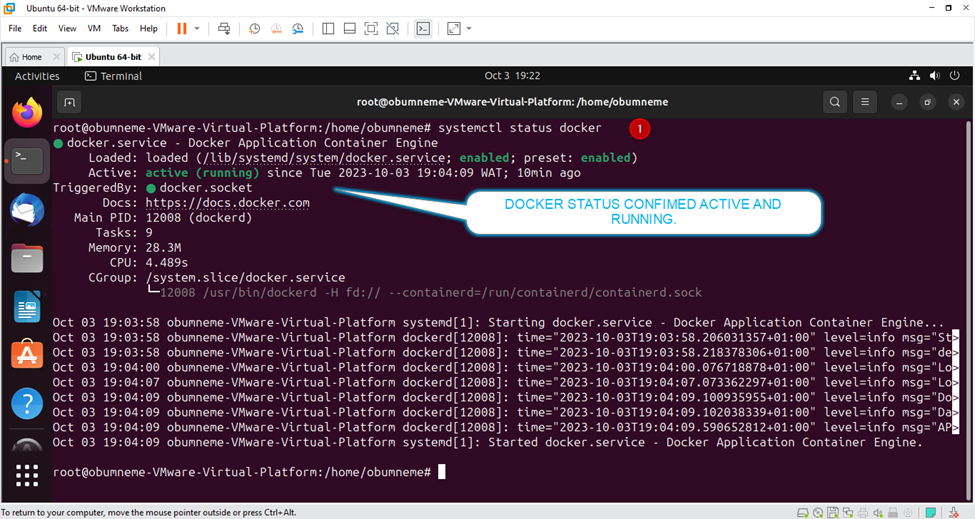
Finally, Add your Login user ID to the Docker group. Run: sudo usermod -aG docker $USER && newgrp docker
STEP 4: DOWNLOAD AND INSTALL MINIKUBE.
Minikube is a tool that allows you to run a single-node Kubernetes cluster on your local machine. It's primarily used for development and testing purposes, providing a way to work with Kubernetes without the need for a full-scale multi-node cluster. Minikube creates a virtual machine or uses a local container runtime to set up a lightweight Kubernetes environment that you can use to deploy, manage, and test containerized applications. This is helpful for developers who want to experiment with Kubernetes features or test their applications in a Kubernetes-like environment without the complexity of a production cluster.
1). Run the command to download and install Minikube:
wget https://storage.googleapis.com/minikube/releases/latest/minikube-linux-amd64 chmod +x minikube-linux-amd64 sudo mv minikube-linux-amd64 /usr/local/bin/minikube
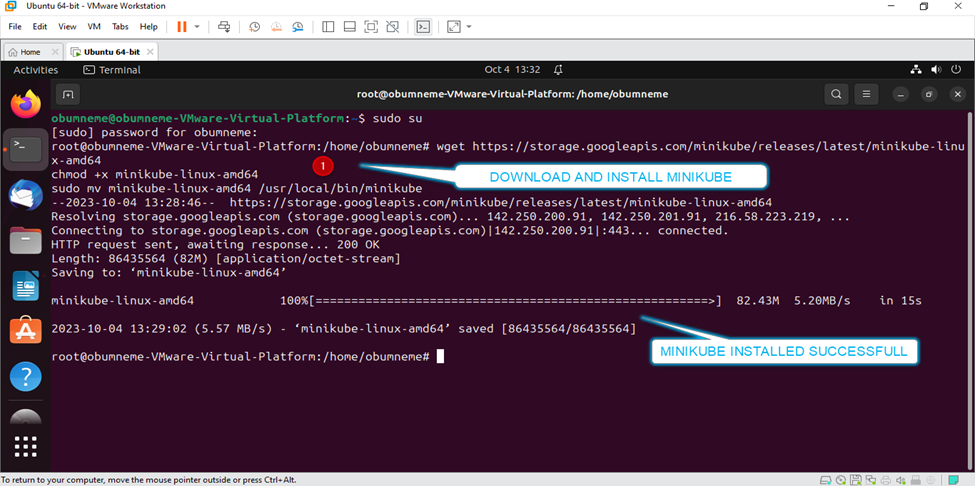
2). Confirm Minikube version. Run: minikube version
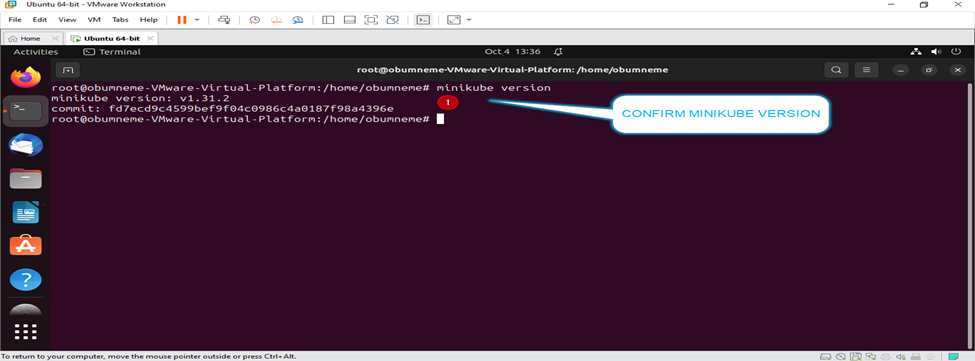
STEP 5: INSTALL KUBECTL ON UBUNTU.
To deploy and manage apps on Kubernetes, we require kubectl command-line tool to install with the command.
1). Run the command: curl -LO "https://dl.k8s.io/release/$(curl -L -s https://dl.k8s.io/release/stable.txt)/bin/linux/amd64/kubectl"
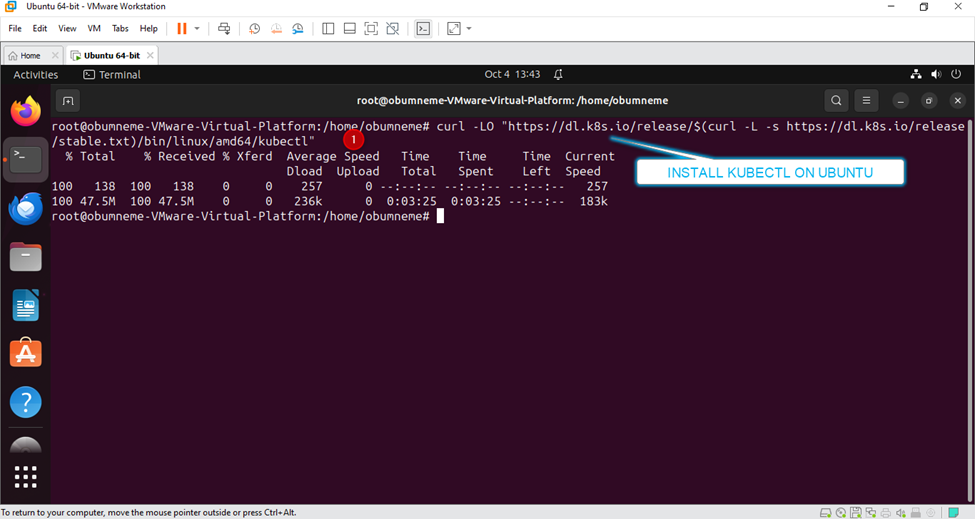
2). Change mode to ensure that Kubectl is executable. Run: chmod +x ./kubectl
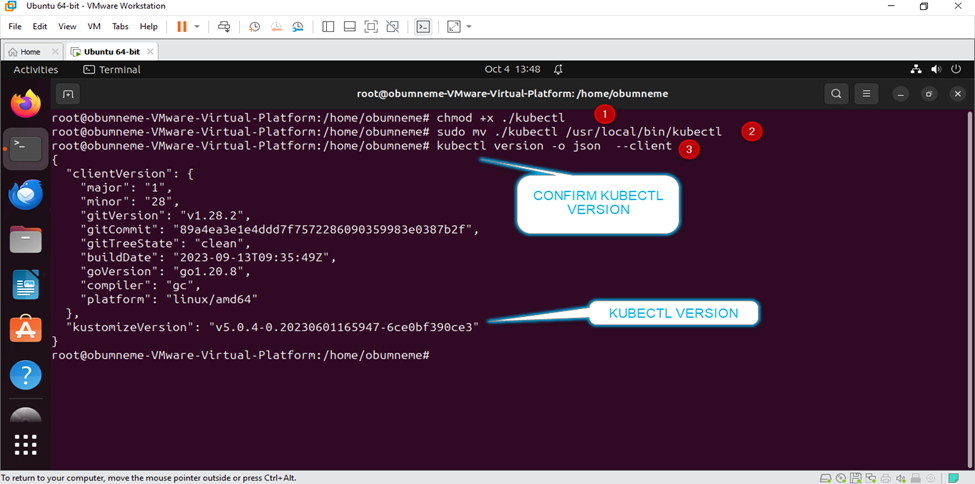
3). The binary should be in your path. Run: sudo mv ./kubectl /usr/local/bin/kubectl {see file above}.
4). Verify the Kubectl that you have downloaded. Run: kubectl version -o json –client {see above file}.
STEP 6: START MINIKUBE.
1). Run command: minikube start --driver=docker
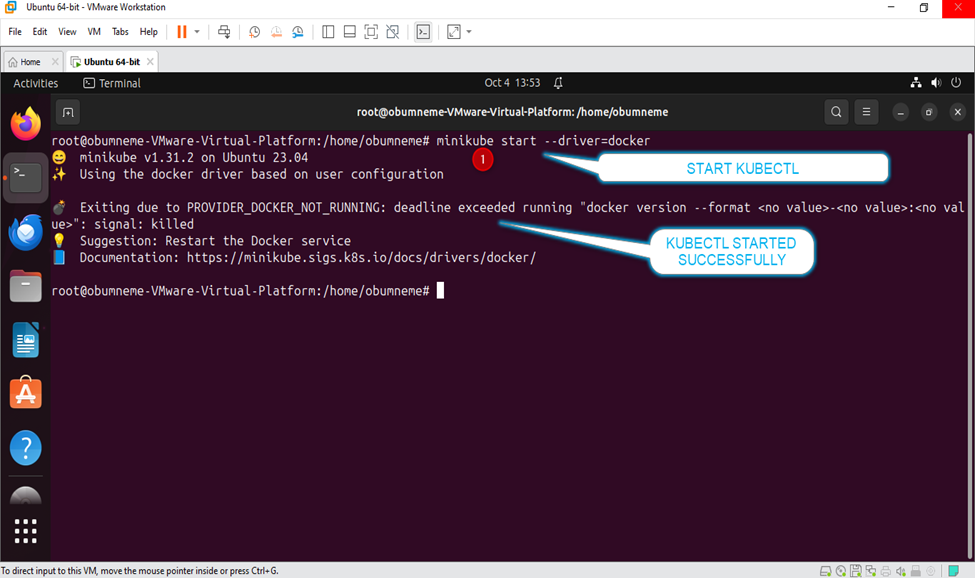
STEP 7: KUBERNETES CLUSTER DEPLOYMENT
We will explore Kubernetes cluster deployment using VMware not on the root drive.
Let's launch our VMware and run the following commands [ensure that you are not on the root drive. Use exit root if already on the root for this section].
1). Run command: minikube start --drive=docker
A.
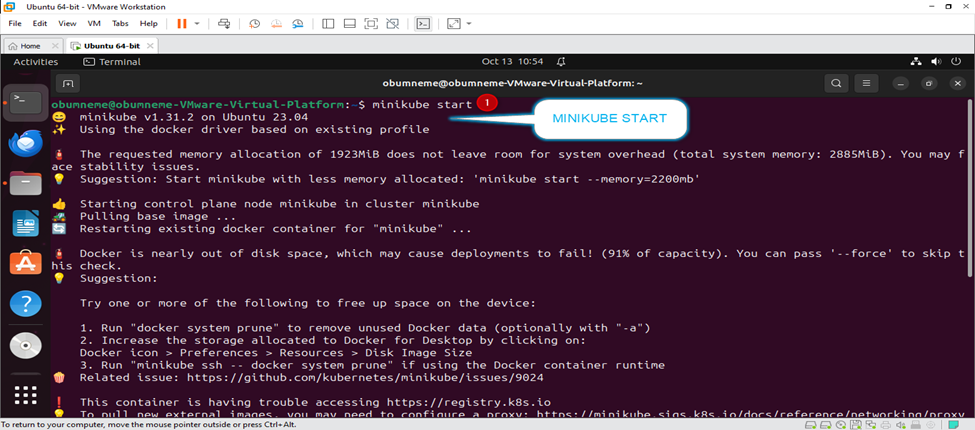
B. Minikube addons enable metrics-server needs to be installed.
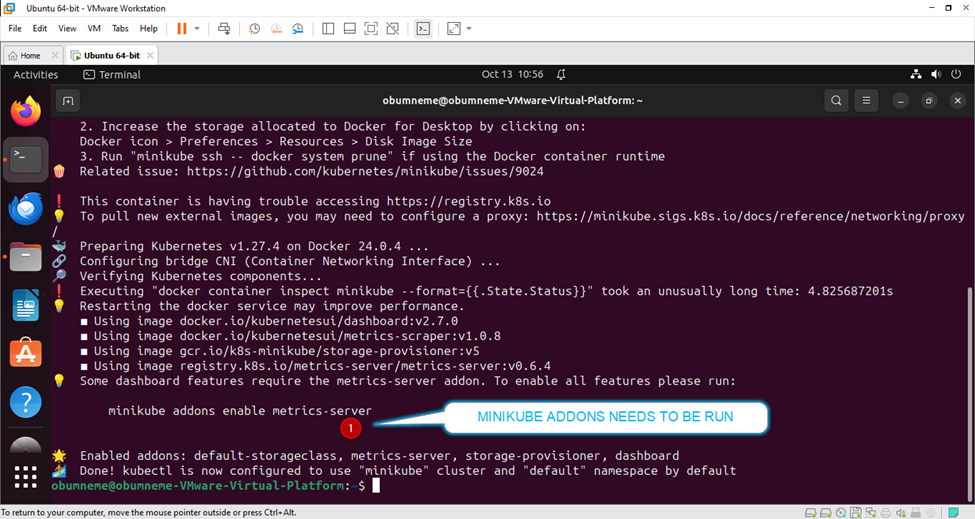
2). Run the command to fix the Minikube and rerun the minikube start command after; sudo usermod -aG docker $USER && newgrp docker
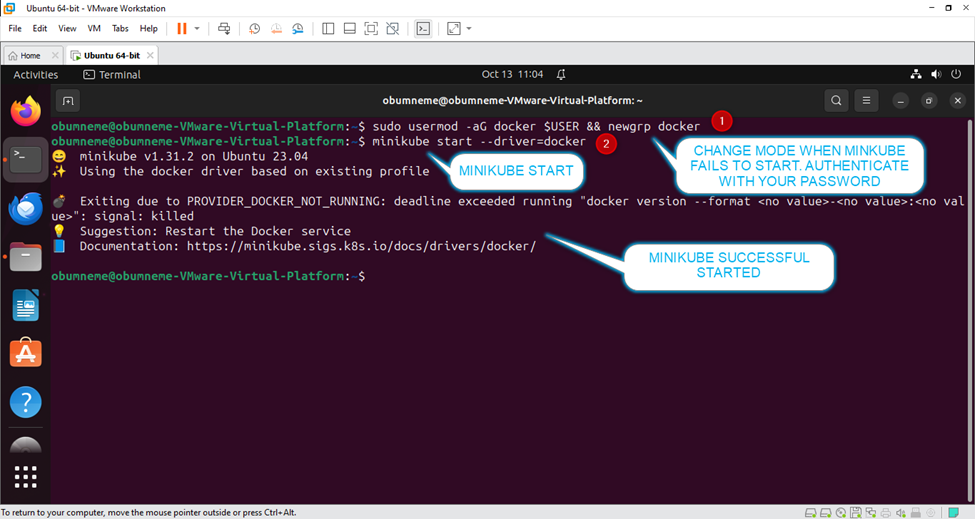
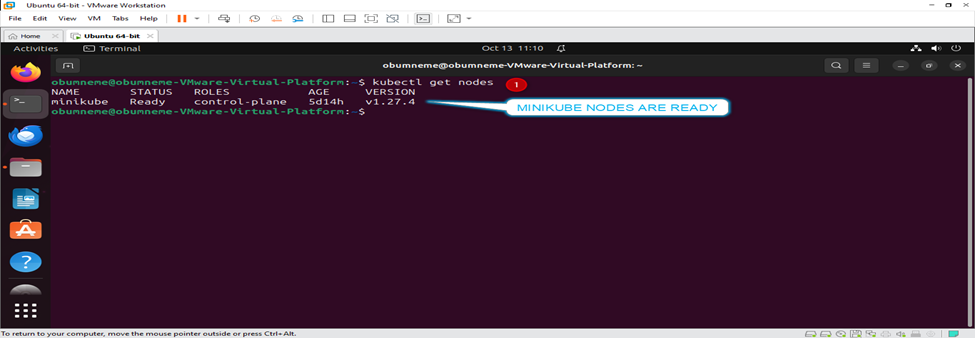
3). Run the command: kubectl get nodes
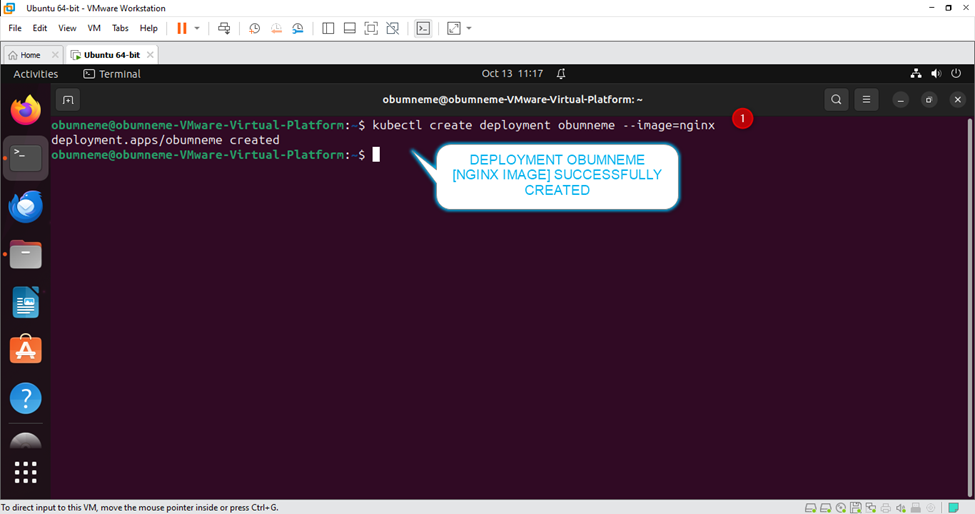
4). Run the command and specify the name of your deployment and image [ubuntu, nginx etc]: kubectl create deployment obumneme --image=nginx
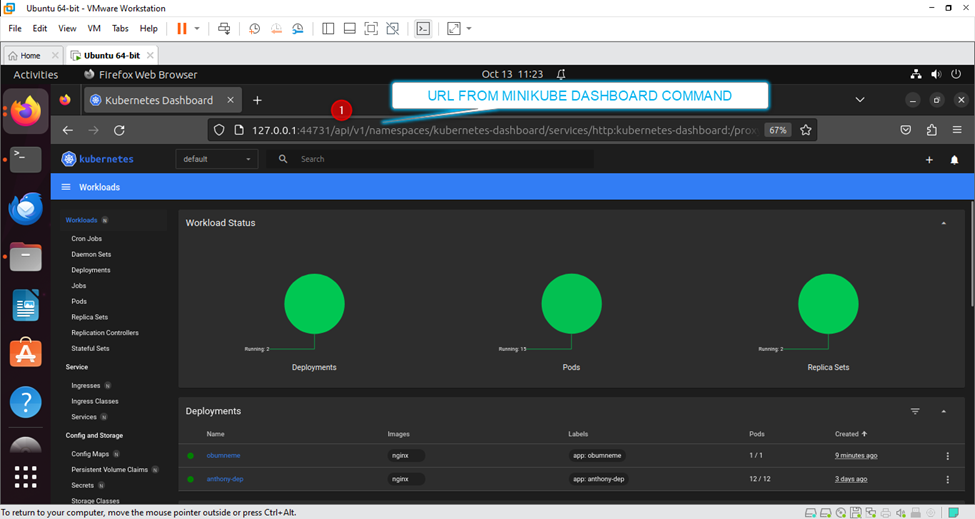
5). Confirm your deployment. Run the command: minikube dashboard
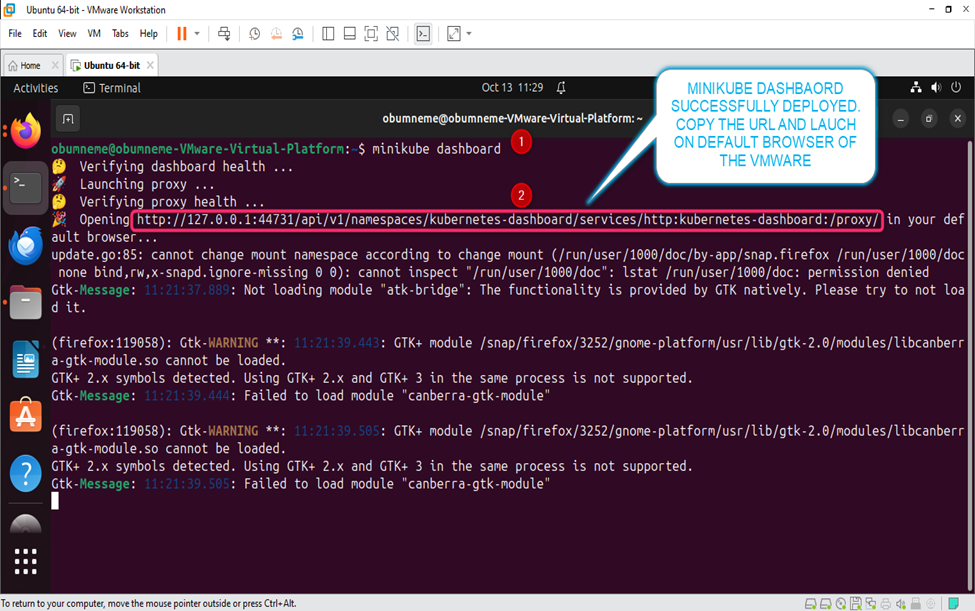
Your deployment will be launched on your default browser of the VMware. You can copy the URL and launch it on the VMware default browser.
A. Minikube Dashboard
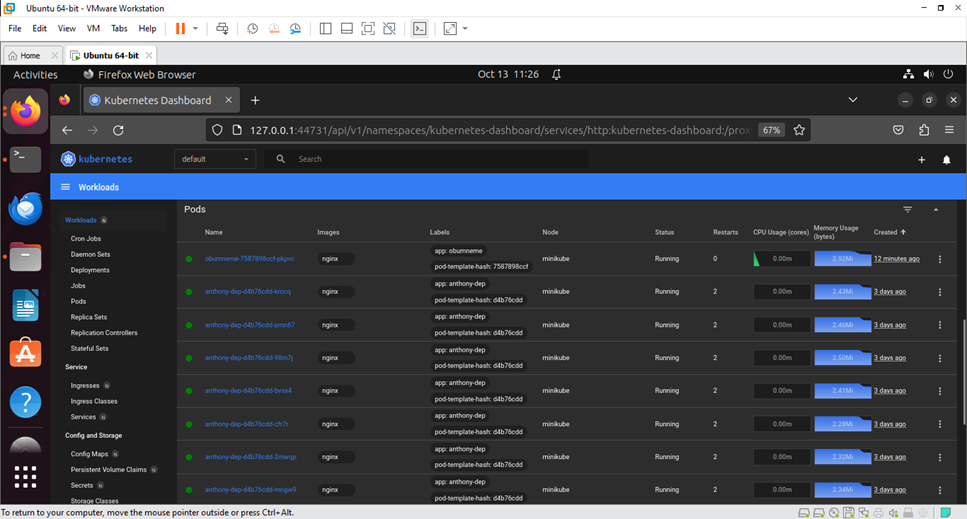
B. Minikube Dashboard continues.
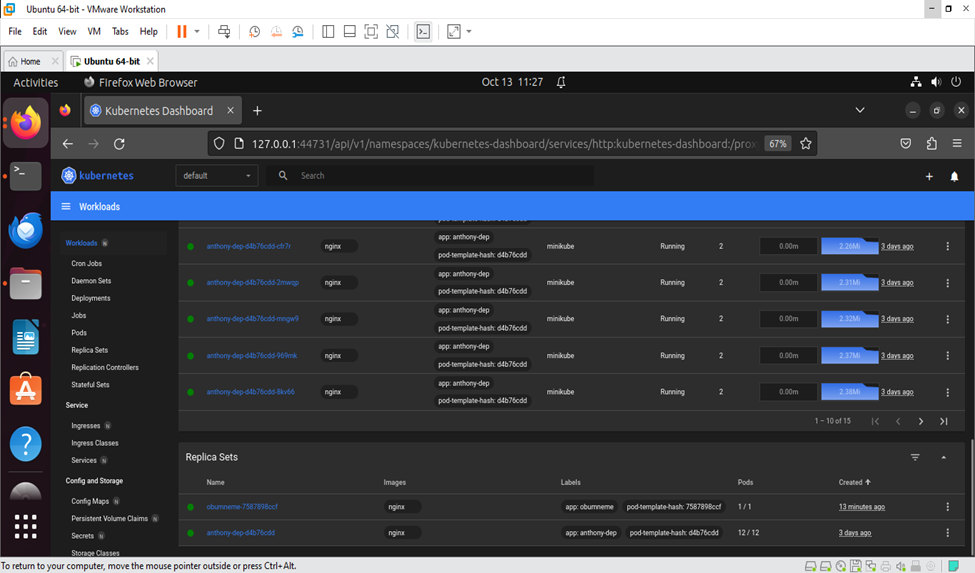
C. Minikube Dashboard continues
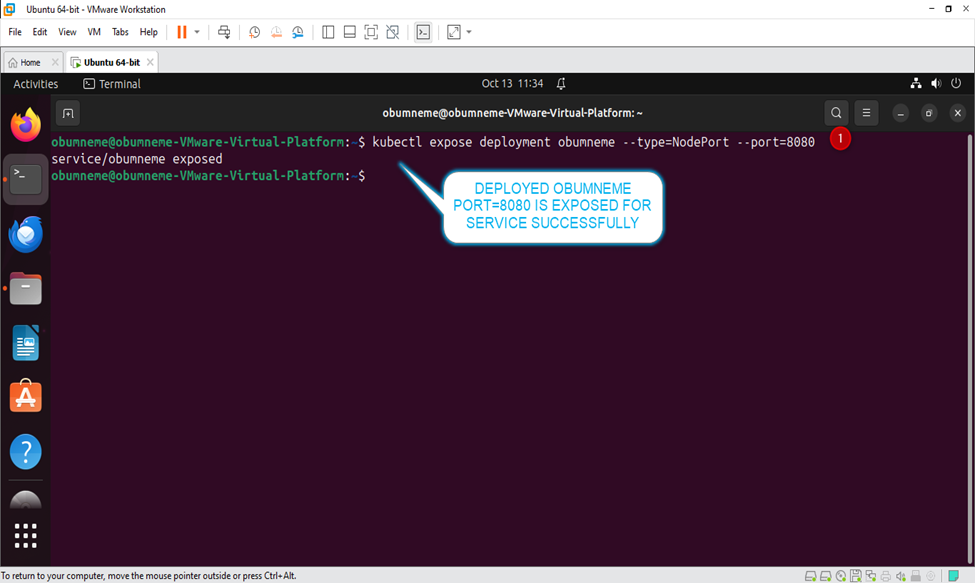
6). Run the command to enable port for service: Kubectl expose deployment obumneme --type=NodePort --port=8080
7). Run the command to show service status: kubectl get service
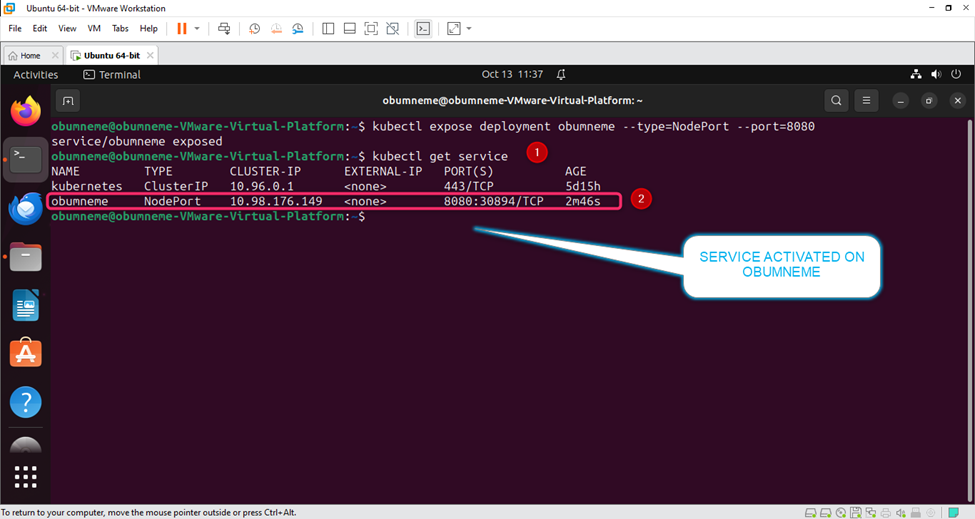
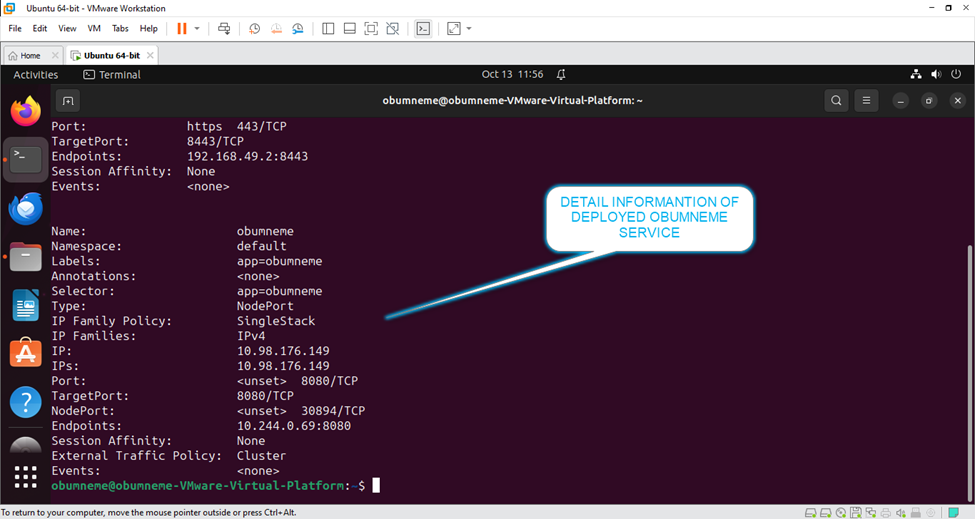
8). Run the command to describe the service: Kubectl describe service
A.
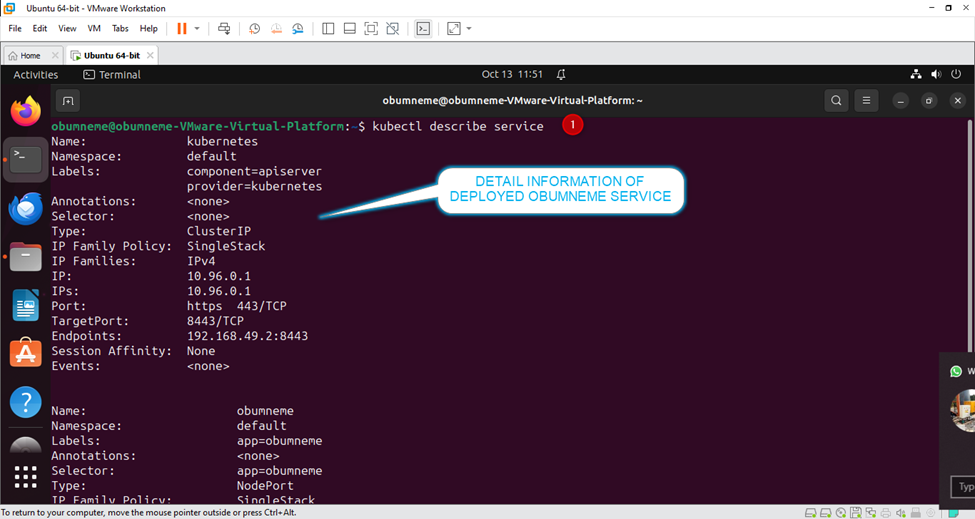
B.
9). Run the command to describe the deployment status: Kubectl describe deployment
A.
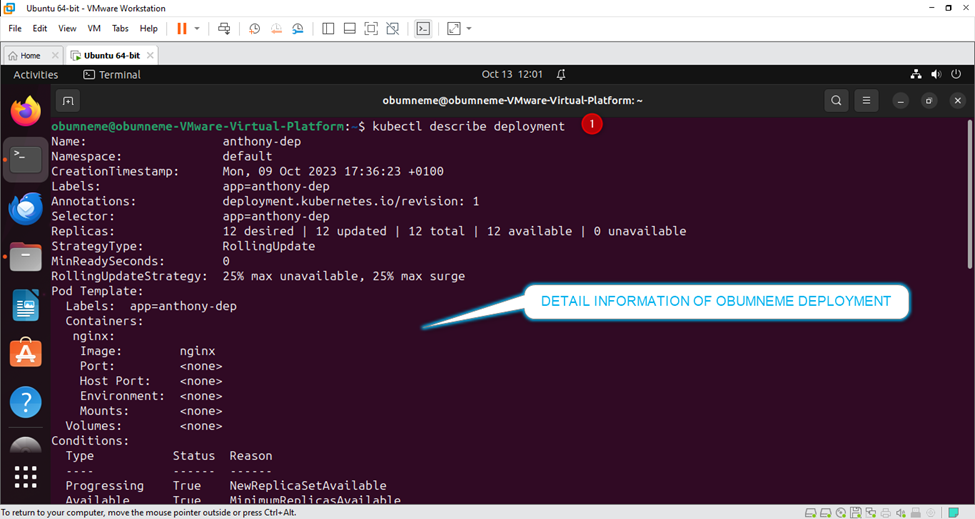
B,
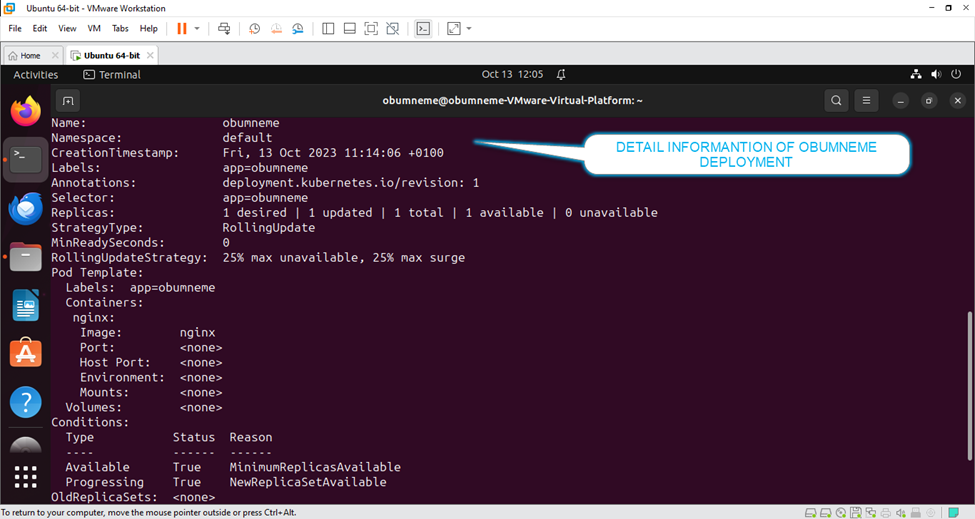
C.
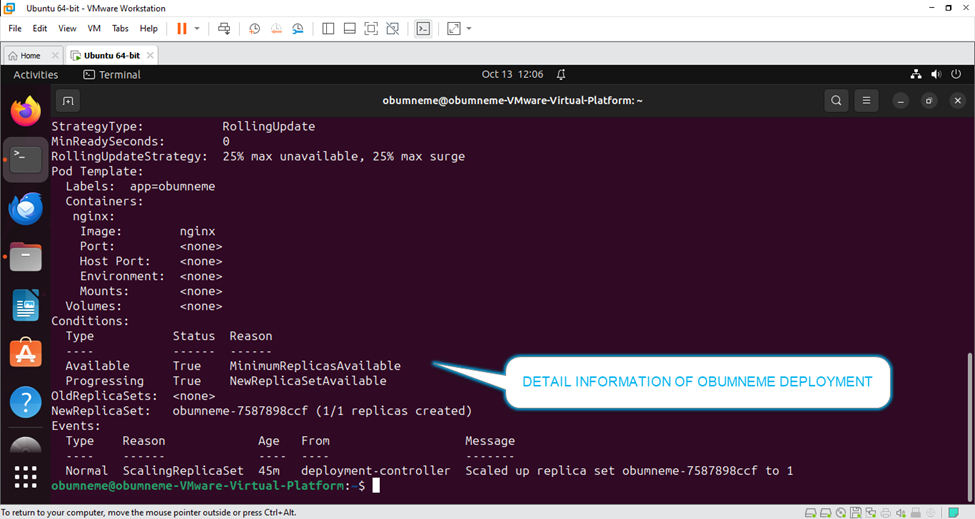
10). Run the delete command for the service and deployment respectively:
A. Kubectl delete service obumneme
B. Kubectl delete deployment obumneme
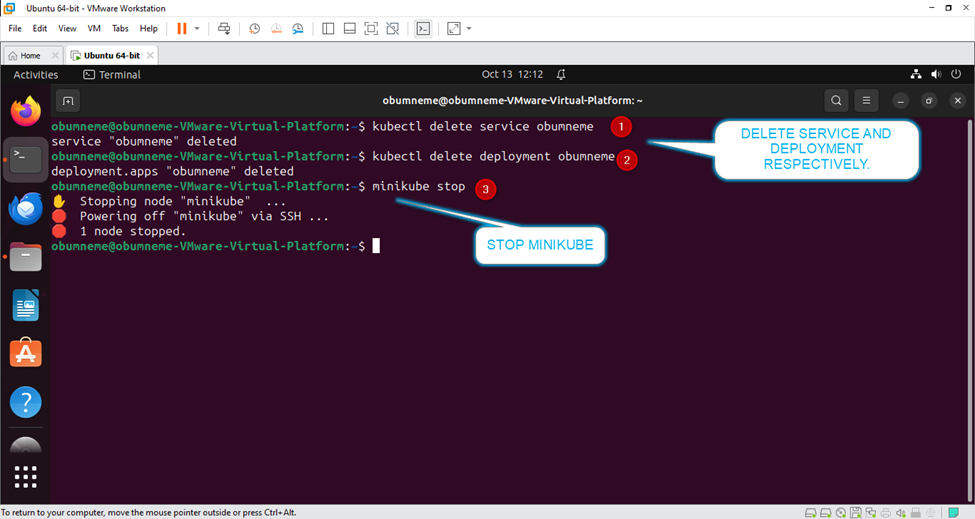
11). Run the Minikube stop command: minikube stop
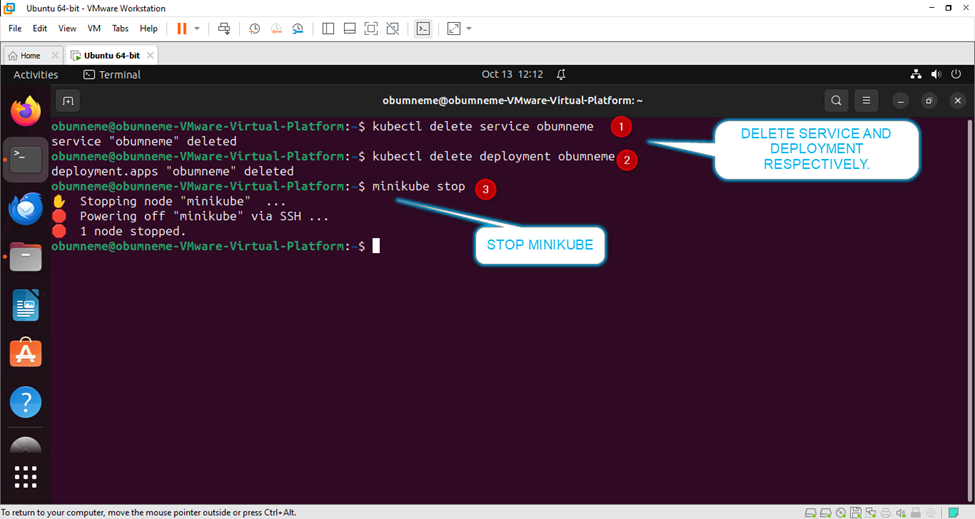
Furthermore, there are lots of Kubernetes commands to lay your hands on for more practice.
SUMMARY:
We were able to successfully explore the following Azure Cloud journey Kubernetes and Minikube command-line tools on Ubuntu 22.04 using the Docker driver. We created service and deployment to demonstrate the fundamentals of utilizing Kubernetes.
I am confident that you can navigate on your own through the above guide made easy in the areas below;
Update your package index [VMware].
Install VirtualBox driver.
Install Docker.
Download / install Minikube.
Install Kubectl on Ubuntu.
Start Minikube.
Kubernetes Cluster Deployment.
Thank You!...
Subscribe to my newsletter
Read articles from OBUMNEME ANTHONY IKECHEBELU directly inside your inbox. Subscribe to the newsletter, and don't miss out.
Written by
