Getting started with LÖVE and TypeScript
 Juriën Meerlo
Introduction
My last game engine was written in Haxe and only supported the web. I released my game Gravity Golfing on iOS by packaging it with Capacitor. Although this works, it is not ideal for performance and stability. Webviews can take up a lot of memory, causing the app to close. I decided to look for a framework that does the basics, lets me build on top of that, and supports native targets and the web. I came across LÖVE and have used it for the past few weeks.
I decided to use TypeScript compiled into Lua with the framework. This takes a bit of work to get going, so I decided to write a post about it. The source of the project is linked at the bottom of the post.
What is LÖVE?
LÖVE is an open-source framework to help you create 2D games. The framework is written in C++ and uses Lua as the scripting language. LÖVE gives you all the basics, like creating the window, loading files, input, audio, and rendering, and lets you build on top of it.
Why TypeScript
I have used a lot of languages over the years. The ones I like the most are typed. With Lua, you do not specify types. When you start to create larger projects, it can lead to hard-to-find bugs. There is a language server that supports type annotations. That does help, but it requires a lot of extra comments in the code.
After using the Lua language server for some time, I started looking for a better solution and came across TypeScriptToLua. This compiler lets you write TypeScript code and compile it to Lua. There are type definitions available for LÖVE. That makes it even easier to start.
There are some caveats. You can't use other TypeScript libraries that are not made to compile to Lua. This is because most of those are JavaScript libraries and don't work with Lua. Also, some TypeScript features are not supported, and some things work differently when compiling to Lua. See here.
Installing LÖVE
Before we can run our project, we have to install the LÖVE framework. Windows, Mac, and Linux are supported. It can be downloaded from https://love2d.org. To run unpackaged games with the engine, drag a .love file or a folder containing a main.lua file onto the executable.
You can also run LÖVE from the command line. The easiest way to do this is by adding the love executable to your path. There is a page on the love2d wiki explaining how to do that on different OSes here: https://love2d.org/wiki/PATH. Once added to the path, you can run love from the command line. You may have to restart your terminal window.
Creating a TypeScript to Lua project
To use the compiler, we will need to install Node.js. If you have done any web development, you probably already have it installed. I'm using PNpM as my package manager, but npm will also work.
I'm on a Mac, but the commands on Windows or Linux should be mostly the same.
First, we need to open a terminal or command prompt.
Then we make a new folder for our project using:
mkdir love2d-typescript
Then we go into the folder:
cd love2d-typescript
Then we initialize a pnpm project:
pnpm init
We have to install the packages needed to use TypeScriptToLua together with LÖVE. You can run the following to do that:
pnpm add -D typescript typescript-to-lua @typescript-to-lua/language-extensions love-typescript-definitions lua-types
You can open the project folder in your favorite editor. I'm using vscode.
We have to tell the compiler how to compile our TypeScript into Lua and where to output the Lua files. For that, we have to create a tsconfig.json file at the root of our project.
There are a lot of configuration options you can add to the config file, but these are the basic ones to get started:
{
  "$schema": "https://raw.githubusercontent.com/TypeScriptToLua/TypeScriptToLua/master/tsconfig-schema.json",
  "compilerOptions": {
    "target": "ESNext",
    "lib": ["ESNext"],
    "moduleResolution": "Node",
    "types": [
      "love-typescript-definitions",
      "@typescript-to-lua/language-extensions",
      "lua-types/jit"
    ],
    "strict": true,
    "outDir": "export"
  },
  "include": ["src"],
  "tstl": {
    "luaTarget": "JIT"
  }
}
Here we add the types we will use and set the output directory to "export" and the source directory to "src".
You can see all the configuration options here.
Writing some TypeScript
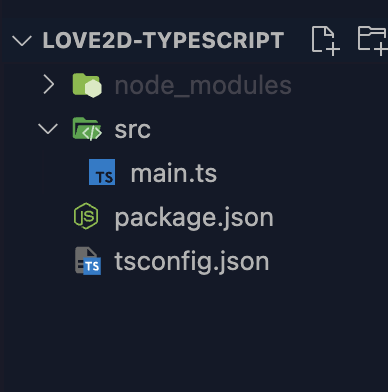
We are ready to write some code. We set our source folder to be src so let's create a new folder in the root directory called src. Inside this folder, create a new file called main.ts.
LÖVE uses a main.lua to start the game, our main.ts will get compiled into a main.lua that LÖVE can use.
Inside our main.ts file, add the following code:
love.draw = () => {
  love.graphics.print("Hello World from TypeScript", 10, 10);
};
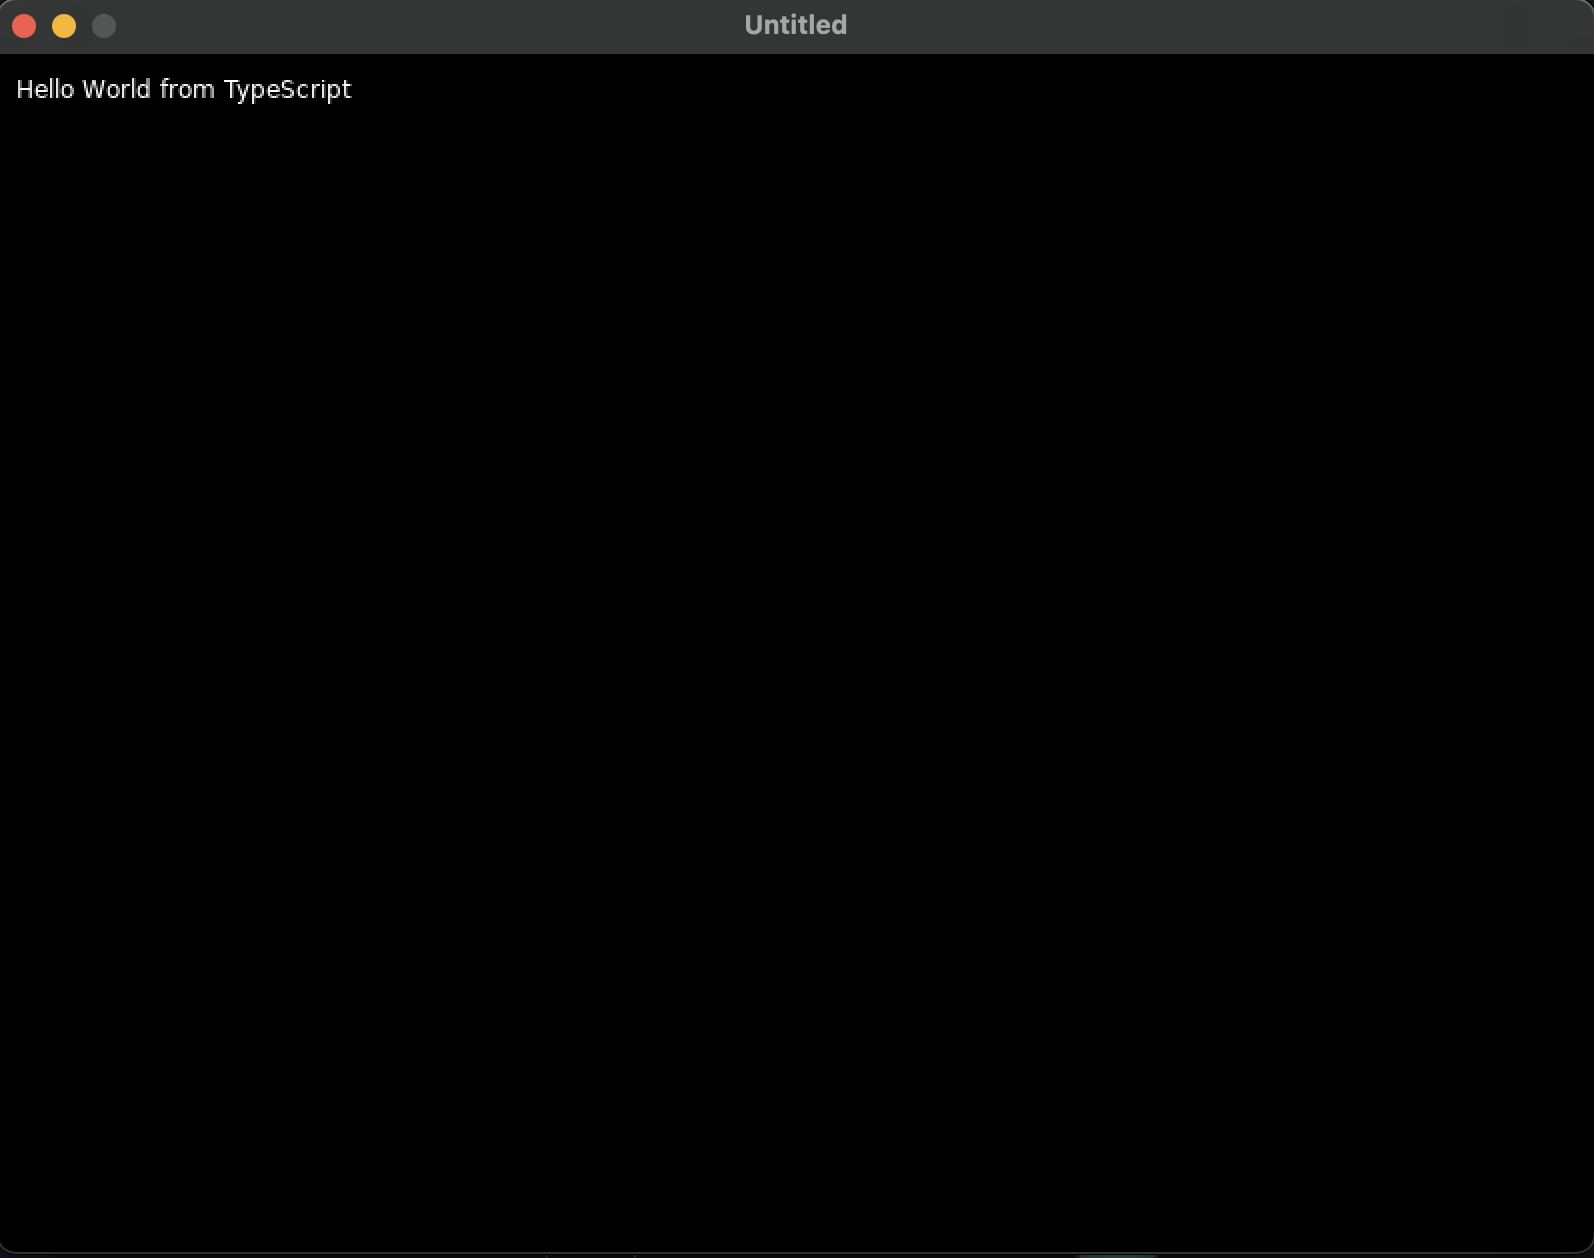
This code adds a function to love.draw that gets called every frame and prints "Hello World from TypeScript" onto the screen.
Compiling TypeScript to Lua
You should now have a project structure that looks something like this:

We are ready to compile our project. To start the compiler, run the following command in the terminal from the root directory of your project:
npx tstl
This will create a new folder called export with a main.lua file inside it.
If you open the Lua file, you can see that the compiler generated some nice Lua code for us that looks something like this:
--[[ Generated with https://github.com/TypeScriptToLua/TypeScriptToLua ]]
love.draw = function()
    love.graphics.print("Hello World from TypeScript", 10, 10)
end
To run the code with LÖVE, run the following command from the terminal in the root directory of your project:
love export
If everything goes well, the love window should open, and you should see the text on the screen.

Debugger support
If you use vscode, you can use the Local Lua Debugger extension and set breakpoints in your TypeScript files when running the debugger. This requires some setup.
Let's add a build script to our package.json file that we can call from a vscode task. Replace the "scripts" entry with the following:
"scripts": {
  "build": "tstl"
},
Next, add a .vscode folder at the root of the project. Create a tasks.json and a launch.json file inside the folder.
Inside the tasks.json add the following JSON:
{
  "version": "2.0.0",
  "tasks": [
    {
      "type": "npm",
      "script": "build",
      "group": "build",
      "problemMatcher": [],
      "label": "npm: build"
    }
  ]
}
This task runs the build script inside the package.json that we want to run before we start the debugger.
In the launch.json add the following JSON:
{
  "version": "0.2.0",
  "configurations": [
    {
      "type": "lua-local",
      "request": "launch",
      "name": "Debug Love",
      "program": {
        "command": "love"
      },
      "args": ["export"],
      "preLaunchTask": "npm: build",
      "scriptRoots": ["export"],
      "scriptFiles": ["export/**/*.lua"]
    }
  ]
}
The command we call is love and args is the folder we want to run in, which is our export folder.
The preLauchTask runs the build task before launching the debugger.
The debugger needs to know what the root folder is and where the Lua files are. That is what the scriptRoots and scriptFiles are for.
We have to update our tsconfig.json so it emits source maps and ignores the debugger path. We can do this by adding
"sourceMap": true
in the "compilerOptions" and
"sourceMapTraceback": true,
"noResolvePaths": ["lldebugger"]
in "tstl"
The config should look something like this:
{
  "$schema": "https://raw.githubusercontent.com/TypeScriptToLua/TypeScriptToLua/master/tsconfig-schema.json",
  "compilerOptions": {
    "target": "ESNext",
    "lib": ["ESNext"],
    "moduleResolution": "Node",
    "types": [
      "love-typescript-definitions",
      "@typescript-to-lua/language-extensions",
      "lua-types/jit"
    ],
    "strict": true,
    "outDir": "export",
    "sourceMap": true
  },
  "include": ["src"],
  "tstl": {
    "luaTarget": "JIT",
    "sourceMapTraceback": true,
    "noResolvePaths": ["lldebugger"]
  }
}
The last step is to start the debugger in our main.ts file.
Add the following code to the start of the file:
if (os.getenv("LOCAL_LUA_DEBUGGER_VSCODE") === "1") {
  require("lldebugger").start();
}
If you set a breakpoint in your TypeScript code and start "Debug Love" in vscode, it should stop on your breakpoint and let you inspect the variables.
Conclusion
These are the steps to set up LÖVE with TypeScript and to use a debugger in vscode. You can find the source of this project on my Github here.
The plan is to create a game engine in TypeScript on top of LÖVE and document the process on this blog.
If you have any questions or suggestions, let me know.
Subscribe to my newsletter
Read articles from Juriën Meerlo directly inside your inbox. Subscribe to the newsletter, and don't miss out.
Written by

Juriën Meerlo
Juriën Meerlo
I'm a senior software engineer using TypeScript, C#, and Python in web and application development. As a hobby, I make games using custom game engines. You can find my latest game Gravity Golfing on iOS. I'm Working on and posting about my new engine called Lilo2d.