Day 17: Docker Project for DevOps Engineers.
 priyanka varshney
Table of contents

Dockerfile:
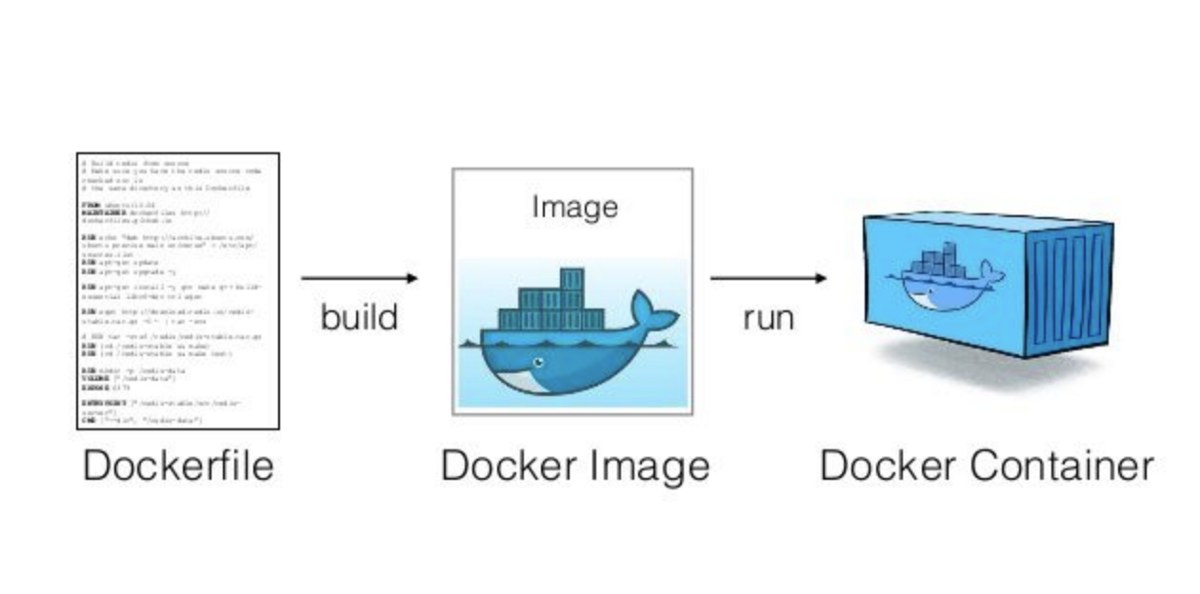
Docker is a tool that makes it easy to run applications in containers. Containers are like small packages that hold everything an application needs to run. To create these containers, developers use something called a Dockerfile.
A Dockerfile is like a set of instructions for making a container. It tells Docker what base image to use, what commands to run, and what files to include. For example, if you were making a container for a website, the Dockerfile might tell Docker to use an official web server image, copy the files for your website into the container, and start the web server when the container starts.
Task:
Step 1: Install Docker If you haven't already, install Docker on your system. You can download and install Docker Desktop for Windows or Docker for Mac, or follow the installation instructions for your Linux distribution.

Step 2: Set up Your Node.js Project Create a directory for your Node.js project if you haven't already. Your Node.js application should have a package.json file with your project dependencies and an entry point (e.g., app.js or index.js).

Step 3: Create a Dockerfile Create a Dockerfile in your project directory. Here's an example of a Dockerfile for a Node.js app:
#Use an official Node.js runtime as the base image

FROM node:14

#Set the working directory inside the container

WORKDIR /app

#Copy package.json and package-lock.json to the working directory

COPY package*.json ./

#Install app dependencies

RUN npm install

COPY . .

#Copy the rest of your application code to the working directory

#Expose a port for your Node.js app to listen on (replace 3000 with your app's port)

EXPOSE 3000

#Define the command to start your Node.js application

CMD [ "node", "app.js" ]

Step 4: Build the Docker Image In your project directory, open a terminal and run the following command to build a Docker image:
docker build . -t my-node-app
Replace my-node-app with a name you prefer for your Docker image.

Step 5: Run a Docker Container After the image is built, you can start a Docker container from the image with the following command:
docker run -dp 8000:8000 my-node-app:latest
This command maps port 8000 on your host to port 8000 inside the container. Adjust the port numbers as needed.

Step 6: Access Your Node.js App Your Node.js application is now running inside a Docker container. You can access it in your web browser by navigating to http://localhost:8000, assuming your Node.js app is listening on port 8000.

Push the image to a public or private repository (e.g. Docker Hub )
Install Docker: Make sure Docker is installed on your system.
Login: Use
docker loginto log in to your Docker Hub account.
Tag Your Image: Use the
docker tagto give your image a name that includes your Docker Hub username and repository
Push Your Image: Use
docker pushto upload your tagged image to Docker Hub.
Access Your Image: Your image is now available on Docker Hub for sharing or use in other setups.

Thank you for reading :-)
Priyanka varshney
Subscribe to my newsletter
Read articles from priyanka varshney directly inside your inbox. Subscribe to the newsletter, and don't miss out.
Written by
priyanka varshney
priyanka varshney
👋 Hello, and welcome to my DevOps journey! 🚀 I am Priyanka Varshney,🛠️ As an aspiring DevOps engineer, I'm all about bridging the gap between development and operations, making software delivery seamless and efficient. 💻🔧 On this Hashnode blog, I'll be sharing my learnings, experiences and adventures as I dive deep into the world of continuous integration, automation, and cloud technologies. ☁️⚙️ Let's connect, learn, and grow as a vibrant DevOps community. Follow my Hashnode blog, and let's embrace the DevOps adventure together! 🤝🔗