How to create a Netflix-like custom accordion
 Daniel Efe
There’s no denying that perfectly designed and functional websites have a higher tendency to attract web users and clients than poorly designed ones, and one of the features of a great website lies in the accordion menu it holds. Yes! Accordion menus are important and a must-have for every website as they tend to hold answers to likely questions that may arise after web users have savored all the contents of a website. The Netflix website carries quite an intriguing accordion menu and in this article, I will be giving a step-by-step guide on how tech newbies and professionals alike can create something similar using HTML, CSS and some simplified JavaScript codes.
Keep reading!
Prerequisite
Basic knowledge of HTML.
Knowledge of CSS.
Knowledge of JavaScript.
Creating the Netflix-like custom accordion
The first step required to build our custom accordion menu is to create a folder. This folder will be called Netflix Accordion (you can pick a name of your choice). Inside our folder, we will create three files, one for our HTML, another for our CSS, and the last for our JavaScript. These files would be named accordion.html, accordion.css, and accordion.js (you can pick any name of your choice), and all would be linked into our HTML markup as shown below.
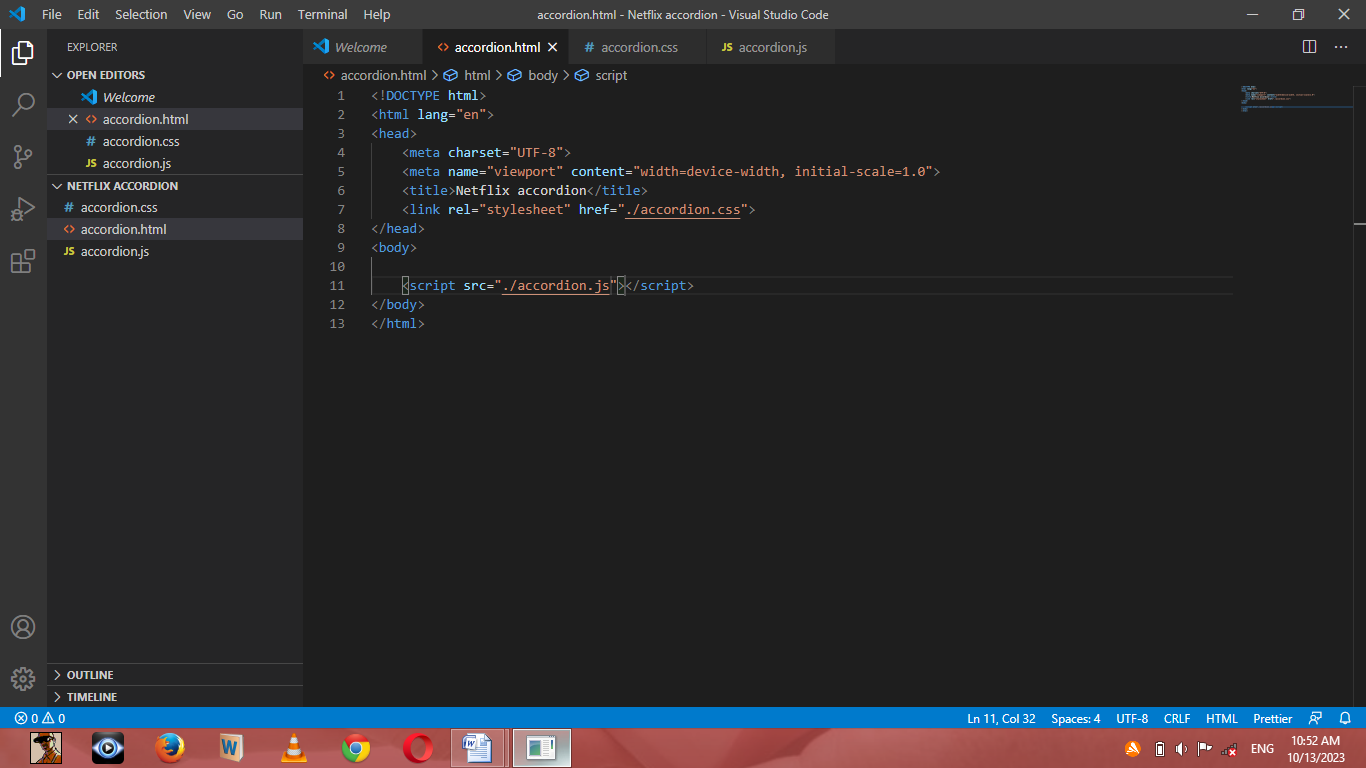
Done with the above, then you are good to move to the next step.
HTML markup for our custom accordion
For our HTML markup, we will create our first div tag. Contained in this div is our h1 tag which would hold the title of our accordion which in this case is “frequently asked questions”. Going forward, we will create another div tag. This would contain our accordion menu with each menu having three div tags – one for the entire menu, the other for the questions, and the last for the answers.
<body>
<div class="heading">
<h1>Frequently Asked Questions</h1>
</div>
<div id="accordion">
<div class="accordion-menu">
<div class="question">What is Netflix?
<p>+</p>
</div>
<div class="answer">
<p>Netflix is a streaming service that offers a wide variety of award-winning TV shows, movies, anime, documentaries, and more on thousands of internet-connected devices.</p>
<p>You can watch as much as you want, whenever you want without a single commercial – all for one low monthly price. There's always something new to discover and new TV shows and movies are added every week!</p>
</div>
</div>
</div>
<div id="accordion">
<div class="accordion-menu">
<div class="question">How much does Netflix cost?
<p>+</p>
</div>
<div class="answer">
<p>Watch Netflix on your smartphone, tablet, Smart TV, laptop, or streaming device, all for one fixed monthly fee. Plans range from ₦1,200 to ₦4,400 a month. No extra costs, no contracts.</p>
</div>
</div>
</div>
<div id="accordion">
<div class="accordion-menu">
<div class="question">Where can i watch?
<p>+</p>
</div>
<div class="answer">
<p>Watch anywhere, anytime. Sign in with your Netflix account to watch instantly on the web at netflix.com from your personal computer or on any internet-connected device that offers the Netflix app, including smart TVs, smartphones, tablets, streaming media players and game consoles.</p>
<p>You can also download your favorite shows with the iOS, Android, or Windows 10 app. Use downloads to watch while you're on the go and without an internet connection. Take Netflix with you anywhere.</p>
</div>
</div>
</div>
<div id="accordion">
<div class="accordion-menu">
<div class="question">How do i cancel?
<p>+</p>
</div>
<div class="answer">
<p>Netflix is flexible. There are no pesky contracts and no commitments. You can easily cancel your account online in two clicks. There are no cancellation fees – start or stop your account anytime.</p>
</div>
</div>
</div>
<div id="accordion">
<div class="accordion-menu">
<div class="question">What can i watch on Netflix?
<p>+</p>
</div>
<div class="answer">
<p>Netflix has an extensive library of feature films, documentaries, TV shows, anime, award-winning Netflix originals, and more. Watch as much as you want, anytime you want.</p>
</div>
</div>
</div>
<div id="accordion">
<div class="accordion-menu">
<div class="question">Is Netflix good for kids?
<p>+</p>
</div>
<div class="answer">
<p>The Netflix Kids experience is included in your membership to give parents control while kids enjoy family-friendly TV shows and movies in their own space.</p>
<p>Kids profiles come with PIN-protected parental controls that let you restrict the maturity rating of content kids can watch and block specific titles you don’t want kids to see.</p>
</div>
</div>
</div>
<script src="./accordion.js"></script>
</body>
The markup for our custom accordion
Output:
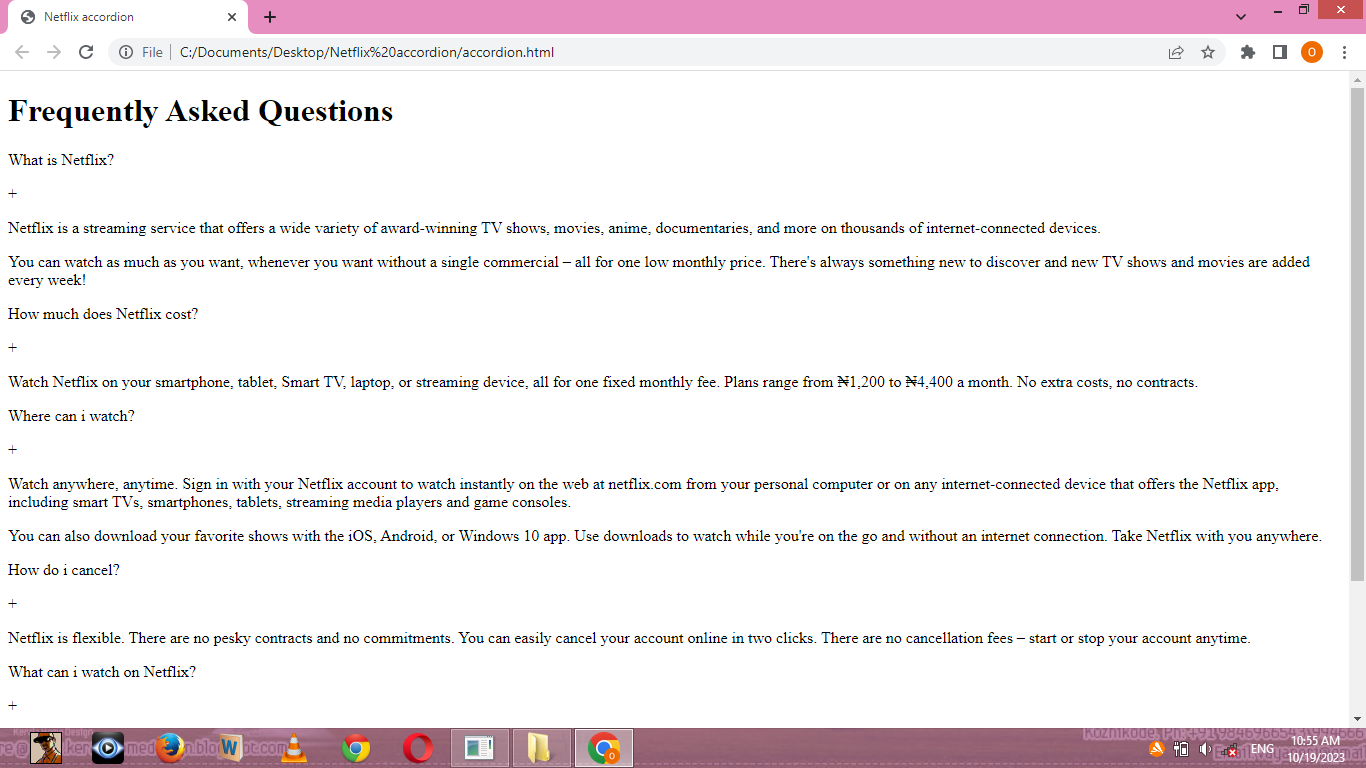
How our custom accordion looks without CSS
With the above HTML markup, we have succeeded in creating the required content for our custom accordion. Our next step will be to make it look beautiful and presentable. This is where our CSS markup comes in.
CSS markup
The first step in styling our custom accordion is setting a style for the entire webpage. We do this using the the *{} syntax.
*{
    margin: 0;
    border: 0;
    box-sizing: border-box;
}
As you can see, our margin and borders have been set to zero and our box-sizing to border-box. It is important to set our box-sizing to border-box to prevent our elements from appearing bigger than expected when we set their individual paddings.
Next, we move to style the body of our custom accordion
/* sets the background-color, the font-color and the font-family of the entire accordion*/
body{
    background: rgb(0, 0, 0);
    color: rgb(255, 255, 255);
    font-family: -apple-system, BlinkMacSystemFont, 'Segoe UI', Roboto, Oxygen, Ubuntu, Cantarell, 'Open Sans', 'Helvetica Neue', sans-serif;
}

/* styles the accordion title which holds the class-name="heading"*/
.heading{
    text-align: center;
    margin-top: 35px;
    margin-bottom: 20px;
    font-size: 23px;
}

/* sets the general style for the accordion menu*/
#accordion{
    width: 950px;
    height: auto;
    margin: auto;
    font-size: 23px;
    font-weight: 500;
}
We have so far made little progress evident in our image below:
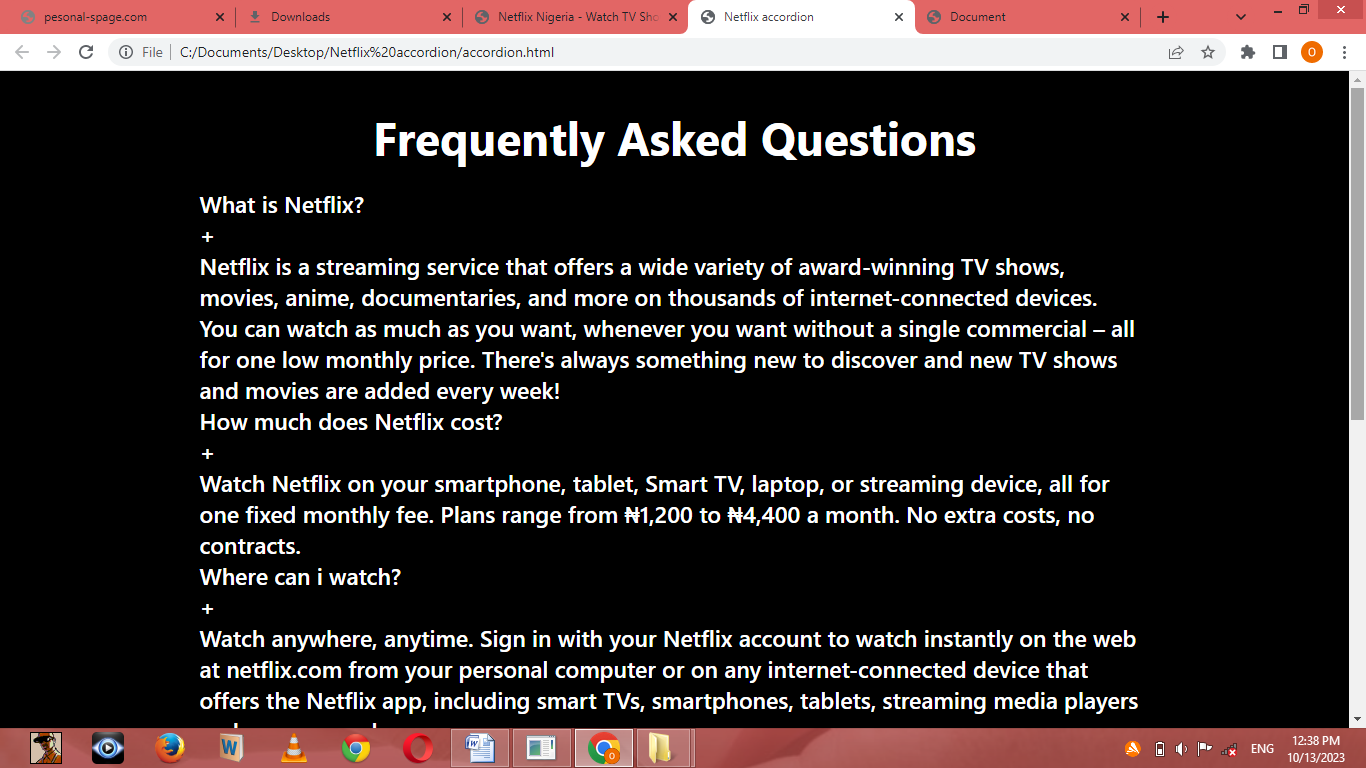
It is time to start working on the inside of our accordion menu. We start by creating a margin between each accordion menu using the margin-bottom property. We go further, by styling the div tags with the question class and answer class changing their background color, and margin, and giving them some padding.
In our div tag that contains the question class, we set the display to flex. This places the plus sign next to our question and creates some space between both elements. Below is our code:
/* creates a margin between each accordion menu*/
.accordion-menu{
    margin-bottom: 10px;
}

/* sets the display of the div tag with the class = "question" to flex,
changes it's background-color from the general page color to a ligher shade of black,
creates a margin between each question class and answer class*/
.question{
    display: flex;
    justify-content: space-between;
    align-items: center;
    margin-bottom: 3px;
    padding: 5px 30px;
    background: rgb(40, 40, 40);
    cursor: pointer;
}

/*sets the style for the plus sign*/
.question p{
    font-size: 77px;
    margin-top: -13px;
    padding-top: 0px;
    font-weight: 100;
}
Output:
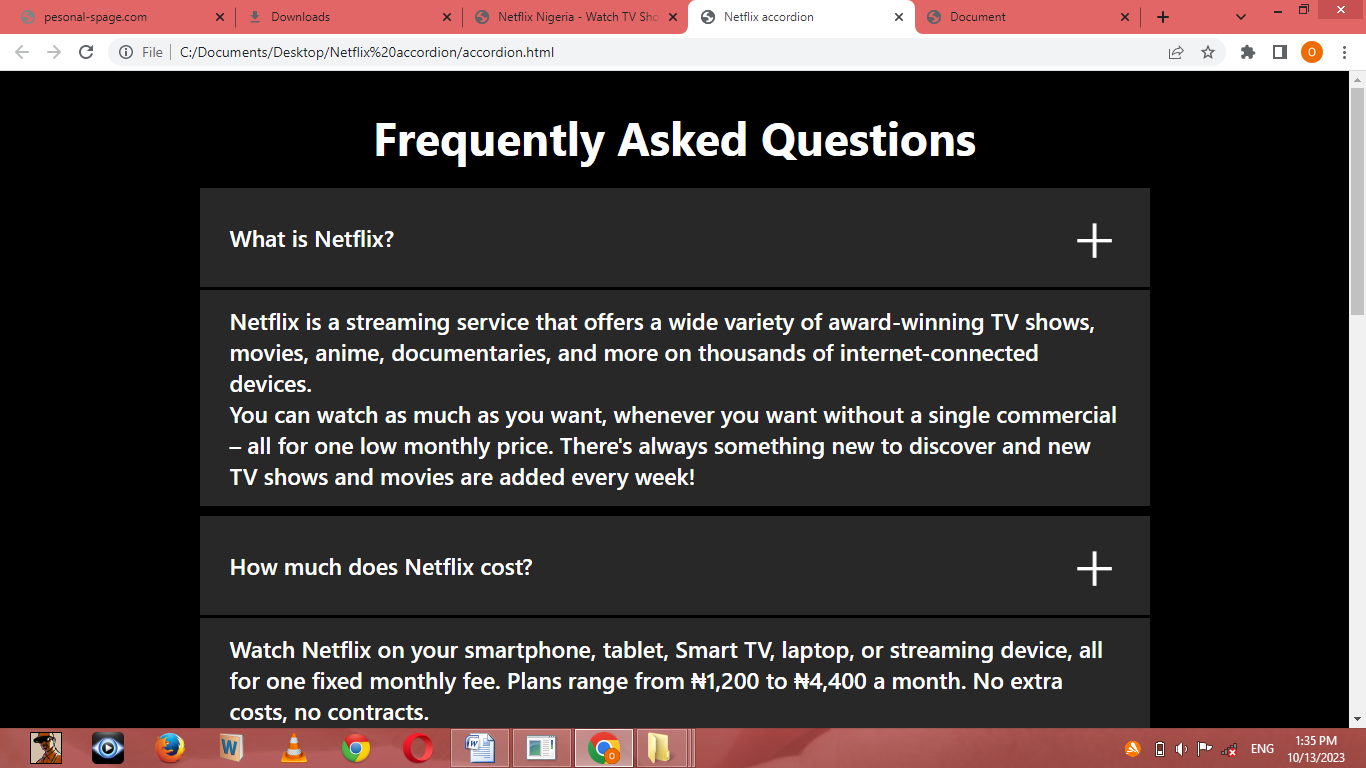
No doubt we've come a long way. However, it is time for us to take a step deeper. Going to our Netflix website, you will notice that the answers to the questions are not on display except when toggled upon. We do this by setting the max-height of our div with the answer class to zero and overflow to hidden.
/*sets the style for the div tag with the answer class and
changes its background color to a darker shade of black*/
.answer{
    background: rgb(40, 40, 40);
    max-height: 0;
    overflow: hidden;
    transition: max-height 0.5s;
}
Output:
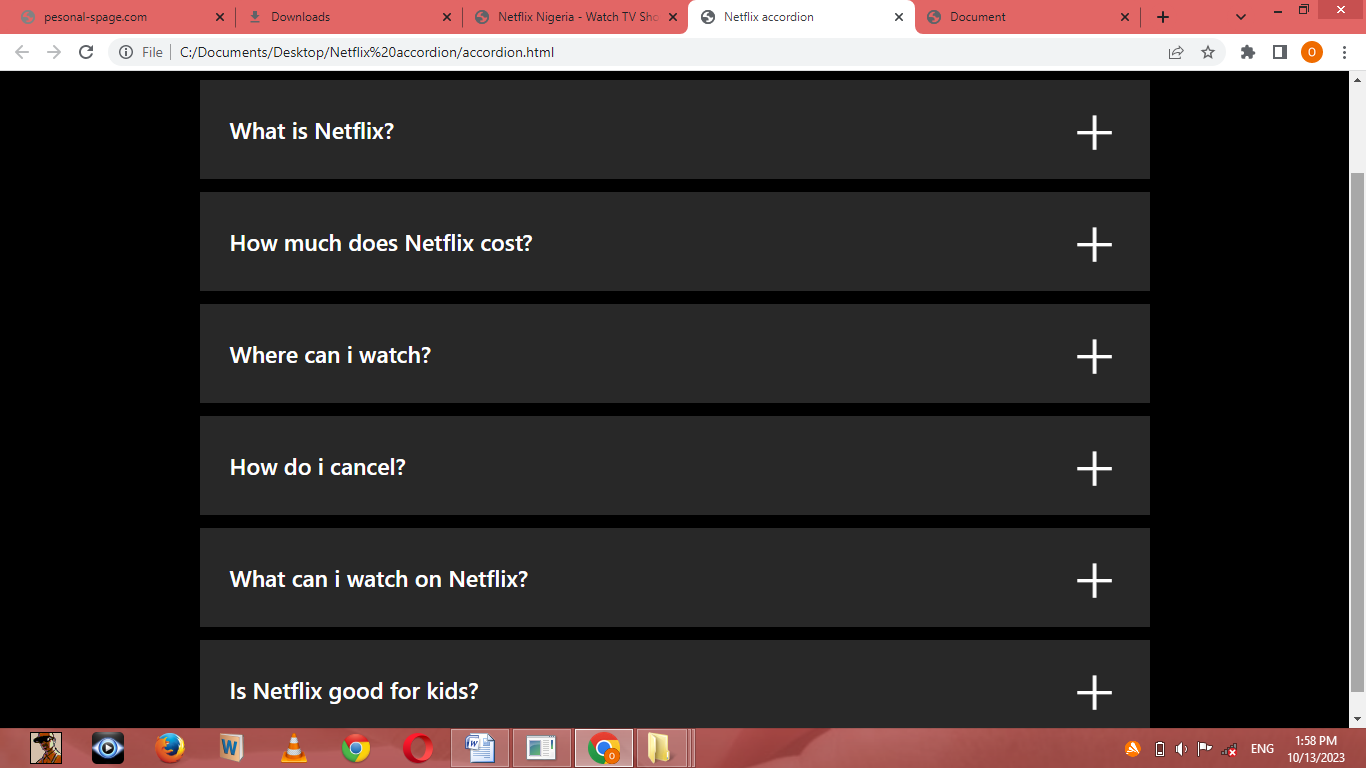
Answers to the questions of our custom accordion have been hidden
However, this only conceals the content of our answer class and doesn’t reveal it once clicked. This is where our JavaScript code comes in.
The magic lines of JavaScript
To start writing your JavaScript codes, navigate to your accordion.js file, and take a deep breath. Now you are good to go.
let accordions = document.querySelectorAll(".accordion-menu");
accordions.forEach(
    (item, index)=>{
        item.addEventListener("click", ()=>{
            item.classList.toggle("active");
            output(index);
        })
    }
)
If you are new to or unfamiliar with JavaScript, there’s no need for you to panic. Here’s what the above code implies:
let accordions = document.querySelectorAll(“.accordion-menu”): We are requesting that JavaScript gain access to our DOM and search for all elements with a class name of accordion-menu and on finding them, it should store them in a variable named accordions.
accordions.forEach((item, index)=>{item.addEventListener(“click”, ()=>{} }): Now that all our elements with a class name of accordion-menu have been stored in the accordions variable. We ask that javascript access each of them, and for each, a function with two parameters, item, and index be added. Within this function that we earlier imbedded in each of our accordions variables, we ask that javascript listens to a click event and once there's a click, it should run a function that holds our code.
item.classList.toggle(“active”): Now, we are taking our item parameter for each accordions variable and instructing JavaScript to check if our element has an active class within it. If it doesn’t, JavaScript should add it. However, if it already does, then JavaScript should remove it.
Output:
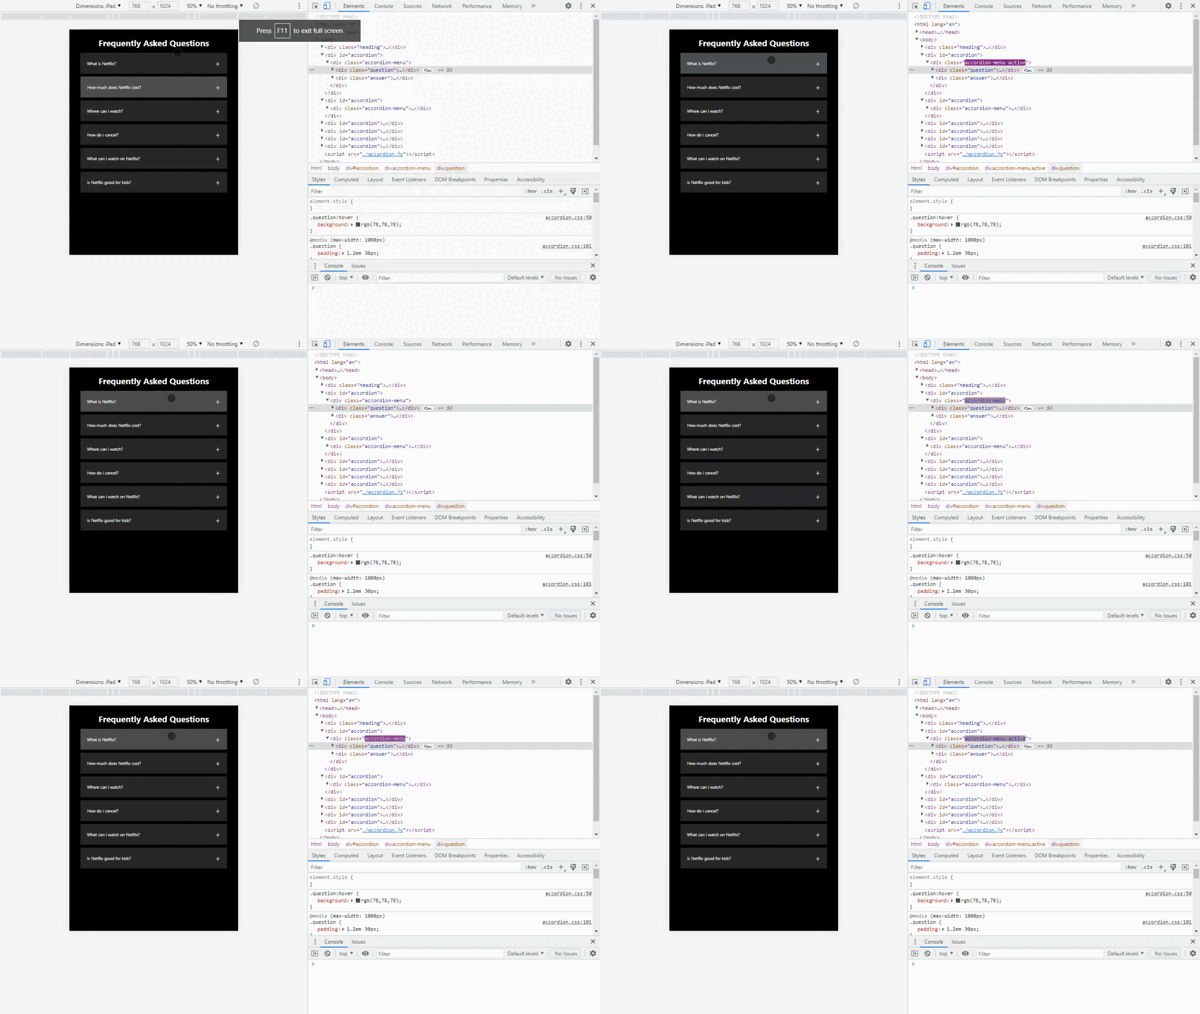
We have succeeded in adding our active class to our div tag with the class name accordion-menu every time we toggle on it. However, our answers still do not become visible. What is required of us is to swipe to our accordion.css file and specify the properties of our active class.
/*within our active class, we add a max-height property and set it to 400px.
this will make our answers visible anytime our div tag with the accordion-menu class is toggled on*/
.accordion-menu.active .answer{
    max-height: 600px;
}
To allow a smooth display of our answers, we will add the transition property to 0.5 seconds.
.answer{
    transition: max-height 0.5s;
}
output:
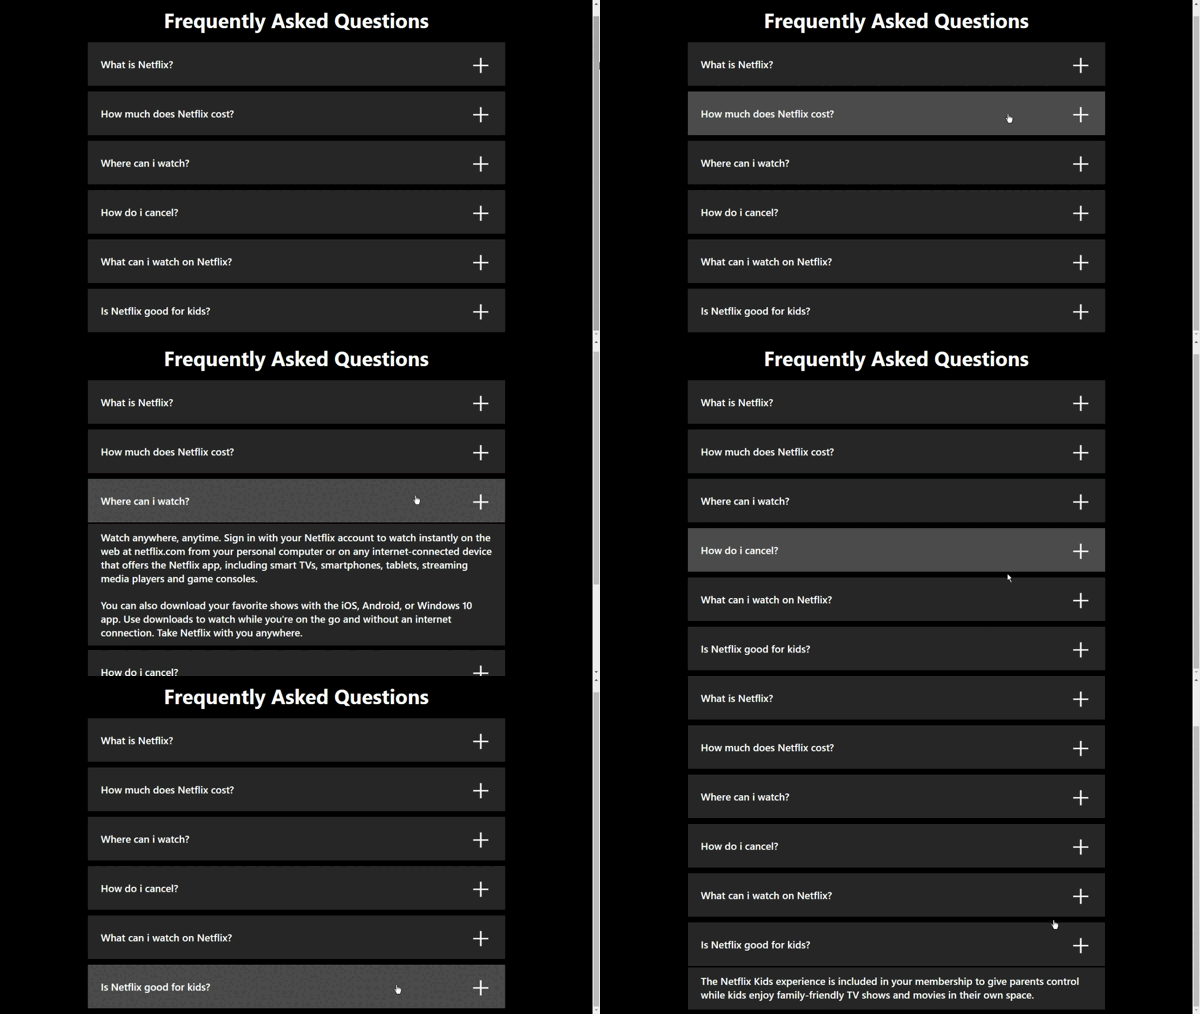
We also want our plus sign to rotate when we click on our question, so we head to our accordion.css file and add the necessary codes.
/*sets the rotation of our plus sign to 45degrees anytime the active class gets added to our div tag with the accorduon-menu class*/
.accordion-menu.active .question p{
    transform: rotate(45deg);
}
To allow a smooth rotation, we add a transition property and set it to 0.2s.
.question p{
    transition: 0.2s ease-in-out;
}
Output:
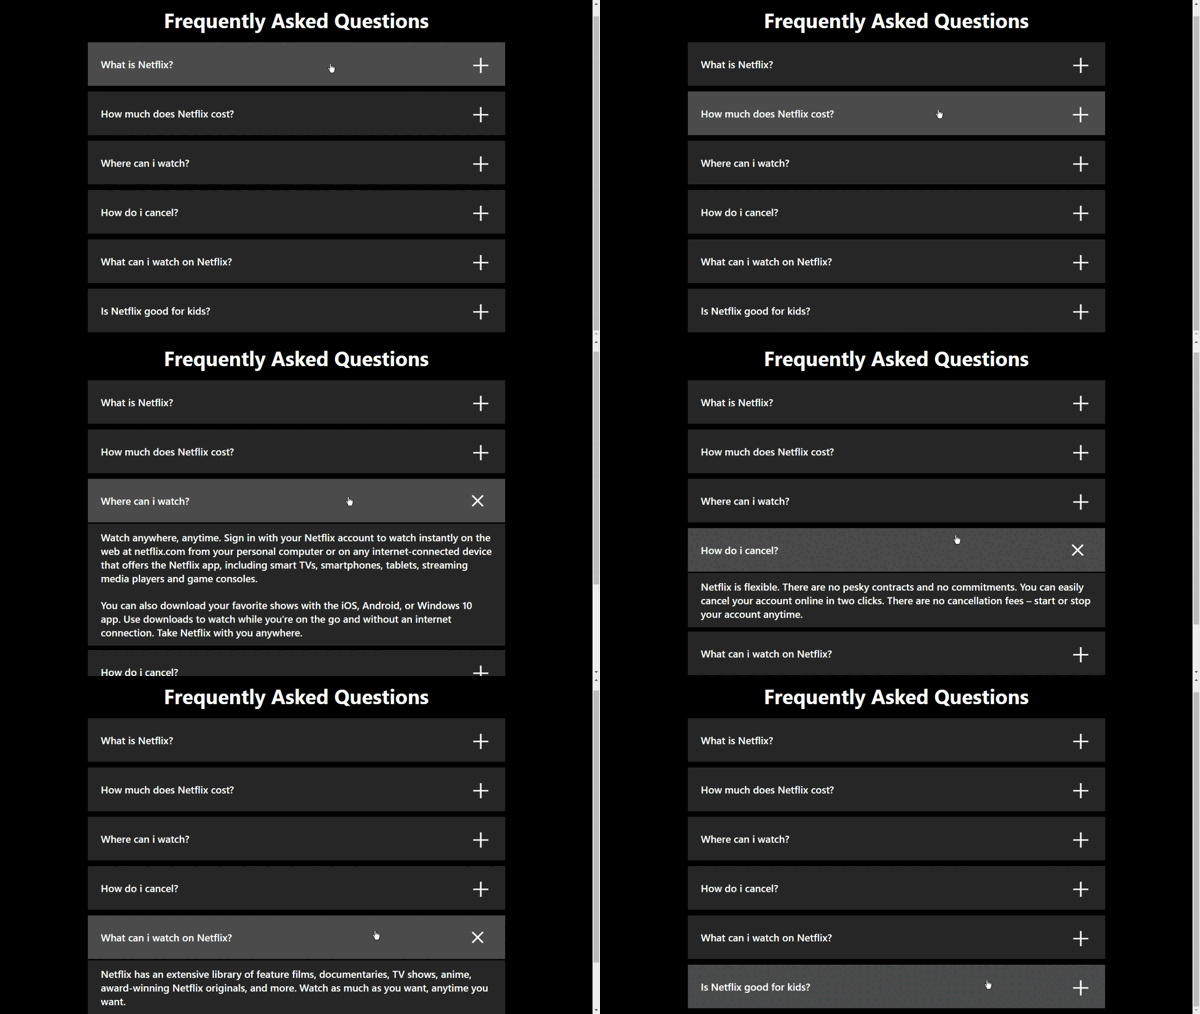
Down to the fun part
For most developers, that is all that is required to make an accordion menu. However, for the developers who developed the Netflix website. This seems to be just the beginning. Wondering why I developed so much interest in the Netflix accordion menu? Well, the answer is not farfetched. On careful observation, you would realize that toggling on one question opens the answer to that question, and while that answer is still on display, toggling on another question would collapse the answer to the previous question and bring up the answers to the freshly toggled question. Below is a simple illustration.
Illustration:
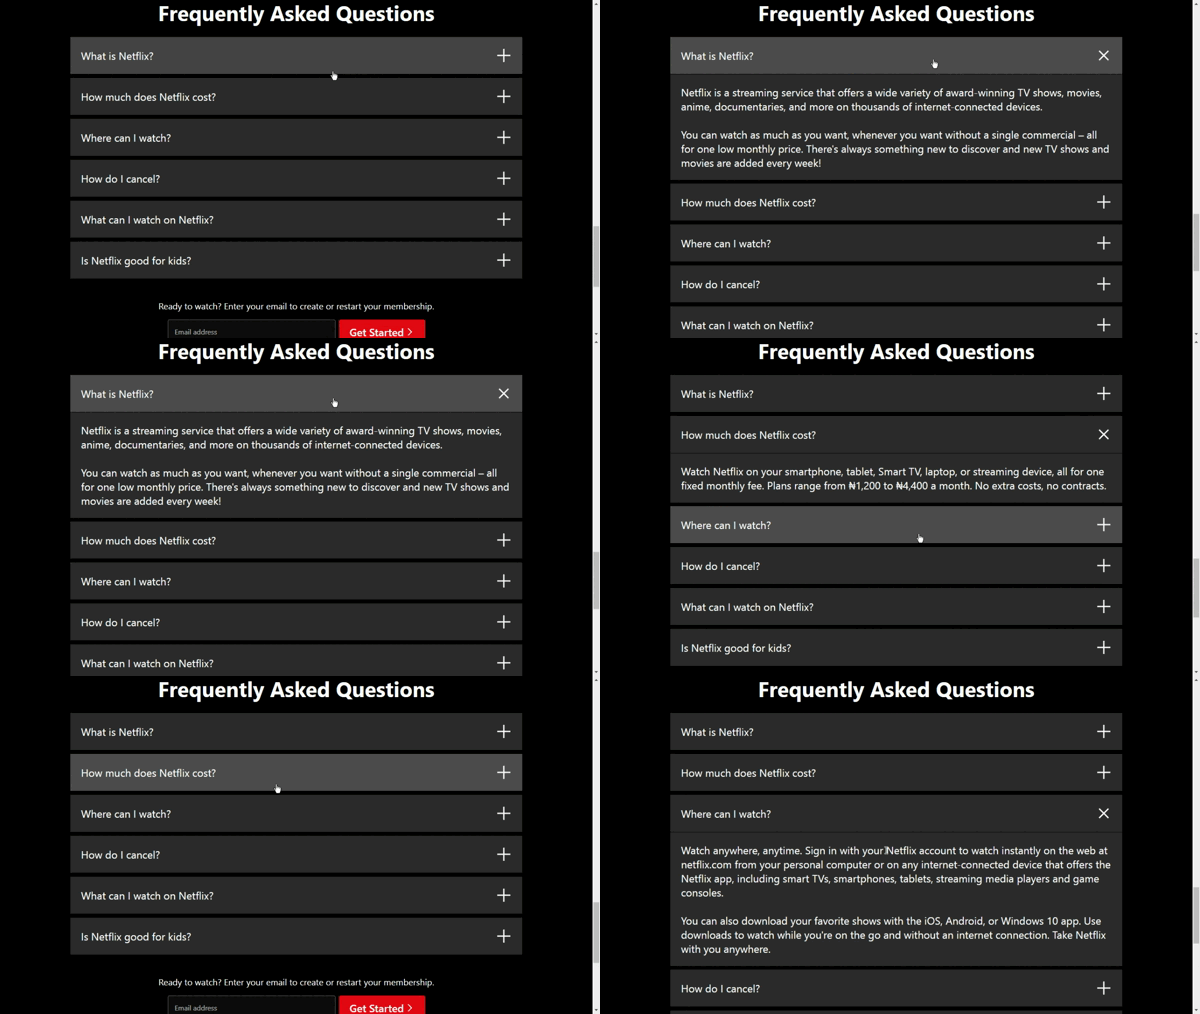
We will be adding this feature to our just-created accordion menu with these simplified JavaScript codes.
function output(index2){
    accordions.forEach((item1, index1)=>{
        if(index2 != index1){
            item1.classList.remove("active")
        };

    })
}
Time to get to what our above code implies:
function output(index2){}: We simply created a function with the name “output” and a parameter “index2”.
accordions.forEach((item1, index1)=>{}: Remember our accordions variable? Good! Now, we are asking JavaScript to access each of those variables and run a function that holds our code.
(item1, index1)=>{if(index2 !=index1){item1.classList.remove(“active”)}: Within the function that holds our code, we are asking JavaScript to check for a condition. That condition is this. If our function with the index2 parameter is not equal to our function with the index1 parameter, then javascript should access any div tag with the accordion-menu class that has the active class already added to it and remove the active class.
To get our code running, we have to invoke our output function and we invoke it within our earlier code.
let accordions = document.querySelectorAll(".accordion-menu");
accordions.forEach(
    (item, index)=>{
        item.addEventListener("click", ()=>{
            item.classList.toggle("active");
            output(index);
        })
    }
)
Our entire JavaScript code should look like this:
let accordions = document.querySelectorAll(".accordion-menu");
accordions.forEach(
    (item, index)=>{
        item.addEventListener("click", ()=>{
            item.classList.toggle("active");
            output(index);
        })
    }
)
function output(index2){
    accordions.forEach((item1, index1)=>{
        if(index2 != index1){
            item1.classList.remove("active")
        };

    })
}
Final result:
Conclusion
we have come to the end of this article and I believe at this point, you can not only build a Netflix custom-like accordion but any accordion ranging from the simplest to the most complex.
Thanks for reading!
Subscribe to my newsletter
Read articles from Daniel Efe directly inside your inbox. Subscribe to the newsletter, and don't miss out.
Written by

Daniel Efe
Daniel Efe
Hello, I'm Daniel. A front-end developer and a professional technical writer. I enjoy documenting my projects and learning new things.