Implement Two-Factor Authentication in a Flask Blog With Vonage Verify V2
 Nicholas Ikiroma
The internet has profoundly transformed our society, ushering in an era of remote work, social media connectivity, online learning, gaming, and many other essential activities. Yet, within this digital age, threats abound. Cybercriminals exploit the online environment, causing substantial harm to unsuspecting individuals and their assets.
According to a recent report by Astra Security, a staggering 2,328 user accounts are breached daily, setting the stage for an estimated 33 billion cyberattacks by the end of 2023.
Fortunately, security experts have devised numerous strategies to shield users from these threats. One such protective measure is the Two-factor Authentication (2FA) system.
In this guide, we will explore the implementation of robust data security using the Vonage Verify API V2. We'll implement a 2FA system using Vonage Verify API to protect user data and some sensitive content.
With the latest version of the Verify API, you can send verification codes to your user via SMS, WhatsApp, Voice, and Email. You can also verify a user by WhatsApp Interactive Message or by Silent Authentication on their mobile device.
Before we dive into coding here are a few things you should have in place before we begin.
Prerequisites
Basics understanding of Python and the Flask web framework.
Vonage account with API key and Secret key.
Python3 installed on your local machine.
Your favorite text editor (VS code, Vim, Emac, etc.).
What is Two-Factor Authentication, and How Does it Work?
Two-factor authentication (2FA) is a security measure that adds an extra layer of protection to online accounts by requiring users to provide two forms of authentication to verify their identity.
The first factor is typically something you know, such as a password or PIN. The second factor is something you have, such as a physical device like a smartphone, token, or security key.
When you log in to an account with 2FA enabled, after entering your password, you will be prompted to provide the second form of authentication. This could be a one-time code generated by an app or sent via SMS. Once you provide the second form of authentication, you will be granted access to the account.
The purpose of 2FA is to make it more difficult for attackers to gain access to your account even if they have obtained your password through a data breach or phishing attack. Since the attacker would also need access to your physical device or other form of authentication, it makes it much harder for them to bypass the additional layer of security.
Project Description
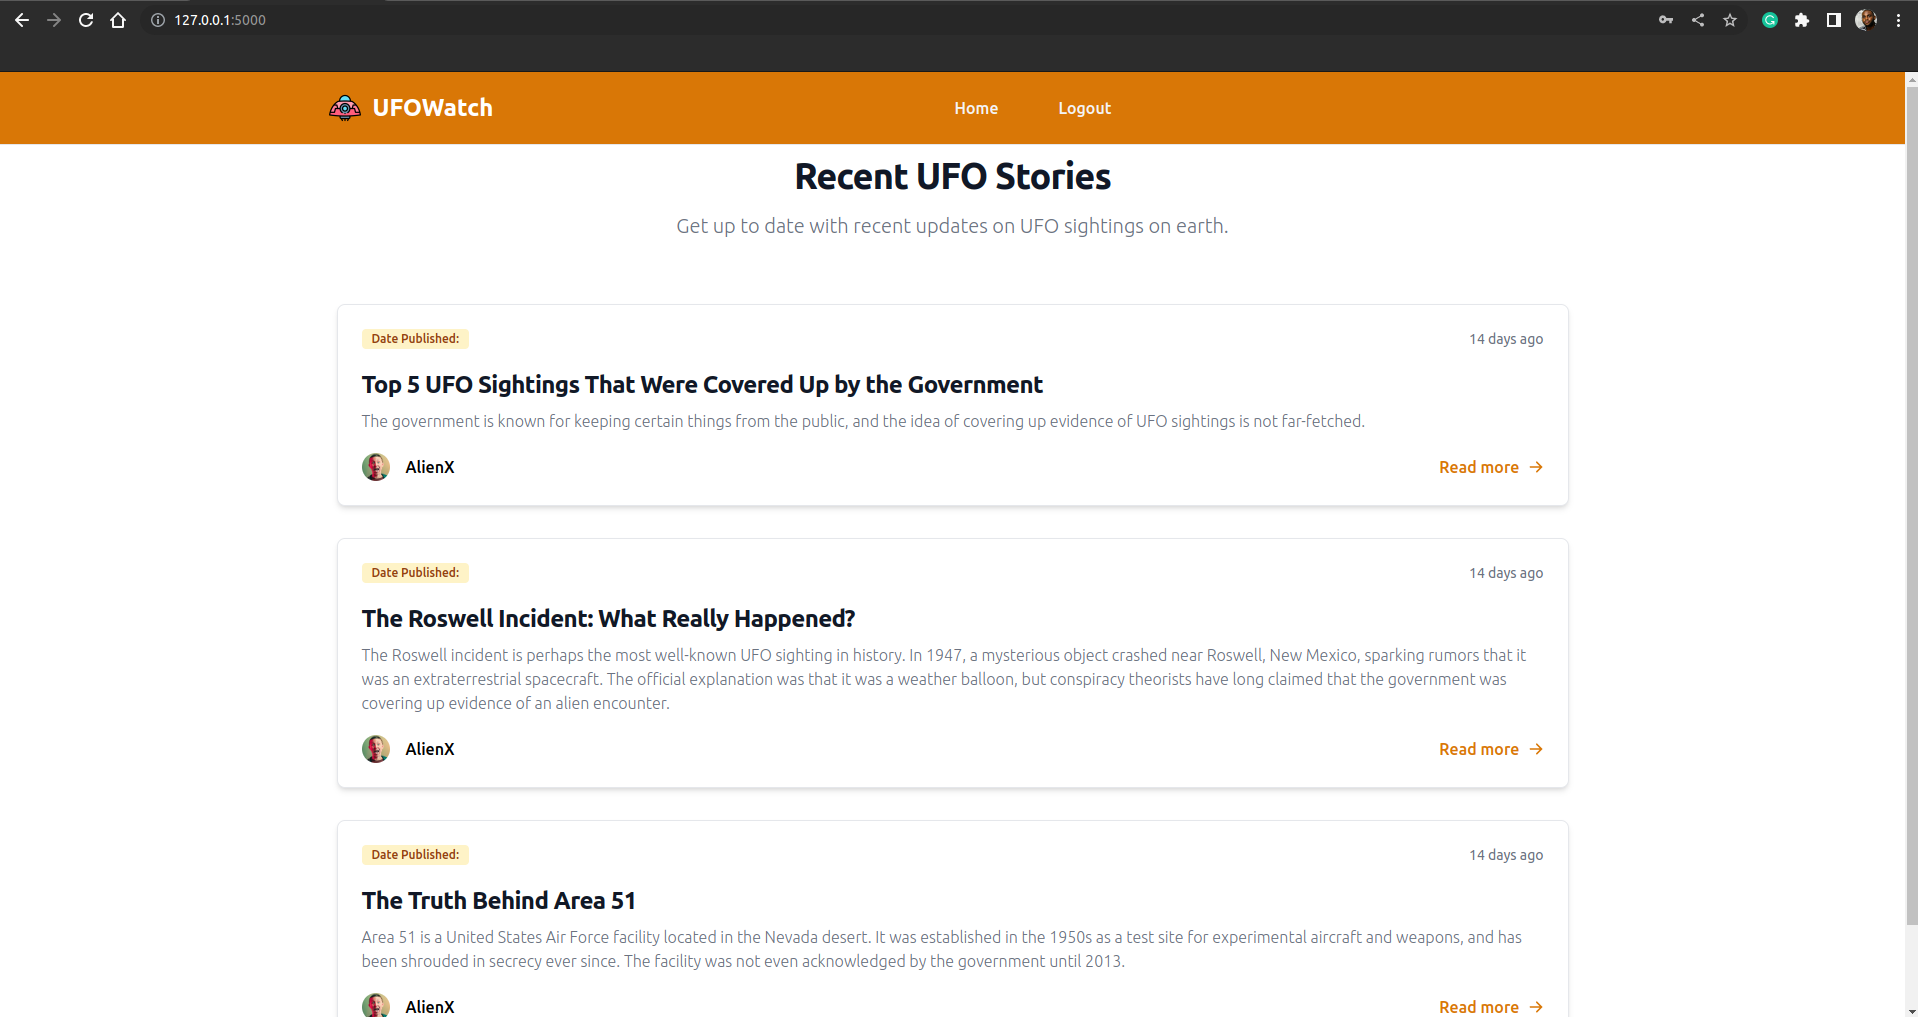
For this project, we'll implement a simple Flask blog where stories about UFO sightings are discussed. Since information such as this is sensitive, we'll protect user identity and the content on our page by implementing a 2FA system with Vonage Verify V2 API.
With this feature in place, only authenticated users will be granted access to the top-secret information on UFO sightings that we share on our blog.
Let's get right into it!
Starter Files
You'll be building a dynamic site with multiple pages. It'll be a bit bulky to introduce all the front-end code within the article. Plus, since this article isn't a front-end tutorial, it wouldn't make much sense to have a lot of HTML + TailwindCSS utility classes splattered around.
I've created a project starter kit that contains all the files needed for the front end of the project. The starter kit will include a static folder (containing a CSS file and images) and a templates folder (containing all html pages).
The template files contain HTML code and Tailwind utility classes for styling. Also, you'll find some Jinja code in the templates for populating pages with data and adding some logic to the page (ex. display fewer items in the navbar when a user is signed in).
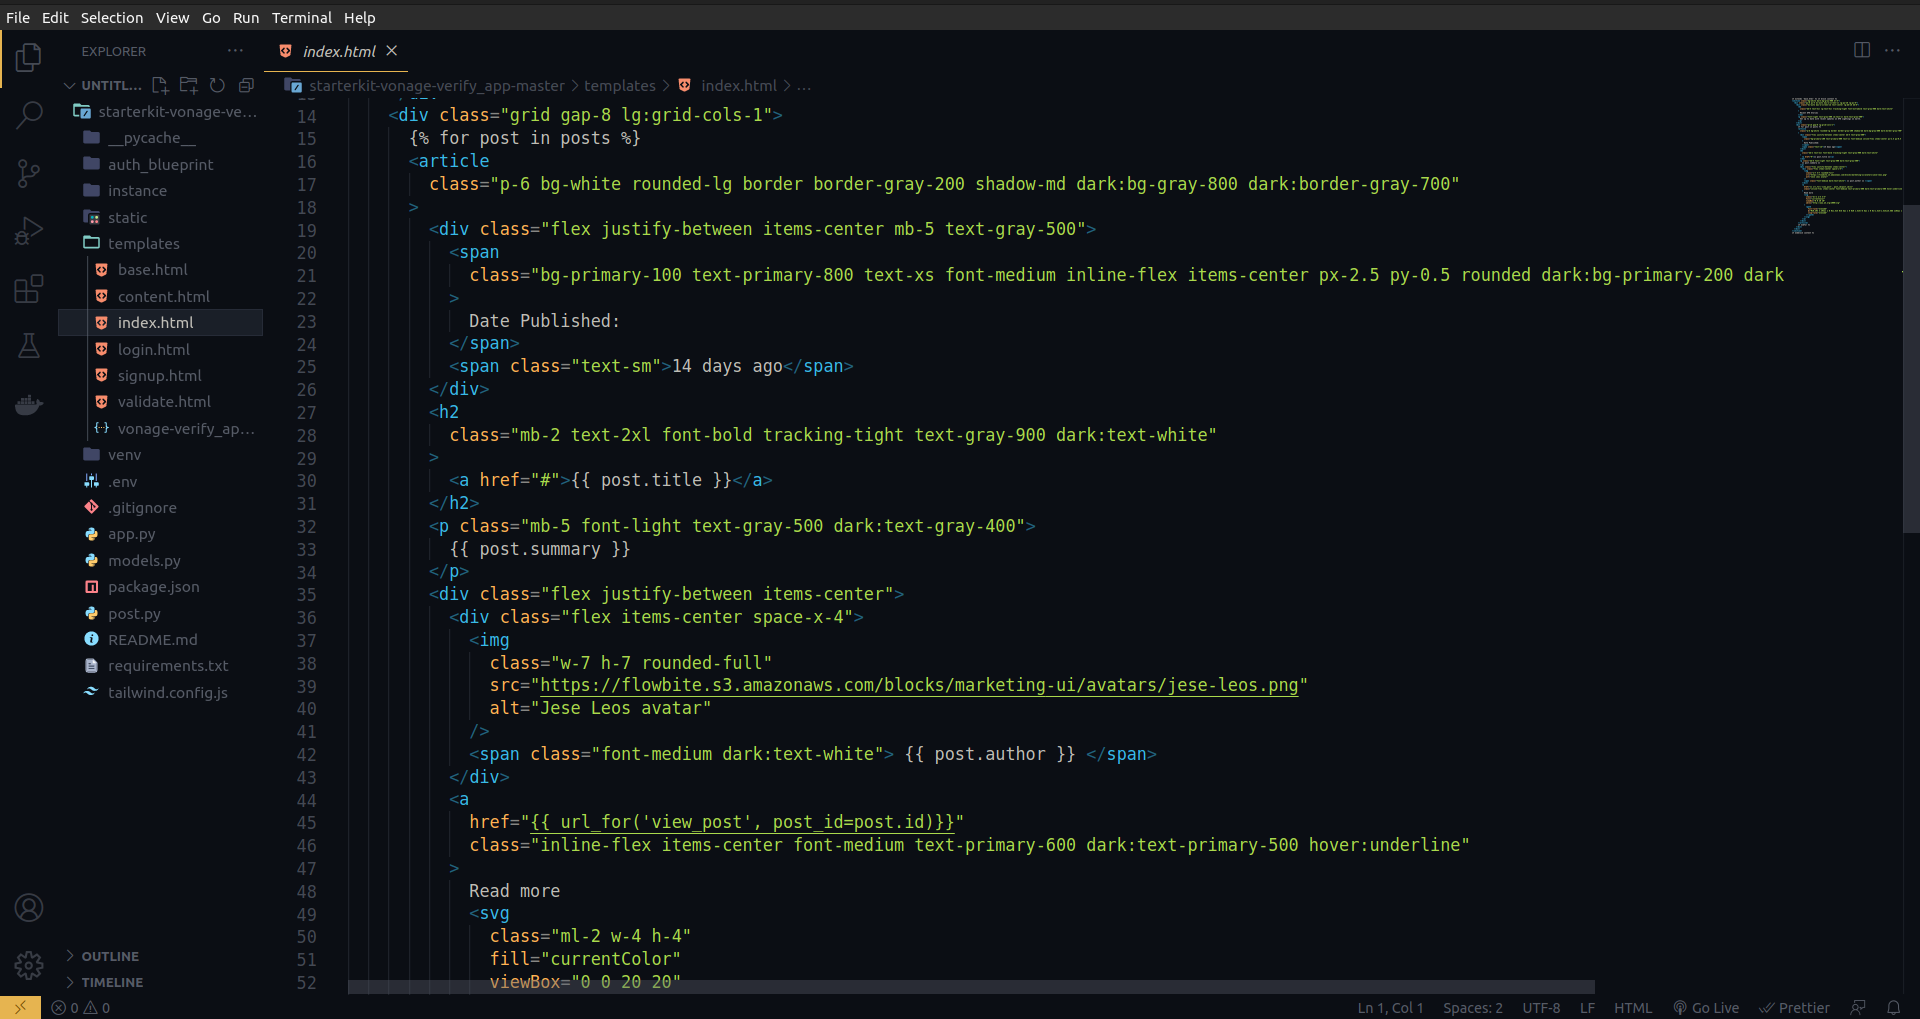
You'll also find a file named postfavorite*.py*. This file serves as an in-memory storage for blog content which will be loaded whenever we run our Flask app.
Other files you'll find in the starter kit includes:
requirements.txt - contains all Python dependencies of the project
tailwind.config.js - contains base configurations for TailwindCSS
package.json - manages front-end dependencies
README.md - contains details about the project
Follow the link to download/clone the repo: starterkit
Download the starter kit and follow the instructions in the README.md file to create a virtual environment, activate the virtual environments, and install the required dependencies. When you're done with that, we can dive into building our Flask App.
If you don't want to code along, you can clone the complete project repo instead.
Set Up Flask APP
After installing the necessary dependencies, you'll have all you need to start building the blog. We'll start by defining some environment variables you'll use later on as we progress.
Vonage offers two keys for accessing their API; you can find them on your Vonage dashboard. Also, our Flask app needs a secret key for data encryption.
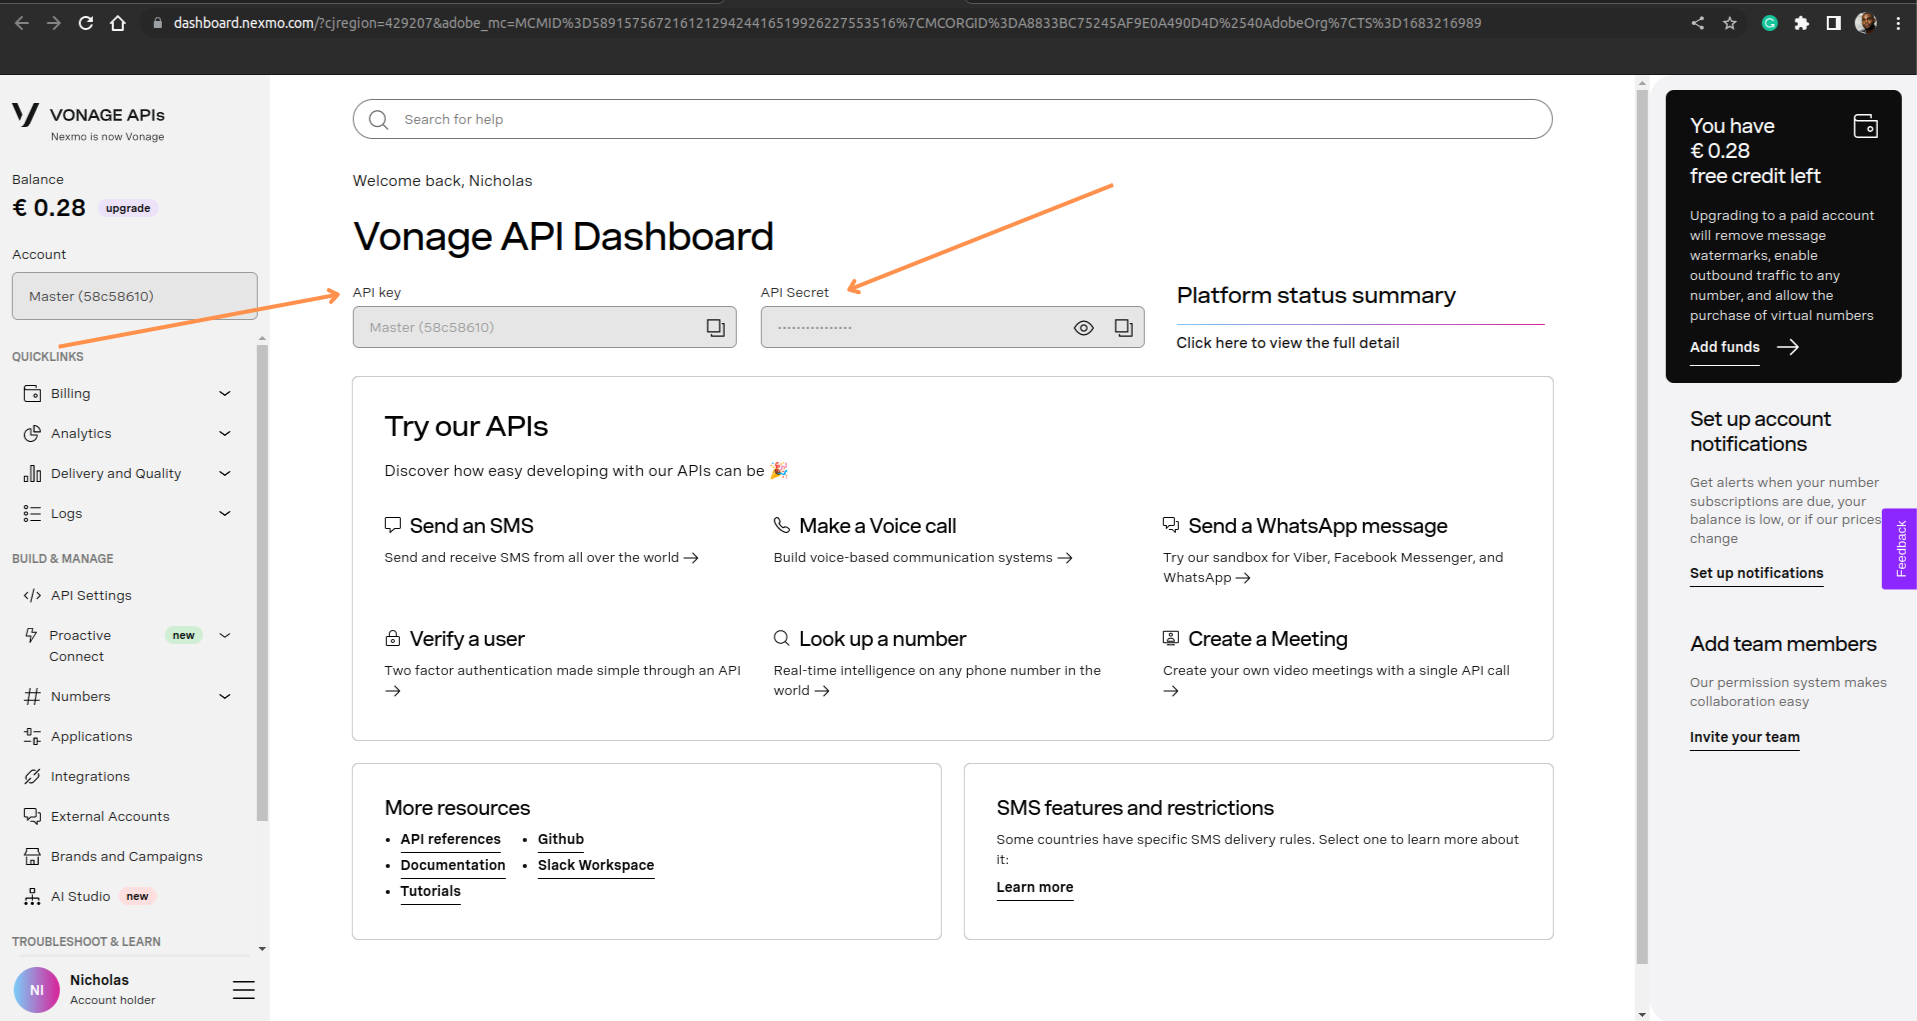
Create a .env file at the root of our project directory so we can safely store our secret keys.
Add the following lines inside the .env file:
FLASK_SECRET_KEY='Replace with a random string'
VONAGE_KEY='Replace with your Vonage key'
VONAGE_SECRET='Replace with your Vonage secret key'
Next, create a file called app.py at the root of our project directory and create an instance of a Flask app.
import os
from flask import Flask
from dotenv import load_dotenv

load_dotenv()
app = Flask(__name__)
app.secret_key = os.getenv('FLASK_SECRET_KEY')

@app.route("/")
def index():
    return "2FA Tutorial with Vonage and Flask!"


if __name__ == "__main__":
    app.run()
Open up your terminal and execute the command below to test your Flask app:
$ flask run --debug

Visit http://127.0.0.1:5000 to view the running app in your browser.
Now that we have our base Flask app up and running, the next step is to implement and register a blueprint for user authentication. In Flask, blueprints are essential for organizing our code, enabling us to define a URL (Uniform Resource Locator) prefix for all routes within the blueprint.
Create a folder called auth_blueprint in the root of your project directory. Within this folder, you'll need to generate two files: auth.py and __init__.py.
Add the line below to __init__.py:
from auth_blueprint.auth import bp
Add the following lines to auth.py:
from flask import Blueprint, render_template

bp = Blueprint("user_auth", __name__, url_prefix="/auth")

@bp.route("/login", methods=["POST", "GET"])
def login():
    return  render_template("login.html")

@bp.route("/signup", methods=["POST", "GET"])
def signup():
    return  render_template("signup.html")

@bp.route("/validate", methods=["POST", "GET"])
def validate():
    return  render_template("validate.html")

@bp.route("/logout")
def logout():
    pass
The code in your auth.py file declares the module as a flask blueprint named "user_auth". Also, we defined routes for the login, signup, validate, and logout pages. More details of these endpoints are given below:
/auth/login: This route displays the login.html template when the user visits the /auth/login URL. The render_template() function renders a template with the given name and returns the result as a string./auth/signup: This route displays the signup.html template when the user visits the /auth/signup URL./auth/validate: This route displays a form where the user would input the code sent by the Vonage Verify API/auth/logout: This route is currently empty (will be implemented later), and does not return anything when visited. It is a function that logs out the user and redirects them to another page.
Next, modify the app.py file to register the blueprint you just created, and also modify the index endpoint to render the home page of the blog. Also, you'll add a new endpoint called view_post which be used for displaying posts on the blog.
import os
from flask import Flask, render_template
from dotenv import load_dotenv
from auth_blueprint.auth import bp as auth_bp

load_dotenv()
app = Flask(__name__)
app.secret_key = os.getenv('FLASK_SECRET_KEY')

app.register_blueprint(auth_bp)
@app.route("/")
def index():
    return render_template("index.html")

@app.route("/content")
def view_post():
    return render_template("content.html")

if __name__ == "__main__":
    app.run()
Models and Form Validations
Here, we'll define our database models and set validations for our HTML forms. We'll be using the SQLite database to ensure the persistence of our data in conjunction with Flask-SQLAlchemy ORM and Flask-WTF forms.
Start by creating a file called models.py at the root of our project directory and add the following contents:
from flask_sqlalchemy import SQLAlchemy
from flask_wtf import FlaskForm
from wtforms import TelField, StringField, PasswordField
from wtforms.validators import InputRequired, equal_to

db = SQLAlchemy()


class User(db.Model):
    """Table for storing registered users"""
    __tablename__= "users"
    id = db.Column(db.Integer(), primary_key=True)
    username = db.Column(db.String(20), nullable=False, unique=True)
    phone_no = db.Column(db.Integer(), nullable=False)
    password = db.Column(db.String(), nullable=False)


class SignupForm(FlaskForm):
    """Validations for signup form"""
    username = StringField(label="Username", validators=[InputRequired(message="Provide a username")])
    phone_no = TelField(label="Phone Number", validators=[InputRequired(message="Provide a valid phone number")])
    password = PasswordField(label="Password", validators=[InputRequired(message="Password cannot be left blank")])
    confirm_password = PasswordField(label="Confirm Password",validators=[InputRequired(message="Password cannot be left blank"), equal_to("password", message="passwords do not match")])


class LoginForm(FlaskForm):
    """Validation for login form"""
    username = StringField(label="Username", validators=[InputRequired(message="Provide a username")])
    password = PasswordField(label="Password", validators=[InputRequired(message="Password cannot be left blank")])


class TwoFactorForm(FlaskForm):
    """Validation for two-factor form"""
    code = StringField(label="Enter Code:", validators=[InputRequired(message="Enter valid code")])
Code breakdown:
Library Imports:
- The code begins by importing necessary libraries, including SQLAlchemy and FlaskForm, to enable working with the Flask web framework and form handling.
Database Setup:
A SQLAlchemy object is created to establish a connection with the database.
A User model is defined, which is a representation of the "users" table in the database. It includes columns for id, username, phone_no, and password. The id column is an integer primary key, and other columns have various data types and constraints.
Form Definitions:
The code defines several classes for forms using Flask-WTF (WTForms):
SignupForm: This class is used for user registration and includes username, phone number, and password fields. Each field has associated validators to ensure valid user input.LoginForm: Used for user login, it also includes form fields (username and password) with validation.TwoFactorForm: This form class is used to validate the second-factor authentication code provided by the user.
In summary, this database stores user data, allowing the Flask app to maintain persistence. This means that user data is retained even when the app is restarted, reducing the need to recreate user accounts with each app run.
Set up Database
Modify app.py to include the following code:
import os
from dotenv import load_dotenv
from flask import Flask, render_template
from auth_blueprint.auth import bp as auth_bp
from models import db, User

load_dotenv()

app = Flask(__name__)
app.secret_key = os.getenv('FLASK_SECRET_KEY')
app.register_blueprint(auth_bp)

app.config["SQLALCHEMY_DATABASE_URI"] = "sqlite:///data.db"
db.init_app(app)

@app.before_first_request
def create_tables():
    db.create_all()

@app.route("/")
def index():
    return render_template("index.html")

@app.route("/content")
def view_post():
    return render_template("content.html")

if __name__  == "__main__":
    app.run()
Code breakdown: We utilized SQLite to store user data. The SQLALCHEMY_DATABASE_URI configuration variable is set to sqlite:///data.db, which specifies the name of the SQLite database to be used with the application.
Then, the db module is initialized with the Flask app using db.init_app(app).
A function called create_tables() is defined with the @app.before_first_request decorator to create the necessary tables in the database before the first HTTP request is processed.
Sign-Up Handler
In the previous section, you linked your Flask app to a SQLite database. This database will hold the username, password, and phone number of your users.
Here, you will implement the sign-up feature. Modify the signup endpoint with the following changes:
from flask import Blueprint, render_template, request, flash, redirect, url_for
from models import SignupForm
from sqlalchemy.exc import IntegrityError, SQLAlchemyError
from werkzeug.security import generate_password_hash

from models import User, db
bp = Blueprint("user_auth", __name__, url_prefix="/auth")
# previously implemented code was omitted
    ...
    ...

@bp.route("/signup", methods=["POST", "GET"])
def signup():
    form = SignupForm()
    if request.method == "POST" and form.validate_on_submit():
        username = request.form.get("username")
        phone_no = request.form.get("phone_no")
        password = request.form.get("password")

        password_hash = generate_password_hash(password)
        new_user = User(username=username, phone_no=phone_no, password=password_hash)
        try:
            db.session.add(new_user)
            db.session.commit()
            flash("Account created successfully!")
            return redirect(url_for("user_auth.login"))

        except IntegrityError:
            flash("User with username already exists")
            return render_template("signup.html", form=form)

        except SQLAlchemyError:
            flash("An unknown error occured. Please try again later.")
            return render_template("signup.html", form=form)

    return render_template("signup.html", form=form)
Code Breakdown:
Import necessary packages and modules including Flask, Blueprint, render_template, request, flash, redirect, url_for, IntegrityError, and SQLAlchemyError.
Define a route for
/signupwith methods "POST" and "GET".Within the
signupfunction, an instance ofSignupFormis created, which is a custom Flask-WTF form that defines the validation and rendering of the sign-up formIf the request method is "POST" and the form is validated successfully, extract the username, phone number, and password submitted in the form.
The
generate_password_hashfunction from Werkzeug is used to securely hash the provided password before storing it in the databaseAfter hashing the password, a new user instance is created with the extracted values and an attempt is made to add the user to the database.
If the user with the same username already exists in the database, catch the IntegrityError exception, flash a message indicating the error, and render the signup form again with the same form values.
If an unknown error occurs, catch the SQLAlchemyError exception, flash a message indicating the error, and render the signup form again with the same form values.
Render the signup form with the SignupForm instance if the request method is "GET" or if there was a validation error during a "POST" request.
If a user is created successfully, redirect to the login page and flash a success message.
Login/Logout Handler and Protected Route
In this section, you will handle user login/logout and specify a protected route in your Flask app.
The blog contains some sensitive content on UFO sightings (they're completely fictional). For that reason, we'll restrict access to the content by granting only authenticated and authorized users access to read the full details of a blog post.
To do this we'd make use of the Flask-Login extension which we installed using the requirements.txt file. Let's start by making a few changes to the app.py file:
import os
from dotenv import load_dotenv
from flask import Flask, render_template, abort
from flask_login import LoginManager, login_required
from auth_blueprint.auth import bp as auth_bp
from models import db, User
from post import posts, get_post_by_id

load_dotenv()
login_manager = LoginManager()

app = Flask(__name__)

app.secret_key = os.getenv('FLASK_SECRET_KEY')
app.register_blueprint(auth_bp)
app.config["SQLALCHEMY_DATABASE_URI"] = "sqlite:///data.db"

db.init_app(app)
login_manager.init_app(app)

@login_manager.user_loader
def load_user(user_id):
    return User.query.get(user_id)

login_manager.login_view = "user_auth.login"

@app.before_first_request
def create_tables():
    db.create_all()

@app.route("/")
def index():
    return render_template("index.html", posts=posts)

@app.route("/content/<int:post_id>")
@login_required
def view_post(post_id):
    post = get_post_by_id(post_id)
    if post is None:
        abort(404)
    return render_template("content.html", post=post)

if  __name__  ==  "__main__":
    app.run()
Code breakdown:
The first few lines of code import the necessary modules and libraries, including the Flask framework, SQLAlchemy, and the LoginManager extension for Flask.
login_managerobject is an instance of theLoginManagerclass. This extension helps manage user authentication and sessions in a Flask application.login_managerobject is initialized with theinit_app()method, which binds the login manager to the application.The
@login_manager.user_loaderdecorator is used to register a function that is used to load a user by their ID. This function is called by the login manager when a user logs in.The
@app.route()decorator is also used to define a route for viewing the content of a post. This route requires the user to be logged in, which is enforced by the@login_requireddecorator.
Then, modify the models.py file to include the UserMixn class provided by Flask-Login. This would give the user model additional properties and methods necessary for managing user sessions.
    ...
    ...
from flask_login import UserMixin


class  User(db.Model, UserMixin):
    __tablename__= "users"
    id = db.Column(db.Integer(), primary_key=True)
    username = db.Column(db.String(20), nullable=False, unique=True)
    phone_no = db.Column(db.Integer(), nullable=False)
    password = db.Column(db.Text(), nullable=False)
We will proceed to implement the login and logout features within our authentication blueprint. Modify auth.py to include the following changes:
from flask import Blueprint, render_template, request, flash, redirect, url_for
from models import LoginForm, SignupForm
from flask_login import login_user, logout_user, login_required
from sqlalchemy.exc import IntegrityError, SQLAlchemyError
from werkzeug.security import generate_password_hash, check_password_hash
from models import User, db

Blueprint("user_auth", __name__, url_prefix="/auth")

@bp.route("/login", methods=["POST", "GET"])
def login():
    form = LoginForm()
    if request.method == "POST" and form.validate_on_submit():
        username = request.form.get("username")
        password = request.form.get("password")

        user = User.query.filter_by(username=username).first()
        if user and check_password_hash(user.password, password):
            login_user(user)
            return redirect(url_for("index"))
        else:
            flash("Username/password incorrect")
            return render_template("login.html", form=form)
    return render_template("login.html", form=form)
Code breakdown:
/loginroute is created and it accepts both GET and POST methods.LoginForminstance is created to enforce input validation when the form is submitted.If the request method is POST and the form data is valid (
form.validate_on_submit()), the login process begins.The username and password are retrieved from the form data using
request.form.get().The user table is queried from the database using
User.query.filter_by(username=username).first().If a user is found and the password provided matches the hashed password stored in the database (
check_password_hash()), the user is logged in usinglogin_user(user).After a successful login, the user is redirected to the "index" route.
If the login fails, an error message is flashed and the login template is rendered with the login form.
If the request method is GET or the form data is not valid, the login template is rendered with the login form.
Now, we can test our app to see if it works.
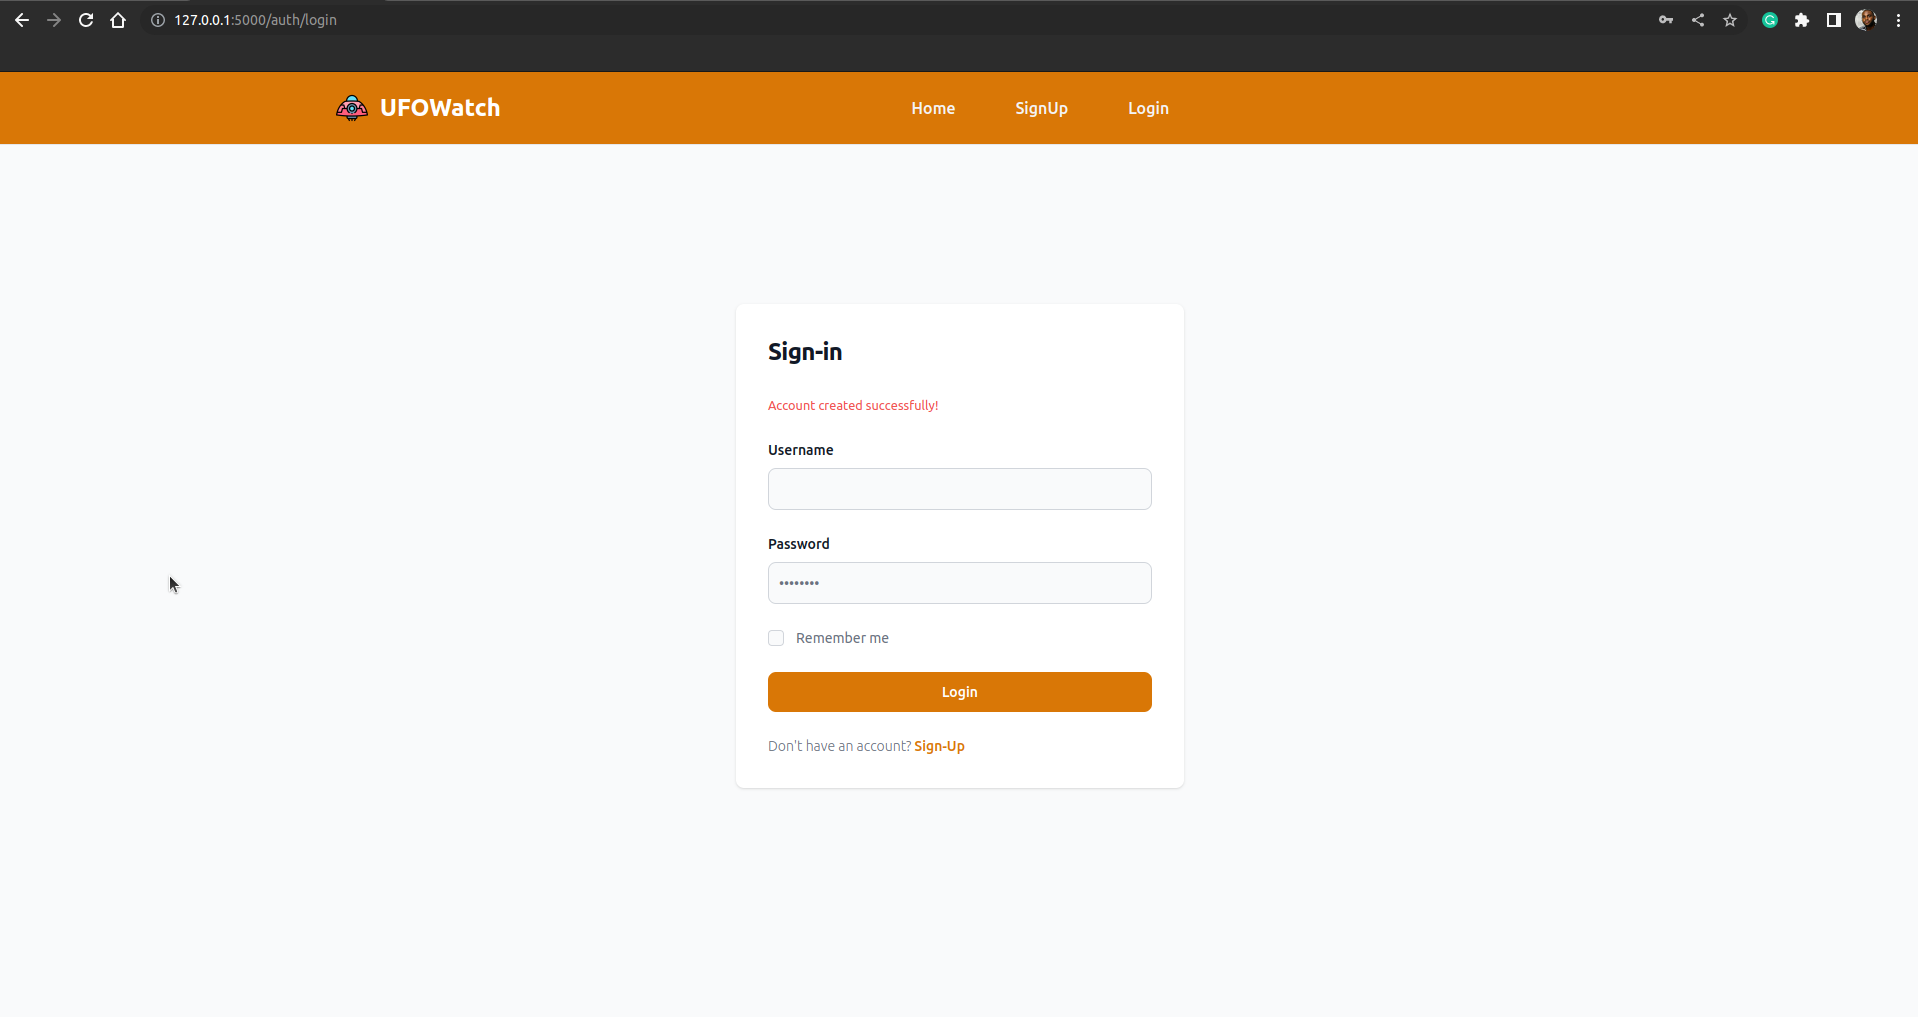
The screenshot below is what you'll see after creating an account successfully:
When an unauthenticated user attempts to read an article on the blog, they'll be redirected to the login endpoint:
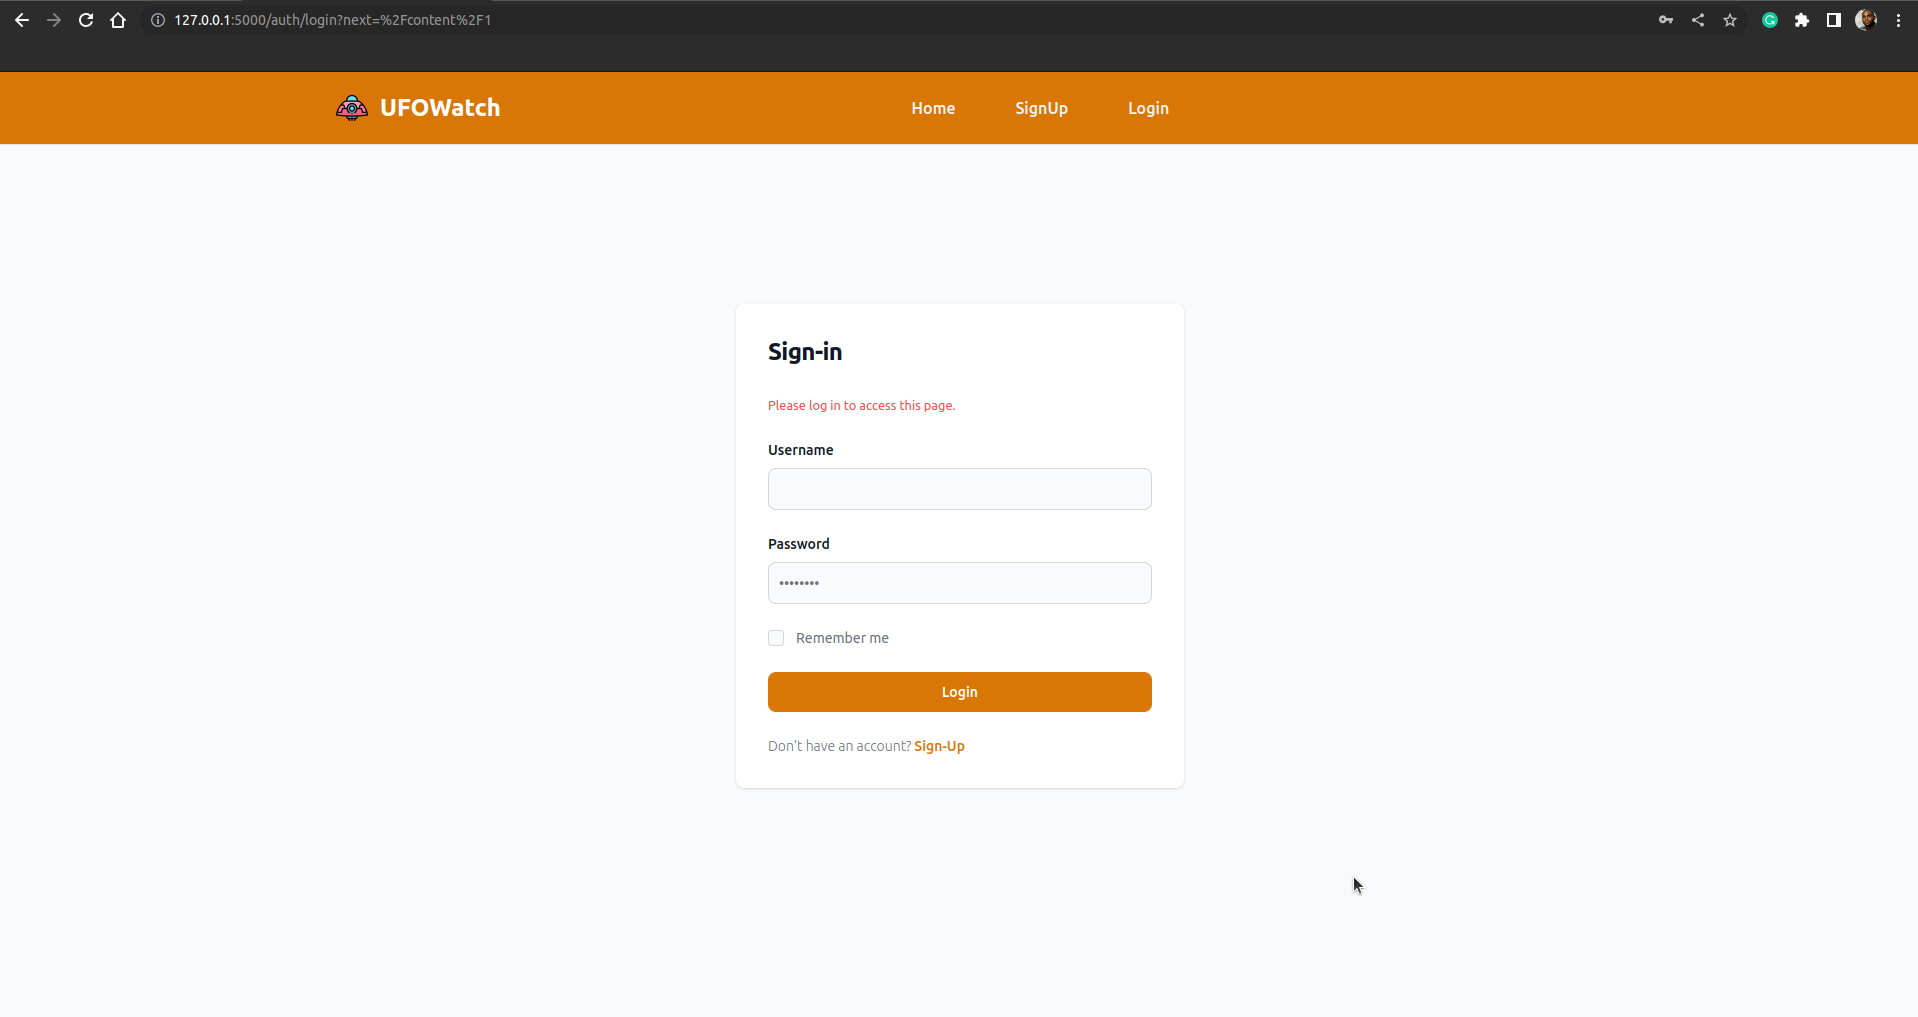
After signing in successfully, the user is redirected to the home page, and there's also a button to safely sign out (not implemented yet) the user:
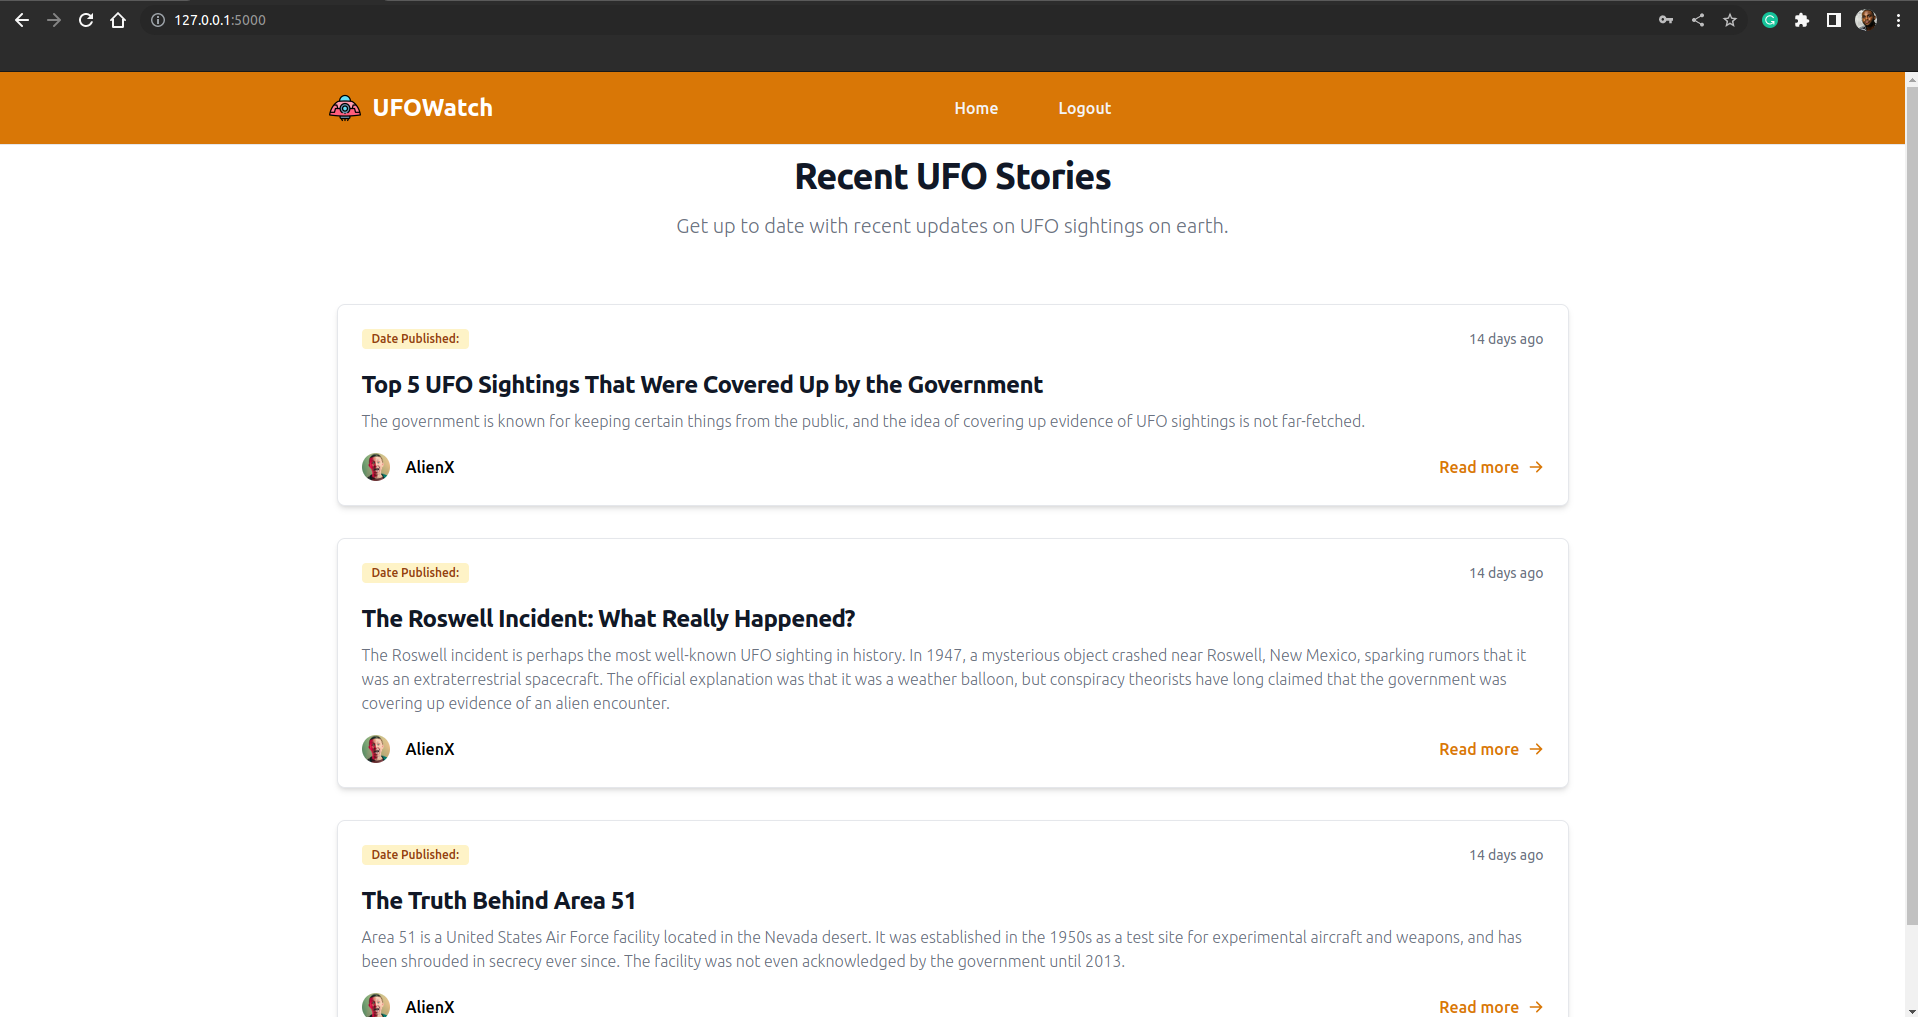
Moving on to the /logout endpoint, we'll ensure secure user logout. To achieve this, we will import logout_user from Flask-Login and subsequently, redirect users to a different page.
@bp.route("/logout")
@login_required
def logout():
    logout_user()
    return redirect(url_for("index"))
Code breakdown:
When a user accesses the /logout route, the logout_user() function is invoked, which effectively terminates their authenticated session by clearing the user's session. Subsequently, the user is redirected to the 'index' route via redirect(url_for("index")).
With these actions completed, we now have all the necessary components in place to integrate Vonage's Verify API for adding two-factor authentication (2FA) functionality to our blog.
Implement 2FA Authentication
So far, we've been able to handle user login and logout. Also, we've restricted access to our content to only authenticated users.
Now, we'll integrate the Verify API in the code to add an extra layer of security for the data and our users. The requirements.txt file includes the vonage-python SDK as a dependency, so you don't have to install anything else.
First, we'll make changes to auth.py to include the Vonage extension and instantiate the Client and Verify class. Let's modify the preliminary imports and declarations in auth.py to include these changes.
import os
import vonage
from dotenv import load_dotenv
from flask import Blueprint, render_template, request, flash, redirect, url_for
from flask_login import login_user, logout_user, login_required
from sqlalchemy.exc import IntegrityError, SQLAlchemyError
from werkzeug.security import generate_password_hash, check_password_hash
from models import User, db, LoginForm, SignupForm, TwoFactorForm

bp = Blueprint("user_auth", __name__, url_prefix="/auth")
load_dotenv()

client = vonage.Client(key=os.getenv('VONAGE_KEY'),

secret=os.getenv('VONAGE_SECRET'))

verify = vonage.Verify2(client)
    ...
    ...
Here's a breakdown of the changes that have been made:
First, we import the
osmodule, thevonagemodule, and theload_dotenvfunction from thedotenvmodule.Then, calls
load_dotenv()to load environment variables from a.envfile, if present in the working directory.Initializes a
Clientobject from thevonagemodule, which is used to send requests to the Vonage API. TheClientconstructor takes two arguments:key: the Vonage API key, read from theVONAGE_KEYenvironment variable.secret: the Vonage API secret, read from theVONAGE_SECRETenvironment variable.
Initializes a
Verify2object from thevonagemodule, which is used to perform phone number verification. TheVerifyconstructor takes one argument:client: theClientobject to use for sending requests to the Vonage API.
Next, we'll make a few changes to our /login endpoint. We want a situation where the user would be redirected to another when after login credentials have been verified instead of logging in right away. Then, at that point, we make an API call to initiate a verification process.
@bp.route("/login", methods=["POST", "GET"])
def login():
    form = LoginForm()
    if request.method == "POST" and form.validate_on_submit():
        username = request.form.get("username")
        password = request.form.get("password")

        user = User.query.filter_by(username=username).first()
        if user and check_password_hash(user.password, password):
            phone_no = str(user.phone_no)
            try:
                response = verify.new_request(
                    {
                        "brand": "Vonage Verify",
                        "workflow": [{"channel": "whatsapp", "to": phone_no}],
                    }
                )
                return redirect(
                    url_for(
                        "user_auth.validate",
                        user_id=user.id,
                        res_id=response["request_id"],
                    )
                )

            except vonage.Verify2Error as err:
                print(str(err))
                flash("Failed to initiate verification")
                return render_template("login.html", form=form)
        else:
            flash("Username/password incorrect")
            return render_template("login.html", form=form)
    return render_template("login.html", form=form)
Code Breakdown
form = LoginForm()creates a new instance ofLoginFormthat is used to render the HTML form template.The
if request.method == "POST" and form.validate_on_submit():statement checks if the current request method isPOSTand the form has been submitted with valid data.The code block inside the above
ifstatement retrieves the username and password submitted in the form, and checks if a user with that username exists in the database and the password hash matches.If the user is authenticated successfully, it retrieves the phone number of the user and initiates a phone number verification process through Vonage's Verify API by calling
verify.new_request(), passing in the phone number and brand name, and communication channel as parameters. In this case, the user will receive a verification code on a registered Whatsapp number. However, if you'd prefer to use a different channel, you could simply change the value to "sms" or "email".If the verification request is successful, the request ID is returned and the view function redirects the user to the
validateendpoint of theuser_authblueprint with the user ID and verification request ID as query parameters.If the verification request fails the error will be caught by the
exceptblock and a message is flashed to the user on the login pageFinally, if the request method is not
POSTor the form is not valid, it simply renders the login form.
Next, we'll include an endpoint that'll be in charge of verifying the code provided by the user and eventually login the user if it is correct. Add the following code to the /validate endpoint:
@bp.route("/validate/user/<int:user_id>/<string:res_id>", methods=["POST", "GET"])
def validate(user_id, res_id):
    form = TwoFactorForm()
    if request.method == "POST" and form.validate_on_submit():
        passcode = str(request.form.get("code"))
        user = User.query.filter_by(id=user_id).first()
        try:
            response = verify.check_code(res_id, passcode)
            login_user(user)
            return redirect(url_for("index"))
        except vonage.Verify2Error as err:
            flash(str(err))
    return render_template("validate.html", form=form, user_id=user_id, res_id=res_id)
code breakdown:
The code defines a route decorator for
/validate/user/<int:user_id>/<string:res_id>. The decorator is created with the user ID and the Vonage request ID which was passed by the/loginendpoint.The function
validatetakes two arguments:user_id, which is an integer, andres_id, which is a string.Inside the function, a
TwoFactorFormobject is created and checked if the form is submitted with the correct data.If the form submission is a POST request and the form is valid, the passcode value is extracted from the form data and converted to an integer.
A
Userobject is queried from the database using theuser_idvalue.Then, a verification request is sent to the Vonage API using the
verify.check_code()method with theres_idandpasscodevalues. Theresponseobject contains the status of the verification request.If the verification fails, the error will be caught by the
exceptblock and the error message will be displayed to the user.Finally, the
render_template()function is called to render thevalidate.htmltemplate with theTwoFactorForm,user_id, andres_idvalues.
Testing the App
- Open a terminal window to start your server:
flask run --debug
Visit http://127.0.0.1:5000 to view the running app in your browser.
Create a user account and try to sign in. Make sure to enter your phone number with the appropriate country code (e.g., "23480755124" for the Nigerian country code "+234").
If everything is done correctly and the Flask app runs without error, you'll receive a code when you try to sign into the blog. At the same time, you'll be redirected to a page where you will submit the code sent by Vonage Verify.
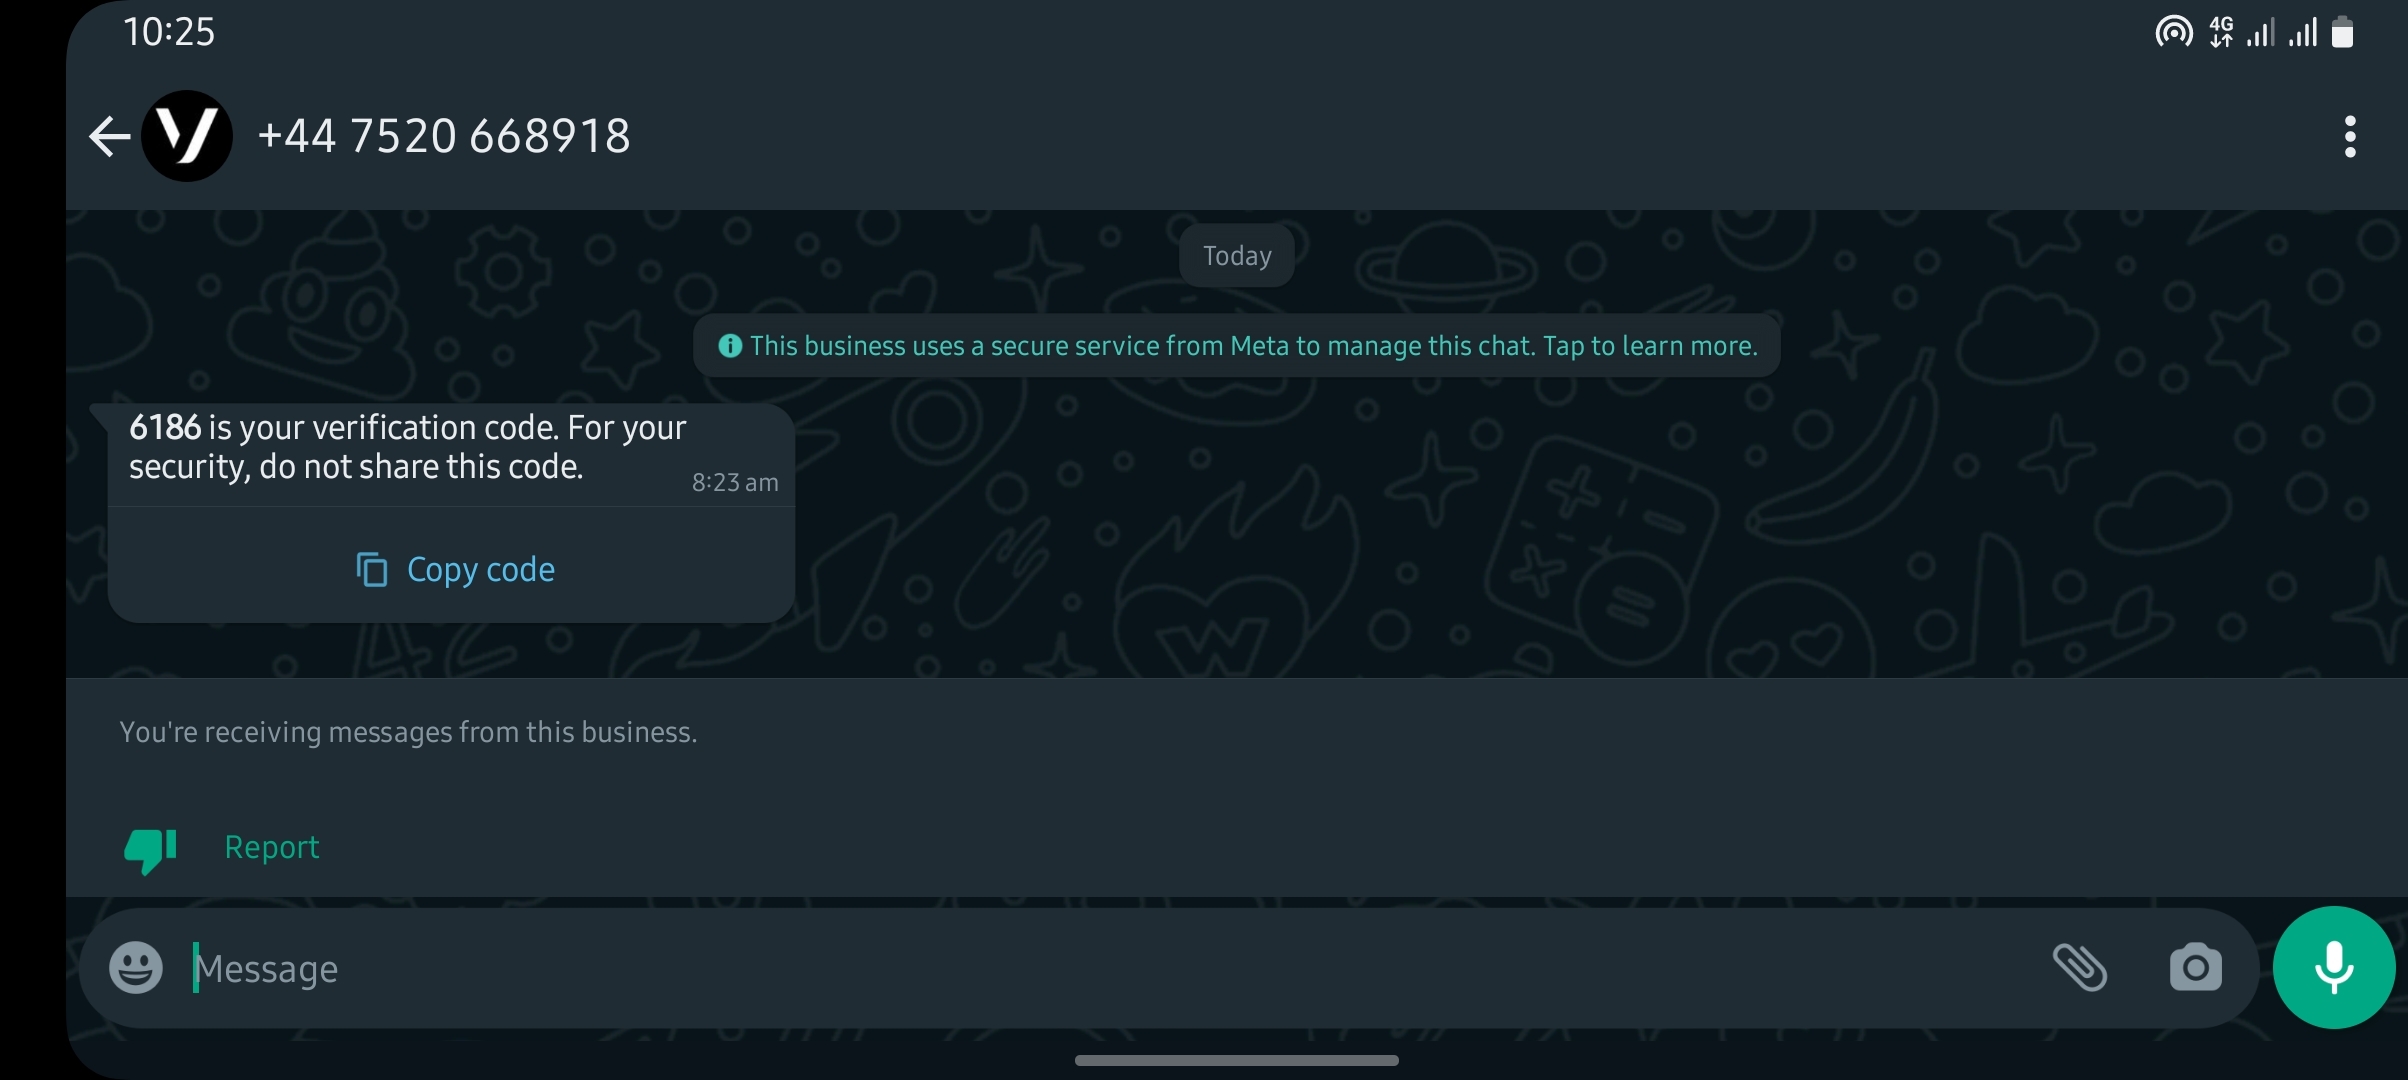
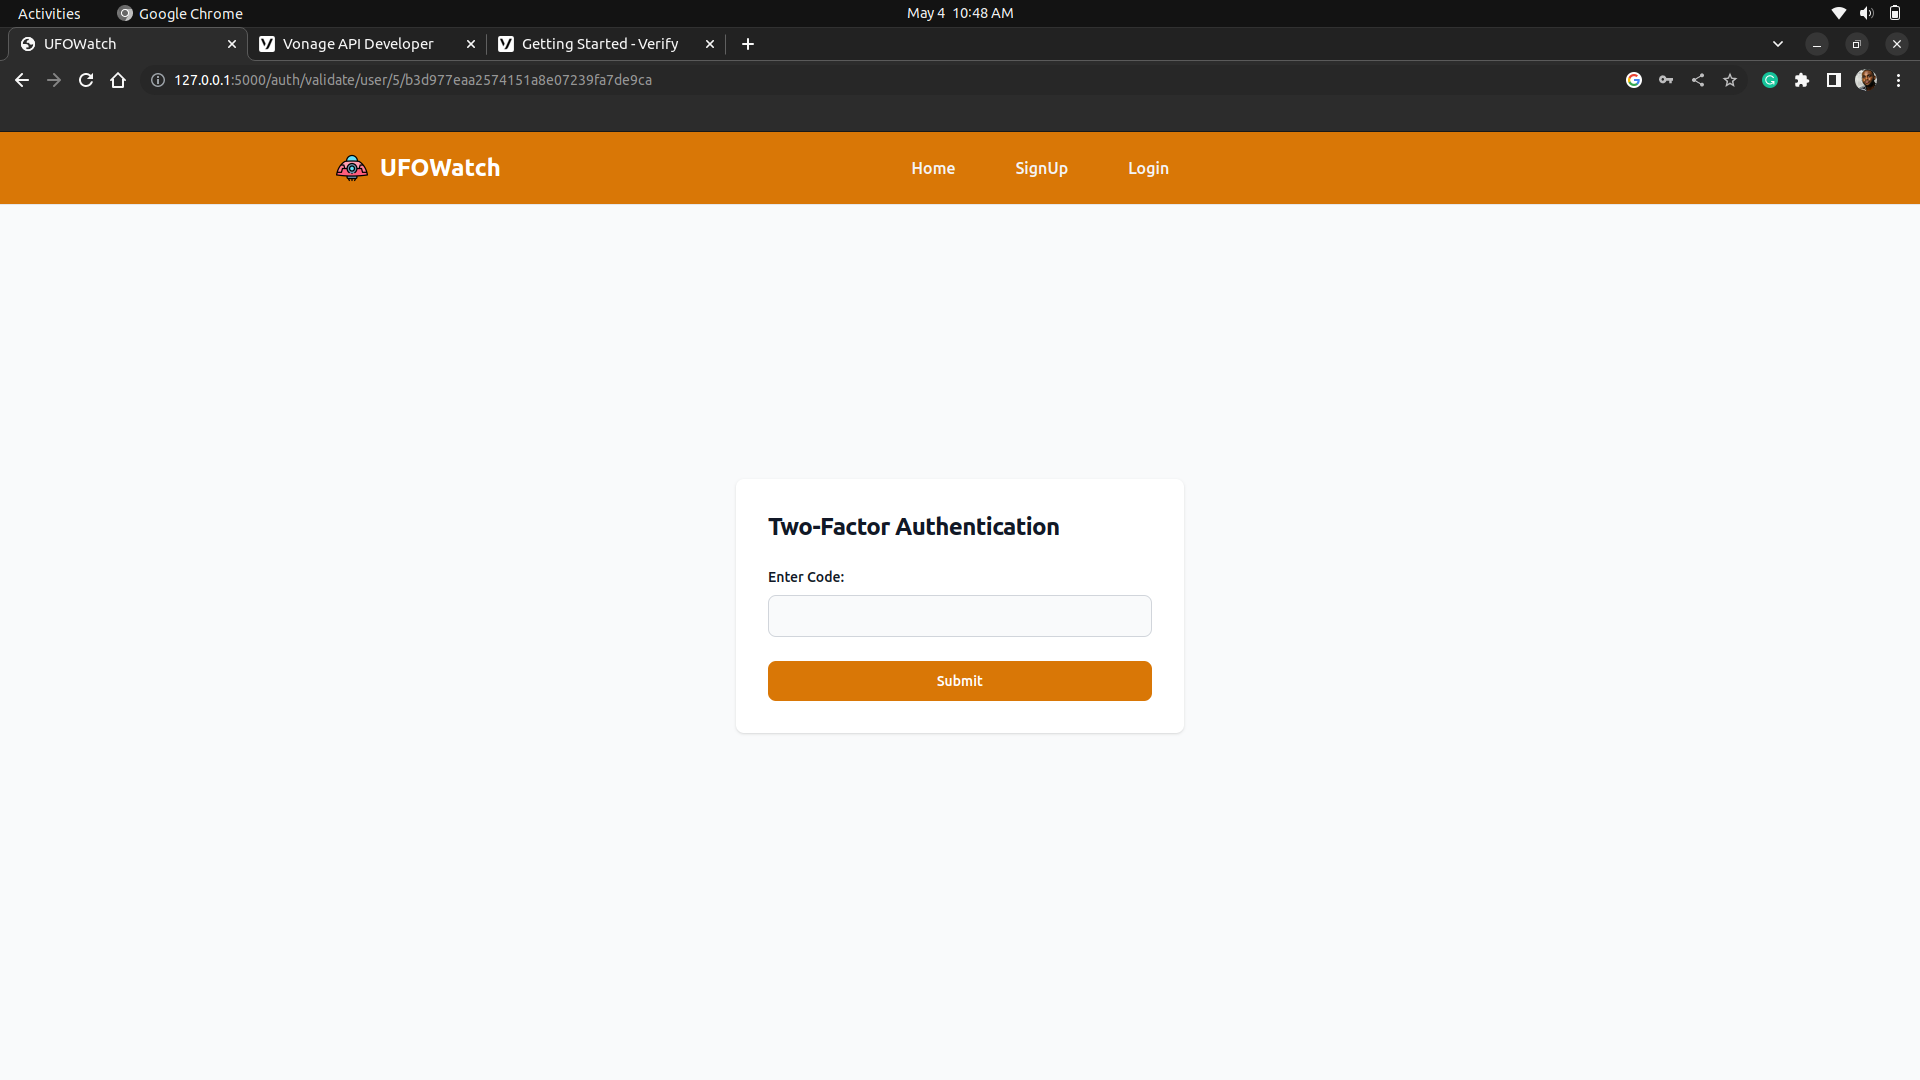
If the verification is successful, we'll be automatically redirected to our index page, with full access to all the content listed there.
Wrapping Up!
In a nutshell, implementing two-factor authentication (2FA) in our Flask blog with Vonage Verify API has provided an extra layer of security for our users' login credentials. With the 2FA solution, users can feel more secure and confident that their personal information is protected.
This simple addition to our blog demonstrates the power of Vonage's Verify API in securing web applications against unauthorized access. The UFOWatch blog has leveraged this technology to ensure that only authenticated users can access its engaging and unique content.
Subscribe to my newsletter
Read articles from Nicholas Ikiroma directly inside your inbox. Subscribe to the newsletter, and don't miss out.
Written by
