Accelerating File Sharing and Data Replication with AWS FSx: A Comprehensive Guide for beginners
 SIDDHANI VAMSI SAI KUMAR
In today's fast-paced business environment, the need for faster file sharing and efficient data replication has become paramount. Companies are continually looking for ways to streamline these processes and make them more robust. One solution that stands out in this regard is Amazon Web Services (AWS) FSx, a managed file storage service that offers two powerful file systems, Windows File Server and Lustre. In this blog post, we'll look into the process of setting up these file systems to meet your organization's requirements for faster file sharing and data replication.
Section 1: Creating an FSx File System for Windows File Server
It is a fully managed Windows file system that is accessible from both Windows and Linux instances. Here's how you can create this file system:
Log in to the AWS Management Console.
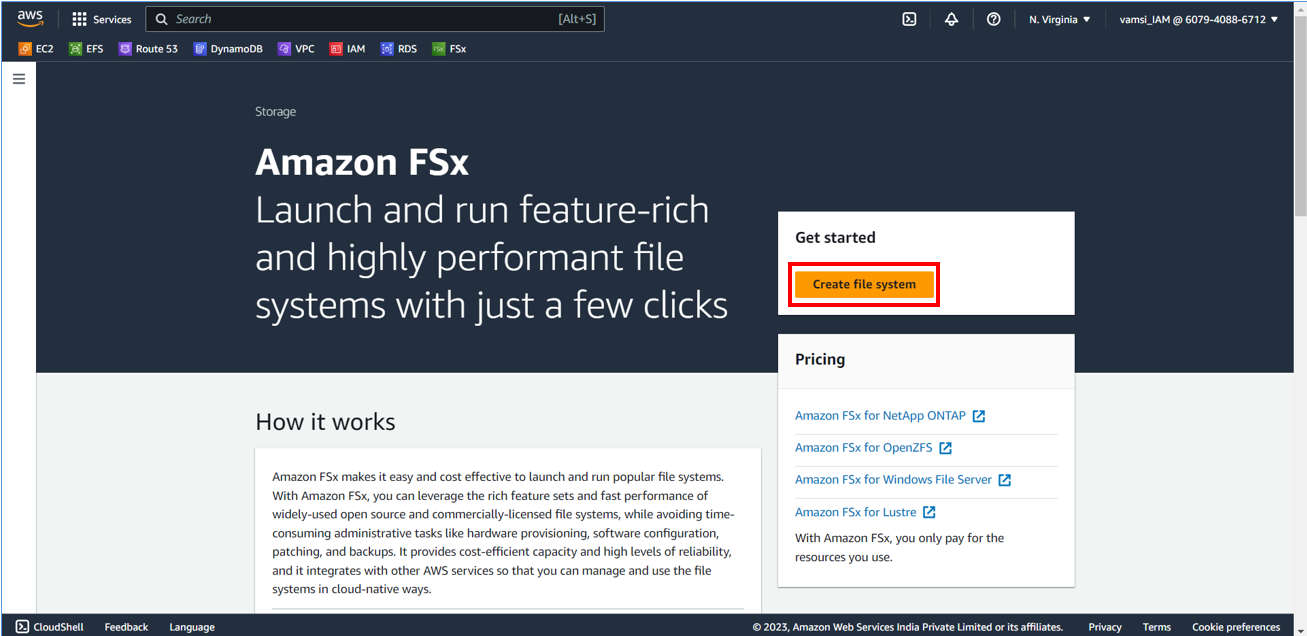
Navigate to the FSx service and click on "Create file system".
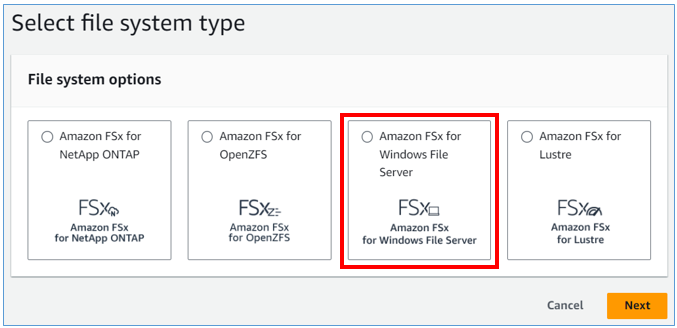
Choose "Windows file server" as the file system type.
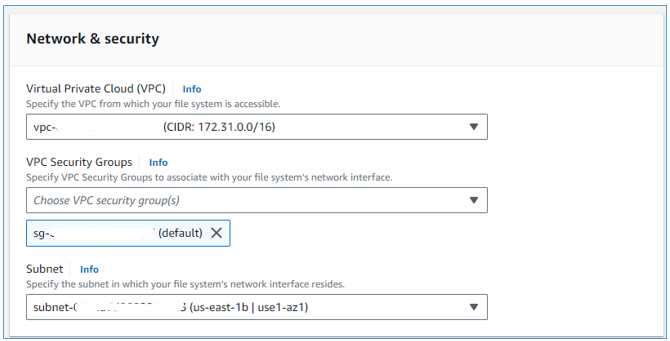
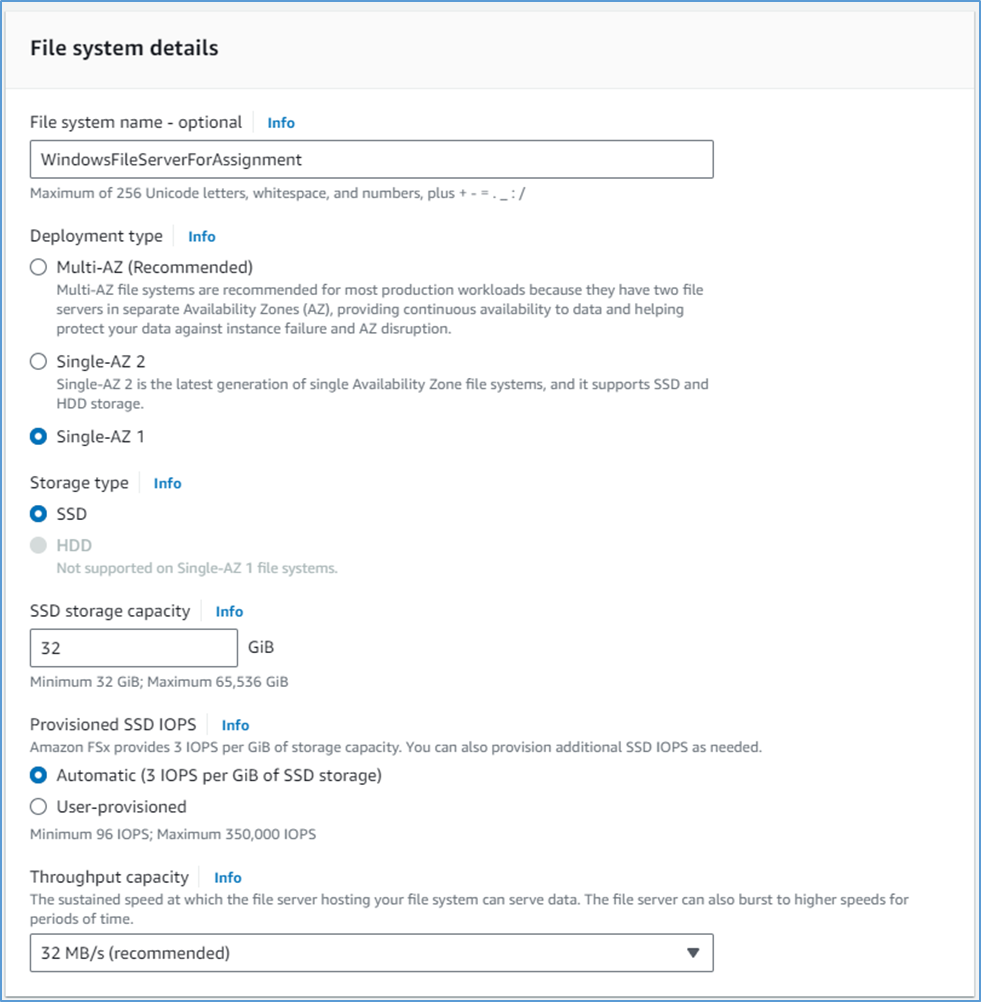
Configure the storage capacity, network settings, and other options according to your needs. For the sake of this demo, I'm choosing the default values for VPC & Subnet.
Note here that the minimum SSD capacity required for FSx windows is 32 GiB.
To proceed further, you need to ensure that you have AWS Managed Active Directory with a valid domain name. AWS Managed Active Directory is a managed Microsoft Active Directory service provided by AWS. It's a crucial component for integrating with your Windows FSx file system. We don’t have any Active Directory, so let’s create one.
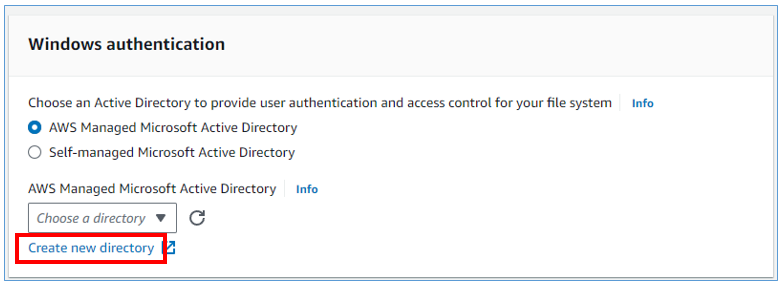
Click on Create a new directory.
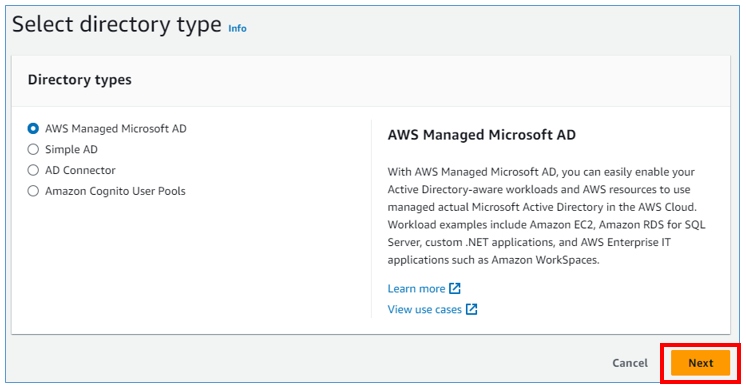
Keep AWS Managed Microsoft AD and Click on Next.
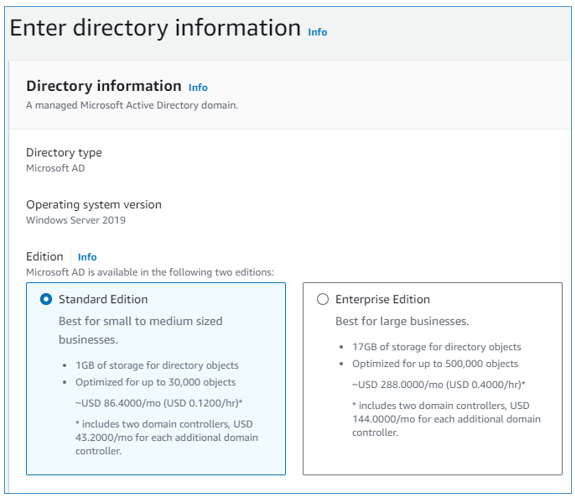
Select the standard edition.
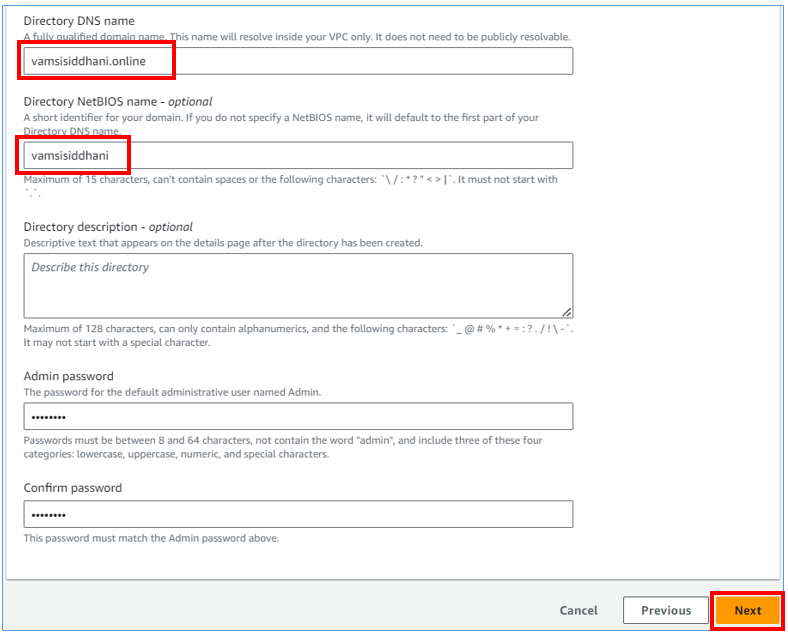
Enter your domain name and a short name for the domain name. Then enter a password for the admin user and click on Next.
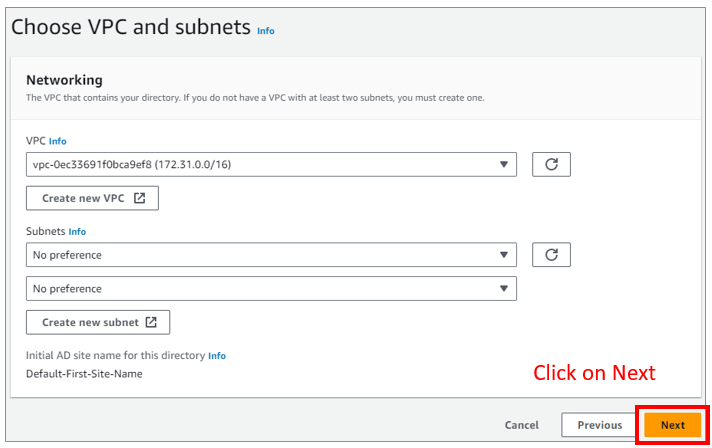
Choose the default values for networking.
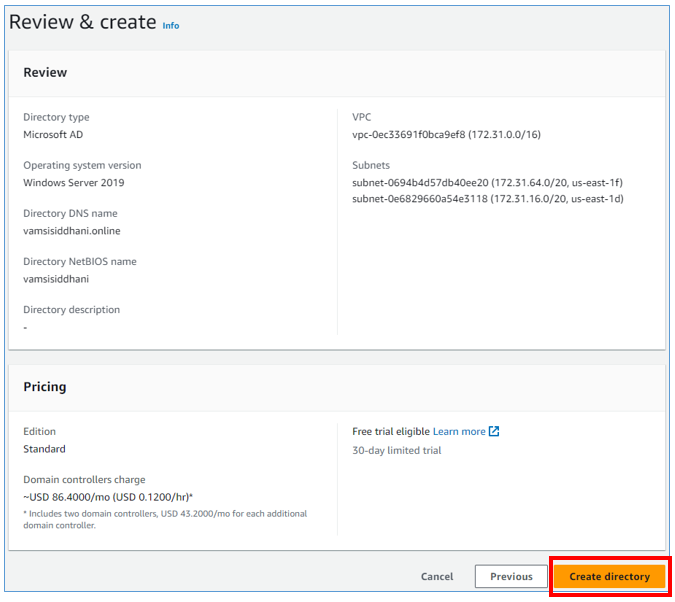
Review the settings and click on Create Directory.
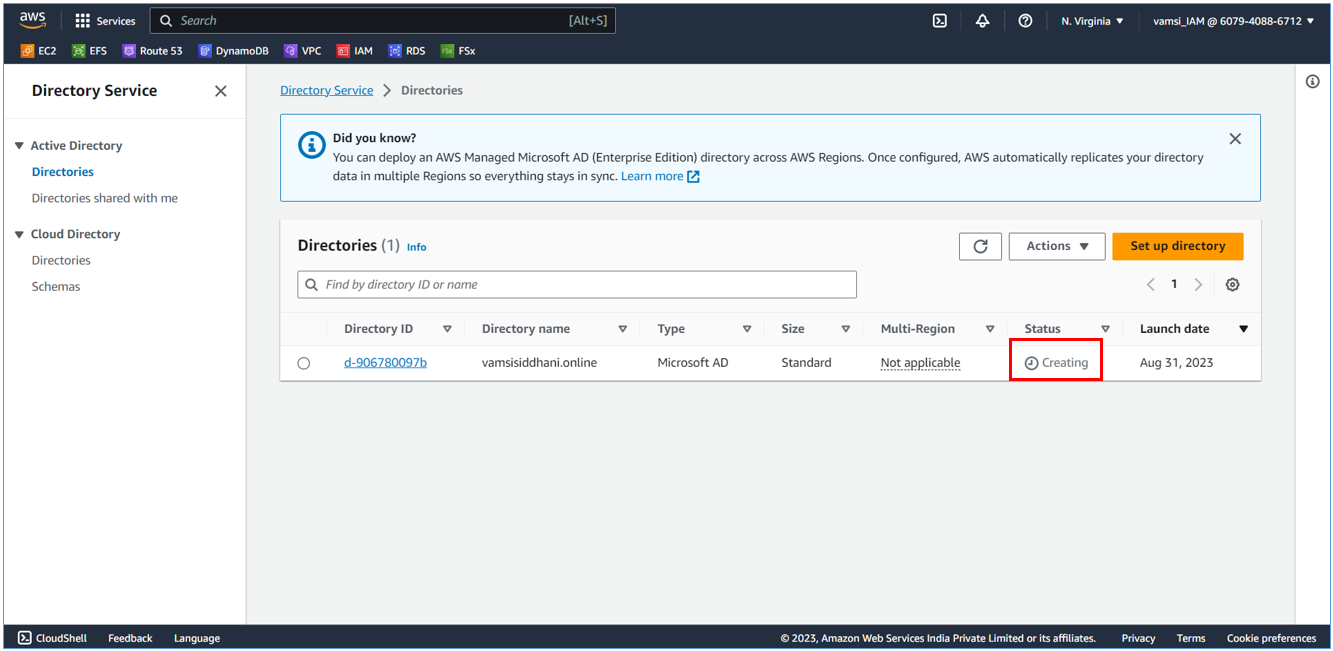
It’ll take some time to create the Active Directory.
Now, we'll go back to the FSx creation. Select the Active Directory that we created just now.
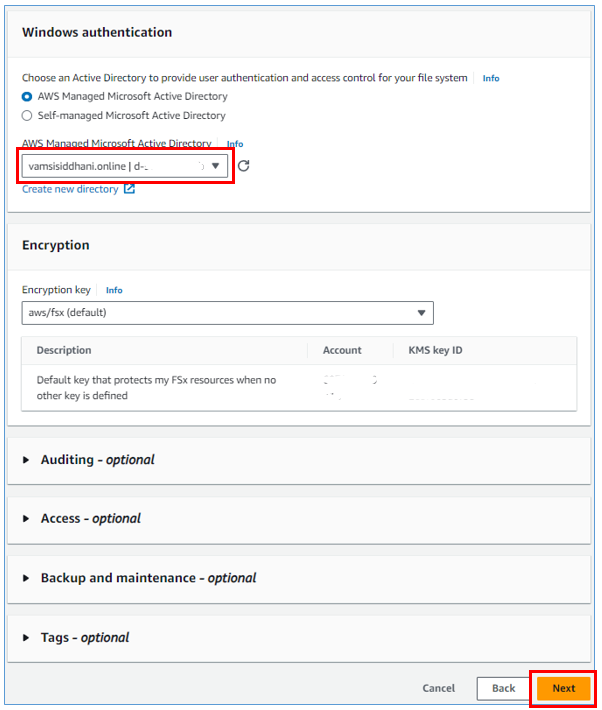
Keep the default values for other options and click on Next.
Review the settings.
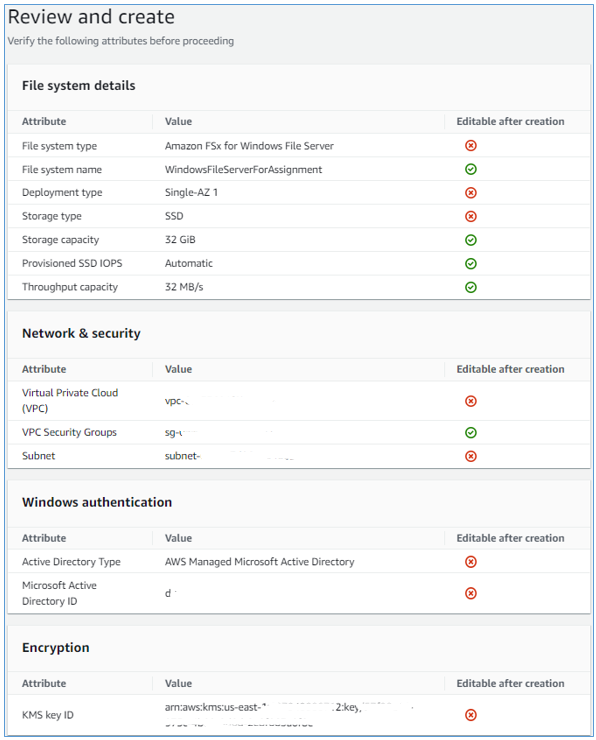
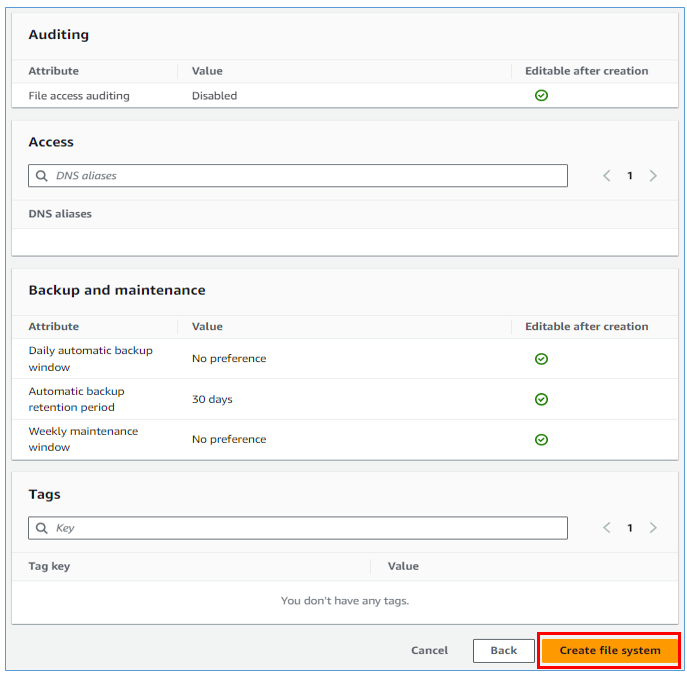
Click on Create file system.
The file system is being created and it'll take some time.
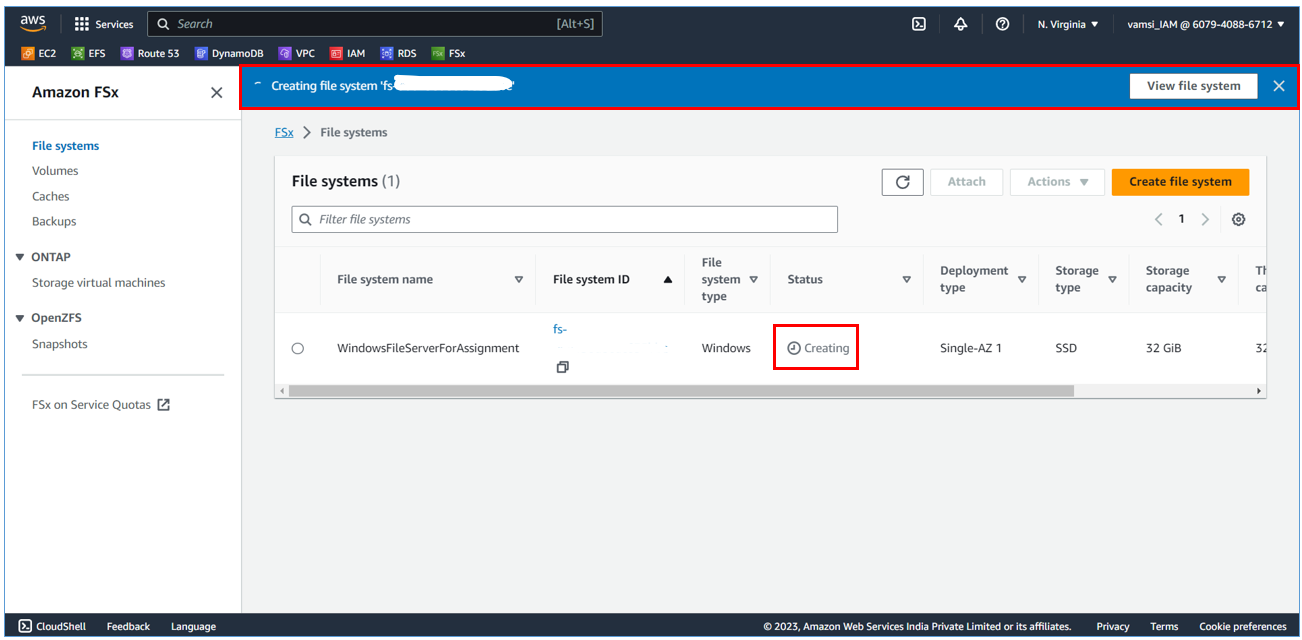
Also, We'll go and check if our directory is active.

Now our directory is active.
Our file system is getting created. Meanwhile, we’ll create an EC2 instance.
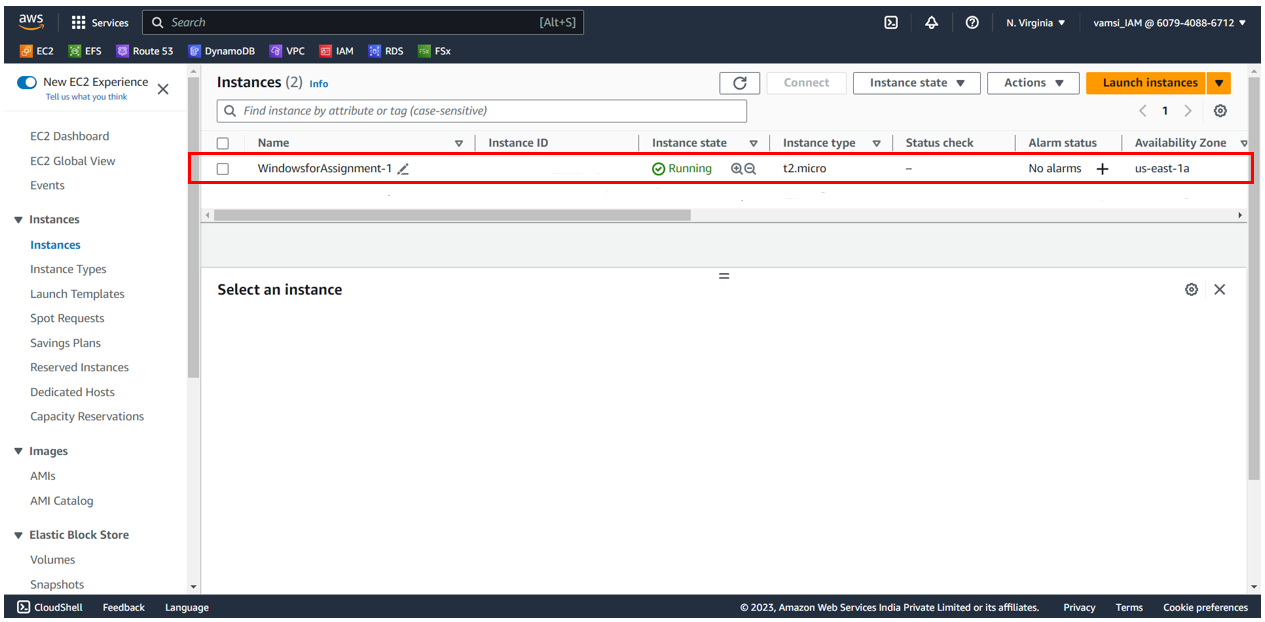
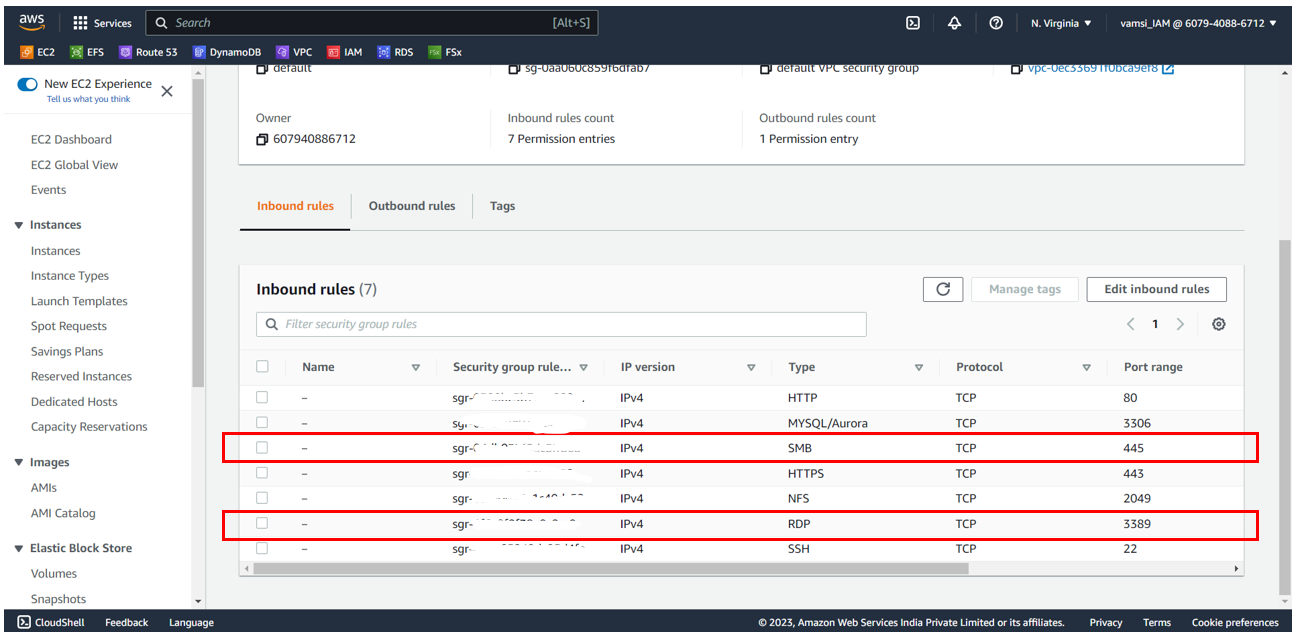
EC2 instance is created. In security groups, we’ll add the following to the inbound rules,
RDP - to allow access to the Windows instance and
SMB – to allow access to the FSx file system.
Use the RDP application in Windows to access the Windows EC2 instance.
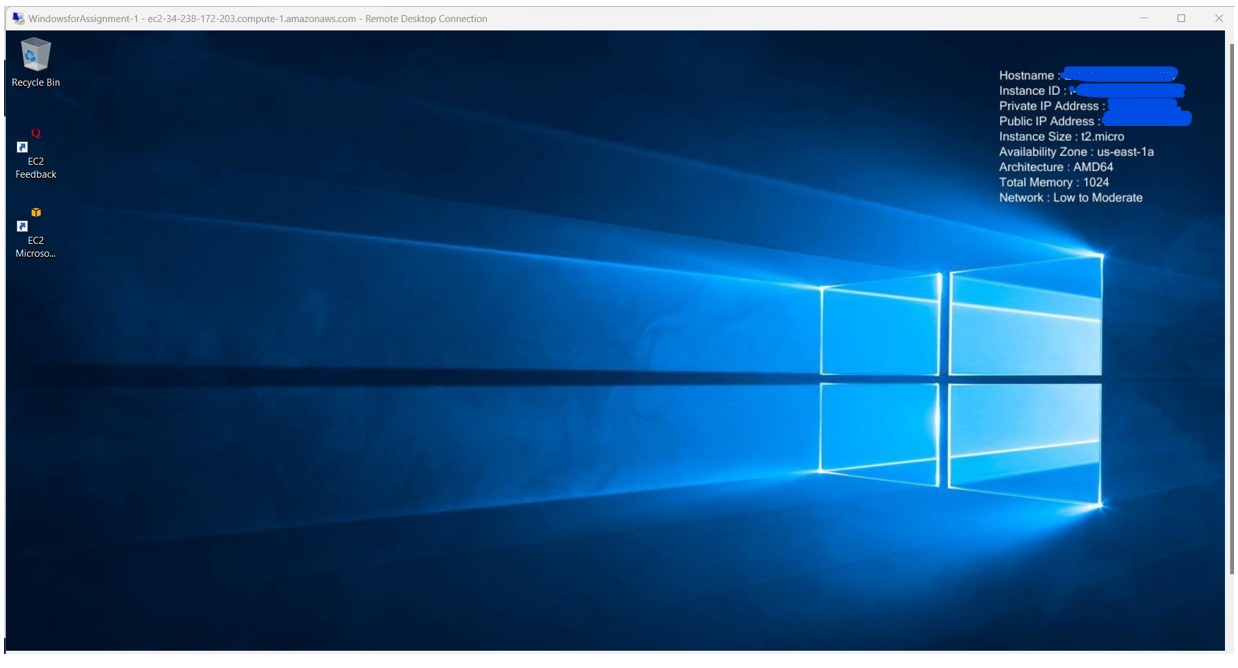
Successfully connected to our Windows instance.
Now, to access the FSx file system,
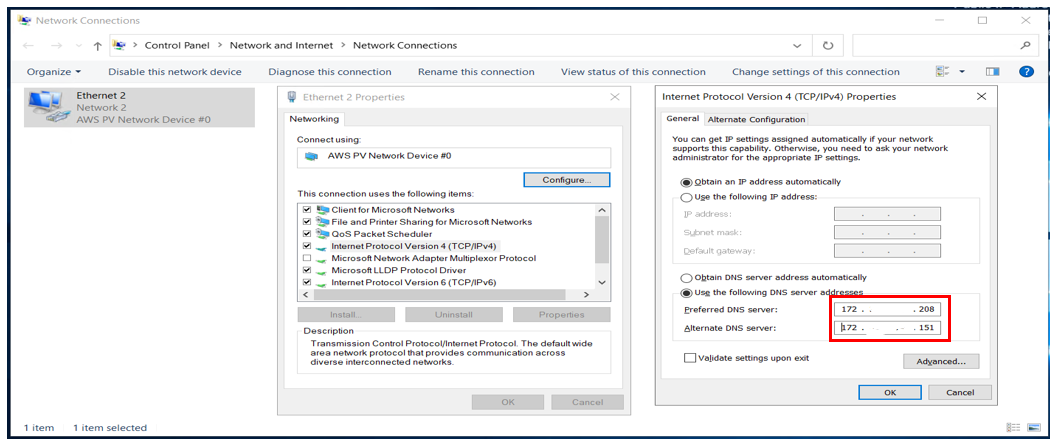
•Change the DNS address in the network settings.
•Add this instance to our Active directory domain.

Copy these addresses to the Windows EC2 DNS settings.
Go to the System properties, and add it to the domain.
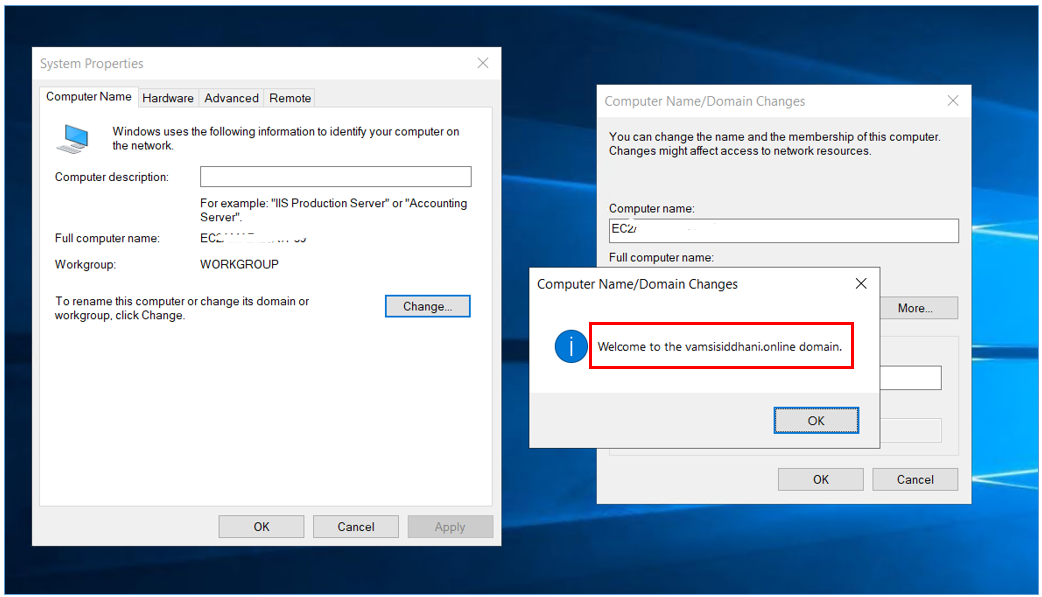
The instance is successfully connected to the domain. Now, restart the PC to apply these changes.
After rebooting the instance, go to the FSx file system and Click on attach.

Open the command prompt and execute this command.

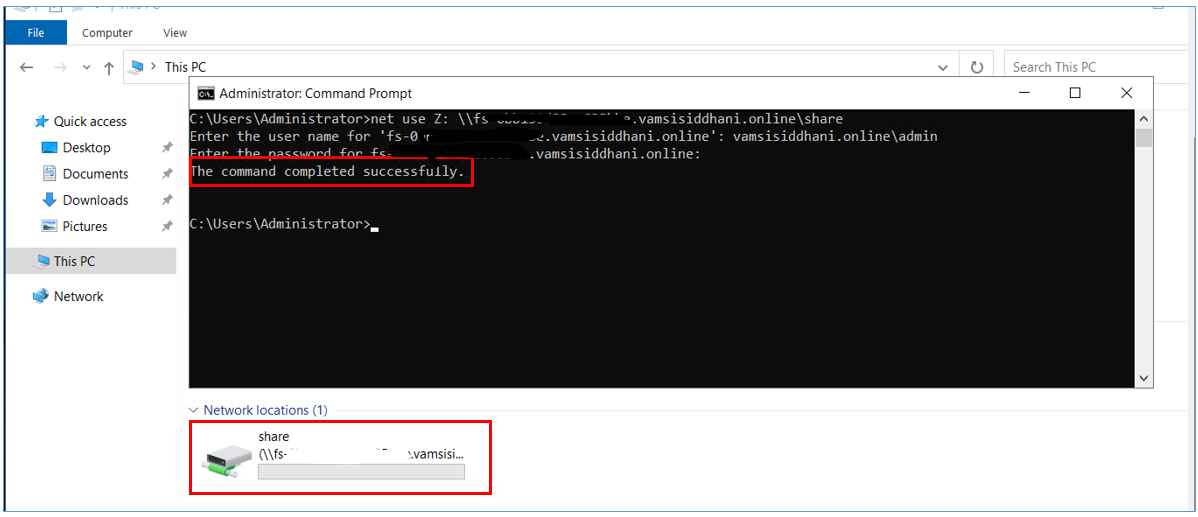
The command is successfully executed and the file system is visible under network locations. You can now access the files on the FSx file system as the normal disk. We'll now see how to create an FSx file system for Lustre.
Section 2: Creating an FSx File System for Lustre
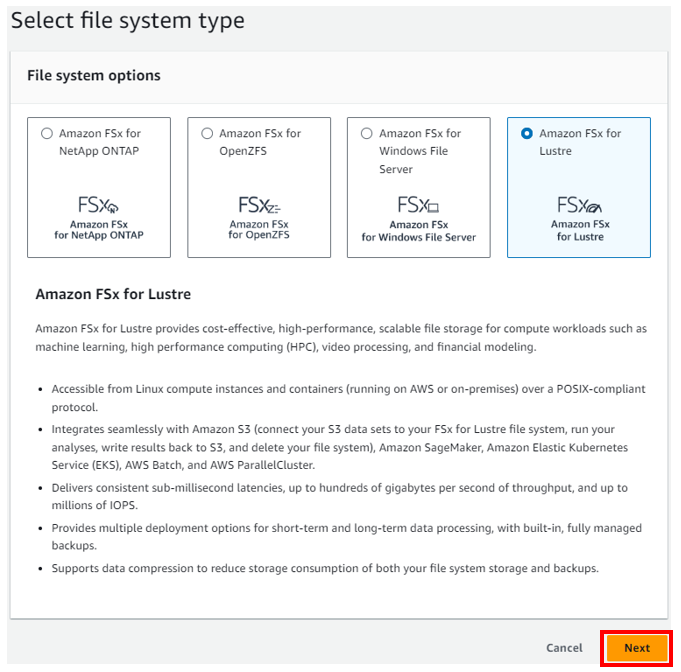
Navigate to the FSx service as shown in step 2 of the previous section and click on "Create file system".
Choose Amazon FSx for Lustre.
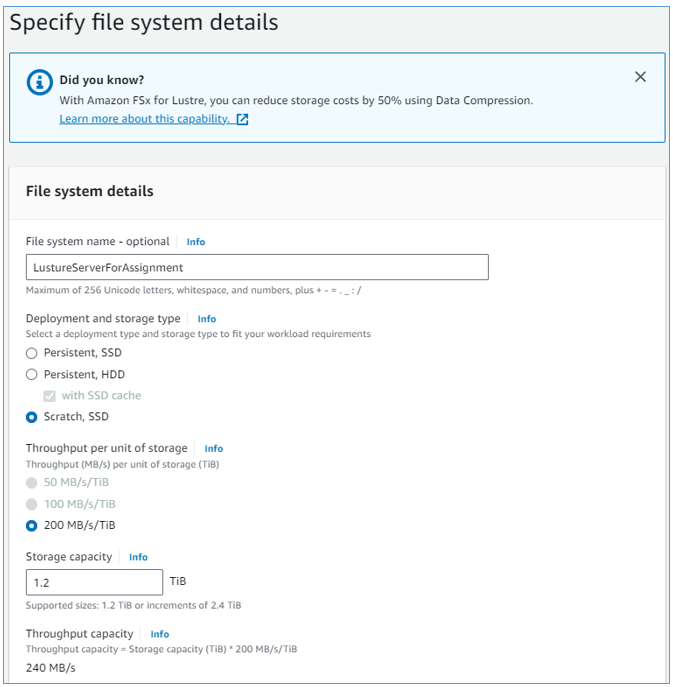
Enter the basic details. Please note that Lustre requires at least 1.2 TiB or storage capacity. For the sake of this demo, I'm creating a size of 1.2 TiB. You can choose a greater value.
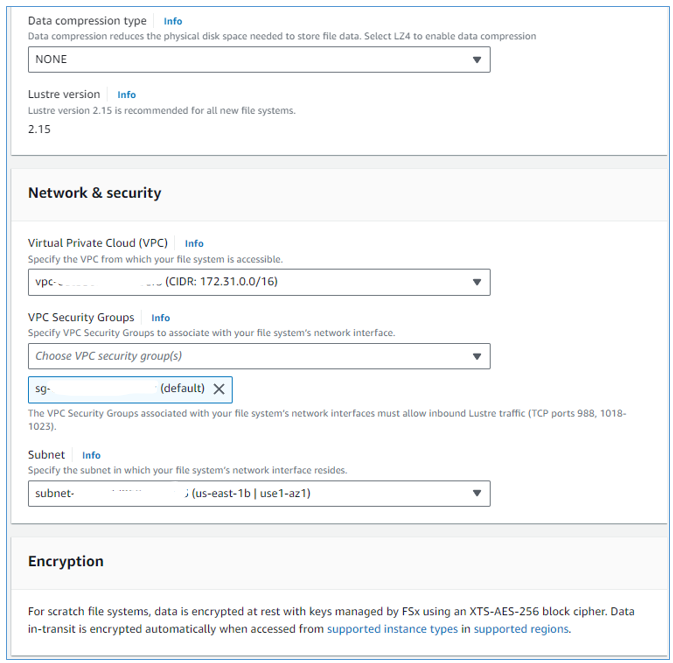
Add port numbers 988 and 1018 - 1023 as custom ports in the inbound rules of this security group to allow access to Lustre.
Keep the default values for the remaining options and click on Next.
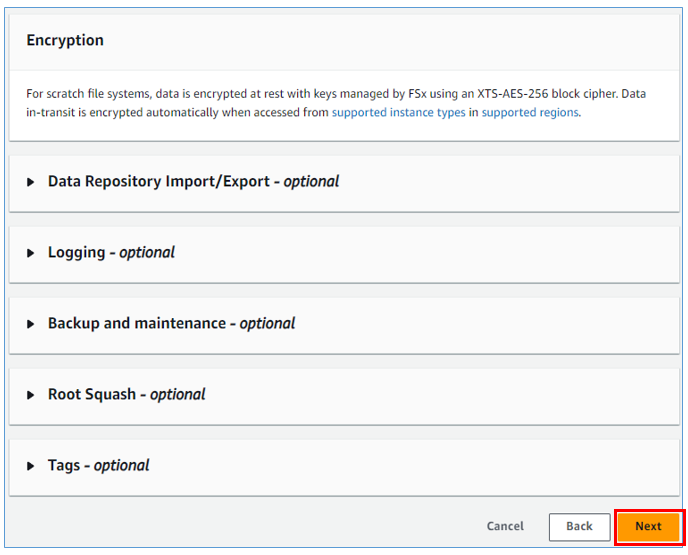
Review the settings and click on Create.
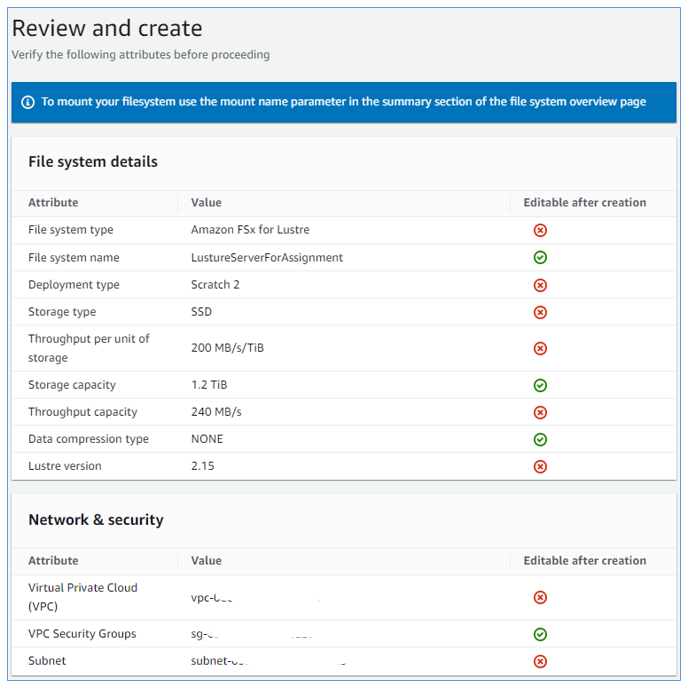
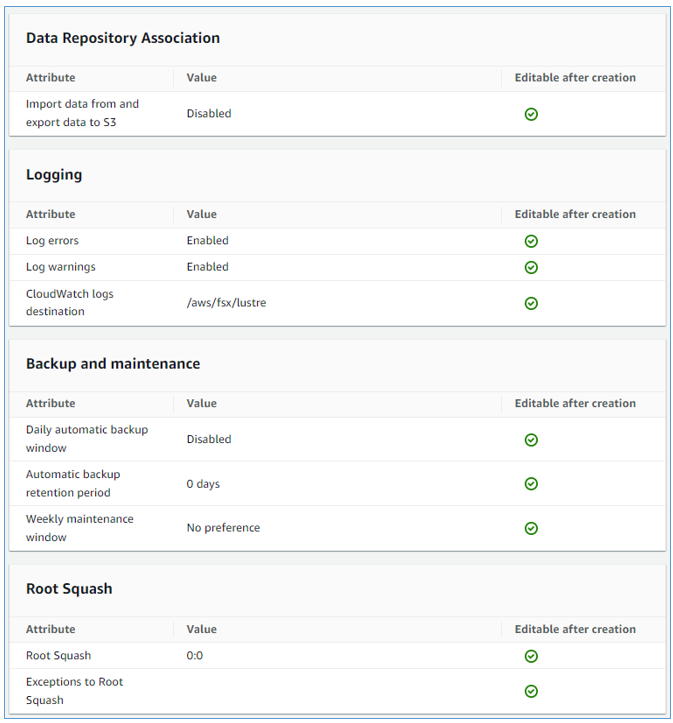
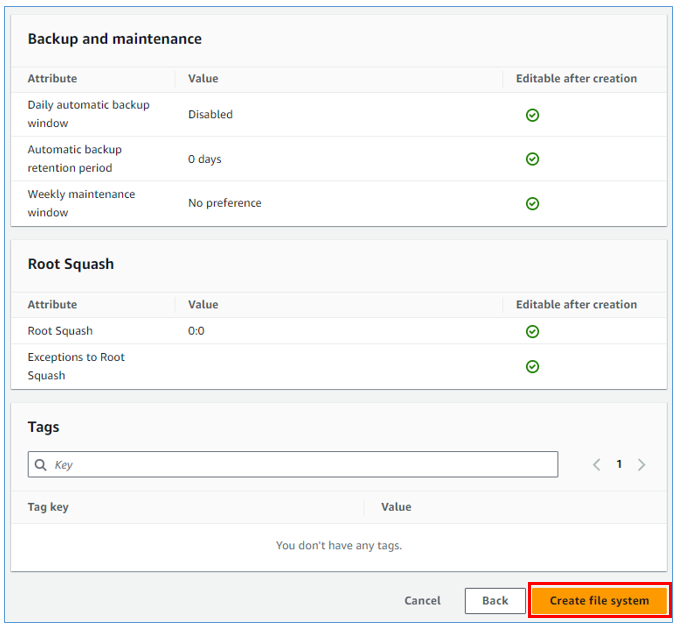
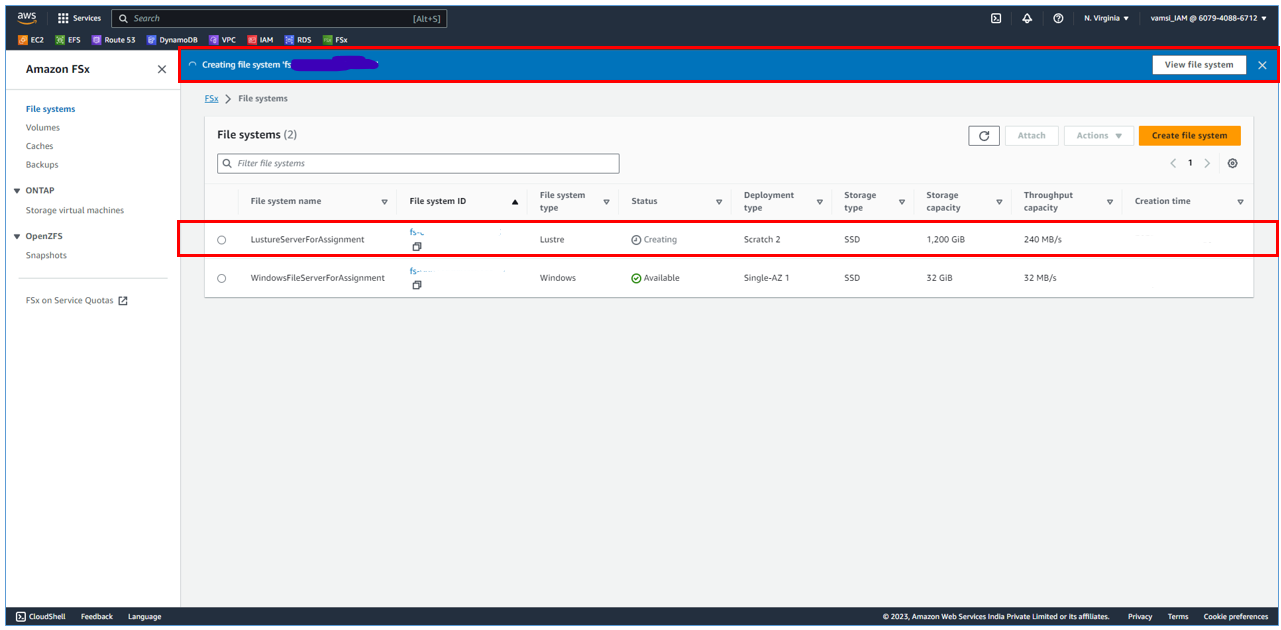
The file system is getting created.
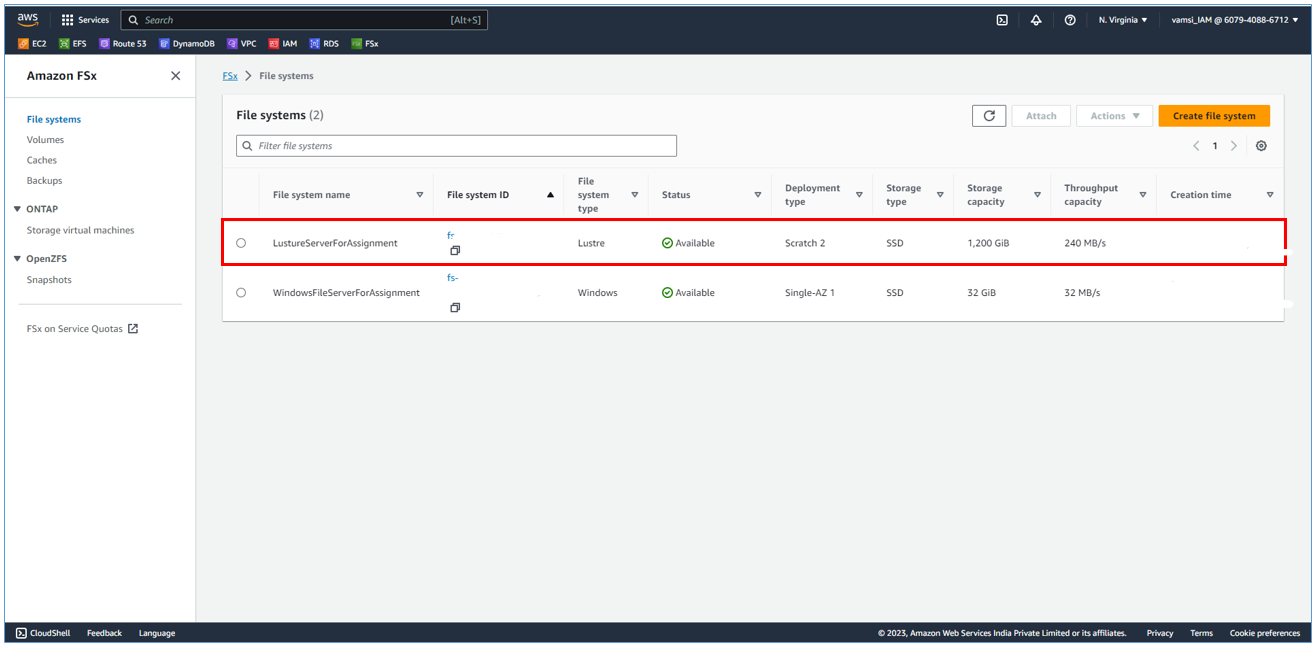
The Lusture File system is ready for use.
Now, we’ll create an Amazon Linux 2 EC2 instance to attach this file system.
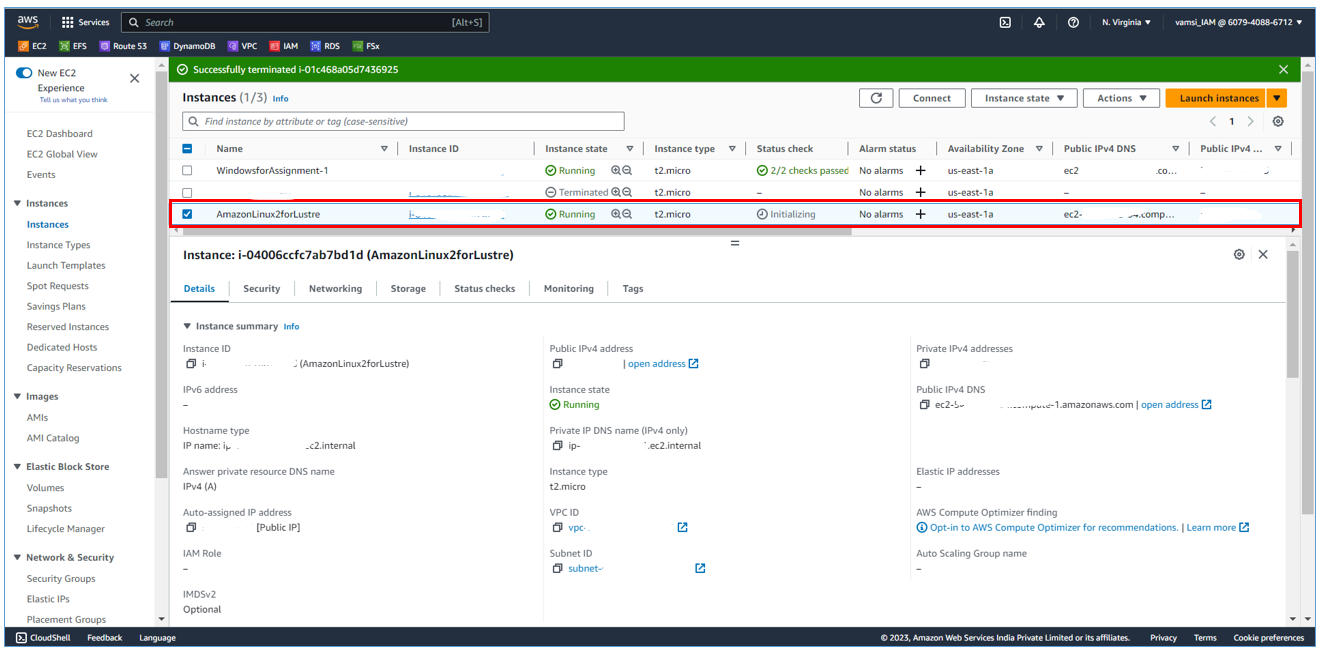
Amazon Linux 2 EC2 instance was created. We’ll connect to it.
Click on Attach.

Go to the EC2 instance and follow these steps to continue.
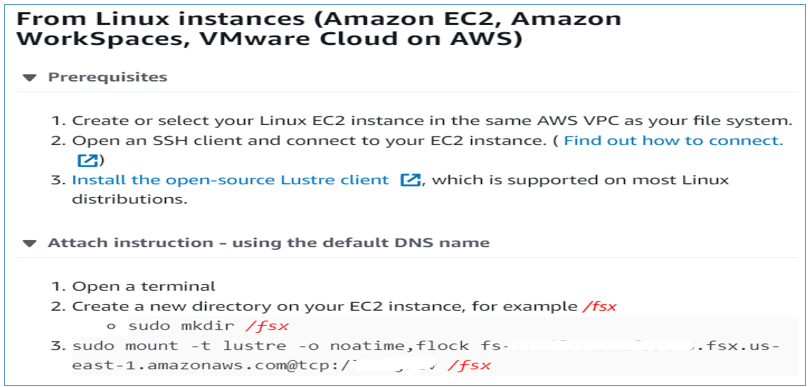
The file system is attached successfully.
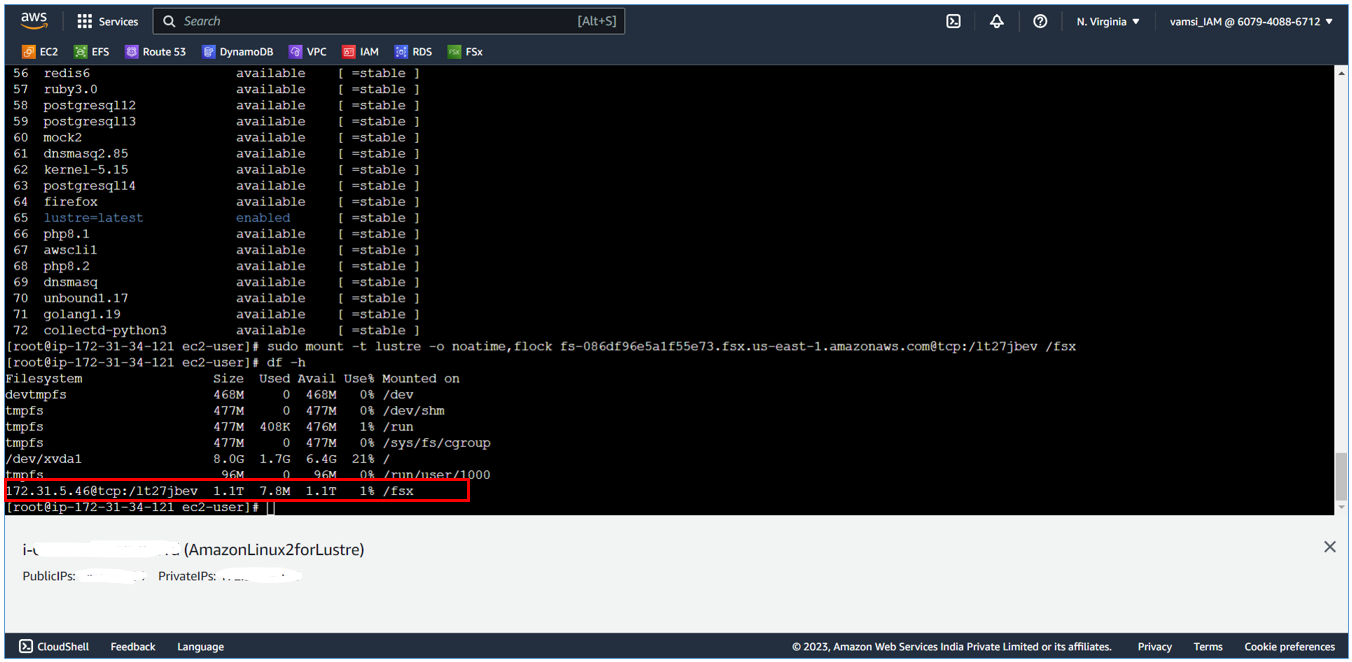
You can start utilizing it for your data-intensive tasks.
By following these steps, you can successfully set up FSx file systems to accelerate file sharing and data replication in your organization. AWS's managed file storage services, Windows File Server and Lustre, provide you with the robust solutions you need to meet the demands of today's data-driven world. With AWS FSx, you'll be able to ensure efficient, high-speed data handling, and enable your organization to thrive in the digital age.
Remember, AWS's extensive documentation and support resources are always available to assist you in case you encounter any issues during this setup process. Happy file sharing and data replication!
Subscribe to my newsletter
Read articles from SIDDHANI VAMSI SAI KUMAR directly inside your inbox. Subscribe to the newsletter, and don't miss out.
Written by

SIDDHANI VAMSI SAI KUMAR
SIDDHANI VAMSI SAI KUMAR
I've spent over 9 years working in software development for the Indian Defense industry. I'm skilled in C++, Qt, Socket Programming, Multi-Threading, BASH Scripting, and CUDA, which have all been crucial for projects in defense. Right now, I'm learning about cloud computing and DevOps, especially focusing on AWS. I'm passionate about making software development and deployment smoother and more reliable using cloud technology. Looking ahead, I'm excited about roles in cloud computing and DevOps. I want to use my software skills and knowledge of AWS and DevOps to lead exciting projects and make a difference in the tech world.