Day-22 : Getting Started with Jenkins
 Siri Chandana
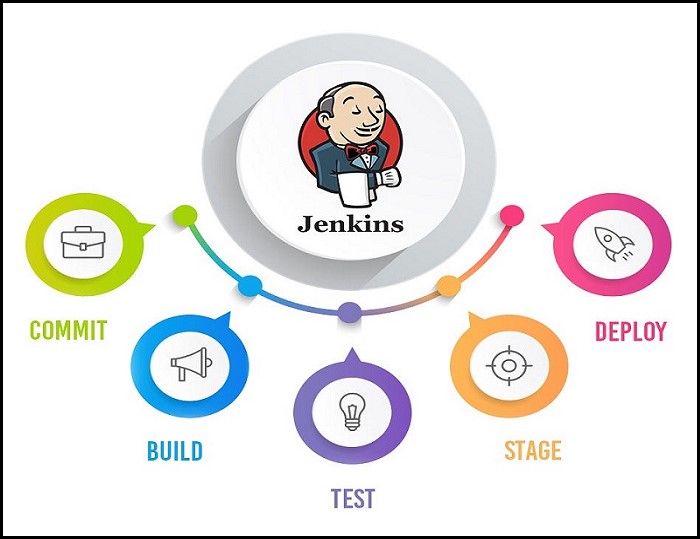
What is Jenkins?
Jenkins is an open-source automation server that helps facilitate the continuous integration and continuous delivery (CI/CD) of software projects. It provides a platform for automating the build, test, and deployment phases of software development, allowing teams to streamline their workflow and deliver software more efficiently.
Jenkins achieves CI (Continuous Integration) with the help of plugins. Plugins are used to allow the integration of various DevOps stages. If you want to integrate a particular tool, you have to install the plugins for that tool. Like Maven 2 Project, Git, HTML Publisher, Amazon EC2, etc.
Jenkins can be used with a wide range of programming languages and technologies and integrates well with various version control systems, such as Git or Subversion. It offers a web-based graphical user interface (GUI) and supports a vast number of plugins that extend its functionality and enable integration with other tools and services.
One of the key benefits of Jenkins is its extensibility. Jenkins has gained widespread popularity among software development teams due to its robustness, flexibility, and active community support. It is widely used in both small and large organizations to automate the software development lifecycle and improve overall productivity and software quality.
For example, If any organization is developing a project, then Jenkins will continuously test your project builds and show you the errors in the early stages of your development.
possible steps executed by Jenkins:
Perform a software build using a build system like Gradle or Maven Apache
Execute a shell script
Archive a build result
Running software tests
workflow :
How does CI/CD work with Jenkins?
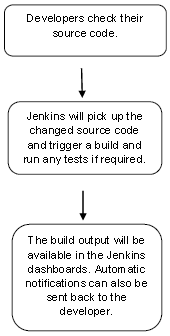
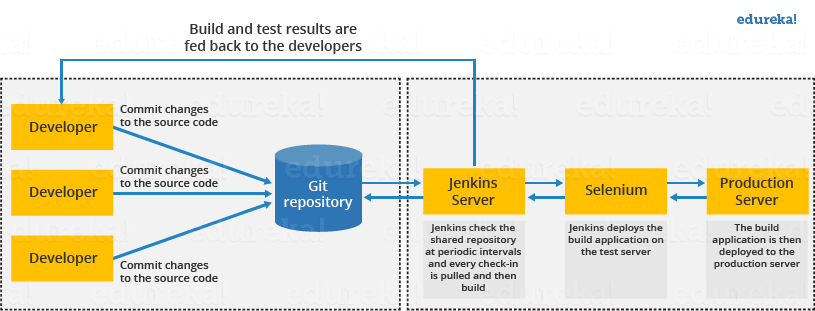
First of all, a developer commits the code to the source code repository. Meanwhile, the Jenkins checks the repository at regular intervals for changes.
Soon after a commit occurs, the Jenkins server finds the changes that have occurred in the source code repository. Jenkins will draw those changes and will start preparing a new build.
If the build fails, then the concerned team will be notified.
If a build is successful, then the Jenkins server deploys the built-in test server.
After testing, the Jenkins server generates feedback and then notifies the developers about the build and test results.
It will continue to verify the source code repository for changes made in the source code and the whole process keeps on repeating.
Advantages of Jenkins:
It is an open-source tool and does not require additional installations or components.
Easily configurable.
It supports 1000 or more plugins to ease your work. If a plugin does not exist, you can write the script for it and share it with the community.
It is built in Java and hence it is portable.
It is platform-independent and It is available for all platforms and different operating systems. Like OS X, Windows or Linux.
Jenkins also supports cloud-based architecture so that we can deploy Jenkins in cloud-based platforms.
Jenkins Architecture
Jenkins follows Master-Slave architecture to manage distributed builds. In this architecture, the slave and master communicate through TCP/IP protocol.
Jenkins architecture has two components:
Jenkins Master/Server
Jenkins Slave/Node/Build Server

Jenkins Master
The main server of Jenkins is the Jenkins Master. It is a web dashboard that is nothing but powered by a war file. By default, it runs on an 8080 port. With the help of Dashboard, we can configure the jobs/projects but the build takes place in Nodes/Slave. By default, one node (slave) is configured and running in the Jenkins server. We can add more nodes using IP address, user name, and password using the ssh, jnlp, or webstart methods.
The server's job or master's job is to handle:
Scheduling build jobs.
Dispatching builds to the nodes/slaves for the actual execution.
Monitor the nodes/slaves (possibly taking them online and offline as required).
Recording and presenting the build results.
A Master/Server instance of Jenkins can also execute build jobs directly.
Let’s have a look at the key Jenkins master components.
Jenkins Job:
A job is a collection of steps that you can use to build your source code, test your code, run a shell script, run an Ansible role in a remote host or execute a terraform play, etc. We normally call it a Jenkins pipeline.
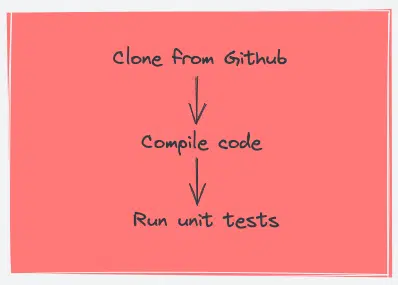
There are multiple job types available to support your workflow for continuous integration & continuous delivery.
Jenkins Plugins:
Plugins are community-developed modules that you can install on your Jenkins server. For the corporate network, you will have to set a proxy details to connect to the plugin repository and also develop your custom plugins. Check out all plugins from the Jenkins Plugin Index.
For example, if you want to upload a file to an s3 bucket from Jenkins, you can install an AWS Jenkins plugin and use the abstracted plugin functionalities to upload the file rather than writing your own logic in AWS CLI. The plugin takes care of error and exception handling.
Jenkins has a vast ecosystem of plugins that extend its functionality and enable integration with various tools and services. Here are some popular plugins commonly used with Jenkins:
Git Plugin: Integrates Jenkins with Git, allowing you to clone Git repositories, manage branches, and trigger builds based on Git events.
GitHub Plugin: Provides integration with GitHub, enabling features like triggering builds on GitHub events, reporting build status to pull requests, and more.
Pipeline Plugin: This offers a powerful and flexible way to define and manage continuous delivery pipelines within Jenkins, allowing you to script your entire build, test, and deployment process.
AWS Elastic Beanstalk Plugin: Allows you to deploy applications to AWS Elastic Beanstalk, an orchestration service for deploying and managing applications on AWS infrastructure.
Jenkins Credentials:
When you set up Jenkins pipelines, there are scenarios where it needs to connect to a cloud account, a server, a database, or an API endpoint using secrets.
In Jenkins, you can save different types of secrets as a credential.
Secret text
Username & password
SSH keys
All credentials are encrypted (AES) by Jenkins. The secrets are stored in $JENKINS_HOME/secrets/ directory. It is very important to secure this directory and exclude it from Jenkins backups.
Jenkins Global Settings (Configure System):
Under Jenkins global configuration, you have all the configurations of installed plugins and native Jenkins global configurations.
Also, you can configure global environment variables under this section. For example, you can store the tools (Nexus, Sonarqube, etc) URLs as global environment variables and use them in the pipeline. This way it is easier to make URL changes that get reflected in all the Jenkins jobs.
Jenkins Logs:
Provides logging information on all Jenkins server actions including job logs, plugin logs, webhook logs, etc.
Jenkins Slave
Jenkins slave is used to execute the build jobs dispatched by the master. We can configure a project to always run on a particular slave machine, or a particular type of slave machine, or simply let Jenkins pick the next available slave/node.
As we know Jenkins is developed using Java and is platform-independent thus Jenkins Master/Servers and Slave/nodes can be configured in any server including Linux, Windows, and Mac.

How to install Jenkins?
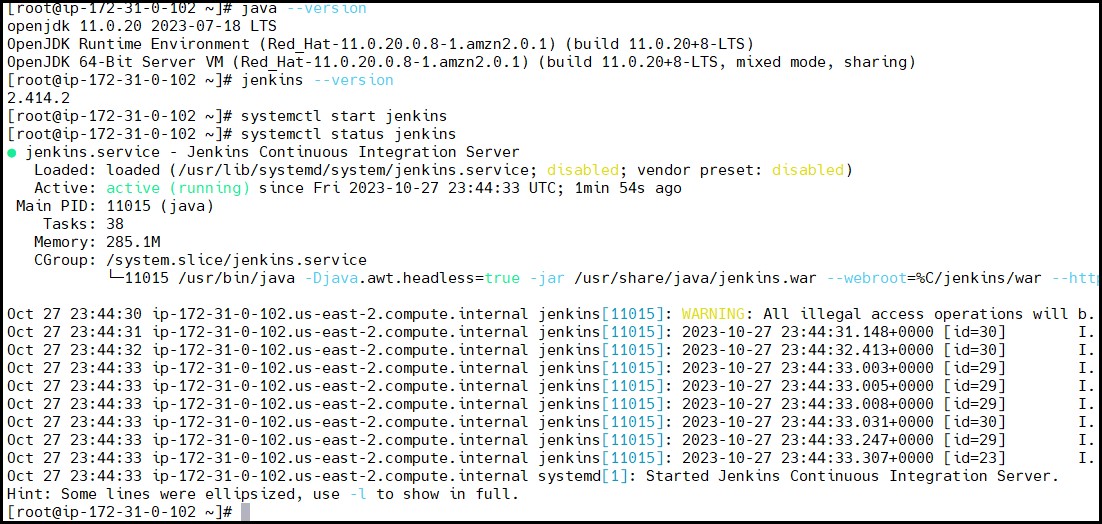
Step 1: Before installing Jenkins, make sure Java is installed. If it is not installed, install Java using Yum repository.
yum -y install java
java --version
If you see a version number (like "Java 11" or similar), you're good to go. If you don't see anything or it says Java is not found, you need to install Java before proceeding.
Step 2: Enable the repo file for installing Jenkins packages directly from the Jenkins repository.
 sudo wget -O /etc/yum.repos.d/jenkins.repo https://pkg.jenkins.io/redhat-stable/jenkins.repo ----------------------jenkins

sudo rpm --import https://pkg.jenkins.io/redhat-stable/jenkins.io-2023.key
 yum install -y jenkins
step 3: Enable and start Jenkins Service
Use systemctl command to enable and start Jenkins service.
 systemctl start jenkins
 systemctl enable jenkins
systemctl status jenkins
Step 4: Accessing Jenkins, runs on port 8080 by default. Open your web browser and navigate to http://localhost:8080. You'll be prompted to enter an initial admin password which can be found on your system.
A page will appear asking for a password. To find the password, go back to the terminal and type:
sudo cat /var/lib/jenkins/secrets/initialAdminPassword
Copy the password from the terminal and paste it into the password field on the browser page.
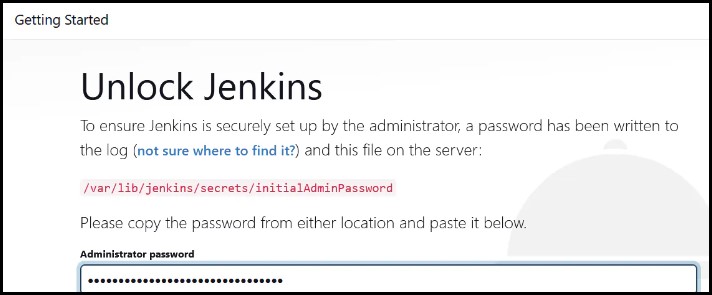
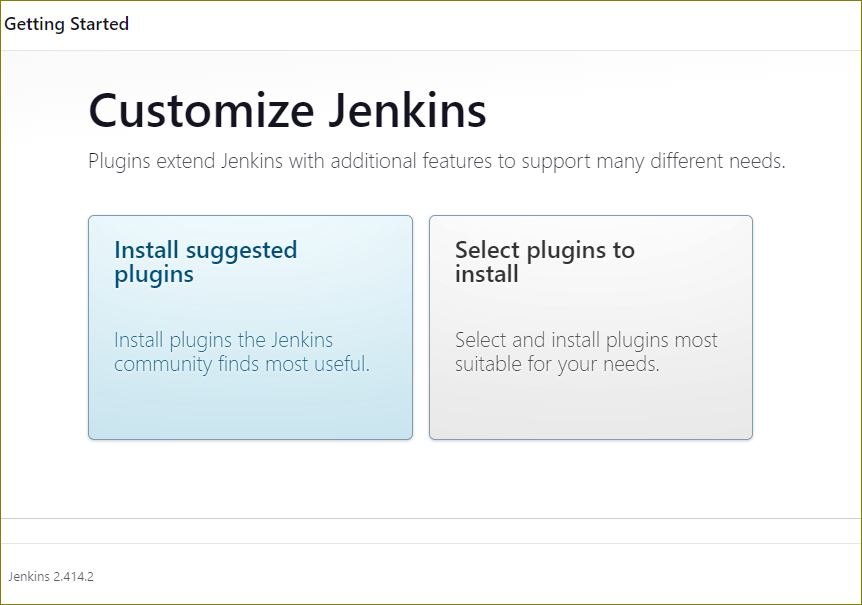
Follow the on-screen instructions to finish setting up Jenkins, creating an admin user, and installing suggested plugins

step 5: create the first admin user and password

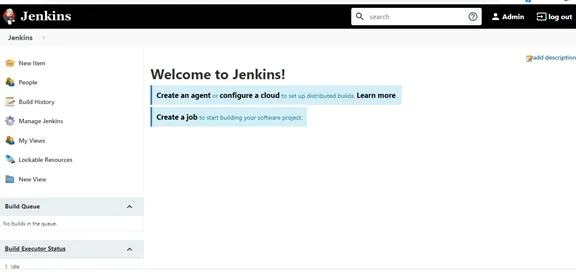
Finally, the dashboard of Jenkins will be like,
Task1:
Creating a Freestyle Pipeline: Saying "Hello World!":
Let's dive into the world of Jenkins by creating a simple freestyle pipeline that prints "Hello World!"
Let's create a freestyle pipeline to print "Hello World!!" or any message you want.
After logging in to Jenkins dashboard, click on New Item to create a new job.
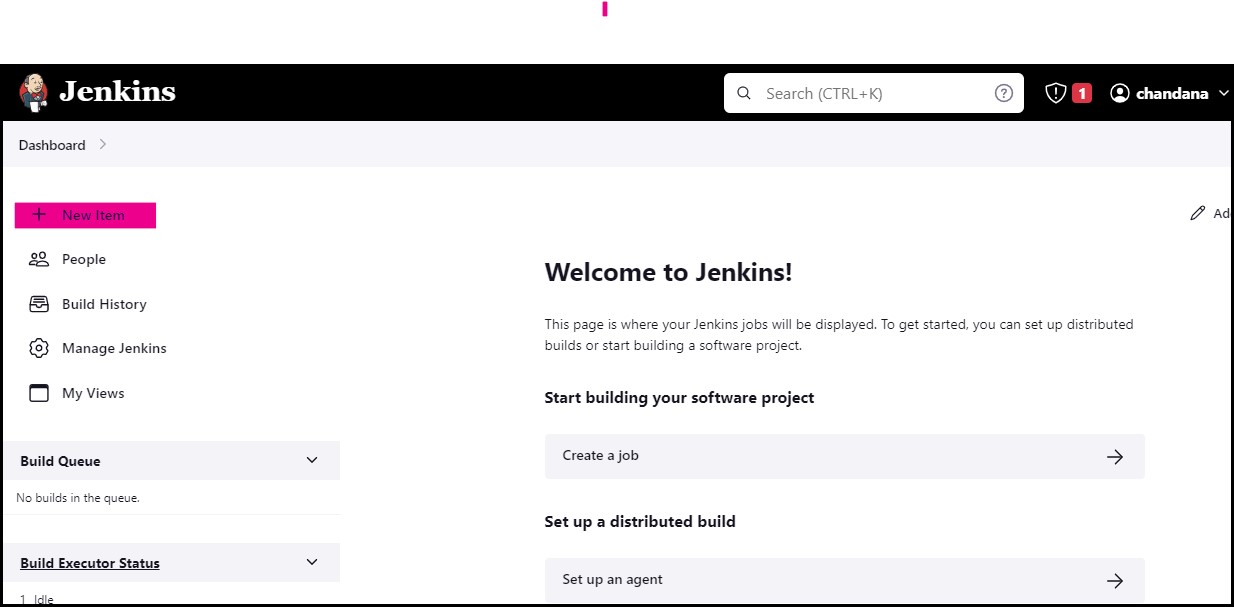
Enter the Name of the job. As per the task choose "Freestyle project".

After this, it shows description box, you can give any simple description of this

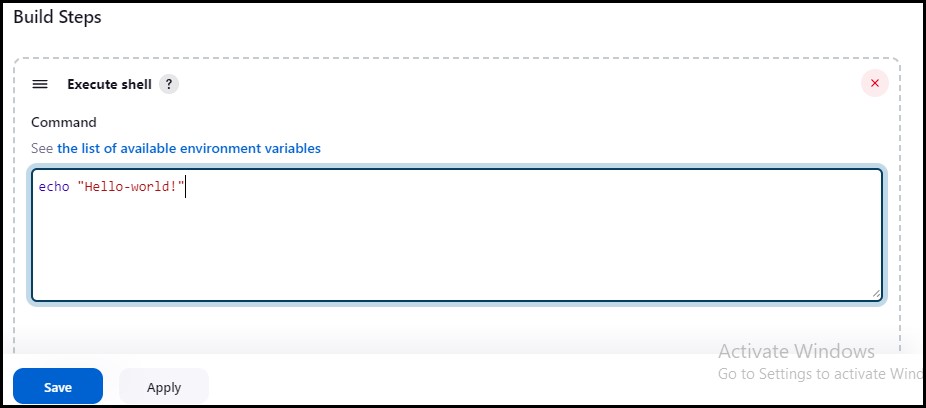
Choose "Build Steps", click on it, select Execute Shell, and enter the command you want to execute and save

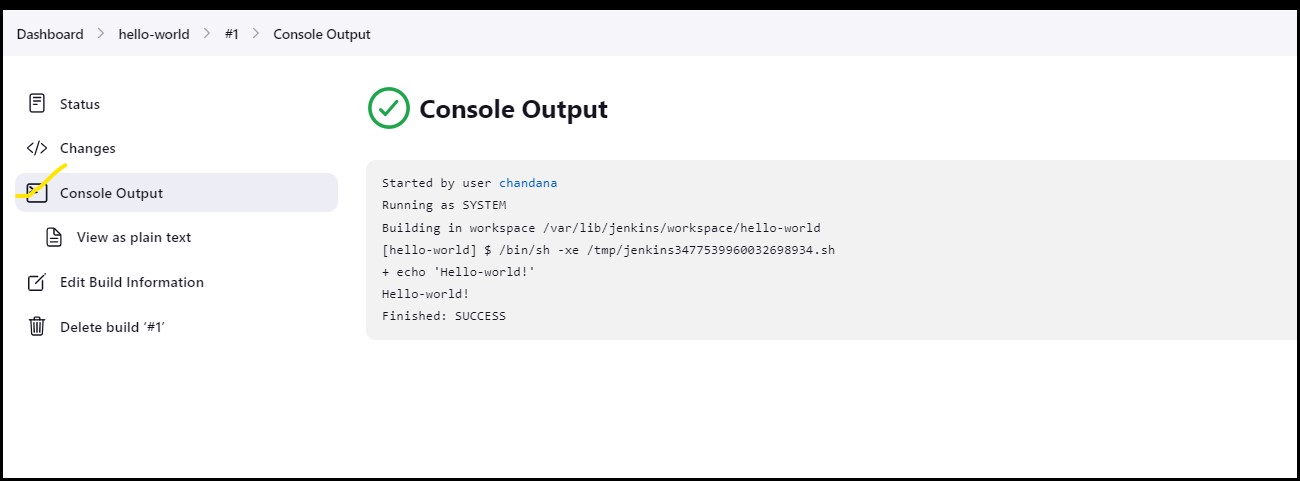
Click on "Build Now". When the build is finished, click on the console output. The output of the "echo" command will be displayed.
Thank you for 📖reading my blog, 👍Like it and share it 🔄 with your friends if you find it knowledgeable.
Happy learning together😊😊!!
Subscribe to my newsletter
Read articles from Siri Chandana directly inside your inbox. Subscribe to the newsletter, and don't miss out.
Written by
