Improve on-device speech recognition by customizing the language model - iOS 17
 Mohammad Ihmouda
I woke up one sunny morning with a throbbing headache. The first thing I did, I swing my legs out of bed and sit up, searching for pills bedside table and bathroom, I didn't find them and my headache refused to relent. I got back to my bed and picked up my iPhone, for a moment I thought about asking my on-speech recognizer app, hoping that Siri might have some answers for my pounding head. and I surprisingly asked her: "Hey Siri, I have a headache, I need acamol". 💊💊💊

“Acamol” is one of paracetamol drugs, which most widely used to treat pain and reduce a high temperature.
Siri confidently recognized and translated my words into:
“I have headache, I need a camel”. 🐪🐪🐪.
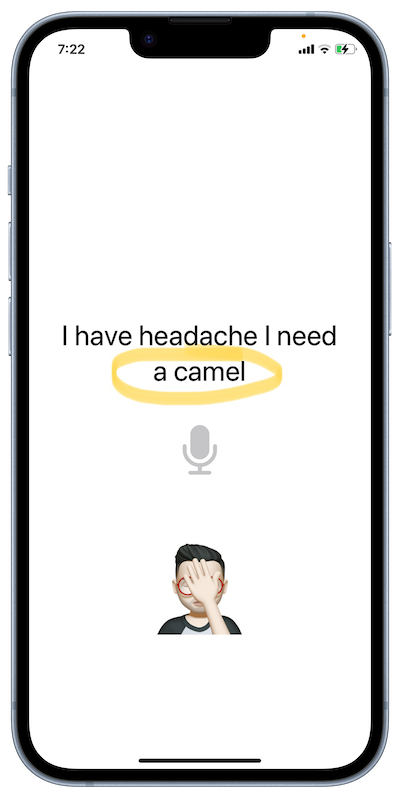
WHAT!!!! "a Camel" ?!! 💥💥💥. I realized I started seeing and hearing things that weren't really there, I rubbed my eyes with my hands, and gave it a second closer look, and the camel was still there. my headache grew more intense. I can't see any magic connection between the camel & headache. I realized that the custom speech framework out of the box, isn't suitable for all apps. Then I started thinking for a way to customize the speech recognition according to the domain for different behaviors, this could not be achieved before the release of iOS 17.

Enough storytelling .... let's talk programmatic. let's do magic 🪄🎩
Speech Framework
IOS 10 introduced an interesting new API “Speech Recognition”, which allows developers to build customizable applications to translate live or pre-recorded audio to transcribed text. Consider the previous funny example “A camel & Acamol”, obviously the speech recognizer class isn’t working well for all domains for different purposes; for example, the speech recognizer for digital health app with very specialized medical terminologies act the same for a sport app specialized in the names of players, clubs, and competitions, that leads to receiving not accurate, out of context information, not tailored to users' needs and the specific domains they are engaging with. But WHY ⁉️⁉️

To explain why!!, we need to understand how the speech recognition system works.
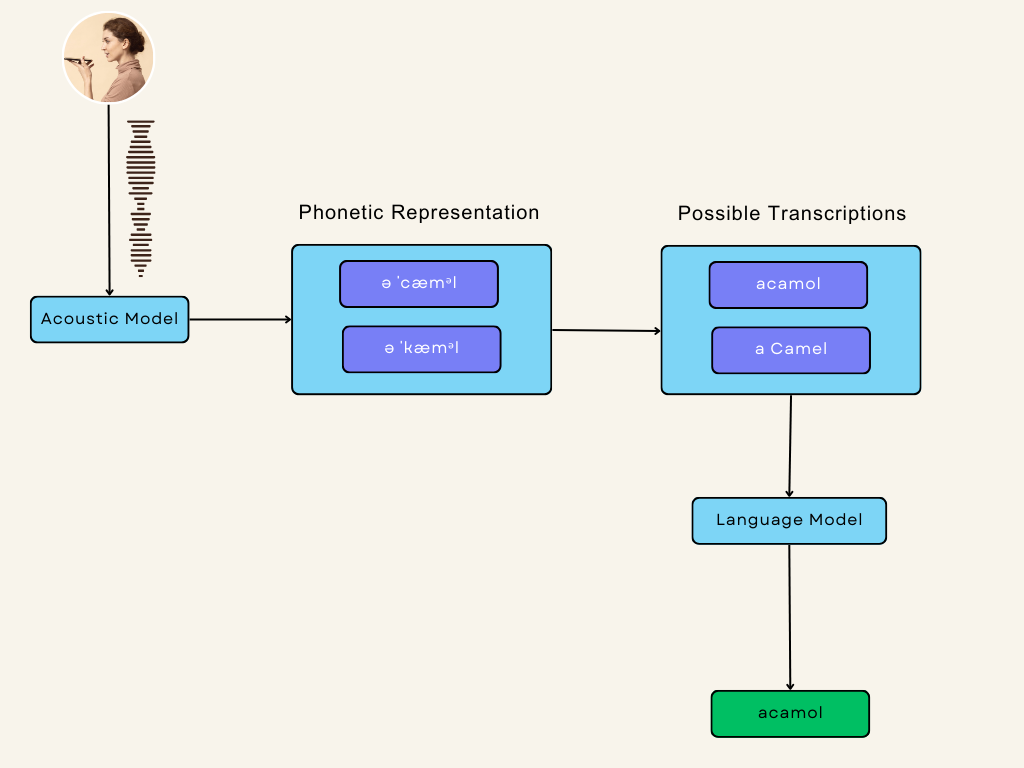
The process begins when the user sends a voice command. The audio input is captured as an analog audio signal. the data is passed in the pre-processing phase and fed into an Acoustic model. which produces a phonetic representation. Then the phonetic representation is converted into a written text. The same audio data can have multiple phonetic representations, and a single phonetic representation could be translated into multiple transcriptions. ended up with multiple possible texts, the language model is used to predict the most likely words or phrases that match the audio input and reject the unlikely other candidates.

Since iOS 10, the speech framework has encapsulated the entire system into a single easy-to-use interface, which forces all applications to use the same language model, resulting receive the same results for different domains. But with iOS 17, you can customize the language corresponding to your domain for different behavior.
Beginning in iOS 17, you'll be able to customize the behavior of the SFSpeechRecognizer's language model, tailor it to your application, and improve its accuracy.
Language Model Customization
The process of customization consists of two steps:
Train a collection of your app domain data.
Configuring the speech recognition request with the customized language model.
Data Generation:
This process is to train your model with a collection of text and phrases from your app's domain, this will increase the possibility to recognize these terms inside your app correctly. Let's train our language model with a collection of items using result builder DSL.
import Speech

// 1
let data = SFCustomLanguageModelData(locale: Locale(identifier: "en_US"),
                                     identifier: "com.lemona.health",
                                     version: "1.0") {

    // 2

    // 2.1
    SFCustomLanguageModelData.PhraseCount(phrase: "I have headache, I need acamol",
                                          count: 1000)

    // 2.2
     SFCustomLanguageModelData.PhraseCountsFromTemplates(classes: [
        "illness": ["headache", "stomach"],
        "medicine": ["acamol", "trofen"]
    ]) {
        SFCustomLanguageModelData.TemplatePhraseCountGenerator.Template(
            "I have <illness>, I need <medicine>",
            count: 1000
        )
      }
    }

    // 2.3
    SFCustomLanguageModelData.CustomPronunciation(grapheme: "Tramadol",
                                                  phonemes: ["tra' ma doll"])

// 3
try await data.export(to: URL(filePath: "/[path]/CustomLMData.bin"))
Here’s a step-by-step breakdown:
The speech framework introduced "SFCustomLanguageModelData": a new class that acts as a container for trained data.
Then, Here is where we are actually training our dataset. We can use any of these three methods:
PhraseCount: The object is used to train and weigh a phrase or part of a phrase.
PhraseCountsFromTemplates: The object is used to train a large number of data sets that fit a regular pattern. For this medical case pattern, to cover many illnesses and medical terms:
"I have <illness>, I need <medicine>"CustomPronunciation: The object is used to train your model by providing the spelling and pronunciations for specialized terminologies. For example medicine names. Pronunciations are accepted in the form of X-SAMPA strings. For me, I added the pronunciation for "Tramadol" in the "en_us" locale.
The count value represents how many times the data should be presented in the final data set, and used to weight certain items more heavily than others.
Next, export the trained data into a binary file.
You could ask yourself the following questions: Do You ??!! 🧐
Where can I train my data??!!
When I can train my data

Here is the way to train your domain data inside the Xcode ?!
Let's do it step by step:Create a new Xcode project - if you don't already have one -:
select the appropriate template: let's assume select "App" under "iOS".Add a second command line utility target:
from the "File" menu, then "New" > "Target", select "Command Line Tool" under "macOS" and click "Next."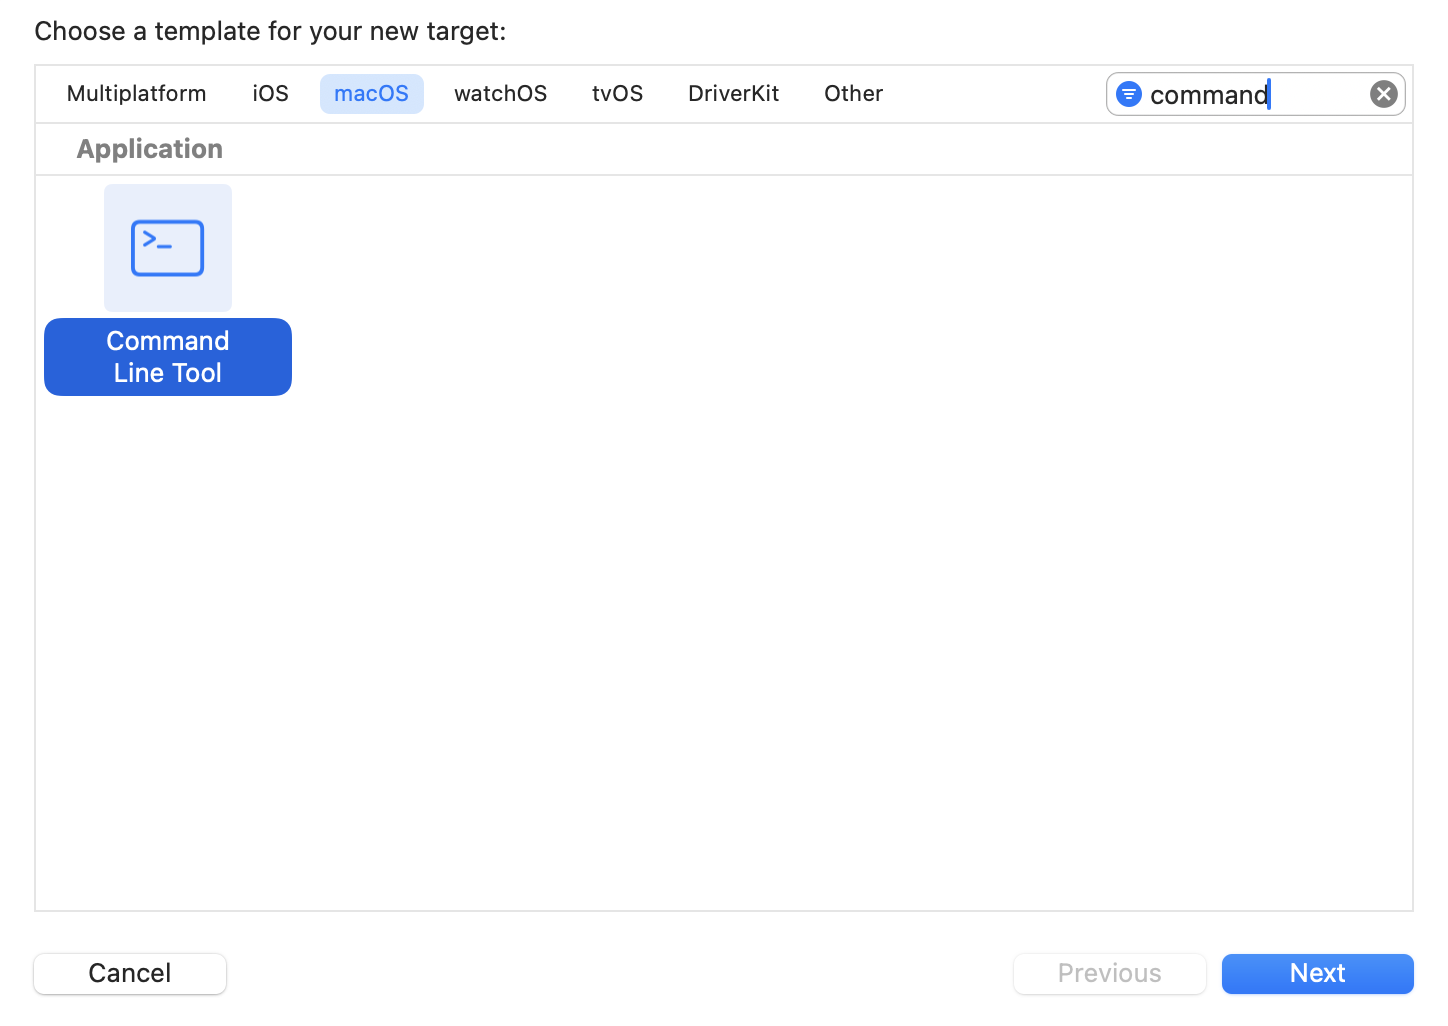
Add your command line utility code:
you can copy the training data code we have written before and paste it into the .main file. Next, run the target's schema.AAAAAND! The binary file should be generated in the target path.
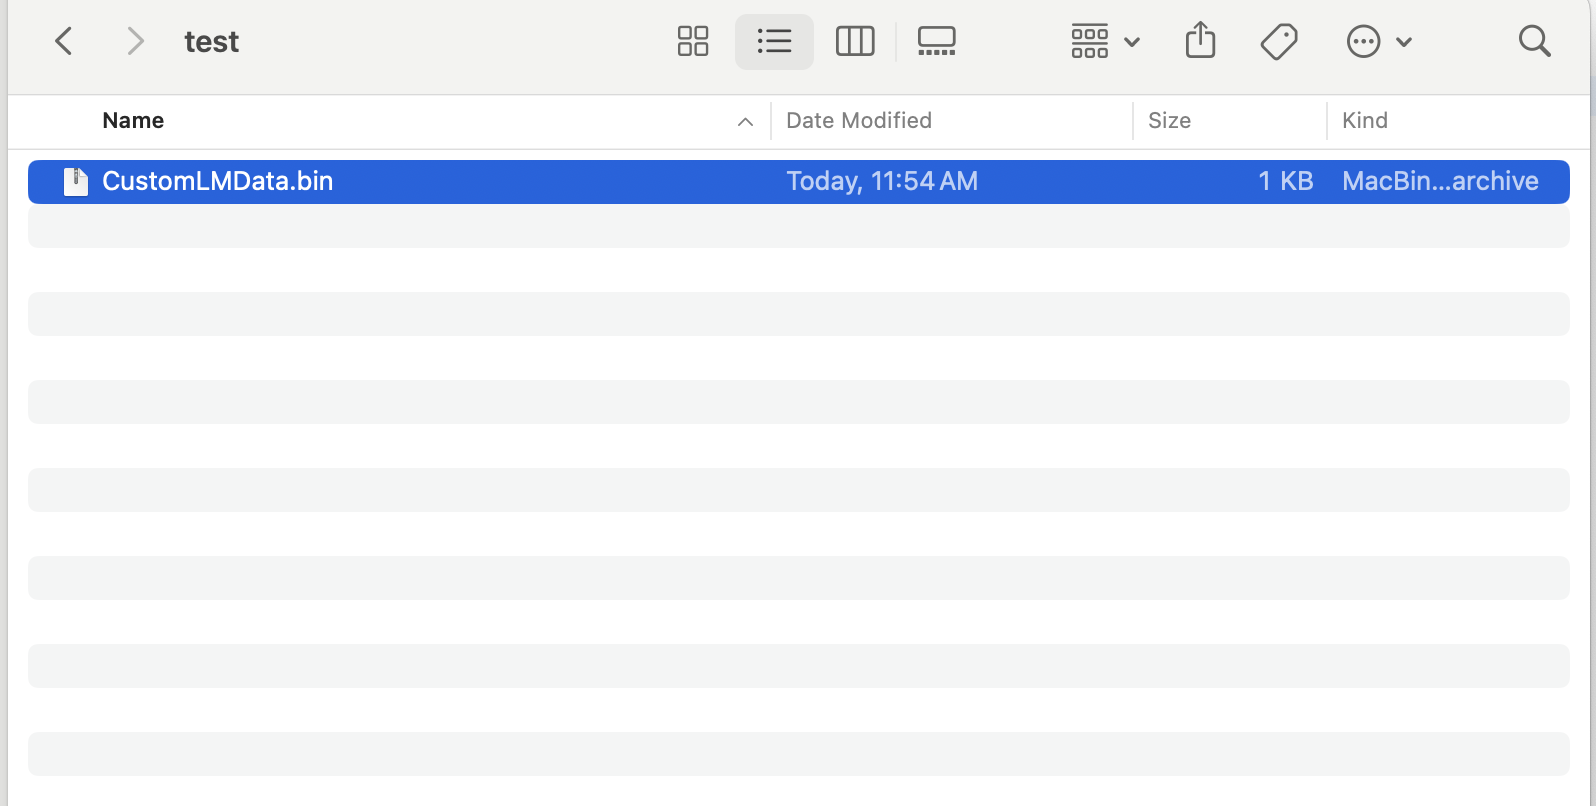
Congratulations. Well done. 🥳🥳
You have successfully trained your data model, it is now ready to be integrated into our app.
- When can I train my data?
You can train a static collection set of data during your development process or dynamically at runtime. You might do this to support names and patterns that are specific to each user, As for example: you need to train your template upon a set of "illnesses" & "medicines" names the user is using inside the app.
Configure the Speech Request:
It's time to configure the request to start using our customized language model with trained data binary file.
Task.detached {
    do {
        let assetPath = Bundle.main.path(forResource: "CustomLMData",
                                         ofType: "bin",
                                         inDirectory: "[path]")!

        let assetUrl = URL(fileURLWithPath: assetPath)

        try await SFSpeechLanguageModel.prepareCustomLanguageModel(for: assetUrl,
                                                                   clientIdentifier: "com.lemona.health",
                                                                   configuration: self.lmConfiguration)
    } catch {
        NSLog("Failed to prepare custom LM: \(error.localizedDescription)")
    }
}
Here’s a code breakdown:
Call "prepareCustomLanguageModel" method: to import and process the binary file we generated in the first step. This method can have a large amount of associated latency, so the system calls it off the main thread. and you can hide the latency with some UI, like an activity indicator.
Enforce the on-device recognition, to respect the user privacy against the customized data, all customized requests are serviced strictly on-device. if not enforced, all requests will be serviced without customization.
Attach the language model to the request.
    request.requiresOnDeviceRecognition = true
    request.customizedLanguageModel = self.lmConfiguration
Now let's test our code and see the recognition result after the customization.
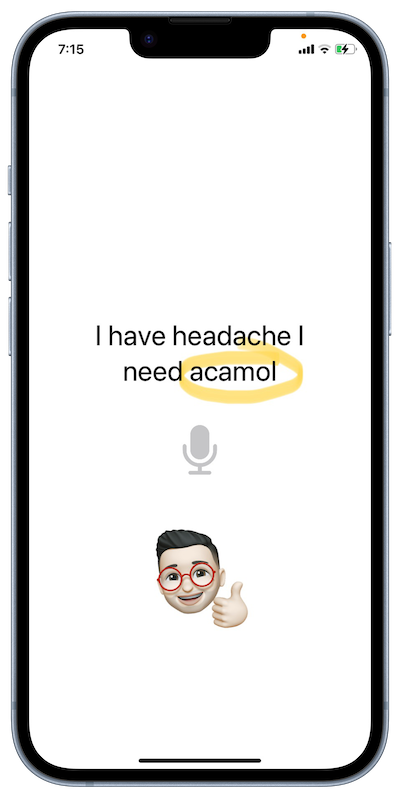
🎉🎉🎉 Awesome. Isn't it ?! Our customization is working well. 🎉🎉🎉
You know, even now I can feel my headache has finally subsided. 😂😂
Amazing ... That’s it. SALAM 👋
for complete source code: CustomHealthData
for deeper understanding refer to Apple documentation
Subscribe to my newsletter
Read articles from Mohammad Ihmouda directly inside your inbox. Subscribe to the newsletter, and don't miss out.
Written by

Mohammad Ihmouda
Mohammad Ihmouda
Organized and highly skilled iOS developer with 8+ years of professional experience in developing innovative IOS apps with international cross-functional teams and clients. Enchanted and can't imagine a world without coding. I wake up every morning and say to myself: as a "Creative professional" what I can develop in this dynamic mobile world with the vast potential it offers, to reach and help millions of users around the world.