Dart Server with good practices
 Shashi Kumar
The dart server code can be written in a similar way to the node. In this article, we will be explaining how to write a dart server with good practices and how to maintain folder structure.
Installation
dart create server_name
Creating a server
Install required dependencies shelf, shelf_router, shelf_static, shelf_hotreload, args
The best way to create & maintain folder structure is:
📦 bin
 ┣ 📂constants
 ┃ ┗ 📜api.constants.dart
 ┃ ┗ 📜string.constants.dart
 ┣ 📂controllers
 ┃ ┗ 📜user.controller.dart
 ┃ ┗ 📜auth.controller.dart
 ┣ 📂db
 ┃ ┗ 📜setup.db.dart
 ┣ 📂routes
 ┃ ┗ 📜user.routes.dart
 ┃ ┗ 📜auth.routes.dart
 ┣ 📂utils
 ┃ ┗ 📜extension.utils.dart
 ┃ ┗ 📜string.utils.dart
 ┃ ┗ 📜date.utils.dart
 ┣ 📜server.dart
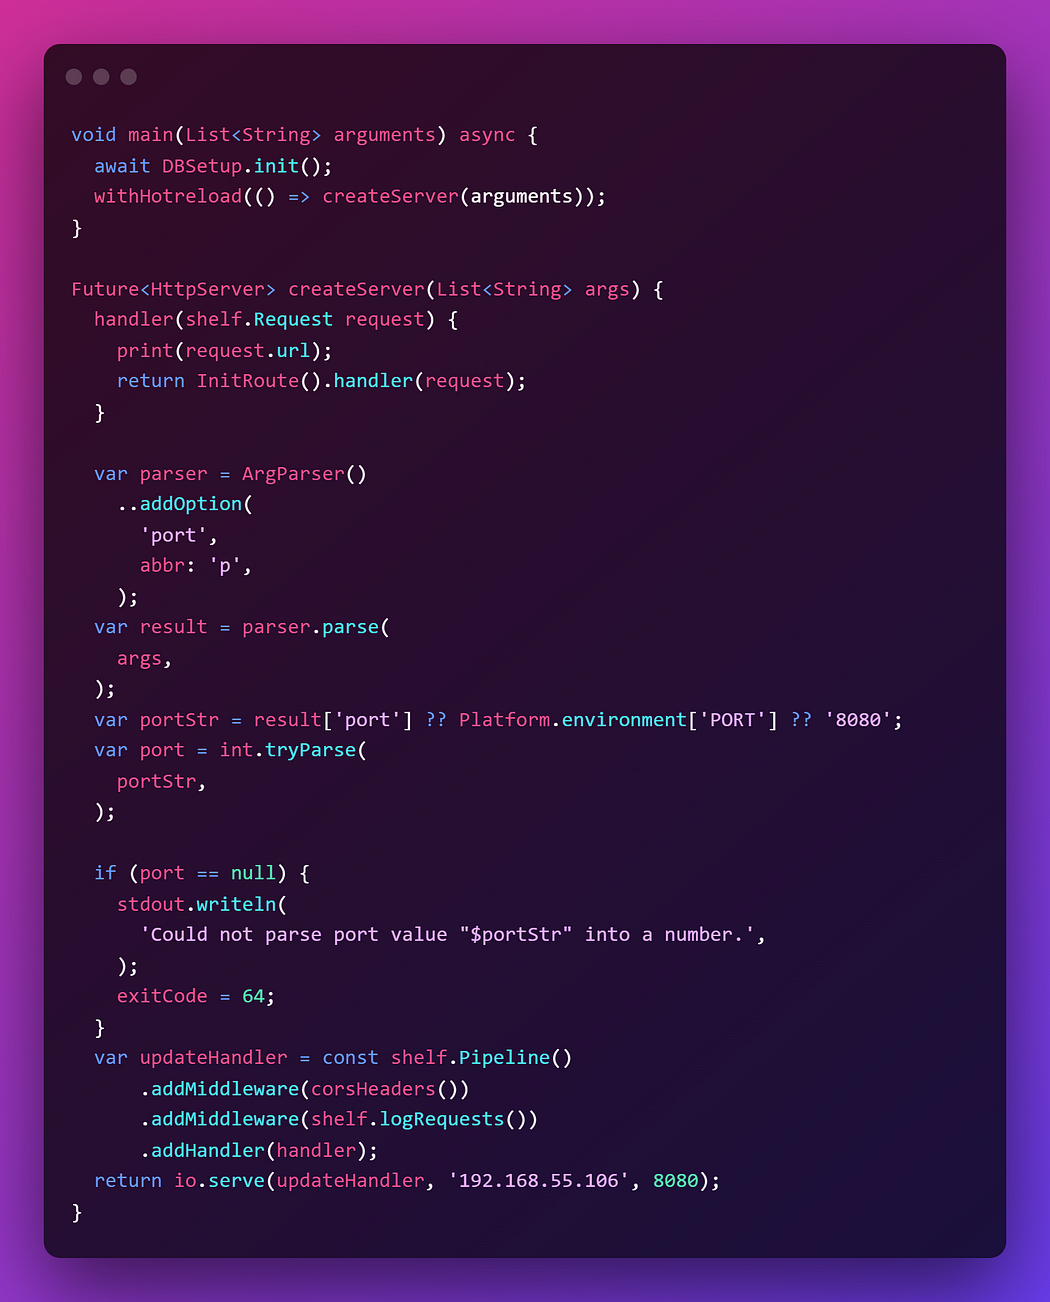
Server file

In the above function , in the updateHandler variable you can ignore the middle ware corsHeaders(), if you want to add cors then you need to add that line.
Constants
- String constants
class StringConstants{
  static const String mongoUrl="";
}
In a similar way we will create multiple constants files, for example, consider api constants file where we will be saving API keys like Twilio,mailchimp etc..
DB Setup
In this example I’m setting up mongo as db, so for that I’m adding mongo_dart as the package and db setup file would like :
class DBSetup {
  DbCollection userRef = db.collection('users');
  DbCollection mortgageRef = db.collection('mortgage');static late Db db;
  static init() async {
    try {
      db = await Db.create(StringConstants.mongoUrl);
      await db.open();
      print("Mongo is connected");
    } on MongoDartError catch (e) {
      print('Mongo Exception: ${e.message}');
    } catch (e) {
      print("Exception: $e");
    }
  }
}
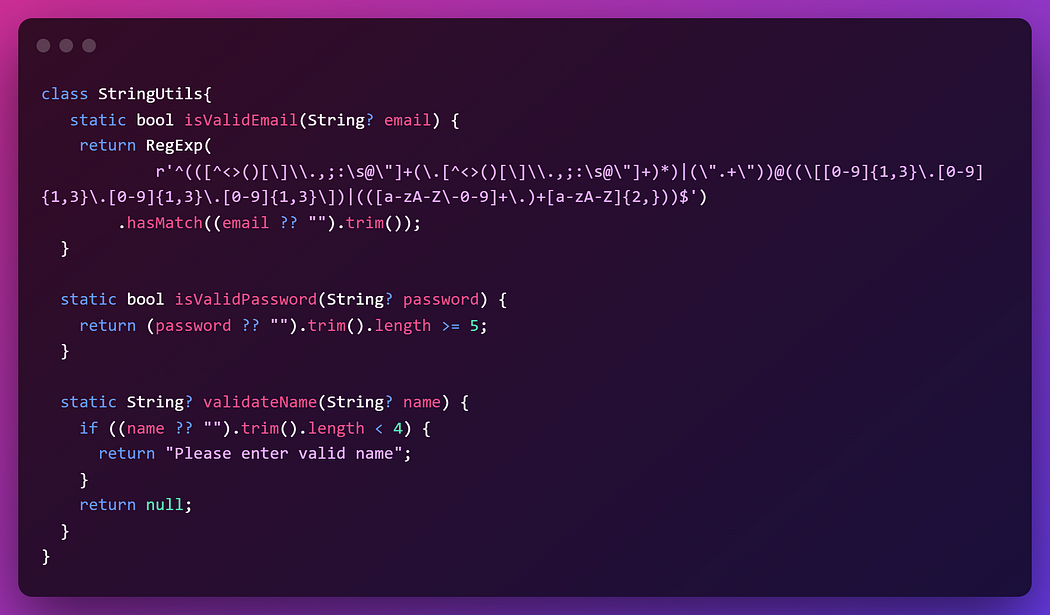
Utils

Routes
In the routes first, create a file name init.routes.dart
Next, define the remaining routes,Suppose let define for auth routes, we will define class and methods as:
import 'package:shelf/shelf.dart';
import 'package:shelf_router/shelf_router.dart';import '../controllers/user.controller.dart';class UserRoutes {
  Handler get handler {
    final UserController _userController = UserController();    var router = Router();
    router.post('/login', _userController.login);
    router.post('/register', _userController.signUp);
    router.get('/', _userController.getAllUsers);
    router.get('/<userId>', _userController.getUserDetails);
    router.put('/<userId>', _userController.updateUser);
    return router;
  }
}
The init.route.dart file would look like:
class InitRoute {
  Handler get handler {
   var router = Router();
   router.mount('/user', UserRoutes().handler);              router.mount('/mortgage', MortgagegRoutes().handler);
  return router;
  }
}
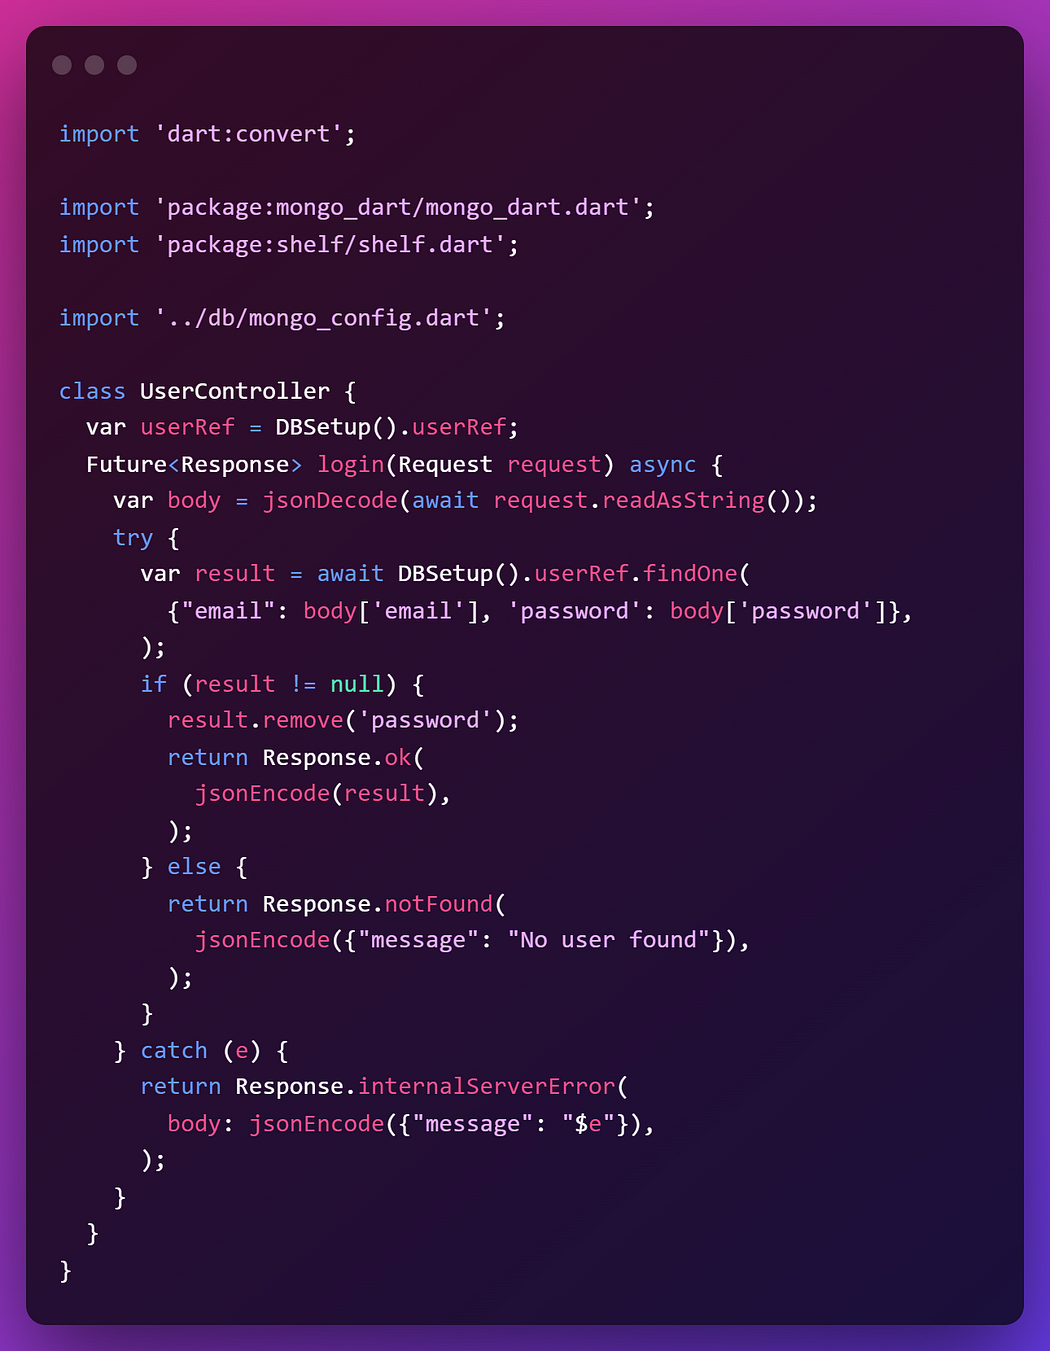
Controller
Now lets define the controller, for example, lets define the user controller
class UserController {
  var userRef = DBSetup().userRef;
}
In order to keep content less I’m defining only a single function

Bonus
In this we will be covering uploading files and retrieving files. The route file would look like
class StorageRoutes {
  Handler get handler {
   var router = Router();
   final ImageController _imageController = ImageController();
   router.get('/<imageId>', _imageController.getImage);
   return router;
  }
}
And the controller code will be:
import 'dart:convert';
import 'dart:io';
import 'dart:typed_data';import 'package:shelf/shelf.dart';class ImageController {
  uploadImage(Uint8List imageData, String fileName) async {
    try {
      final _uploadDirectory = Directory('storage');
      if (await _uploadDirectory.exists() == false) {
        await _uploadDirectory.create();
      }
      File file = await File('${_uploadDirectory.path}/$fileName').create();
      print(await file.exists());
      var res = await file.writeAsBytes(imageData);
      return res.path;
    } catch (e) {
      return {"message": "$e"};
    }
  }Future<Response> getImage(Request request, String imageId) async {
    try {
      File file = File('storage/$imageId');
      return Response.ok(file.readAsBytesSync(),
          headers: {'Content-type': 'image/jpg'});
    } catch (e) {
      return Response.internalServerError(body: jsonEncode({'message': "$e"}));
    }
  }
}
In the controller code, you can fetch the imageData from the formData and you can call the uploadImage function to upload it. Or else you can create a separate route to upload it.
Conclusion
Guess we’ve covered all the required information. For more information check out my GitHub profile shashiben.
Subscribe to my newsletter
Read articles from Shashi Kumar directly inside your inbox. Subscribe to the newsletter, and don't miss out.
Written by
