Hosting static website using AWS S3 with CloudFront and CI/CD pipeline
 Haripriya
Table of contents
This is Haripriya, an AWS Cloud Enthusiast and Ex Java developer writing this blog as a part of the #10weeksofcloudops challenge.
#week1 challenge - Hosting a static website in the cloud, using the CICD Pipeline.
Project 1:
The project involves hosting a static website on AWS S3, utilizing AWS CloudFront as a Content Delivery Network (CDN) to enhance website performance, creating a Continuous Integration and Continuous Deployment (CI/CD) pipeline for automated deployments, and enabling SSL with a custom domain name for secure connections. Below is a brief description of the services used for this project.
GitHub is a web-based platform and service that provides a version control repository hosting service for software development projects. In short, it is a code hosting platform that allows developers to collaborate, manage, and track changes to their code, making it easier to work on projects as a team and maintain a history of code revisions.
AWS CodePipeline is an AWS service for continuous integration and continuous delivery (CI/CD). It automates the process of building, testing, and deploying applications, enabling faster and more reliable software delivery.
AWS S3, a short form of Amazon Simple Storage Service, is a scalable and secure cloud-based storage service provided by Amazon Web Services (AWS). S3 is widely used for various purposes, including hosting static websites, storing and backing up data, and serving as a content delivery network (CDN) for distributing content globally.
Amazon Route 53 is a scalable and highly available Domain Name System (DNS) web service provided by AWS. It translates human-readable domain names into IP addresses and efficiently routes internet traffic to AWS resources and other endpoints.
Amazon CloudFront is a fast and secure content delivery network (CDN) service provided by AWS. It distributes content globally, reducing latency and improving the performance of websites, applications, and media by caching data at edge locations closer to users.
AWS Certificate Manager (ACM) is a managed service provided by Amazon Web Services (AWS) that allows you to easily provision, manage, and deploy SSL/TLS certificates for use with AWS services and external resources.
Architecture
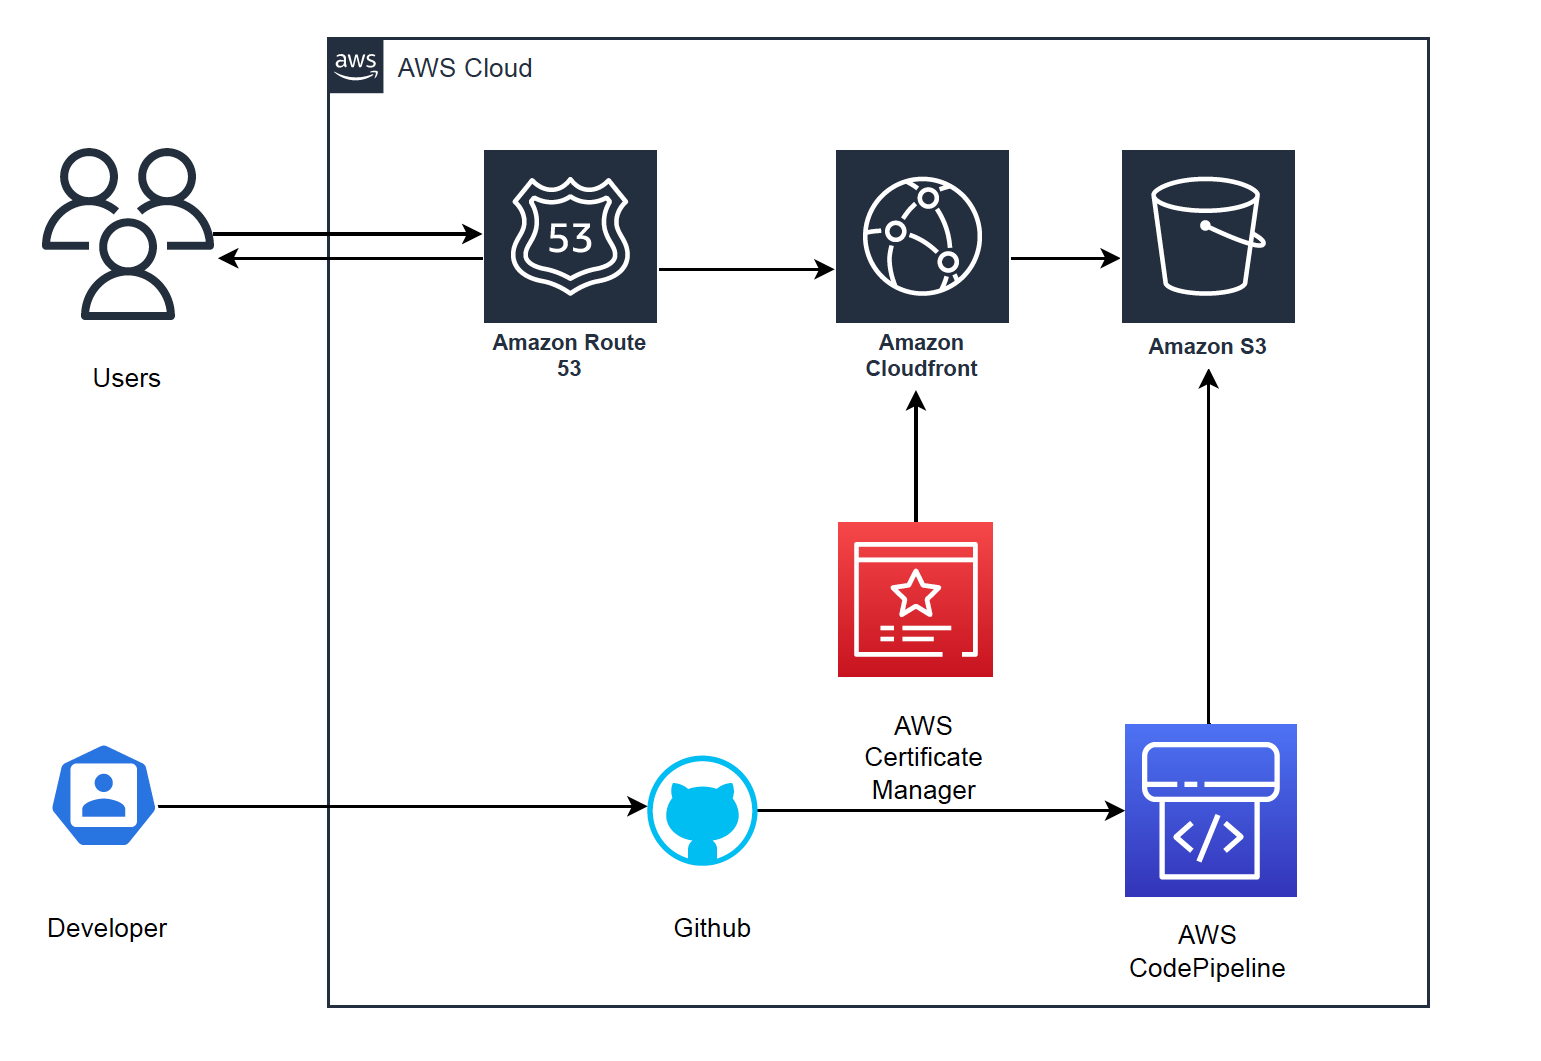
Prerequisites to build this project:
AWS Account
GitHub Account
Domain( from Route53, GoDaddy, Hostinger etc)
Basic Website/HTML Template
Steps:
Creating an S3 bucket
Create a Hosted Zone in Route53
Request / Import a Certificate (SSL/TLS)
Create a CloudFront Distribution
Connect Cloudfront distribution Domain name
AWS Code Pipeline
Step 1: Create an S3 Bucket
Log into AWS Management Console. Search for Amazon S3 in the search box. Click on create a bucket.
The bucket name will be www.<domainname>. Here it is www.priyagh13.tk any region. I will be going for us-east-1.
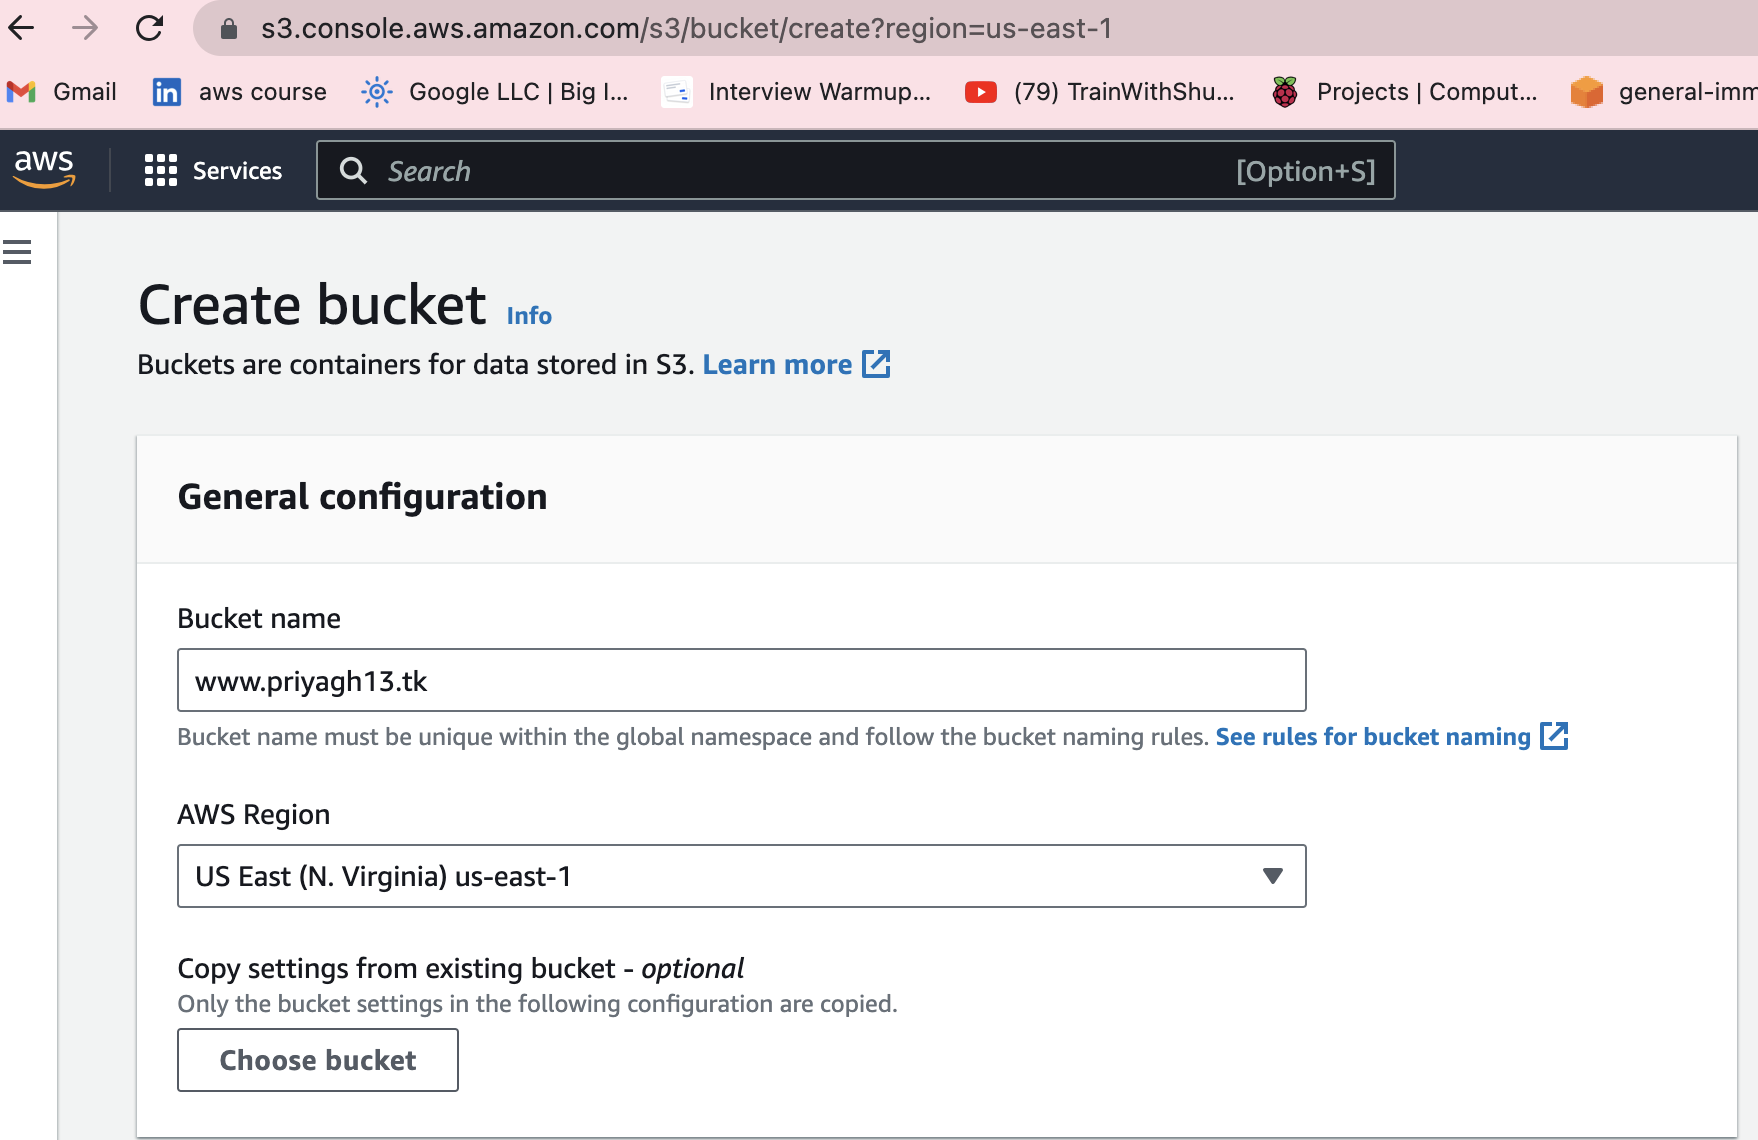
Log into AWS Management Console. Search for Amazon S3 in the search box. Click on create a bucket.
The bucket name will be www.<domainname>. Here it is www.priyagh13.tk any region. I will be going for us-east-1.

- Leave the other settings to Default, scroll down and click on Create a bucket.

- Click on the bucket name. Go to the Properties tab and scroll down. Click on the edit button for Static Web Hosting.
- Now change it to enable. Place the name of the index document, which we will upload in s3 for static web hosting later. Usually, it is index .html.
- Scroll down and save changes

- Click on the bucket name. Go to the Properties tab and scroll down. Click on the edit button for Static Web Hosting.
- Now change it to enable. Place the name of the index document, which we will upload in s3 for static web hosting later. Usually, it is index .html.
- Scroll down and save changes.
Step 2: Create a Hosted Zone
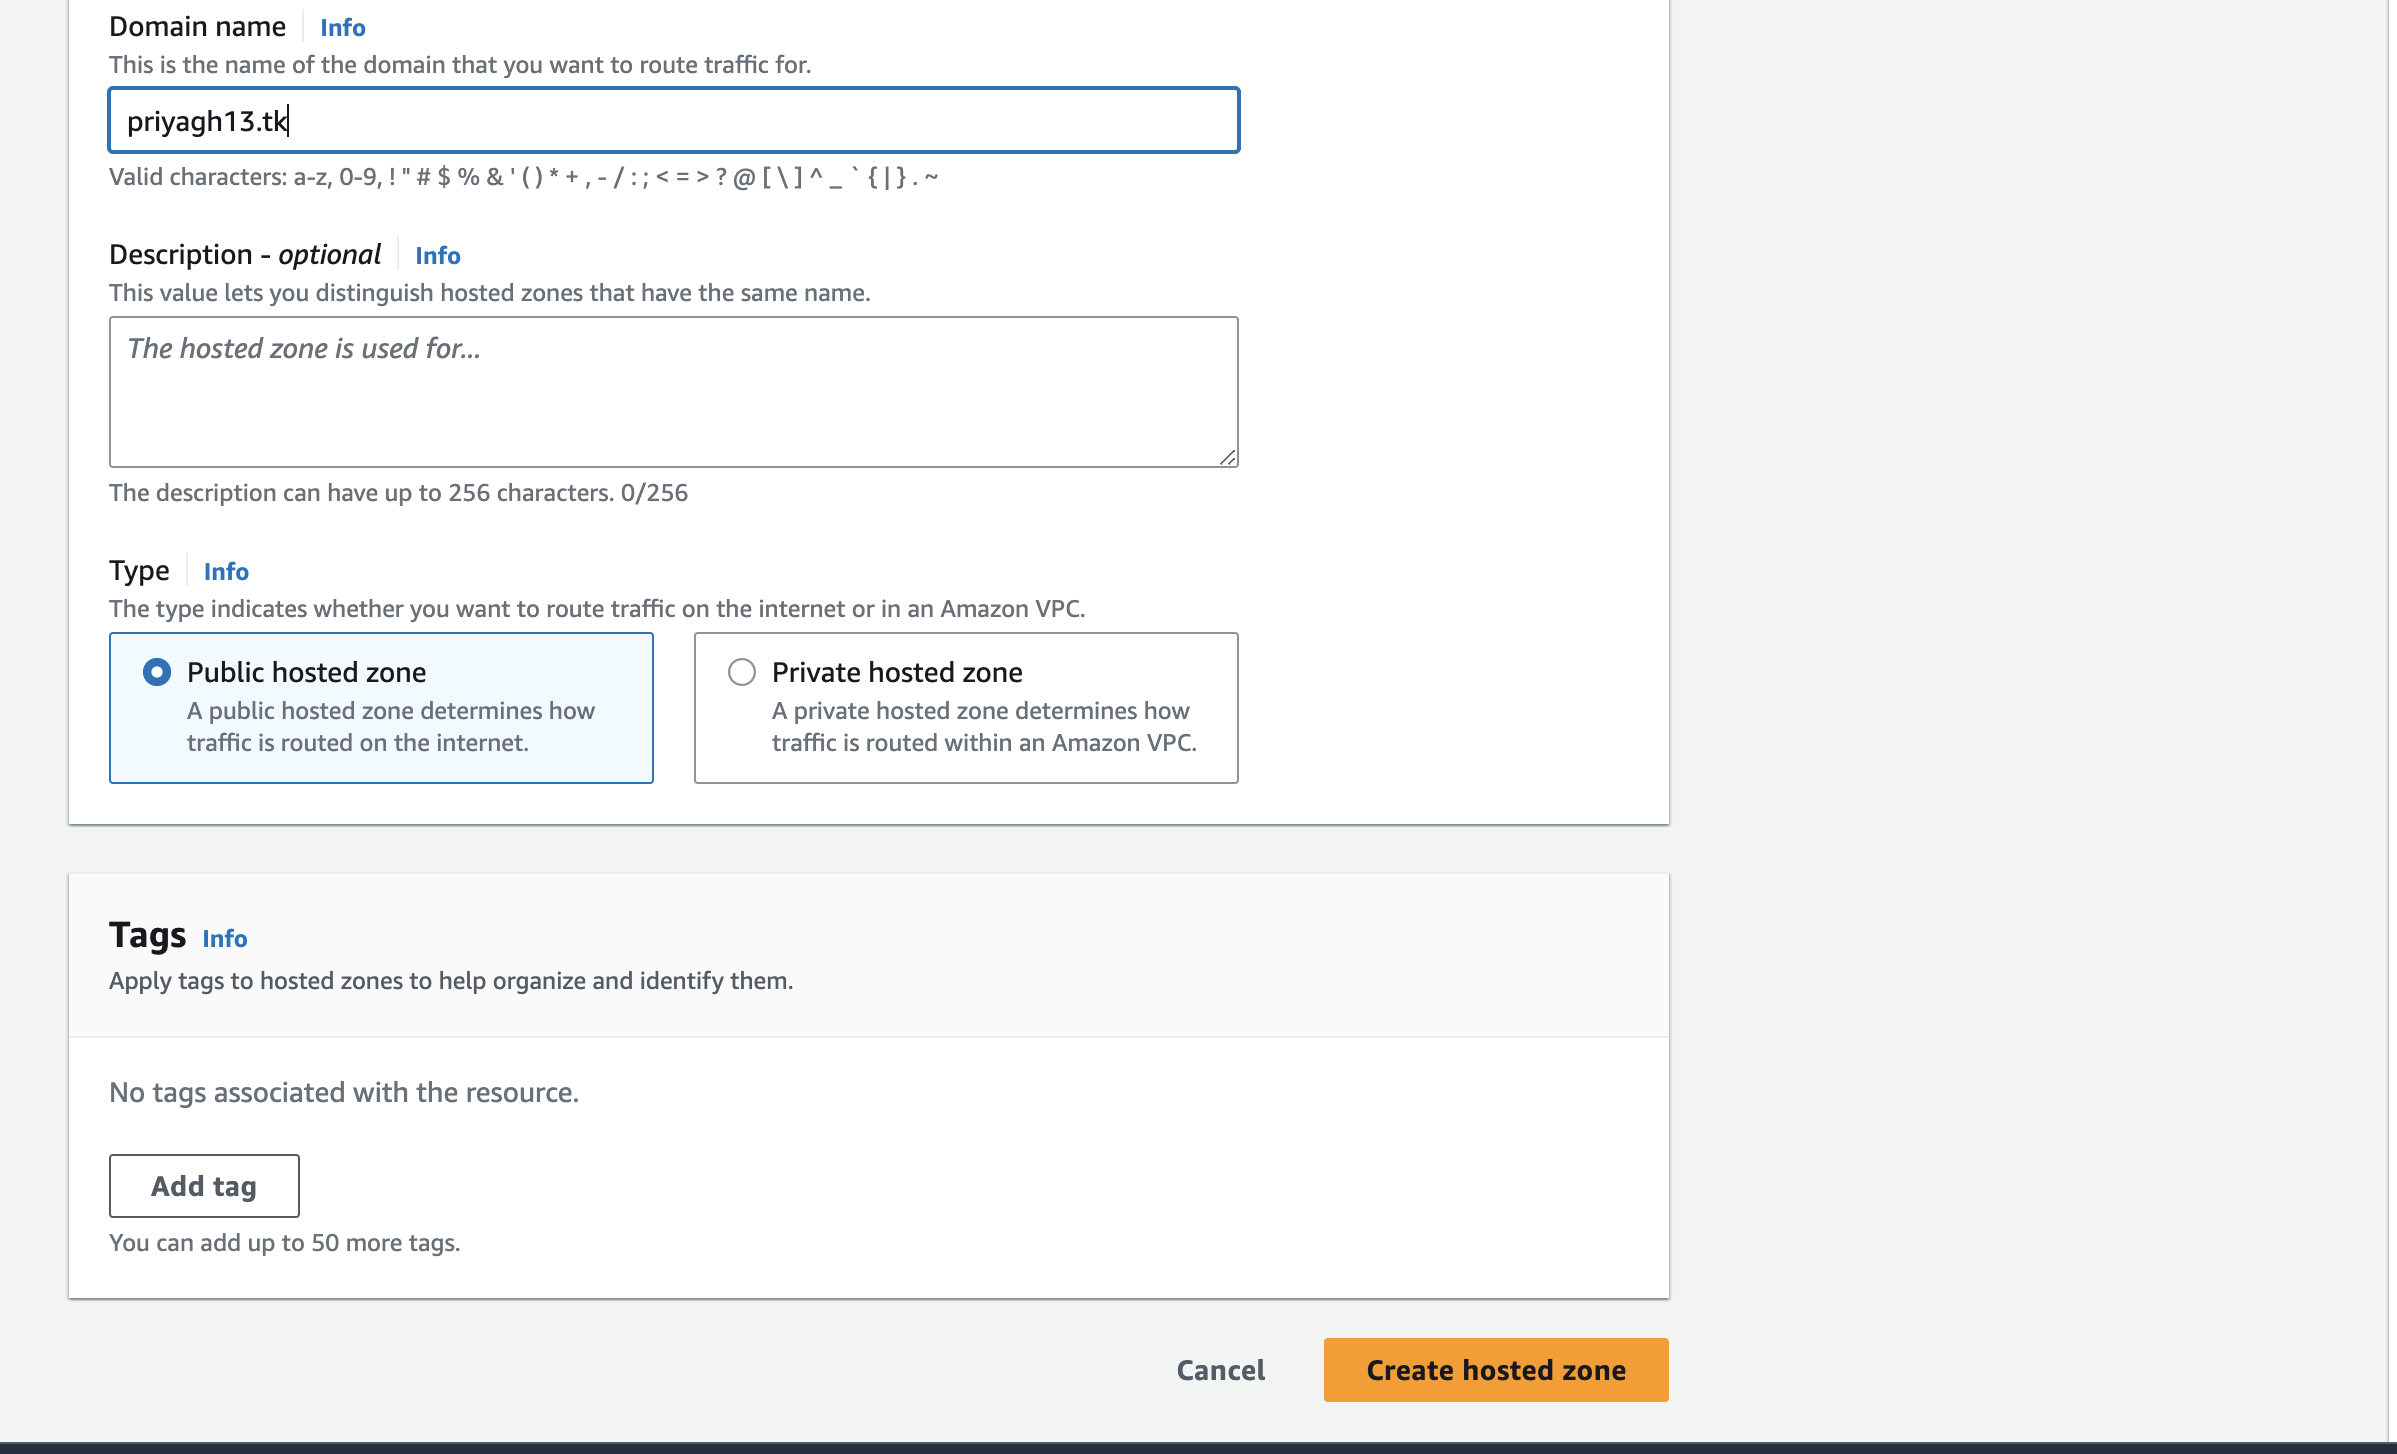
Goto Amazon Route53→ Hosted Zone. Enter the Domain name and select Type as Public Hosted zone then click on create a hosted zone
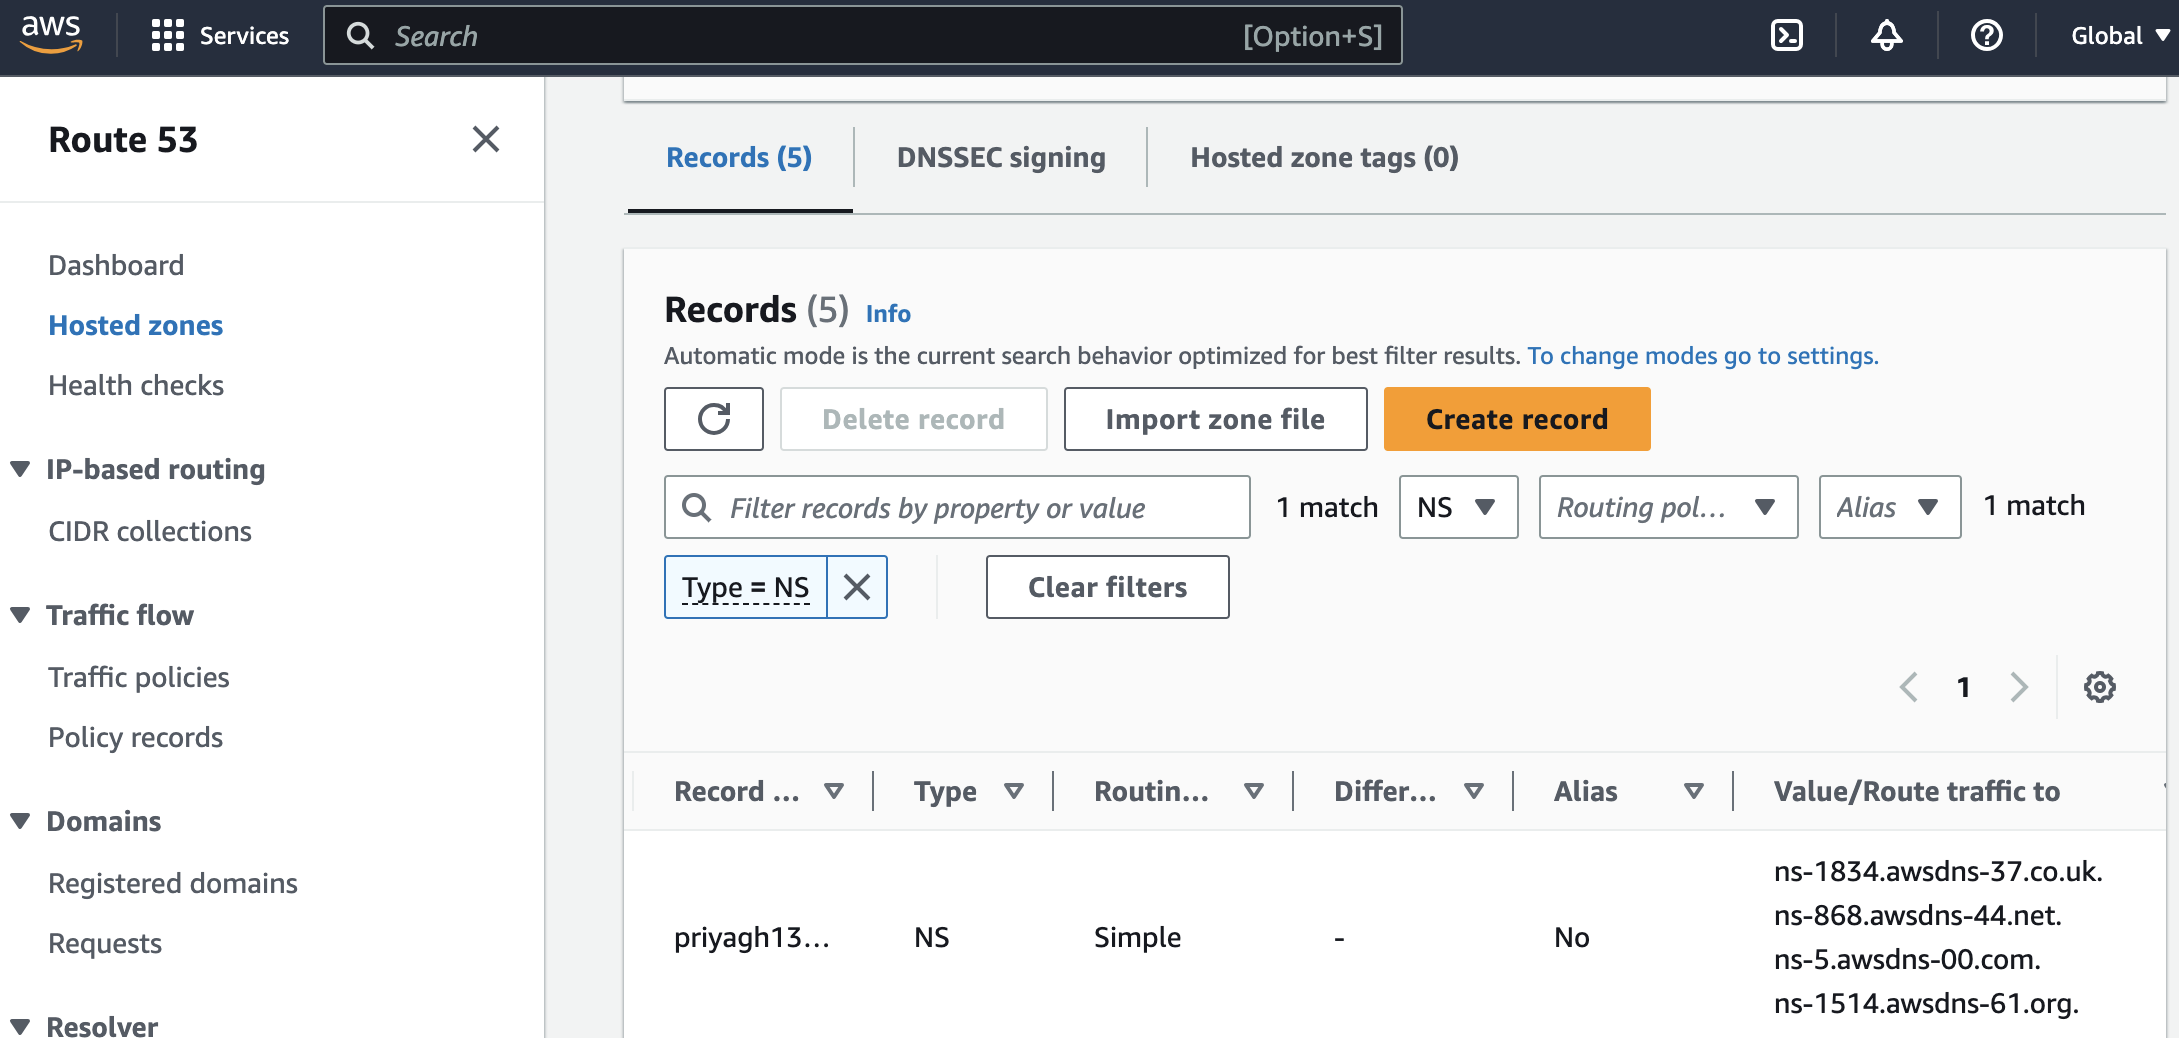
You need to replace the NS records from your domain provider with the NS records from your hosted zone after creating it.
Step 3: In this step, we will be securing our domain name by using an SSL certificate generated by ACM( AWS certificate manager).
- Go to AWS Certificate Manager—> Request Certificate.[Ensure that the region selected is N.Virginia].
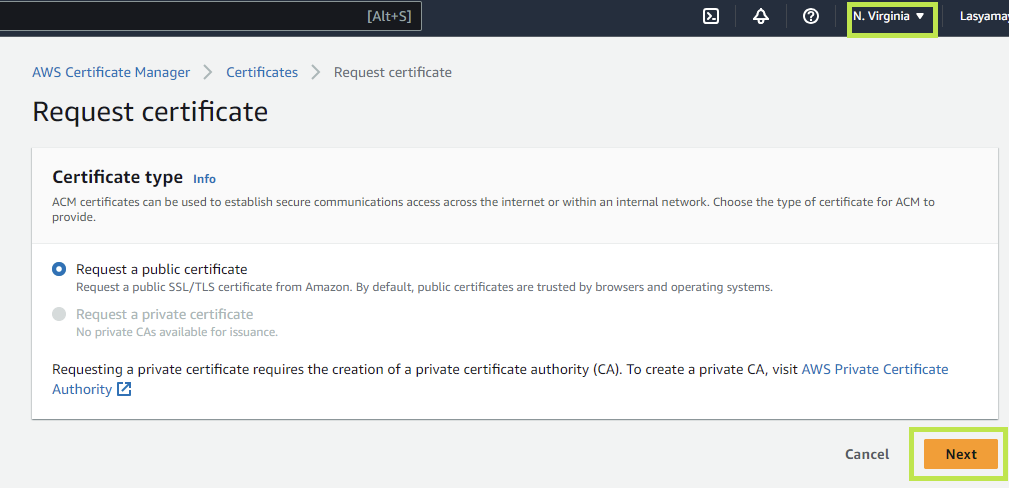
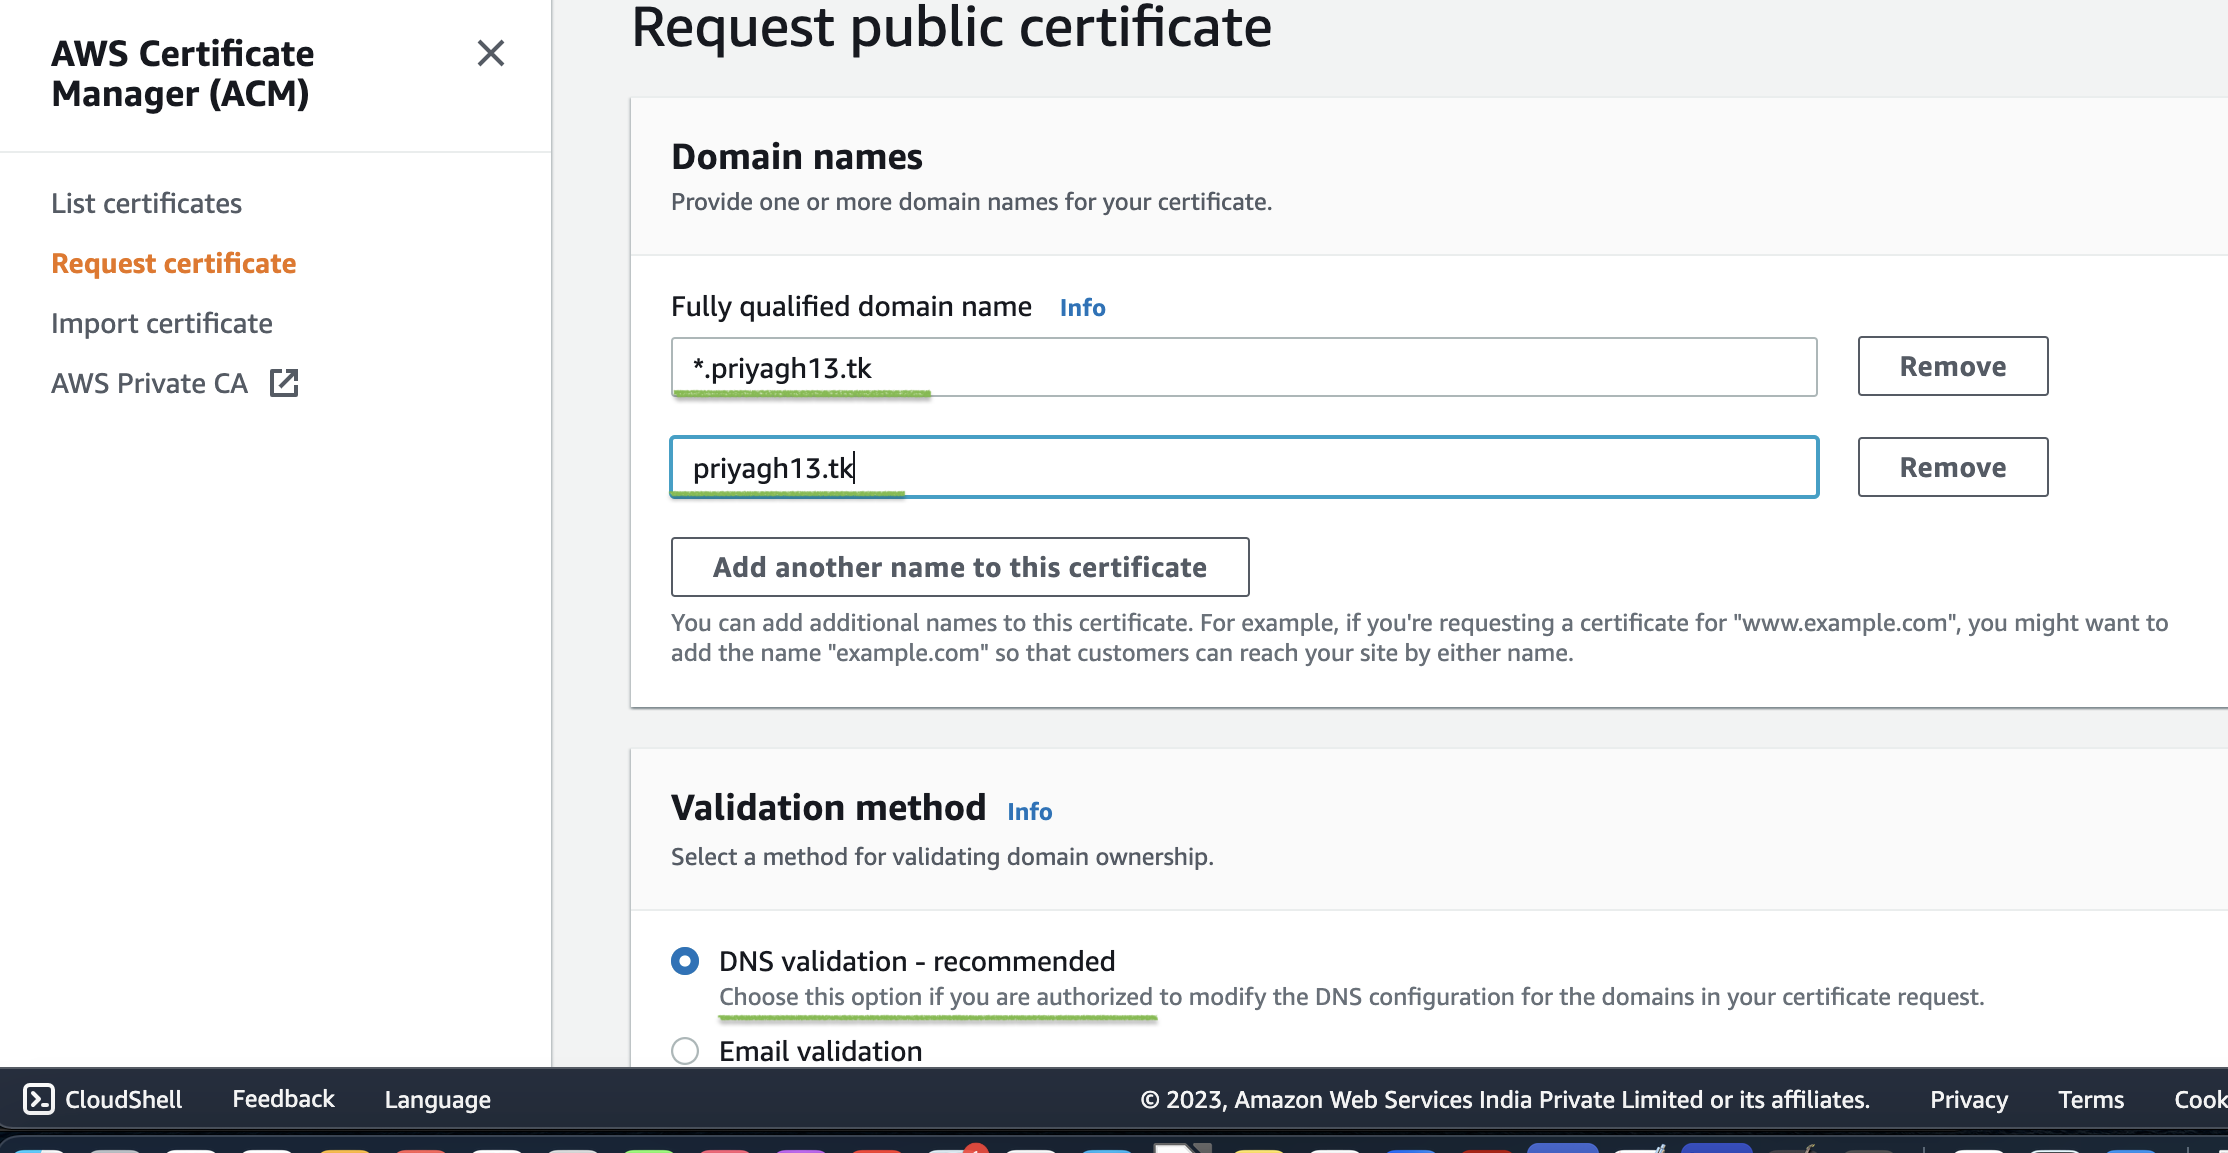
- Under fully qualified domain names, mention your domain name in the below format.
*.<domain_name>
<domain_name>
Let the validation method be DNS Validation.
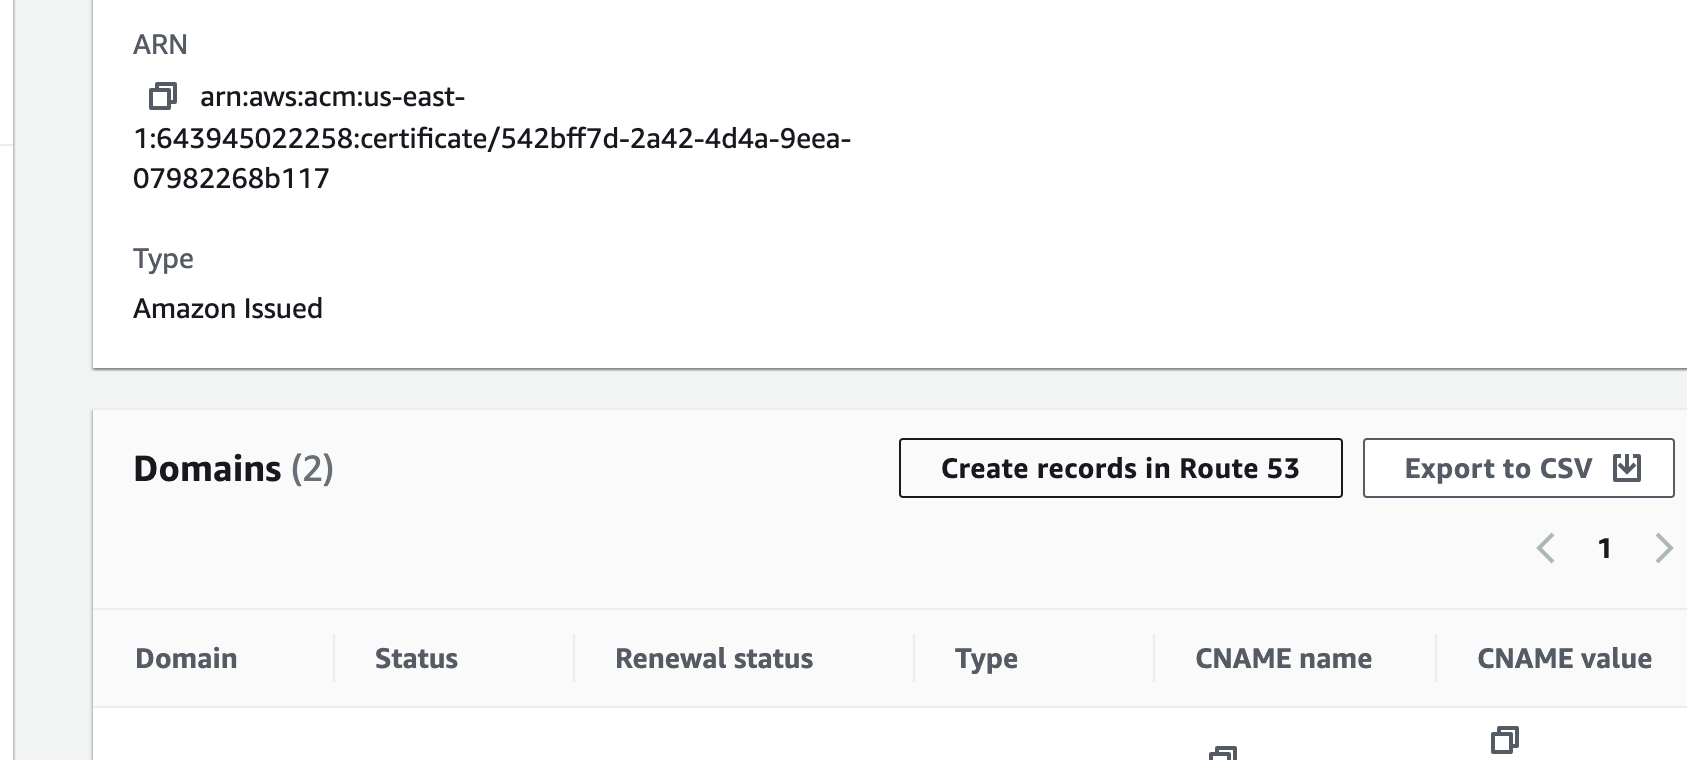
- While the Status for the certificate changes to Issued, create the records for Certificate Manager in Route53.
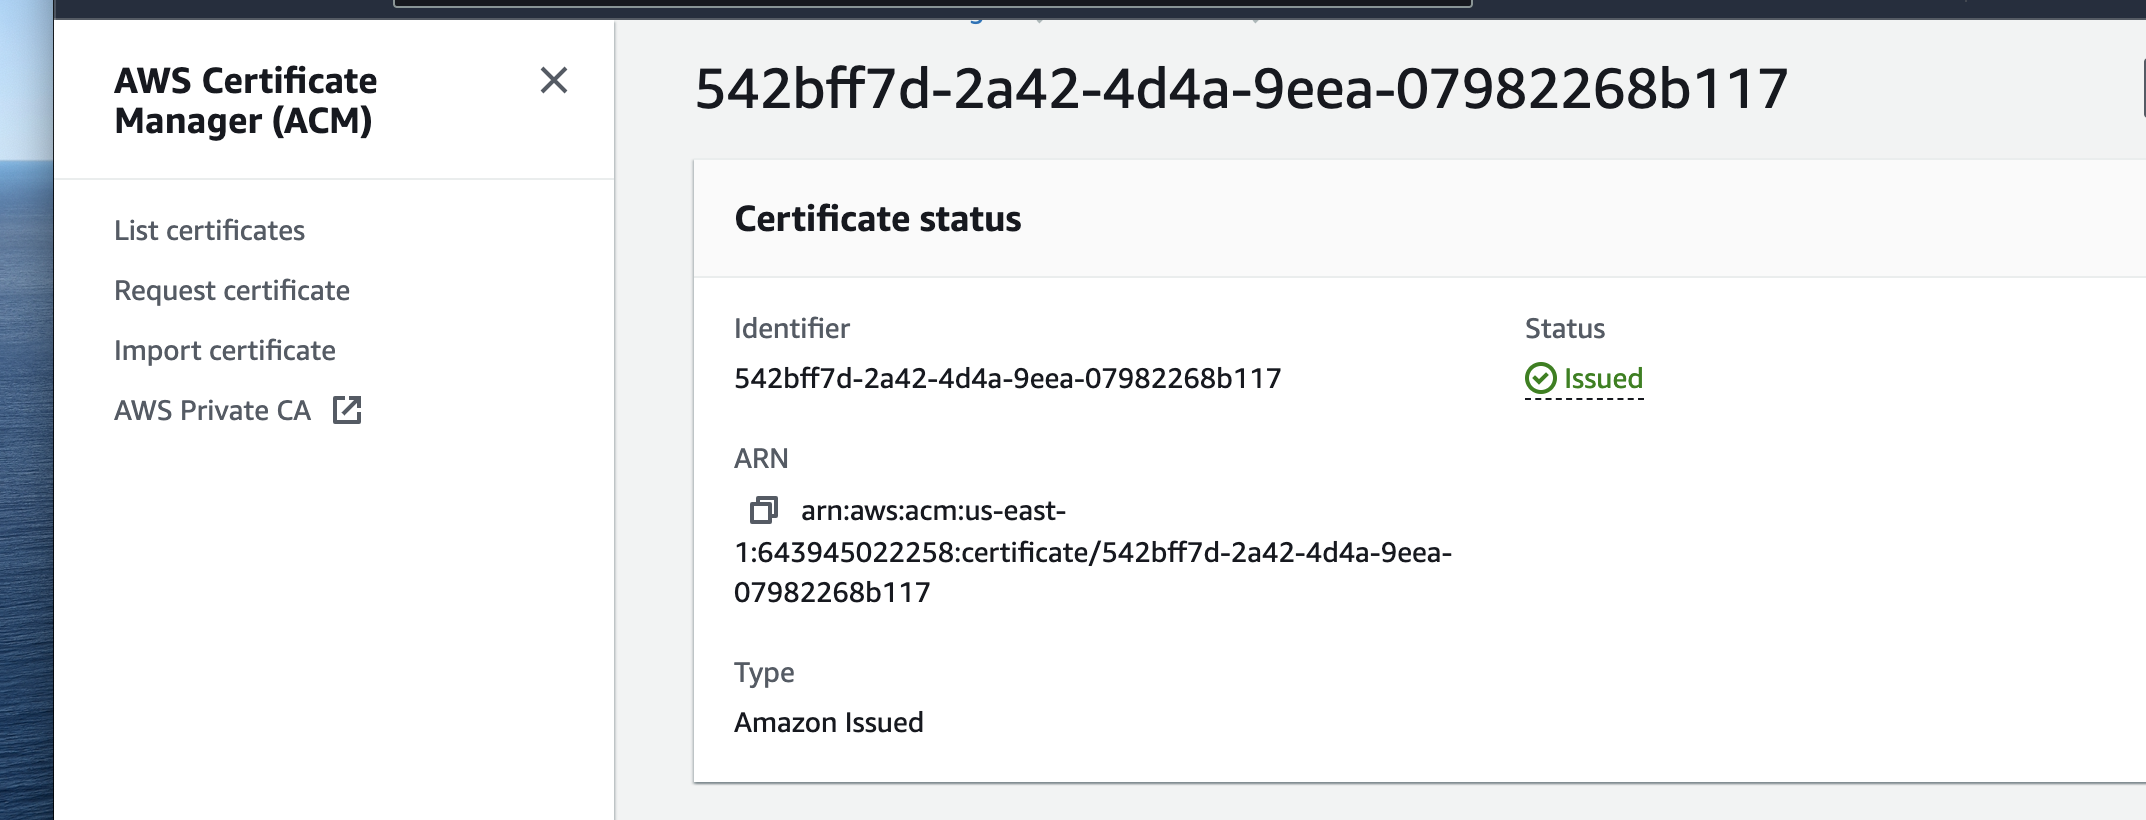
- Once you refresh, the status for the certificate will change to Issued.
Step 4: Building a Content Delivery Network using CloudFront. This will connect to the s3 bucket we created earlier, and provide a distribution domain name that will be accessible from multiple edge locations.
- Goto Amazon Cloudfront→ Create a CloudFront Distribution. Under Origin Domain, select the s3 static website URL.
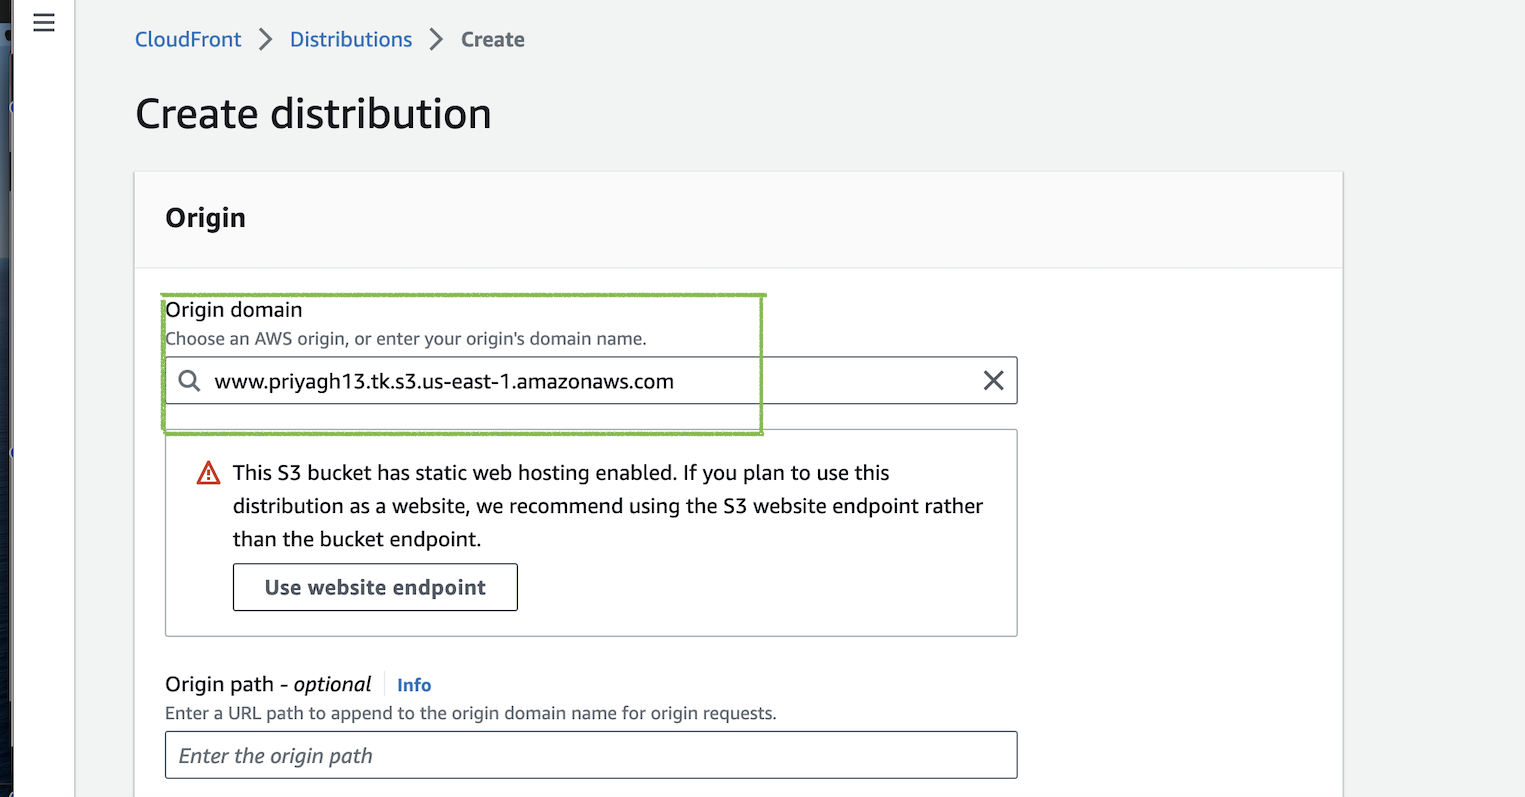
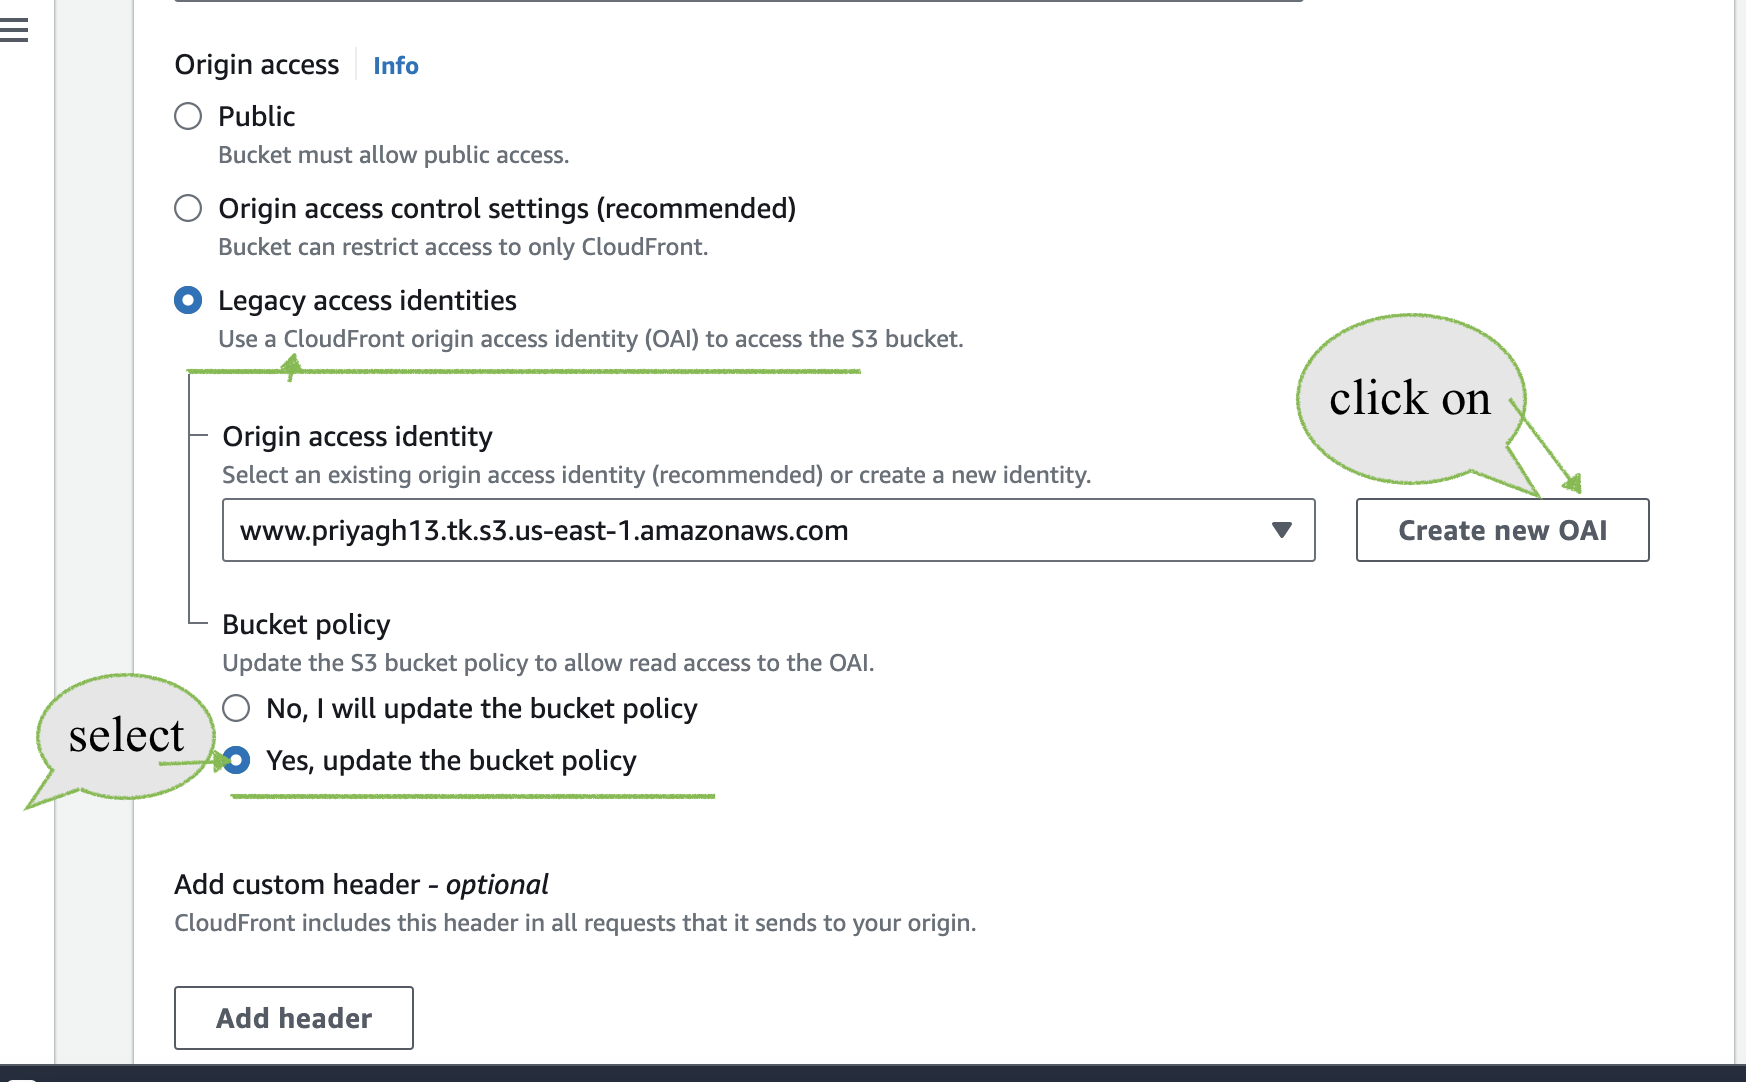
- Under Origin Access—> Legacy access identities—>Click on a create new OAI.Select your Bucket URL.
- Scroll down to the viewer Protocol policy and choose” Redirect HTTP over HTTPS”
Enable Security Protection under WAF. Scroll down to settings. Add the alternate domain name as “priyagh13.tk.”
Add the SSL Certificate from the Dropdown.
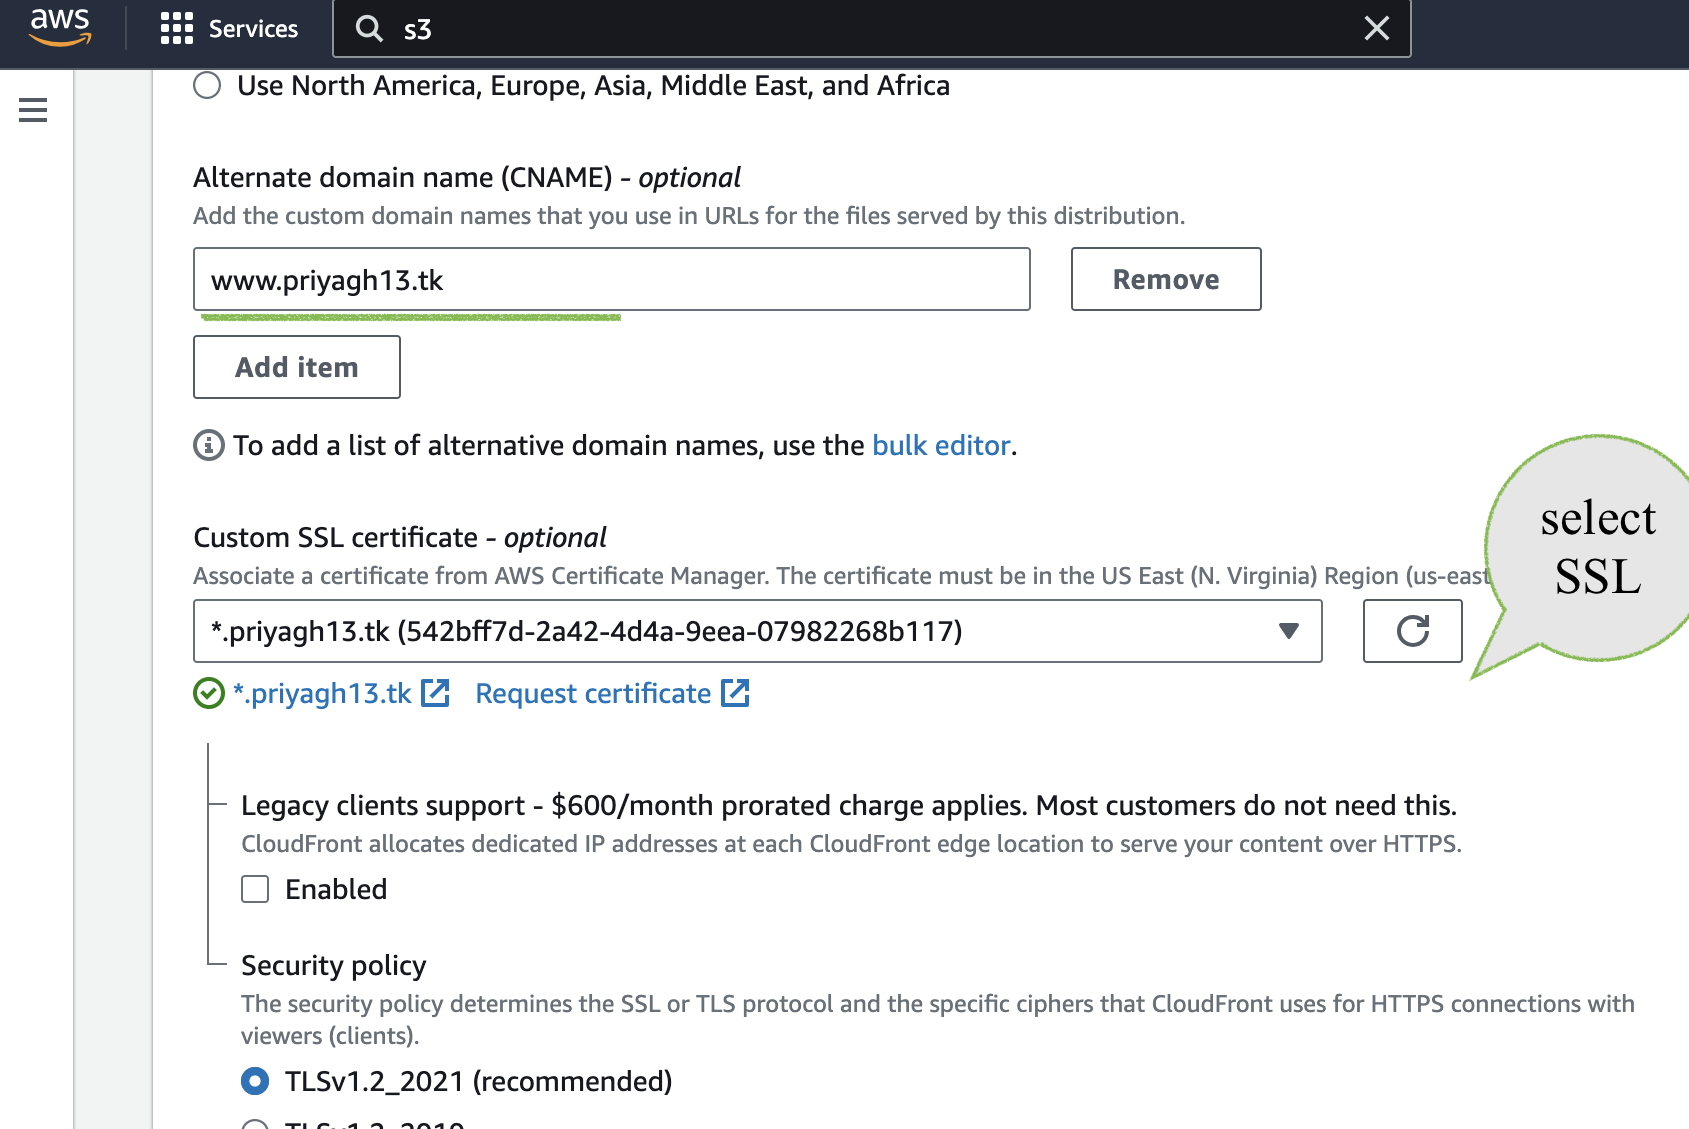
- For Default root Object→ index.html.Scroll down and click on Create Distribution.

Step 5: Connect Cloudfront distribution Domain name to domain name., This will help us access our domain securely from any edge location, through our domain name.
Instead, you can also use the distribution domain name to access the static website.
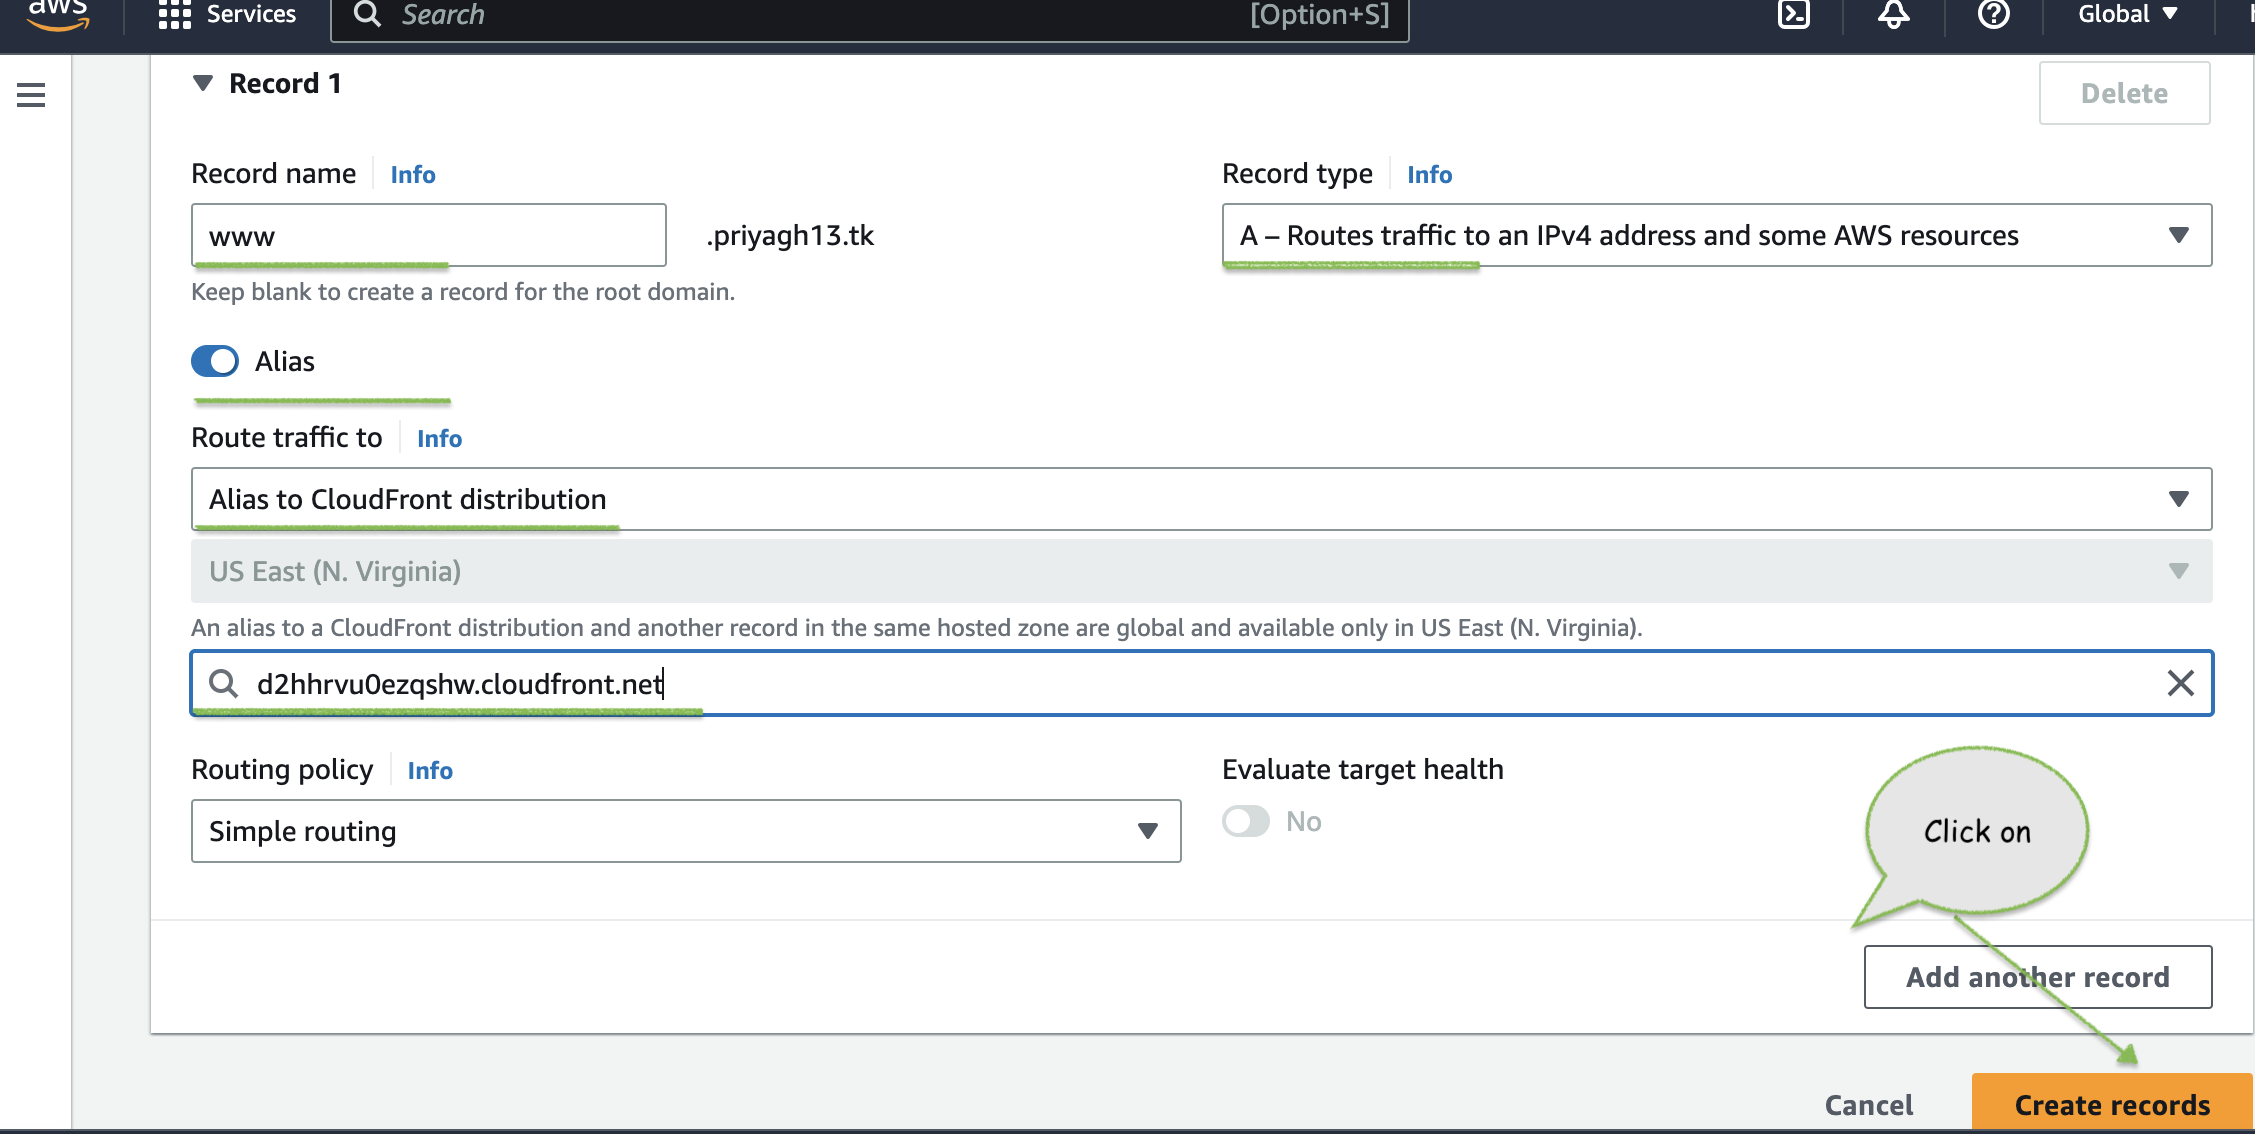
- Go to Route53→Hosted Zones→Your Domain→Create record.
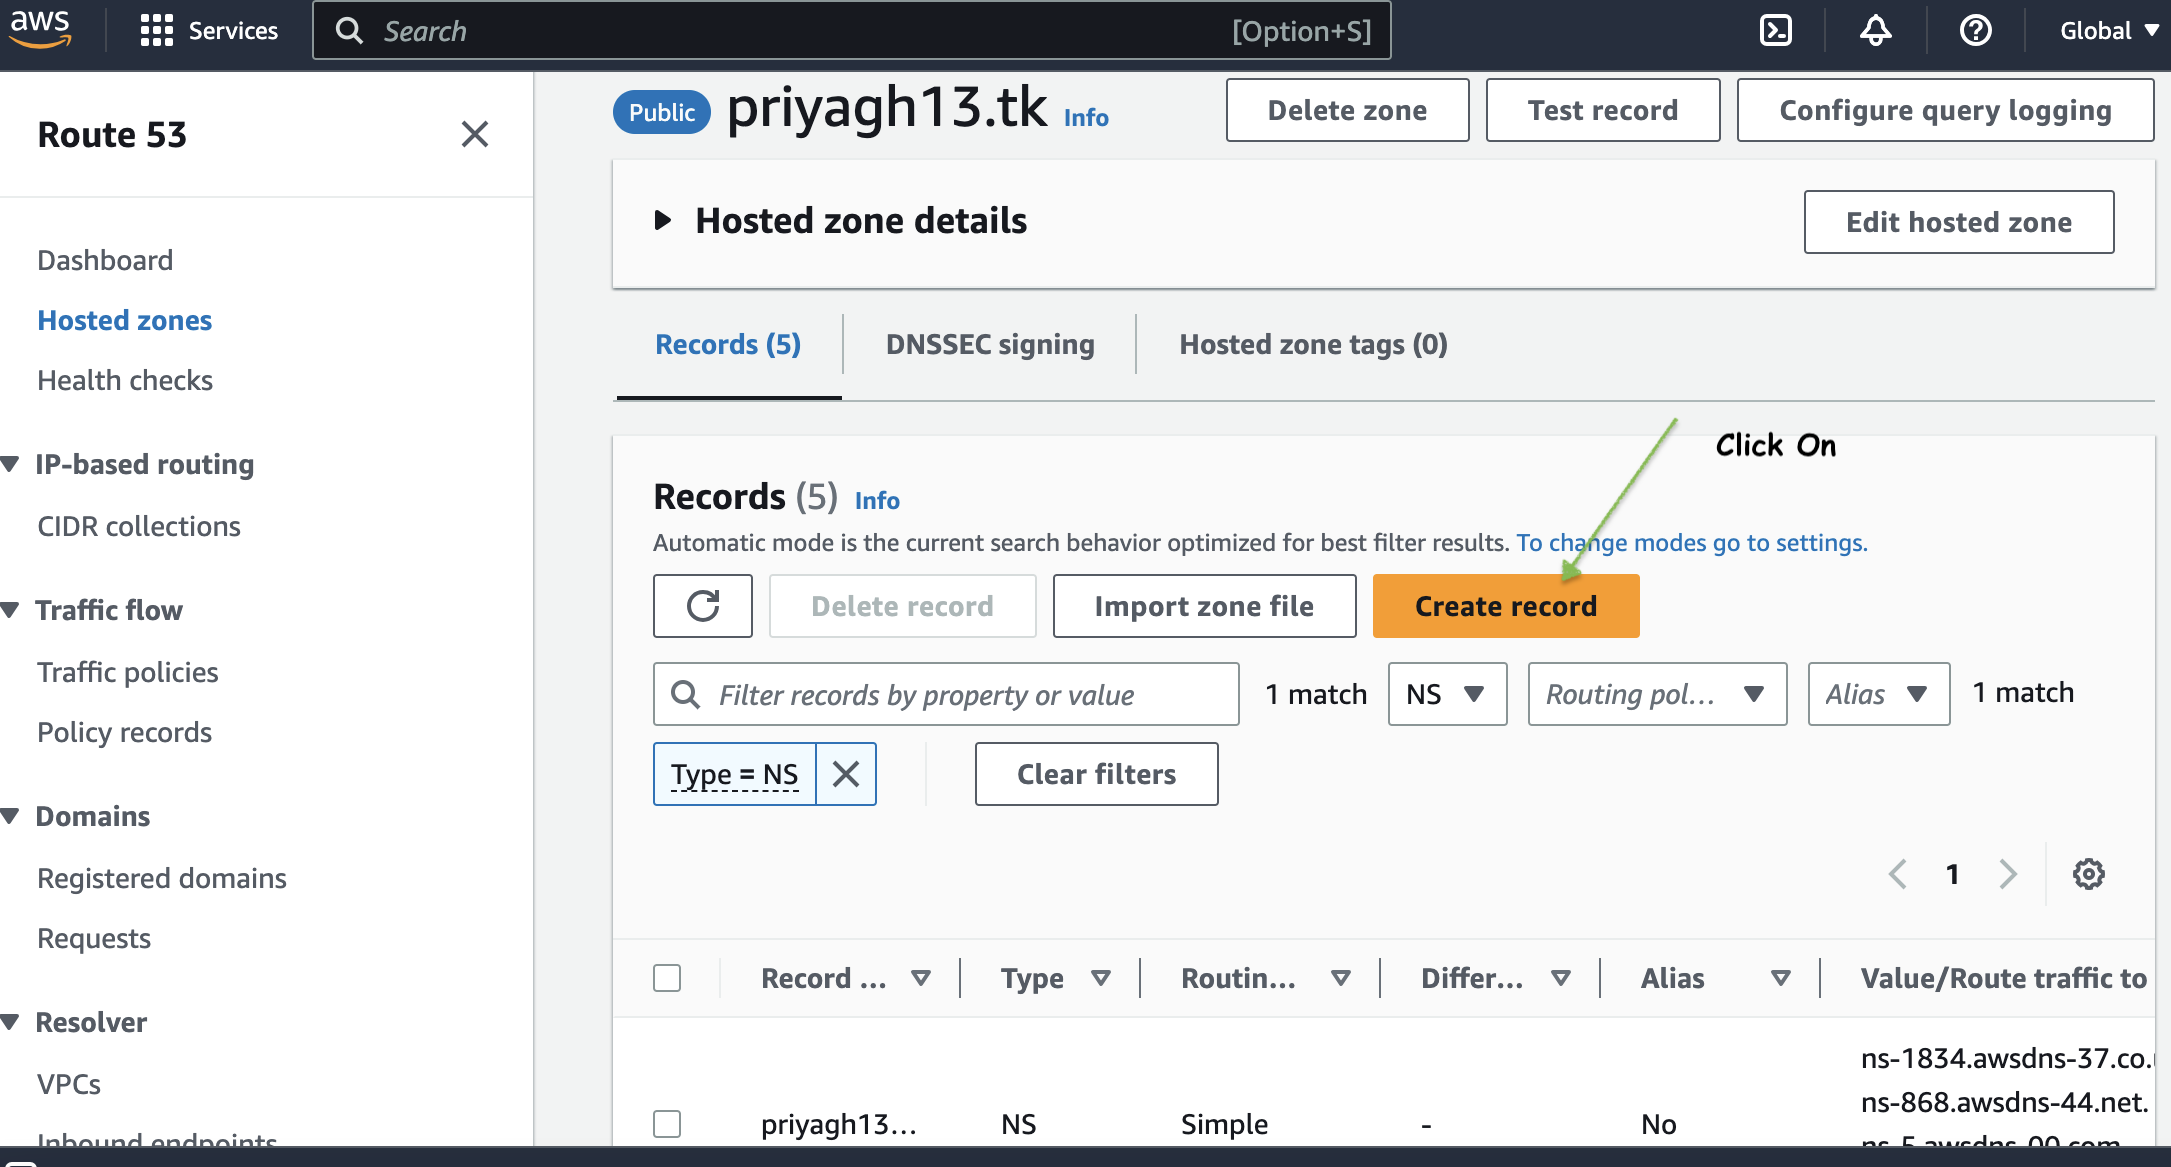
- Choose Record Name→www Record Type→A. Select Alias. Route traffic to→ CloudFront Distribution. Select the CloudFront distribution and create the record.
Step 6: Now your static website has been successfully created, but the bucket is empty. To send files to s3, we will be creating a CI/CD Pipeline using AWS CodePipeline.
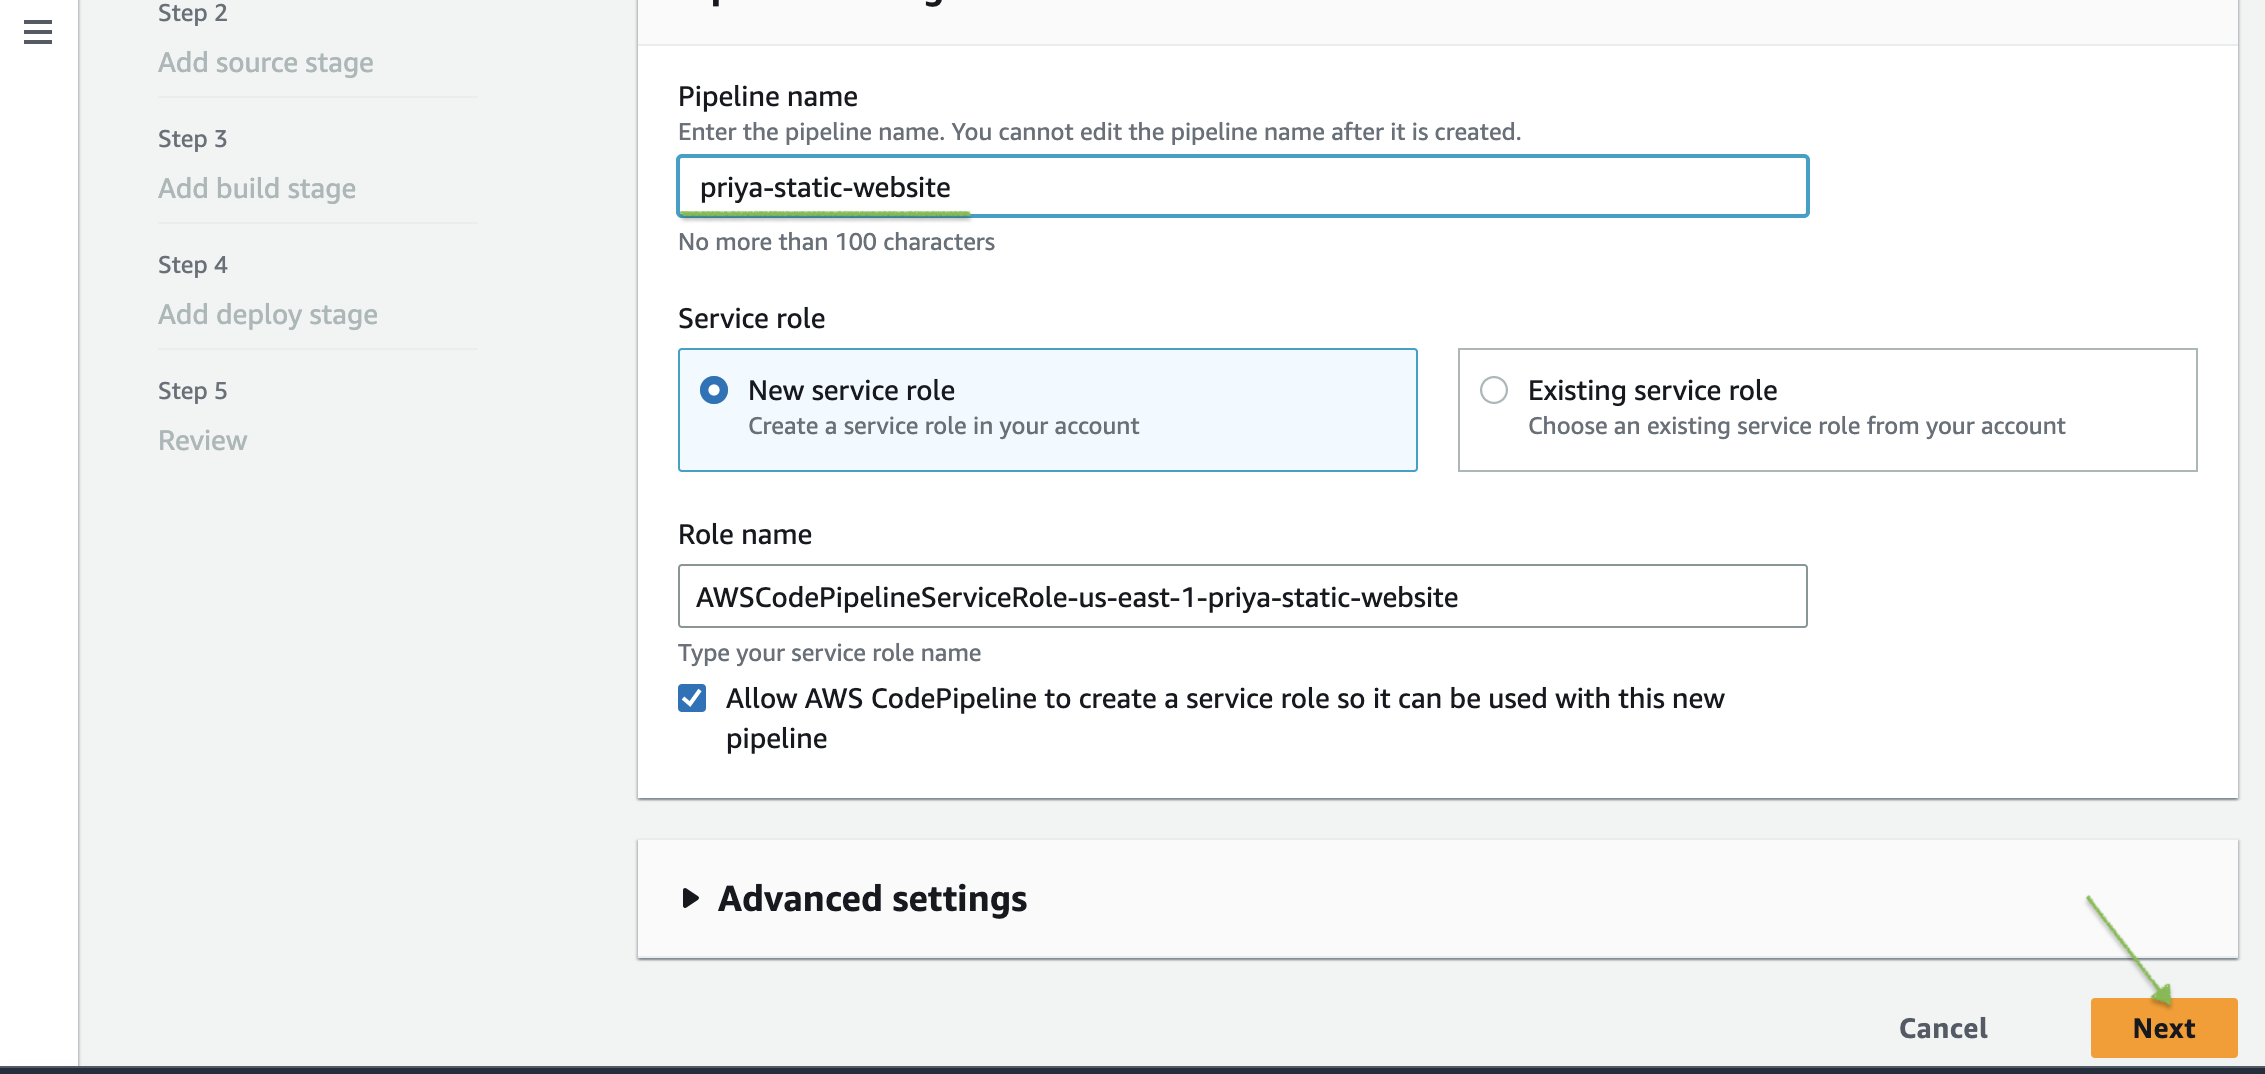
Go to the Search bar in AWS Management Console --> CodePipeline-->Pipelines--> Create Pipeline.
Ensure that the pipeline is being created in the same region as your s3 bucket[Since i created s3 bucket in us-east-1, will be creating the pipeline in the same region].
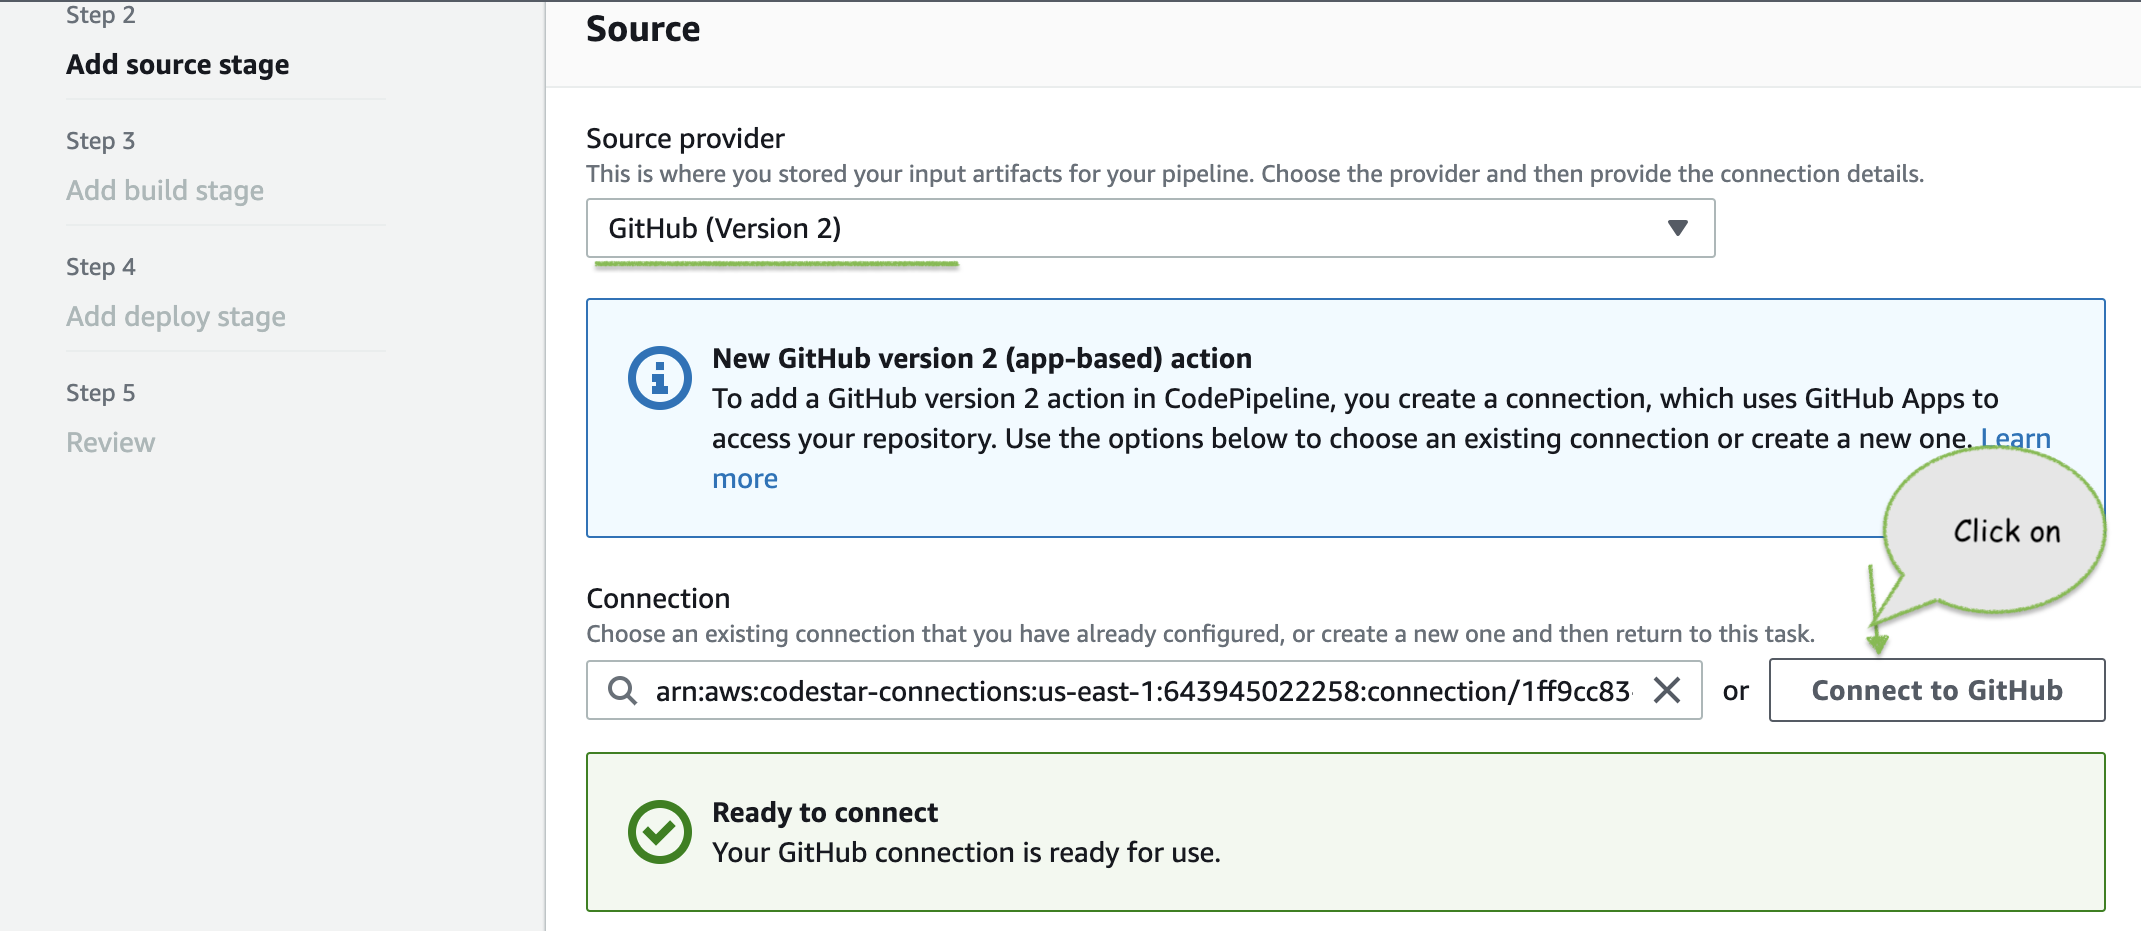
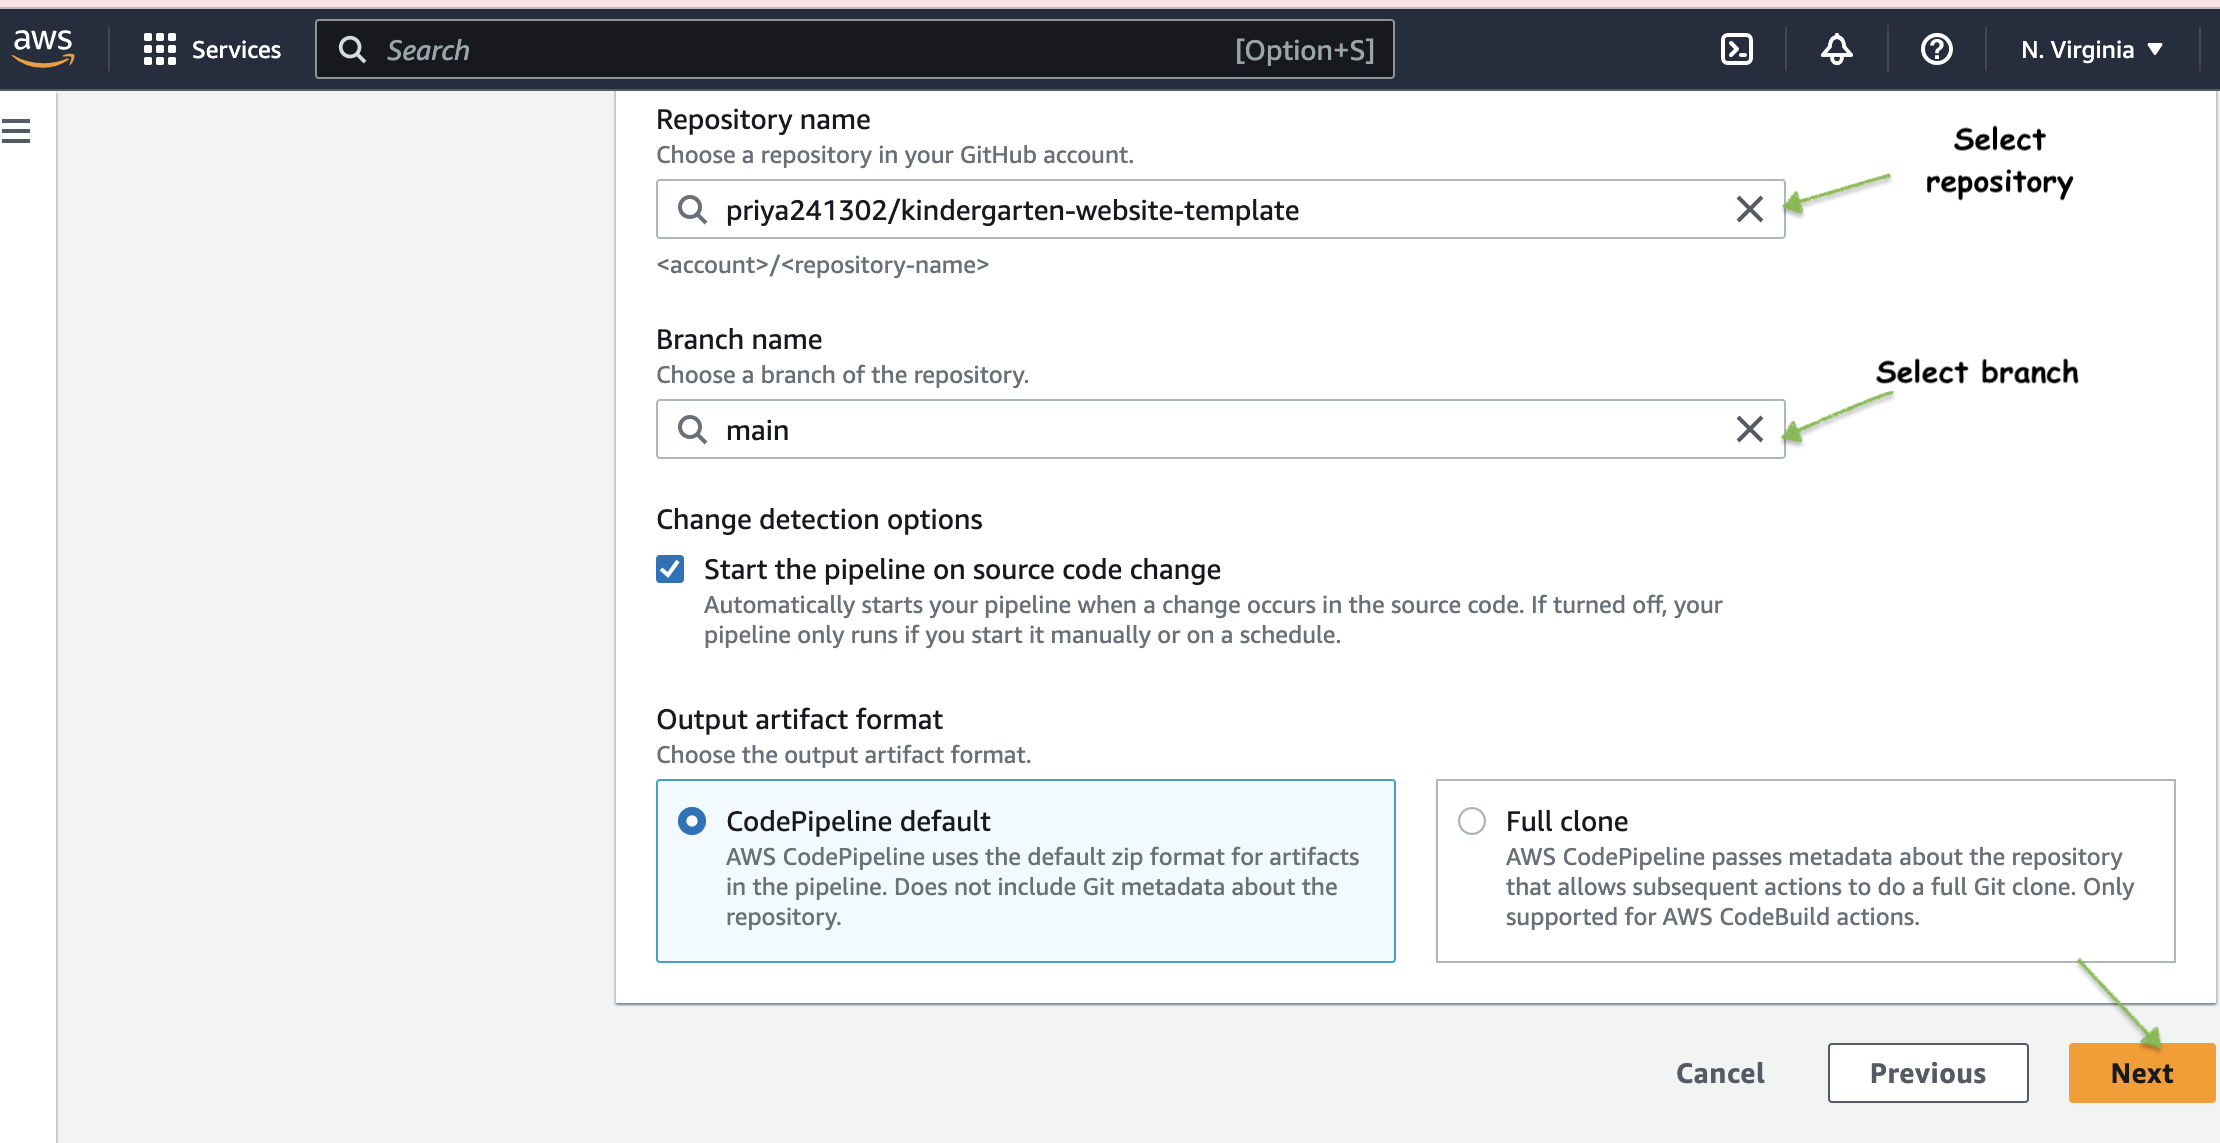
- For the Source provider, I have chosen GitHub Version 2. ( as this was recommended over version 1), Click on Connect to Git Hub and create the connection. Once the connection has been established, Choose your code repository and branch.
We can skip the build stage.
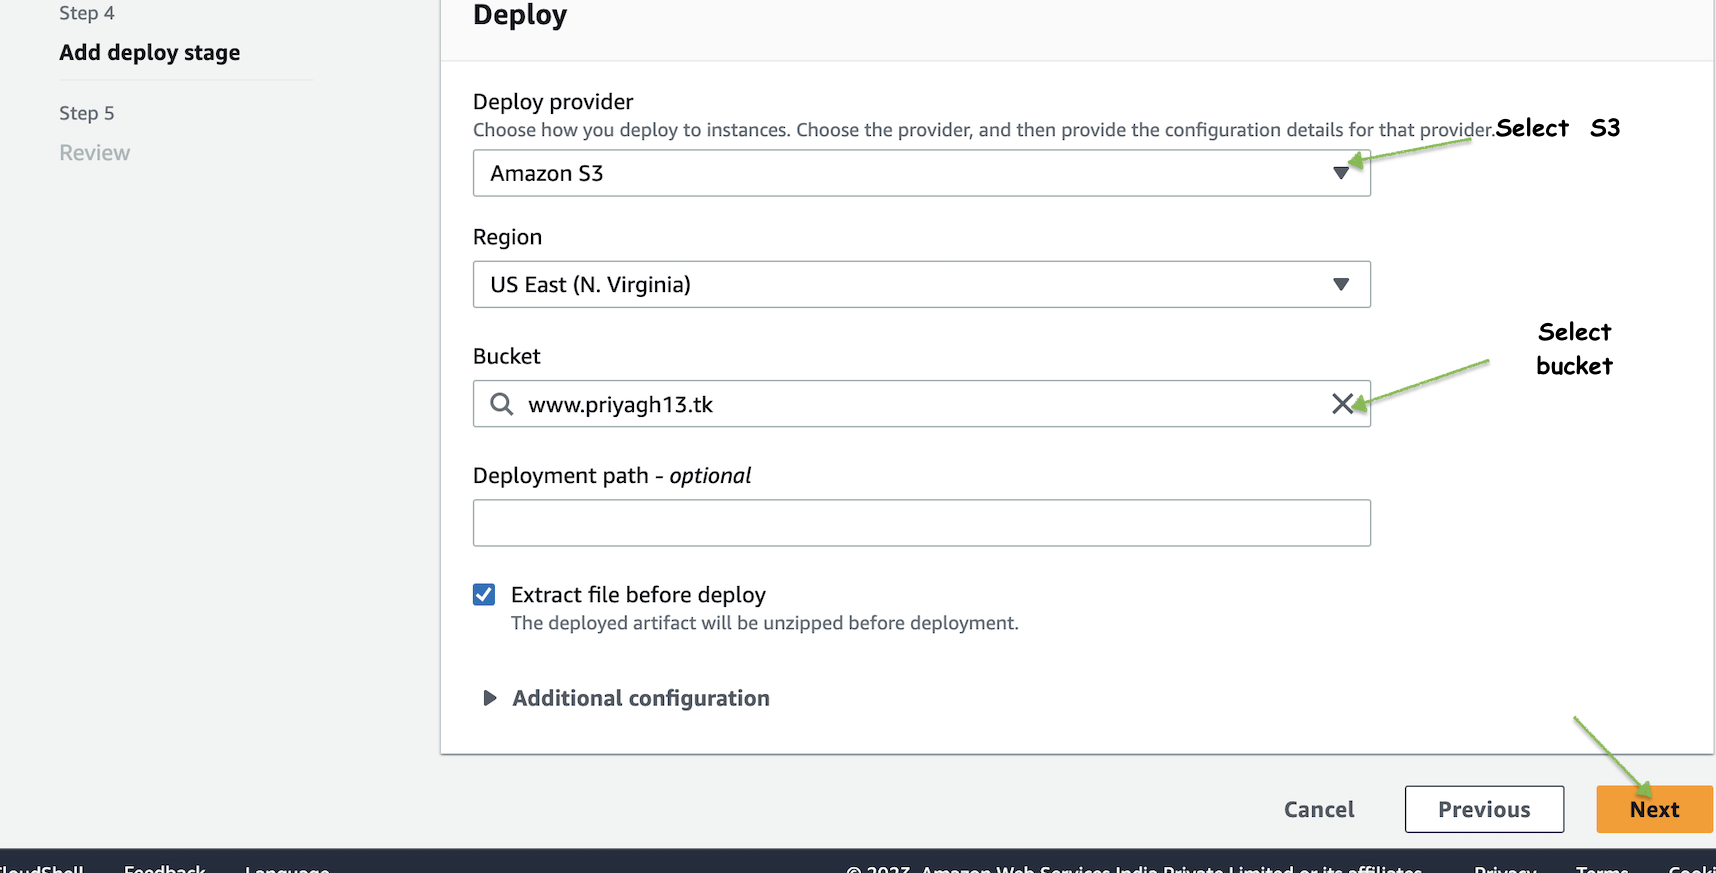
We are in the deployment stage. Under Deploy Provider–Choose Amazon S3, and choose your bucket name under the bucket. Select the checkbox for extract files before Deploy.
- Review the pipeline and click on Create pipeline.
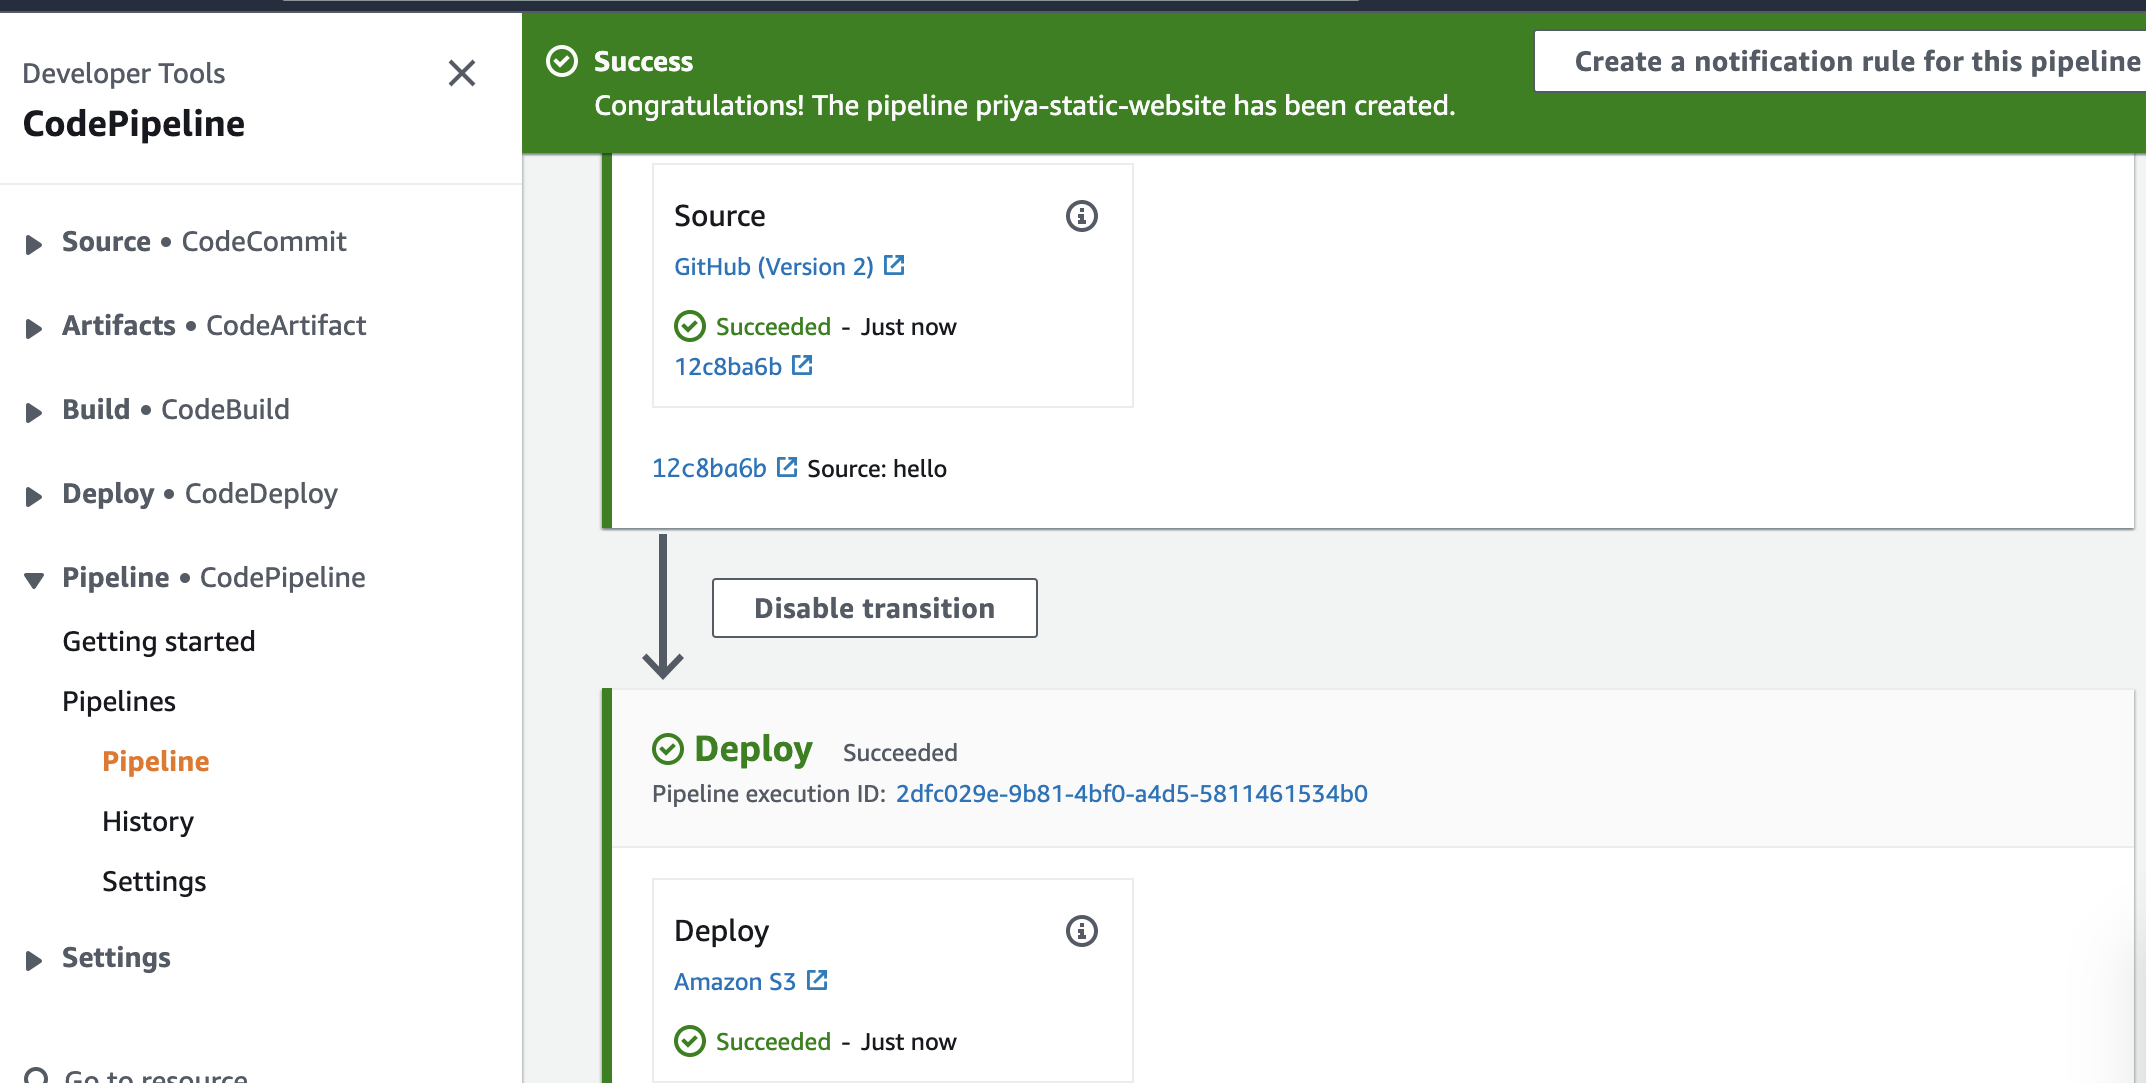
- Final Step**:** Once all the stages turn green, go to your Static Website

Thank you for joining me on this exciting journey through this blog I hope this helps you to build this project.
Also make sure you clean up your AWS resources, after completing the project, to save costs.
References:
https://docs.aws.amazon.com/AmazonS3/latest/userguide/WebsiteHosting.html
https://www.youtube.com/playlist?list=PLl4APkPHzsUUc8HOEIwfB3Z2uxRv2SKOG
Subscribe to my newsletter
Read articles from Haripriya directly inside your inbox. Subscribe to the newsletter, and don't miss out.
Written by
