K3s Cluster on AWS EC2
 Subbu
Subbu
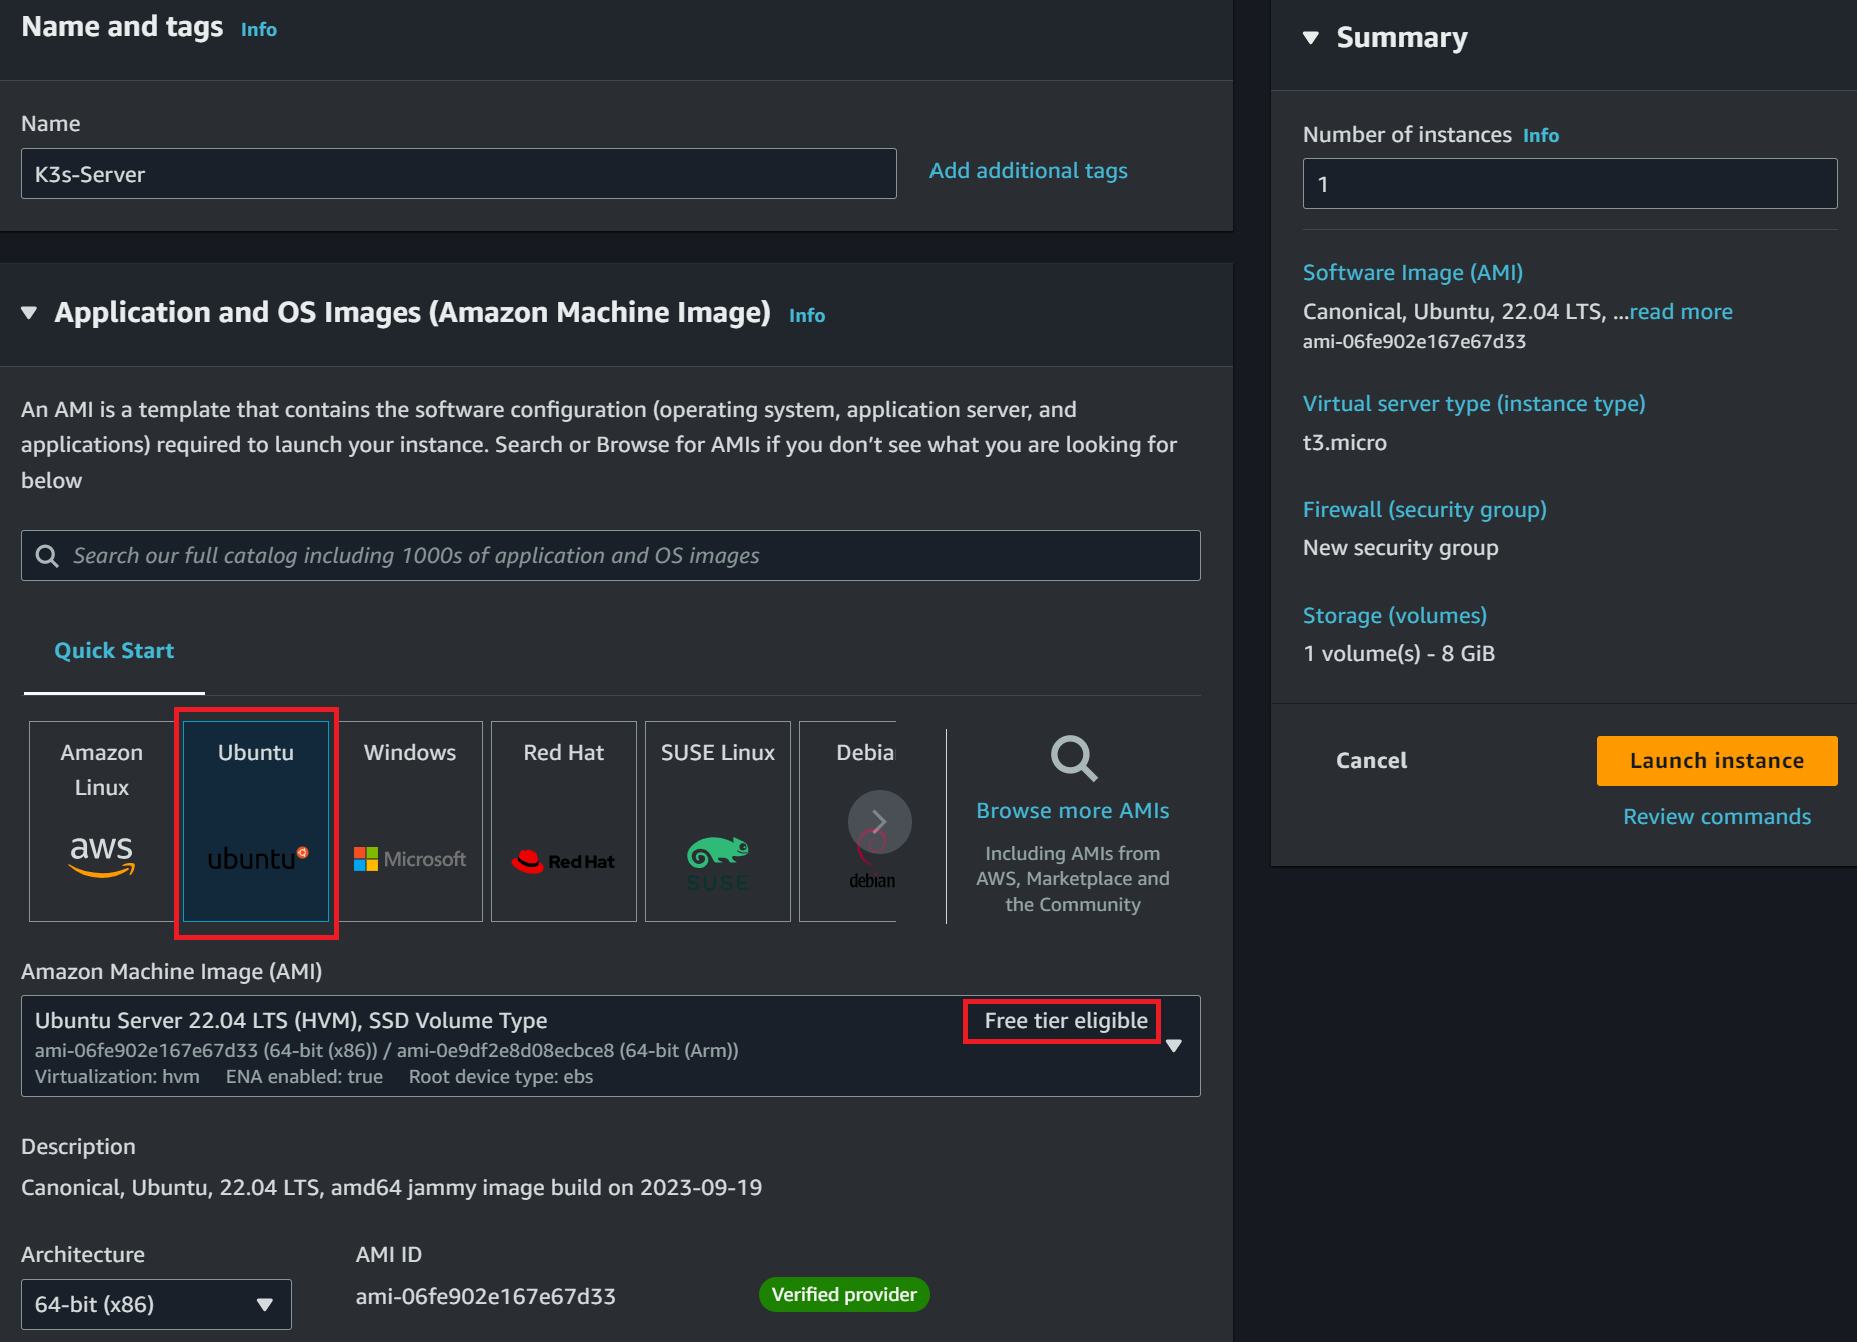
EC2 is like your typical computer hosted on the cloud. The first thing is to choose which OS distribution you are good at working with. This demo uses an Ubuntu machine. Follow along as follows:
Create your instance using Ubuntu. Remember to always check you are using Free tier-eligible services; in this case, the t2.micro and t3.micro server types will be fine:
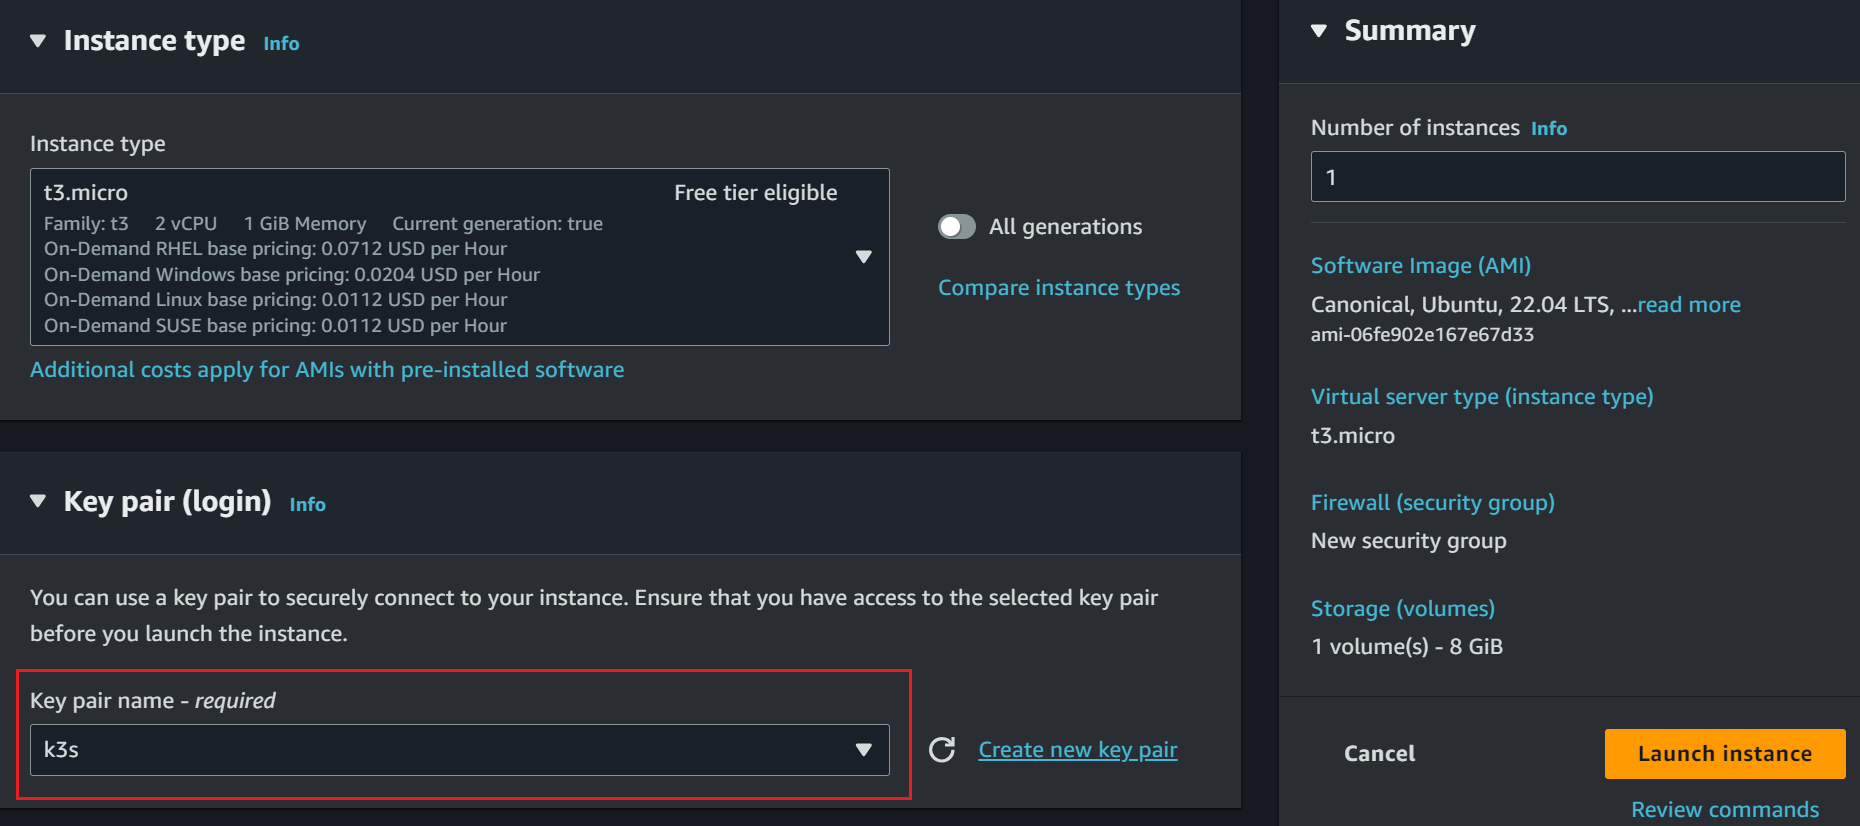
To access the instance on a secure SSH client, create an SSH key and assign it to this EC2:
Are you planning to expose this EC2 to the public and mainly use a domain name to access the K3s cluster running on AWS? Set your networking so the cluster can allow HTTP and HTTPS traffic from the internet:
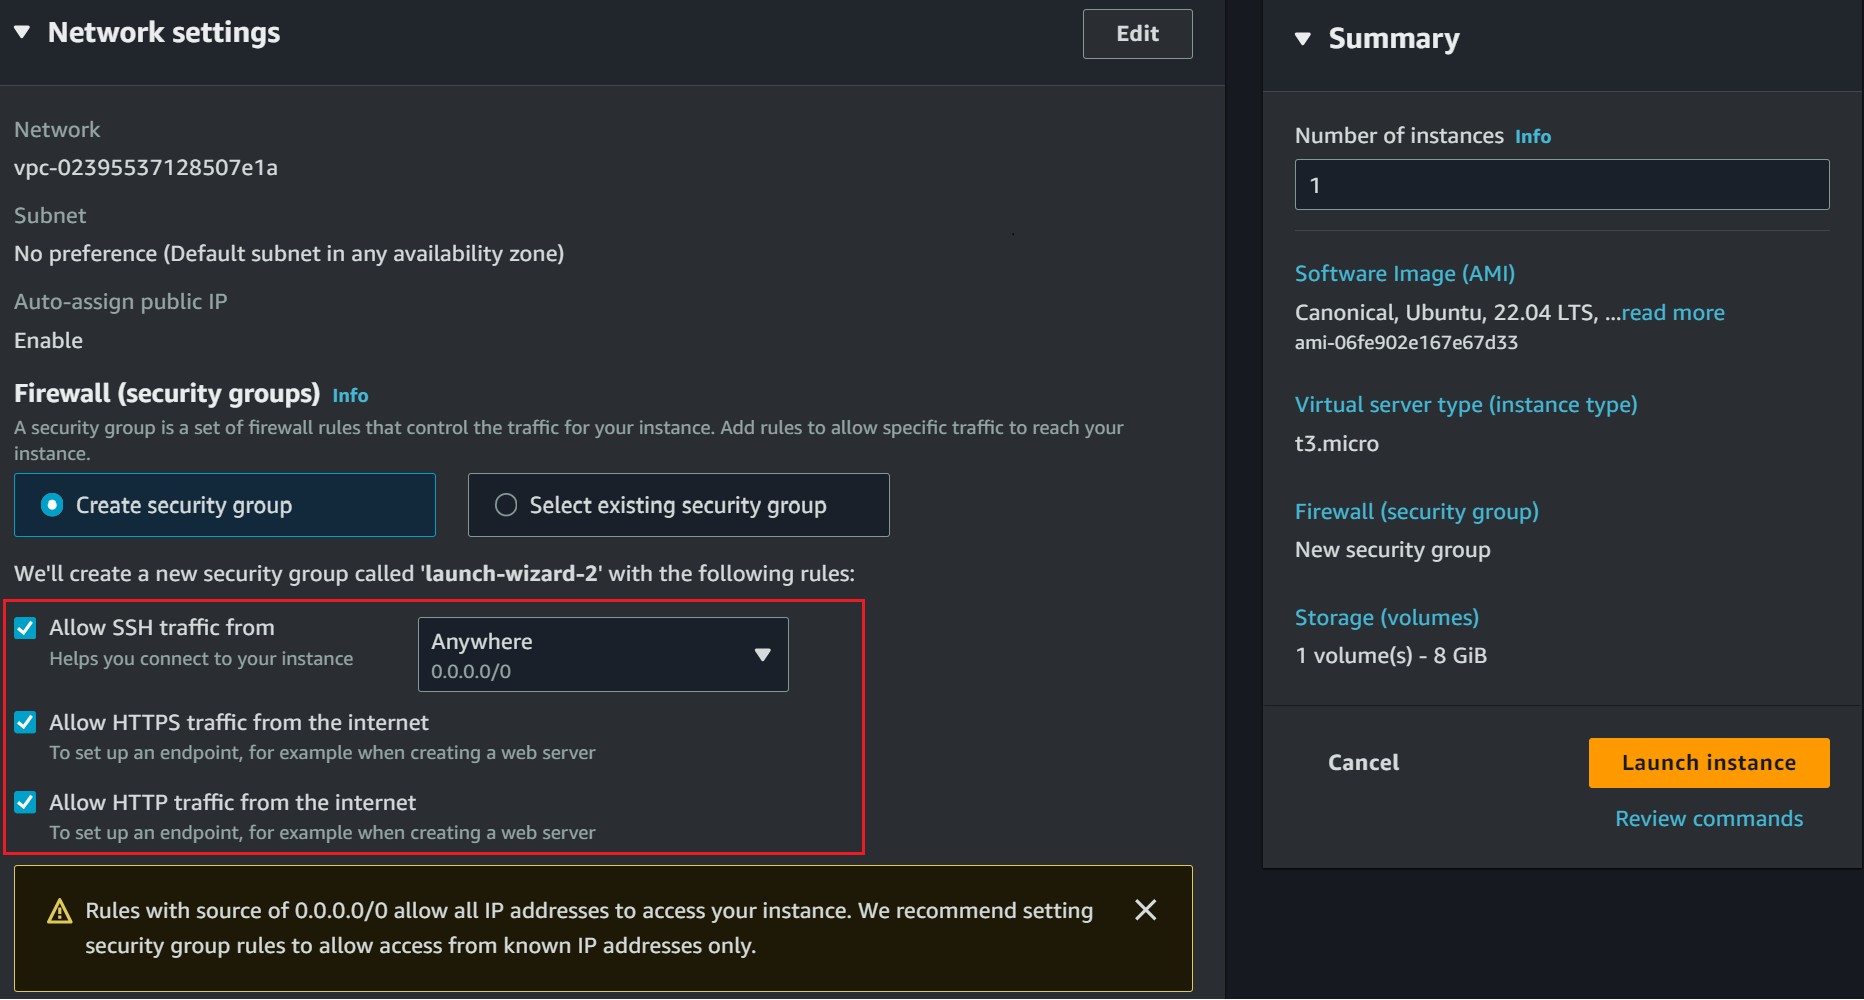
Launch your instance if you have these settings ready.
Creating an Elastic K3S AWS EC2 IP Address
Your EC2 will be exposed to the internet. If it reboots, it will get assigned a new IP address. You don’t want this to happen. Traffic must point to a stable IP address.

we can view the list of Elastic IP Addresses.

Allocate Elastic IP address as follows:
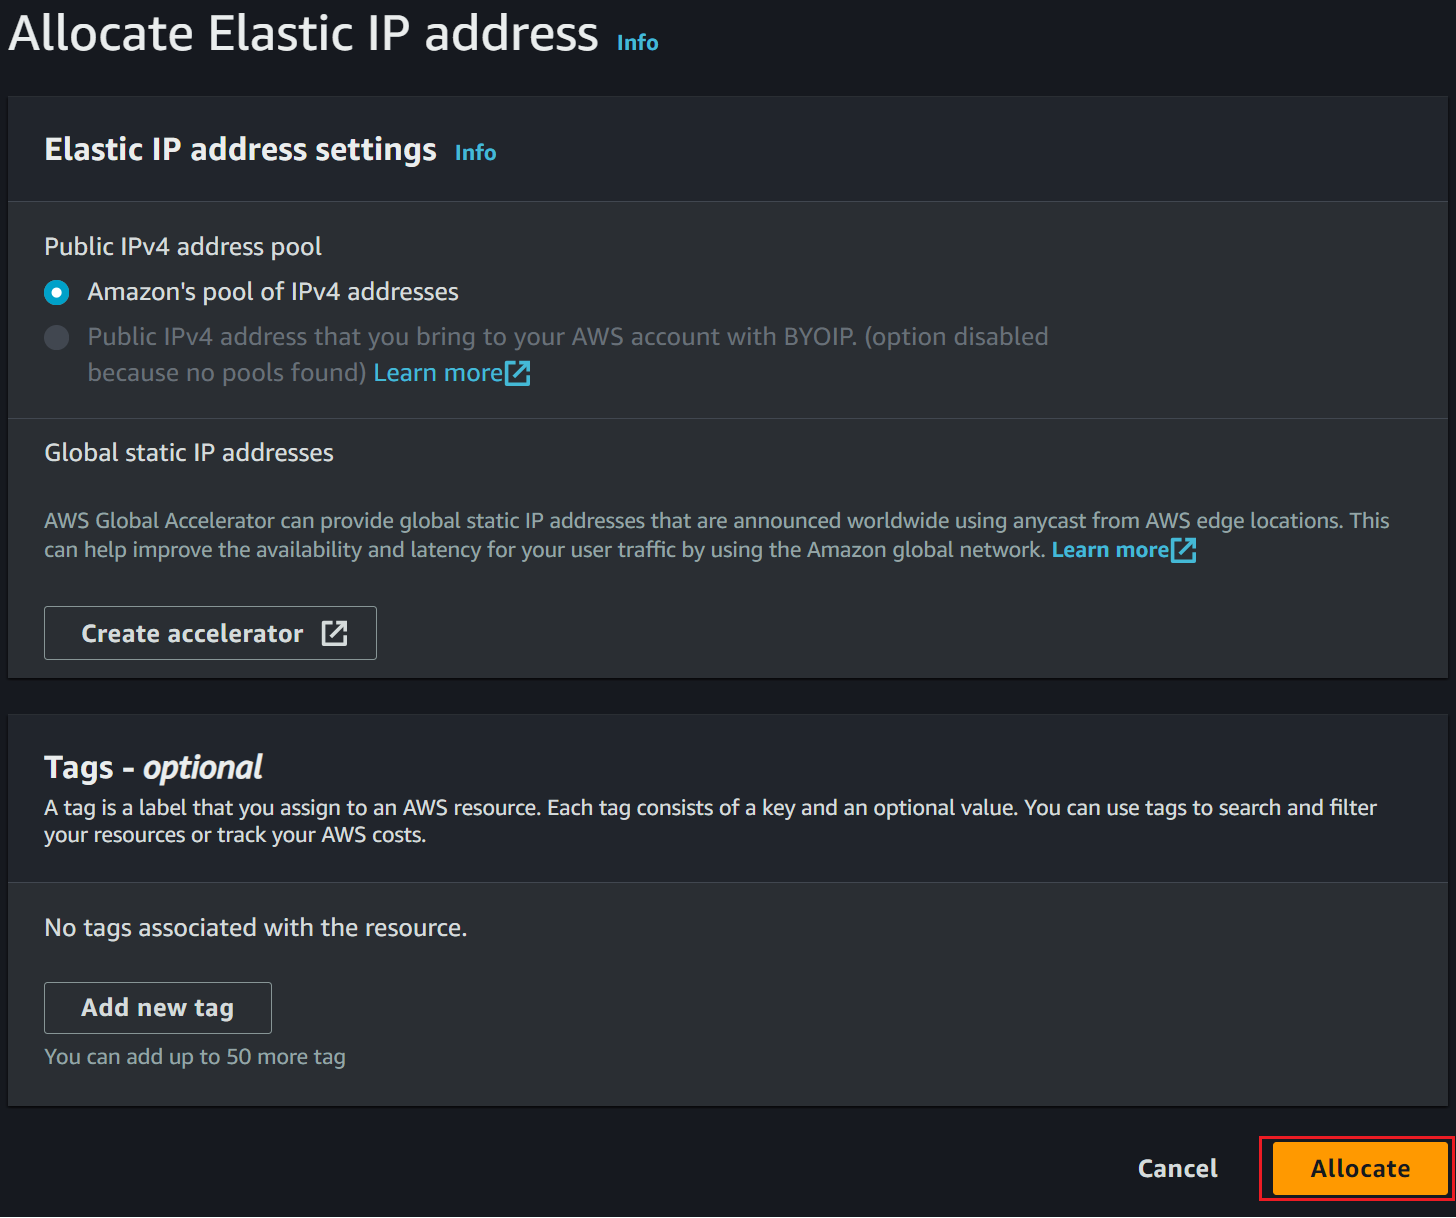
You don’t need to edit this setting further, click Allocate to proceed to the created Elastic IP address.
Your instance will be assigned to this IP. But you need to Select the IP and on Actions you will Associate the Elastic IP Address

You will select your Instance and Private IP address to finally Associate the IP
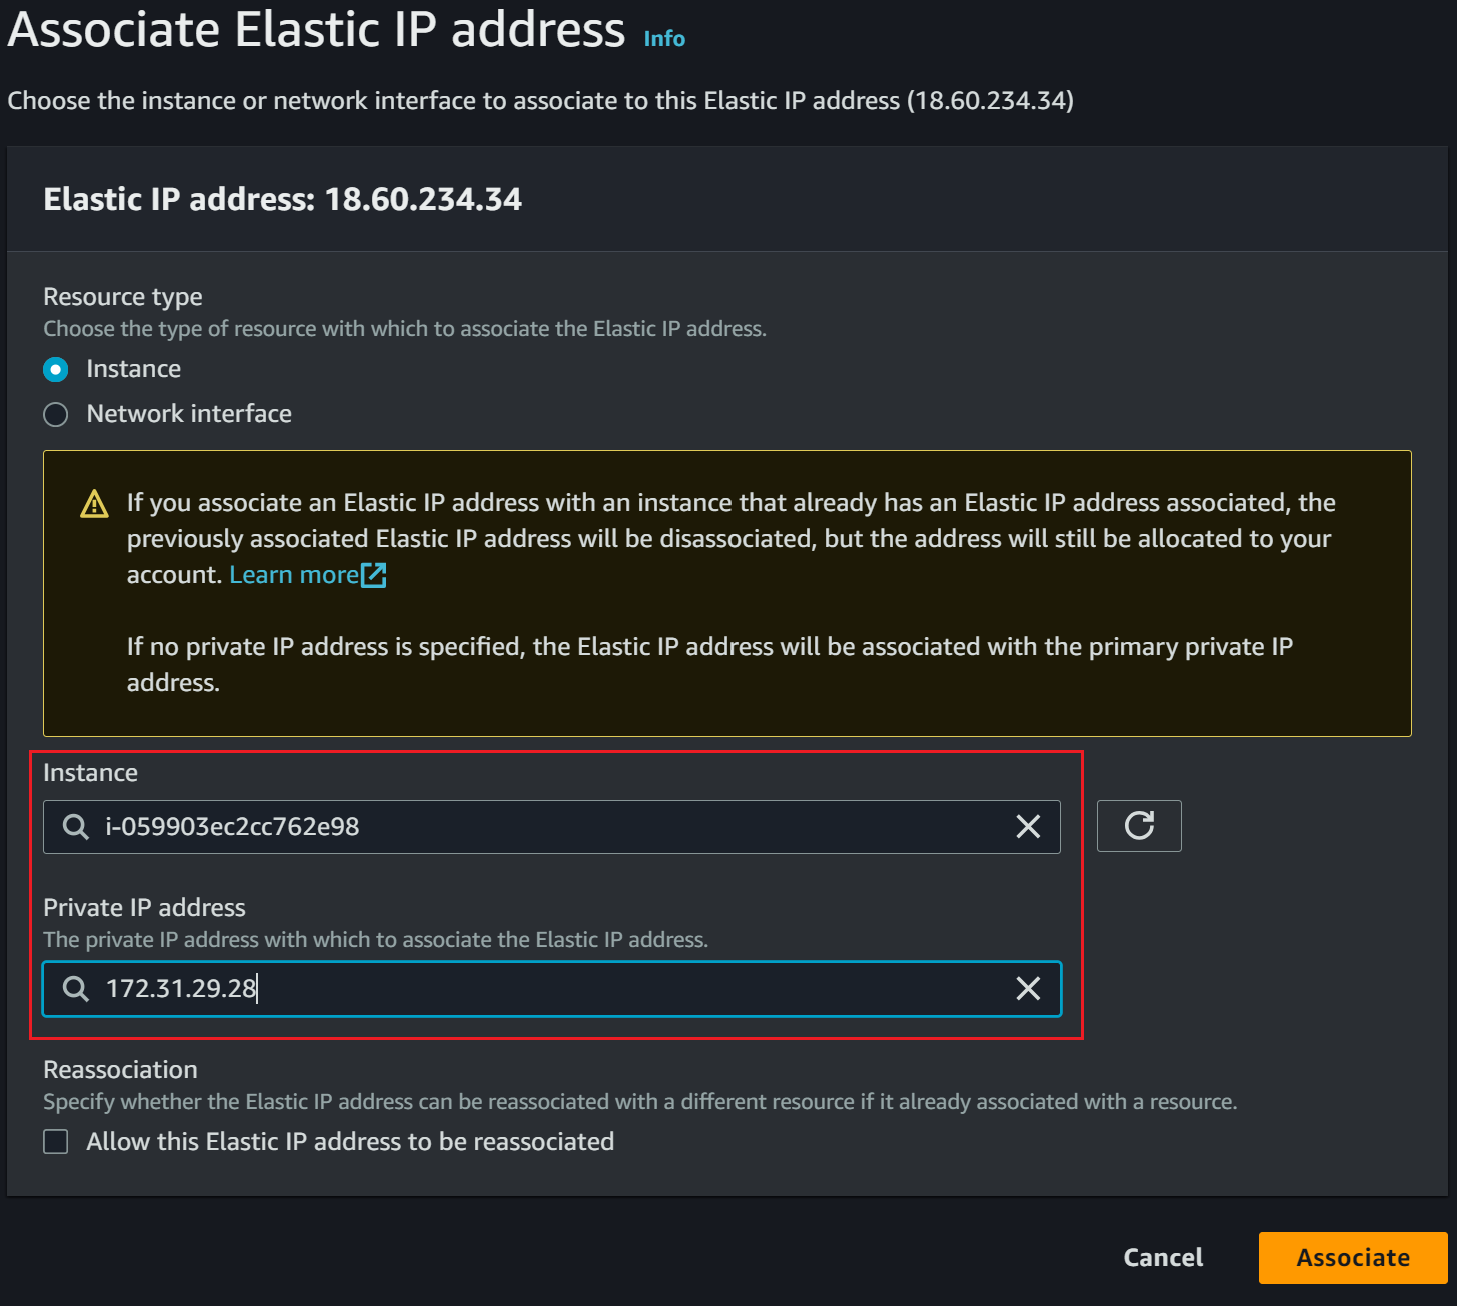
The instance is running and ready to configure K3s AWS EC2 :

Accesing AWS EC2 On SSH
To run a command for setting up K3s on AWS EC2, you must access the EC2 instance in a terminal.
One way is to use the key pair you generate using FTP to SSH to your instance. If you know how to use this option, go ahead and use it.
However, to make this simple, you can use an online AWS-based SSH client as follows:
Select your instance and navigate to Connect:

Select Connect using EC2 instance Connect:
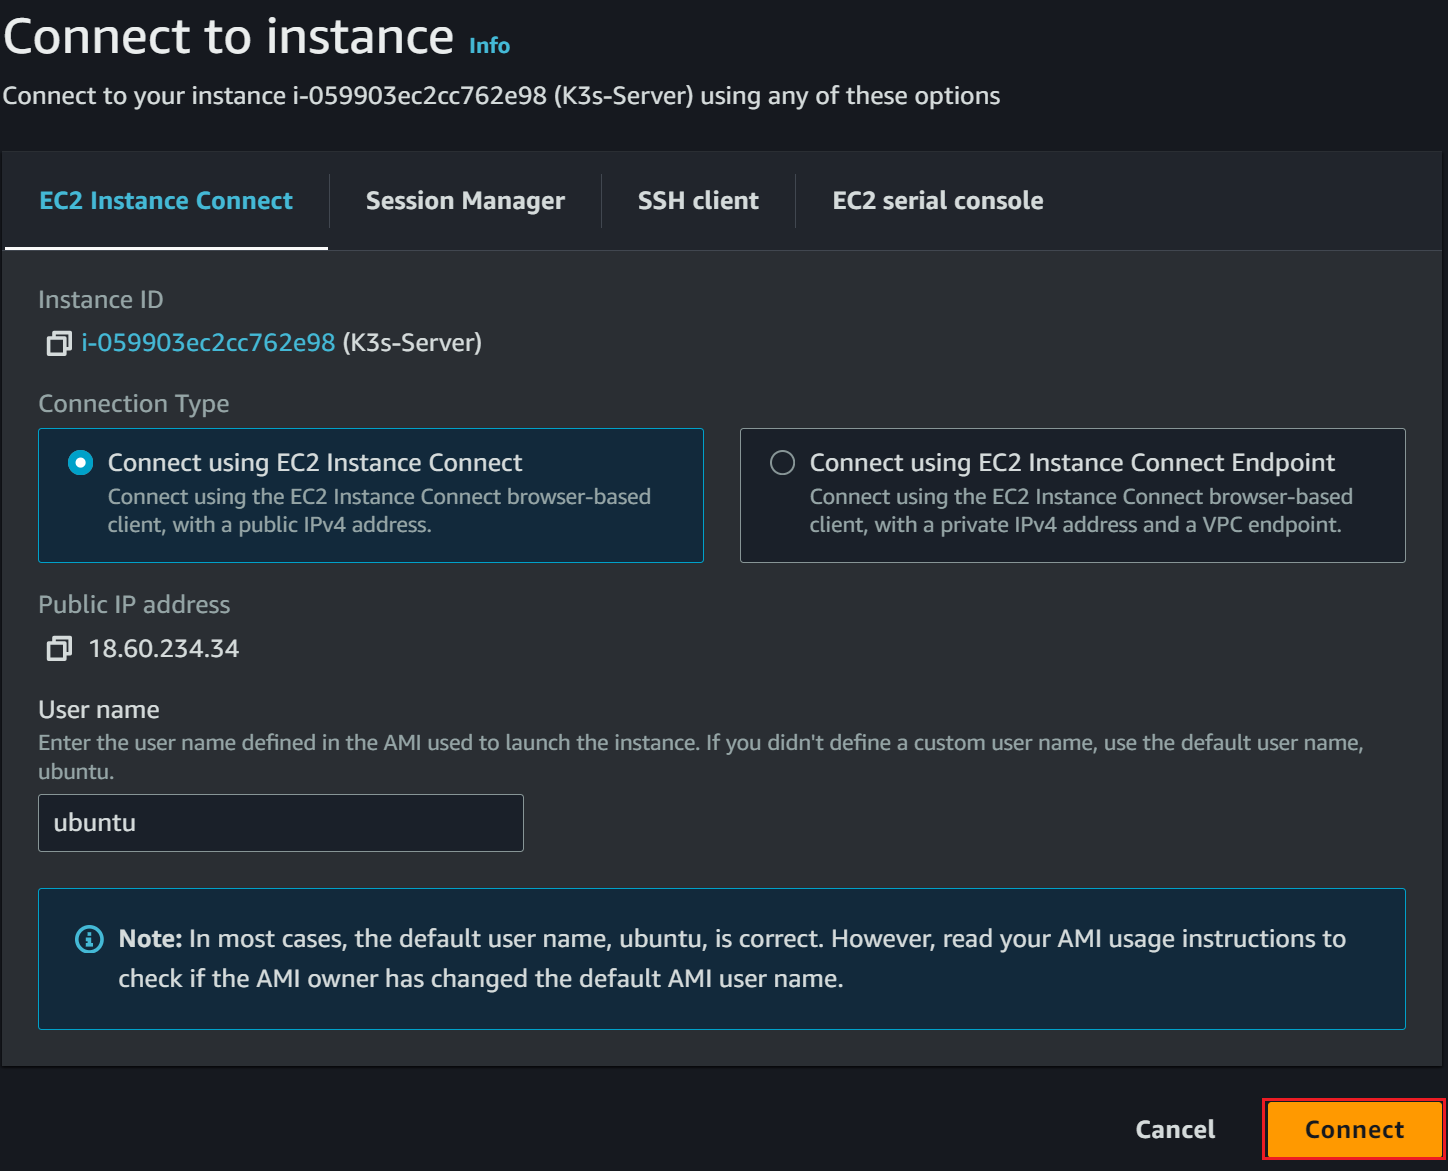
A terminal will be launched on your browser that you can use to run the commands:
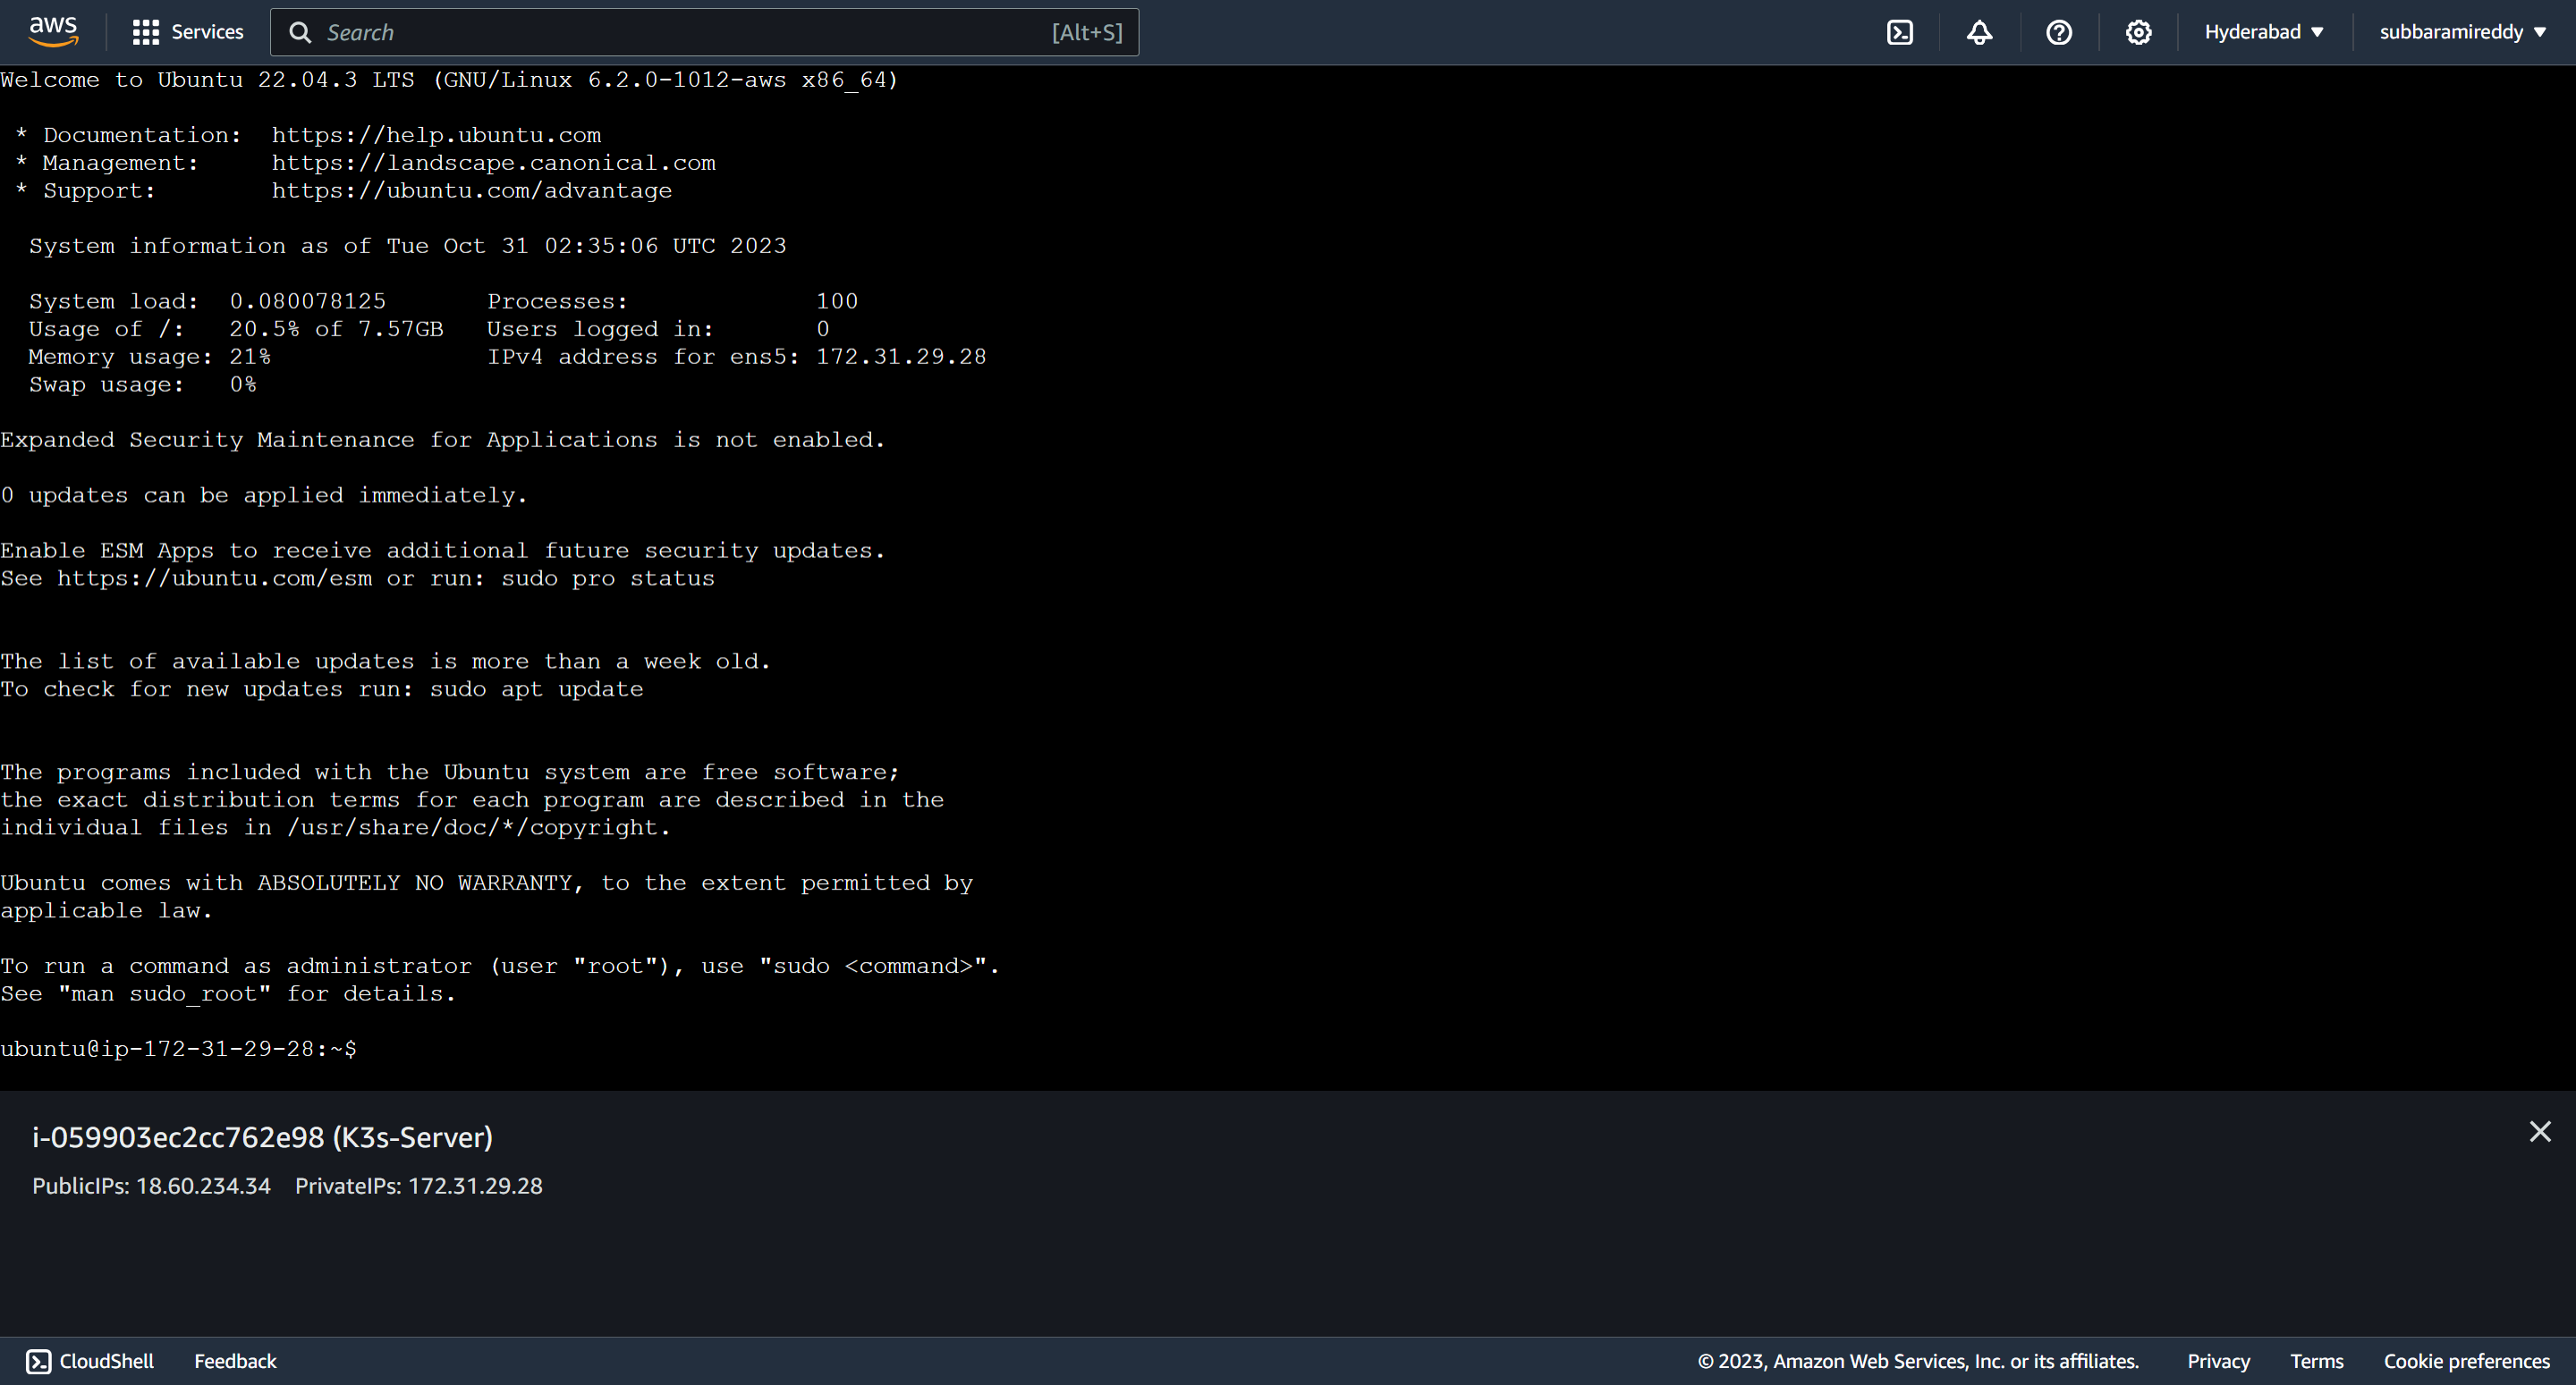
Installing K3s On AWS EC2
K3s get up and running with a single command. The following is the basic installation command K3s provided on K3s docs:
curl -sfL https://get.k3s.io | sh -s - --write-kubeconfig-mode 644

Now run the following commands to check if the K3s server is working:
kubectl get nodes
# Or
kubectl cluster-info

A Quick Note For k3s AWS EC2 for production: If you are running this setup for a production purpose, I have included the following command. I have added a --tls-san as Configuration Value to add hostnames or IPv4/IPv6 addresses to the K3s installation. This is not a must-use setup. However, if you want to use a TLS cert, you need to install K3s with your IPv4 address as a subject in the following command your_server_ip value:
curl -sfL https://get.k3s.io | INSTALL_K3S_EXEC="--tls-san your_server_ip" sh -
Running K3s Kubernetes Cluster on AWS EC2
That’s all you need as far as installing K3s is required. So, let’s get an application up and running on this server.
sudo apt update -y && sudo apt install docker.io -y

Add the user to the docker Group and update the docker group as follows:
sudo usermod -aG docker $USER
newgrp docker
create a directory for k3s-app and create an index.html file
mkdir k3s-app
cd k3s-app
vi index.html
I will go ahead and edit a single file here. open the index.html and add the following line
<h1>Welcome to K3s Kubernetes Cluster on AWS EC2</h1>
Dockerize the application
Now, you must ensure you have a Dockerfile to build an image for your specific application.
In your k3s-app directory, create a Dockerfile and add the following instructions:
FROM nginx:alpine
COPY . /usr/share/nginx/html
Add DockerHub username and password. If you don’t have them, head to DockerHub and create an account.
- Build your image using the DockerHub username
docker build -t princeram/k3s-app:latest .
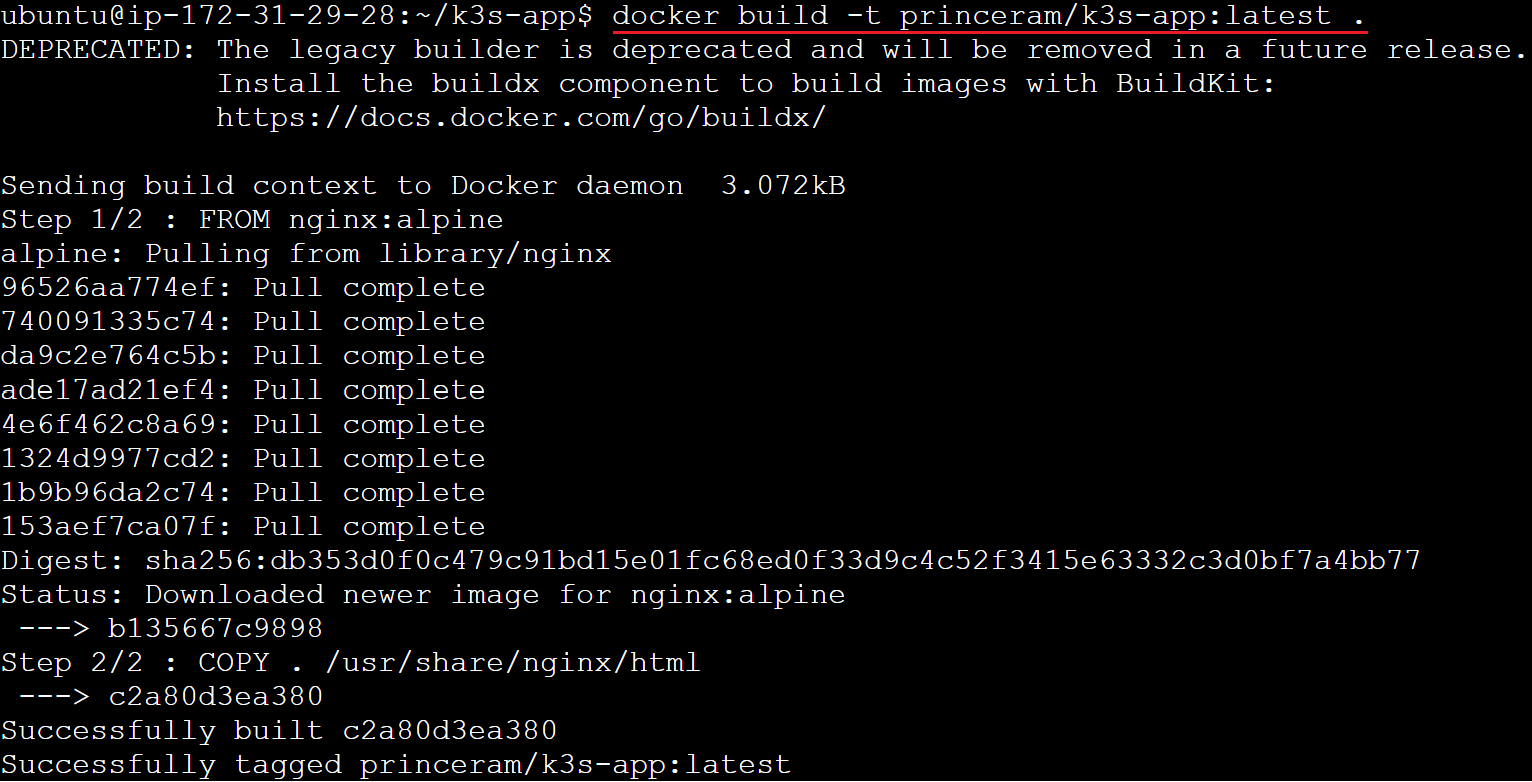
To view the list of docker images as followsa
docker images

Run the K3s-app image as follows
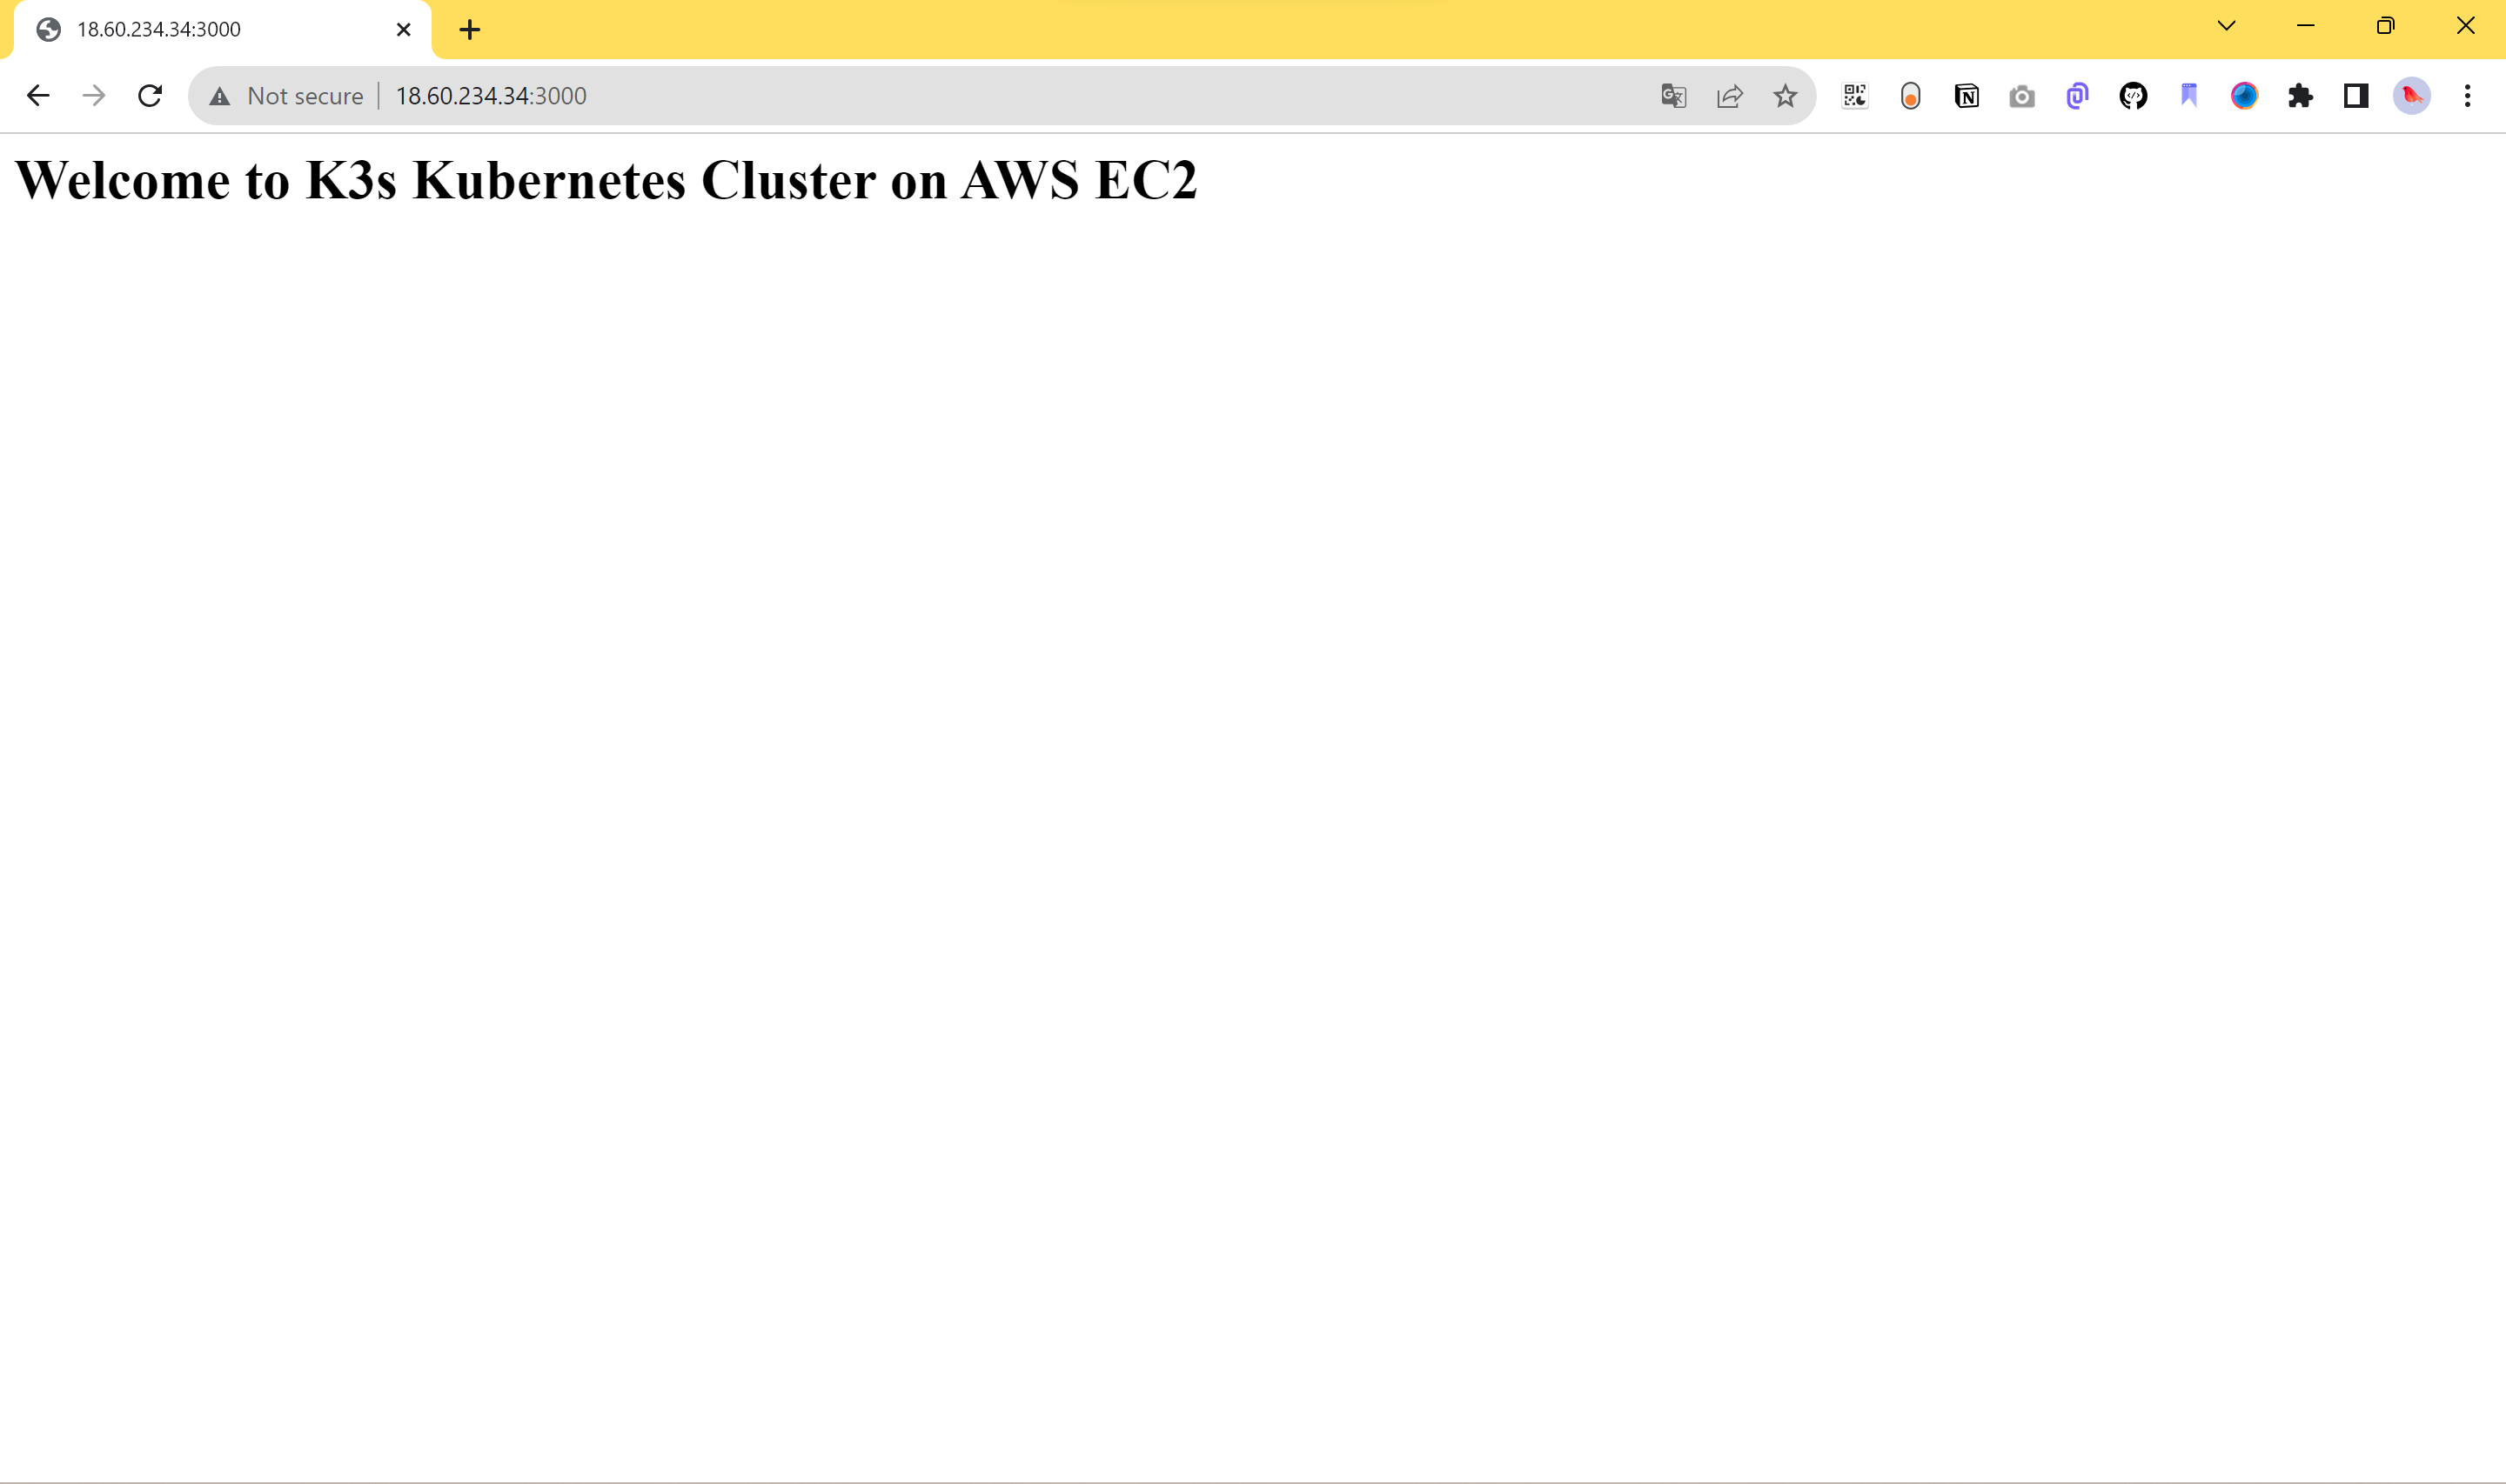
docker run -d -p 3000:80 princeram/k3s-app:latest

Add the 3000 port to your security Group

Open the app using http://<ip-address>:3000/ on your browser. You should be served the same application that will run on the K3s cluster inside your AWS EC2:
K3s on AWS EC2 will access this image. Simply saying, AWS EC2 is a cloud service. To access your image, you must also host it on the internet. DockerHub is the right place to do that.
Let’s build the image and store its artefacts in DockerHub:
In your Dockerfile root directory, run the following commands:
- Log in to Docker Hub:
docker login

- Push and publish the image to DockerHub:
docker push princeram/k3s-app:latest

Creating K3s Kubernetes Cluster on AWS EC2
Let’s create the K3s Kubernetes Cluster on AWS EC2 to run this application.
In your EC2 ssh terminal, create a Kubernetes deployment file:
vi k3s-app.yml
The following K3s deployment Configuration to this k3s-app.yml and save it:
apiVersion: apps/v1
kind: Deployment
metadata:
  name: k3s-app
  labels:
    app: k3s-app
spec:
  replicas: 1
  selector:
    matchLabels:
      app: k3s-app
  template:
    metadata:
      labels:
        app: k3s-app
    spec:
      containers:
        - name: k3s-app
          image: princeram/k3s-app
          imagePullPolicy: Always
          ports:
            - containerPort: 80
---
apiVersion: v1
kind: Service
metadata:
  labels:
    app: k3s-app-service
  name: k3s-app-service
spec:
  ports:
    - name: "3000-80"
      port: 3000
      protocol: TCP
      targetPort: 80
  selector:
    app: k3s-app
  sessionAffinity: None
  type: ClusterIP
status:
  loadBalancer: {}
---
apiVersion: networking.k8s.io/v1
kind: Ingress
metadata:
  name: k3s-app-ingress
  annotations:
    ingress.kubernetes.io/ssl-redirect: "false"
spec:
  rules:
    - http:
        paths:
          - path: /
            pathType: Prefix
            backend:
              service:
                name: k3s-app-service
                port:
                  number: 3000
In this k3s-app.yml:
You have the deployment to run the application image on
image: your_dockerhub_username/my-app. So makeyour_dockerhub_usernamereflect your DockerHub username.The service exposes the application on a
ClusterIPTraffic to run Ingress as a load-balancer, routing the traffic to the service and exposing the application.
Deploying K3s AWS EC2 Cluster
You have all the files ready. Let’s get the cluster up and running. Execute the following command:
kubectl apply -f k3s-app.yml

To confirm the cluster is running, check its pod status:
kubectl get pods

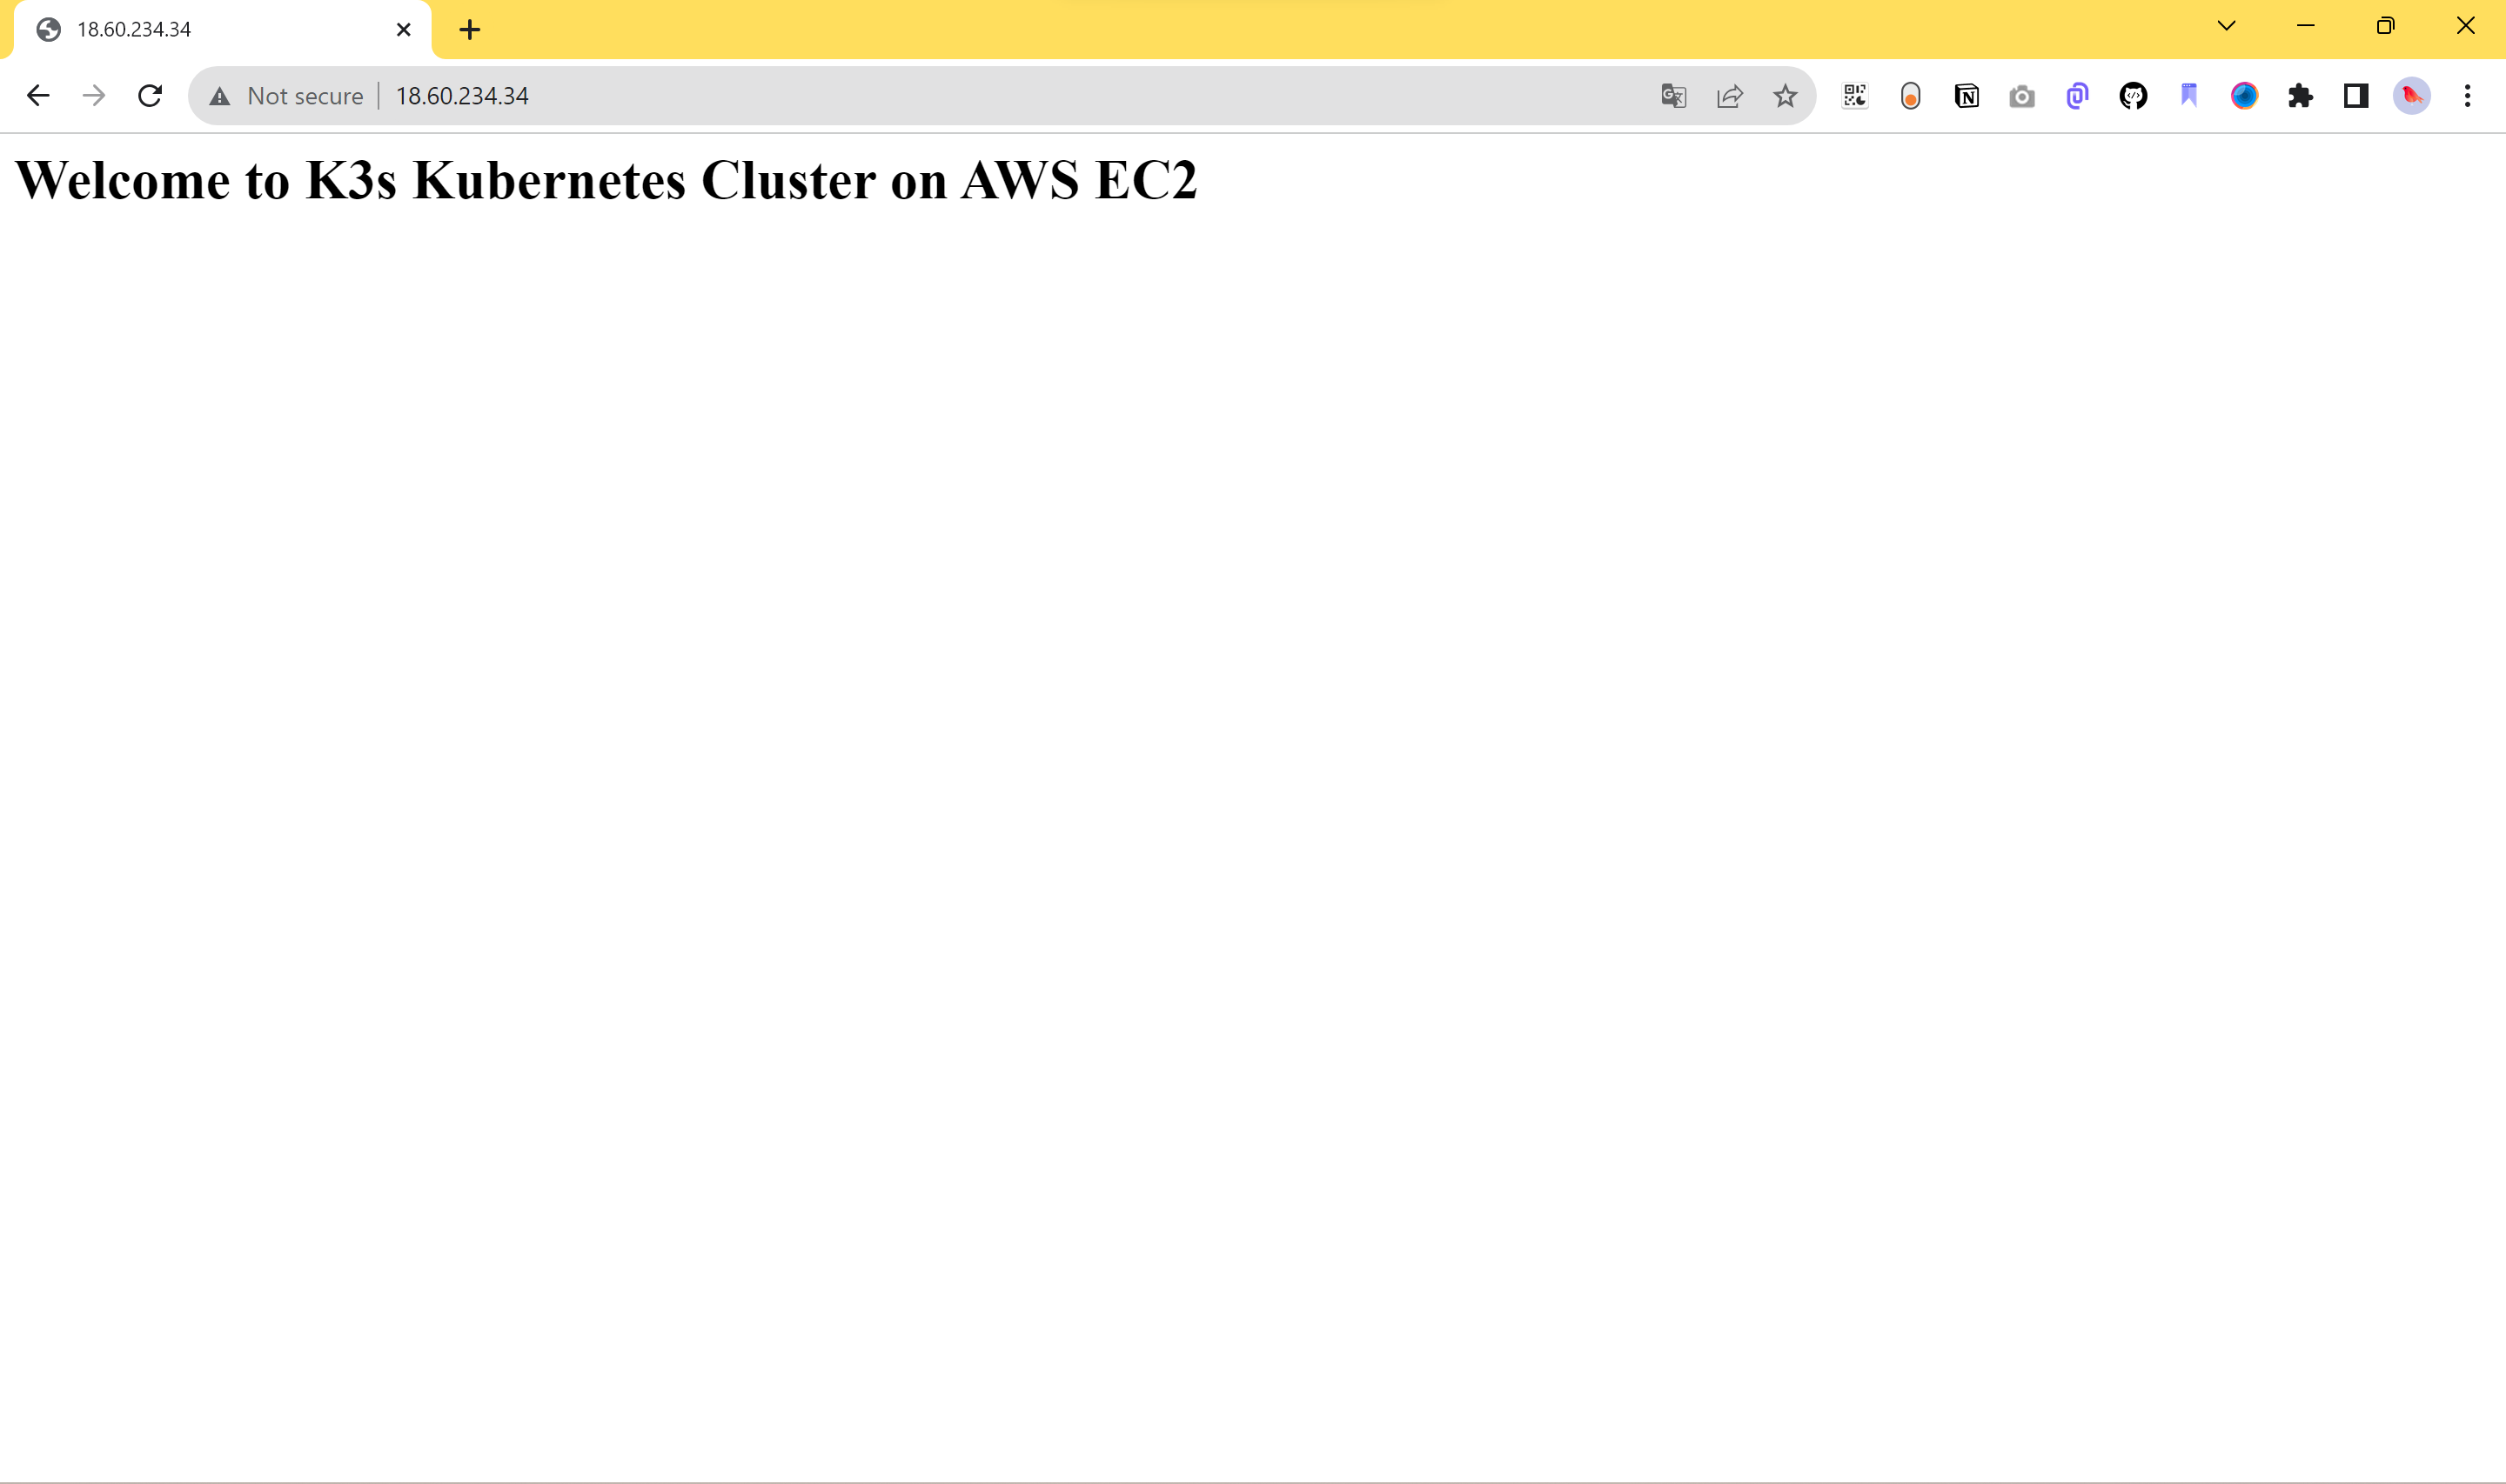
The pod is running. To test this deployment, open your EC2 Elastic IP address on the browser. For example, here, I was using 44.212.229.204. This should serve me the application on the browser as follows:
Thanks for reading! I hope you found this helpful and informative.
I'm always happy to connect with fellow tech enthusiasts and answer any questions you may have. Don't forget to follow me for more updates on tech, programming, and more.😄😄
Follow me on LinkedIn to see interesting posts like this : ) Linkedin
Subscribe to my newsletter
Read articles from Subbu directly inside your inbox. Subscribe to the newsletter, and don't miss out.
Written by
Subbu
Subbu
👋Hello, Hashnode community! I'm subbaramireddy, a passionate DevOps Engineer with a relentless commitment to optimizing software development workflows and infrastructure management. 🚀 Hands-on experience in the DevOps field, I've honed my skills in AWS cloud services, containerization, and CI/CD pipelines. As an AWS Certified Developer, I'm well-versed in leveraging cloud technologies to drive efficiency and innovation. 💡 I firmly believe in the power of continuous improvement. My journey began with an internship, where I immersed myself in the intricacies of DevOps, from deploying web applications to orchestrating containerized solutions. I've also delved into AWS CDK, enhancing security through RDS instance policies, and creating foundational infrastructure with precision. 🌐 My goal is to share insights, best practices, and the latest trends in the DevOps landscape. I'm excited to connect with like-minded professionals, engage in meaningful discussions, and learn from the diverse experiences of the Hashnode community. 📝 Let's explore the ever-evolving world of DevOps together. Feel free to connect with me, ask questions, or share your own insights. Together, we can drive innovation and efficiency in the tech world!