Azure File Share
 Olufemi Moses
An Azure file share is a fully managed file storage service that provides a secure and scalable way to share files across Azure and on-premises deployments.
Azure file share can be used for application data sharing, file sharing and file backup. It is reliable and secure.
To create an Azure file share:
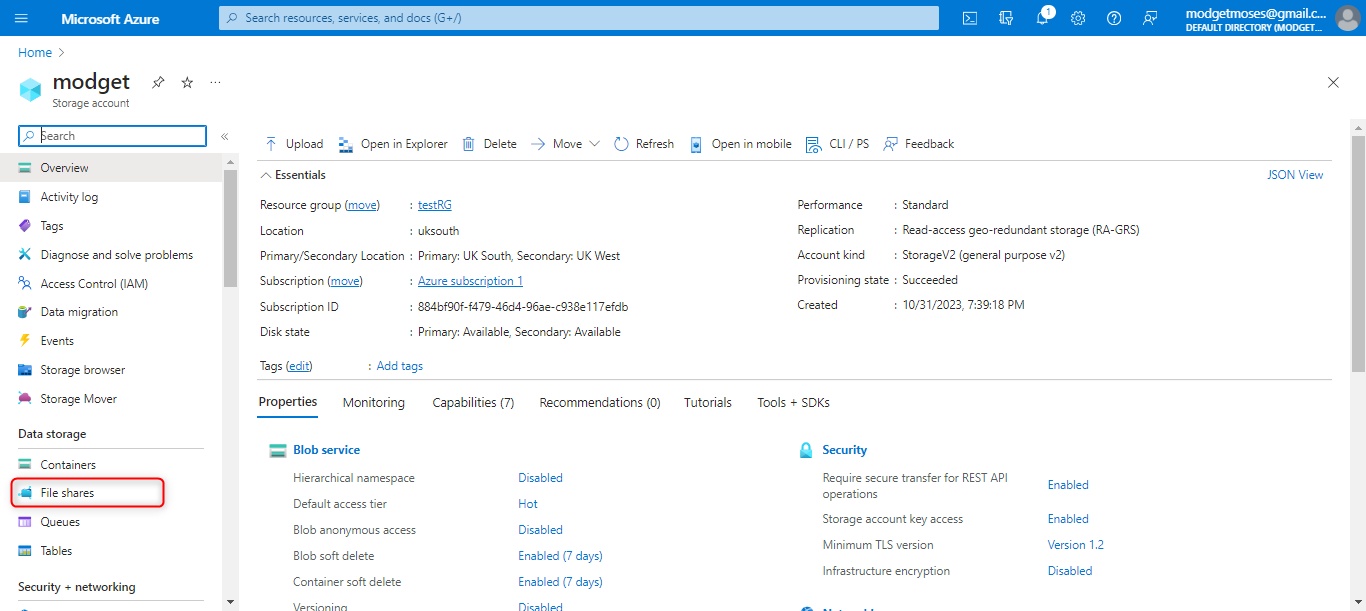
Step 1: From your Azure Portal, select the storage account you want to create the file share on. Then select File Shares
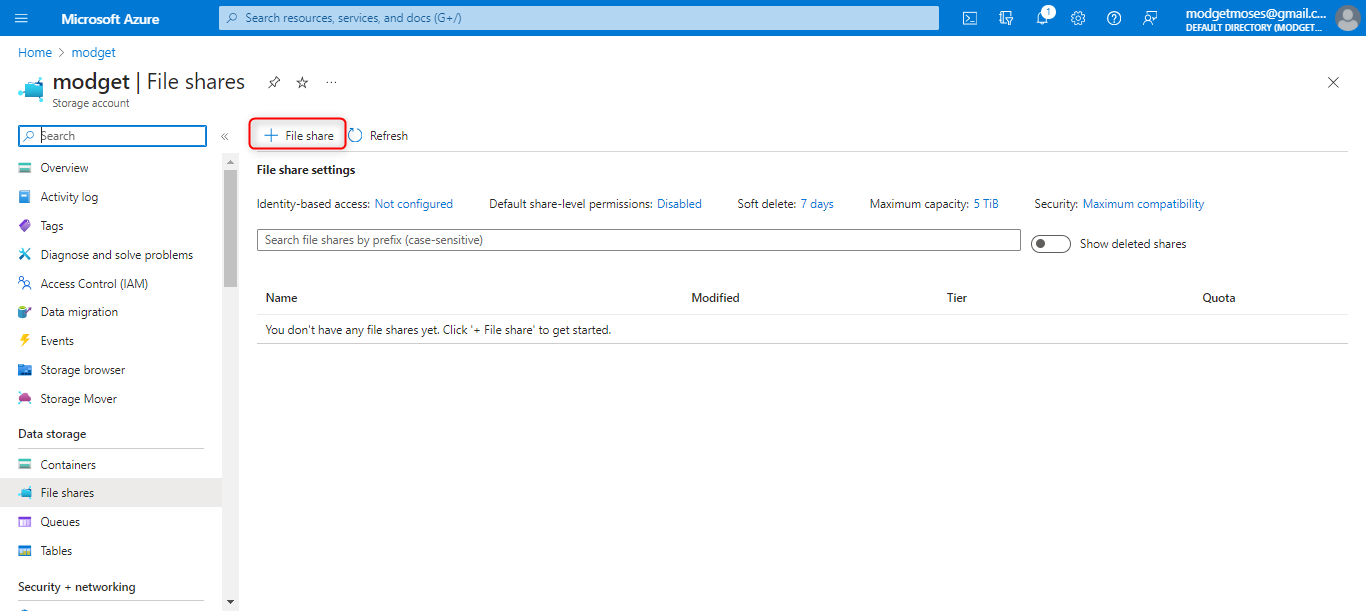
Step 2: Select +File share for a new file share and enter the name for the File Share
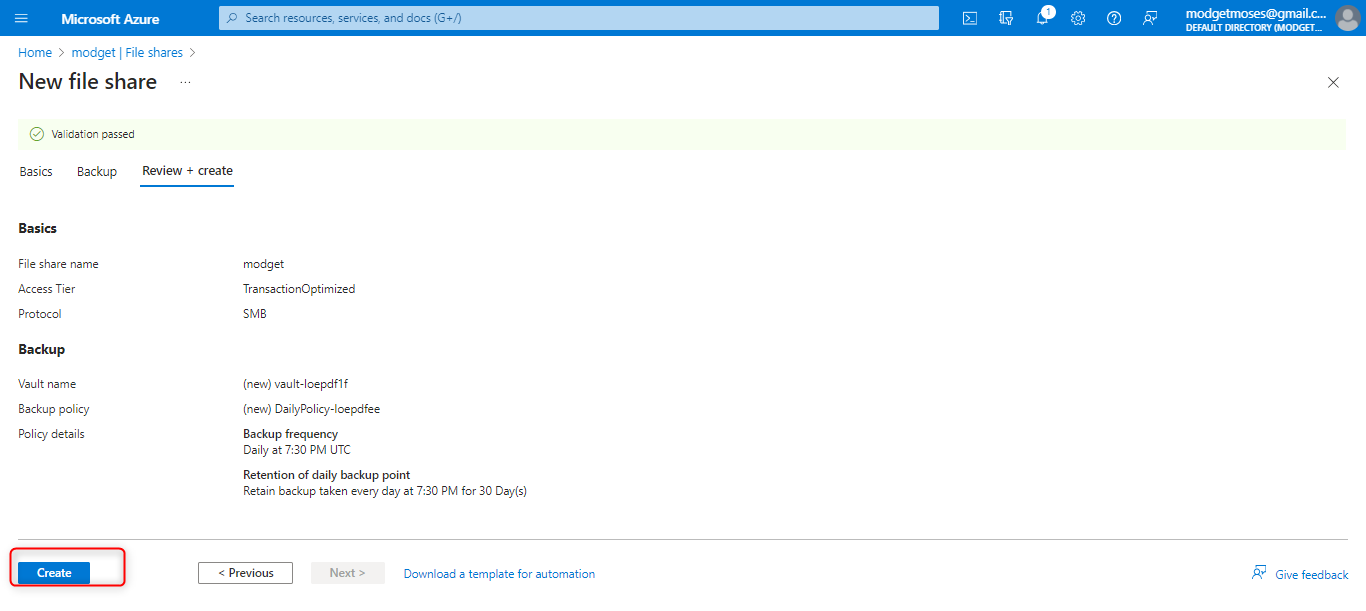
Enter a name for the file share, you can choose to enable backup, this will create a vault in the resource group. The Vault is a secure file-sharing solution that helps users to share files with others in a controlled and secure manner. After this click on Create.
Step 3: Mounting the Azure file share on the local system on on-premise server
On the file share window, select connect and choose a drive letter of your choice. Note the drive letter should be different from the ones already in use by the local system or on-prem server
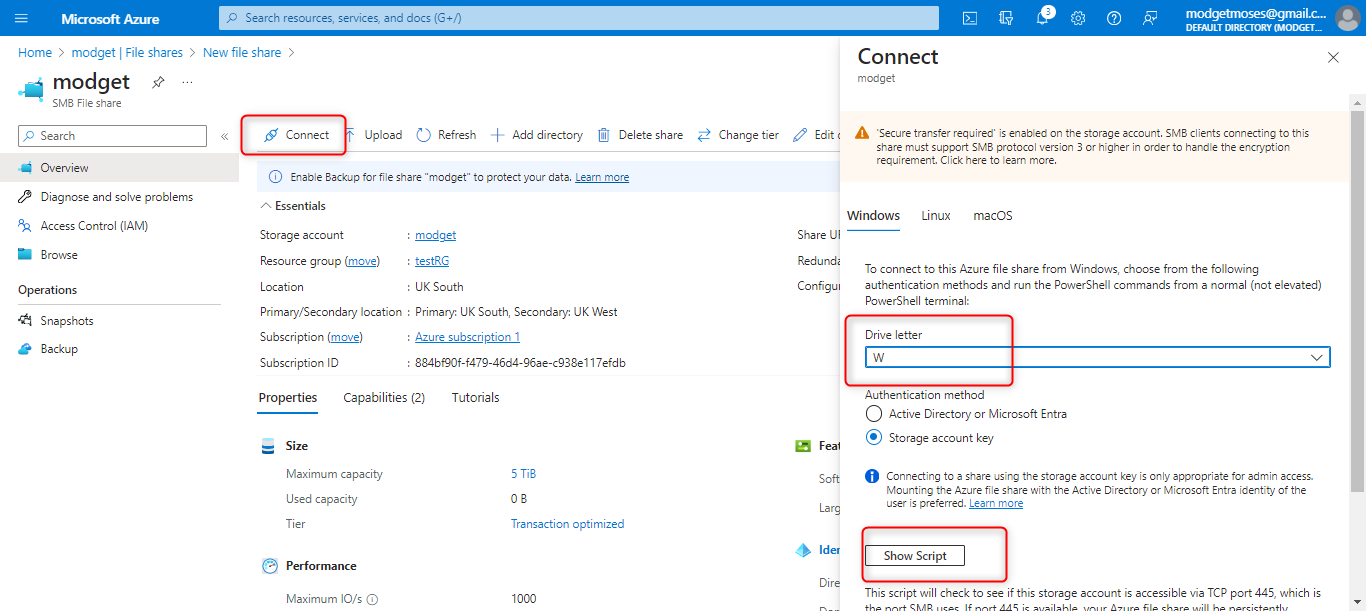
- Select show script
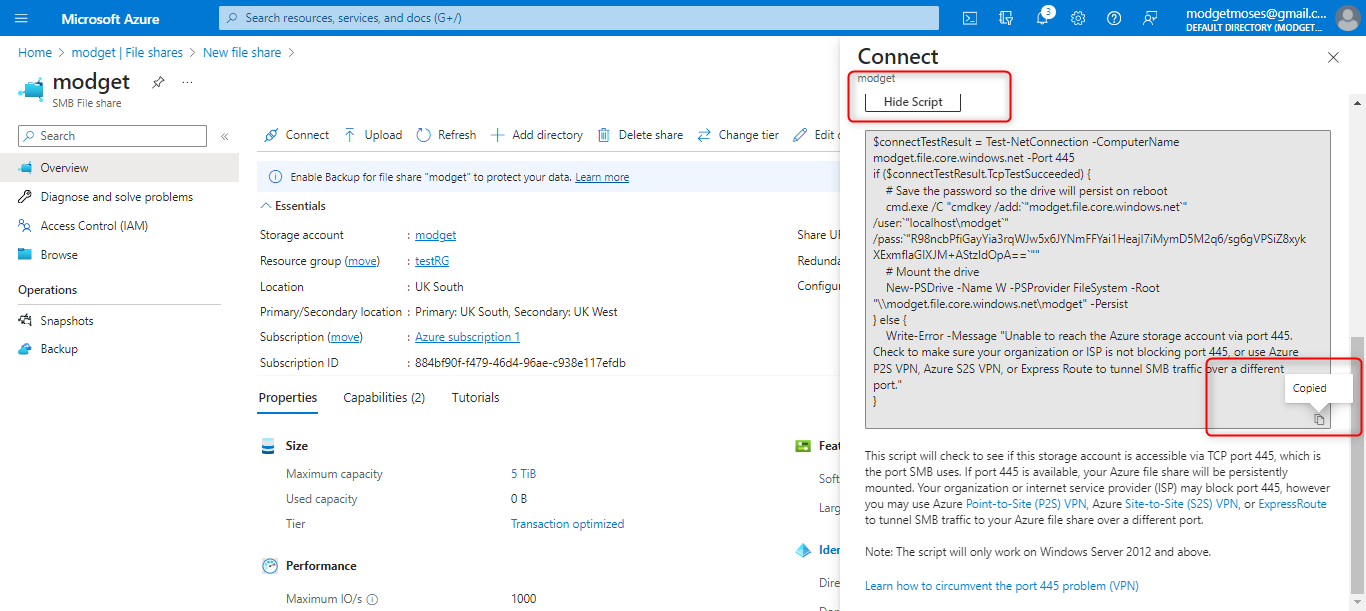
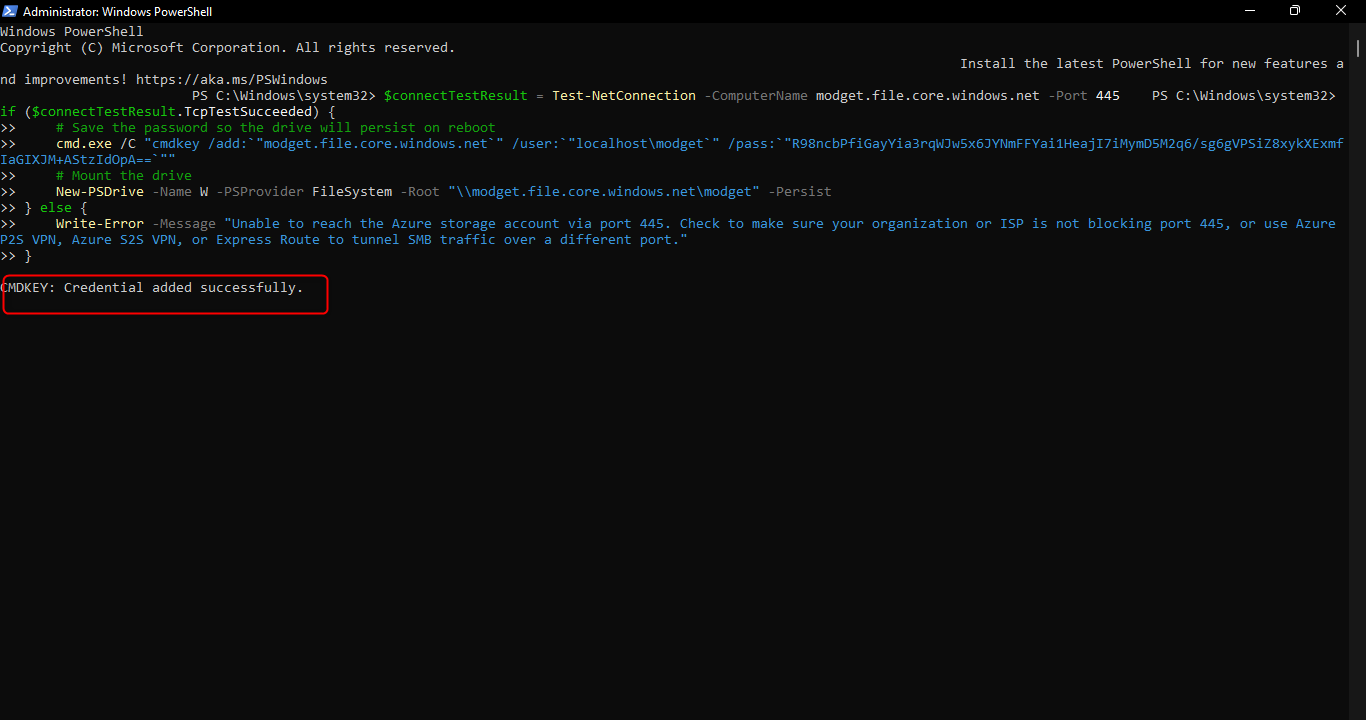
copy the script and paste it into the power shell. Wait for the credential added successfully notification.
Step 4: Accessing mounted drive
Open the file explored and enter in the search bar
\\<storage-account-name>.file.core.windows.net<file-share-name>
The drive is mounted and you can now work on the drive on your local or on-prem location
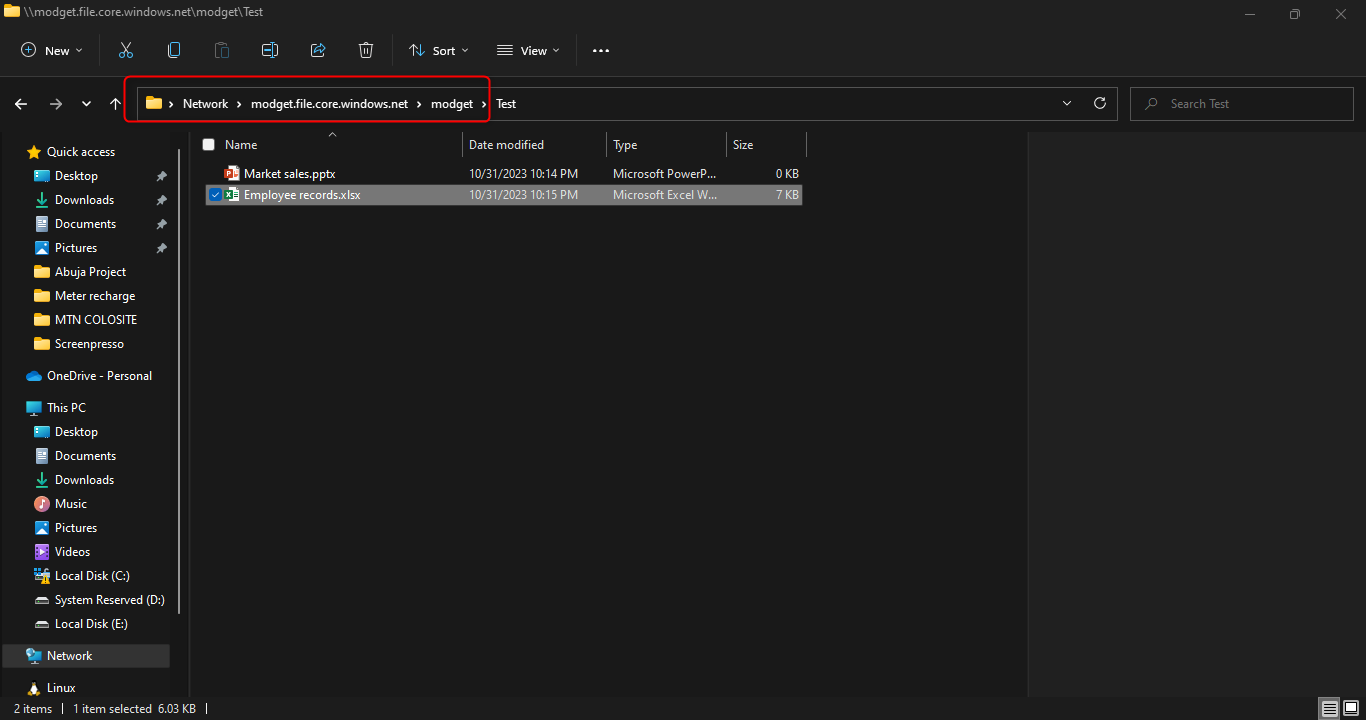
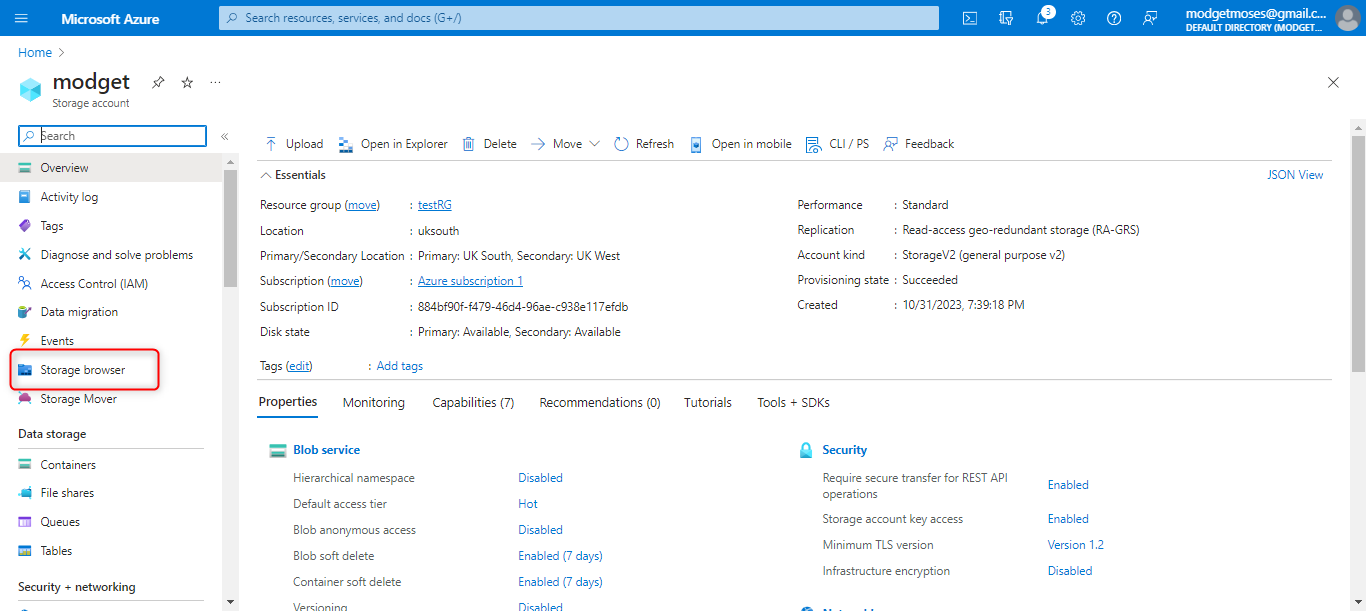
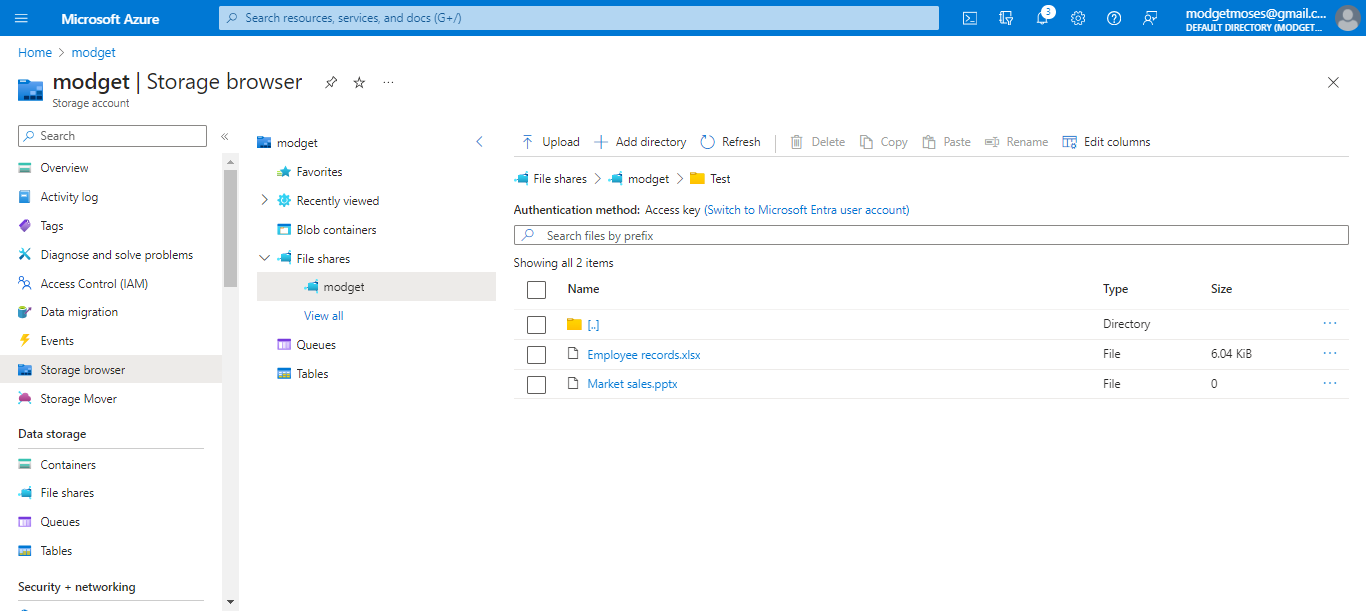
The same folder and file created on the mounted drive location are reflected on our Azure storage file share as shown below. This can be view by selecting the Storage account with the file share and select the storage browser
I hope you have found this educative. You can like and share same.
Femi Moses.
Subscribe to my newsletter
Read articles from Olufemi Moses directly inside your inbox. Subscribe to the newsletter, and don't miss out.
Written by
