Day26- Jenkins Declarative Pipeline
 Siri Chandana
One of the most important parts of your DevOps and CICD journey is the Declarative Pipeline Syntax of Jenkins.
What is Pipeline?
In essence, the Pipeline consolidates a set of instructions that are essential for building and testing applications in a repeatable manner. The idea is to extend the CD practice capabilities, which aims to bring the software from version control to a user-facing release.
A pipeline is a collection of events or jobs that are interlinked with one another in a sequence and has an extensible automation server for creating simple or even complex delivery pipelines "as code", via DSL (Domain-specific language).

Jenkins Pipeline Advantages:
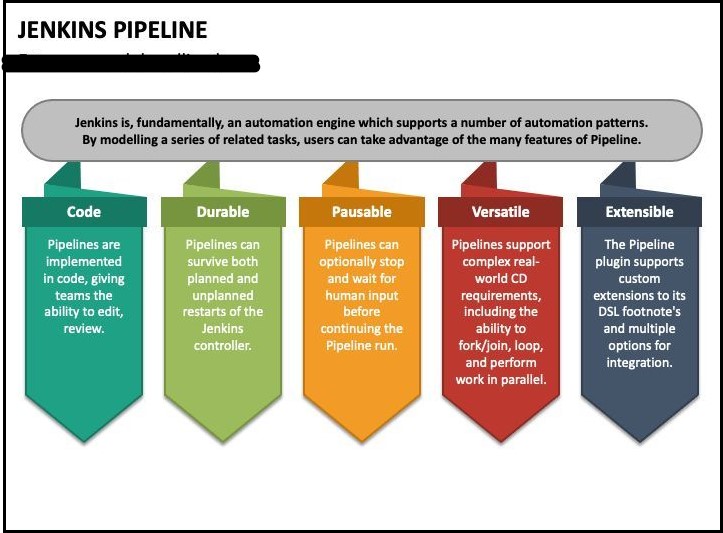
It models simple to complex pipelines as code by using Groovy DSL (Domain Specific Language)
The code is stored in a text file called the Jenkinsfile which can be checked into an SCM (Source Code Management)
Improves user interface by incorporating user input within the pipeline
It is durable in terms of the unplanned restart of the Jenkins master
It supports complex pipelines by incorporating conditional loops, fork or join operations and allowing tasks to be performed in parallel and can integrate with several other plugins.
What is a Declarative pipeline?
A Declarative pipeline is defined using a Jenkinsfile, which is a text file written in Groovy syntax. The Jenkinsfile describes the stages, steps, and conditions for building, testing, and deploying software.
The declarative pipeline approach provides a structured and more human-readable way to define the CI/CD process. making it easier to understand, version, and maintain the pipeline code. It also allows for better visualization and tracking of the pipeline's progress and provides built-in support for features like parallel execution, error handling, and post-build actions.
Certainly! Here's an example of a simple declarative pipeline in Jenkins:
pipeline {
    agent any

    stages {
        stage('Build') {
            steps {
                sh 'echo "Building..."'
                // Additional build steps go here
            }
        }

        stage('Test') {
            steps {
                sh 'echo "Testing..."'
                // Additional test steps go here
            }
        }

        stage('Deploy') {
            steps {
                sh 'echo "Deploying..."'
                // Additional deployment steps go here
            }
        }
    }

    post {
        success {
            sh 'echo "Pipeline executed successfully!"'
        }

        failure {
            sh 'echo "Pipeline failed!"'
        }
    }
}
In this example, the pipeline has three stages: 'Build', 'Test', and 'Deploy'. Each stage consists of a series of steps defined within the steps block. In this case, the steps are simple shell commands using the sh step, but they can be any valid Jenkins step or plugin.
The agent any directive specifies that the pipeline can execute on any available agent in the Jenkins environment.
The post section defines post-build actions based on the result of the pipeline execution. In this example, if the pipeline succeeds, it will execute the shell command echo "Pipeline executed successfully!". If the pipeline fails, it will execute echo "Pipeline failed!".
Various mandatory sections are common to both the declarative and scripted pipelines and must be defined within the pipeline.
These are explained below:
Agent Directive: The agent directive is used to specify where the pipeline should run. It can be defined at the top level of the pipeline or within individual stages
Stages and Steps: Stages represent the logical divisions of the pipeline, such as build, test, deploy, etc. Each stage contains a series of steps defined within the steps block. Steps can be shell commands, Jenkins pipeline steps, or integrations with external tools or plugins.
Parallel Execution: Declarative pipelines support parallel execution of stages using the parallel directive. This allows you to run multiple stages concurrently, which can help improve the overall pipeline execution time.
Post Actions: The post section is used to define post-build actions or conditions based on the result of the pipeline execution. You can define different actions based on whether the pipeline succeeds, fails, or encounters other conditions such as unstable or aborted. Common post-actions include sending notifications, archiving artifacts, triggering downstream jobs, or performing cleanup tasks.
Pipeline Visualization: Jenkins provides a visual representation of declarative pipelines in the Jenkins UI. This visualization allows you to see the progress and status of each stage and step in the pipeline, making it easier to understand and troubleshoot the pipeline.
These are concepts of declarative pipelines in Jenkins. With declarative pipelines, you can define complex CI/CD workflows, integrate with various tools and plugins, and have greater control and visibility over your software delivery process.
What is the scripted pipeline?
A scripted pipeline is an alternative syntax for defining pipelines in Jenkins, It provides more flexibility and fine-grained control over the pipeline execution compared to the declarative pipeline.
In a scripted pipeline, the pipeline code is written in Groovy scripting language. It allows for imperative-style scripting, where you have more control over the flow of execution and can use conditional statements, loops, and variables directly in the pipeline code.
Here's an example of a scripted pipeline in Jenkins:
node {
    stage('Build') {
        echo 'Building...'
        // Additional build steps go here
    }

    stage('Test') {
        echo 'Testing...'
        // Additional test steps go here
    }

    stage('Deploy') {
        echo 'Deploying...'
        // Additional deployment steps go here
    }

    stage('Cleanup') {
        echo 'Performing cleanup...'
        // Additional cleanup steps go here
    }

    post {
        success {
            echo 'Pipeline executed successfully!'
        }

        failure {
            echo 'Pipeline failed!'
        }
    }
}
In this example, the pipeline is defined using a node block, which specifies the agent on which the pipeline should run. Inside the node block, each stage is defined using a stage block, and the steps are written as Groovy code within each stage.
The post section is used to define post-build actions based on the pipeline result, similar to the declarative pipeline example. While the scripted pipeline offers more flexibility and control, it can be more complex to write and maintain compared to the declarative pipeline.
Why you should have a Pipeline?
Jenkins is a continuous integration server that can support the automation of software development processes. You can create several automation jobs with the help of use cases, and run them as a Jenkins pipeline.
With Jenkins Pipeline, developers can create a robust, maintainable, and scalable development environment that fills the gap between release and production. As soon as the Jenkins Pipeline is implemented in the source control repository, it advocates for the creation of pipelines for each branch. It further creates audit trails by default and executes against any changes to the code for testing and deployment.
Jenkins Pipeline offers powerful automation for software delivery pipelines, providing benefits such as:
Automation: Effortlessly automate the entire software delivery process, from build to deployment, reducing errors and ensuring consistent results.
Flexibility: Customize pipelines to fit specific project requirements, workflows, and technology stacks.
Reusability: Define pipelines as code for easy sharing and reuse across projects and teams, promoting collaboration and consistency.
Visibility: Gain clear visibility into each stage and step of the delivery process, enhancing accountability and troubleshooting capabilities.
CI/CD Support: Facilitate continuous integration and delivery practices with frequent code integration, automated testing, and seamless deployment.
How to create a Jenkins pipeline?
The definition of a Jenkins Pipeline is written into a text file (called a Jenkinsfile) which in turn can be committed to a project’s source control repository. This is the foundation of "Pipeline-as-code"; treating the CD pipeline as a part of the application to be versioned and reviewed like any other code.
In the context of Jenkins, pipelines are defined using the Groovy scripting language. Groovy is a dynamic programming language that runs on the Java Virtual Machine (JVM), which makes it suitable for integration with Java-based tools and frameworks like Jenkins
Creating a Jenkinsfile and committing it to source control provides several immediate benefits:
Automatically creates a Pipeline build process for all branches and pull requests.
Code review/iteration on the Pipeline (along with the remaining source code).
Task-1:
Create a New Job, this time select Pipeline instead of Freestyle Project.
Log in to the Jenkins dashboard.
Click on the "New Item" link on the left-hand side of the dashboard.
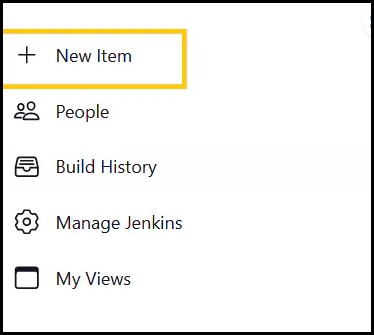
Enter a name as hello-world for your new Pipeline job, select "Pipeline" as the job type, and Click on "OK" to create the job.
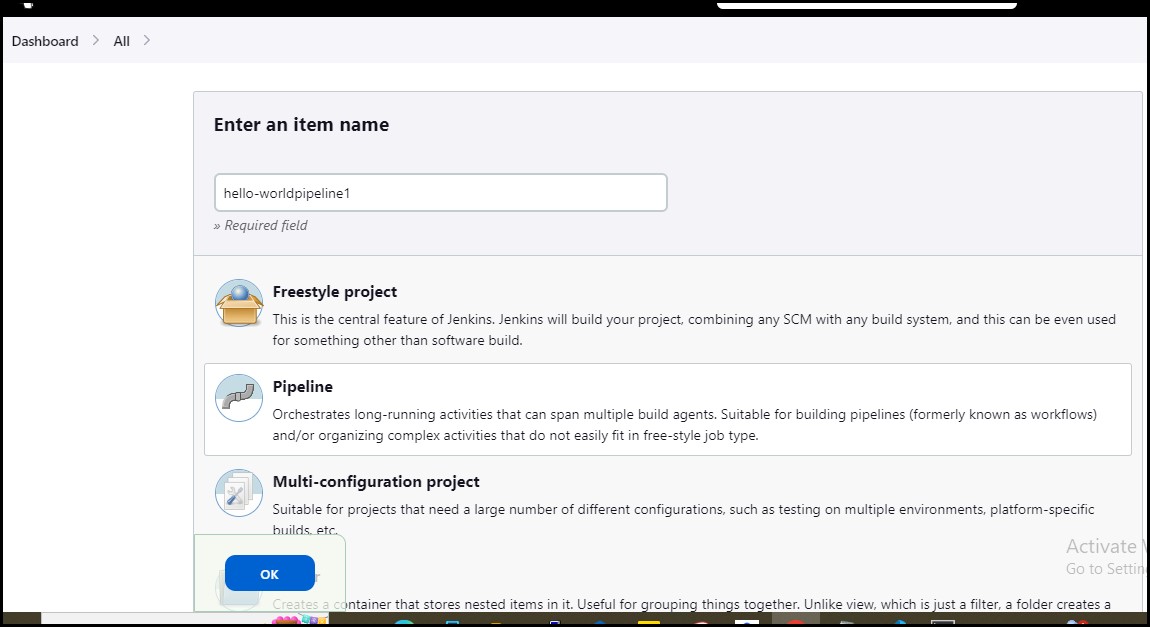
Describe as you want, scroll down under the pipeline section.

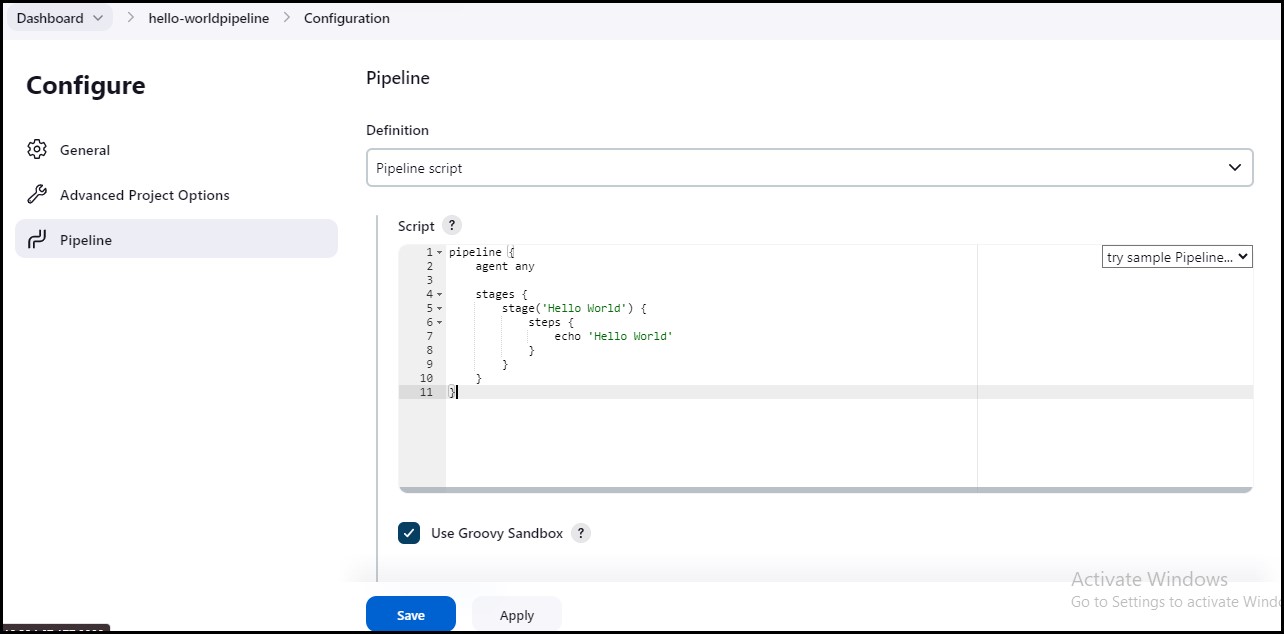
In the "Pipeline" section, select "Pipeline script" and Define Declarative Pipeline Script in the Pipeline section of the job configuration page, click on "Save" button.
 pipeline {
     agent any

     stages {
         stage('Hello World') {
             steps {
                 echo 'Hello World'
             }
         }
     }
 }
Now, build the Job and click on "Build Now" to start the job.
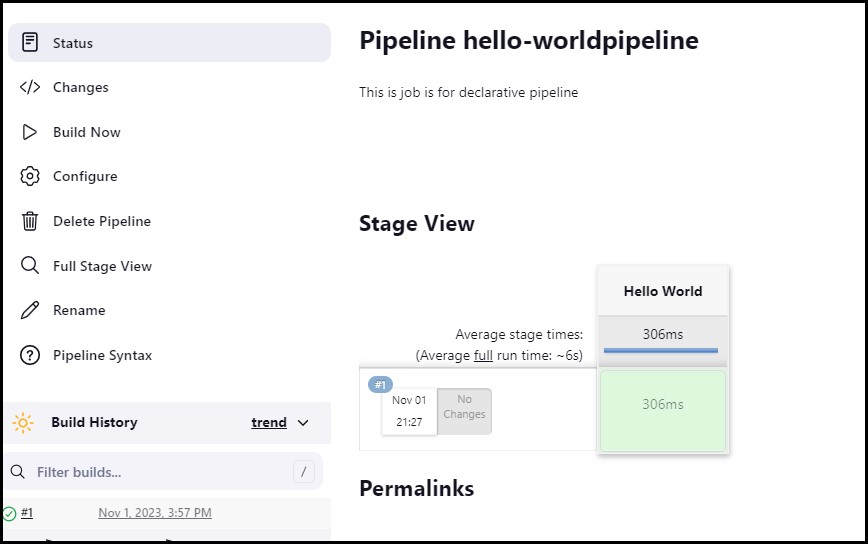
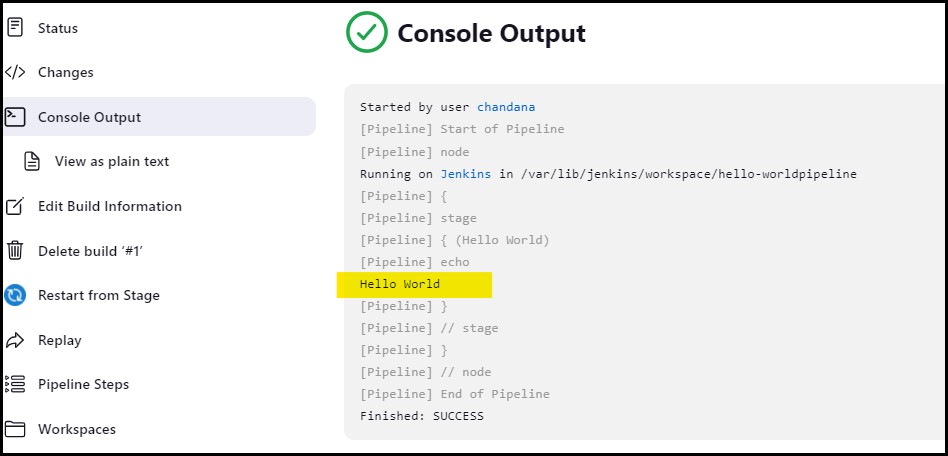
After a build is completed, you can view the console output by clicking on the "Console Output" link on the build page.
I hope you can your own pipelines now.....⚙🖇
In the Next Article, we will explore more on Declarative pipeline with docker......🚀🚀
Thank you for 📖reading my blog, 👍Like it and share it 🔄 with your friends.
Happy learning !!!!
Subscribe to my newsletter
Read articles from Siri Chandana directly inside your inbox. Subscribe to the newsletter, and don't miss out.
Written by
