Part – 02: Steps for Development, with total Implementation.
 sowmya surekha manukonda
Table of contents
- Part 01 - Find It here Click here
- Note:
- Steps to Create User Interface using RAP:
- Step 1: Package creation.
- step2: Create the database table:
- step3: Selection Of CDS view, Now Select the Data Definition:
- step6: create a behaviour definition for interface view:
- Step 7: Create a Class from the Behaviour Definition for Managed Implementation.
- Step 8: Create a behavior definition for the consumption view:
- Step 9: Create a service definition:
- Step 10: create service binding:
- step11: fine output:

Part 01 - Find It here Click here
Note:
01. Explained the code thing with ScreenShot.
02. Steps 04 & 05 Not Explained.
Steps to Create User Interface using RAP:
The steps that we follow to create a User-interface using RAP are:
1)create the package.
2)create the database table.
3)create CDS view(interface view, consumption view
4)Add Metadata Extension File. (Not Mandatory - Even No Explanation in this blog)
5)Define Business Objects – ‘DEFINE ROOT VIEW’ (If you use above Step 04, then Step 05 is required)
6)Create a Behaviour definition for the Interface View.
7)Create a Class from the Behaviour Definition for Managed Implementation.
8)Create a Behaviour definition for the Consumption View.
9)Create Service Definition – Expose Consumption View Name.
10)Create Service Binding and bind a service definition to client-server communication protocol – Right-click on Service Definition and then create Service Binding.
11)Showing the Result in the Preview.
Step 1: Package creation.
As already aware SAP usage People, not required :)
step2: Create the database table:


step3: Selection Of CDS view, Now Select the Data Definition:

Now it's time to create an Interface View

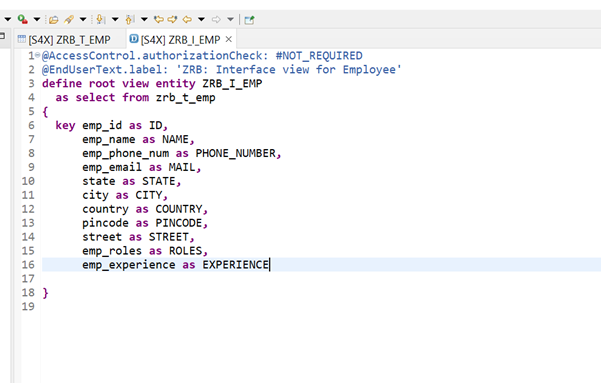
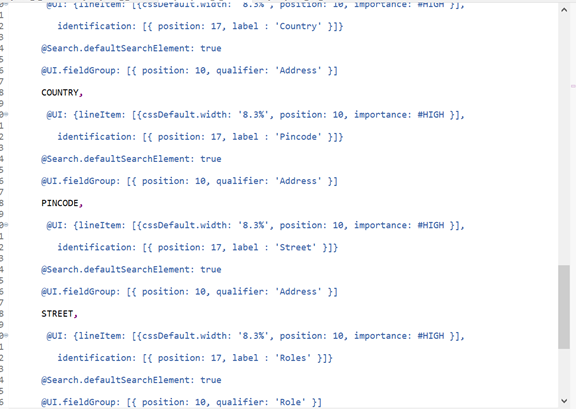
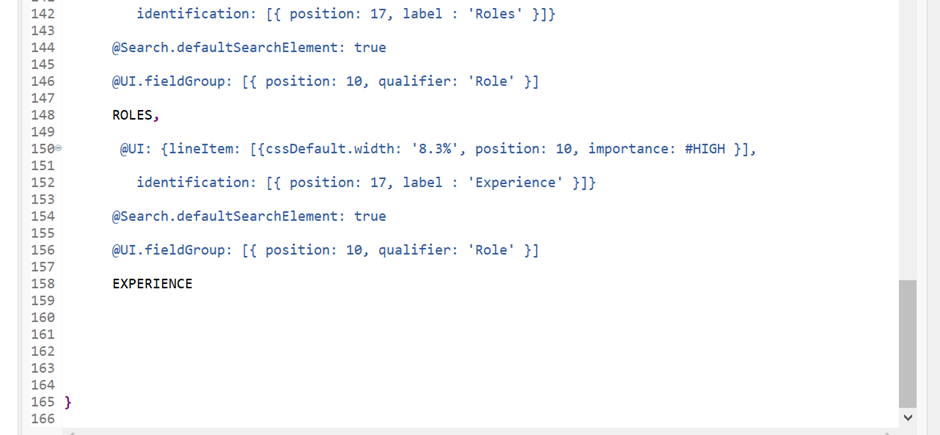
After creating the interface view we have to create a consumption view (or) projection view


Behaviour Definition:
A behaviour definition in SAP RAP is a CDS view that defines the actions that can be performed on the data in a data model. It is used to control how the data can be created, updated, and deleted.
Behaviour definitions can be used for both managed and projection scenarios. In managed scenarios, the behaviour definition is used to generate the implementation code for the data model. In projection scenarios, the behaviour definition is used to define the actions that can be performed on the projected data.
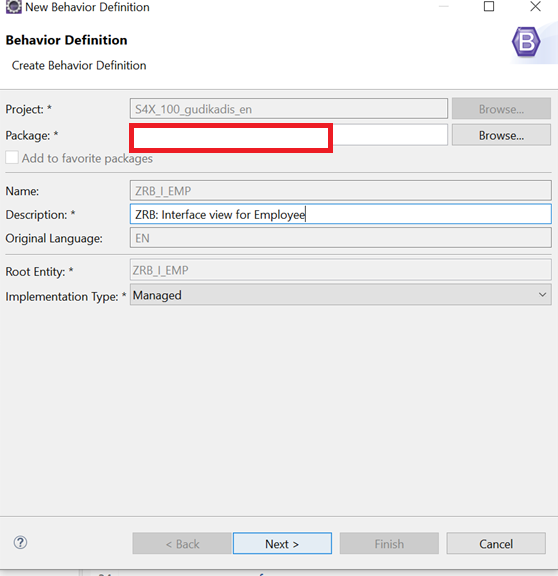
step6: create a behaviour definition for interface view:

Behaviour implementation: (zbp_rb_i_emp)
Behaviour implementation in RAP is the process of implementing the custom logic that defines the behaviour of a business object. This logic can be used to perform a variety of tasks**, such as:**
Validating data
Performing calculations
Triggering events
Interacting with another system.
It is typically done in a behaviour implementation class, which is a specialized ABAP class that references the behaviour definition for the business object. The behaviour implementation class contains methods that are called by the RAP runtime to perform the custom logic.
There are two types of behaviour implementation in RAP:
Managed implementation: The RAP runtime automatically handles the implementation of certain operations, such as create, update, and delete. This is the default implementation type.
Unmanaged implementation: The developer must implement all of the behavior for the business object, including the create, update, and delete operations.
Unmanaged implementation is typically used for more complex business objects or for business objects that require custom logic that cannot be handled by the RAP runtime.
Persistent table:
A persistent table in SAP RAP is a database table that is used to store data that needs to be persisted beyond the runtime of the RAP application. This data can be anything from simple configuration settings to complex business data.
Persistent tables are defined using the SAP ABAP Dictionary. Once a persistent table is defined, it can be accessed by the RAP application using the ABAP Open SQL library.
There are two types of persistent tables in SAP RAP:
Active persistence tables: These tables are used to store data that is actively used by the RAP application. Active persistence tables are typically updated in real time as the user interacts with the application.
Passive persistence tables: These tables are used to store data that is not actively used by the RAP application. Passive persistence tables are typically updated periodically, such as at the end of the day or the end of the week.
Persistent tables are a key component of SAP RAP applications. They allow developers to store data that needs to be persisted beyond the runtime of the application. This data can then be used by the application to provide a consistent and reliable experience for the user.
Draft table:
A draft table in SAP RAP (Restful Application Programming Model) is a database table that stores temporary or incomplete versions of business objects. Draft tables are used to enable users to work on changes to business objects without affecting the active data.
lock master total ETag:
The lock master total ETag in SAP RAP is a unique identifier for a draft business object and its lock master. It is used to ensure that only the lock master can modify and save the draft.
eTag masters:
eTag masters are typically used for root entities in SAP RAP. A root entity is the highest-level entity in a business object.
This is how we create the draft table:
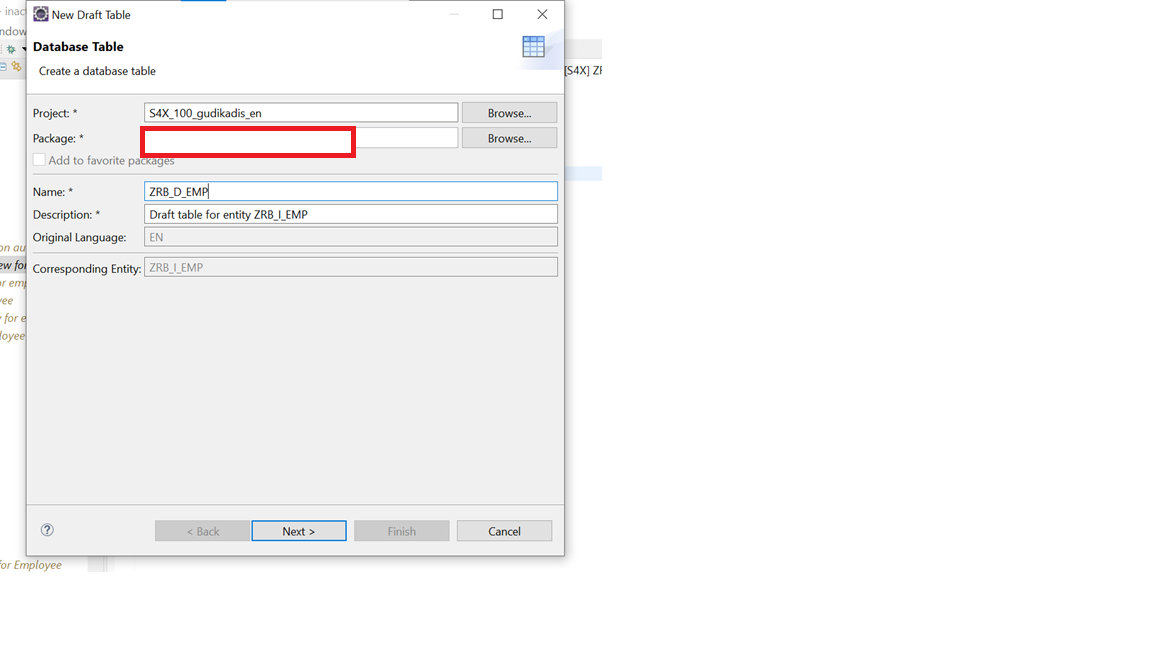

In the previous step, I explained the behaviour implementation in that I mentioned that we can perform a variety of tasks that I have created validation and determination.
Step 7: Create a Class from the Behaviour Definition for Managed Implementation.
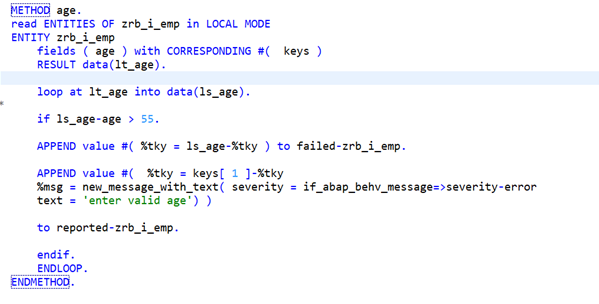
Validation: Here I am validating for age.
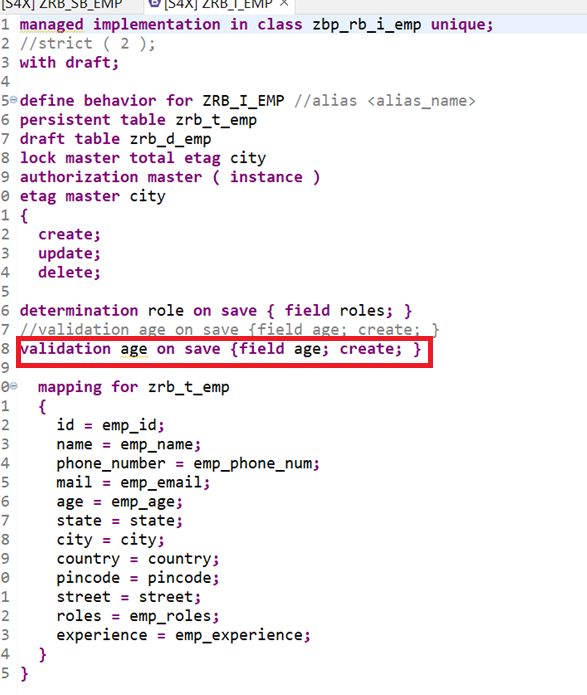
Now we need to implement the custom logic for validation in behavior implementation.

now we need to implement the method for age
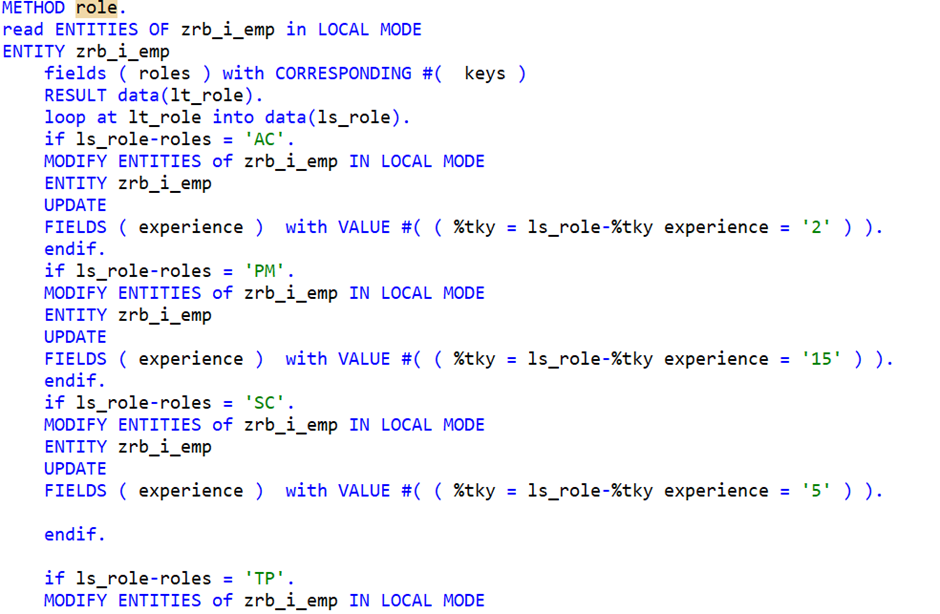
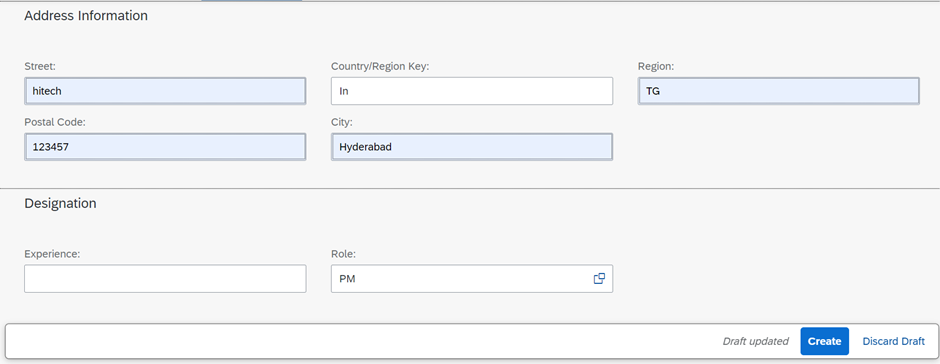
Determination: Determination for experience and role, when we are creating a role automatically experience will be populate.

Now implement a method for the role
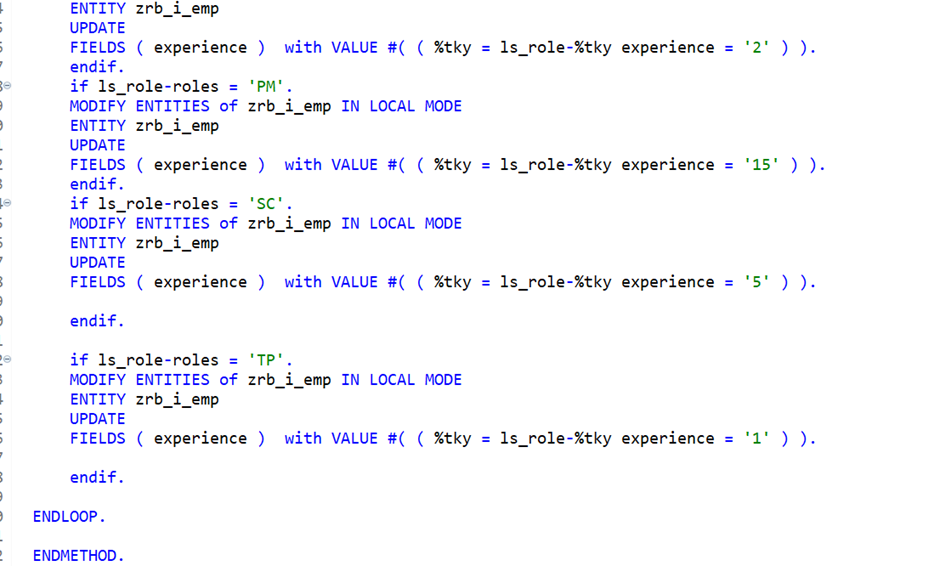
Step 8: Create a behavior definition for the consumption view:

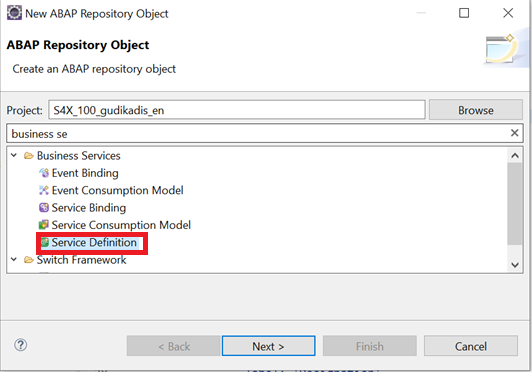
service definition:
It describes which CDS entities of a data model are to be exposed so that a specific business service can be enabled.
Step 9: Create a service definition:

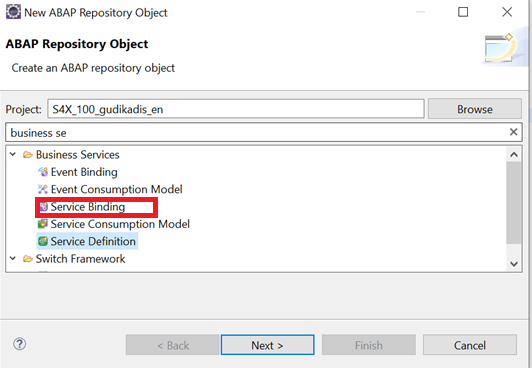
service binding:
In Service Binding, we define what kind of service we want to create. The service can be a simple Odata Service which can be consumed by other services or external systems using REST calls or it could be a UI service which then creates FIORI element UI5 service.
Step 10: create service binding:

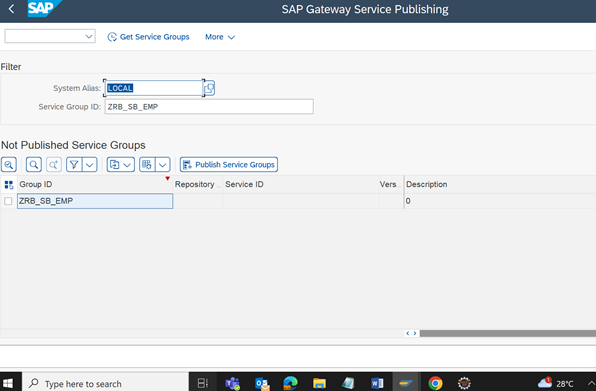
After creating the service binding active the binding then, we need to go to the t-code /IWFND/V4_ADMIN in this we have activated your service.


step11: fine output:


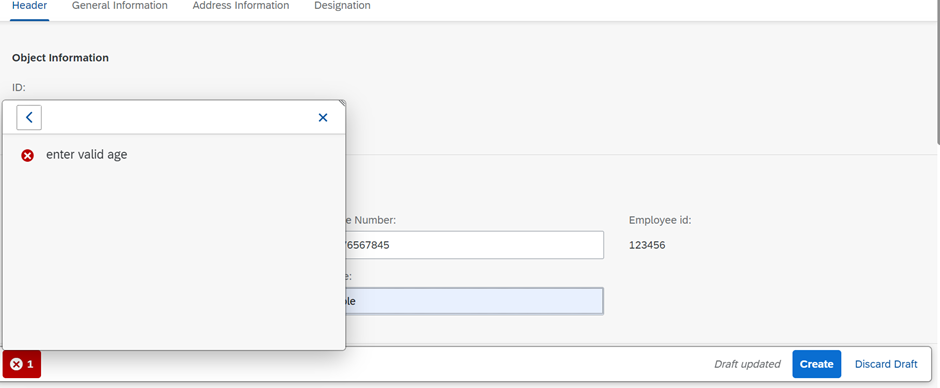
The above error that we are getting is based on the validation that we did.

This is done by the determination.

This Is the End Of Part 02 | Stay Tuned For Part 03
Thank You,
Sowmya Surekha.
Subscribe to my newsletter
Read articles from sowmya surekha manukonda directly inside your inbox. Subscribe to the newsletter, and don't miss out.
Written by
