Spin up ARM Kali VM on Apple Silicon
 rxn
rxnTable of contents

💡 A simple guide on how to install ARM Kali VM onto Apple Silicon computers.
🐲 The Problem
Kali ARM VM and QEMU don't really like each other for some reason, and it's a bit of a struggle to make them get going. Having faced with the issue of installing Kali VM on any new Mac with Apple Silicon and spending quite some time googling for answers, I've managed to gather all of the needed steps and compile them into this simple article.
Really hope it does help you guys!
🙋 Prerequisites
- Install
QEMUusing brew
brew install qemu
Download ARM image of Kali installer from the official website
Download a uefi file. Either from this repo (
QEMU_EFI.fd) or from other sources.
📄 How to install
After installing all prerequisites we need to run following commands.
Create a new directory and cd into it:
mkdir kaliVM && cd kaliVM
Create a new raw virtual disk of your preferable size (I use 30GB):
qemu-img create -f raw kali.raw 30G
Start qemu with following flags. (Some are redundant and I would really like if you test out different combinations to minimize the quanitity. Feel free to open an issue on github):
qemu-system-aarch64 \
   -M virt,highmem=off \
   -accel hvf \
   -cpu host \
   -smp 4 \
   -m 3000 \
   -bios QEMU_EFI.fd \
   -boot d \
   -device virtio-gpu-pci \
   -display default,show-cursor=on \
   -device qemu-xhci \
   -device usb-kbd \
   -device usb-tablet \
   -drive file=kali.raw,format=raw \
   -device nec-usb-xhci \
   -cdrom kali-linux-2023.3-installer-arm64.iso \
   -drive file=kali-linux-2023.3-installer-arm64.iso,media=cdrom
In the future you should replace the file=...iso with the name of an image you downloaded if it doesn't match.
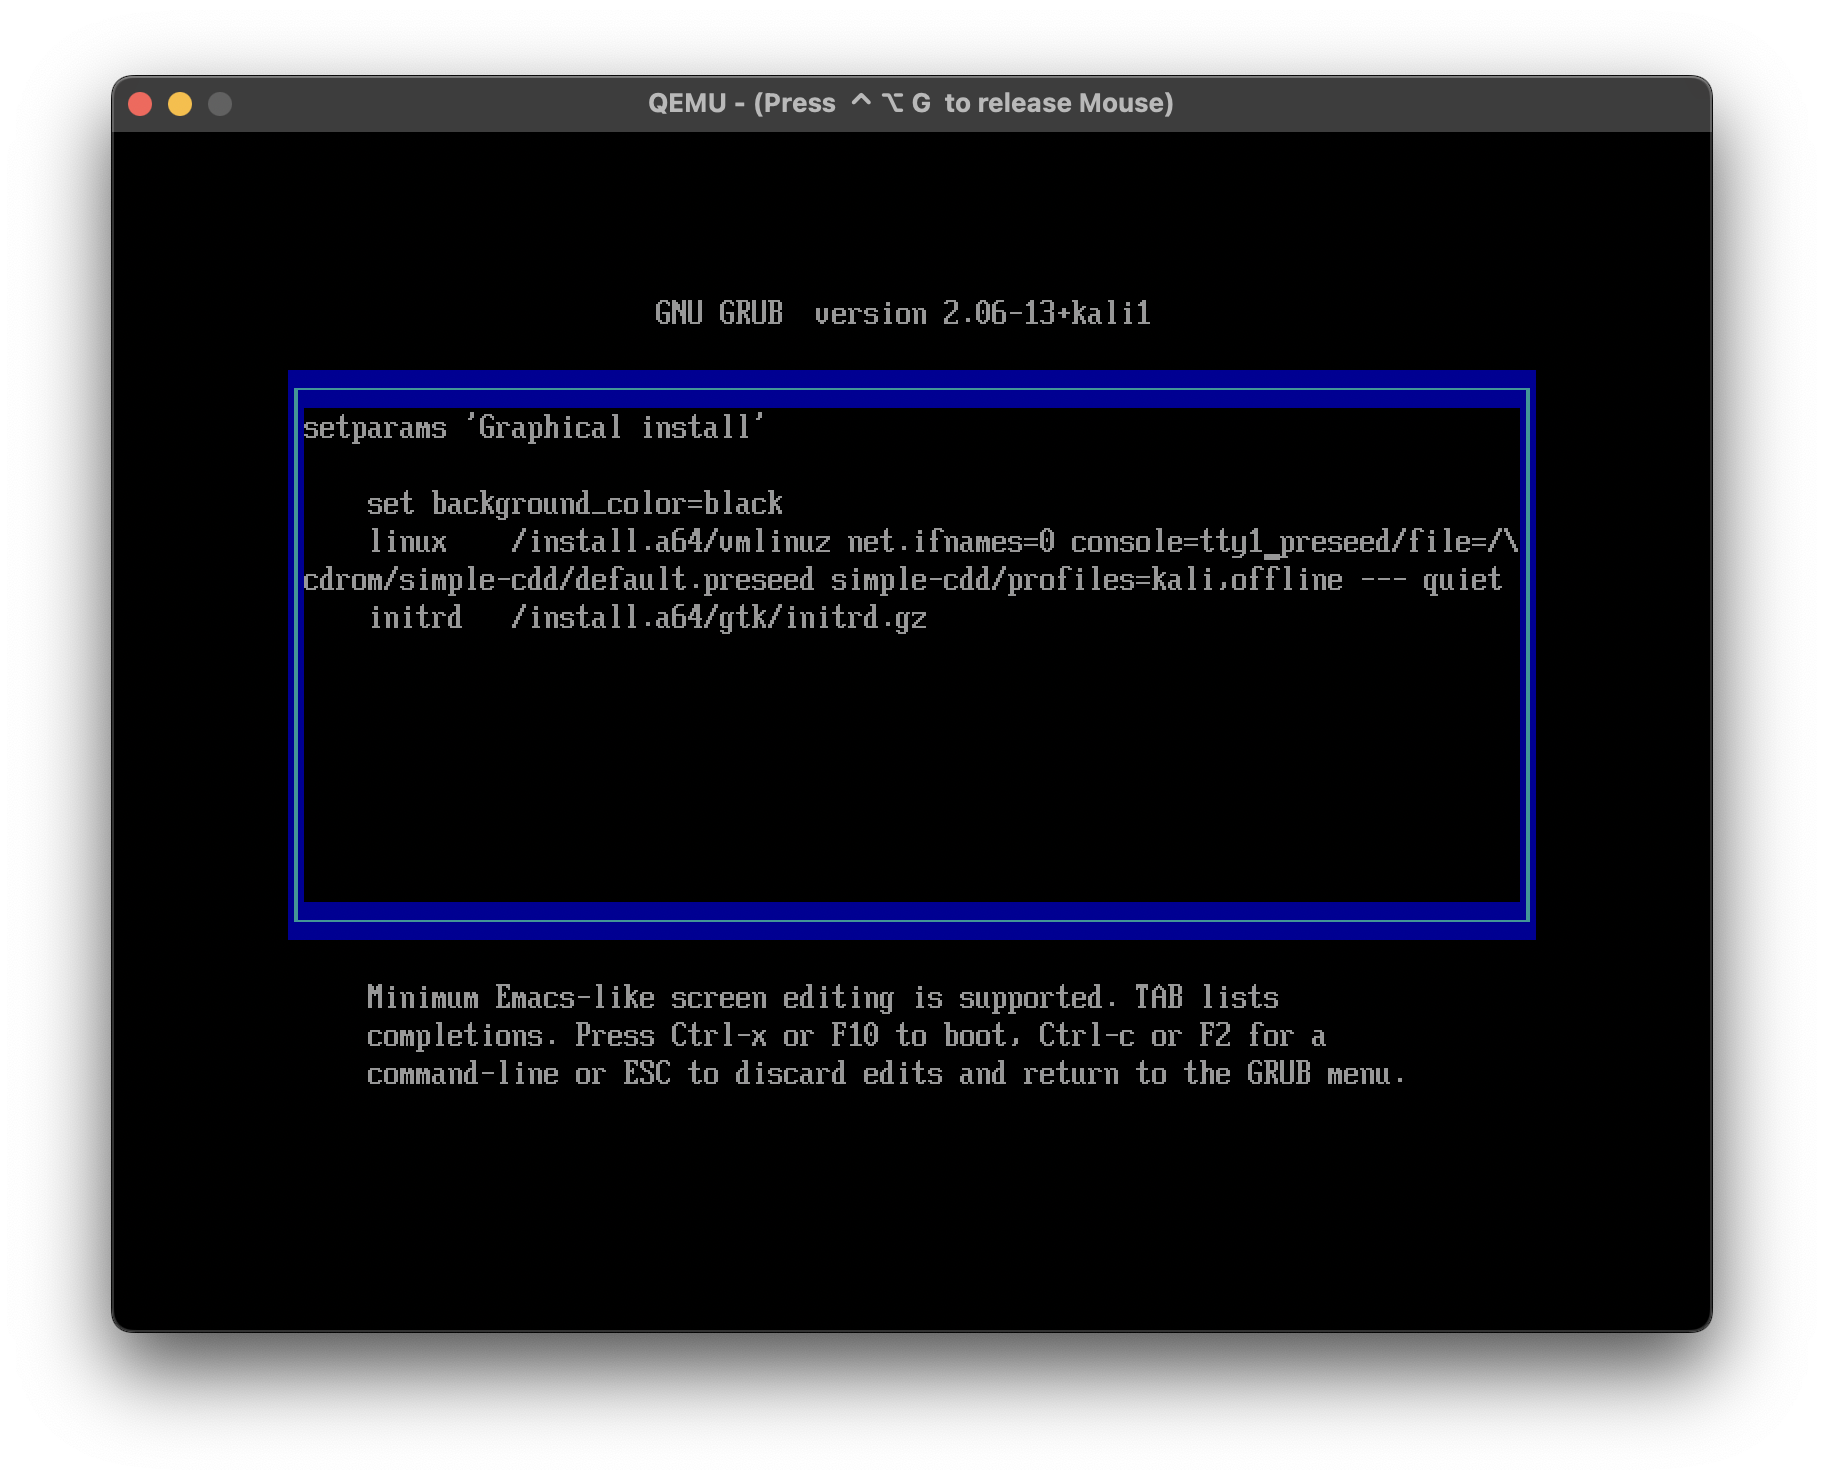
By default the installer uses a different tty after going into visual installation. So we need to change that by pressing e while being focused on Graphical install.

Replace console=tty0 with console=tty1 and hit Ctrl-X to start installation.
Follow the instructions and configure the system to your liking.
After being asked for reboot close the QEMU window or Ctrl-C the process in terminal.
Boot up with this command.
qemu-system-aarch64 \
   -drive file=kali.raw,format=raw \
   -boot order=d \
   -M virt \
   -accel hvf \
   -cpu max \
   -smp 4 \
   -m 4096M \
   -bios QEMU_EFI.fd \
   -device virtio-gpu-pci \
   -display default,show-cursor=on \
   -device qemu-xhci \
   -device usb-kbd \
   -device usb-tablet \
   -device nec-usb-xhci
Unfortunately, it won't work for the first time. That's where people struggle the most, but hang on we'll figure this out pretty quickly.
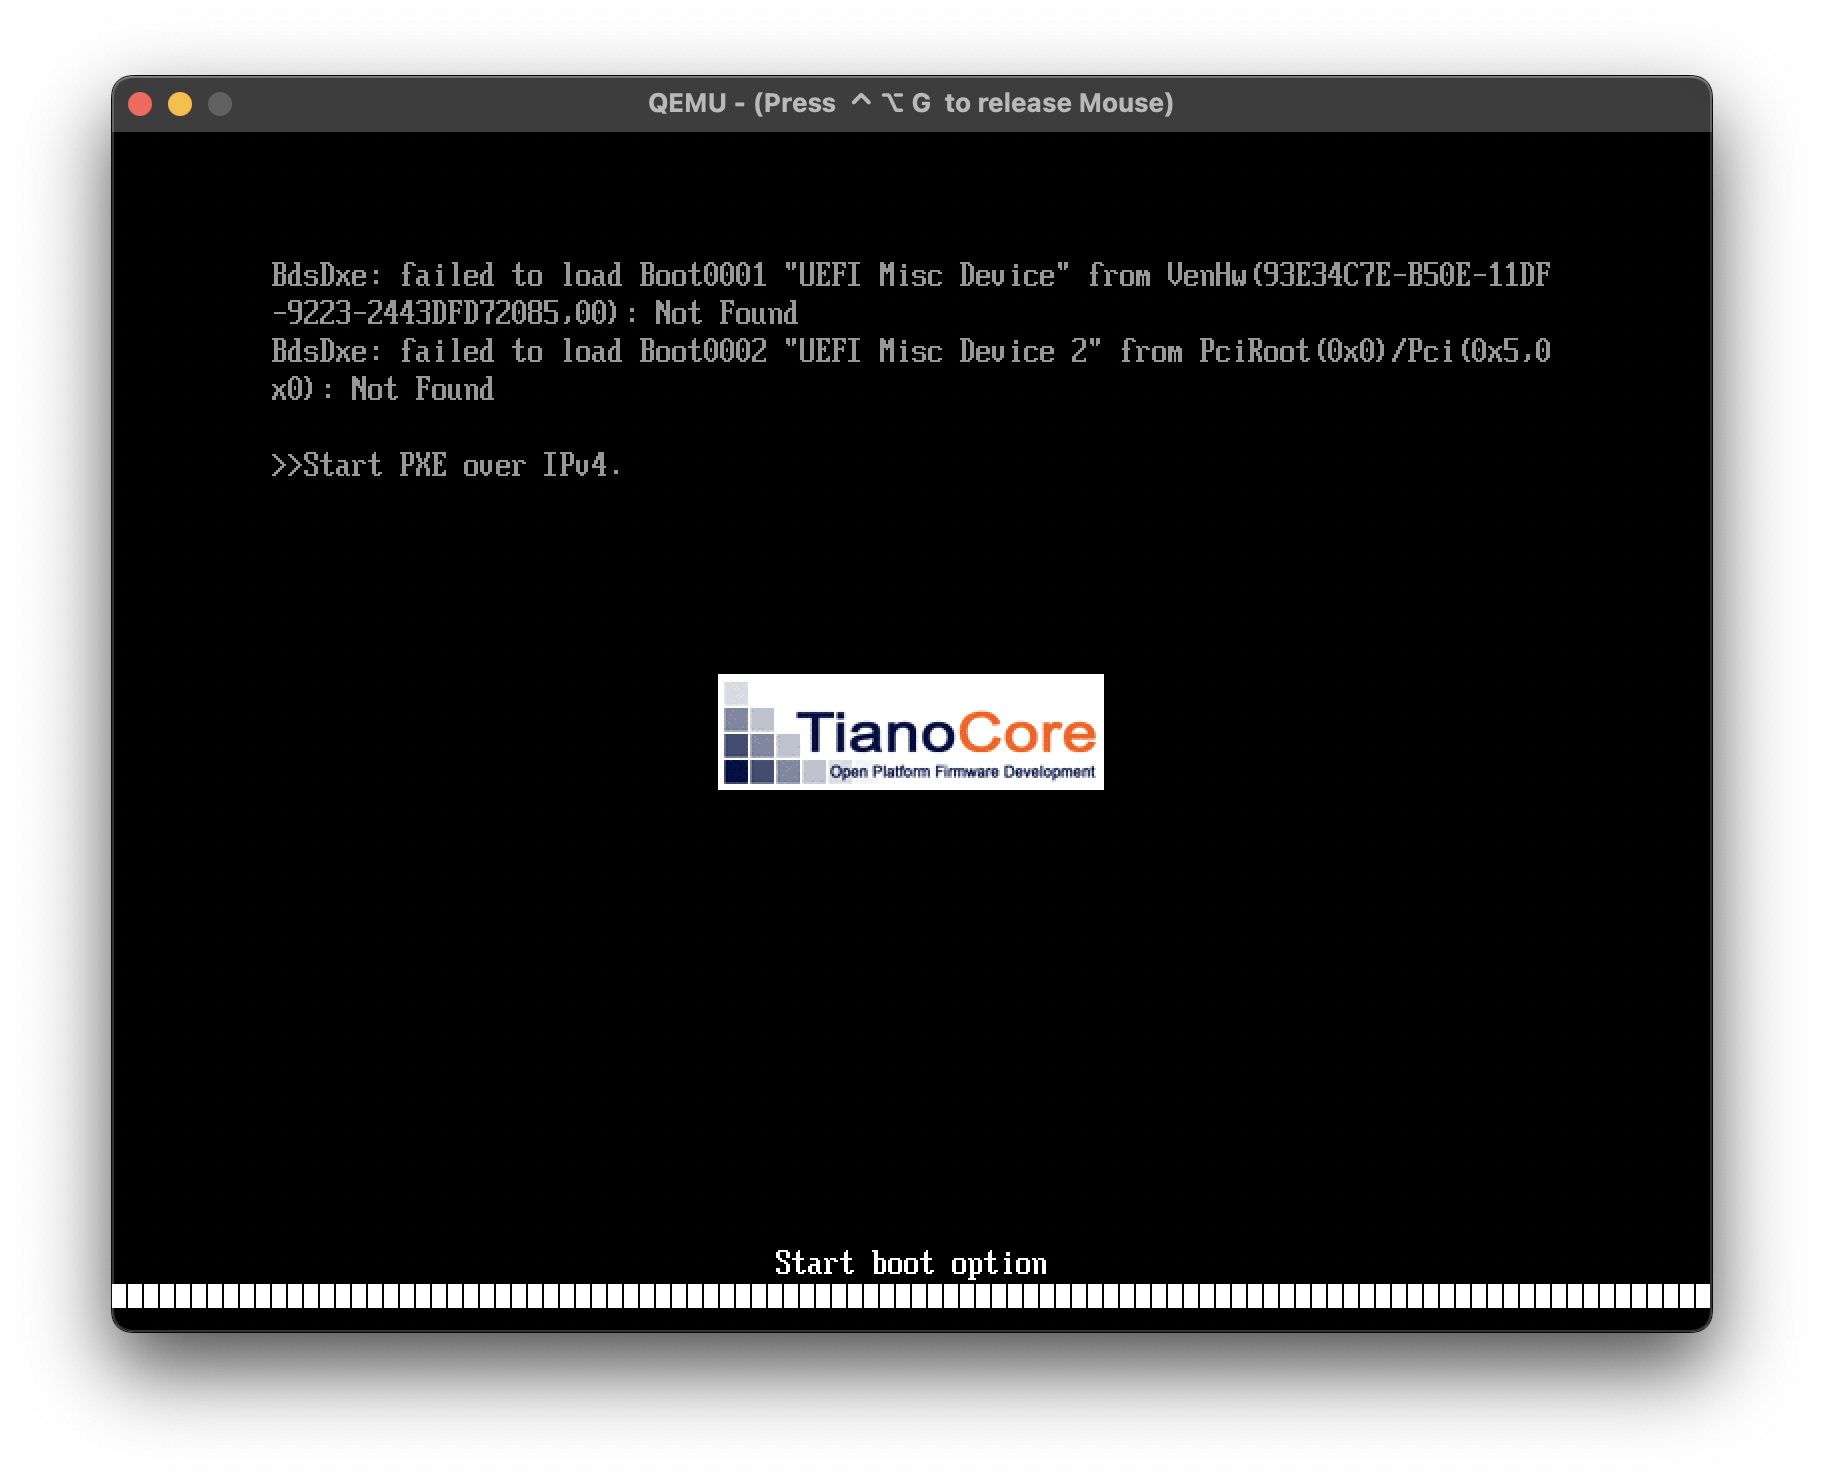
To actually boot into Kali we need to wait for efi shell.
(Or click esc on boot -> Boot Manager -> EFI Internal Shell) Then, enter the following commands to fix the boot problem.
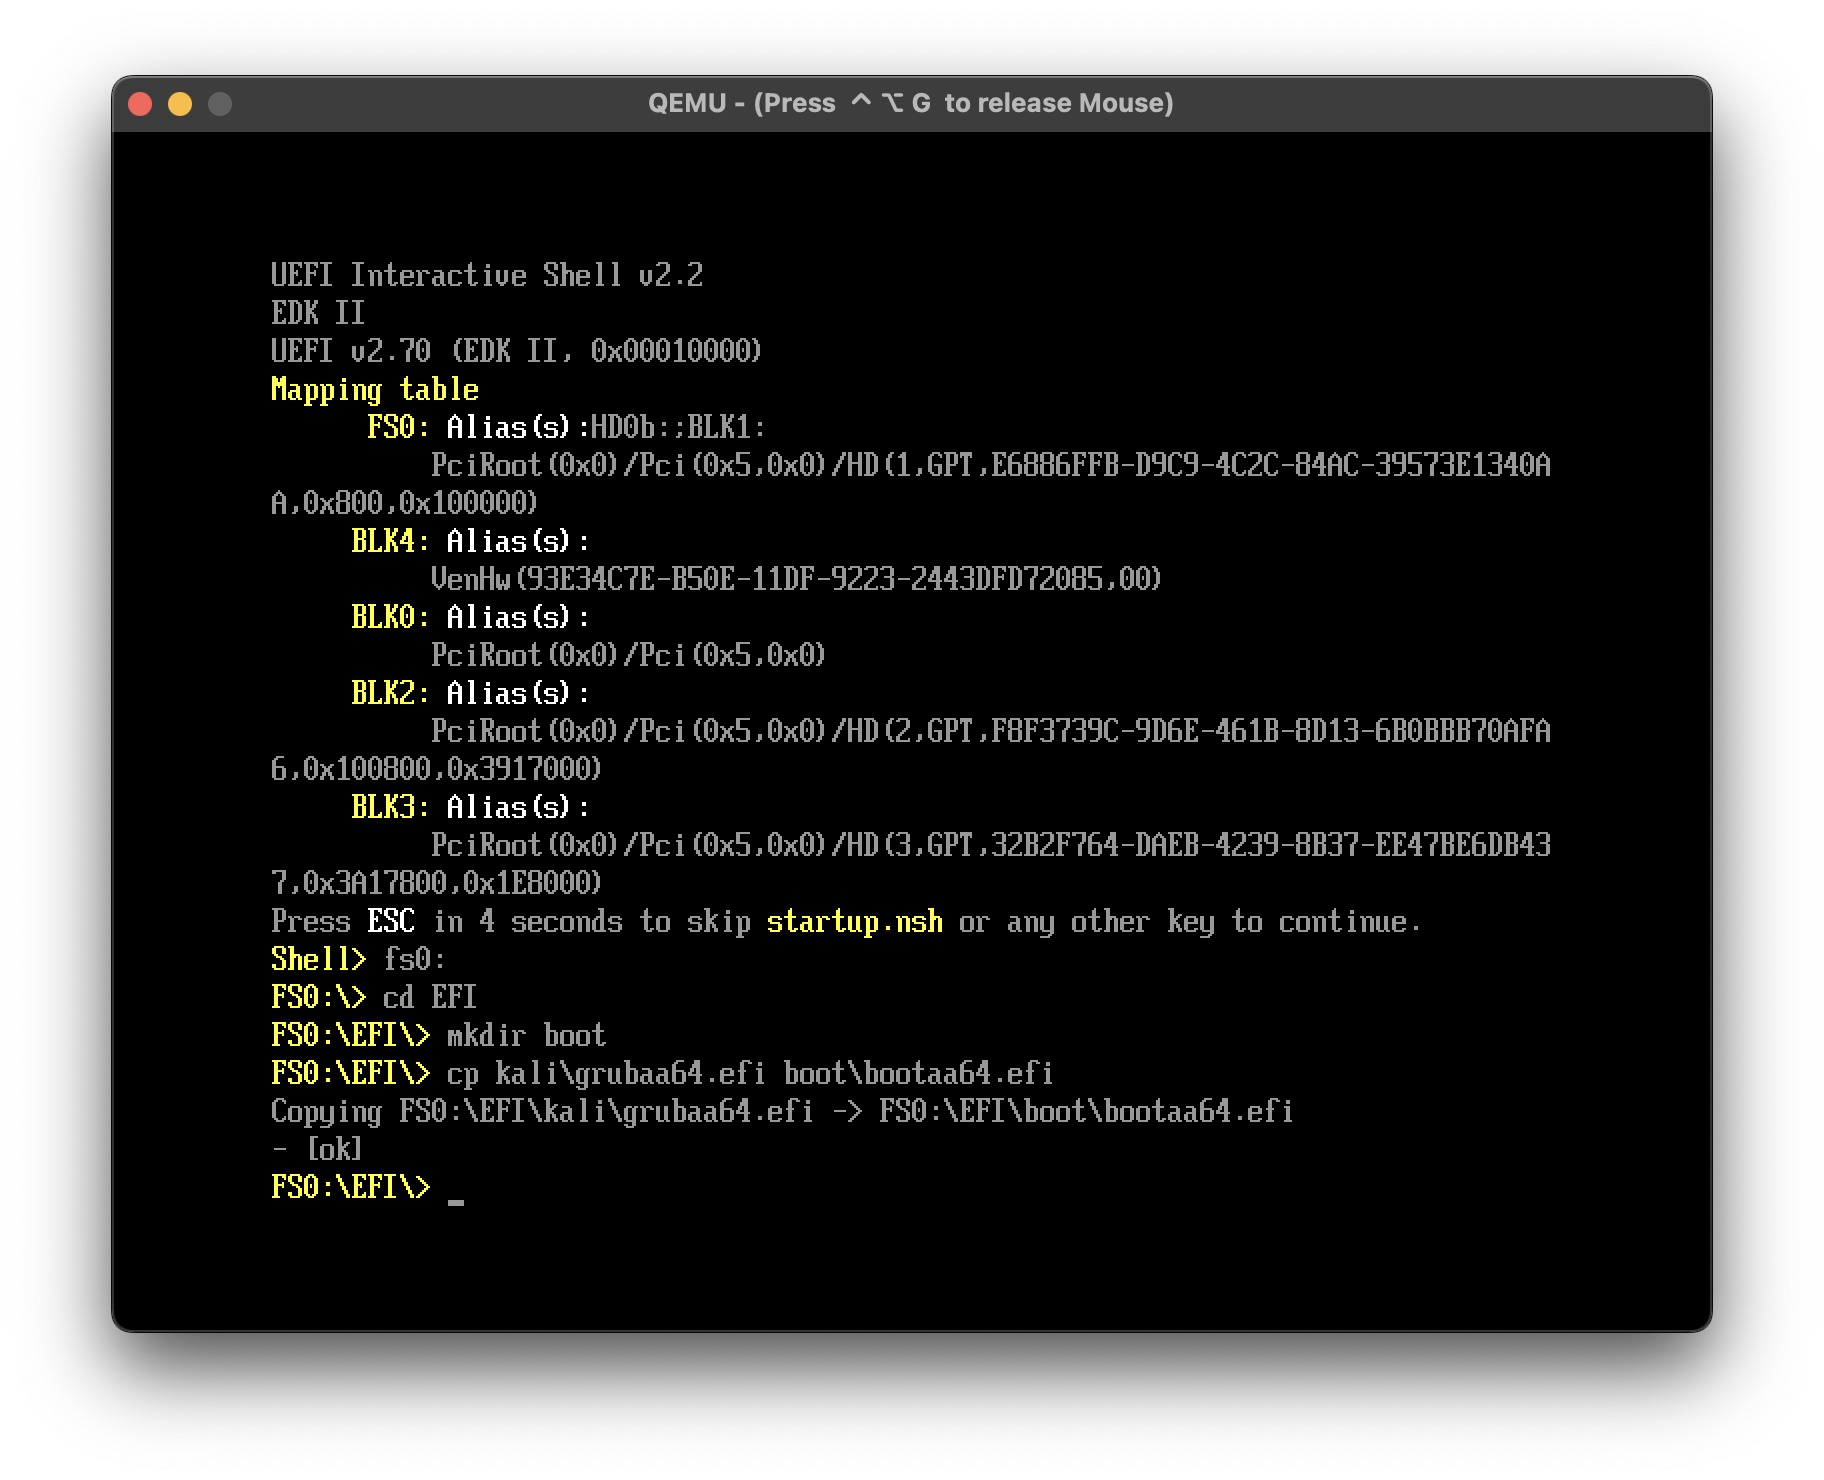
After copying the abovementioned commands run reset command in the efi shell to save the changes and reboot.
✨ Results
VM will reload into normal Kali Bootloader!
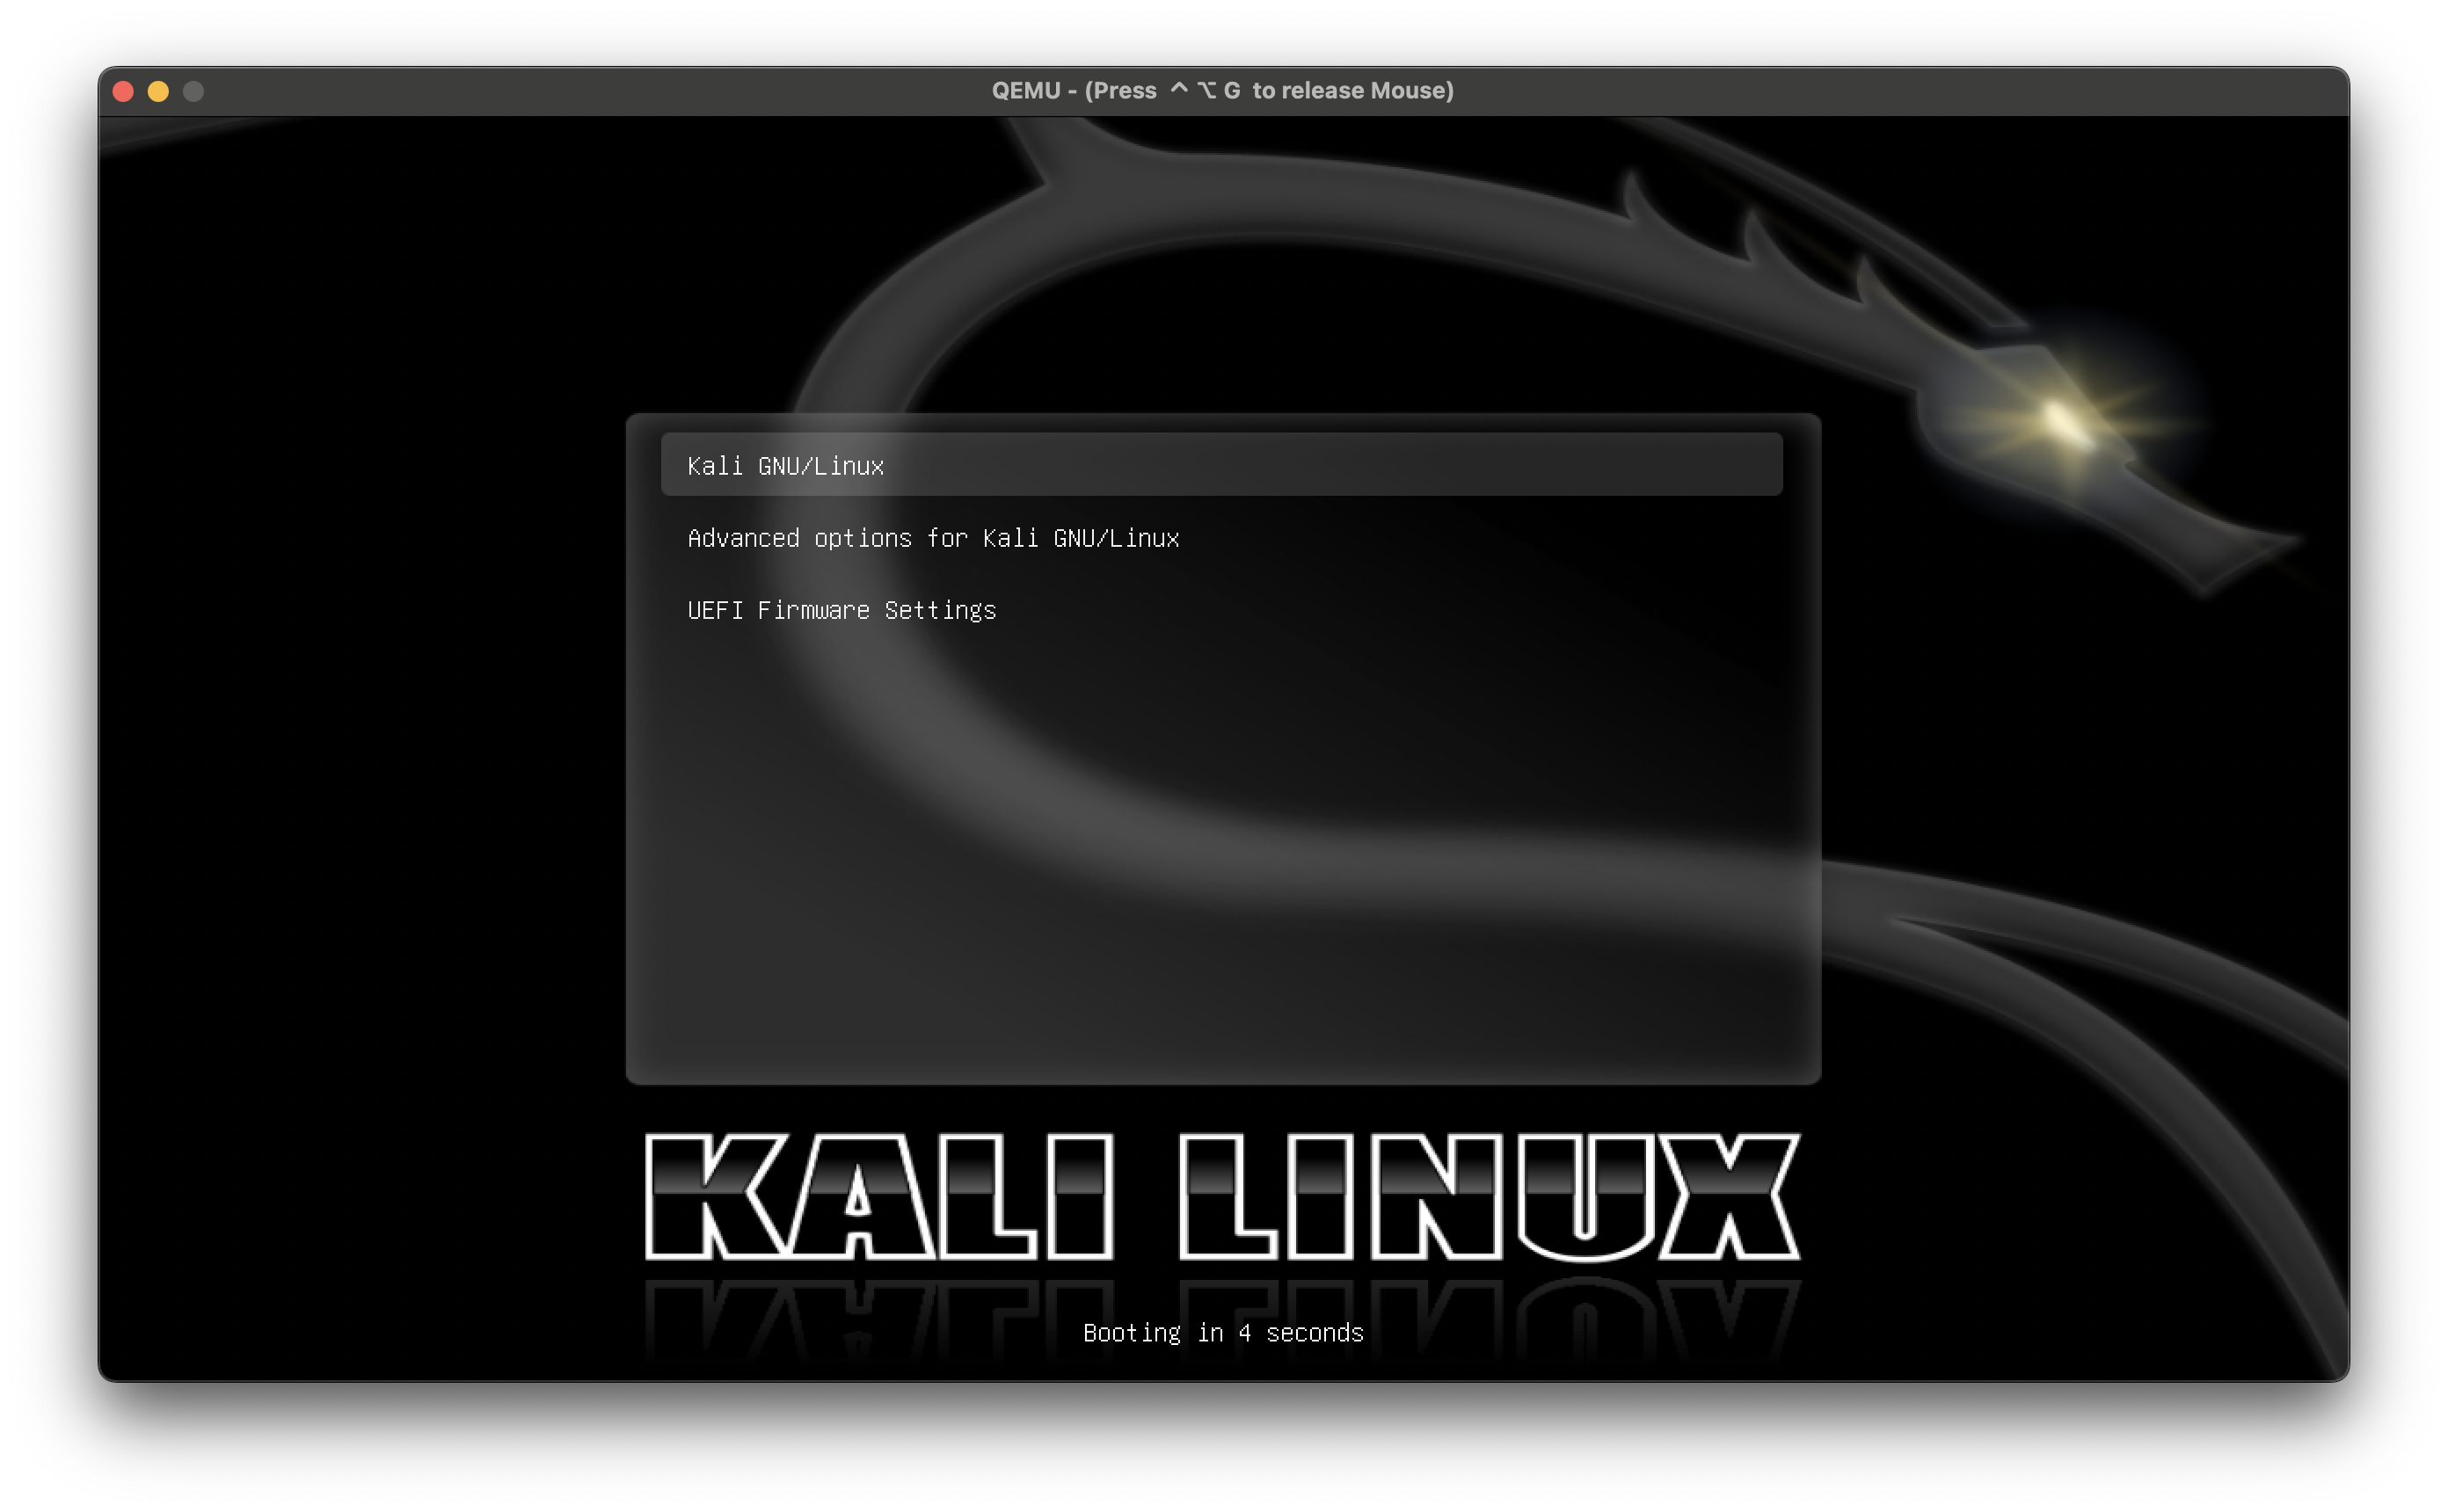
Congratz! You won't need to do all of this EFI BS from now on
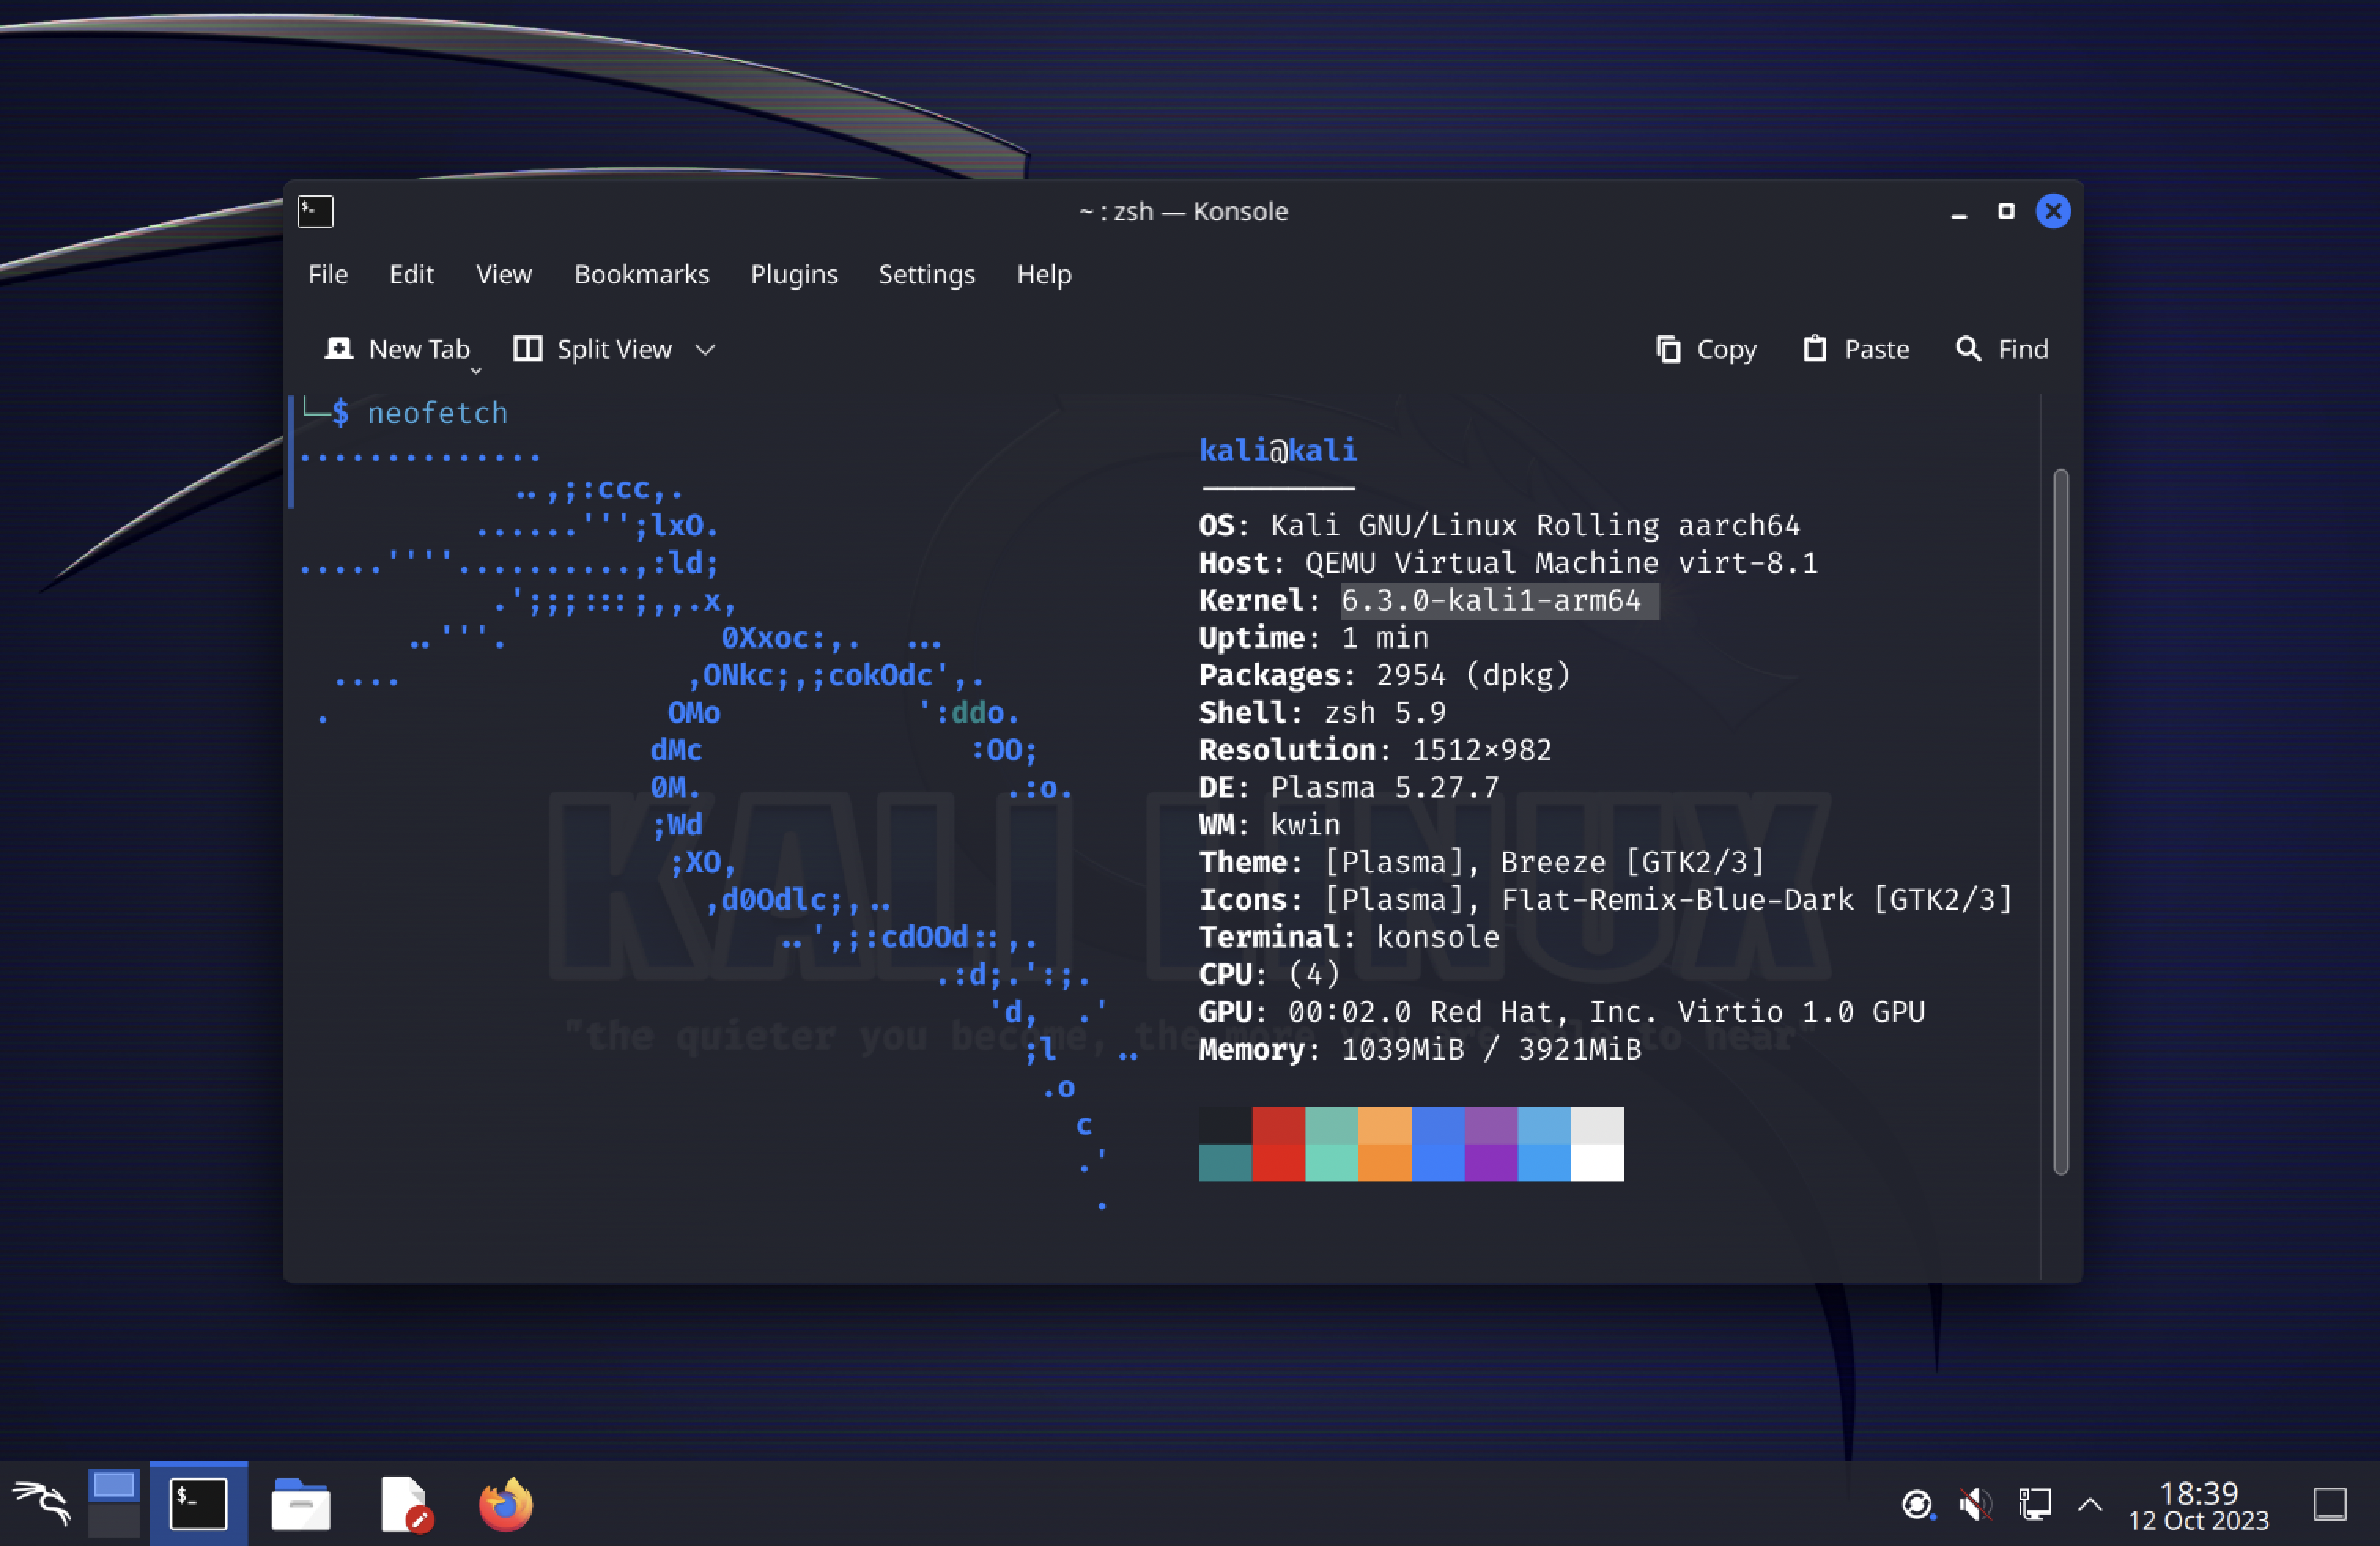
P.S. this is not a perfect guide and any contribution/automation will be greatly appreciated
Subscribe to my newsletter
Read articles from rxn directly inside your inbox. Subscribe to the newsletter, and don't miss out.
Written by
