Getting started with yagmail: Sending your first email.
 Abdulrahman
Your ultimate guide to scripting mails in fewer lines of code.
Introduction
Have you been stuck with writing email scripts in Python? Trying to write those scripts but they are not working? Stay Tuned and read this script to the end and you will be comfortable with scripting those birthday emails.
Yagmail is a Python library that simplifies sending emails using Gmail/SMTP servers. It simplifies sending emails by providing a simple API that allows you to send emails with just a few lines of code.
Installation and Setup
Customarily Yagmail is designed to work with Gmail accounts, We are meant to turn on the Allow less secure app options in Account settings.
Yagmail can be installed natively through PyPI(python package installer). It is recommended to install Yagmail together with the keyring library.
#for python 2.x
pip install yagmail[all]
#for python 3.x
pip3 install yagmail[all]
Facing challenges during installation with the keyring? The [all] block can be omitted to install without the keyring. Yagmail can also be installed from its GitHub repo but will not be covered in the scope of this blog.
Starting a connection
There are several ways to initialize a connection by instantiating yagmail.SMTP .
But so far the recommended(also secure) and concise way to do so is by using a keyring which saves you from harcoding your credentials into your script. The video below explains the keyring library.
Sending Mails.
Below is the line of code that sends Mails using Yagmail:
Please remember to generate an app password for your Gmail account.
#import Yagmail library
import yagmial
try:
    #Connecting to server
    mail = yagmail.SMTP(user='my_username@gmail.com', password='mypassword')
    #Sending the mail
    mail.send(to='recipient_username@gmail.com', subject='Testing Yagmail', contents='Wohoo, this mail was sent from yagmial')
    print("Email  sent succesfully")
except:
    print("Email was not sent")
Concise!, Right?
The code above does 3 things:
Import Yagmail library
Initialize a connection using yagmail.SMTP
Invoke Yagmail's send() function which sends the mail.
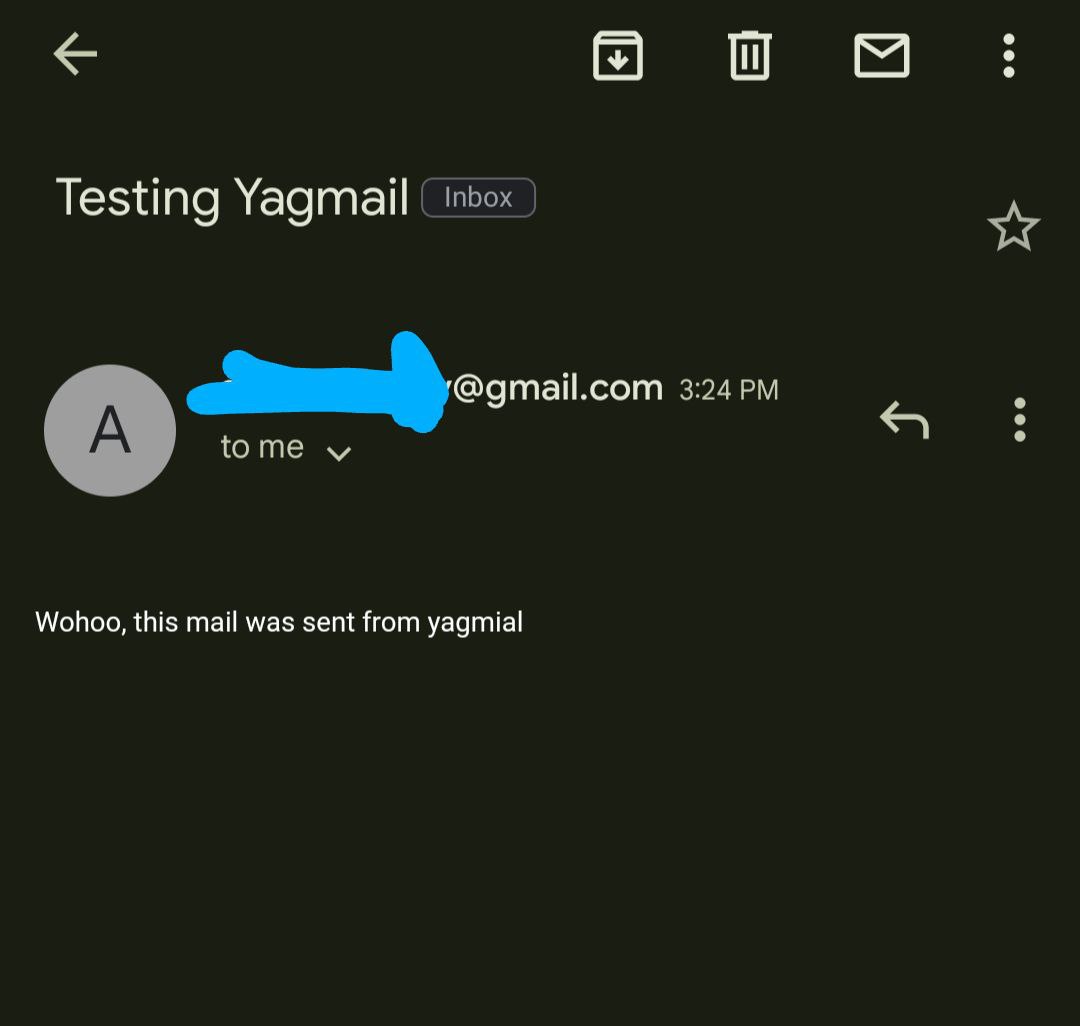
Running the code gives the below result except for when errors are caught:

We can also send with our mail attachments, multiple contents, and multiple attachments all using them as keyword arguments in our send() function.
   #import Yagmail library
import yagmial
try:
    #Connecting to server
    yag = yagmail.SMTP(user='my_username@gmail.com', password='mypassword')
    #Sending mail with attachment
    yag.send(to='recipient_username@gmail.com', subject='Testing Yagmail',
             contents='Wohoo, this mail was sent from yagmial', attachments="path/to/attachment")
    print("Email  sent succesfully")
except:
    print("Email was not sent")
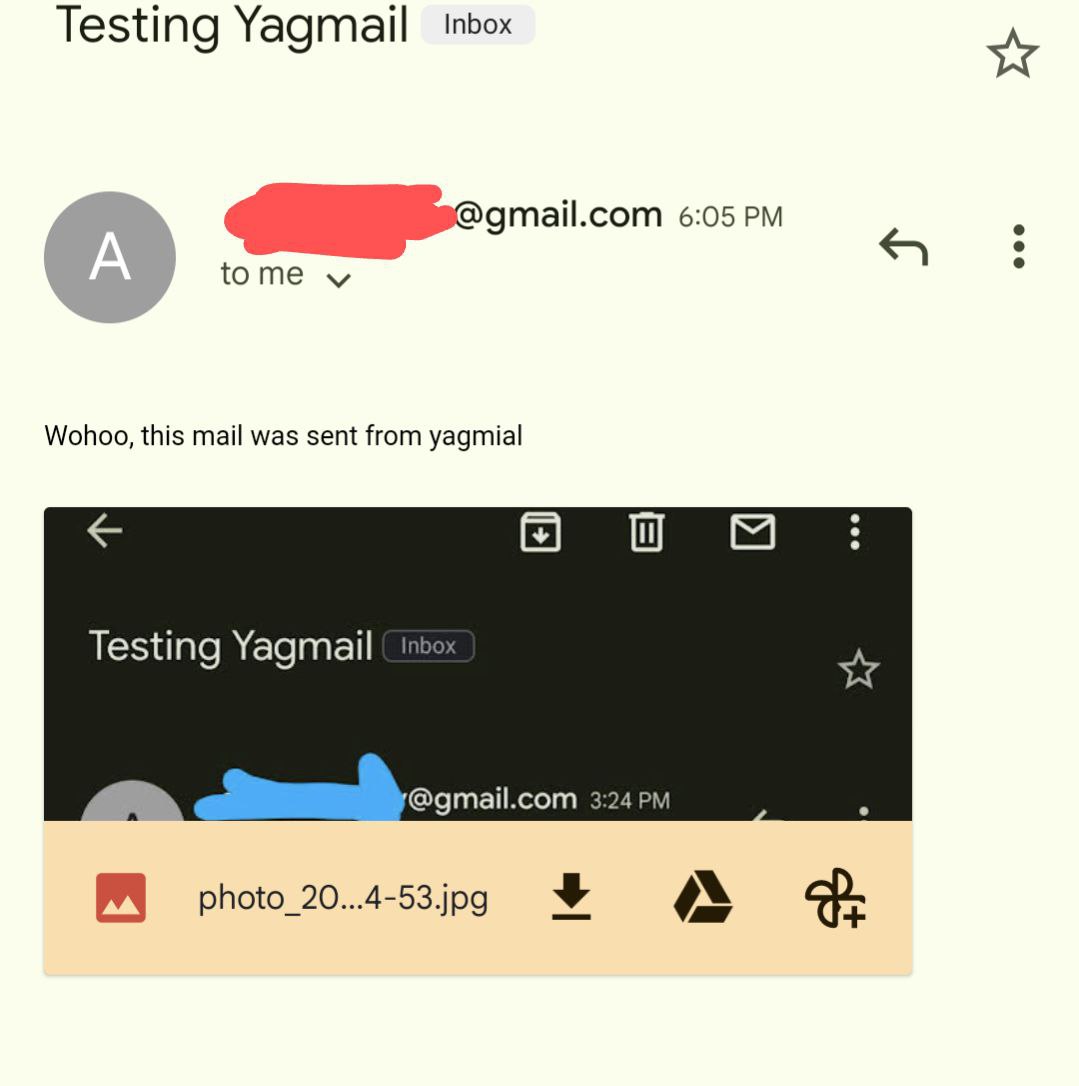
If we run the above code we find the attachment in the inbox:

The function send() can also receive a list in its keyword arguments to & attachments to define multiple receivers and multiple attachments respectively.
yag.send(to=['person1@gmail.com', 'person2@gmail.com', '...'],
        content="This mail was not sent to you alone."
         Subject="Hi All",
         attachments=['path/to/file1', 'path/to/file2', '...']
Conclusion
In conclusion Yagmail is a powerful user-friendly python library for sending and managing emails for both beginners and experienced developers, It is a valuable tool to have as a Python developer.
In this blog we've introduced you to Yagmail, explained how to set up a connection, and how to send emails with provided examples. But there is more to versatility in its official documentation. We hope the guide has been informative and sparked your interest in writing shorter scripts for sending emails.
Thank you for reading, If you have any questions or insights to share, please feel free to leave a comment and connect.
Stay connected, stay productive, and happy emailing with Yagmail.
Subscribe to my newsletter
Read articles from Abdulrahman directly inside your inbox. Subscribe to the newsletter, and don't miss out.
Written by
