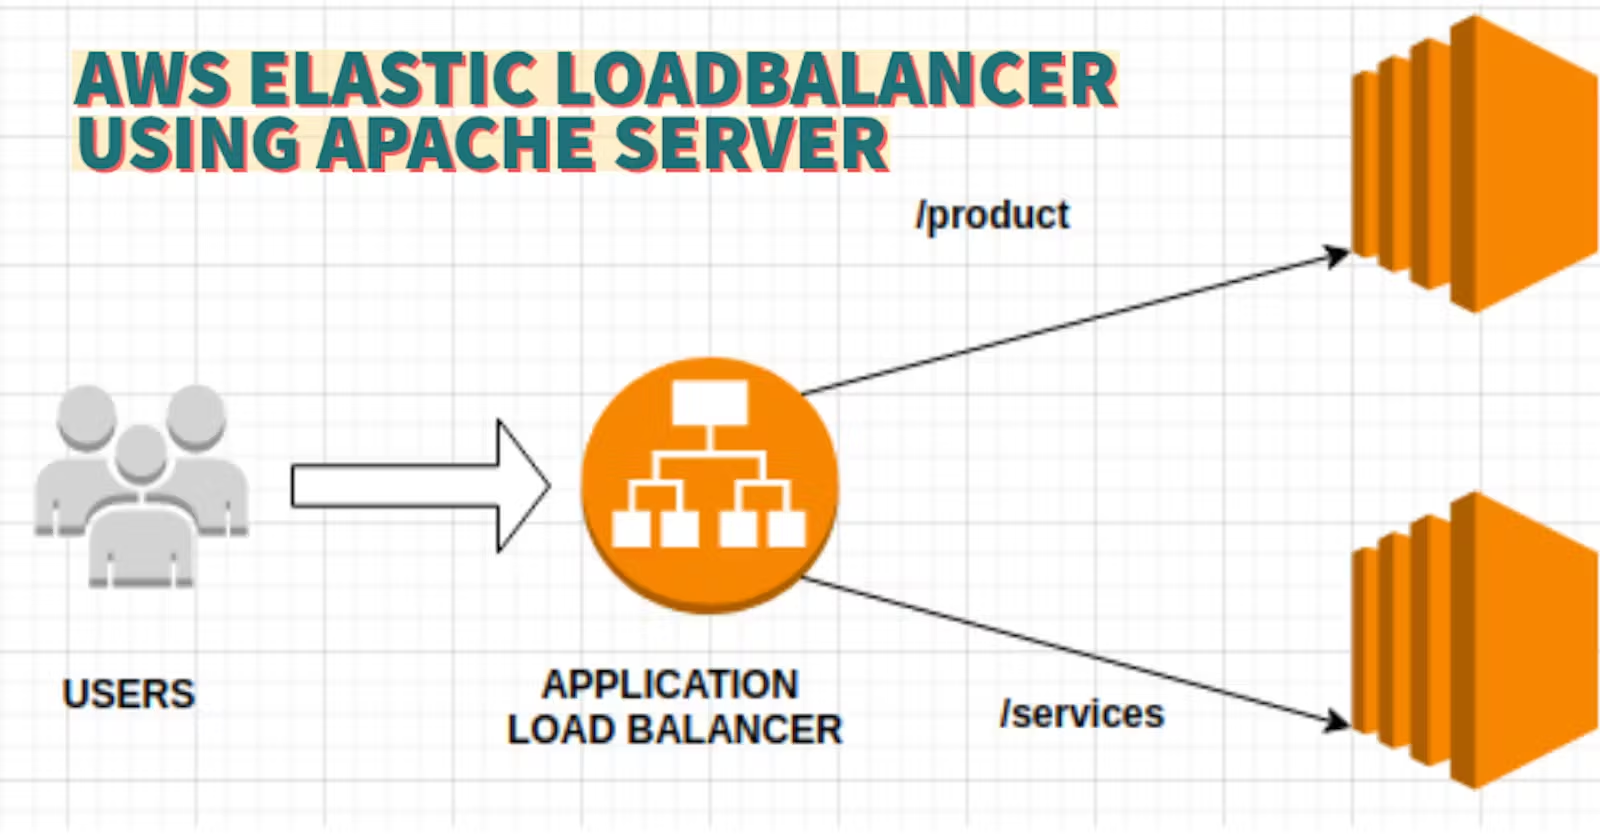
Day - 41 : Setting up an Application Load Balancer with AWS EC2
 Sahil Kamble
What is Load Balancing?
Load balancing is the distribution of workloads across multiple servers to ensure consistent and optimal resource utilization. It is an essential aspect of any large-scale and scalable computing system, as it helps you to improve the reliability and performance of your applications.
Elastic Load Balancing:
Elastic Load Balancing (ELB) is a service provided by Amazon Web Services (AWS) that automatically distributes incoming traffic across multiple EC2 instances. ELB provides three types of load balancers:
1. Application Load Balancer (ALB) - operates at layer 7 of the OSI model and is ideal for applications that require advanced routing and microservices.
Network Load Balancer (NLB) - operates at layer 4 of the OSI model and is ideal for applications that require high throughput and low latency.
Classic Load Balancer (CLB) - operates at layer 4 of the OSI model and is ideal for applications that require basic load balancing features.
Task 1:
Launch 2 EC2 instances with an Ubuntu AMI and use User Data to install the Apache Web Server.
Log in to your AWS Console and go to the EC2 dashboard.
Click on the "Launch Instance" button and select "Ubuntu Server ".
Step 1: Open EC2 Dashboard and click on Launch Instance Template button and name as Apache Server and select Ubuntu Server 20.04 LTS (HVM), SSD Volume Type and click on Next: Configure Instance Details button.

Step 2: Select Key pair and Network setting within region by checking VPC and subnet.


Step 3: Select Advanced Details and paste the below code in User Data which will install the Apache Web Server.
!#/bin/bash
sudo apt update
sudo apt install apache2 -y
sudo systemctl start apache2
sudo systemctl enable apache2

Step 4: Now check the EC2 Dashboard and you can see the instance is running.

Step 5: Now click on Connect button and copy the SSH command and paste it in Terminal and you can see the Apache Web Server is installed.

Step 6: Change the index.html file in /var/www/html directory and add the Instance ID and Availability Zone in the file.

Step 7: Now check the Public IP of instance 1 and you will see the HTML is running on the IP address.

DO THE SAME PROCESS FOR THE SECOND INSTANCE
Apache Server 2 Instance:

Change the index.html file in /var/www/html directory and add the Instance ID and Availability Zone in the file.
cd /var/www/html
sudo vi index.html
Now check the Public IP of instance 2 and you will see the HTML is running on the IP address.

Task 2:
Create an Application Load Balancer (ALB) in EC2 using the AWS Management Console.
- Step 1: Open
EC2 Dashboardand click onCreate Target Groupsthe button.

Let's first specify the group details. Name the target group ApacheGroup and select Instance the target type. Click on Next the button.

- Step 3: Now we will configure the HTTP settings. Select HTTP as the protocol and
80as the port. Click onNextthe button.

Now click on Load Balancers and click on Create Application Load Balancer button here we will add all the instances in the load balancer via Target Group.

Name the Load Balancer ApacheLB and select Internet-facing the scheme. Click on Next the button.

Now we will configure the VPC and Network-Mapping. Select the VPC Default VPC and select all the subnets. Click on Next the button.

Now we will redirect the traffic to the target group. Select the ApacheGroup as the target group and click on Next button.

Thus we have successfully created the load balancer. Click on Create button.

- Step 1: Let's check the Register Target to verify the instances are added in the load balancer.

- Step 2: Now we will review the
DNS Nameload balancer and paste it into the browser and you will see theApache Web Serveris running.

Similarly Apache Server 2 running in different DNS
Subscribe to my newsletter
Read articles from Sahil Kamble directly inside your inbox. Subscribe to the newsletter, and don't miss out.
Written by
