Project 2: Deploy a static website on AWS.
 Adedeji Adekunle
Overview
This documentation provides a comprehensive guide on hosting a static website on an AWS EC2 instance using the Apache web server. By following these steps, you can deploy your static website and make it accessible over the internet. We will be leveraging the 3-Tier VPC deployed in Project-1 to host this website.
Architecture
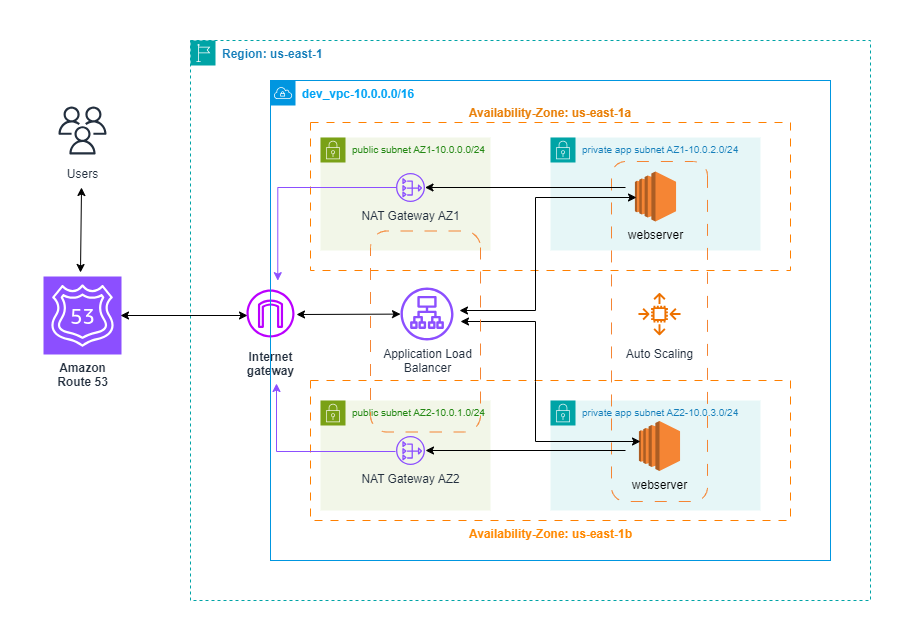
Prerequisites
Before starting the setup process, ensure that you have the following:
An AWS account (Required)
New or Existing Domain name (Optional)
Please follow the steps in Project-1 to set up the VPC that will serve as the backbone for this deployment.
Deployment Steps
After deploying the VPC, the following services will be deployed to host the website:
Application Load Balancer (ALB)
Configure DNS for our ALB in Route53
SSL Certificate to secure our website
Auto-scaling Group to dynamically scale our website
Configure the ALB
Before setting up the application load balancer, we first need to launch two ec2 instances, one in each availability zone.
In the AWS search box, search for ec2 instance and click on
launch ec2-instance.Input the instance name i.e., webserver az1.
select preferred Linux AMI. In my case,
Red Hat Linux.Edit the network configuration and select the VPC we created and under subnet select private app subnet az1.
Under security group, select the
webserver SGsecurity group and create the key pair that will be used to SSH into the server.Scroll down to user data and paste the script below into the user data input box.
#!/bin/bash
yum update -y # To update the yum package repository
yum install -y httpd wget unzip # To install apache, wget and unzip
cd /var/www/html # Navigate to the root html directory
wget https://github.com/azeezsalu/jupiter/archive/refs/heads/main.zip # download the website files
unzip main.zip # extract the website files
cp -r jupiter-main/* /var/www/html/ # copy the extracted files into the root html directory
rm -rf jupiter-main main.zip # delete the downloaded files to free up space
systemctl enable httpd # enable the apache service to allow it auto start on system reboot
systemctl start httpd # start the apache service
- Click on
Launch instanceand repeat the steps above for the second ec2 instance in the second availability zone.
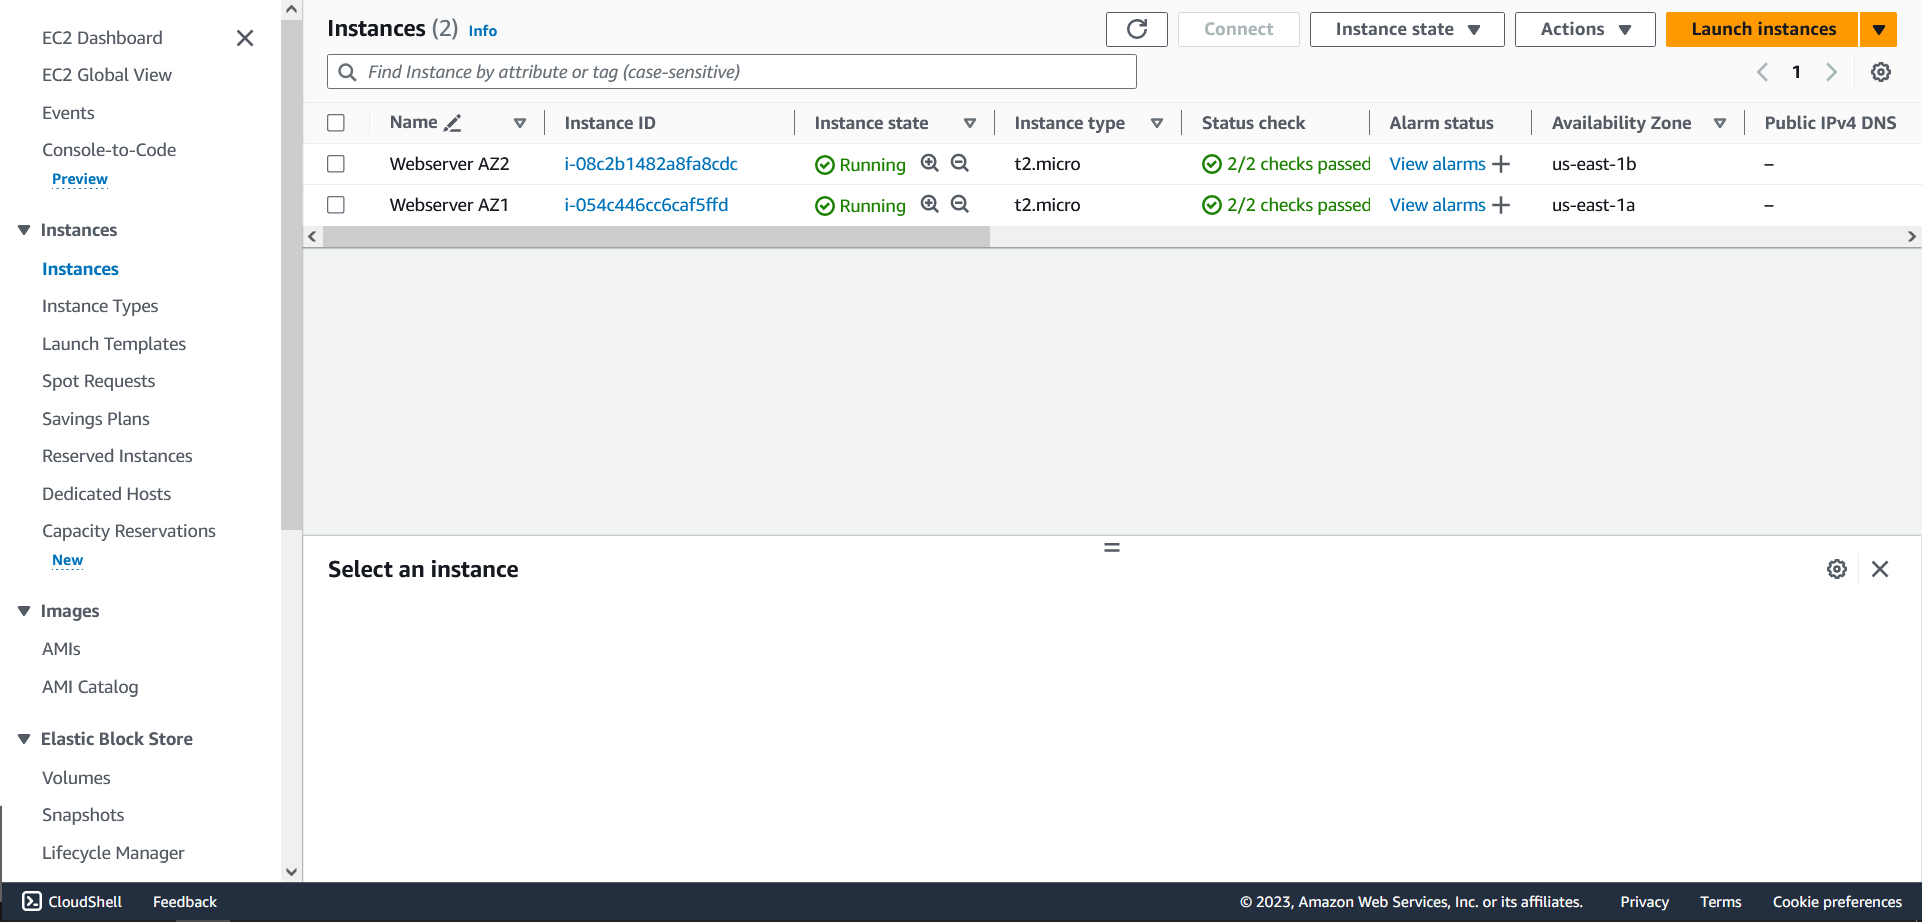
Now we will configure the Application Load Balancer:
Navigate to Load Balancers on the ec2 dashboard, click on
Create Load BalancerUnder load balancer type, select
Application load balancer.Input a name for the ALB i.e., Dev-ALB. Scroll down to Network mapping and select the VPC we created. Under mappings check both availability zones and select the
public subnetsin each of the zones.Under Security Groups, deselect the default security group and select the created
ALB SG.Under Listeners and routing we leave the default protocol on HTTP/port 80. Click on
Create target group.Select
Instancesas our target type and give the target group a name i.e. App-TG.Select the VPC we created and click
Next.On the Register targets page, select both instances we created and click
Include as pending below. Click onCreate target group.
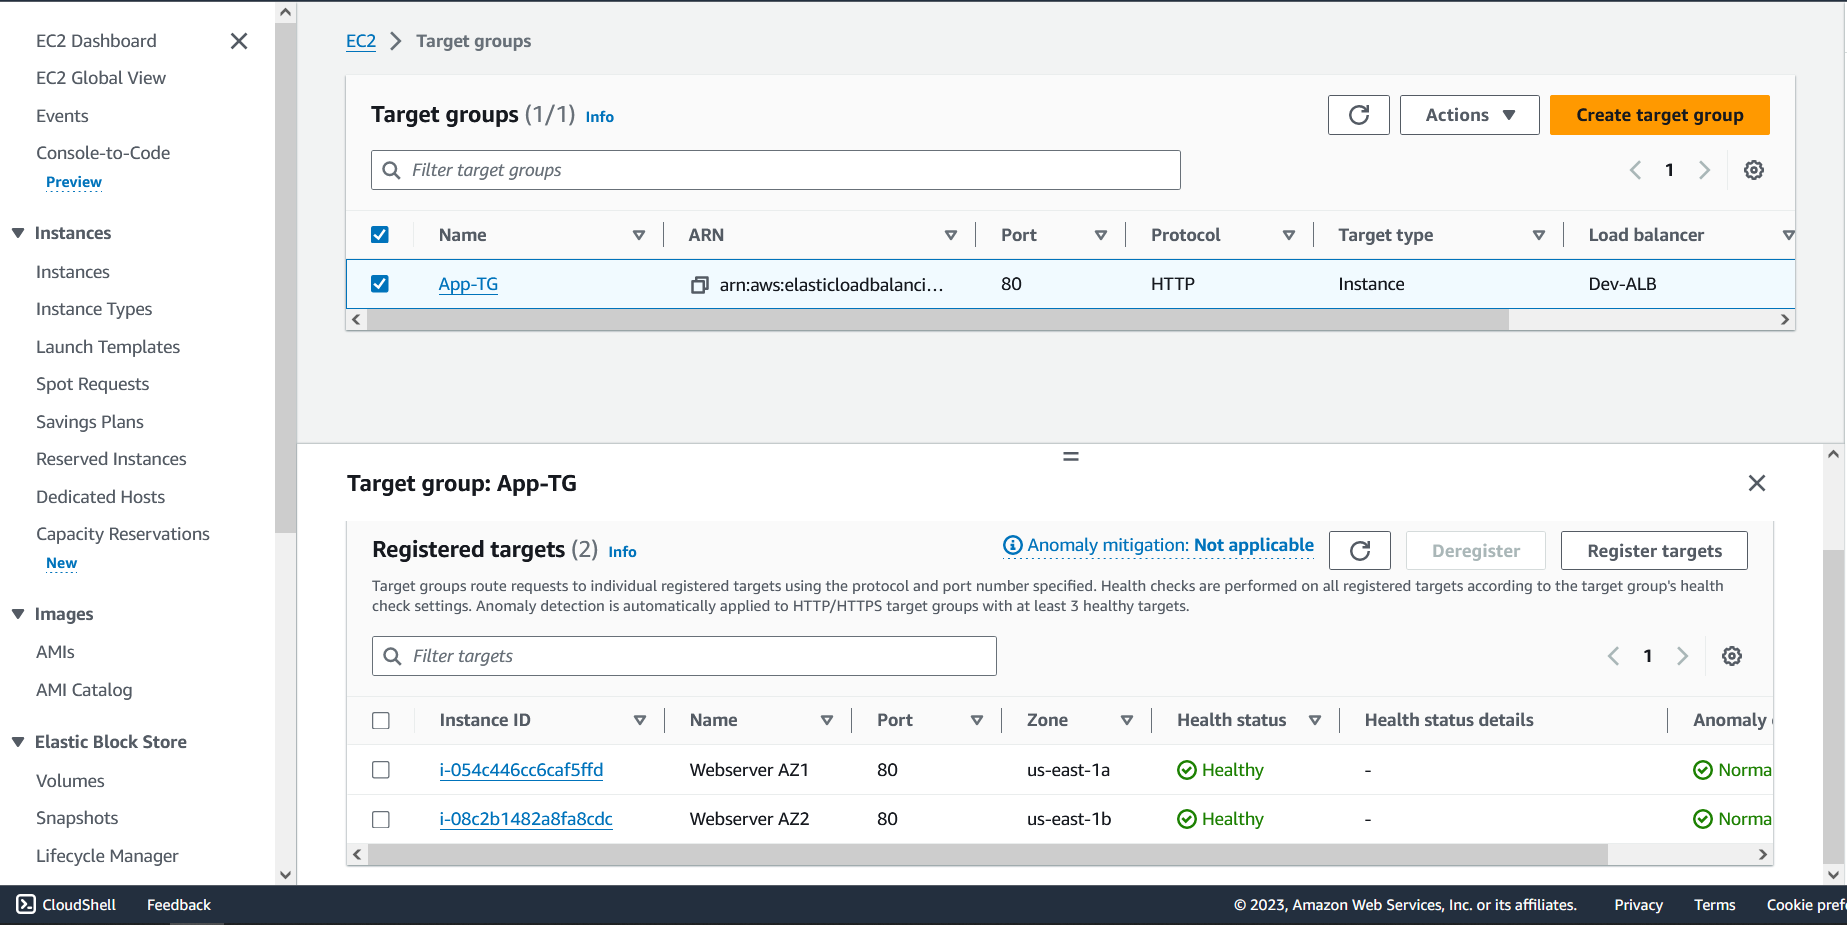
Go back to the load balancer creation page to associate the load balancer with our Target group by selecting the Target group we just created under Listeners and routing. Click on
Create load balancer.To see the load balancer, click on
View load balancer. Allow the Load balancer state to change from Provisioning to Active.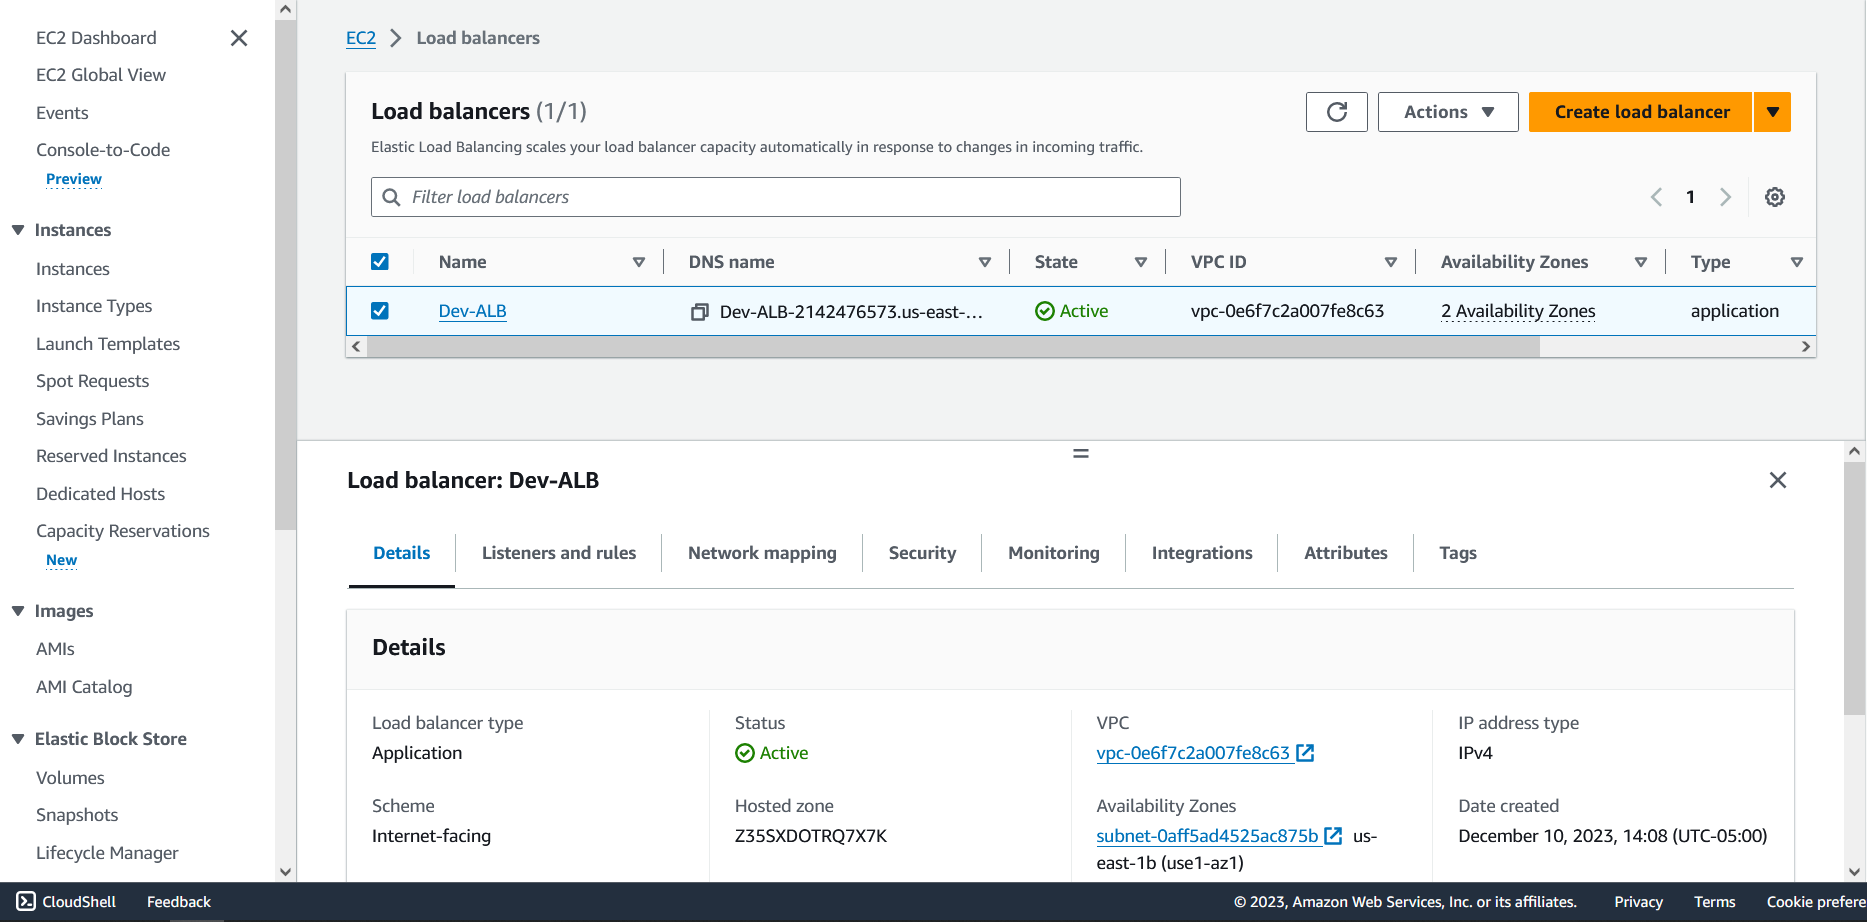
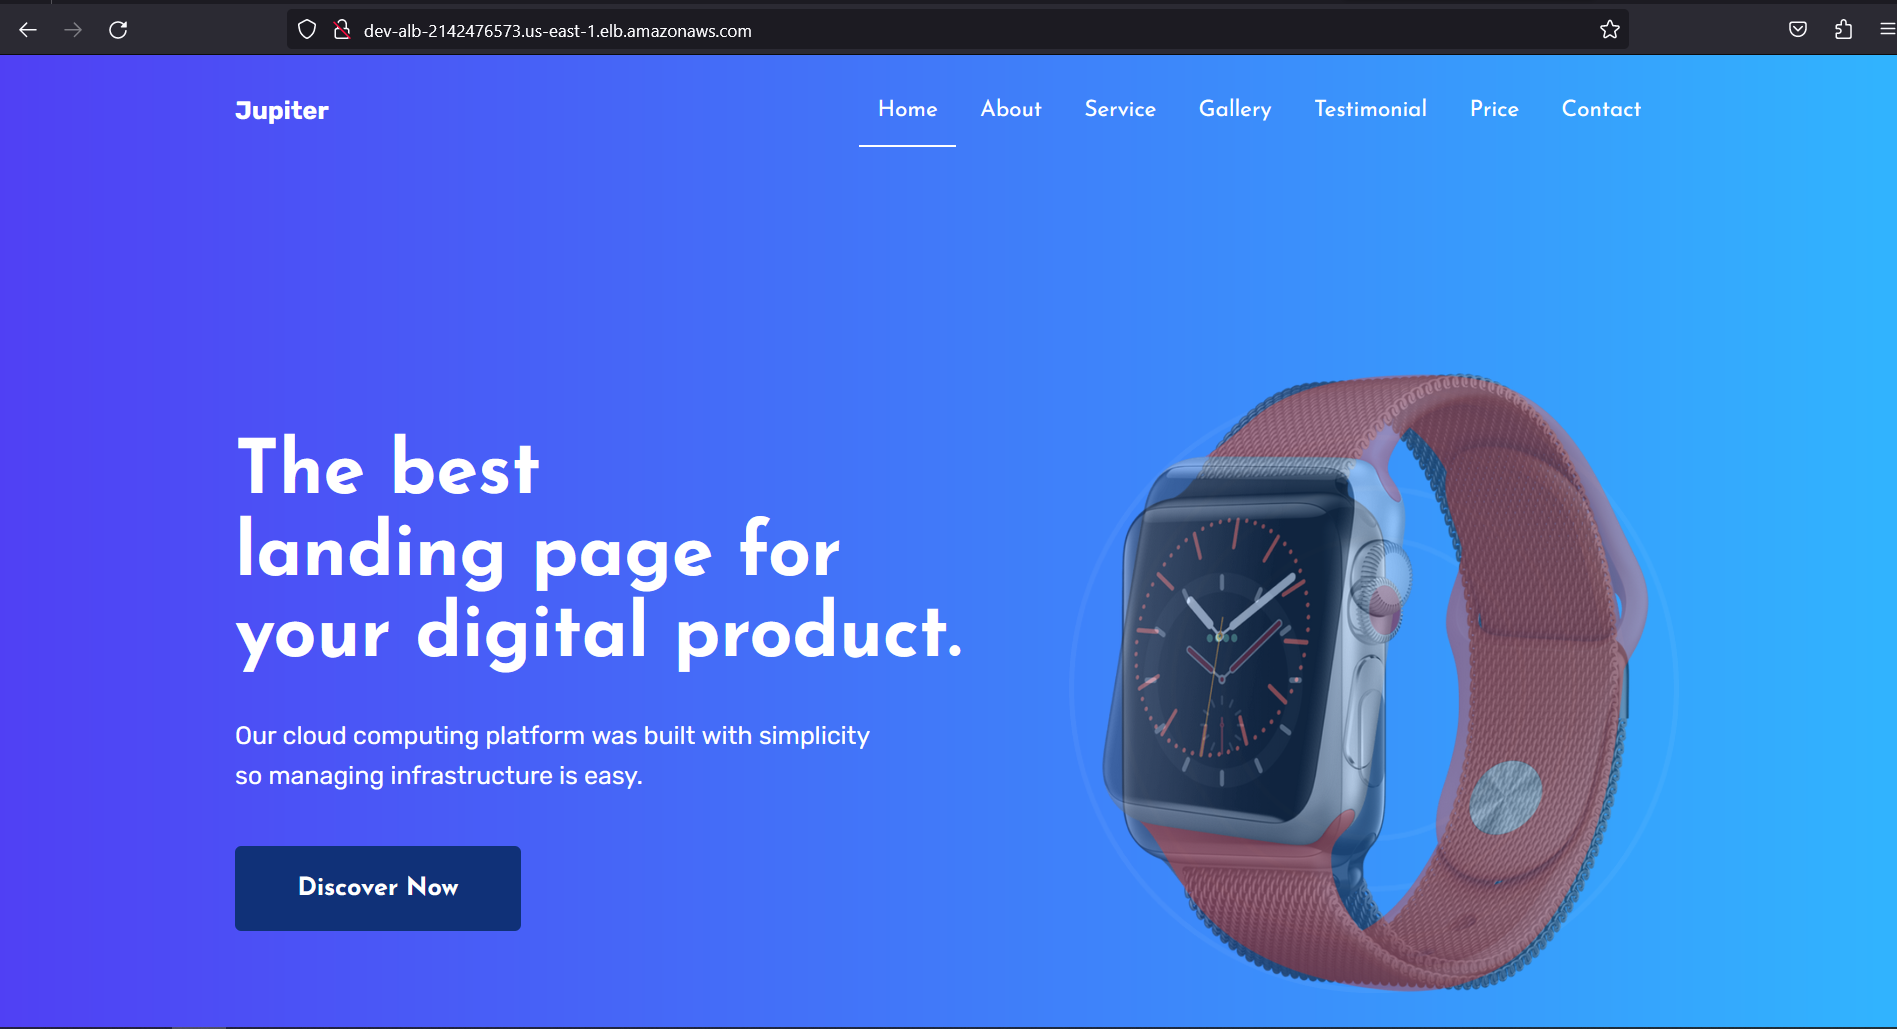
At this point, we can reach our website on our browser using the DNS name of our application load balancer.
Register a Domain Name in Route53
Navigate to the Route 53 console by either searching for "Route 53" in the AWS services search bar or selecting it from the list of available services.
Click on the
Register domainbutton.Enter the domain name you want to register in the search box.
Choose the domain extension (e.g., .com, .net, .org) and click
Check.If the domain name is available, select it and click "Add to cart". If it's not available, try a different name or extension.
Review the details of your domain purchase, including the domain name, duration, and price.
Click on "Add contact details" or "Use existing contact details" to provide or select contact information for the domain registration.
Proceed to the payment section and select your payment method.
Review the purchase summary and click
Complete Orderto confirm your domain registration.We may have to wait for some time for the domain name to be verified.
Once verified, you can configure the DNS settings for your domain in Route 53. You can create hosted zones, set up records, and manage your DNS settings within Route 53.
Configure Record set in Route53
In the Route 53 console, navigate to the
Hosted zonessection.Click
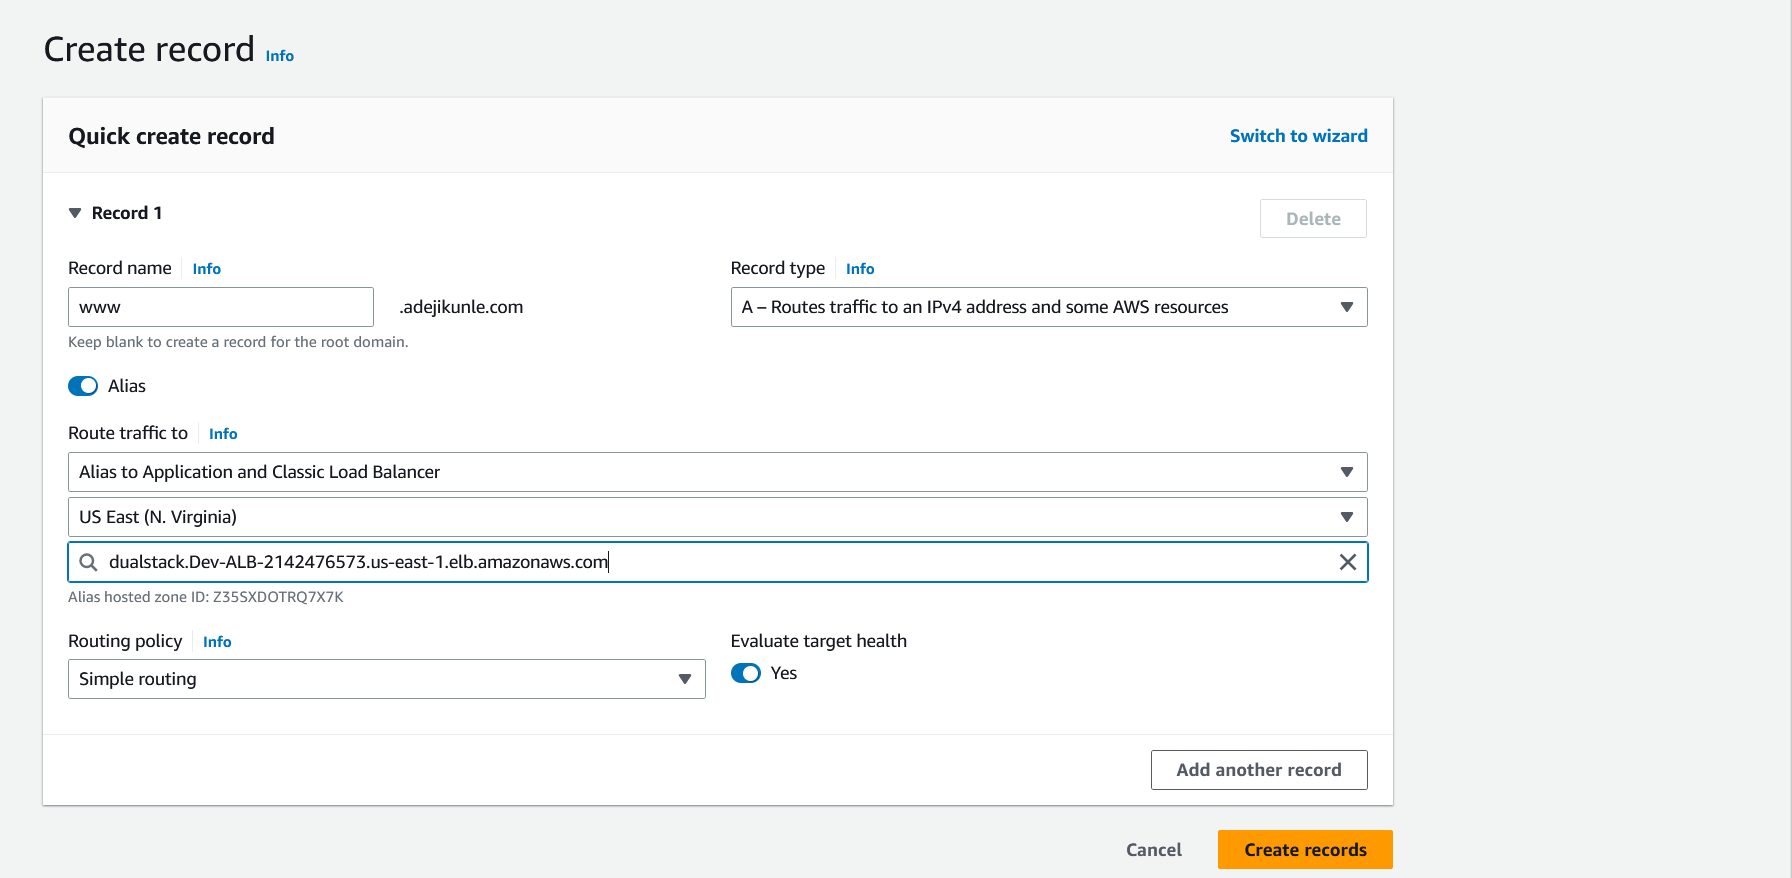
Create recordand input www in the Record name box.Toggle on the
Aliasbutton and selectAlias to Application and Classic Load Balancer.Choose the ALB Region i.e., us-east-1 then choose the Dev-ALB.
Click
Create record.
Changes made to DNS settings may take some time to propagate across the internet. It can range from a few minutes to a couple of days.
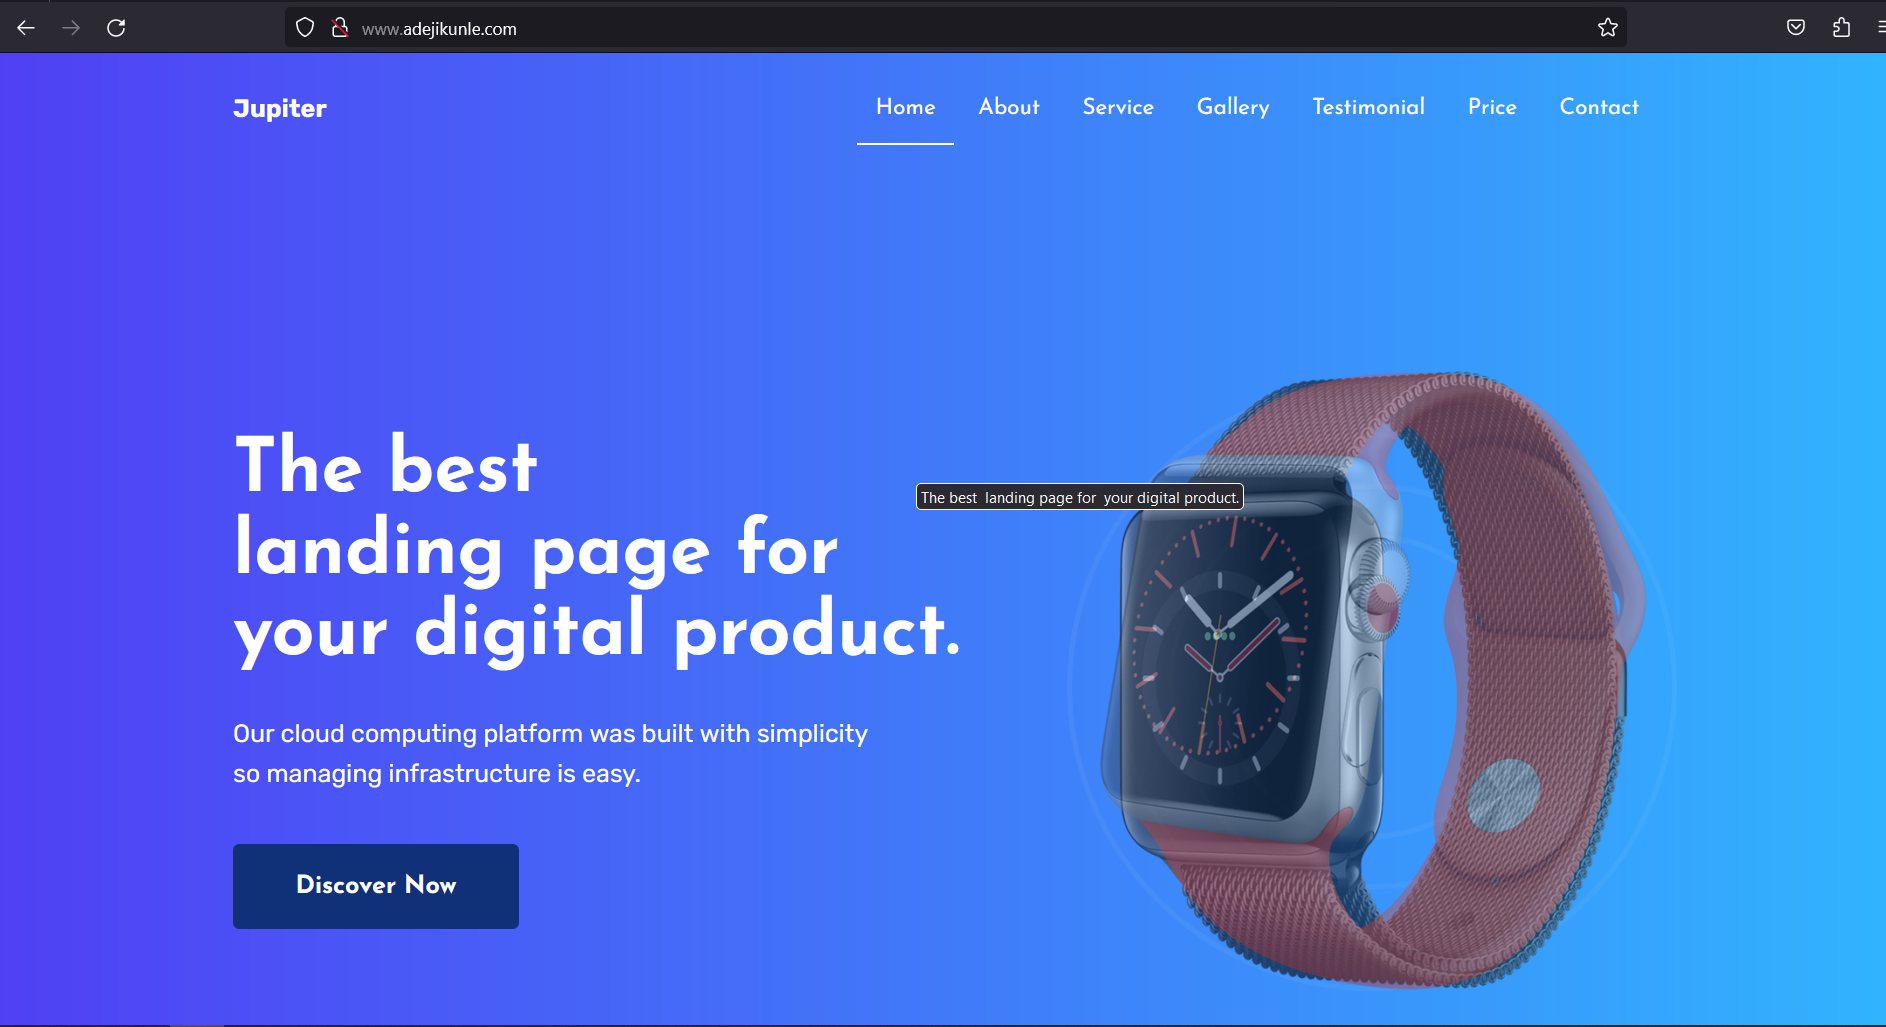
Once these steps are completed, we can now reach our website using the Domain name we registered.
Register for a free SSL certificate
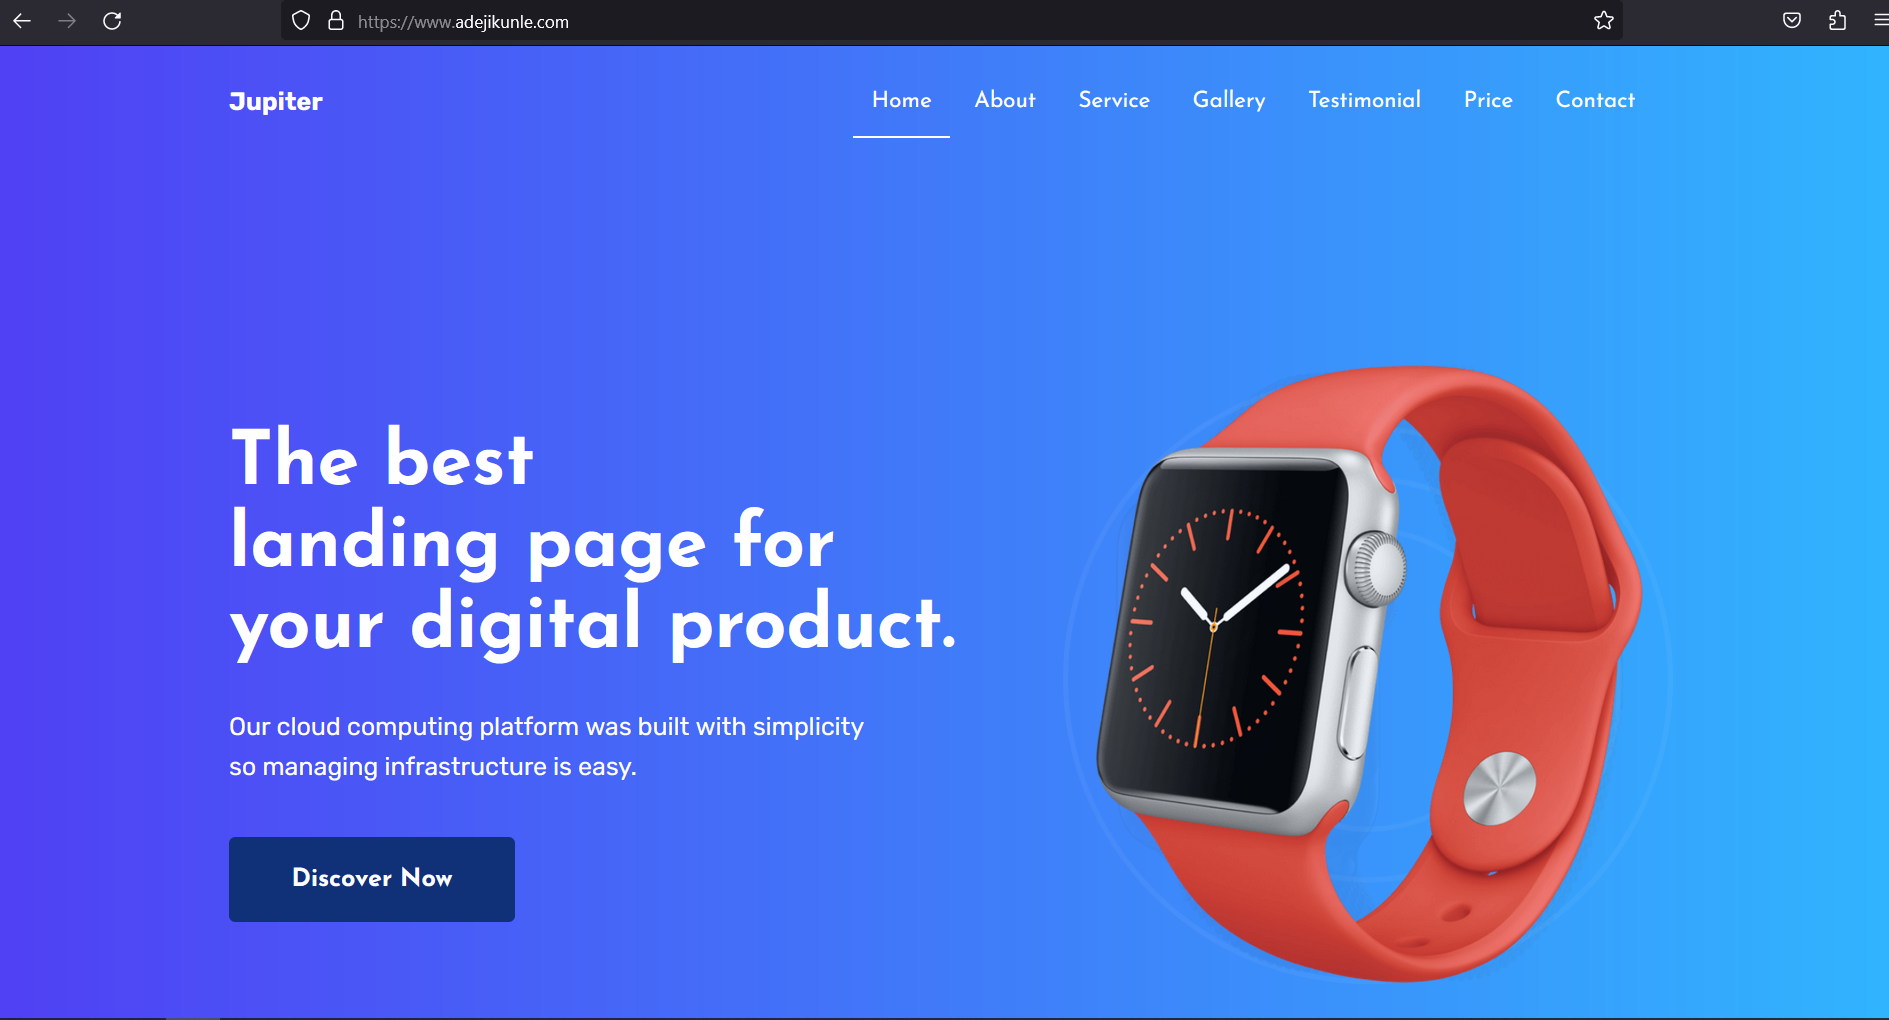
An SSL certificate is essential for protecting data, building trust with visitors, and potentially boosting your website's SEO performance. When a website has an SSL certificate, it shows a padlock icon in the address bar, indicating a secure connection.
We can get a free SSL certificate from the AWS Certificate Manager.
On the AWS console search for Certificate manager then click
Request a Certificate. SelectRequest a public certificateand clickNext.Under Domain names, enter your domain name i.e.,
adejikunle.com. Click Add another name to this certificate and enter a wildcard with your domain name like so*.adejikunle.com.Click
Requestand clickView Certificate.Click
Create records in Route53and select the domain name and wild card we created earlier then clickCreate records. The certificate status should show that it has been issued.
Configure HTTPS using our SSL Certificate
On the ec2 dashboard, navigate to Load Balancers and on our Dev-ALB, select the
Listenerstab and click onAdd listener.Set the Protocol to HTTPS and make sure the port is 443. Set default action as
Forwardand select our Target group.Under Default SSL certificate select the Certificate we were just issued and click
Add.Edit the HTTP listener. Remove the Forward action and select
Redirectand set the protocol as HTTPS/443 thenSave changes.At this point, communication to our website should be secure.
Deploy AutoScaling Group
Before creating our Autoscaling group, we should first terminate the ec2-instances.
We will then create a launch template that will be used to spin up ready-made instances of our website.
On the ec2 menu list, navigate to Launch Templates and click
Create launch template.Give the template a name and description and click the Auto Scaling guidance checkbox.
Scroll down and select the preferred AMI i.e., Red Hat Linux.
Set instance type, key pair and add to the Web server SG security group.
Paste the script we used earlier in the
user databox and clickCreate launch template.Navigate to Autoscaling Group and click
Create Autoscaling groupand name the Autoscaling group.Under Launch template, select the launch template we created earlier and click
Next.Under VPC, select our VPC and under Availability Zone select both Private app subnets and click
Next.Under Load balancing, select
Attach to an existing load balancerand select our earlier created Target group.Under Health checks tick ELB and under Monitoring, tick to enable group metrics collection within CloudWatch then click
Next.Under Group size, we can set our capacity as required. I set mine to 2,1,4
Desired capacity is the number of instances that are created at launch.
Minimum capacity is the least number of instances that we can automatically downscale to. In my case, this means that at the very least, I must have one instance up at all times.
Maximum capacity is the highest number of instances we can automatically upscale to if there is an increase in the number of traffic coming to my website.
Click
Nextand clickAdd Notificationto receive notifications based on events happening in our Auto scaling group then clickNext.Add a tag to specify the Name that our Auto scaling group will add as a prefix to the instance it launches.
Click
Next, review the configuration and clickCreate Auto scaling group.
Cleaning up our deployment
We can delete our resources in the following order:
Auto scaling group.
Launch Template
Application Load Balancer
Target Group (If you created your VPC using the Terraform script in Project-1, then you can just run
terraform destroy -auto-approveto delete the remaining resources after deleting the Target Group.)Security Groups
Webserver SG
SSH and ALB SG
NAT Gateways
Elastic IPs
A-Record
VPC
Acknowledgments
Credits to AOSNOTE for the project guidance and static website content.
Subscribe to my newsletter
Read articles from Adedeji Adekunle directly inside your inbox. Subscribe to the newsletter, and don't miss out.
Written by

Adedeji Adekunle
Adedeji Adekunle
With years of IT experience encompassing Systems Administration and Cloud Technologies, I have a proven track record of designing, automating, and maintaining cloud infrastructures on AWS, utilizing essential tools such as Kubernetes, Docker, Ansible, and Terraform. I'm recognized for efficient problem-solving and collaboration with cross-functional teams to optimize cloud infrastructure and ensure resiliency in data centres.