Week3 Implementing a 2-Tier Application in AWS using Terraform
 Yaswanth Kumar Rayana
Hello Everyone, Hope you are all doing well. This project is a part of 10WeeksofCloudOps, project 3. In this project, we are going to Deploy a 2 Tier Architecture Application on AWS using Terraform as an Infrastructure As a Code (IAC) tool.
A huge shoutout to The CloudOps Community and Piyush Sachdeva, who has implemented this project on his YouTube Channel.
10WeeksofCloudOpsGitOps
I have followed the guide on YouTube by Piyush Sachdeva,
This is the GitHub link for the repository
Prerequisites
A Domain, which you have access to the Domain Manager
Public Signed Certificate from any CA in our case AWS Certificate Manager.
Creating S3 Bucket and Dynamo DB table:
/To get started we first need to create an S3 bucket to store the .tfstate file. In the remote back end. The terraform.tfstate file is stored in the same directory where the Terraform run is executed it's it stores the infrastructure details in a JSON format, mapping to the resources defined in the configuration and to those that exist in your infrastructure. We also have to enable the Bucket Versioning. Once we create the S3 bucket, we need to create a DynamoDB table and also make sure that the partition key is set to LockID and the type as a string.
Configuring Backend.
From the above step copy the bucket name and the path to the key and the Dynamo table name, and paste it in the backend.tf file
terraform {
  backend "s3" {
    bucket = "BUCKET_NAME"
    key    = "backend/FILE_NAME_TO_STORE_STATE.tfstate"
    region = "us-east-1"
    dynamodb_table = "dynamoDB_TABLE_NAME"
  }
}
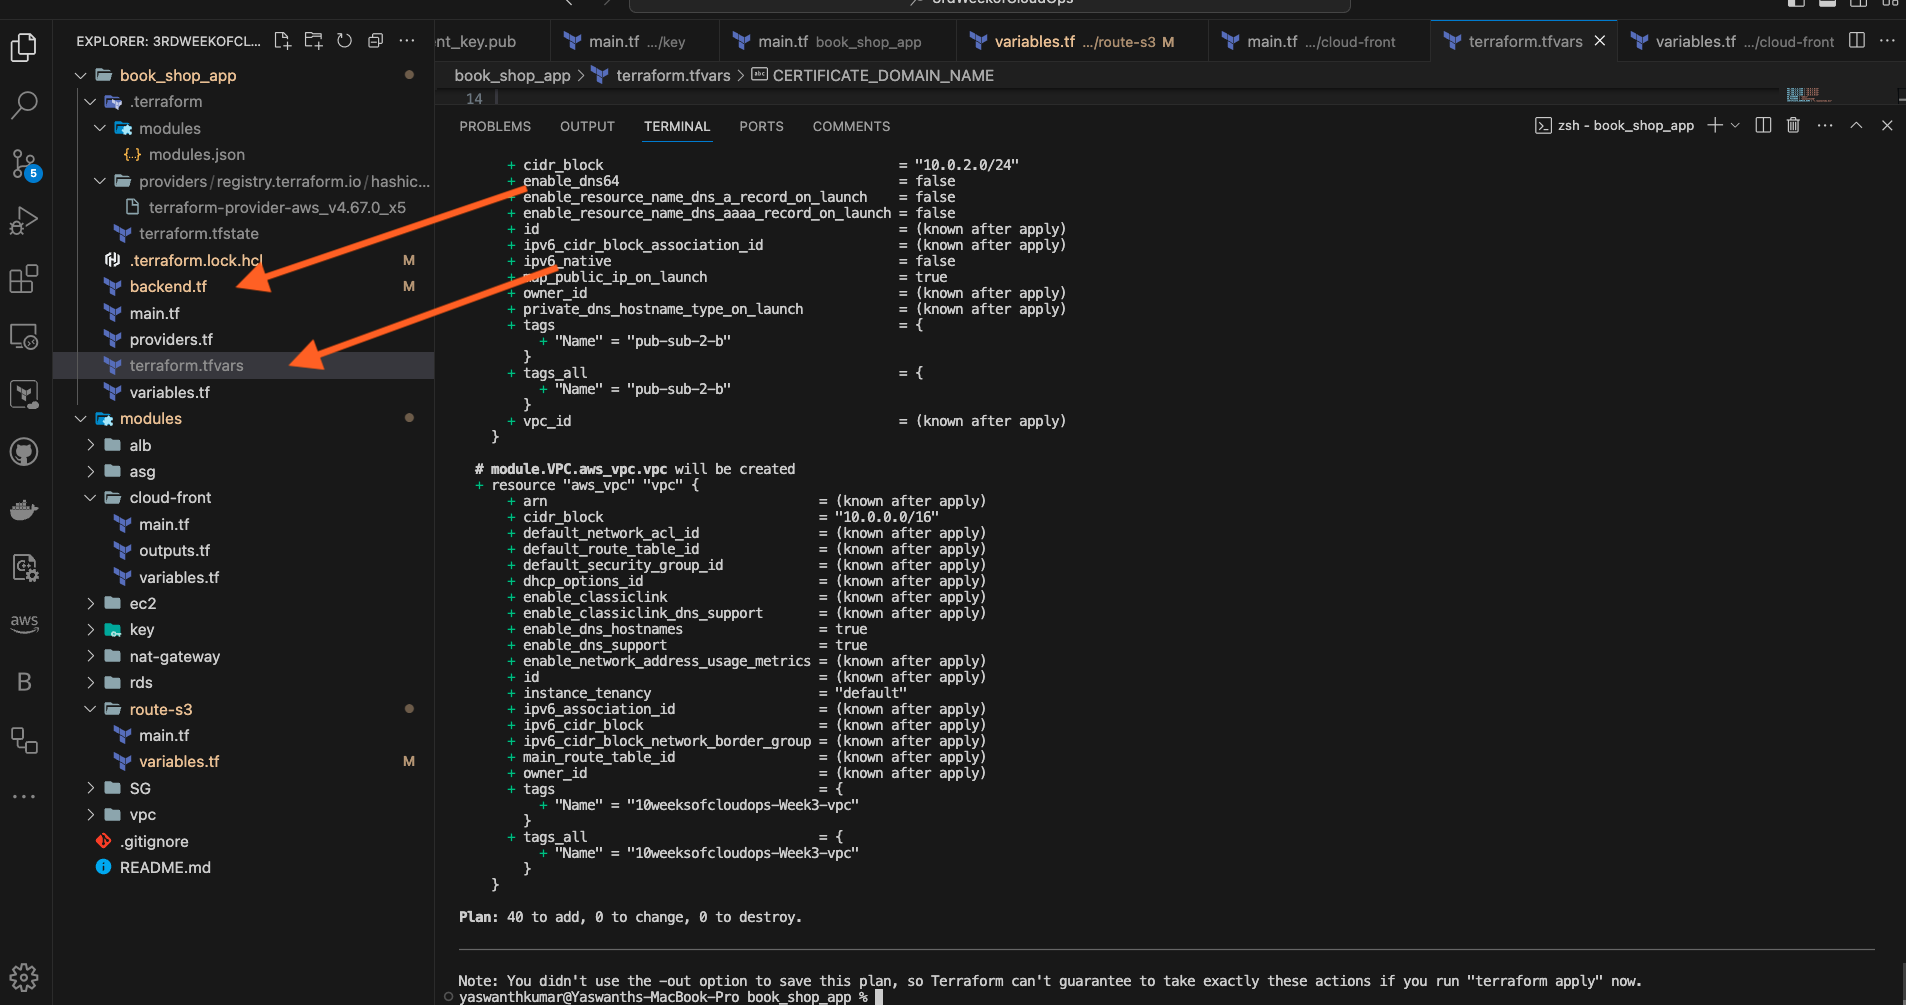
The backend.tf file should be in the main root module of the folder, here is the sample folder structure

You also need to add another file called terraform.tfvars which contains all the variables that we use in this project.
REGION = "REGION" //us-east-1 as an example.
PROJECT_NAME = "YOUR_PROJECT_NAME"
VPC_CIDR = "10.0.0.0/16"
PUB_SUB_1_A_CIDR = "10.0.1.0/24"
PUB_SUB_2_B_CIDR = "10.0.2.0/24"
PRI_SUB_3_A_CIDR = "10.0.3.0/24"
PRI_SUB_4_B_CIDR = "10.0.4.0/24"
PRI_SUB_5_A_CIDR = "10.0.5.0/24"
PRI_SUB_6_B_CIDR = "10.0.6.0/24"
DB_USERNAME = "admin"
DB_PASSWORD = "YOUR_PASSWORD"
CERTIFICATE_DOMAIN_NAME = "*.YOUR_DOMAIN_NAME"
ADDITIONAL_DOMAIN_NAME = "www.YOUR_DOMAIN_NAME.xyz"
Once you make the changes, you can check run terraform init from the /book_shop_app, terraform is going to initialize in that folder by creating the required modules in that folder. If you don't have any issues with dependencies, terraform is going to be initialized successfully.
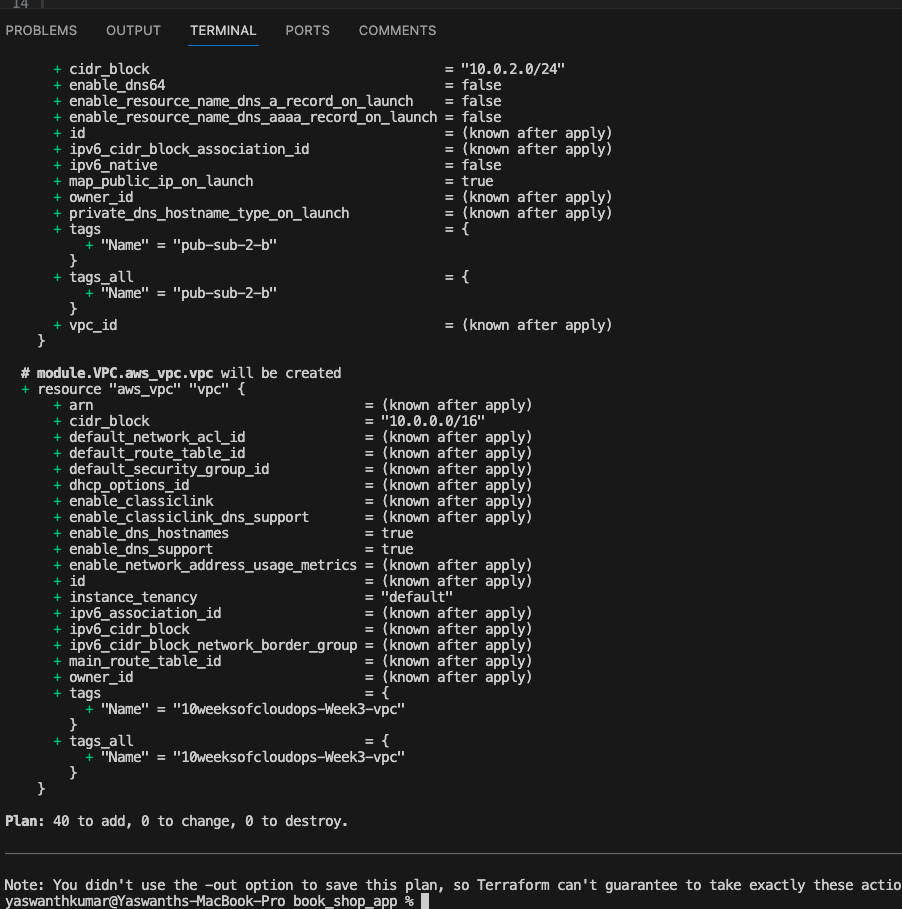
You can run terraform plan and you can see the resources that are going to be created

Here, a total of 40 resources are going to be created.
You can scroll through the resources to check for the resources that are going to be created and run terraform run command and authorize to create the resources.
Once you created resources on your AWS using Terraform, navigate to AWS to get the Cloud Front distribution Domain name to access the distribution across different regions,( Asia, Europe, and North America ..) with very little latency. since the application has been deployed across multiple regions using Cloud Front.

We can also access the website URL using the Load Balancer URL from the EC2 dashboard.

Since we also have configured an A record in our Terraform resource, we can access our Domain with the subdomain we have configured.
We can access our application using Load Balancer URL or Cloud front DNS or even from our Subdomain.
Here is an example of accessing the application using the Application Load Balancer URL

CloudFront DNS

After trying the whole tutorial, navigate to the same /book_shop_app folder to clean up the resources using the terraform destroy command.
Hope this blog is useful and taught you something. Feel free to reach out with any questions, I will try to resolve them.
Subscribe to my newsletter
Read articles from Yaswanth Kumar Rayana directly inside your inbox. Subscribe to the newsletter, and don't miss out.
Written by
