Hands_On_Lab 1: Creating EC2 Instance using Terraform
 Mamoona Arshad

Steps:
Install Terraform on Windows, Configure
Download Visual Studio Code and HashiCorp autocomplete extensions
Download and install AWS CLI On Windows
- What is AWS CLI?
The AWS Command Line Interface (AWS CLI) is a command-line tool that allows developers, system administrators, and other users to manage resources and interact with AWS services. You can develop, configure, and manage resources on the cloud without the need for a graphical user interface, and access AWS services through a text-based interface.
Key features and capabilities of the AWS CLI include:
Service Commands: AWS CLI provides commands for several AWS services, such as CloudFormation, EC2, Lambda, Amazon S3, and more. Users can construct, configure, and manage AWS resources with these commands.
Parameter Options: Users can define options and parameters to customize instructions and operations to their own requirements. It is feasible to precisely manage AWS resources thanks to this adaptability.
Scripting and Automation: The AWS CLI is frequently used in automation workflows and scripts to carry out operations like data transfer, resource provisioning, and AWS infrastructure scaling.
Cross-Account and Cross-Region Operations: It is a versatile tool for setups involving multiple accounts and regions because it enables users to interact with resources across multiple AWS accounts and regions.
Authentication and Access Control: Users of the AWS CLI can configure access keys, temporary security tokens, and other authentication methods in order to authenticate with AWS. Roles and policies for AWS Identity and Access Management (IAM) are used to control user permissions and actions.
Output Formats: The AWS CLI supports various output formats, including JSON, text, and table, which makes it easier to process the results in scripts or integrate with other tools.
Interactive Mode: AWS CLI offers an interactive mode that can assist users in configuring their AWS environment and generating commands.
Plugin and Extension Support: Users can extend the AWS CLI's functionality through plugins or by adding custom commands for their specific use cases.
To use the AWS CLI, you need to install it on your local machine and configure it with your AWS credentials. Once configured, you can start using AWS CLI commands to interact with AWS services and resources. The AWS CLI is available for Windows, macOS, and Linux, making it a versatile tool for managing AWS infrastructure from various platforms.
Create an IAM User in AWS and Access Key
To safely regulate access to AWS resources and services, you can use the Identity and Access Management (IAM) service in AWS to manage users, groups, roles, and their permissions. A particular set of functionalities is enabled when you create an IAM user with admin access and give them an Access Key and Secret Access Key.
IAM User: An application or person interacting with AWS services is represented by an IAM user. Each user in your AWS environment has a unique username, and they are linked to different policies and permissions that specify what they can and cannot do.
Admin Access: When you provide an IAM user with "Admin Access," you are granting them full administrative privileges within your AWS account. Admin users can perform any action on any AWS resource, making them powerful and potentially risky. It's important to restrict such access to trusted individuals who require full control of your AWS environment, like system administrators.
Access Key and Secret Access Key:
Access Key ID: The Access Key ID is a public identifier that is used to authenticate an IAM user when interacting with AWS programmatically. It is a 20-character alphanumeric string.
Secret Access Key: The Secret Access Key is a private key that must be kept confidential. It is used in conjunction with the Access Key ID to sign requests made to AWS services. It is a 40-character alphanumeric string.
The main use is programmatic access to AWS resources, which entails using AWS SDKs, AWS CLI, and other tools to communicate with AWS services. With these keys, you can grant programmatic access to an IAM user, enabling them to make AWS service API calls on your behalf. It is now possible to automate and integrate tasks that involve AWS resources, like launching EC2 instances, managing S3 buckets, and configuring AWS resources through code.
Here are some recommended practices:
• Store them securely.
• Rotate them often to increase security.
• Use them only as much as the application or user demands.
• The Secret Access Key should never be shared or kept in plaintext.
• Consider using IAM roles and instance profiles when working with EC2 instances to avoid requiring access keys.
• To avoid requiring access keys when working with EC2 instances, think about utilizing IAM roles and instance profiles.
Keypair value
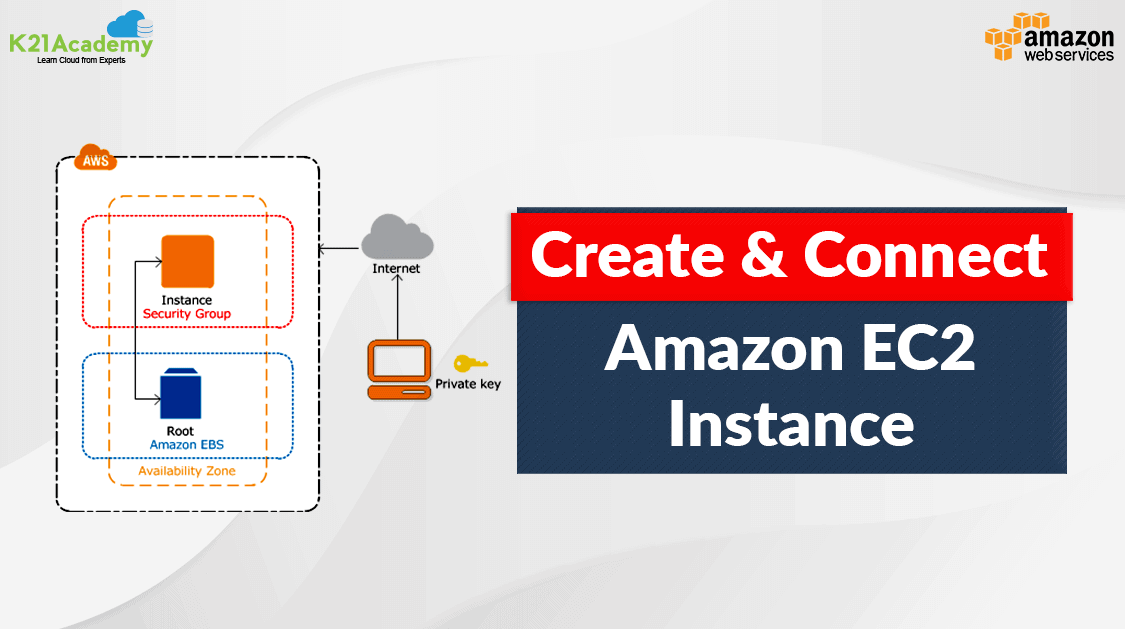
In the context of Amazon Elastic Compute Cloud (EC2) instances, a key pair refers to a set of cryptographic keys used to securely connect to and authenticate with an EC2 instance. The key pair consists of two parts: a private key and a public key.
Here's how it works:
Public Key: This key is associated with your EC2 instance. It can be shared freely and is used by the EC2 instance to verify the signature of the private key during the SSH (Secure Shell) or RDP (Remote Desktop Protocol) authentication process.
Private Key: This key is securely stored on your local machine. You use the private key to authenticate yourself when connecting to the EC2 instance. It should be kept secret and should not be shared.
When you launch an EC2 instance, you specify the key pair to be associated with the instance. This is usually done during the instance creation process. Once the instance is running, you use the private key to authenticate your identity when connecting to the instance. If the private key matches the public key associated with the instance, access is granted.
The use of key pairs enhances the security of EC2 instances by providing a secure way to authenticate without relying solely on passwords. Key pairs are commonly used with SSH for Linux instances and RDP for Windows instances.
It's important to note that if you lose the private key associated with an instance, you may lose the ability to connect to that instance. Therefore, it's crucial to handle and secure your private keys responsibly. If necessary, you can associate a new key pair with an existing EC2 instance, but this typically requires stopping and restarting the instance.
1. Install Terraform
Copy the link and paste it into your browser. Install terraform according to your environment.
https://developer.hashicorp.com/terraform/tutorials/aws-get-started/install-cli
2. Install AWS CLI
Copy the link and paste it into your browser. Install AWS CLI according to your environment.
https://docs.aws.amazon.com/cli/latest/userguide/getting-started-install.html
3. Create IAM Roles as a User with Admin Access Permissions
Open your AWS account
Create IAM Roles with access key
4. AWS Configure
I have installed the prerequisites on Ubuntu.
Then I used these Commands in the terminal:
aws configure
Paste the access key for the open IAM role as a user and then create folder of Terraform.
mkdir terraform
ls
cd terraform/
touch main.tf
Open main.tf file
nano main.tf
Paste the following code into your main. tf for creating ec2 instances with key pair.
provider "aws" {
  region = "us-west-1"
}
resource "aws_instance" "terraformdemo1" {
  ami           = "ami-010f8b02680f80998"  # Replace with your desired AMI ID
  instance_type = "t2.micro"
  key_name      = aws_key_pair.deployer.key_name
  tags = {
    Name = "terrafromdemo1"
  }
}
# Keypair
resource "aws_key_pair" "deployer" {
  key_name   = "deployer-key"
  public_key = "ssh-rsa AAAAB3NzaC1yc2EAAAADAQABAAABAQD3F6tyPEFEzV0LX3X8BsXdMsQz1x2cEikKDEY0aIj41qgxMCP/iteneqXSIFZBp5v>
}
Now Save main.tf file and use the following command
terraform init
terraform plan
terraform apply
After applying Terraform, you can check the ec2 instances with keypair in your AWS account.
You have successfully created EC2 instances using the Terraform
Use the terraform destroy command to clean the resources from your AWS account.
Also, delete the IAM as a user.
Subscribe to my newsletter
Read articles from Mamoona Arshad directly inside your inbox. Subscribe to the newsletter, and don't miss out.
Written by

Mamoona Arshad
Mamoona Arshad
Hello, I'm Mamoona Arshad, a highly motivated and skilled professional with a Master's degree in Information Technology, with research areas of Machine Learning, Computer Networking, Computer Vision, and deep learning. My research areas have provided me with a solid foundation in cutting-edge technologies and a deep understanding of their applications. My academic journey has sparked a passion for working at the intersection of cloud engineering and DevOps. I am deeply fascinated by the seamless integration of cloud technologies and the efficient deployment of software through DevOps practices. I have been actively learning and gaining hands-on experience in both areas to enhance my skills and contribute to organizations' digital transformation. I possess excellent problem-solving skills, a keen eye for detail, and a strong ability to adapt to new technologies and methodologies. My dedication to continuous learning and my passion for DevOps make me a valuable asset to any organization seeking to streamline their software development processes and improve collaboration between development and operations teams. If you are looking for a dedicated and motivated professional who can contribute to your cloud engineering and DevOps initiatives, I would love to discuss opportunities further. Let's connect and explore how my skills and experience align with your organization's goals. Feel free to reach me at out.