How to Create Linux Virtual Machine On Microsoft Azure
 Abdulrazaq Abari
INTRODUCTION
Microsoft Azure, often known as Azure, operates as a cloud computing service managed by Microsoft. It facilitates application management through Microsoft-run data centers, offering a comprehensive suite of cloud-based solutions. Within Azure's offerings, users can seamlessly create, configure, and oversee Linux-based virtual machines (VMs). These VMs, hosted within Microsoft-managed data centers, cater to diverse computing needs, allowing users to deploy Linux distributions such as Ubuntu, CentOS, and others. Azure's global network of data centers ensures optimal performance and compliance with specific data locality requirements for these Linux VMs. The platform's flexibility enables users to scale their Linux VMs effortlessly, making it ideal for hosting web servers, databases, containers, and other applications.
Step-by-Step Guide
Step 1: Signing in to the Azure portal
Go to the Azure portal at https://portal.azure.com in a web browser.
Enter your Azure account email address.
Type in your password.
If required, complete multi-factor authentication (MFA) steps.
Click the "Sign In" button.
You'll now have access to the Azure portal for managing your Azure resources.
Step 2: Creating a Linux Virtual Machine
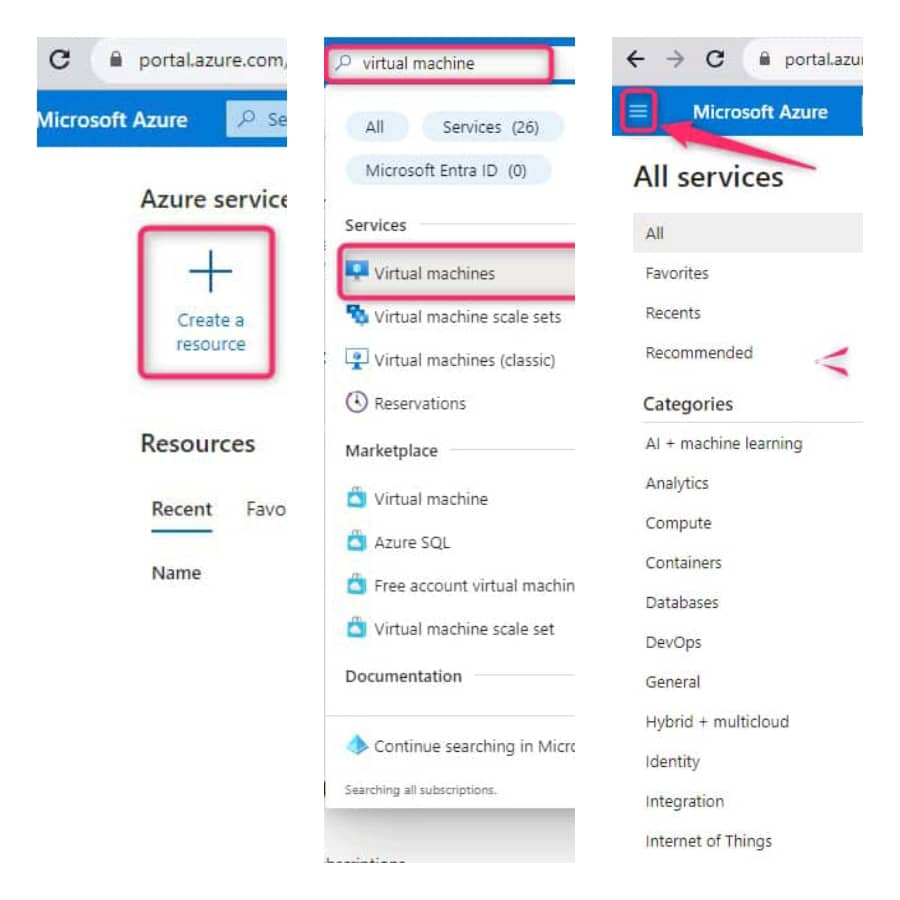
In the Azure portal, you can either go to the left-hand side and opt for the "+ Create a resource" button, or in the search bar, type "Virtual machine" and select it. Alternatively, you can click the hamburger icon, access the "All services" option, and proceed to select "Virtual Machine."
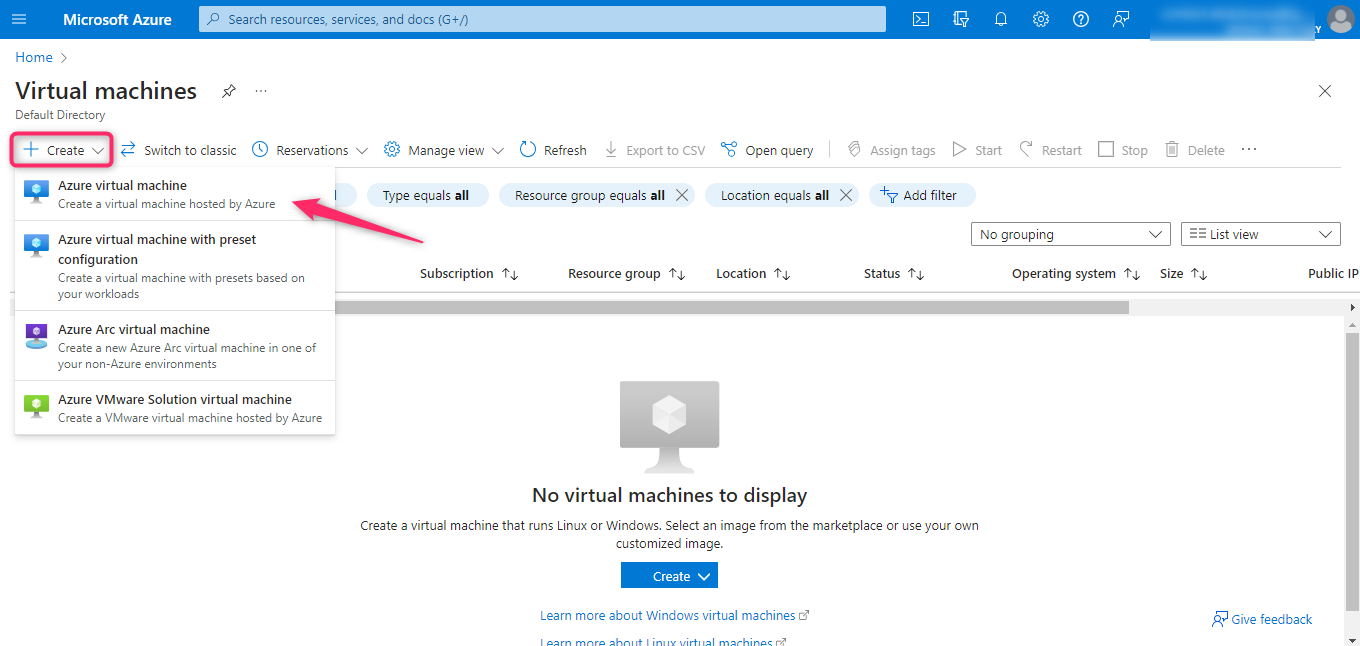
Step3: Click Create and Select Azure Virtual machine
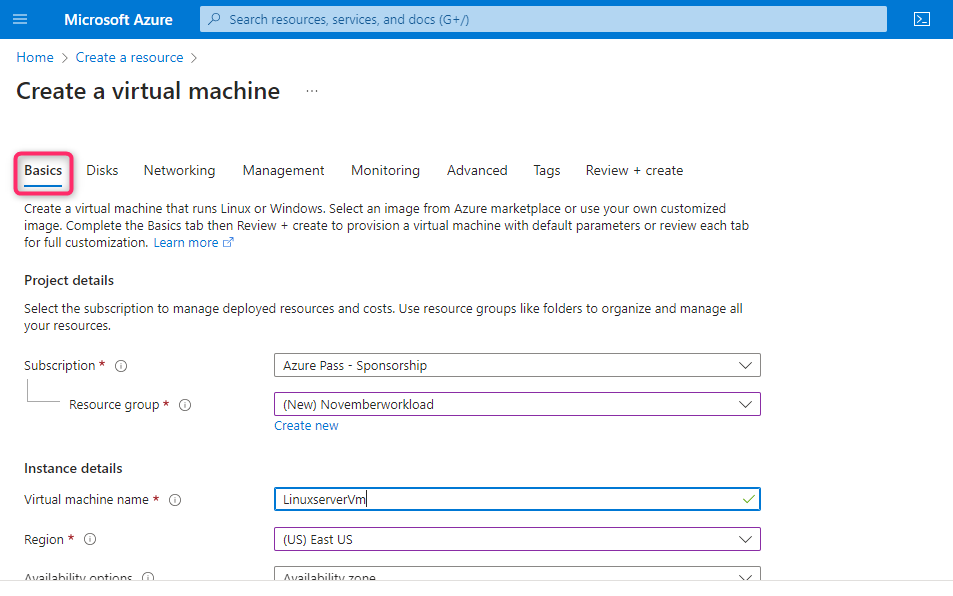
Step 4: Configure Basics: Fill in the required details:
Subscription: Choose your subscription.
Resource Group: Create a new or select an existing one.
Virtual Machine Name: Give your VM a unique name.
Region: Choose the region closest to your location.
Image: Select your preferred Linux distribution (e.g., Ubuntu)
Size: Choose the virtual machine's size, including things like how powerful the CPU is, how much memory it has, and how much storage space it needs.
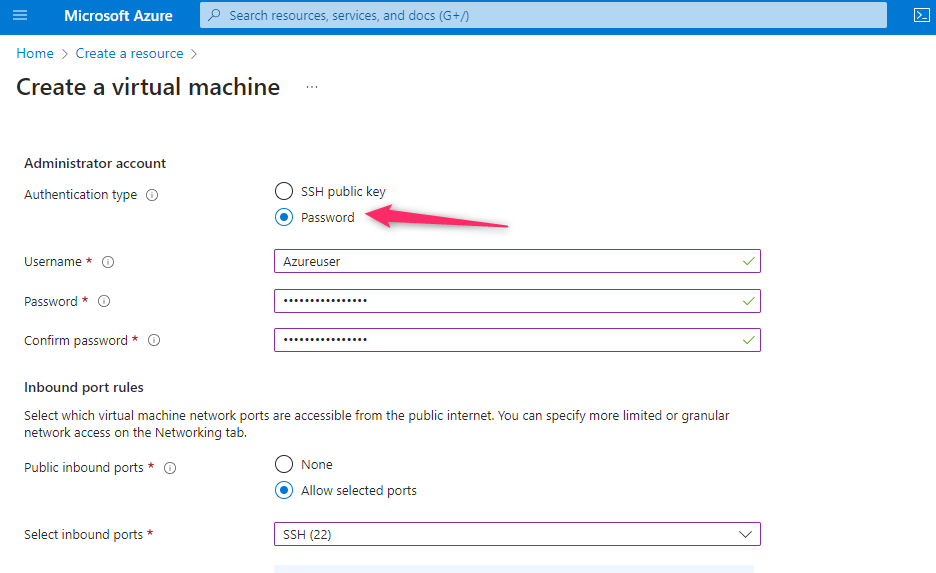
Administrator Account: Make a username and password for the main account that lets you control the virtual machine.
Inbound Port Rules: Decide which types of messages can come into your virtual machine from the internet. Some jobs need special messages to get in. When you pick which messages to let in, think about what you want to do on your virtual machine. Pick the right messages to make sure everything works and stays safe.
After you've provided all the required details, select the "Review + Create" button to move forward with the setup and examine your configurations.
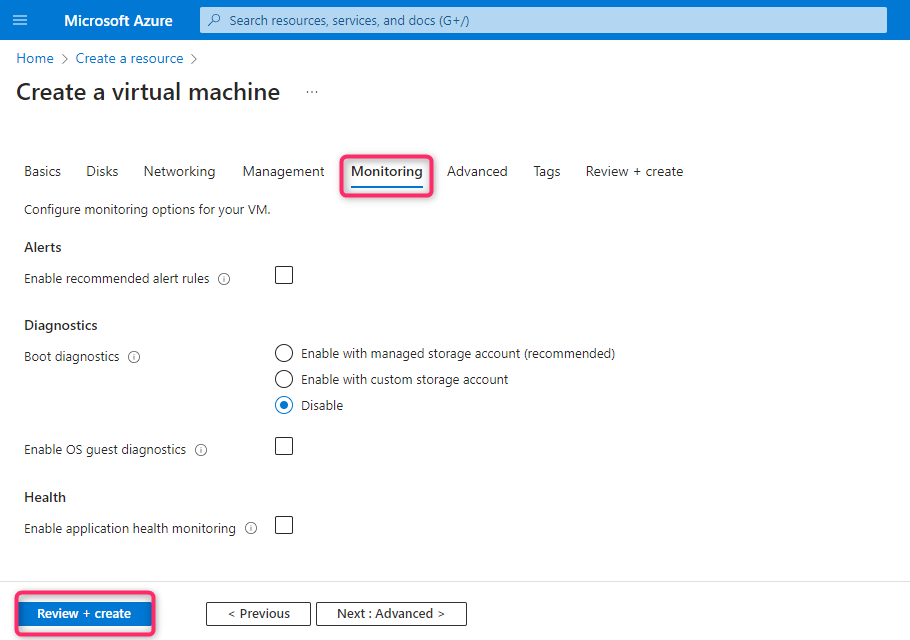
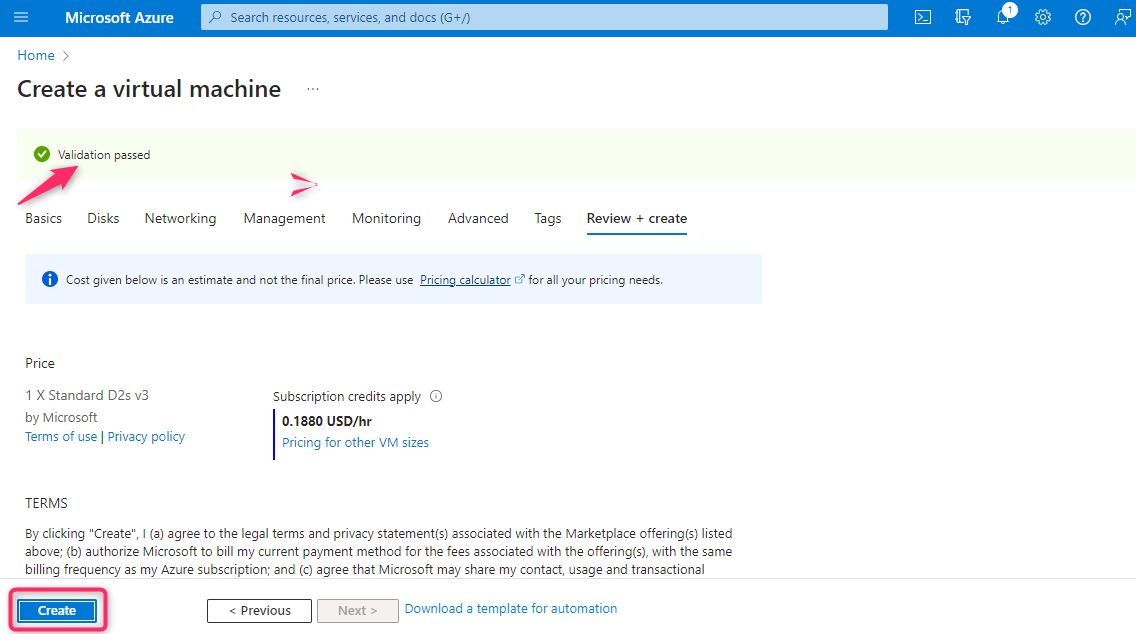
- Initiating Deployment: Once you are satisfied with the configuration, you can initiate the deployment by clicking on the "Create" button.
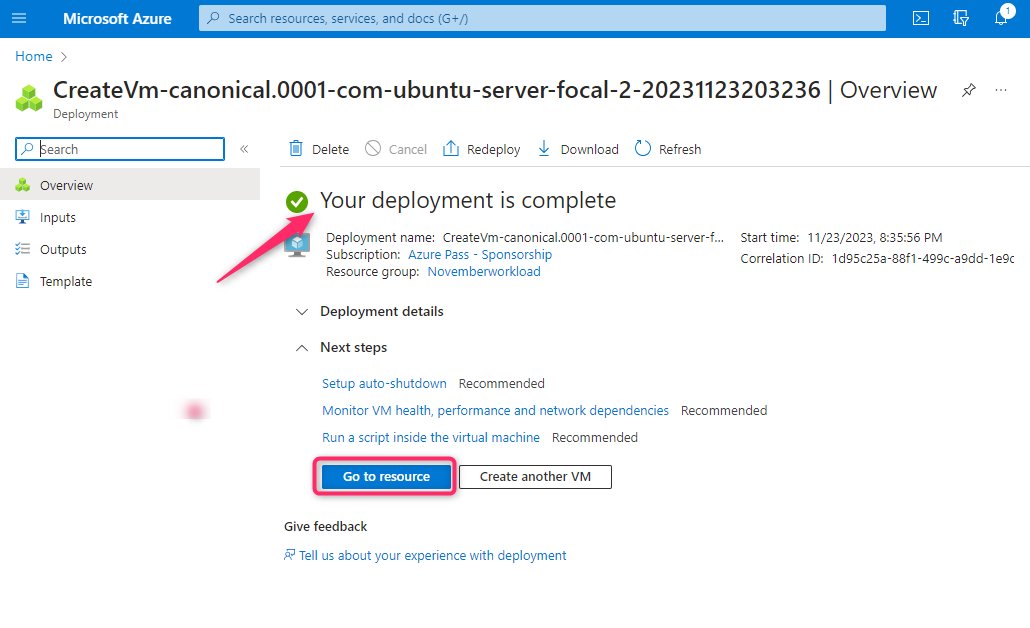
When the deployment is complete, select Go to Resource, and you'll be able to access your virtual machine's dashboard
Select native ssh
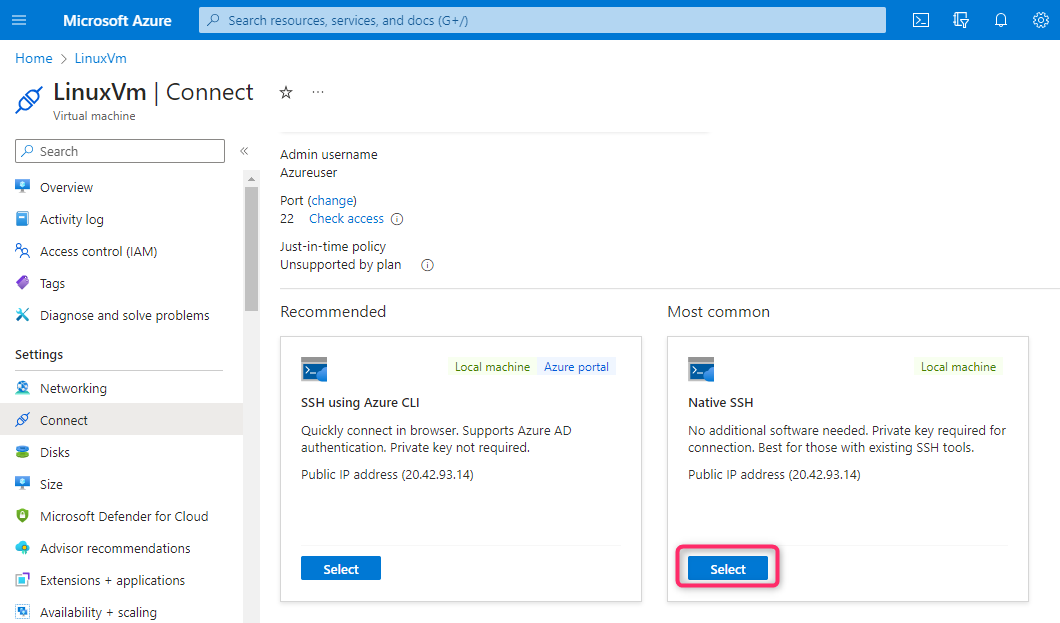
Copy the ip address after the configuration is done
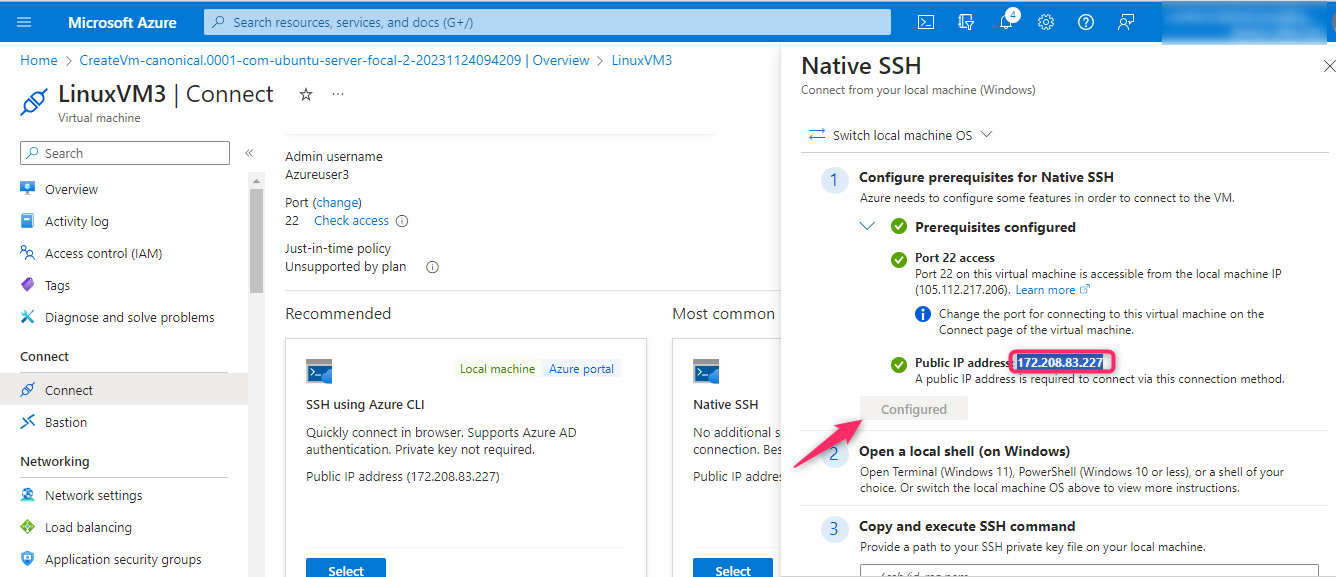
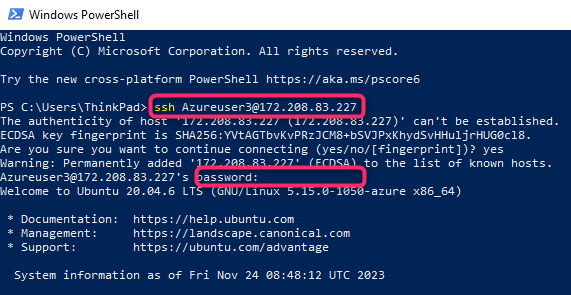
Step 5: Connect to the VM : Open Powershell on your machine, type the command "ssh Azureuser3@172.208.83.227" and input the virtual machine password.
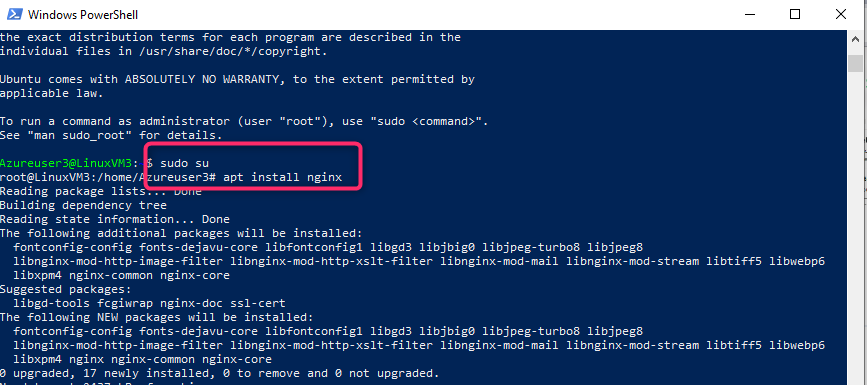
Step 6:Install Nginx: We are going to install "nginx" server and show it on a web server. Type "sudo su" click enter, and Type "apt install nginx".
Step 7: Verify Nginx installation: Open a web browser, copy the public ip address "172.208.83.227" and paste it.
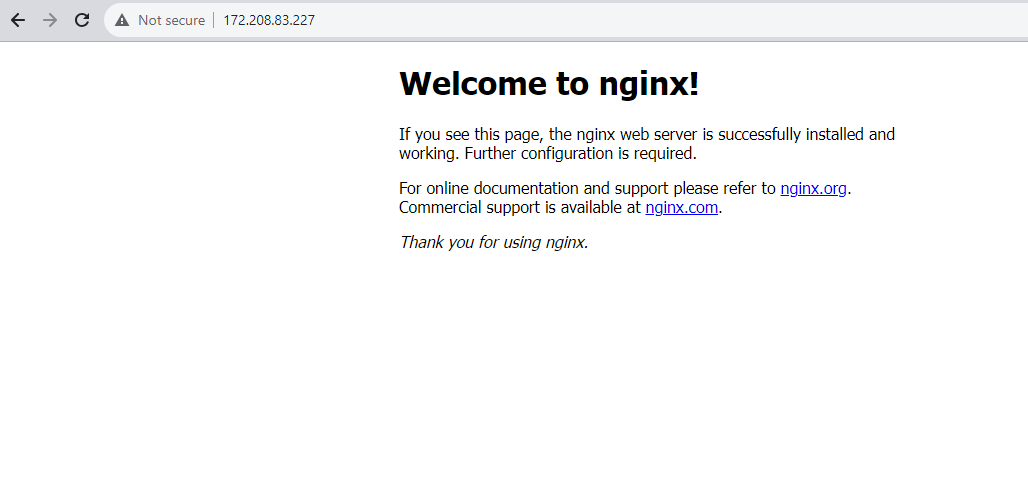
Congratulations, we have successfully installed "nginx" on our Linux virtual machine.
Conclusion: Verifying the installation of Nginx on the Linux Virtual Machine in Azure and successfully accessing the default Nginx welcome page confirms that the server was installed correctly and is operational. This indicates that the VM is configured appropriately, allowing Nginx to serve web content, and validates the proper functioning of the web server within the Azure environment.
VITAL NOTIFICATION: Delete and dissociate resources and IP addresses.
Once unnecessary, you have the option to eliminate the resource group, virtual machine, and associated resources. Navigate to the Resource group link on the Overview page of the VM. Click on 'Delete resource group' at the top of the resource group page. A confirmation page will appear, cautioning about the impending deletion of resources. Input the resource group name and click 'Delete' to complete the deletion process for both resources and the resource group.

Subscribe to my newsletter
Read articles from Abdulrazaq Abari directly inside your inbox. Subscribe to the newsletter, and don't miss out.
Written by

Abdulrazaq Abari
Abdulrazaq Abari
An ardent enthusiast of cloud computing and Devops, I'm dedicated to navigating the intricate realms of technology. Continuously exploring new innovations, I seek to optimize processes and systems. With a fervent passion for problem-solving and optimizing workflows, I aim to foster efficiency and advancement in the tech domain