Google Assistant Interactive Canvas using Angular — Part 2
 nidhinkumar
Overview
In the previous post, we saw how to create an Interactive Canvas action using Angular and created an Audio Splash screen for our action. In this post, we will see how to create categories, questions with audio, Display scores, etc.,
What we are going to build on
We will create a simple musical quiz action in which a song will be played for 20 secs and the user should answer the questions asked. The more they answer the more they can listen to music.
The action which we are going to create would look like the below video. You can play with this action from Google Assistant. Click here to play with the action.
If you are new to this post check the first part and come back :)
Objectives
Create a Category page in Angular
Link Category page with Cloud Function
Create a Question page in Angular
Link Question page with Cloud Function
Create a Score page in Angular
Link Score page with Cloud Function
Add functionality for Play Again and Exit options
Handle about intent
Handle fallback and random category intent
Test the action
Don’t worry about the huge list. Will take baby steps to understand everything and create the action with fun :)
1. Create a Category page in Angular
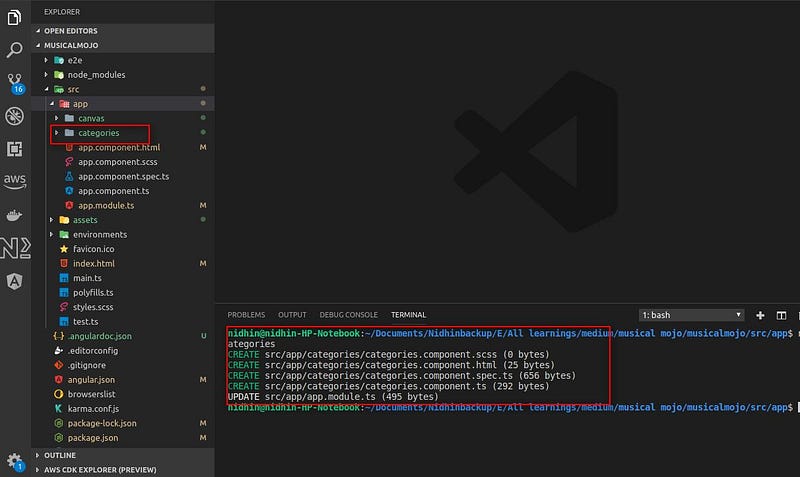
Open the Angular application which we have done in part 1 and open the src->app folder. Once opened create a new component named categories using the command in the terminal like below
ng g c categories

Now open categories.html copy the below code and paste it in categories.html
What we have done in the above code is we have created a card view to display an image and text from the array of categories. When the user clicks on a card it will pass the selected card name to the category.component.ts as we have used the shimmer effect while loading the images
Now open categories.component.ts file and replace the existing codes with the below code
In the above code, we have used the input and output selector which is used to get the values from the parent component through Input() and send the selected values to the parent component through Output(). In our case, the parent component is the canvas component
Now open categories.component.scss file and add paste the below codes
The above styles are for the shimmer effect and the card view
Now open the canvas.component.html and replace the existing codes with the below code
In the above code, we have called the app-categories component which we created earlier and passed the categories to the categories component. The selected music from the categories component is received via the selected music event and passed to the music select function.
Now open canvas.component.ts file and replace the existing codes with the below code
What we have done in the above code is have set types for the showQuestions, categories, selectedMusicCategory and then we have created the musicSelect function where we pass the user-selected category to interactive canvas
As well as we have timer function in the splash screen to hide the splash screen and show the categories page
Now save all the files and created the production build using the command
ng build --prod
2. Link Category page with Cloud Function
Now we will link the category page with the cloud function open cloud function and create a new folder named data and create a new file named categories.js and add the below code
Once the above step is done open index.js file and replace the existing code in index.js with the below code
Now save the index.js file and deploy both the cloud function and HTML files using the below command in the root directory
firebase deploy
Once the deployment is completed you could see the categories section like below
3. Create Question page in Angular
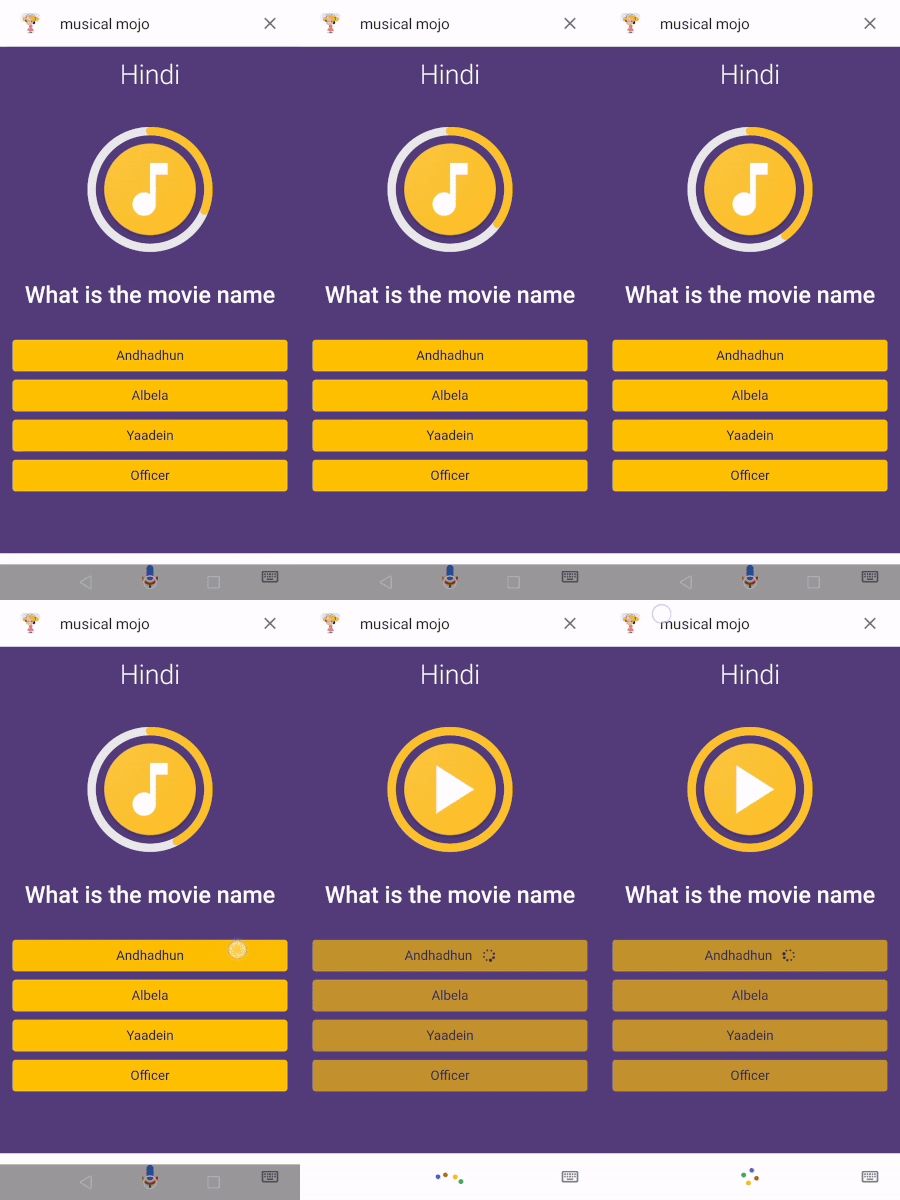
In the question page, we will show the selected category name in the questions page along with a progress bar while the song is been played and a play button to replay the song as well as we will display the question and options.
The screen which we are going to design would be like the below one once we complete the below steps

To make the progress bar we should install the plugin Angular SVG round progress bar. You can install the plugin by opening the angular folder in terminal like below
npm install angular-svg-round-progressbar --save
Once the plugin is installed open app.module.ts file and import the RoundProgressModule like below
Once the Module is added navigate to src->app directory and create a new component named questions using the command
ng g c questions
Questions.component.html
Once the component is created open questions.component.html file and add the below code
Now you could see some errors highlighted in the html don’t worry will fix it in a minute.
What we have done in the above code is we have shown the progress bar and inside the progress, we are showing the image with a condition if the song is being played show the music icon and if the song stops playing show the play icon
Then we have shown the question and its option in each button with a condition if the user clicks the button show the progress bar inside the button and disable the button.
Questions.components.ts
Now open the questions.components.ts file and replace the existing code with the below code
What we have done in the above code is we got the questions and options from the canvas component and once the page loads we start the progress bar and set the progress bar with a max of 20 seconds once the loader stops we will change the isAudioPlaying to false.
When the user clicks the play button we will call the repeatSong event emitter which will call the repeatSong in Canvas component which will call the cloud function to repeat the song
When the user clicks an option we will disable all the options as well as we will show the loader for the selected button like below

Now open questions.component.scss file and paste the below styles
Now open assets folder and copy the below images
Music — Click here to download the image
PlayButton — Click here to download the image
Now open canvas.component.html file and replace the existing code with the below code
In the above code, we have called the questions component and passed the current question with the options to be displayed. We have added condition whether to show the questions page or not
Now open canvas.component.ts file replace the existing code with the below code
In the above code, we have added the questions scene where we set the showQuestions flag to be true, as well as handled the nextQuestion as well as repeatSong function.
In the questionScene function, we have added zone.run(). With zone.run(...) we explicitly make code execute inside Angulars zone and change detection is run afterward. To know more about Angular Zones click here
Now save all the files and created the production build using the command
ng build --prod
4. Link Question page with Cloud Function
Now we will link the question page with the Cloud Function.
Open cloud function directory and install lodash library like below
npm i lodash
Now open the data directory and create the below files
hindiquestions.js
malayalamQuestions.js
tamilQuestions.js
Once the files are created add the questions like the below structure
Make sure the audio format is in .ogg format and the audio length should not exceed more than 20 seconds. If you are adding new artist name or movie name then go to your Dialogflow and select the entities and add the names in key-value pair
Now open index.js file and replace the existing code with the below code
What we have done in the above code is we have created the music_category intent and when the user clicks a category we will pass the selected category to the storeQuestionDetails function where we would store the selected category, questionID, questionCount, and score.
In the repeat_song intent, we will get the currently played audio and question from the storage and pass it to the storeQuestionDetails function
Now save the index.js file and deploy both the cloud function and HTML files using the below command in the root directory
firebase deploy
Once the deployment is completed you could see the questions section like below
5. Create Score page in Angular
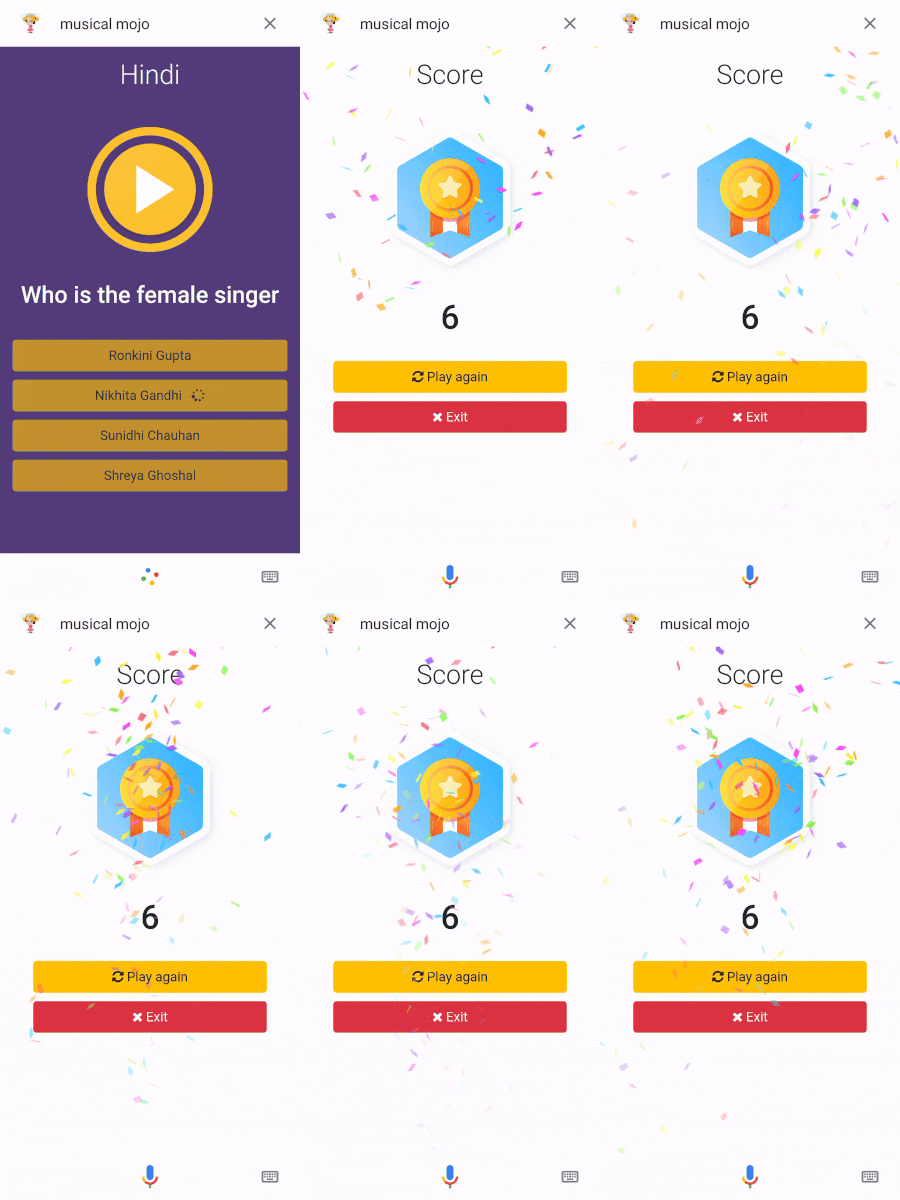
When the user gave a wrong answer we will calculate the score of the user and display the score as well as based on the score we will show the medals. The score page which we are going to develop will be like the below one

If you notice the above score page we have shown confetti animation as well as the animated score for that we have installed the following plugins.
Canvas Confetti — Click here to view the demo
Ngx-Countup — Click here to view the demo
RxJs Pausable — RxJS pipable operator to pause and resume streams
Now open the musical-mojo angular project and install the confetti and count up plugins like below
npm i canvas-confetti
npm i ngx-countup
npm i rxjs-pausable
Once the plugins are installed open app.module.ts file and replace the existing codes with the below codes
What we have done in the above code is we have imported the CountUpModule and BrowserAnimationsModules.
Now open src->app and then create a new component named score like below
ng g c score
score.component.html
Once the component is created open score.component.html file and replace the existing codes with the below codes
What we have done in the above code is we have added an image view that shows the medal and an h1 tag to show the score with a count up animation and a play again, exit button.
score.component.ts
Now open score.component.ts file and replace the existing codes with the below code
What we have done in the above code is we got the score as an input from the canvas component and based on the score we have set the image in imageurl and when the user clicks the playagain or exit button we are passing it to the canvas component.
Now create a new folder named score in assets directory and copy the images from here
score.component.scss
Now open score.component.scss file and paste the below styles
We have the styles for the shimmer effect for the image loading
canvas.component.html
Now open canvas.component.html file and replace the existing codes with the below code
What we have done in the above code is we have added the score component and pass the values to score component as well as received the event clicks
canvas.component.ts
Now open canvas.component.ts file and replace the existing codes with the below code
What we have done in the above code is we have added the score scene which we will receive from the cloud functions and based on the score we are enabling the confetti animation
Now save all the files and created the production build using the command
ng build --prod
6. Link Score page with Cloud Function
Now we will link the score page which we have created in Angular with the cloud function
Inside the prompts, directory create a new file named scoreAudio.js and add the below
Now open index.js file replace the existing codes and add the below code
In the above code we have imported the scoreAudio as well as created the answer intent.
In the answer intent, we check the user given answer with the answer which is stored in the questions using the questionsID.Based on the score we have shown the message.
Now save the index.js file and deploy both the cloud function and HTML files using the below command from the root directory
firebase deploy
Once the deployment is completed you could see the score section like below
Source: Nidhinkumar
7. Add functionality for Play again and Exit options
Suppose if the user wants to play the game again once the score is shown. It can be handled by clicking the play-again button from the score page which we have handled earlier. Now we will handle the intent in Cloud function like below
What we have done in the above code is when the user clicks the play-again button we will store the category in which the user was playing and then we will re-initialize all the stored data using clearStorage() and then a new question will be asked from the storeQuestionDetails()
8. Handle about intent
We have handled most of the core functionalities for the musical mojo action but if a new user visits your action and doesn’t know what your action is doing and if they want to know what your action is going to do.
It is a good practice to add an about intent stating what your action will do
In the above code, you could notice the last line conv.ask(new HtmlResponse()) The reason for having the HtmlResponse in the about intent is suppose if the user asks what the action does in between the gameplay it will trigger the about intent but the HTML view which was shown will get disappeared like below.
To handle it we have used the HtmlResponse:)
9. Handle fallback and random category intent
Similarly, we will handle the fallback and random category intent that is if the user asks for a language which is not available in the action it should be handled like below
10. Test the action
We have covered all the intents and now if you test your action you will see the output like below
You can even make this action better by adding numbers for the options where the user can say the number instead of clicking the action. You can open up your imagination door and start doing experiments:)
Reference Links
Feel free to grab the code :)
Congratulations!
You have learned how to create an Interactive Canvas action using Angular in Google Assistant. I am excited to see what you are going to build with Interactive canvas. Until then Happy Learning :)
Subscribe to my newsletter
Read articles from nidhinkumar directly inside your inbox. Subscribe to the newsletter, and don't miss out.
Written by
