Google Assistant — Interactive Canvas
 nidhinkumar
Overview
Google Assistant is a personal voice assistant that offers a host of actions and integrations. From sending texts and setting reminders, to ordering coffee and playing music, the 1 million+ actions available suit a wide range of voice command needs.
Objectives
What is an interactive canvas
How interactive canvas works
Create an action with interactive canvas
Let’s Begin
During I/O’19 Google announced an Assistant-based-framework called Interactive canvas which will allow developers to build full-screen apps (or Actions) on smart displays that bring together touchscreen inputs, voice and visuals. For the time being, games are the only type of Actions they can create for smart displays using Canvas, with more categories coming soon.
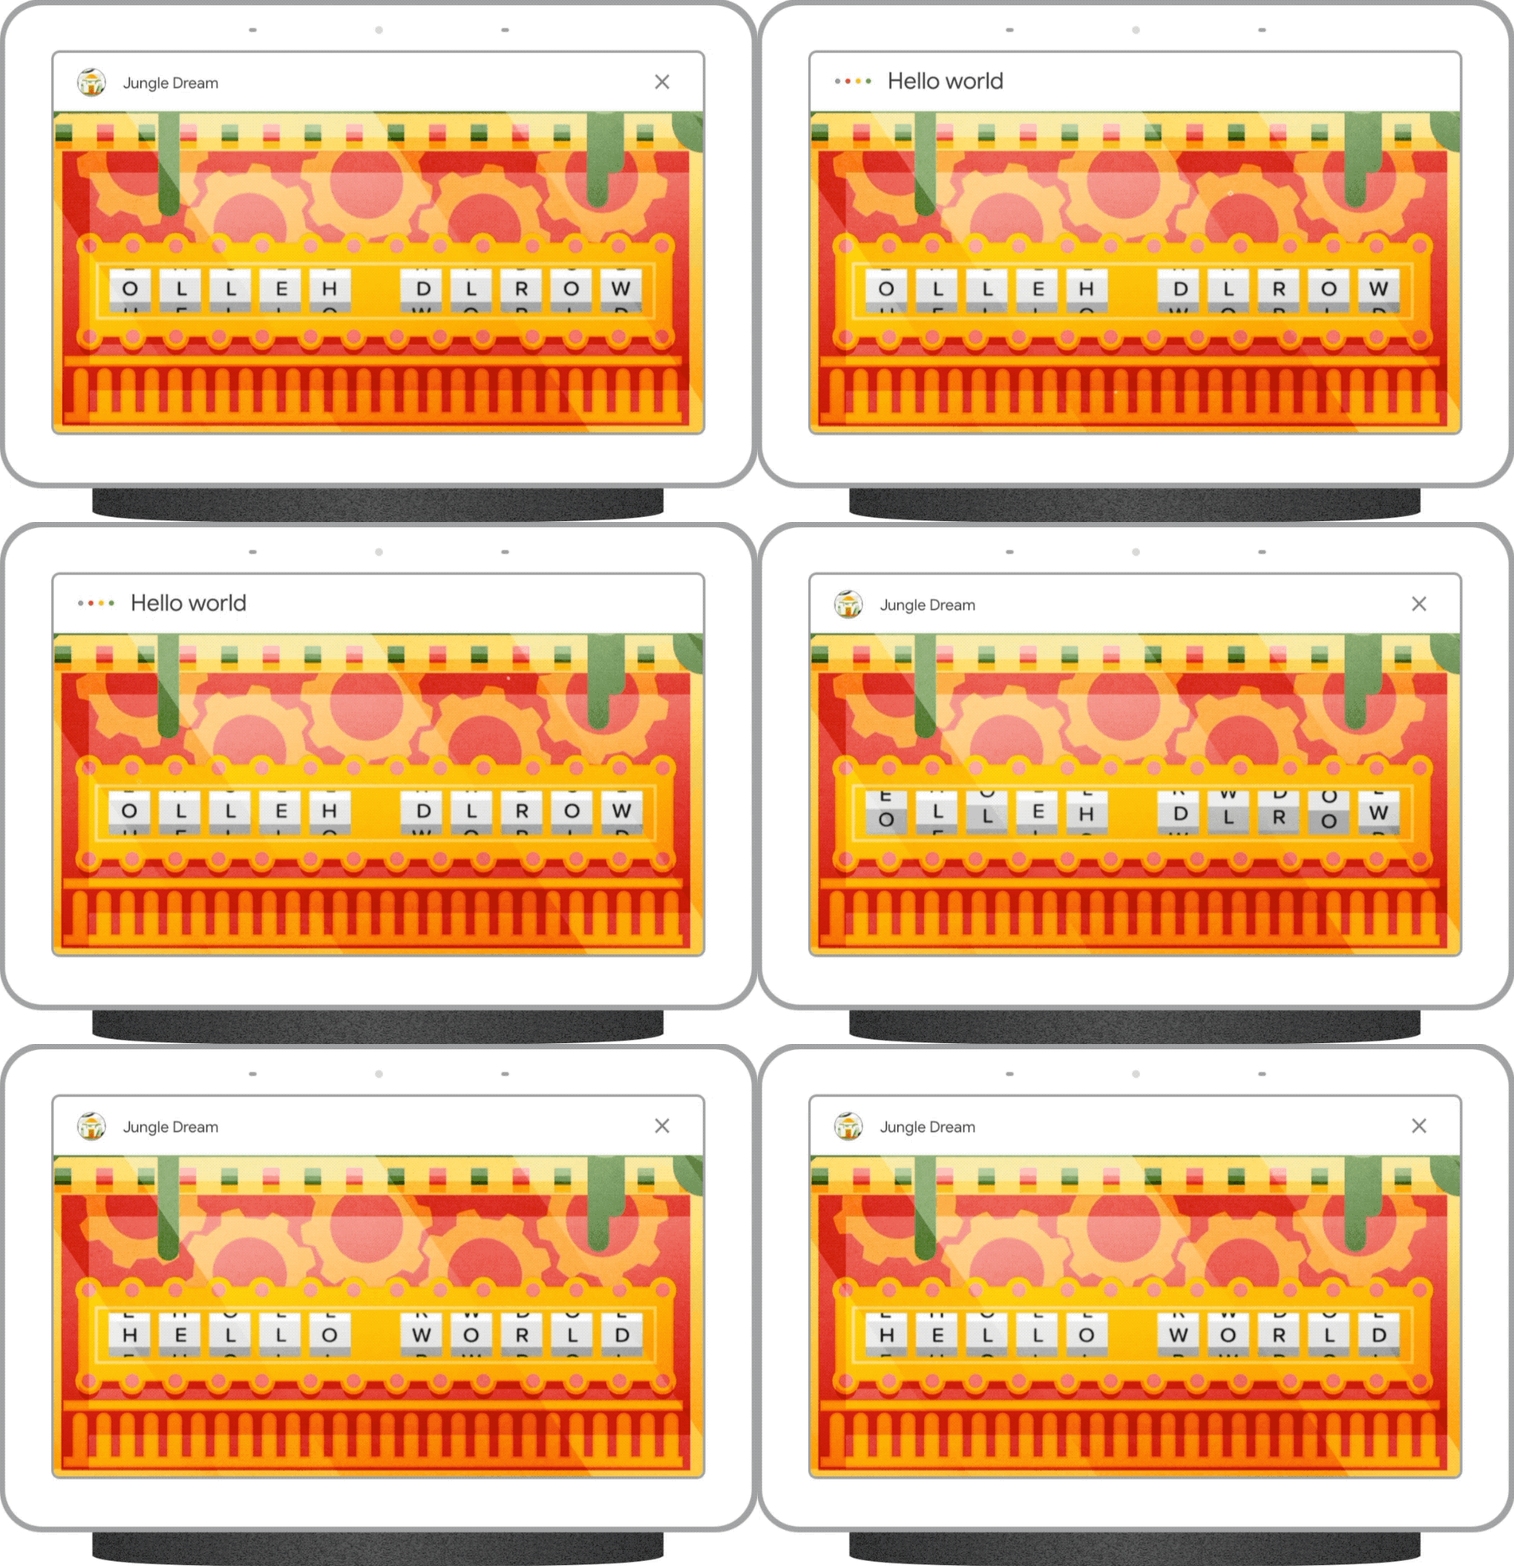
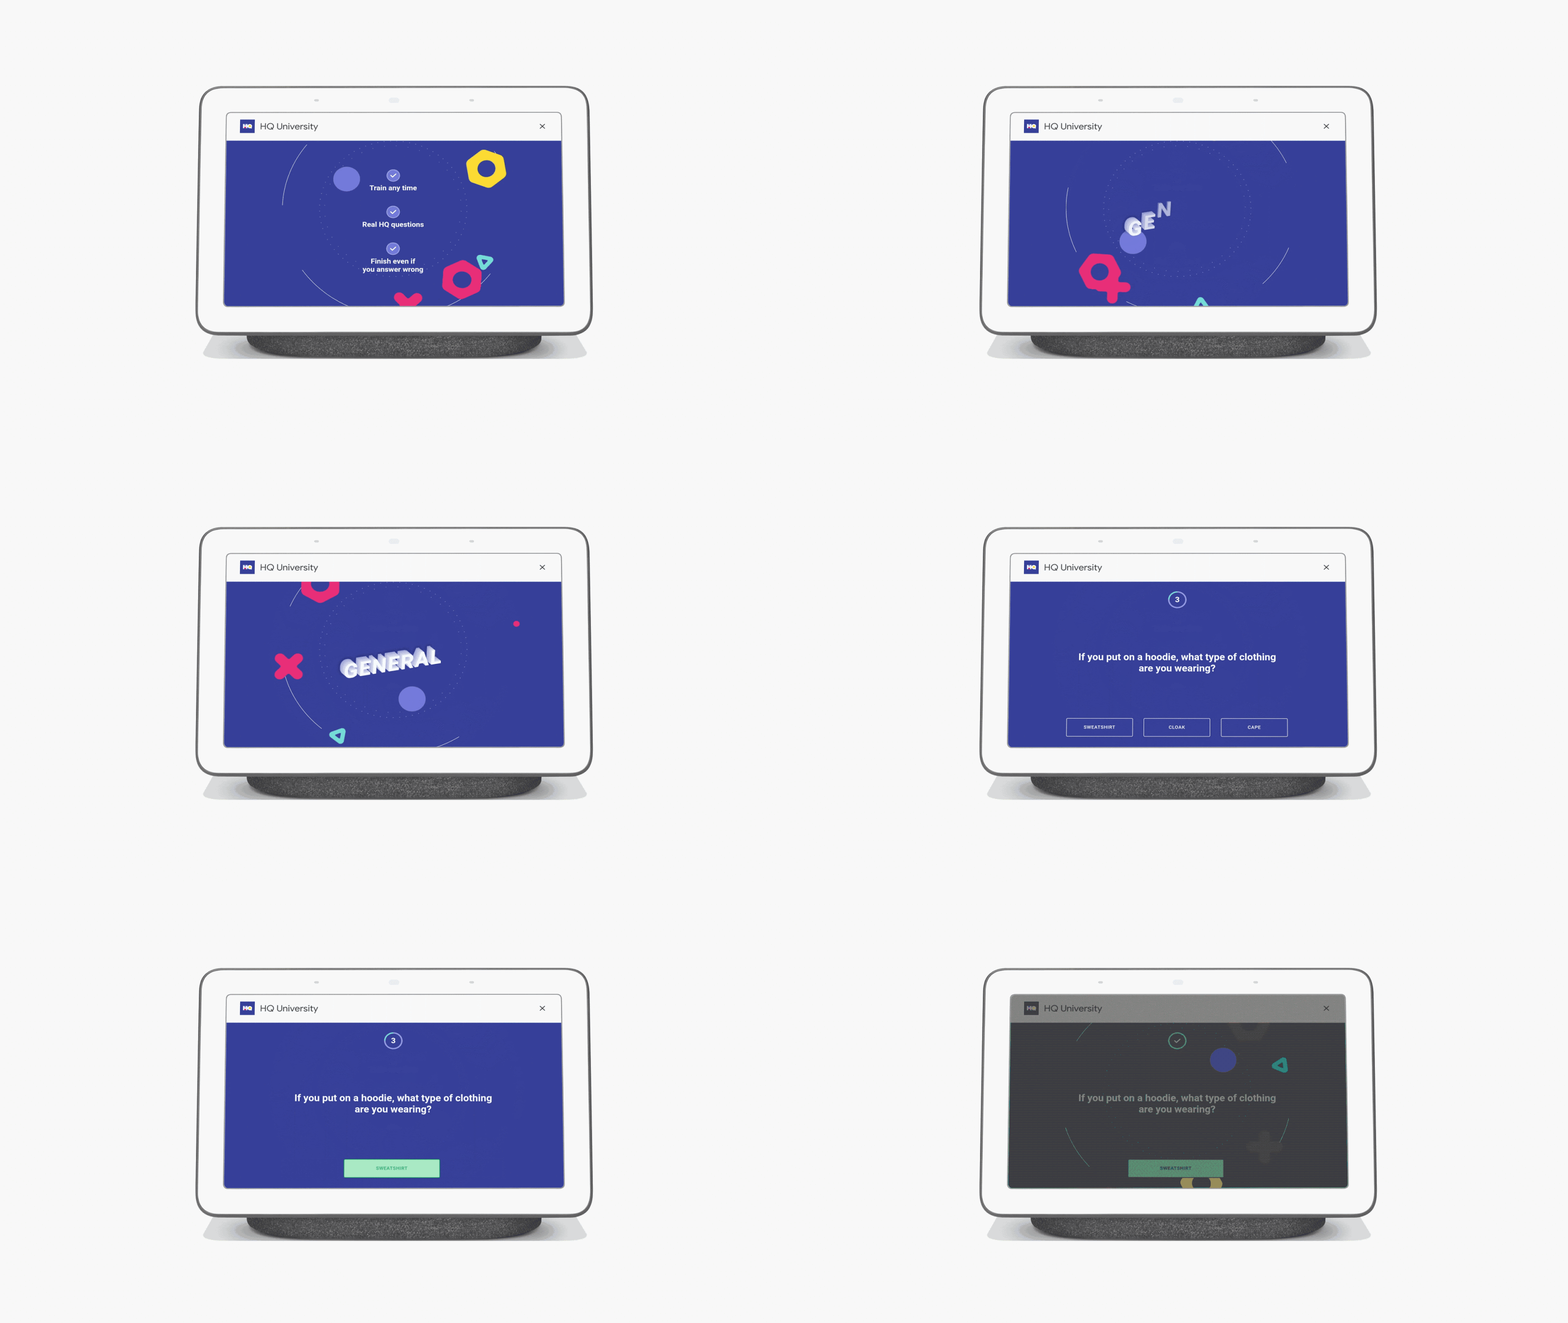
HQ University (a version of HQ Trivia that was already available through Assistant) was given as an example of the type of game you’ll be able to play, along with Jungle Dream, an interactive word game. You probably shouldn’t expect AAA blockbuster games here, as Canvas uses open web technologies such as HTML, CSS and Javascript, so these Actions seem likely to be akin to web apps. However, it certainly seems you’ll have more options for things to do with your Nest display in the not-too-distant future.
Source: Google I/O’19
What is an interactive canvas
Interactive Canvas is a framework built on the Google Assistant that allows developers to add a visual, immersive experience to conversational Actions. This visual layer is an interactive web app that is sent as a response to the user in conversation. Unlike traditional rich responses that exist in-line in the Assistant conversation, the Interactive Canvas web app renders as a full-screen web view.
You can use Interactive Canvas if you want to do any of the following in your Action:
Create full-screen visuals
Create custom animations and transitions
Do data visualization
Create custom layouts and GUIs
Implement video playback (videos are not yet fully supported, but may still play in Interactive Canvas)
How it works
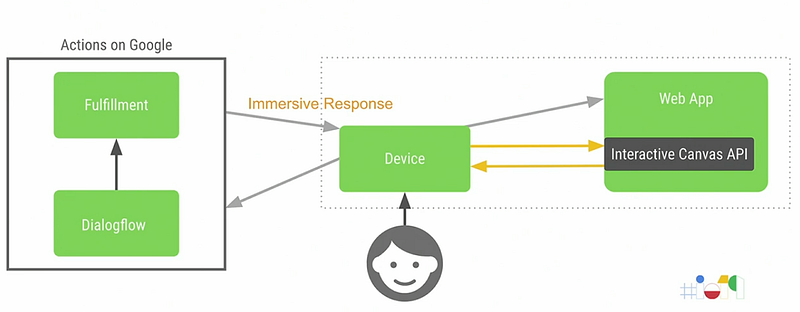
Interactive Canvas connects your conversational Action to an interactive web app so that your users can interact with your visual user interface through voice or touch. There are four components to an Action that uses Interactive Canvas
Custom Conversational Action
Web app
Assistant Canvas
ImmersiveResponse
Custom Conversational Action
An Action that uses a conversational interface to fulfill user requests. Actions that use Interactive Canvas operate in the same fundamental way as any conversational Action, but use immersive web views ([ImmersiveResponse](https://developers.google.com/actions/interactivecanvas/reference/immersiveresponse)) to render responses instead of rich cards or simple text and voice responses.
Web app
A front-end web app with customized visuals that your Action sends as a response to users during a conversation. You build a web app with web standards like HTML, JavaScript, and CSS. assistantCanvas lets your web app communicate with your Conversational Action.
Assistant Canvas
JavaScript API that you include in the web app to enable communication between the web app and your conversational Action.
Immersive Response
A response type that defines how the web app should render.
Source: Google I/O’19
The user talks to the device
User input is passed to actions on google.
Actions on Google then invokes the dialog flow
Dialog flow matches the intent based on the user phrase
It invokes the associated fulfillment which provides the immersive response
As part of the immersive response, a URL is provided along with the response
The device loads the associated web app from the URL
It also registers some callbacks from the Interactive Canvas API
Creating an Action in Interactive Canvas
Let’s start an action using an interactive canvas
Create an Actions project
Regardless of the Assistant application, you’re building, you will always have to create an Actions project so your app has an underlying organizational unit.
Open the Actions on Google Developer Console in a new tab. You should be looking at a clean Actions console that resembles the following (If you are a new user (:
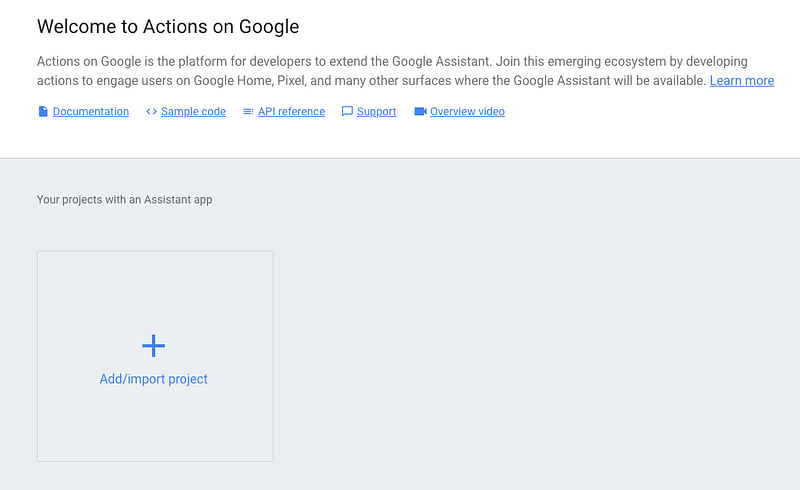
Click Add/import project and agree to Actions on Google’s terms of service when prompted.
Click into the Project Name field and Add the project name Interactive Canvas
Select Games/Fun
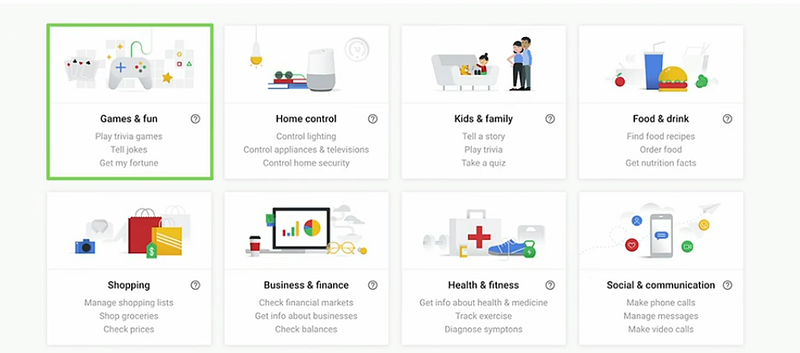
Source: Google I/O’19
Select Conversational

Source: Google I/O’19
Once Conversational is selected click Directory Information in Deploy and the app category is selected as Games&Fun once scrolled down you can see a new option
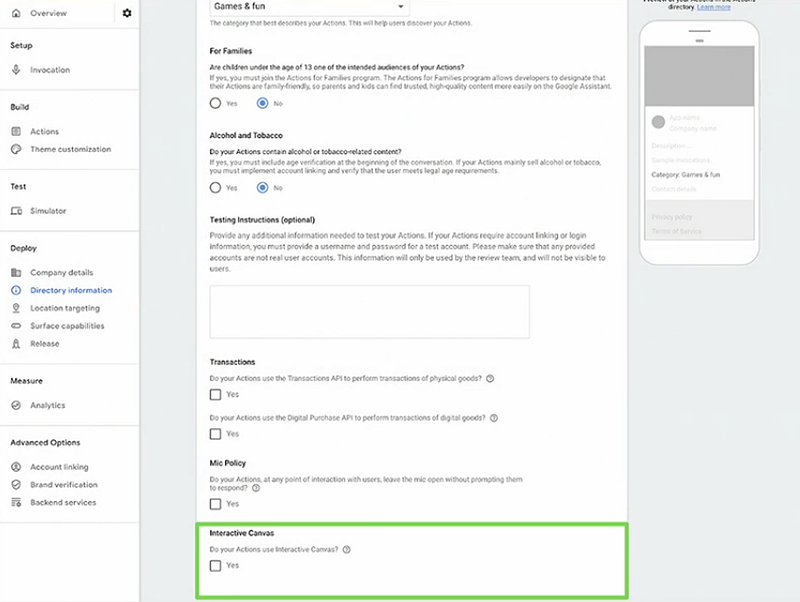
Source: Google I/O’19
Once the Checkbox is enabled. Click Actions in Build
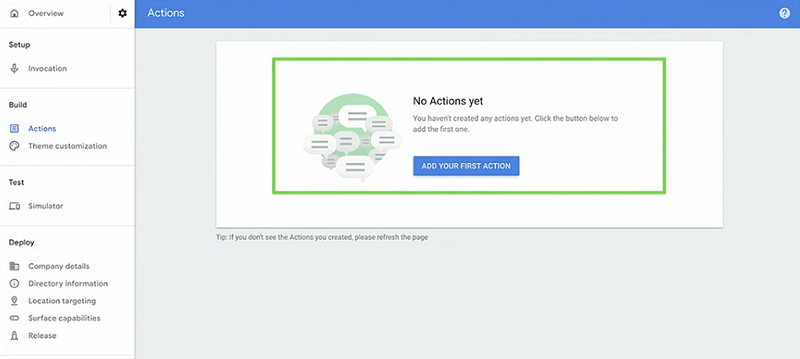
Source: Google I/O’19
Click ADD YOUR FIRST ACTION. A pop-up dialog will appear in that select PLAY GAME and Click GET STARTED IN DIALOG FLOW
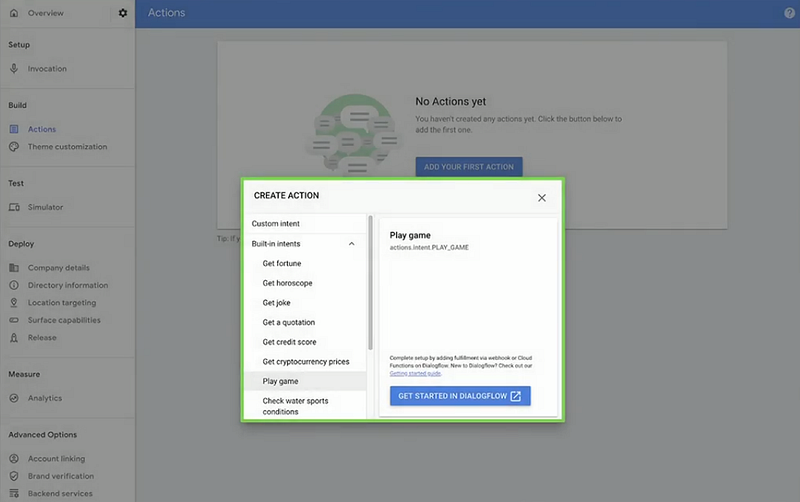
Source: Google I/O’19
Build better voice apps. Get more articles & interviews from voice technology experts at voicetechpodcast.com
This will take you to the Dialogflow console.
click Allow when Dialogflow prompts you for permission to access your Google Account.
When you land on the Dialogflow account settings page, check the box next to Yes, I have read and accept the agreement and click Accept. You will now be brought to a Dialogflow agent creation page. Click CREATE
You can see the default intents like below
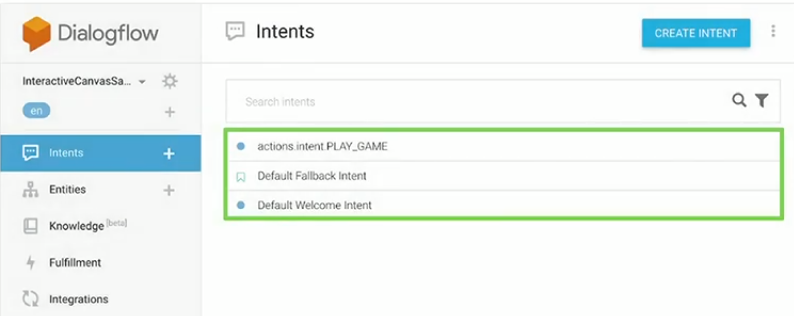
Source: Google I/O’19
once you click actions.intent.PLAY_GAME you can see the events like below
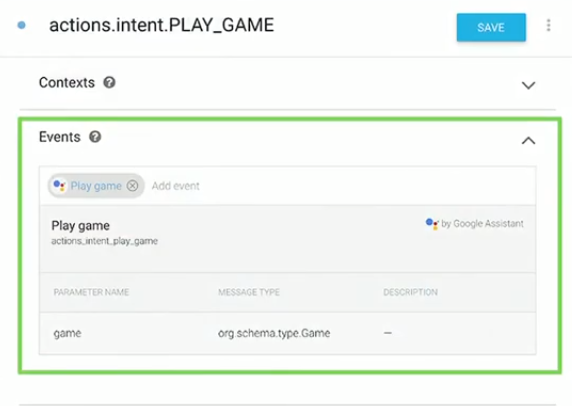
Source: Google I/O’19
Remove all the intents which is shown by default and create the below intents
color
fallback
instructions
pause
start
timer
welcome
select color intent and add the training phrases like below
set tint to blue
change color to red
change the triangle’s color to green
green
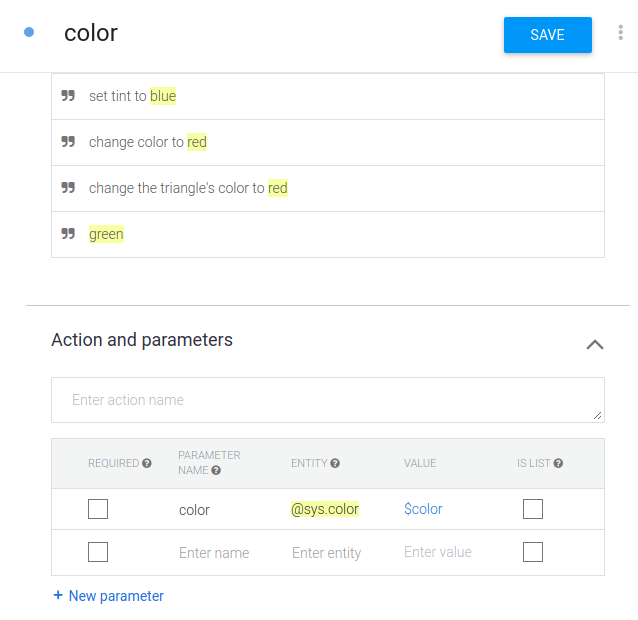
Under fulfillment, section enable webhook for the intent and click SAVE
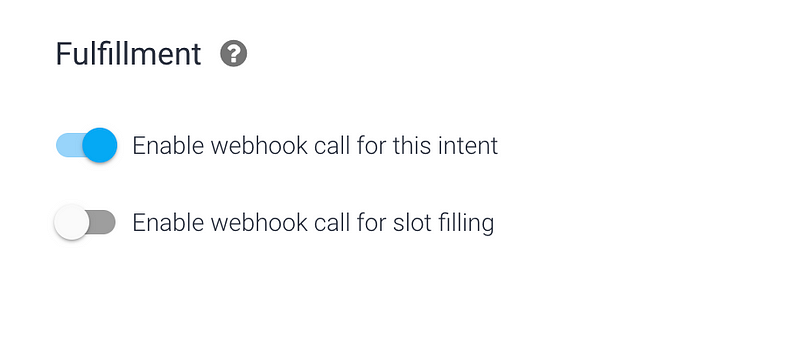
Select pause intent and add the below Training Phrase
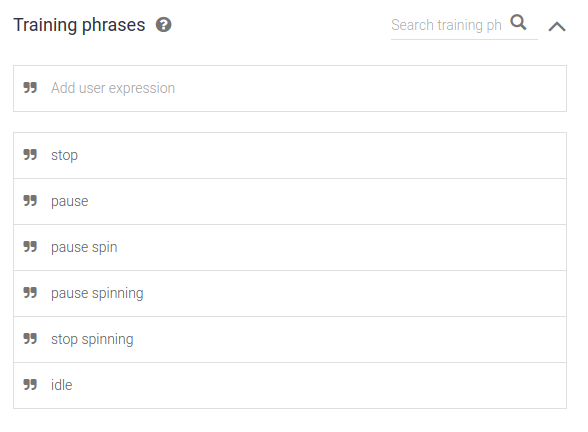
Under fulfillment, section enable webhook for the intent and click SAVE
Select start intent and add the below Training Phrase
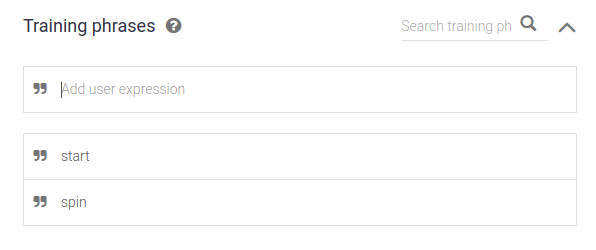
Under fulfillment, section enable webhook for the intent and click SAVE
Select timer intent and add the below Training Phrase
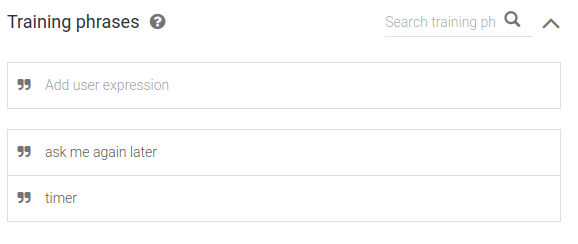
Select Response in timer intent and add the below code in default response
Under fulfillment, section enable webhook for the intent and click SAVE
For the rest of the intents click fulfillment and enable webhook and click SAVE
Backend Part
Create a firebase cloud function. If you are new to cloud function have a look at this post
In index.js add the below code
Replace package.json with the below code
Now we will create the html page
Create a folder named public and then create files/folders like below
css (folder)
js(folder)
index.html(file)
triangle.svg(svg file)
or you can grab the code from this repository
You deploy your codes and get the webhook url and replace the url in dialogflow
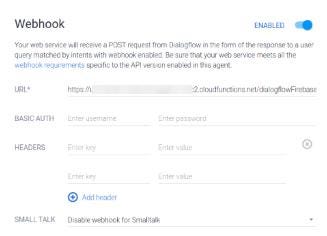
Scroll down to the bottom of the page and click Save in the lower right corner.
Now that your Cloud Function has been deployed and your webhook has been properly set up, you can preview the app in the Actions simulator.
Change your Google permission settings
In order to test the application that you built you need to enable the necessary permissions.
Open a new tab in your browser and visit the Activity Controls page. Sign in with your Google credentials if prompted.
Ensure that the following permissions are enabled by sliding the toggles and selecting TURN ON for the following cards:
Web & App Activity
Device Information
Voice & Audio Activity
Now close the Activity Controls page.
Test the application with the Actions simulator
Return to the Actions console. Then from the left-hand menu, under the TEST header click Simulator. Your output will be like below
Congratulations!
You have learned what is interactive canvas, how it works as well as created a sample action using interactive canvas. It’s time to create more actions with interactive canvas. Good Luck!!!
References
Subscribe to my newsletter
Read articles from nidhinkumar directly inside your inbox. Subscribe to the newsletter, and don't miss out.
Written by
