A Step-by-Step Guide to Creating an AWS Free Tier Account and Launching Your First EC2 Instance ☁☁
 Avik Dutta

Introduction:
In the world of cloud computing, Amazon Web Services (AWS) is a leading provider that offers a wide range of services to businesses and individuals. The AWS Free Tier allows users to explore and use AWS services for free for a limited time, making it an excellent choice for those looking to get hands-on experience with cloud computing. In this blog post, we will walk you through the process of creating an AWS Free Tier account and launching your first Elastic Compute Cloud (EC2) instance.
Step 1: Sign Up for an AWS Account
1.1. Visit the AWS Free Tier webpage (https://aws.amazon.com/free/) and click on the "Create an AWS Account" button.
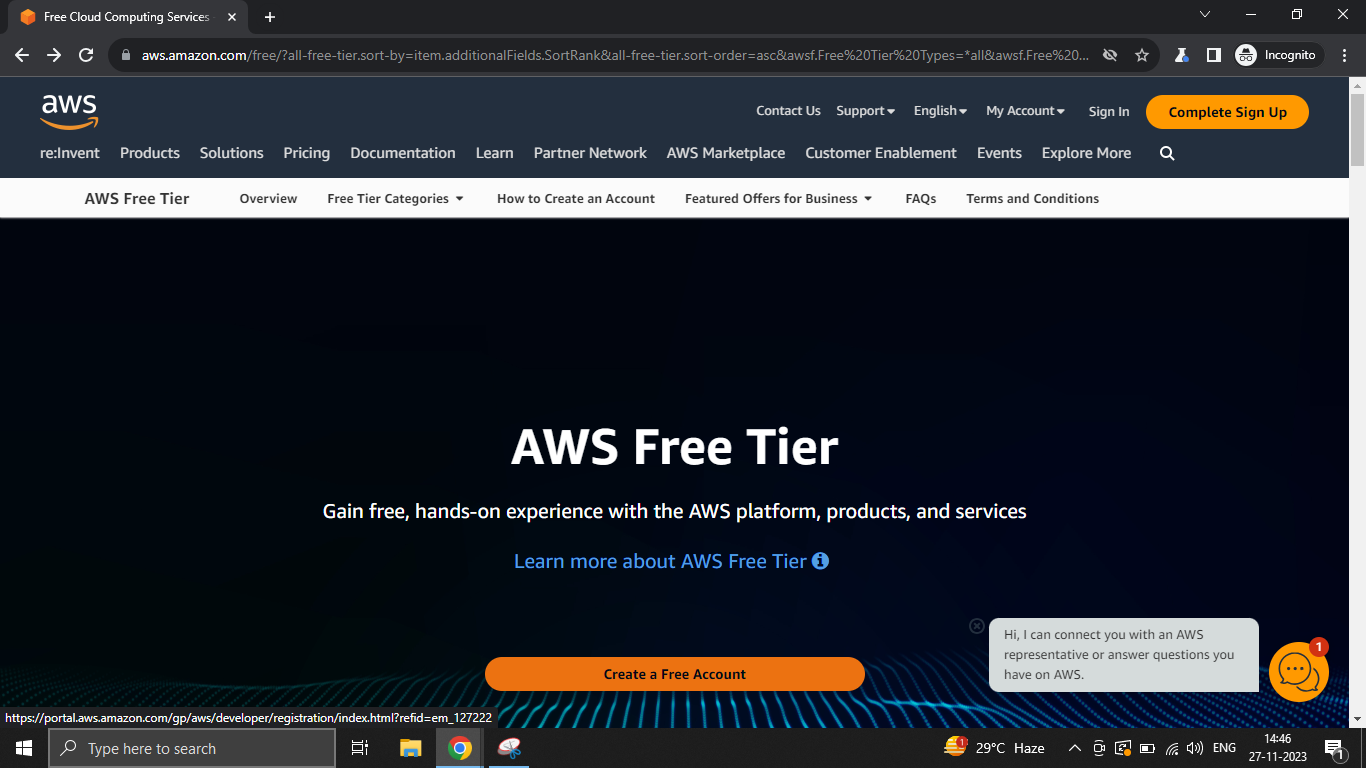
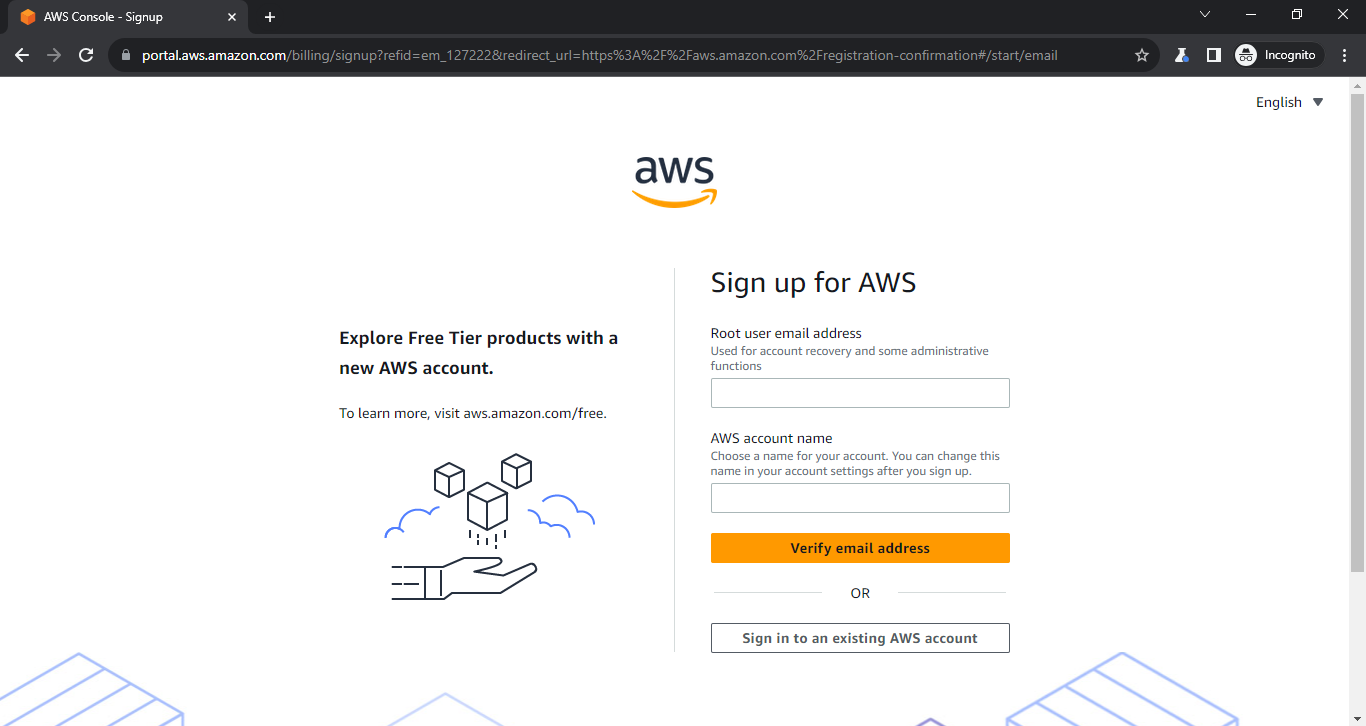
1.2. Follow the on-screen instructions to provide your email address, password, and account information.
1.3. Enter your payment information. While the Free Tier provides a limited amount of free usage each month, AWS requires a valid payment method to verify your identity.
Step 2: Navigate to the AWS Management Console
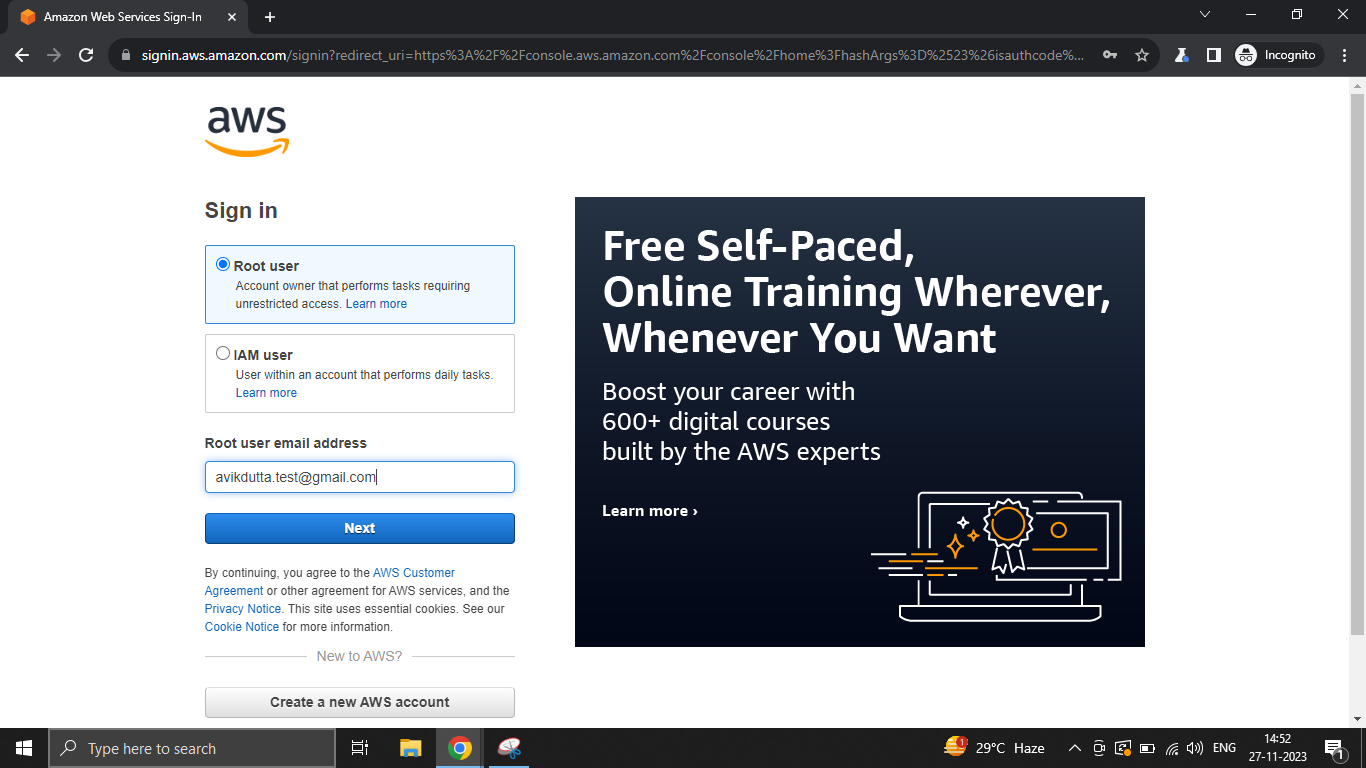
2.1. Once your account is set up, log in to the AWS Management Console (https://aws.amazon.com/console/).
2.2. Familiarize yourself with the AWS Management Console interface, where you'll be able to access and manage various AWS services.
Step 3: Access the EC2 Dashboard
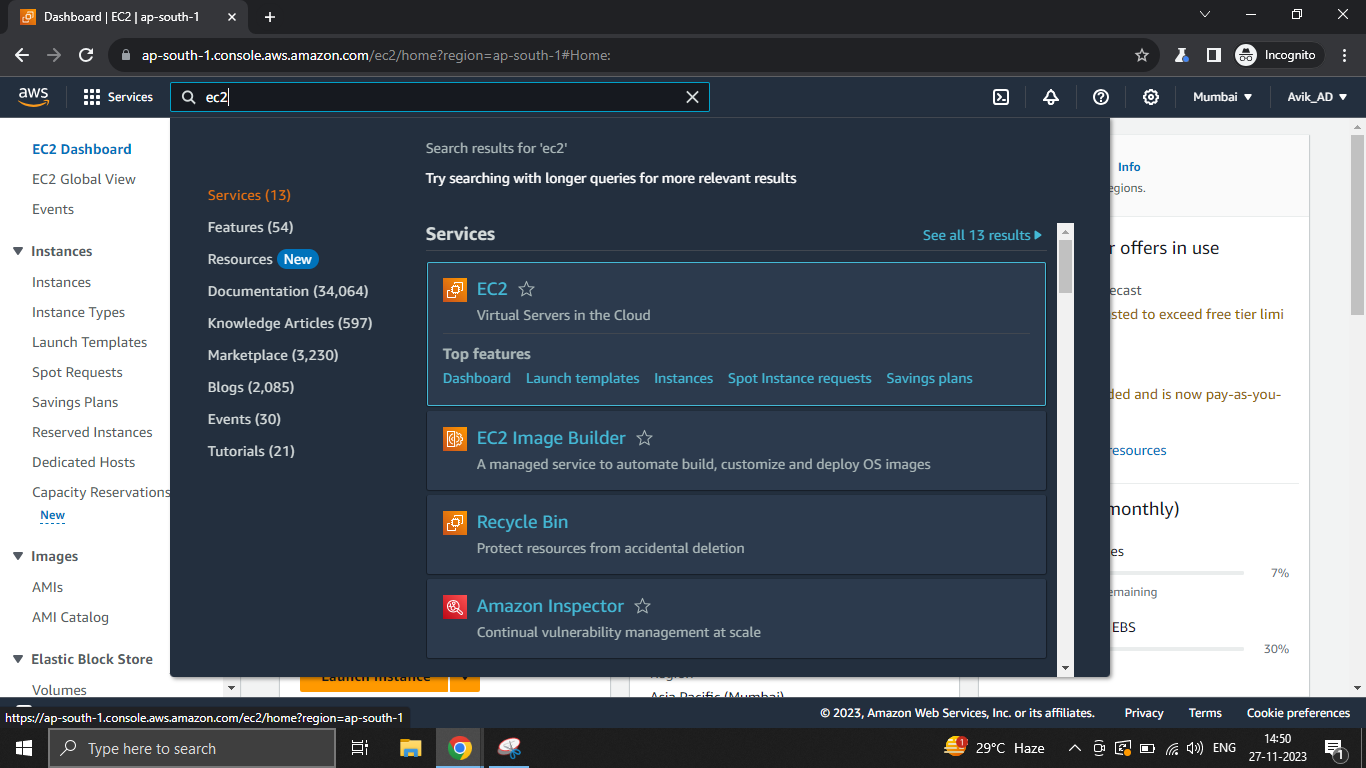
3.1. In the AWS Management Console, locate the "Services" dropdown and select "EC2" under the "Compute" section.
3.2. You'll be redirected to the EC2 Dashboard, where you can manage your virtual servers (EC2 instances).
Step 4: Launch an EC2 Instance
4.1. Click the "Launch Instance" button to begin the process of creating a new EC2 instance.
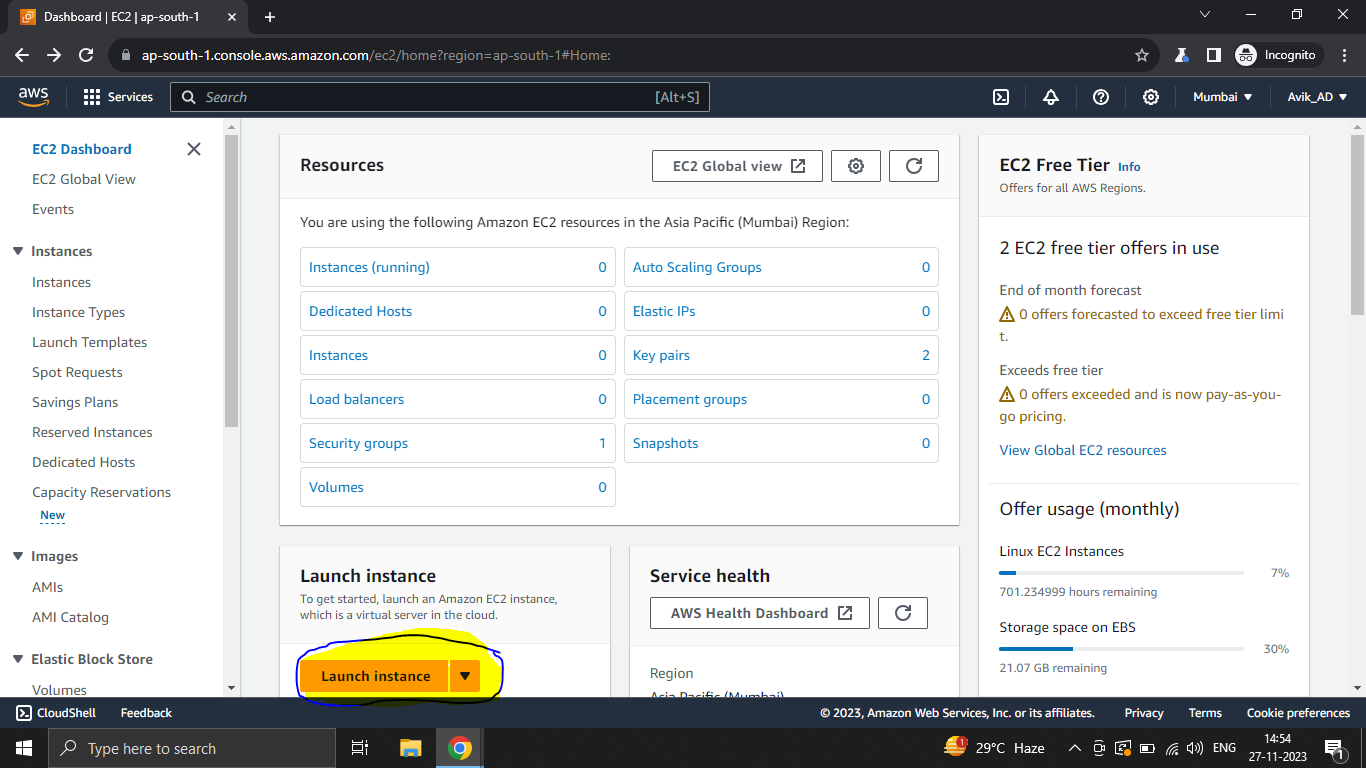
4.2. Give your EC2 instance name, for example:- test-vm
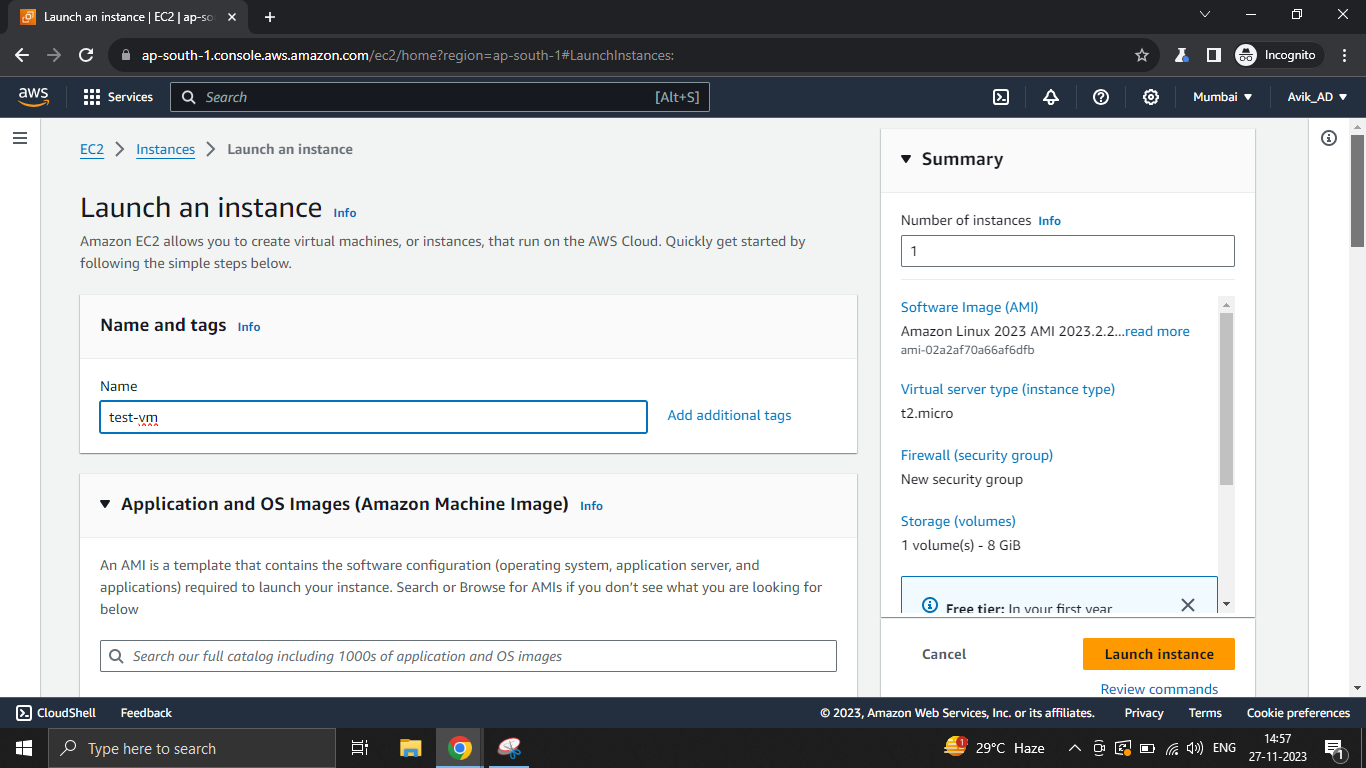
4.3. Select the operating system by scrolling down below in the same page. You can select Ubuntu, since we are going to learn Linux and run DevOps projects in Linux. (You can check-out my previous blogs for more details)
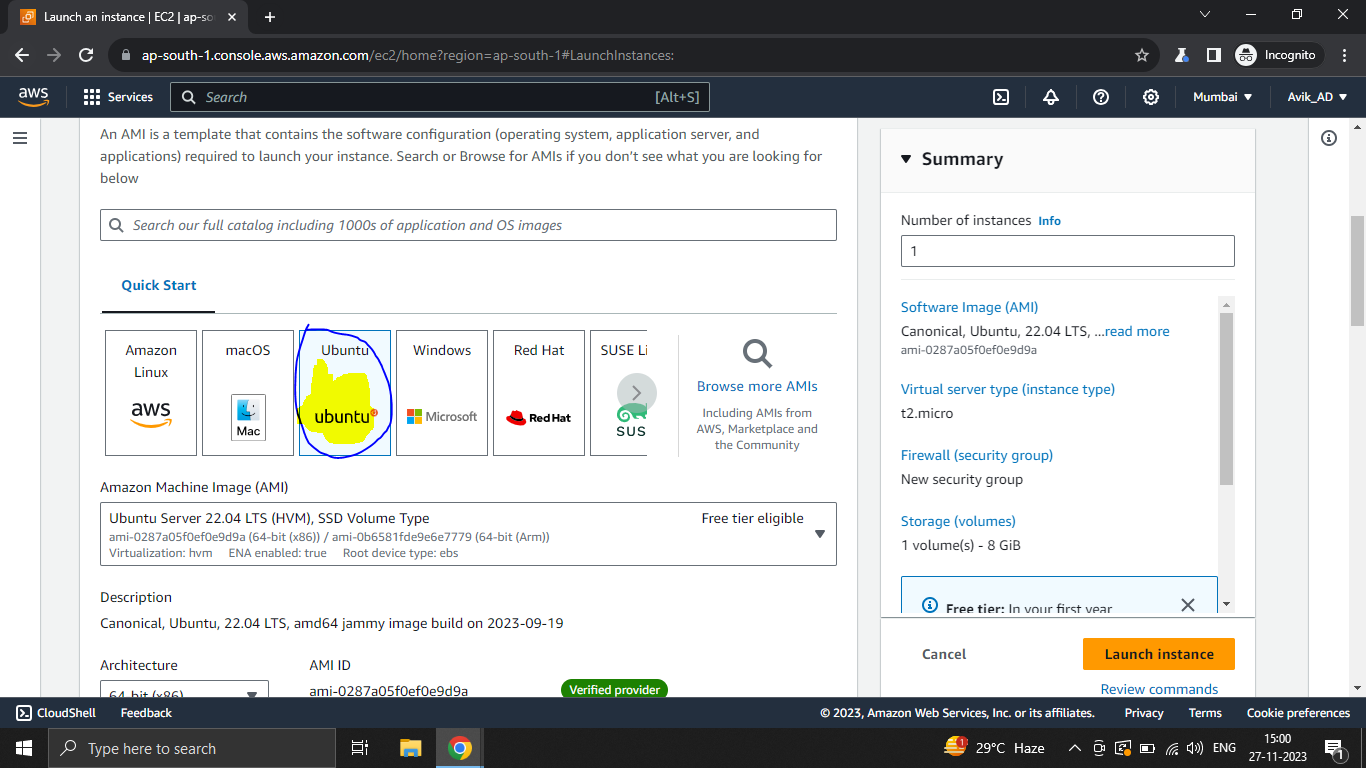
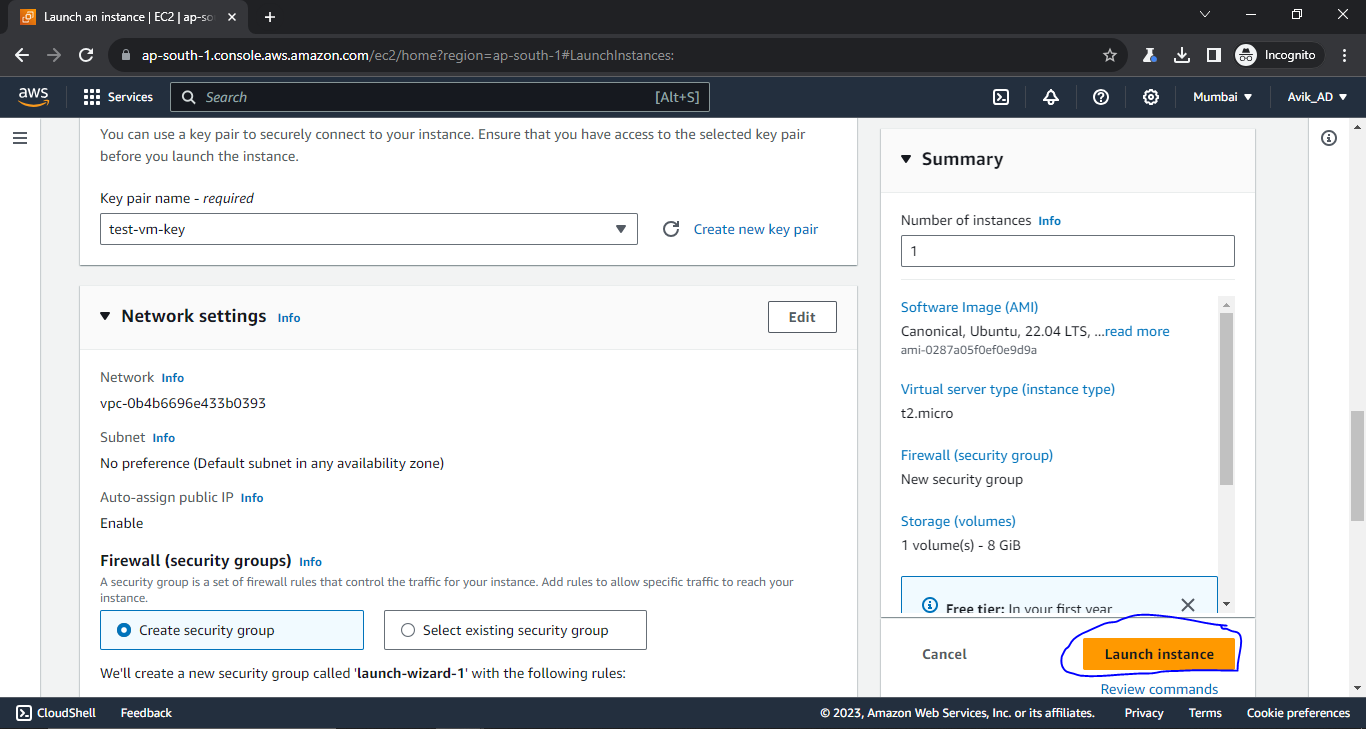
4.4. Select an instance type. For the Free Tier, choose a t2.micro instance, which is eligible for the free usage tier.
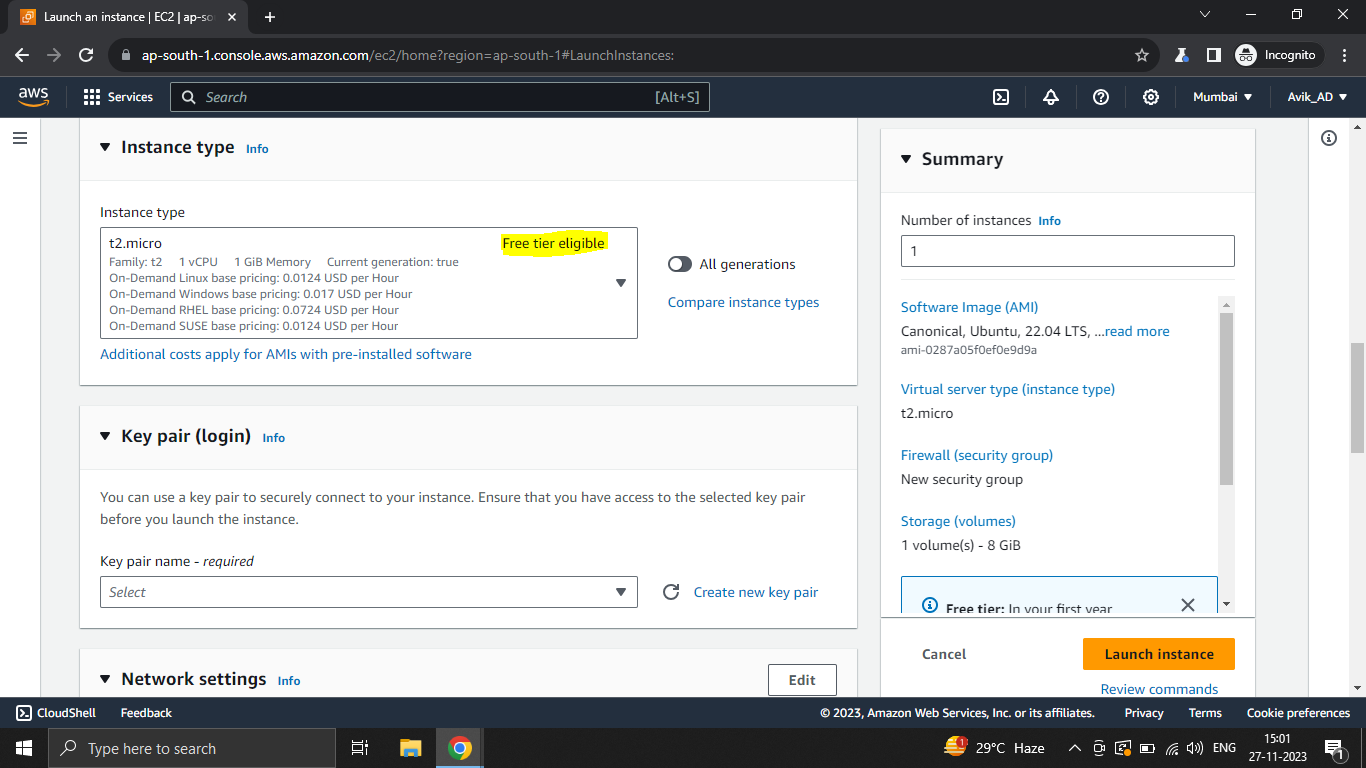
4.5. Create and Download a Key Pair
4.6. Create a new key pair to securely connect to your instance. Give a name of you key pair.
4.7. Download the private key file (.pem) if you are using Mac, as you'll need it to connect to your EC2 instance. If you are using Windows Laptop/Desktop you need to select .ppk. (ensure you have putty installed in your personal laptop/desktop)
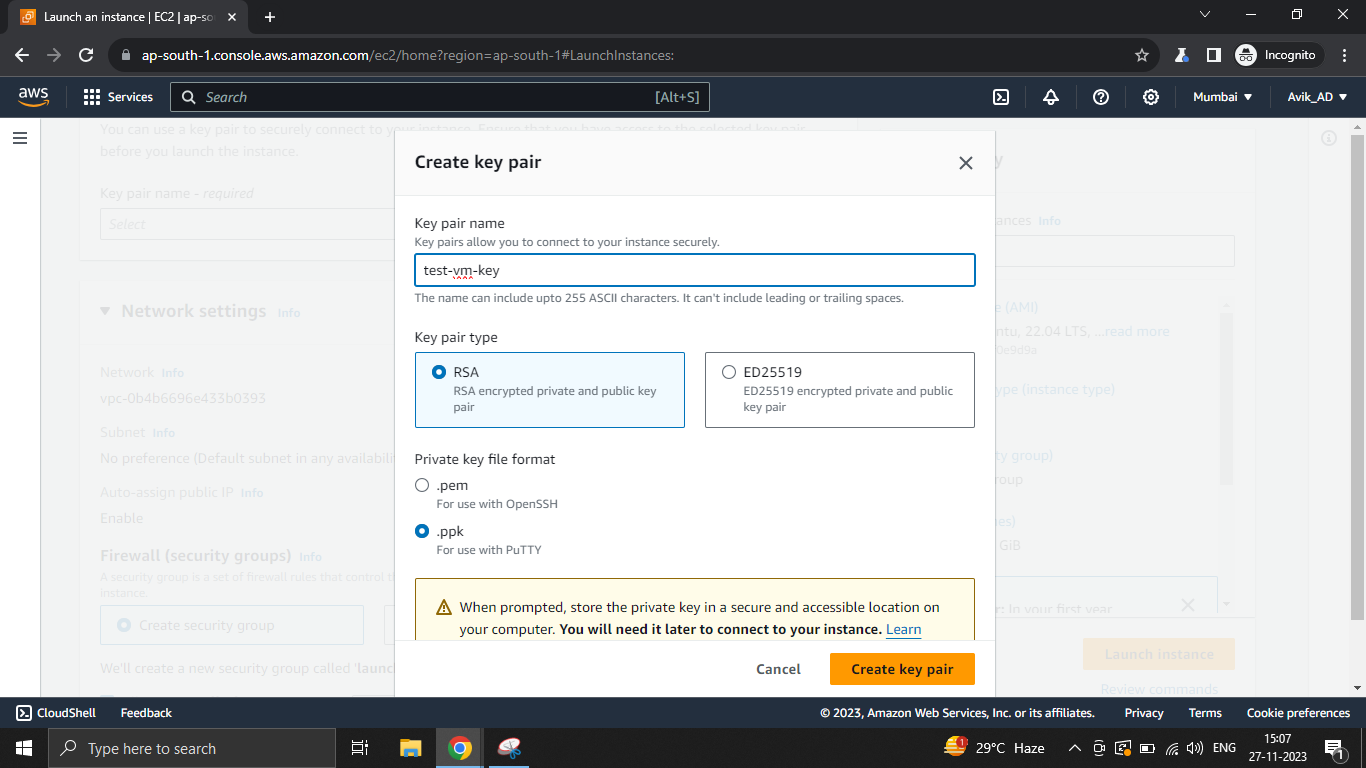
4.8. Review your settings and click "Launch." Leave other fields as it is.
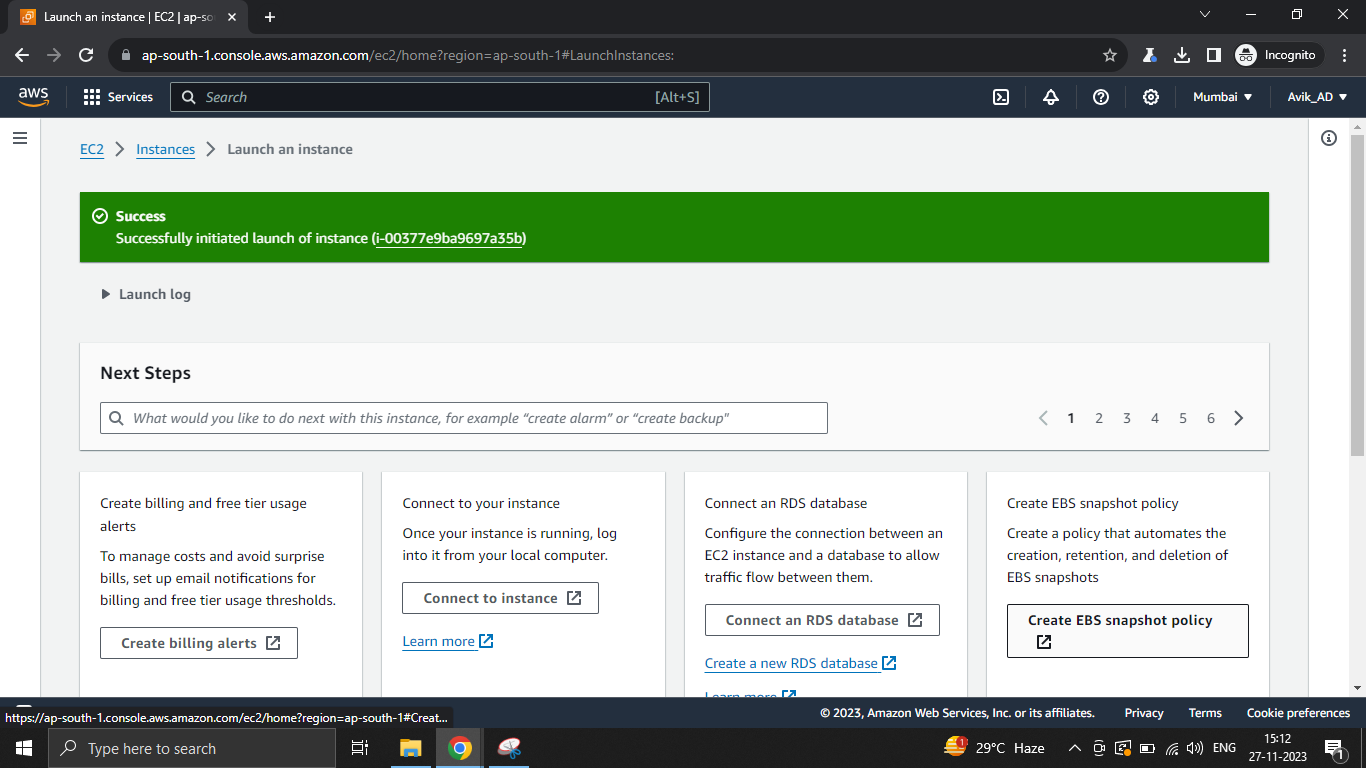
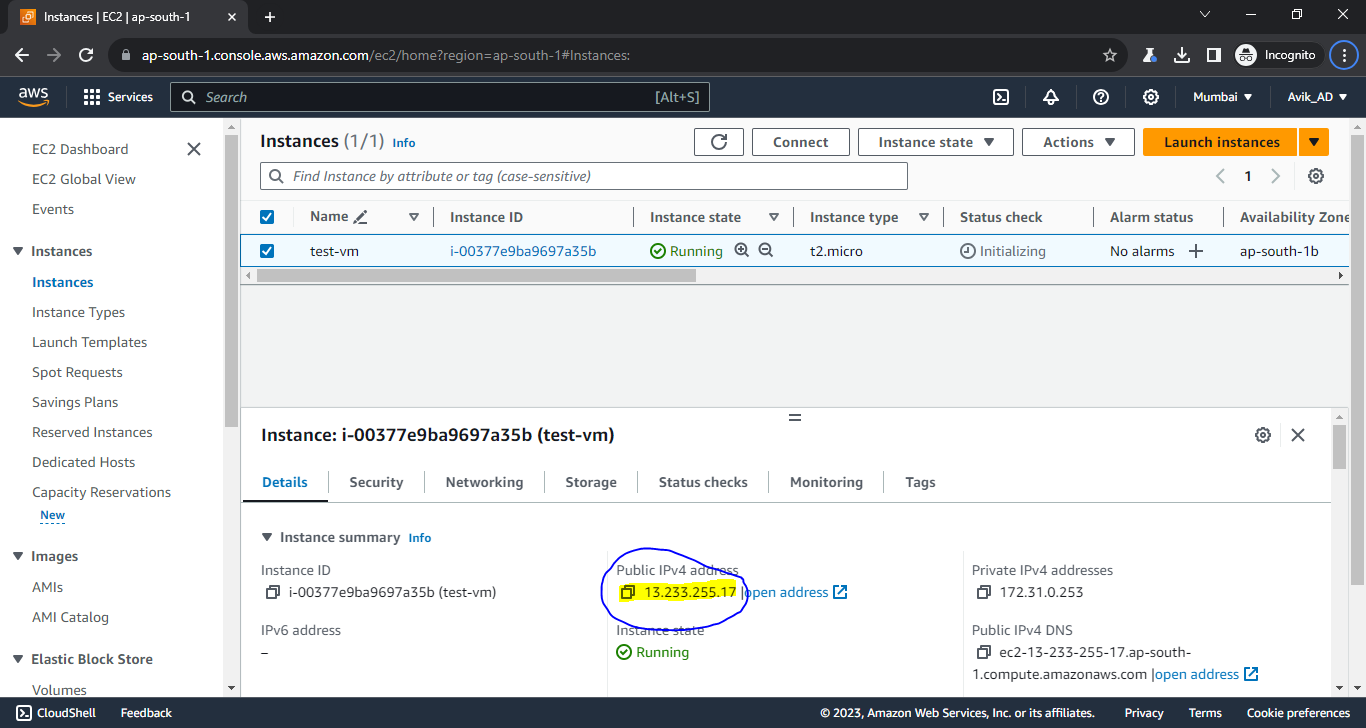
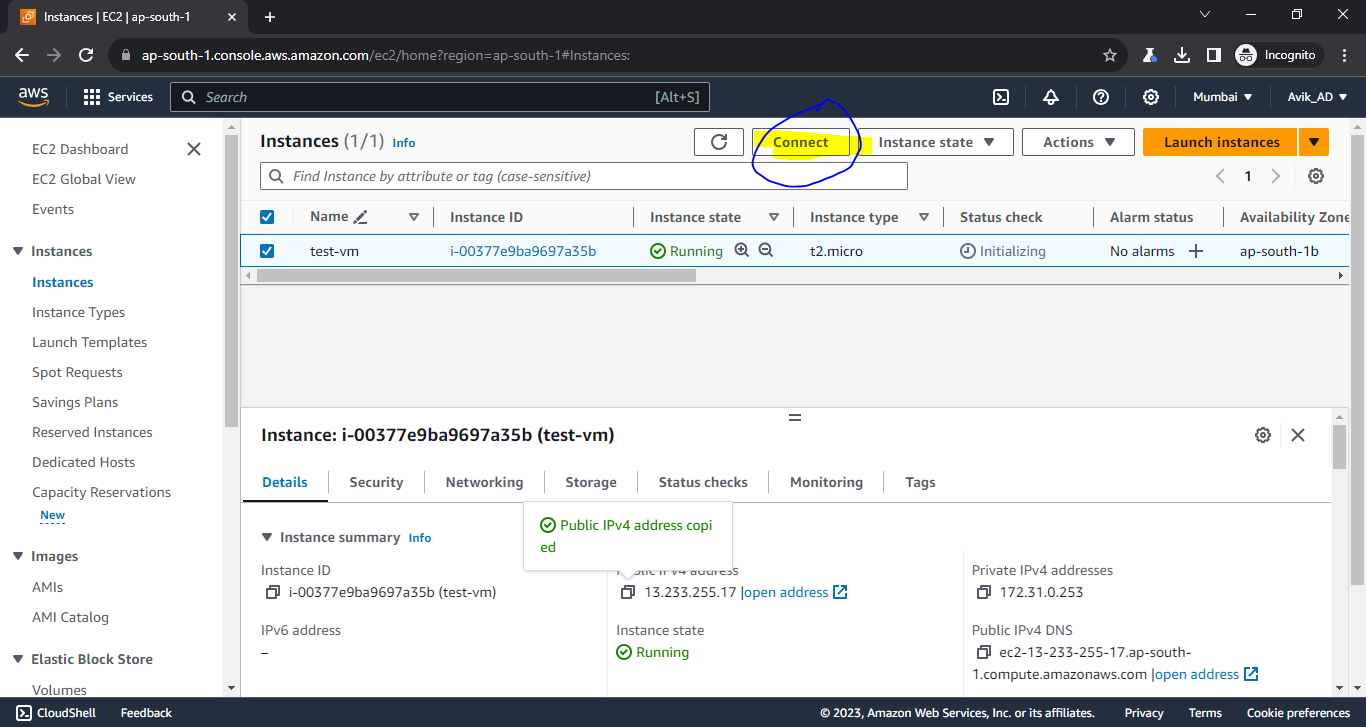
4.9. Once your instance is running, select it in the EC2 Dashboard. And copy the public IP of your instance.
5.0. Open Putty application in your laptop and paste the IP you copied.
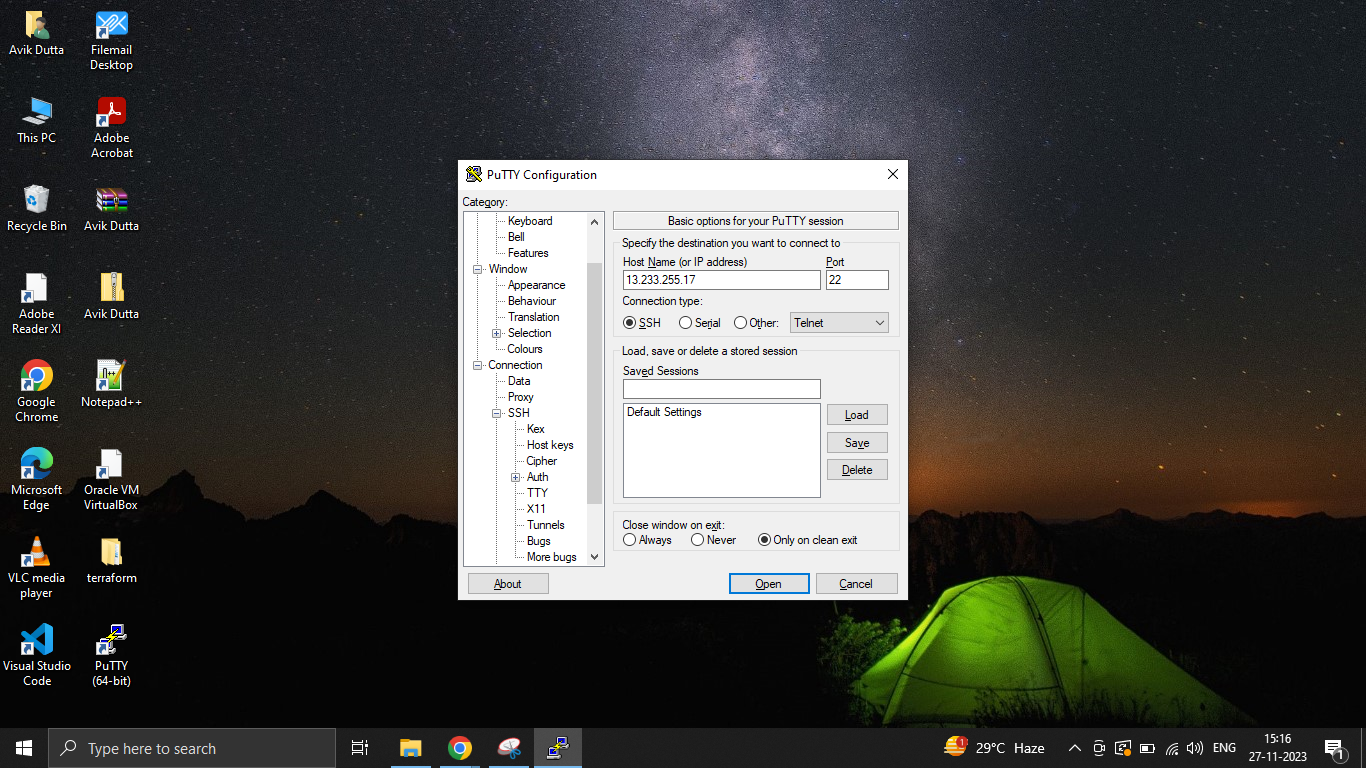
5.1. In the left side expand SSH then expand Auth and select Credentials to authenticate with
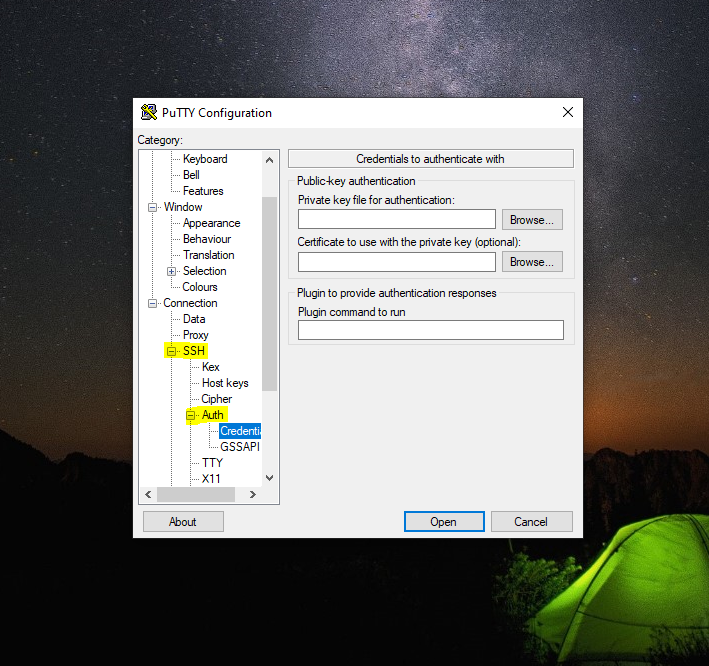
5.2. Browse the Private key which you downloaded while creating the key pair in step 4.7.
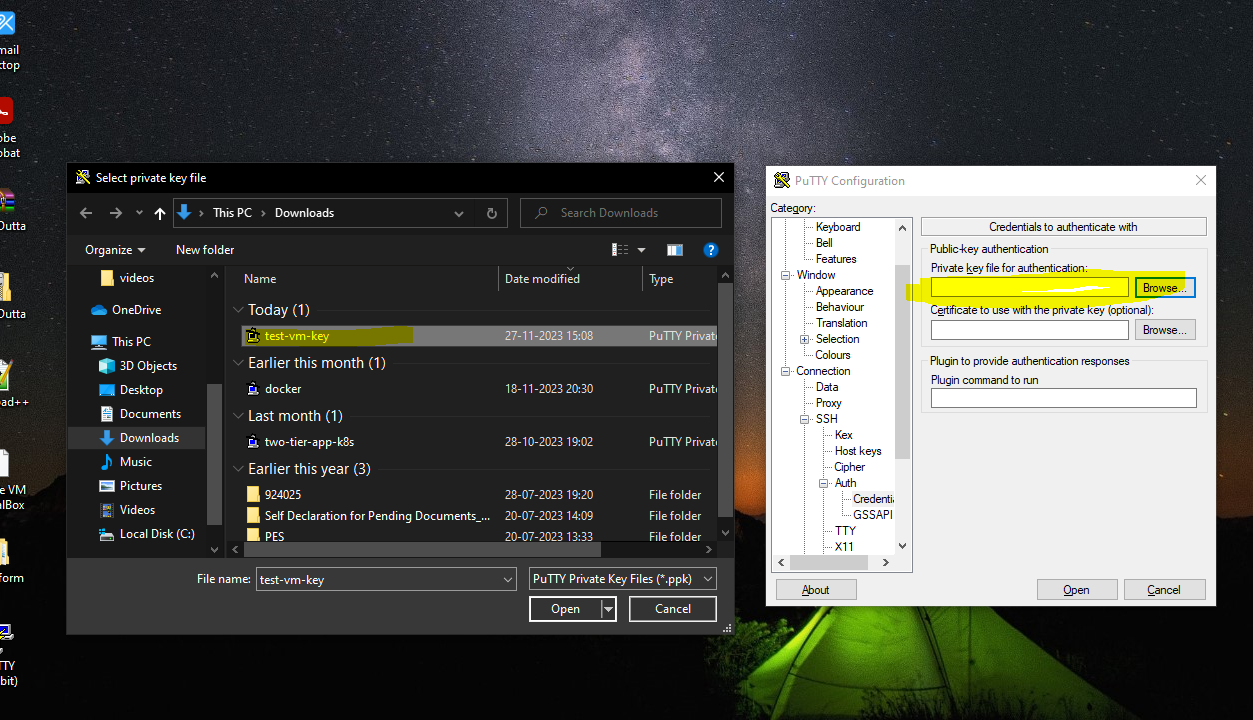
5.3 Click on Open then Accept
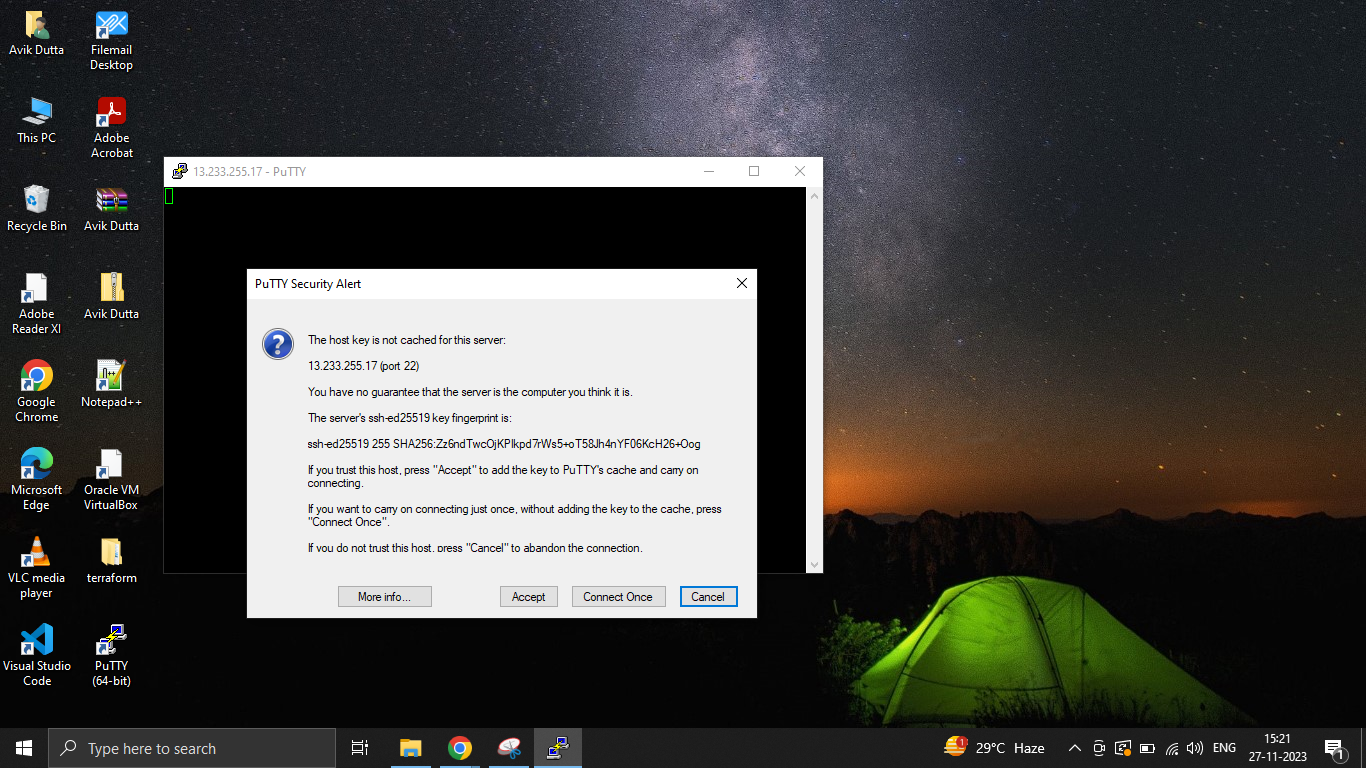
5.4. Give the user name for your Ubuntu EC2 instance (test-vm) as unbuntu and hit enter
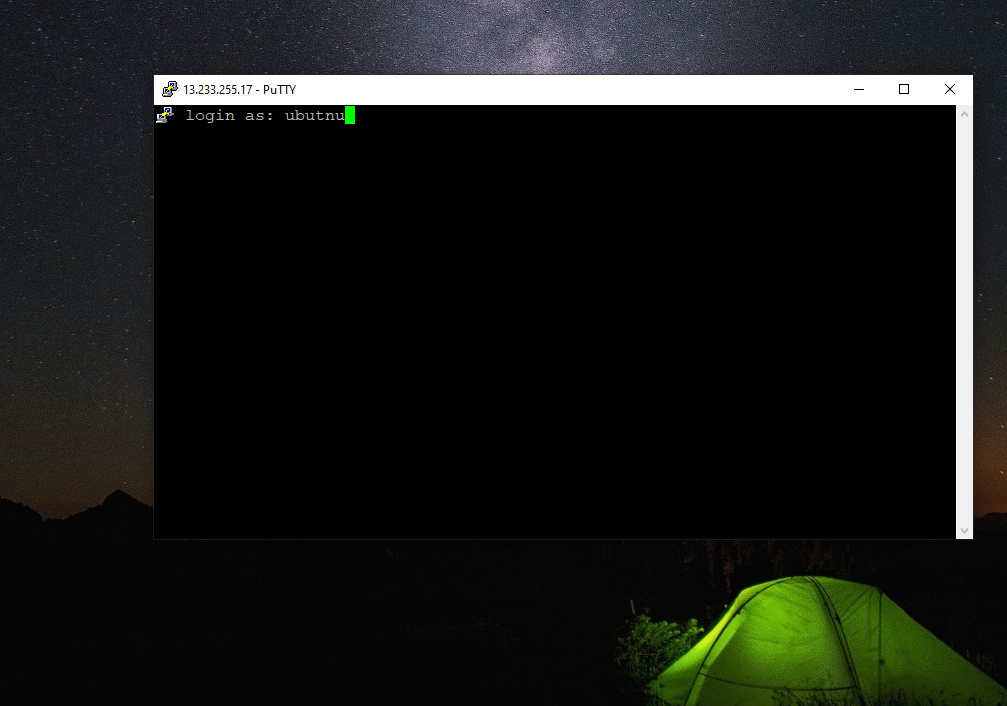
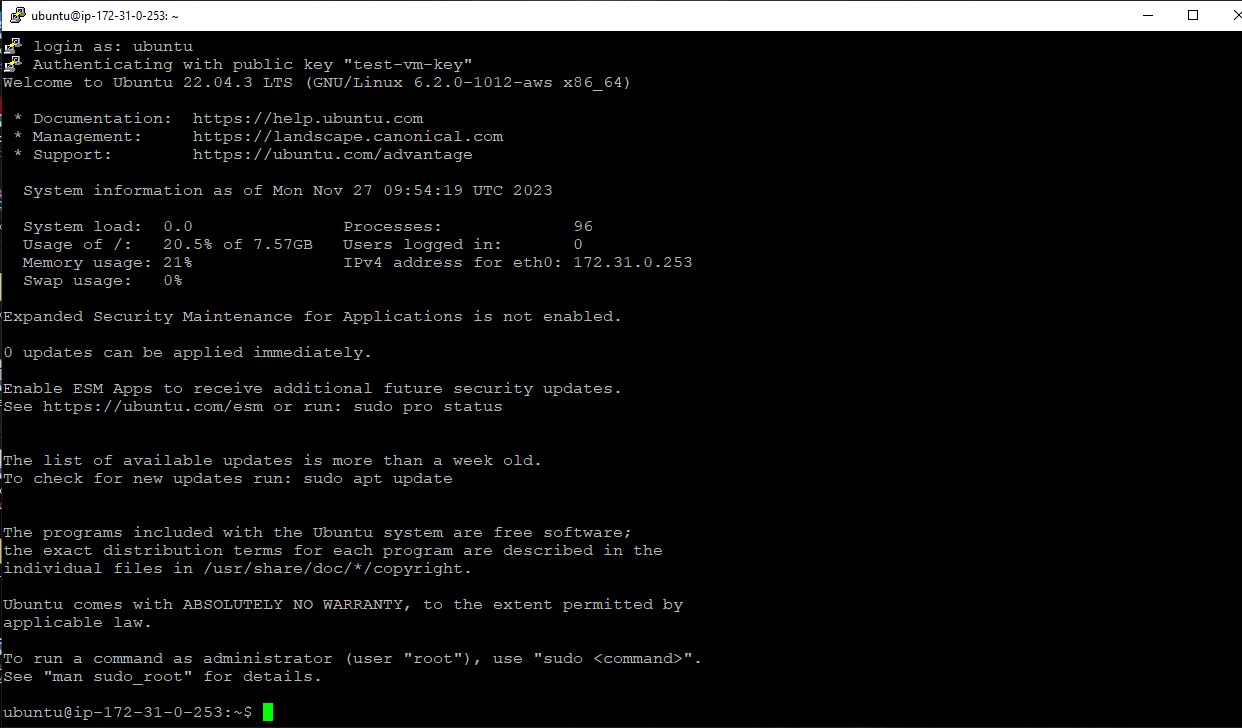
Congratulation, you have successfully connected to your first AWS EC2 instance. Happy learning!! 😊😊
For Mac Users,
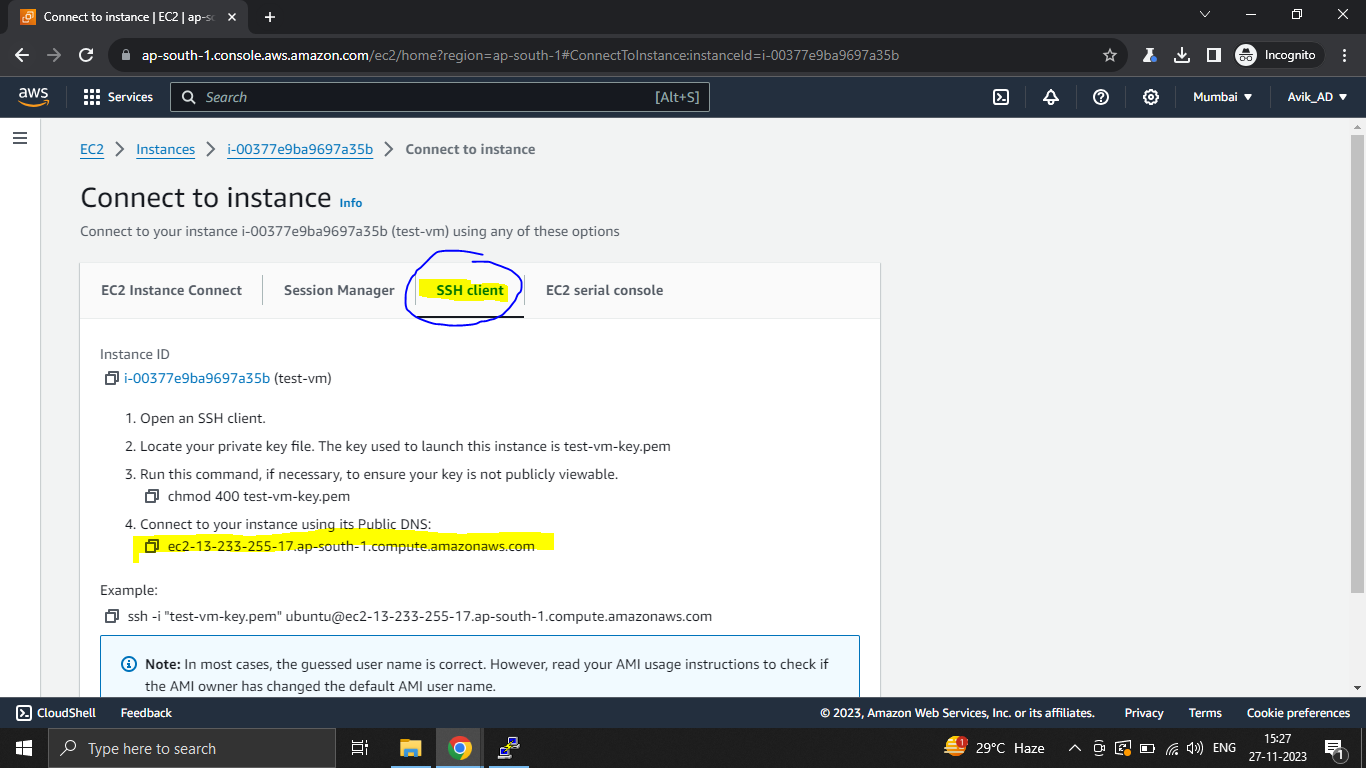
6.0. Click the "Connect" button to get instructions on how to connect to
your instance using SSH, in AWS console.
6.1. Open a terminal on your local machine and use the downloaded key pair to connect to your EC2 instance.
Congratulations! You've successfully created an AWS Free Tier account, launched your first EC2 instance, and connected to it. This is just the beginning of your journey into the world of cloud computing with AWS. Explore additional services, experiment with different configurations, and continue learning to make the most of the AWS platform.
Please stop/terminate you EC2 instance once you are done with your practice. DO NOT FORGET
On my next blog I will share Linux Basic commands to practice. Do follow me for more updates.
Subscribe to my newsletter
Read articles from Avik Dutta directly inside your inbox. Subscribe to the newsletter, and don't miss out.
Written by

Avik Dutta
Avik Dutta
Experienced with a demonstrated history of working in the information technology and services industry. Strong engineering professional skilled in Linux and Cloud platform, AWS, Azure. Passionate about DevOps....