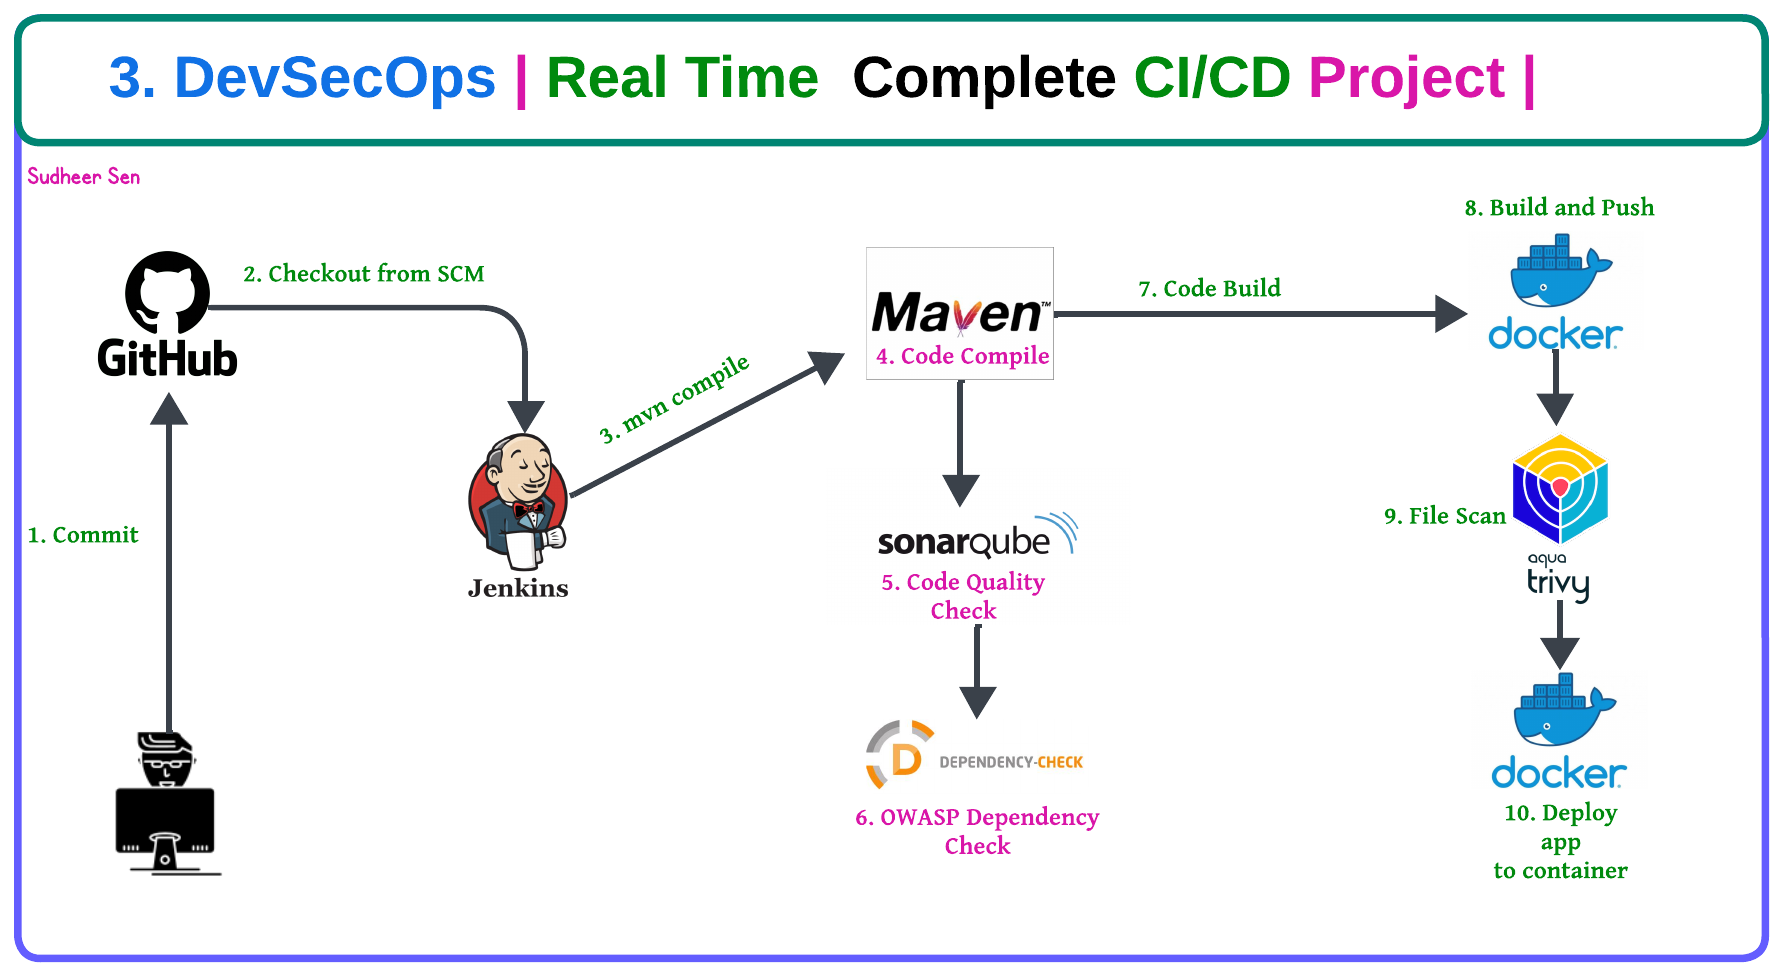
Project - 3. DevSecOps | Real Time Complete CI/CD Project
 Sudheer sen
Table of contents
- 📢🎡Pre-requisites
- 🎢Working Steps🎢
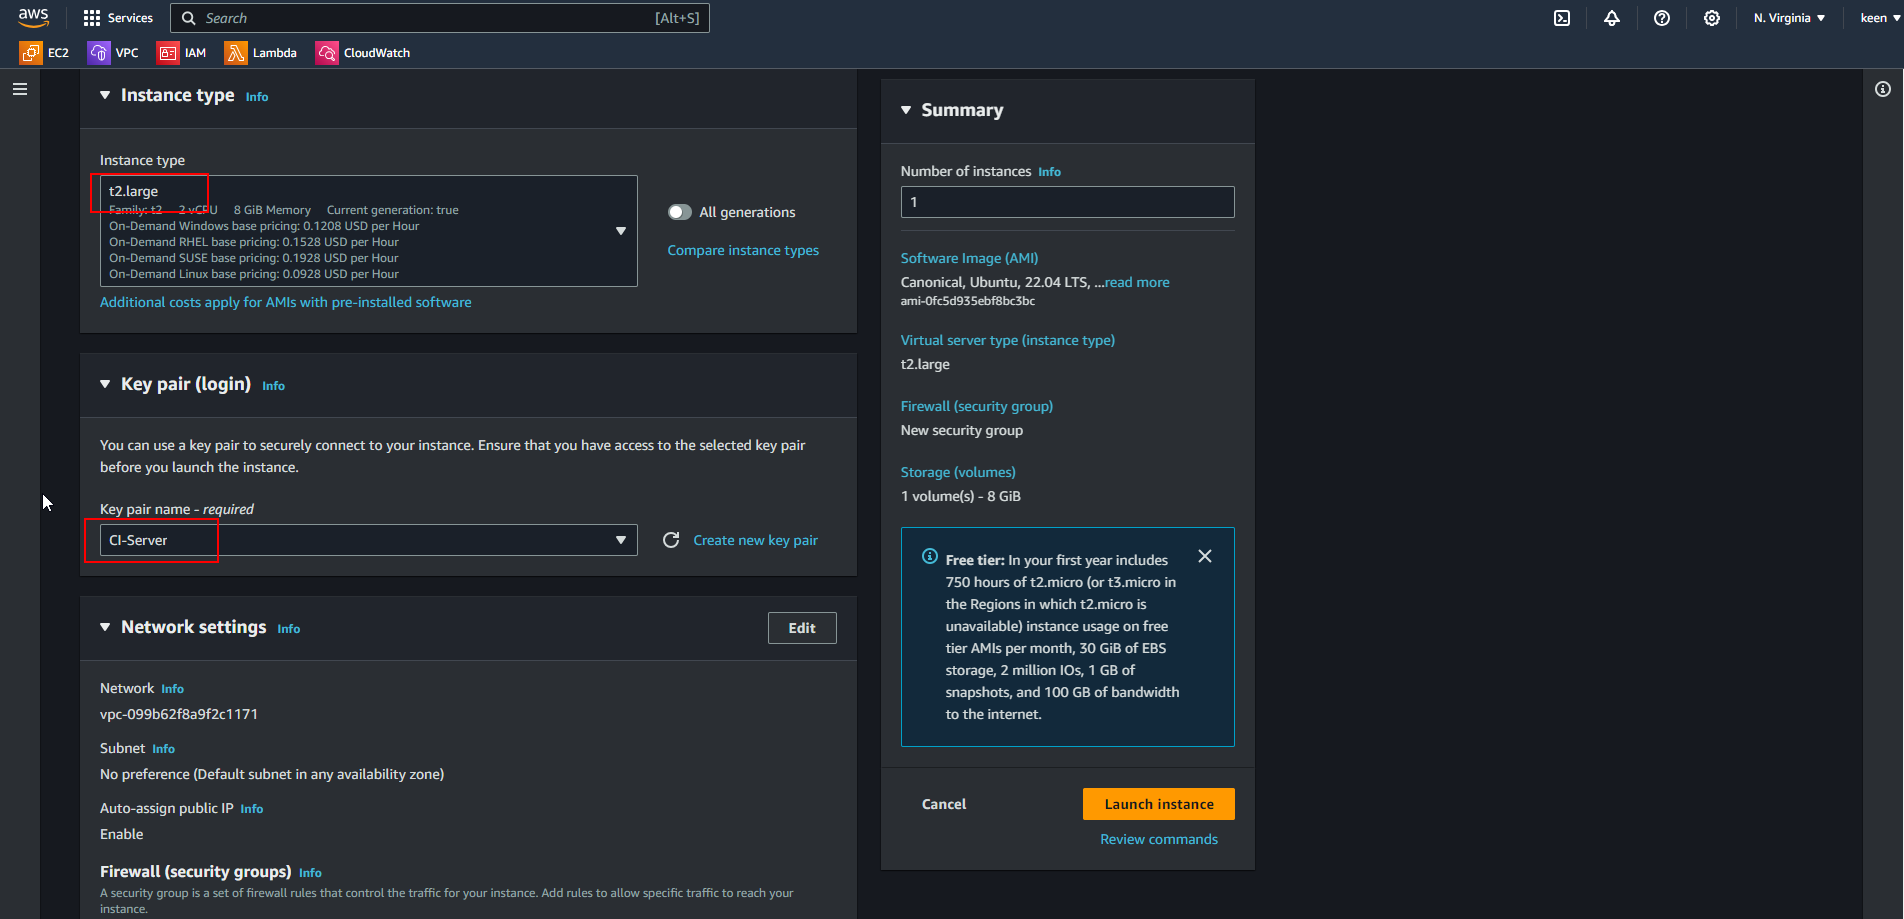
- Step-1. Create an Ubuntu t2.large Instance
- Step-2. Install Docker, Jenkins, and Trivy Create a Sonarqube container using Docker
- Step-3. Install Plugins like JDK, Sonarqube Scanner, Maven, OWASP Dependency Check
- Step-4. Create a Pipeline Project in Jenkins Using a Declarative Pipeline
- Step -5. Build and push on Docker Hub
- Step -6. Deploy on Docker
- Step -7. Access the Real World Application
- Step - 8. Terminate the AWS EC2 Instance
📢🎡Pre-requisites
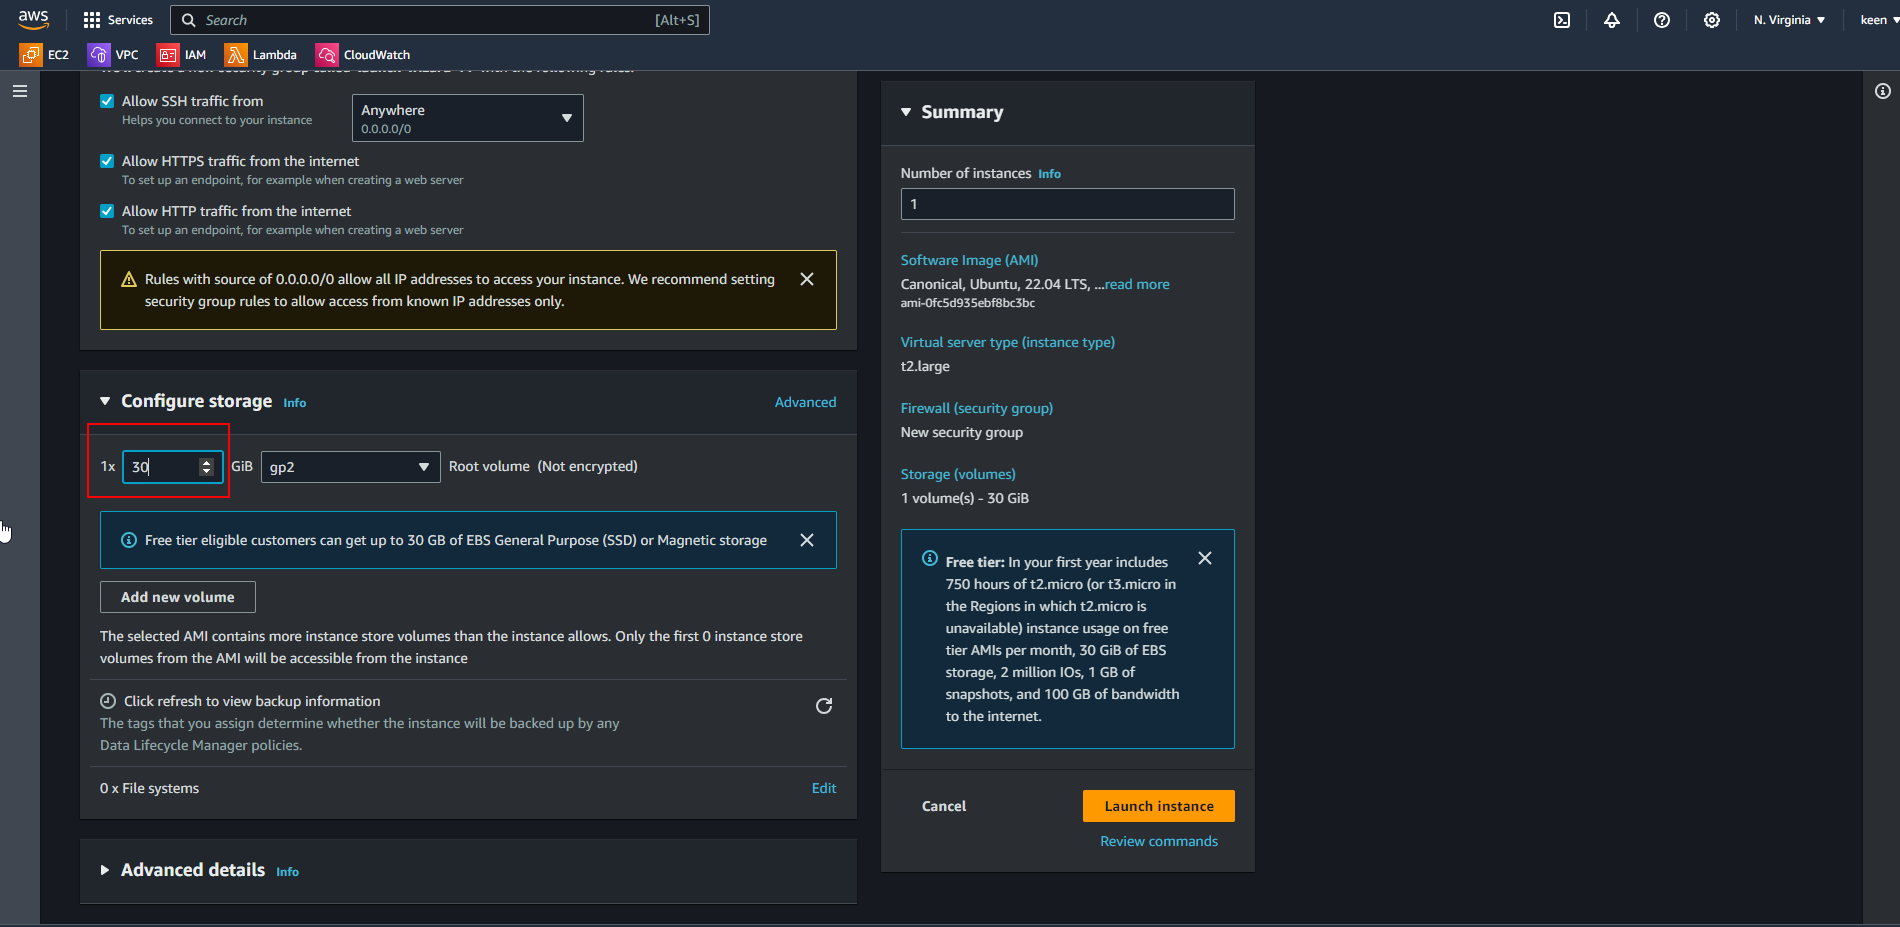
EC2 Instance t2.large 30gb
Docker and Docker Hub
Jenkins Setup
Trivy for file scan
SonarQube
🎢Working Steps🎢
Create an Ubuntu t2.large Instance
Install Docker, Jenkins, and Trivy Create a Sonarqube container using Docker.
Install Plugins like JDK, Sonarqube Scanner, Maven, and OWASP Dependency Check.
Create a Pipeline Project in Jenkins Using a Declarative Pipeline
Build and Push on Docker Hub
Deploy on Docker
Access the Real World Application
Terminate the AWS EC2 Instance
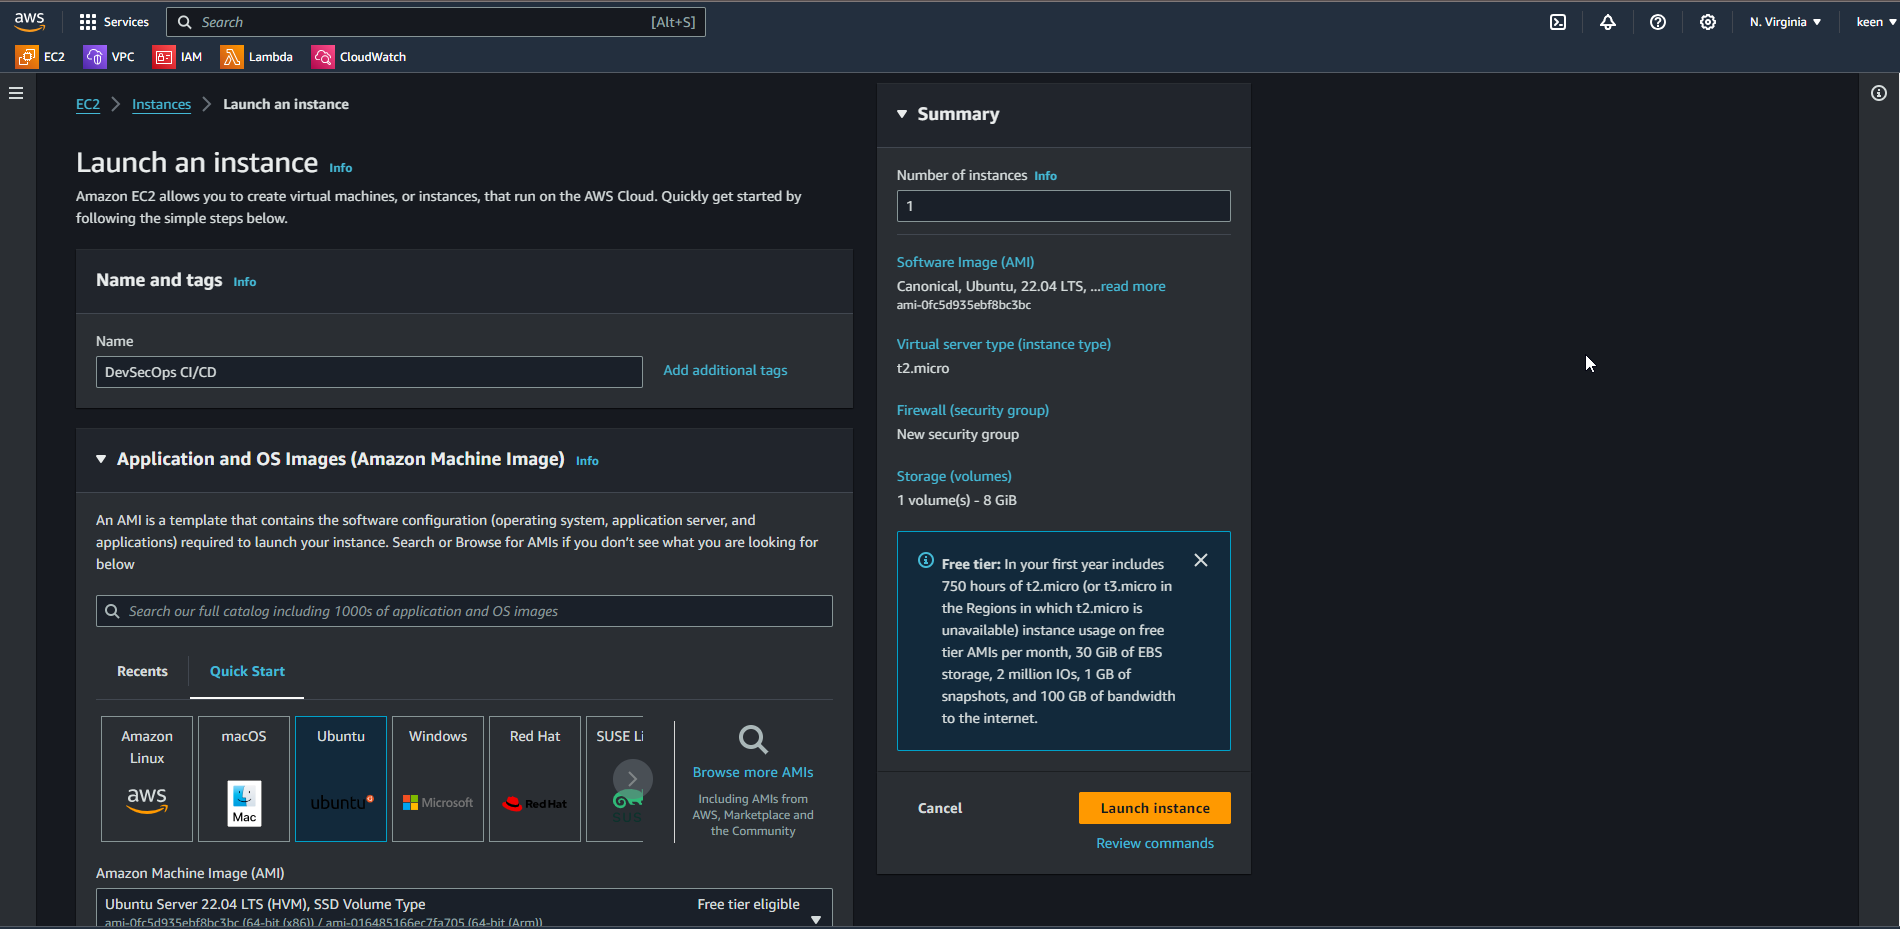
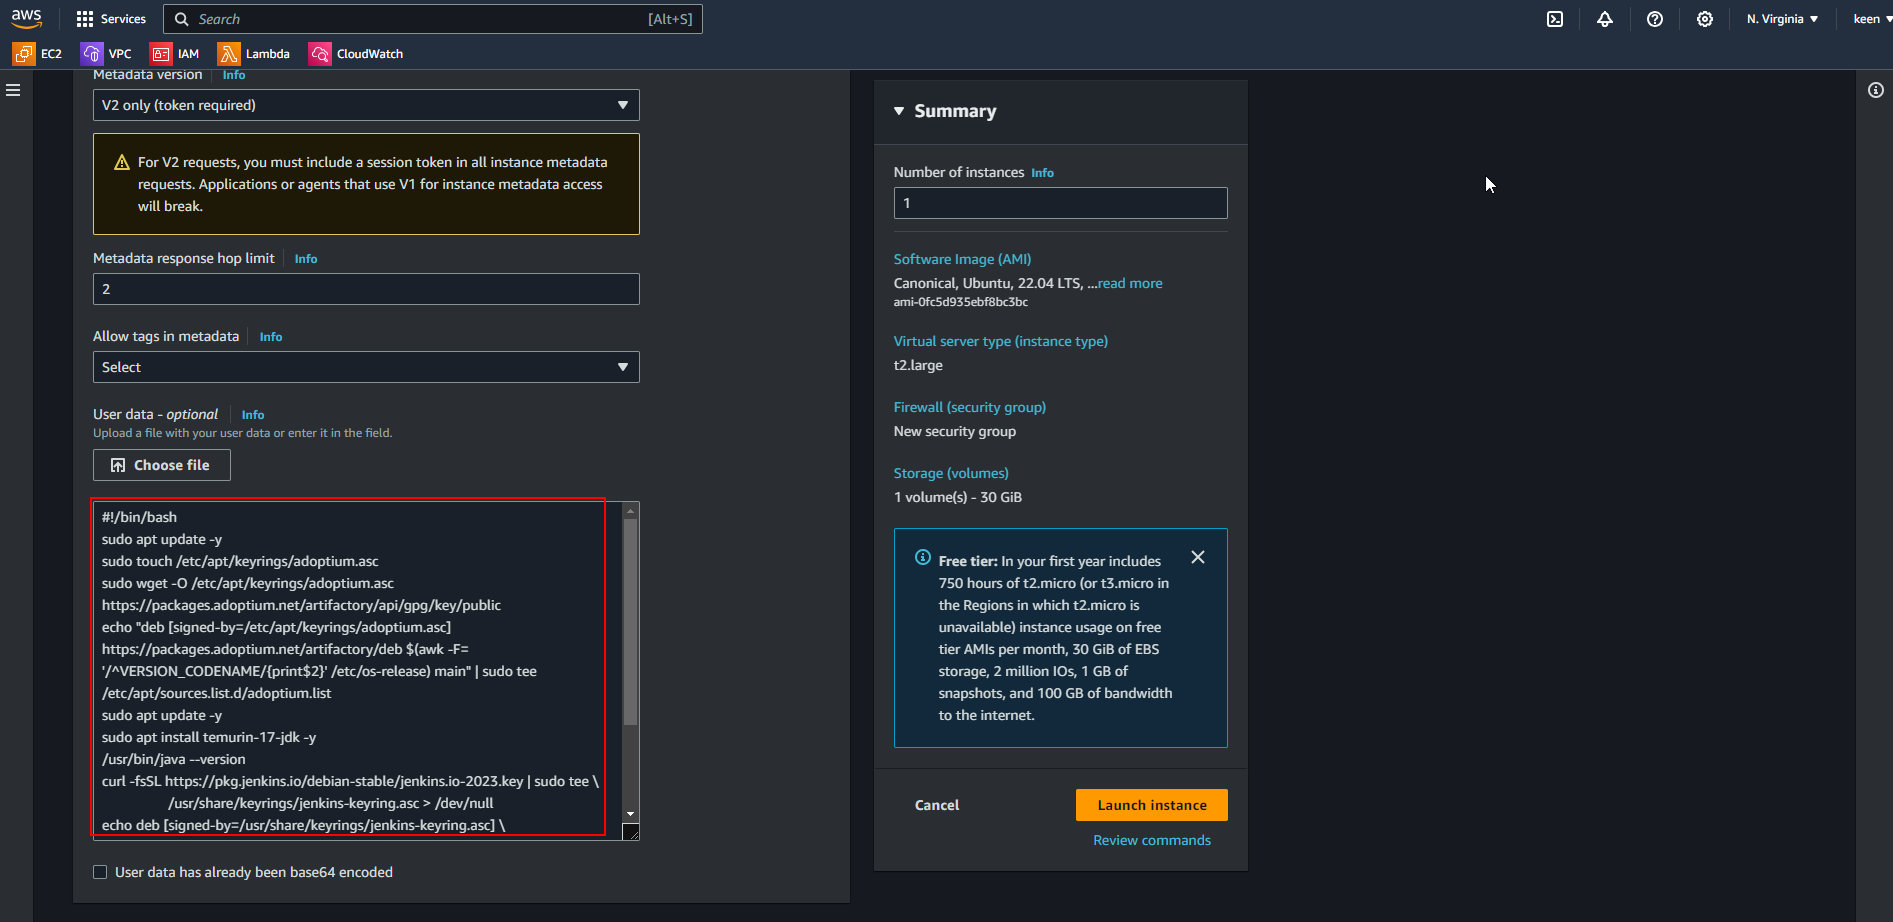
Step-1. Create an Ubuntu t2.large Instance
Go to the AWS account and launch the ec2 t2.micro instance
Step-2. Install Docker, Jenkins, and Trivy Create a Sonarqube container using Docker
A. Install Docker
vi docker.sh
sudo apt-get update
sudo apt-get install docker.io -y
sudo usermod -aG docker $USER
newgrp docker
sudo chmod 777 /var/run/docker.sock
docker ps
Save -> Press <ESC + : + wq + Enter\>
Give Permission
chmod 700 docker.sh
Run
./docker.sh
Run in Background Mode
sudo systemctl enable docker
B. Jenkins Setup
vi jenkins.sh
#!/bin/bash
sudo apt update -y
sudo touch /etc/apt/keyrings/adoptium.asc
sudo wget -O /etc/apt/keyrings/adoptium.asc https://packages.adoptium.net/artifactory/api/gpg/key/public
echo "deb [signed-by=/etc/apt/keyrings/adoptium.asc] https://packages.adoptium.net/artifactory/deb $(awk -F= '/^VERSION_CODENAME/{print$2}' /etc/os-release) main" | sudo tee /etc/apt/sources.list.d/adoptium.list
sudo apt update -y
sudo apt install temurin-17-jdk -y
/usr/bin/java --version
curl -fsSL https://pkg.jenkins.io/debian-stable/jenkins.io-2023.key | sudo tee \
/usr/share/keyrings/jenkins-keyring.asc > /dev/null
echo deb [signed-by=/usr/share/keyrings/jenkins-keyring.asc] \
                      https://pkg.jenkins.io/debian-stable binary/ | sudo tee \
                                  /etc/apt/sources.list.d/jenkins.list > /dev/null
Save -> Press <ESC + : + wq + Enter\>
sudo apt-get update -y
sudo apt-get install jenkins -y
sudo systemctl start jenkins
sudo systemctl status jenkins
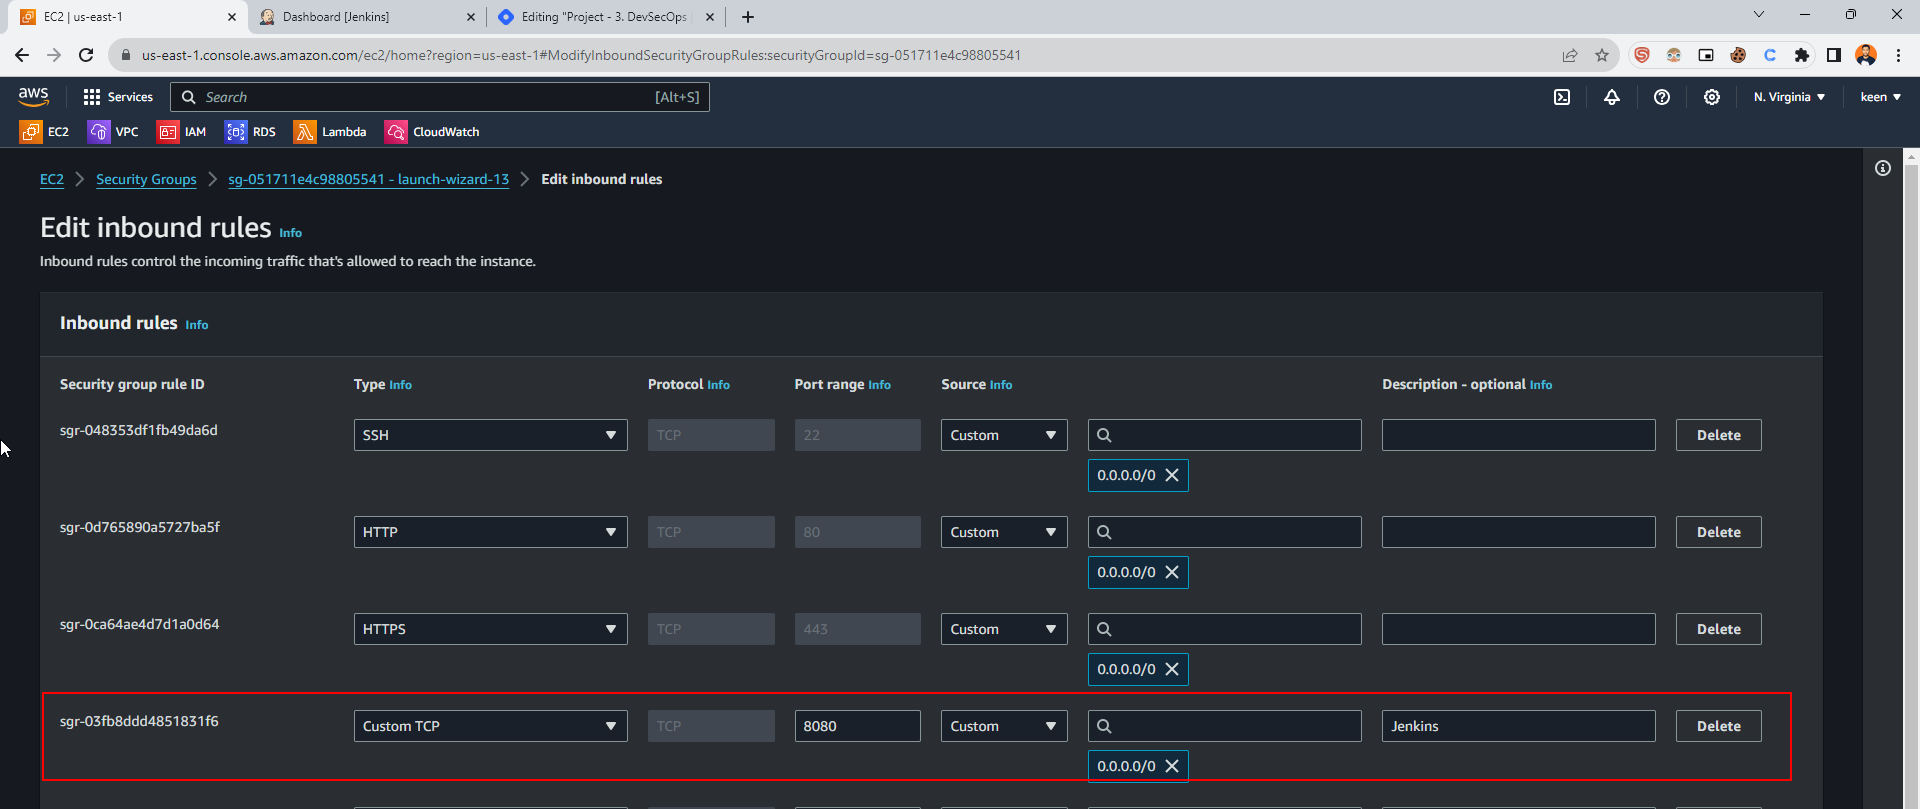
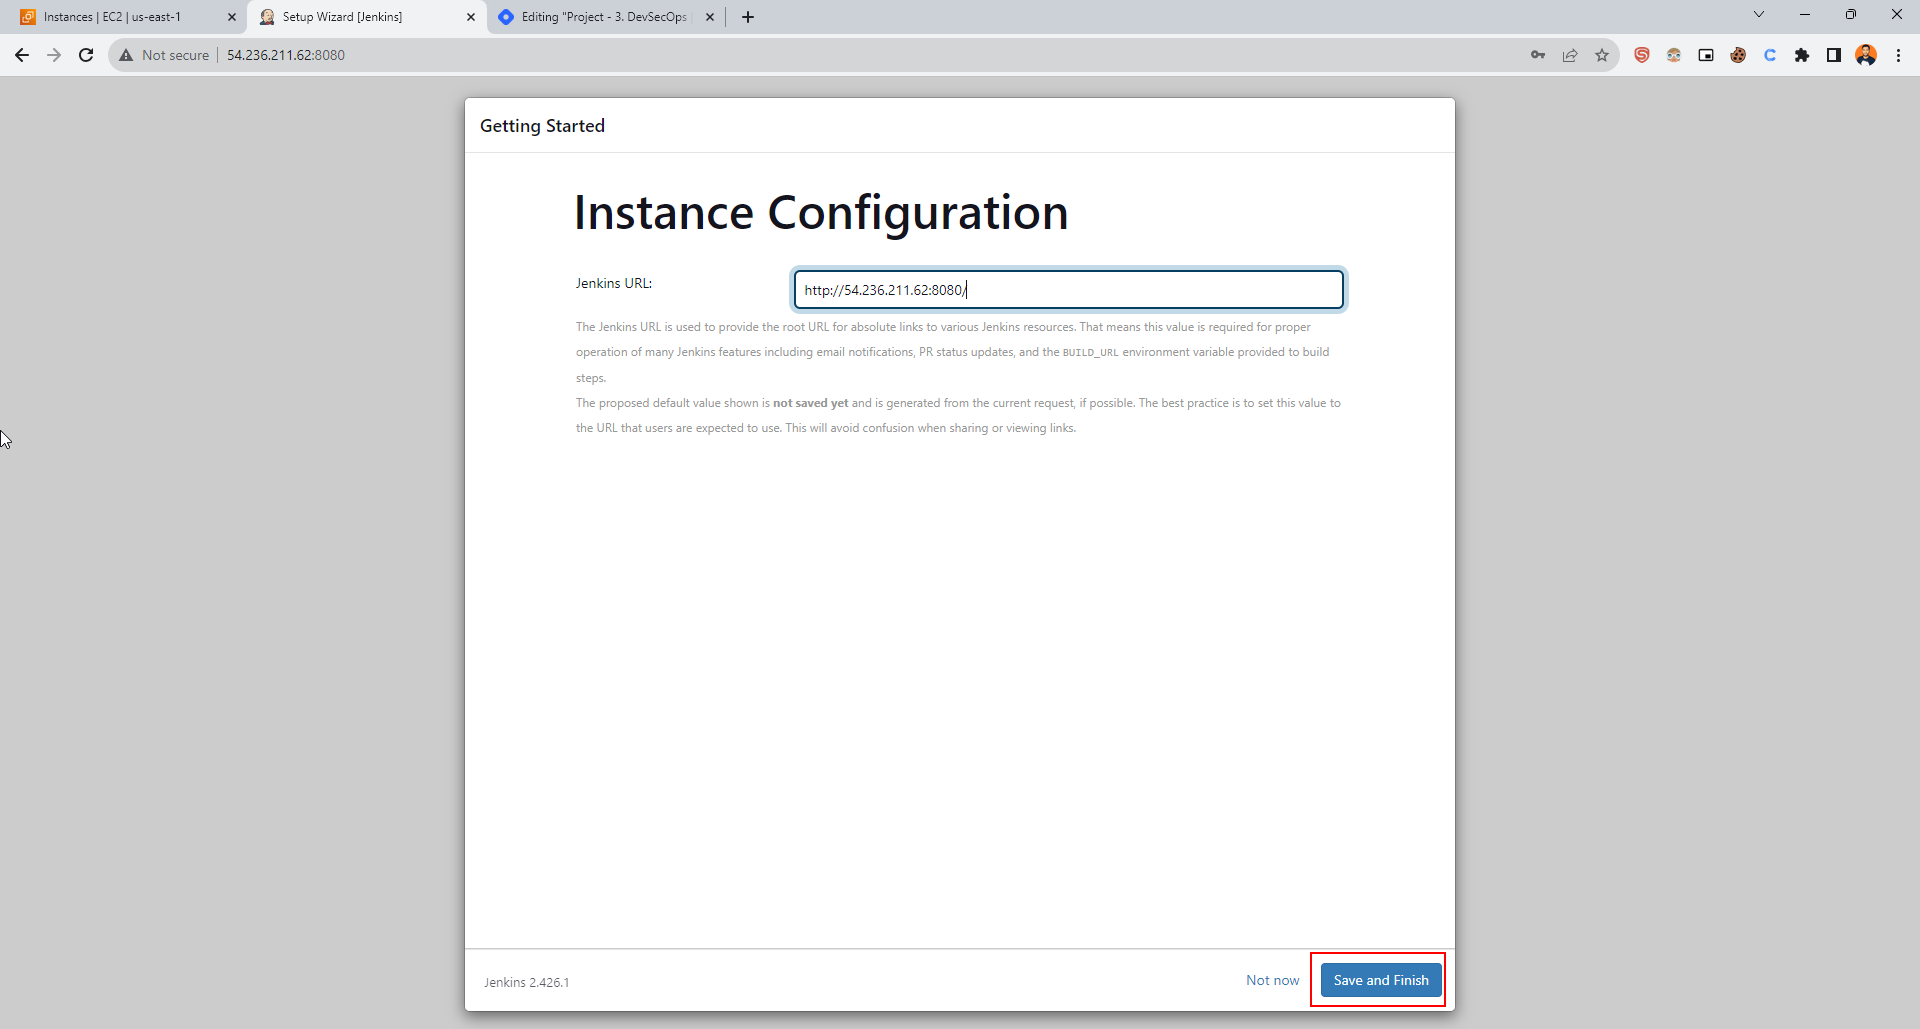
Define Port 8080 in the Security Group
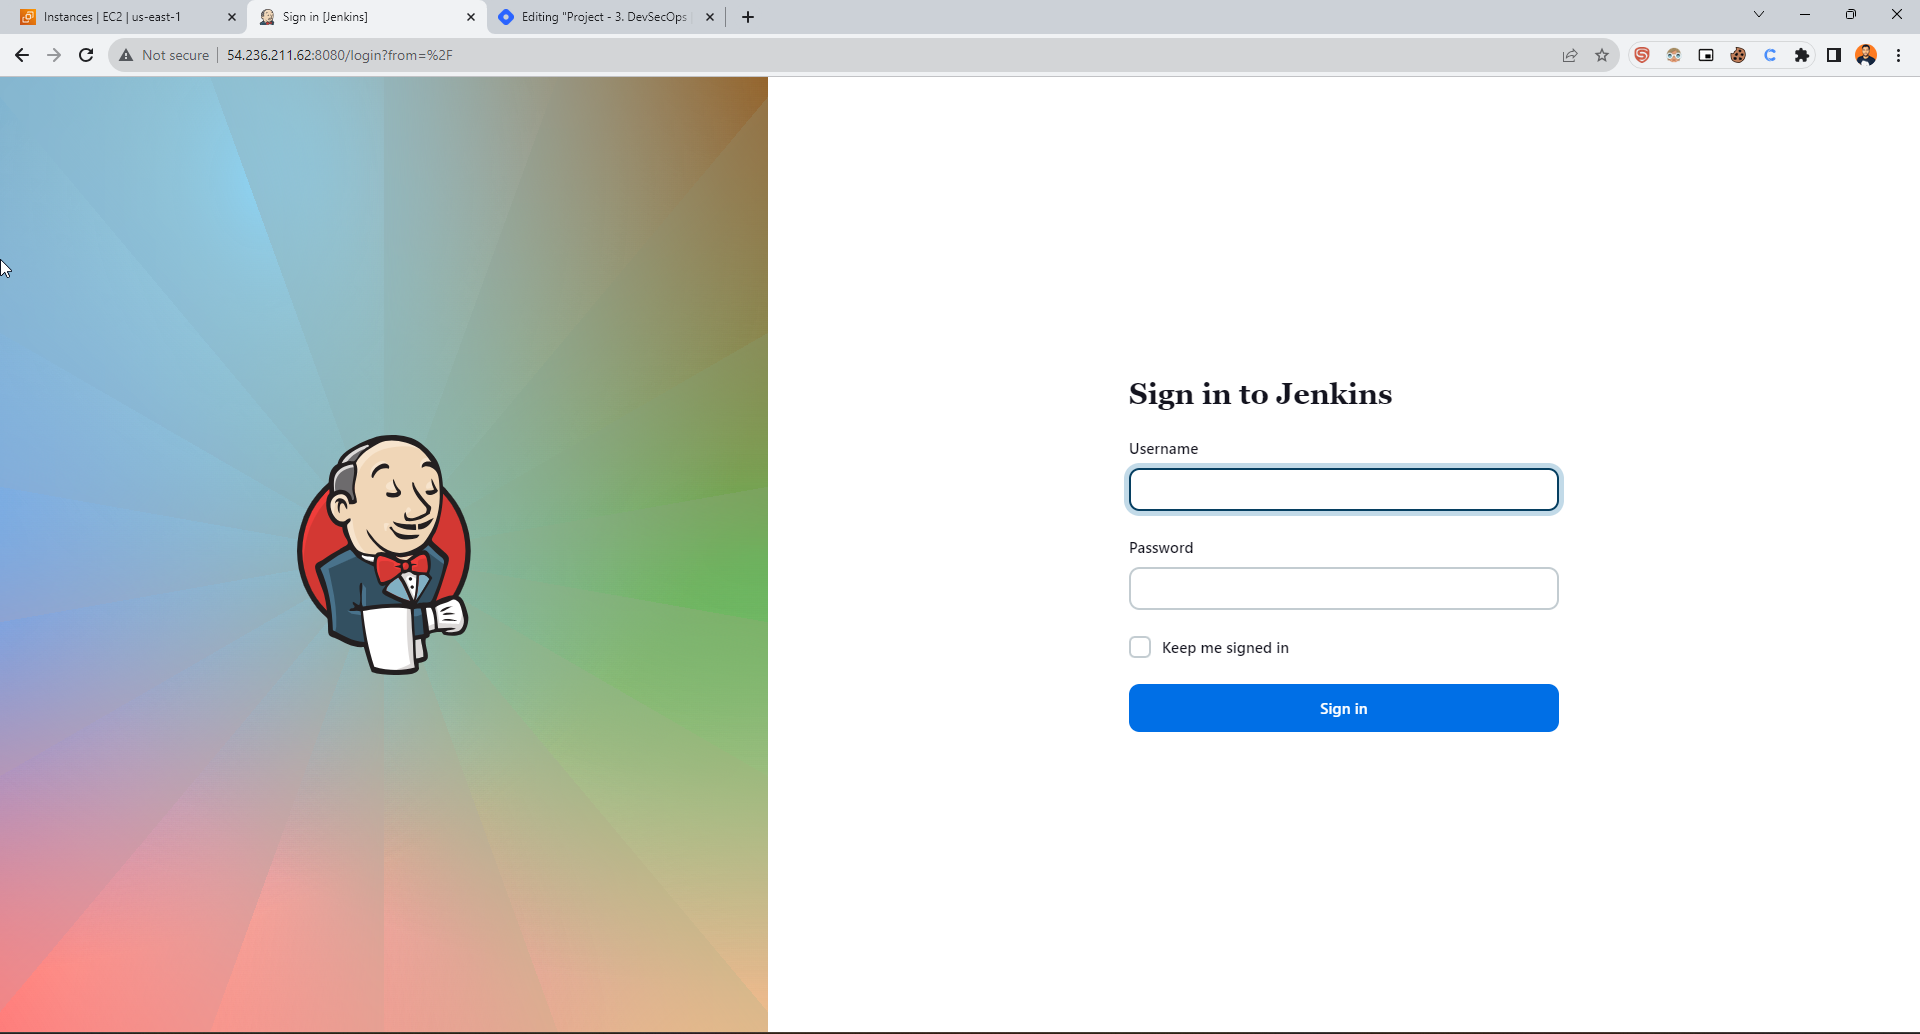
Paste <IP:8080\> on the browser
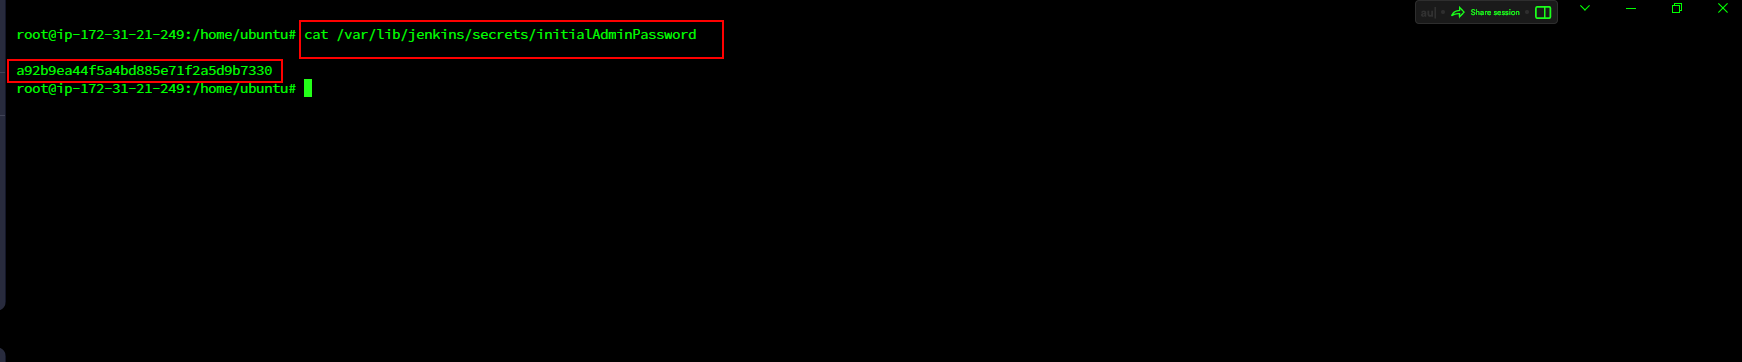
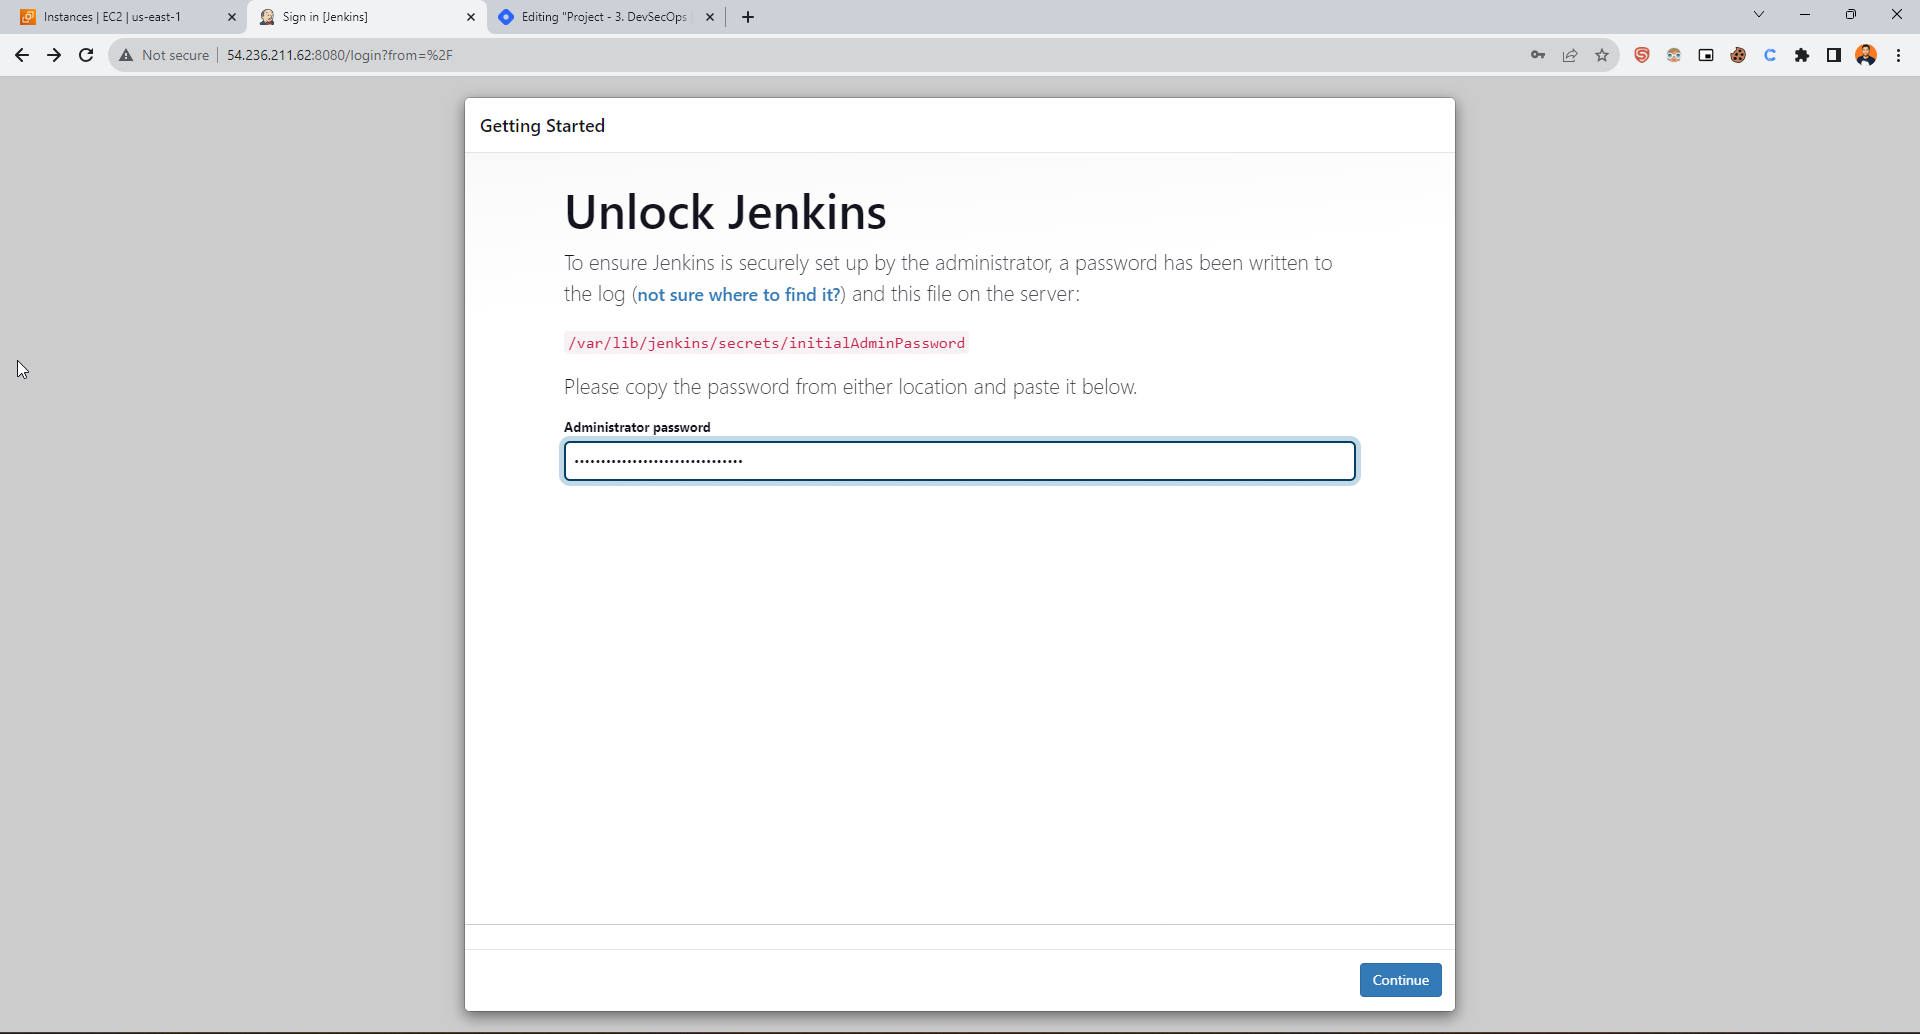
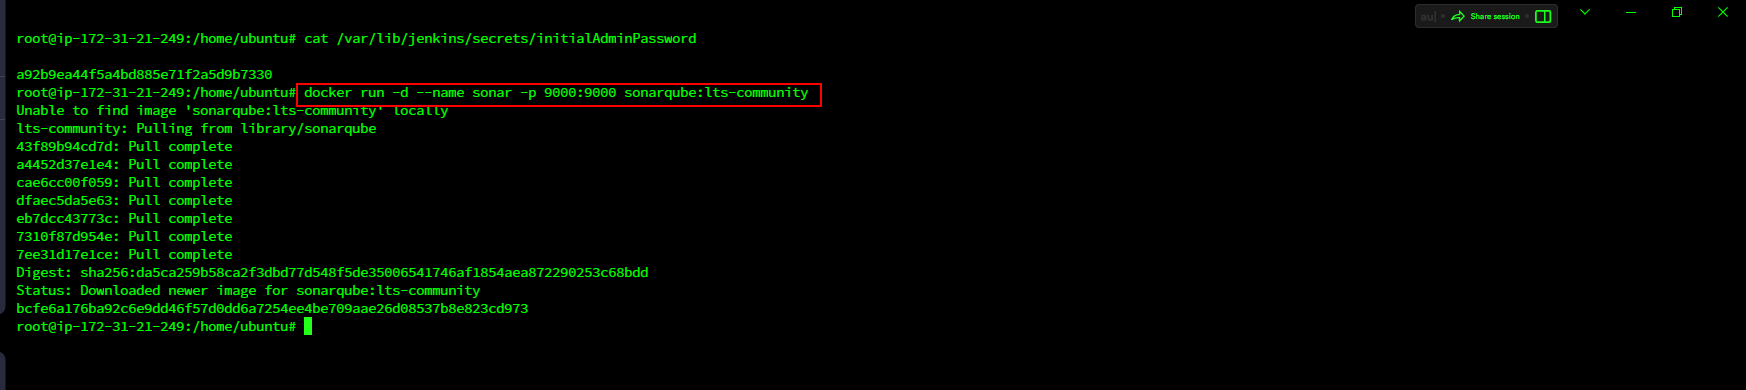
Get Password
cat /var/lib/jenkins/secrets/initialAdminPassword


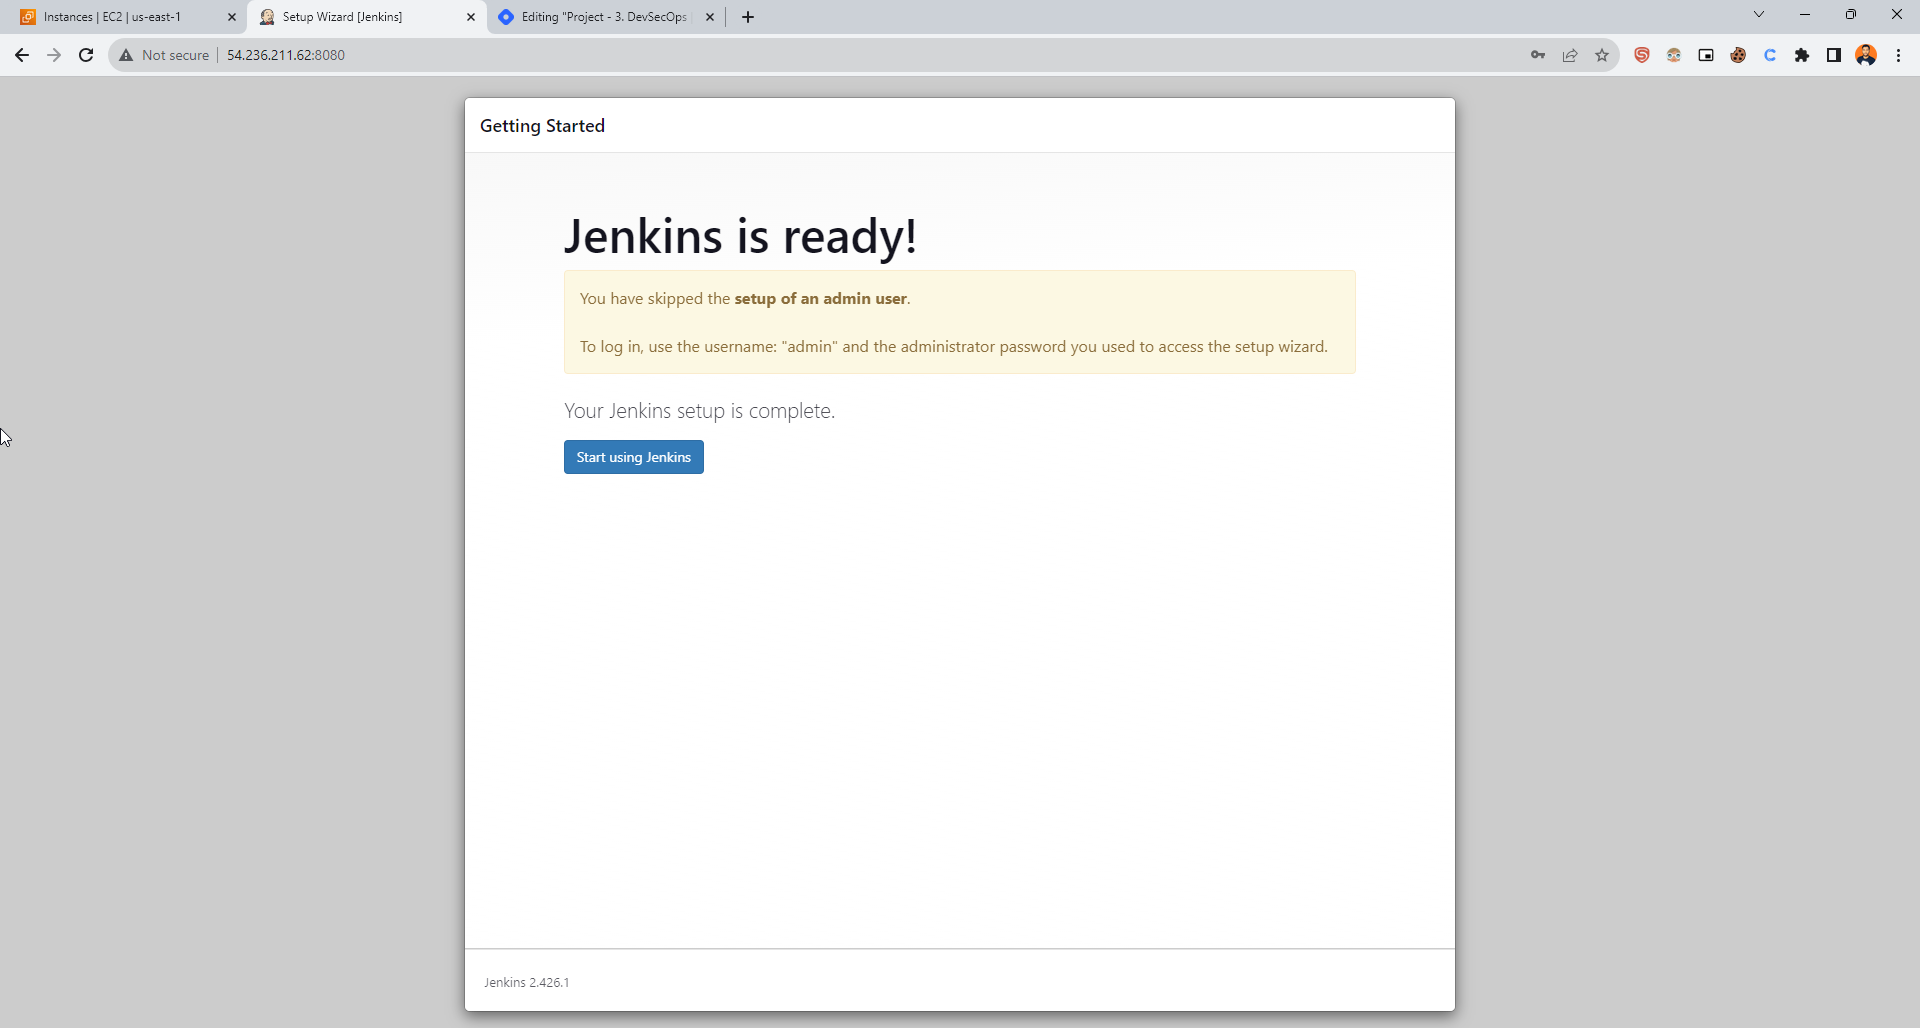
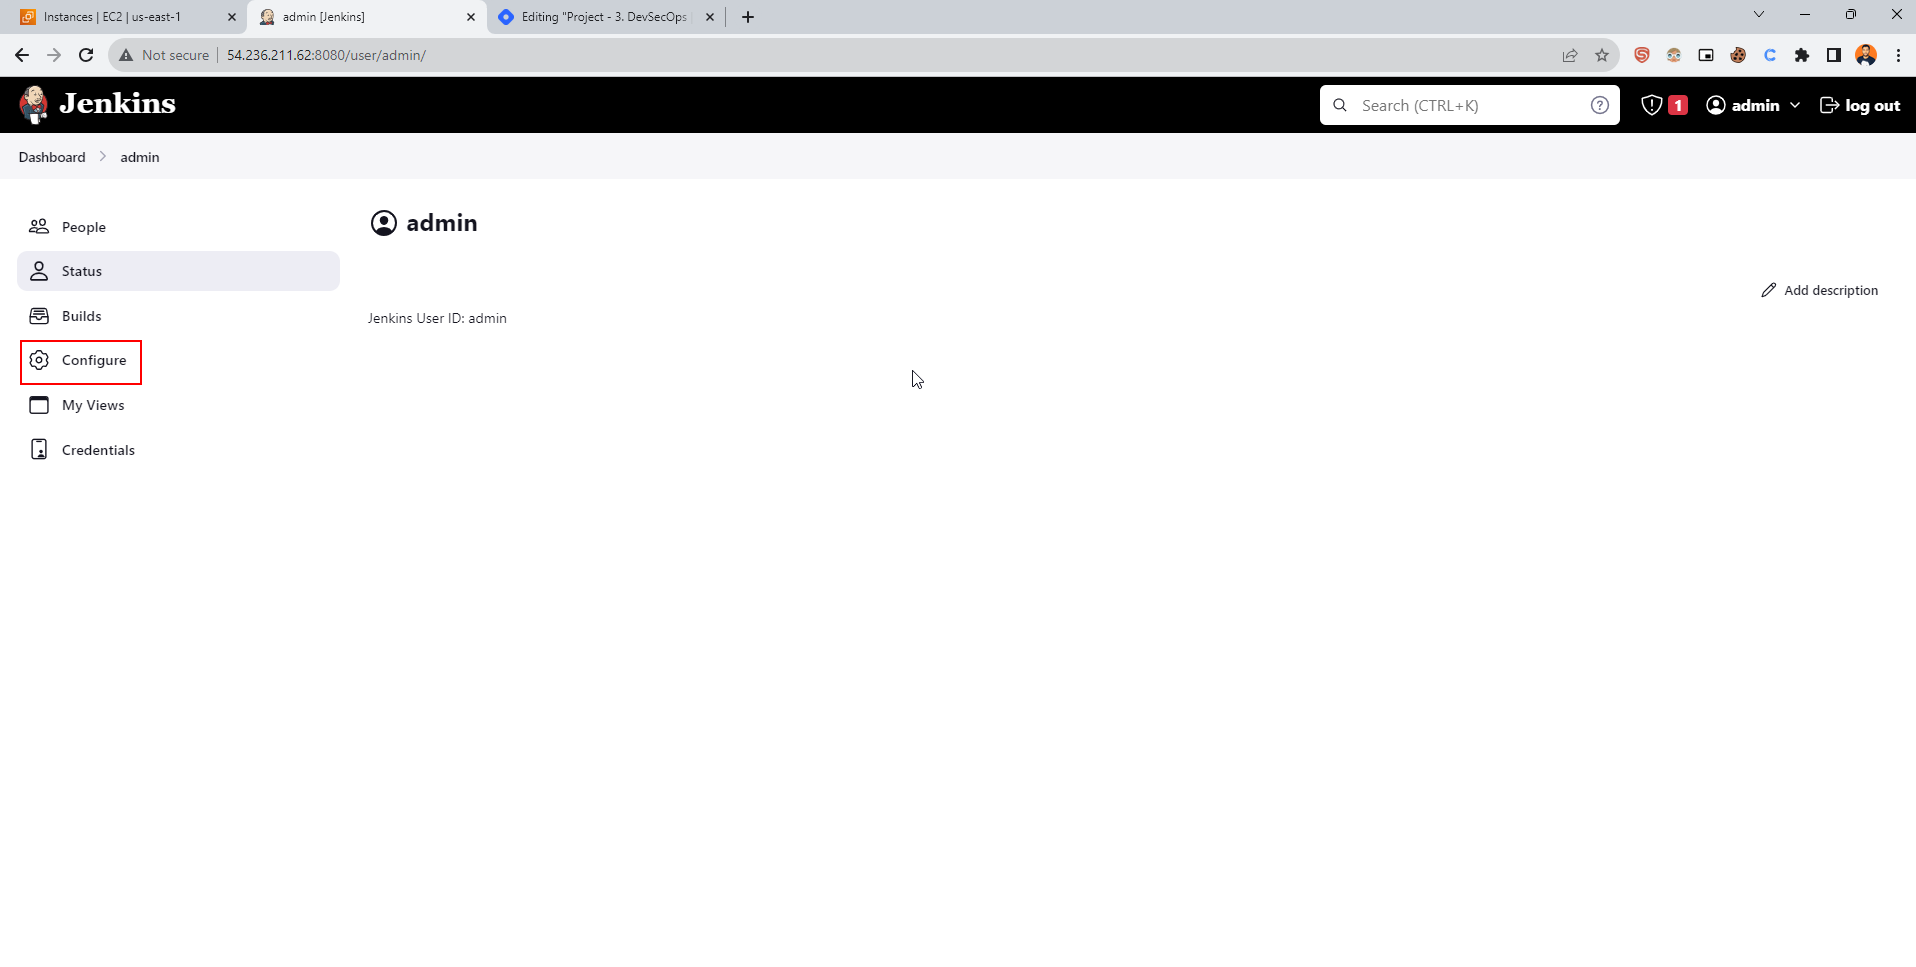
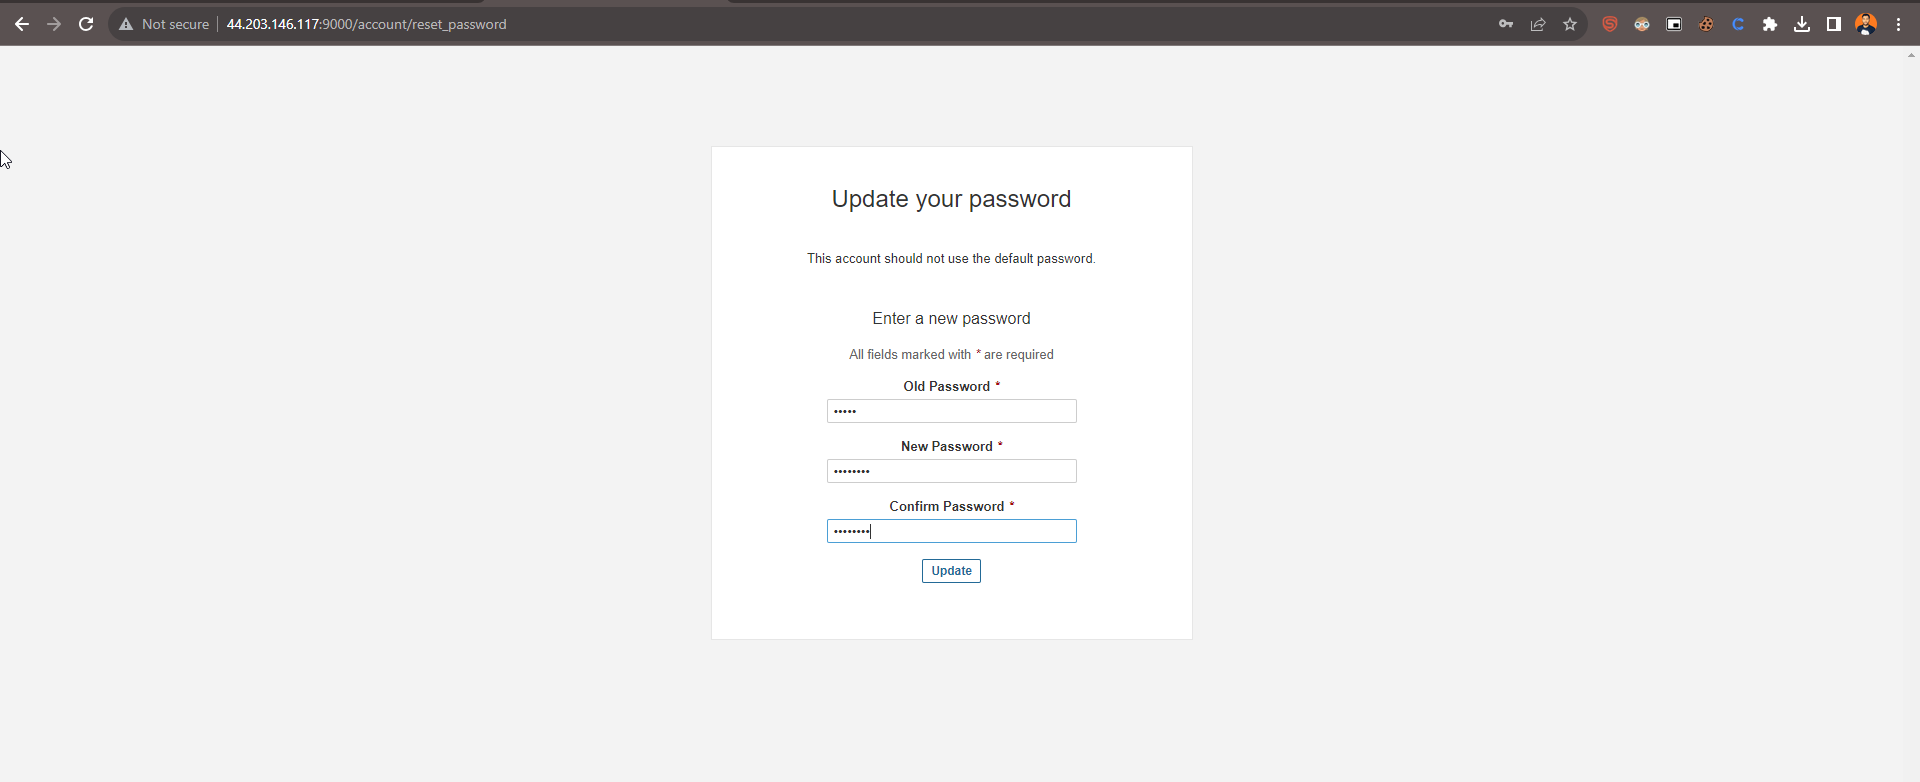
Change with your own password like user- admin, pass - admin123
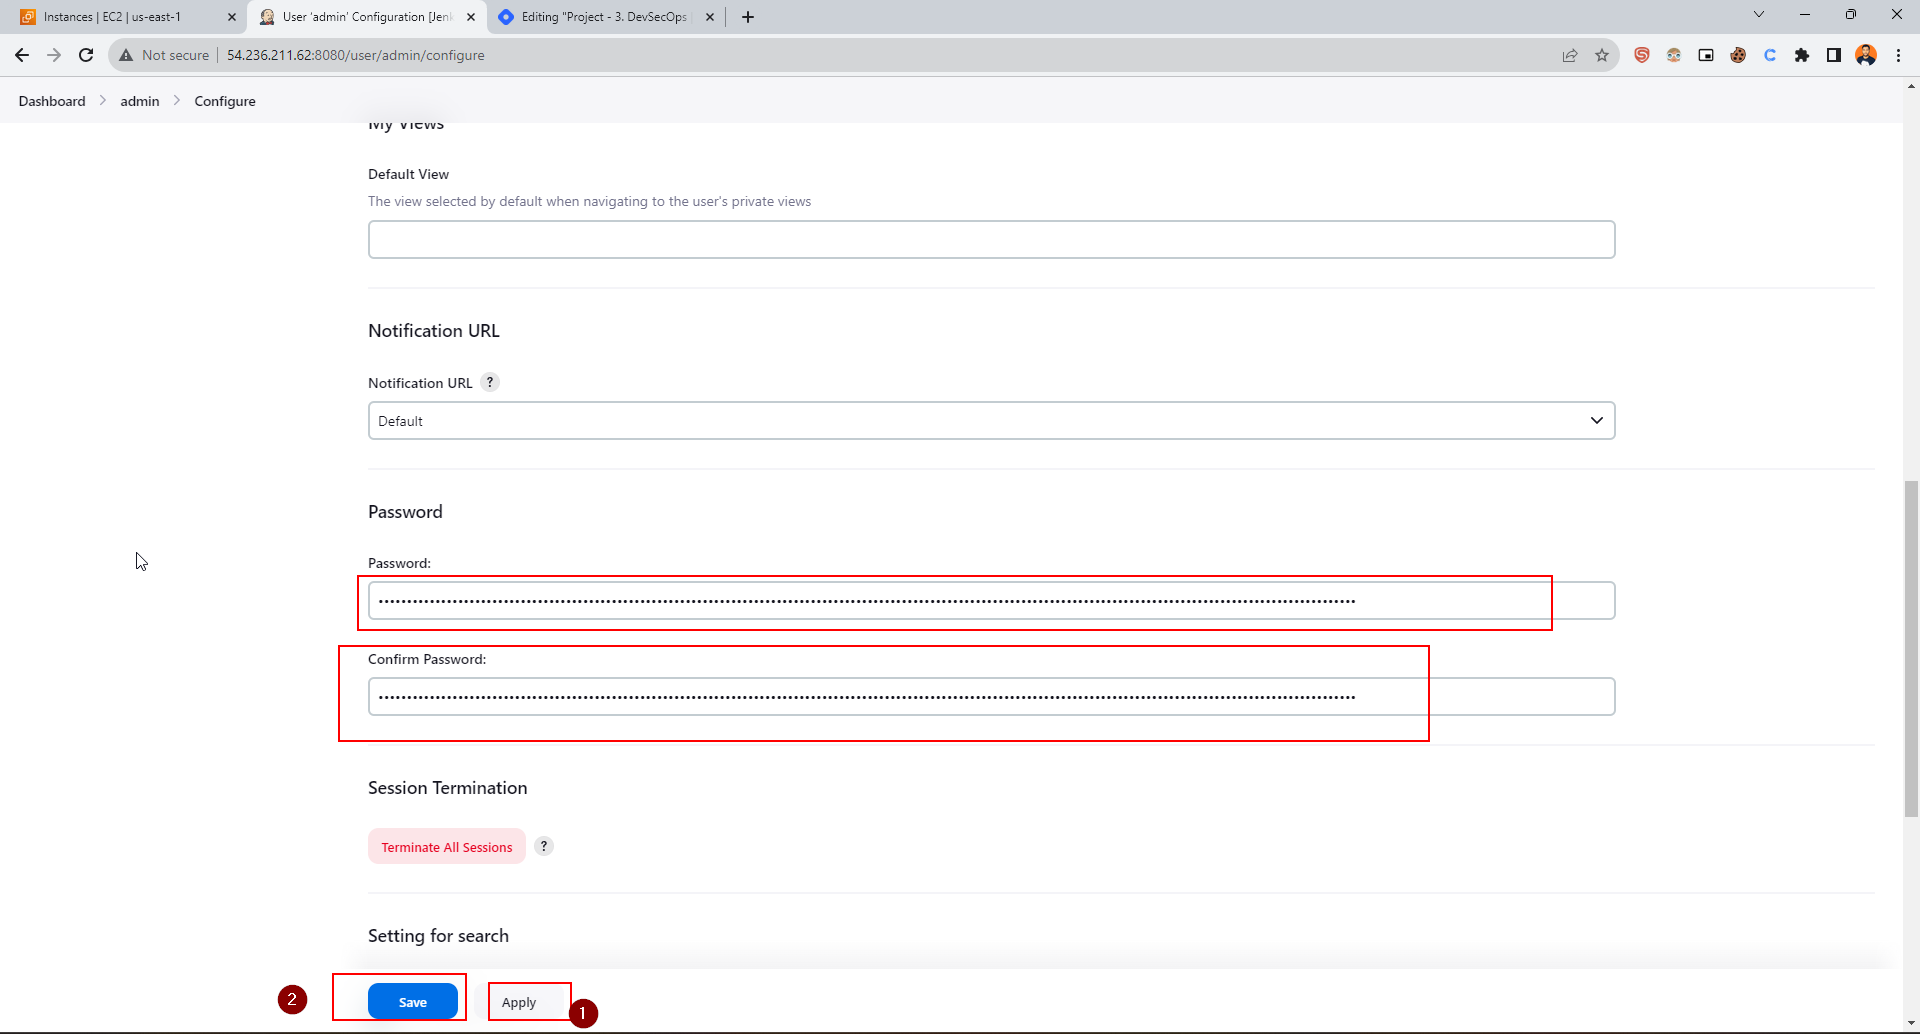
Username - admin
Pass- admin123
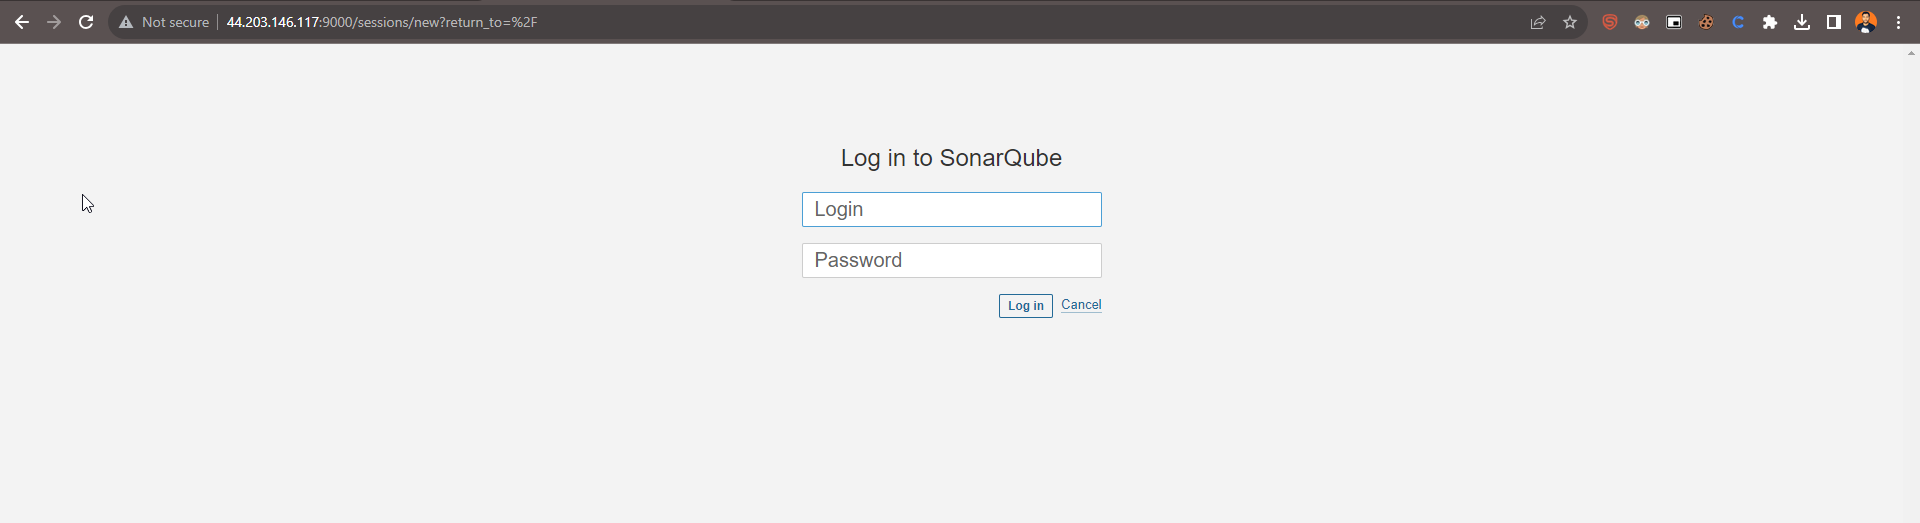
C. Create a Sonarqube container using Docker
docker run -d --name sonar -p 9000:9000 sonarqube:lts-community
Define Port in the Security Group 9000

Paste <IP:8080\> on the browser
D. Install Trivy
vi trivy.sh
Paste the code
sudo apt-get install wget apt-transport-https gnupg lsb-release -y
wget -qO - https://aquasecurity.github.io/trivy-repo/deb/public.key | gpg --dearmor | sudo tee /usr/share/keyrings/trivy.gpg > /dev/null
echo "deb [signed-by=/usr/share/keyrings/trivy.gpg] https://aquasecurity.github.io/trivy-repo/deb $(lsb_release -sc) main" | sudo tee -a /etc/apt/sources.list.d/trivy.list
Save -> Press <ESC + : + wq + Enter\>
sudo apt-get update
sudo apt-get install trivy
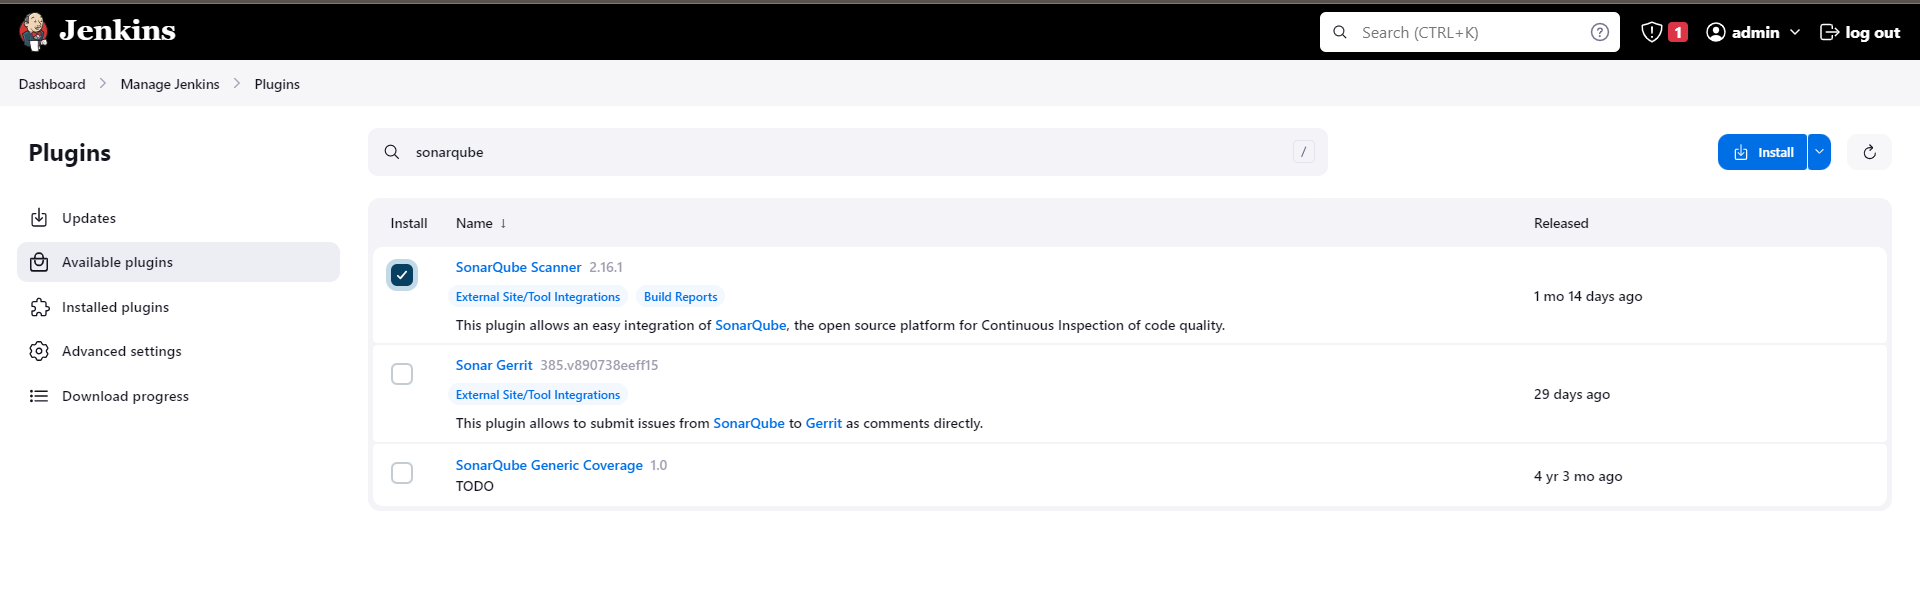
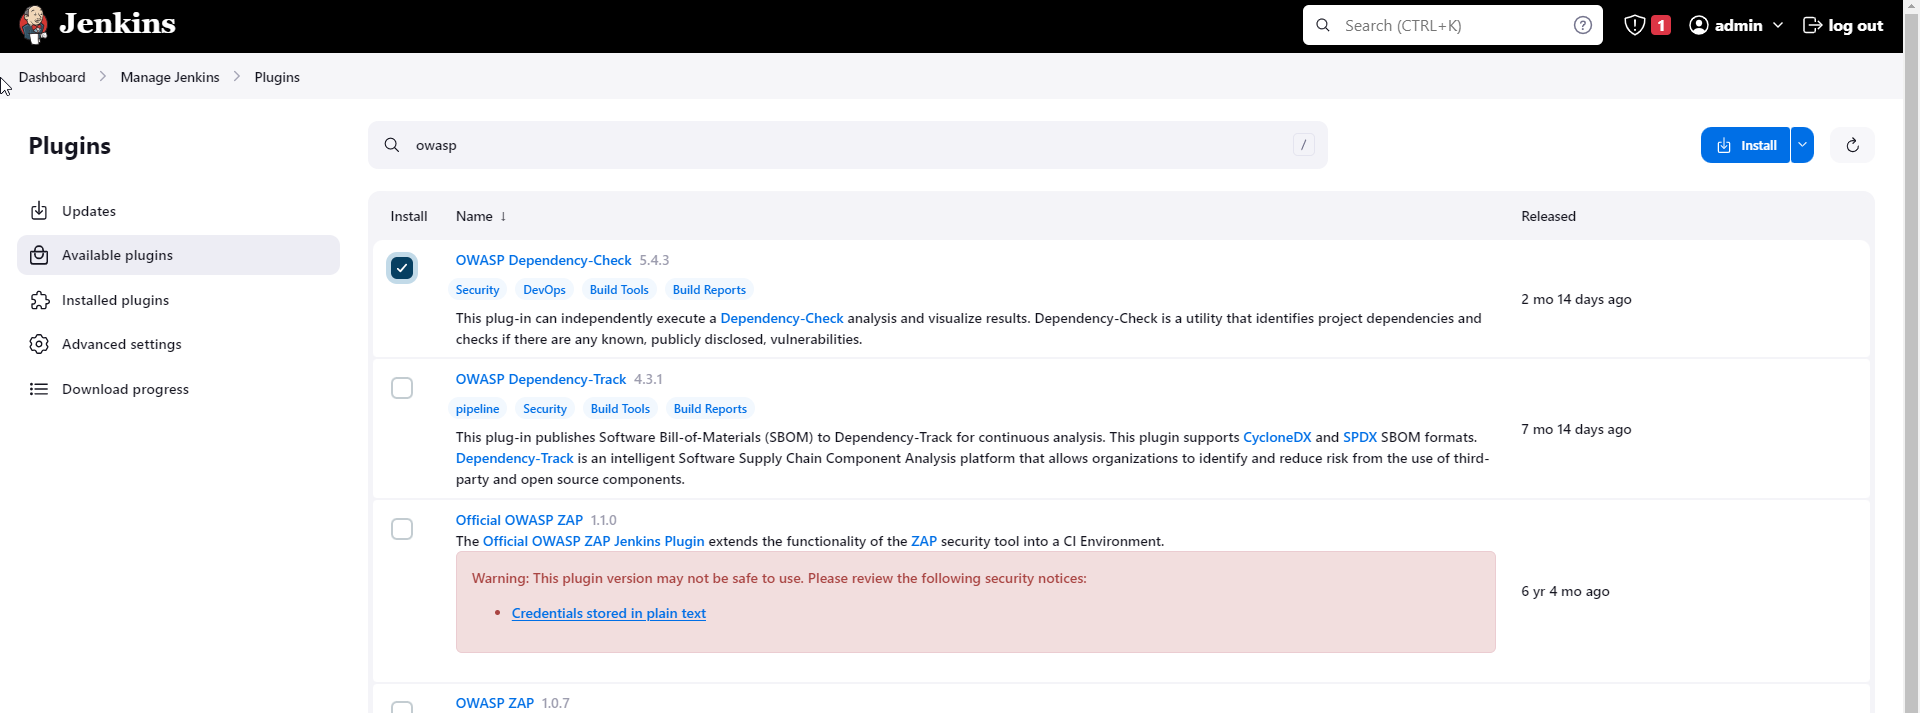
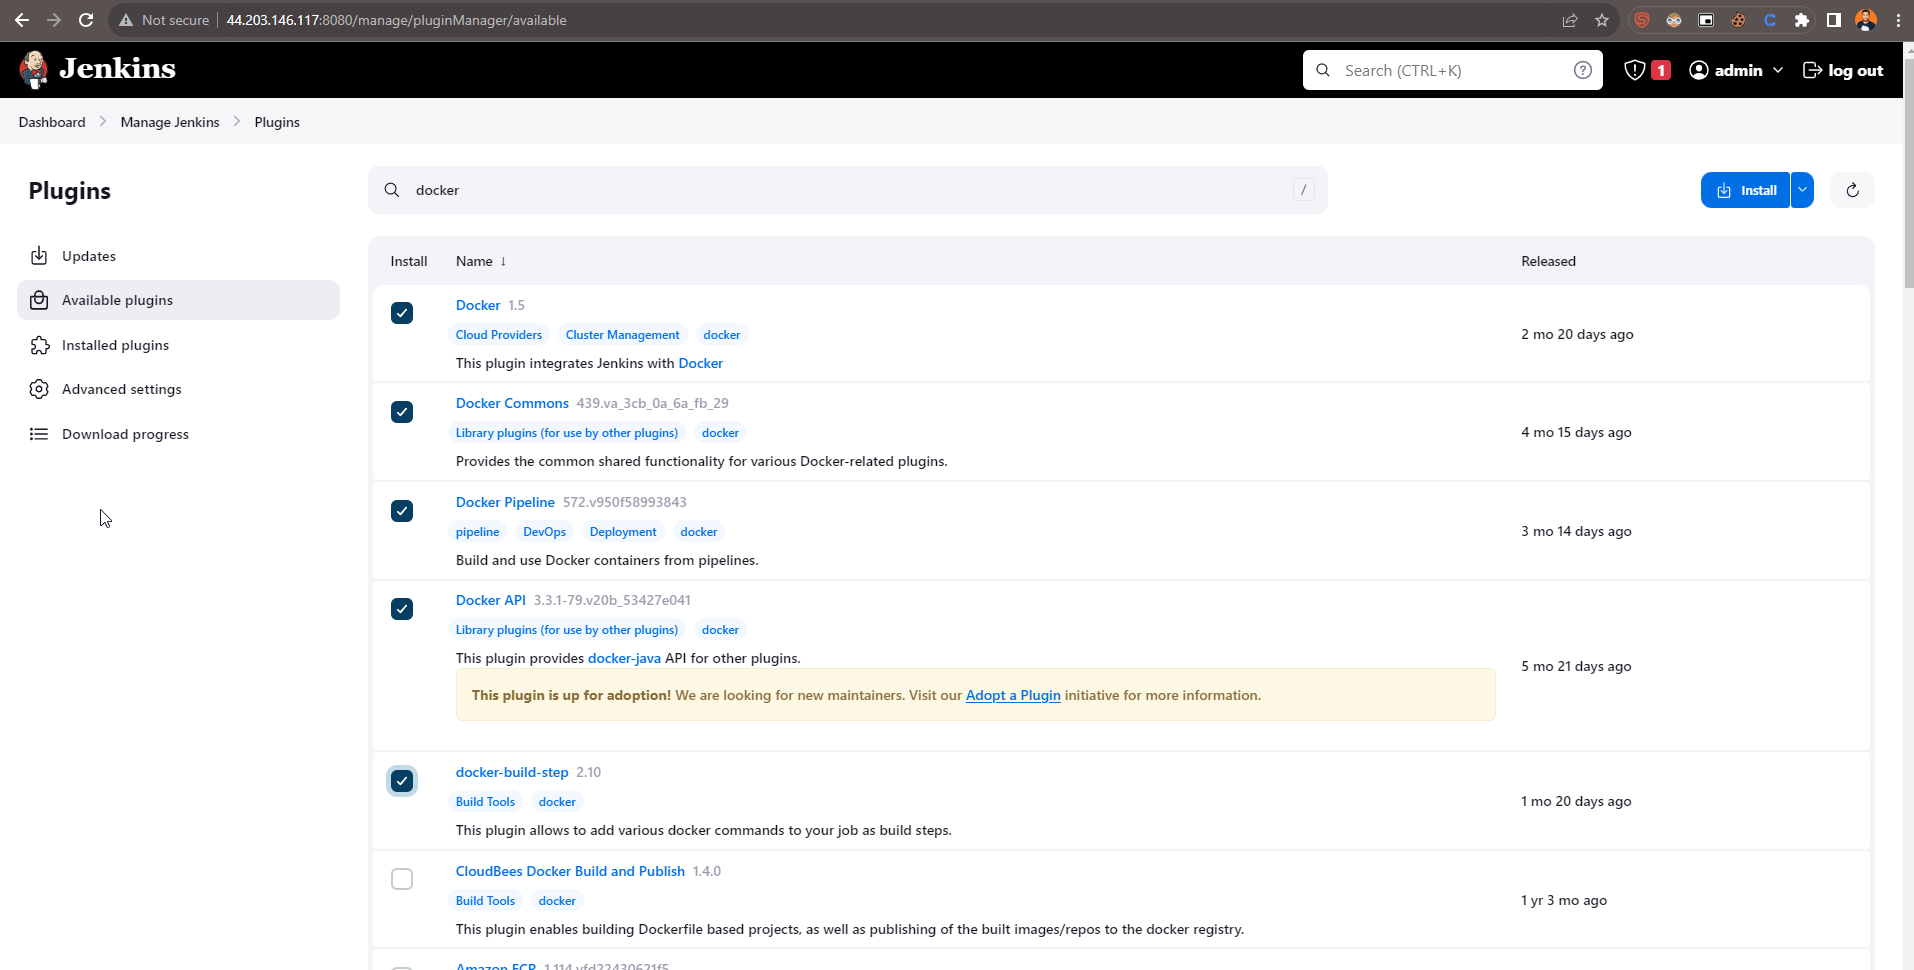
Step-3. Install Plugins like JDK, Sonarqube Scanner, Maven, OWASP Dependency Check
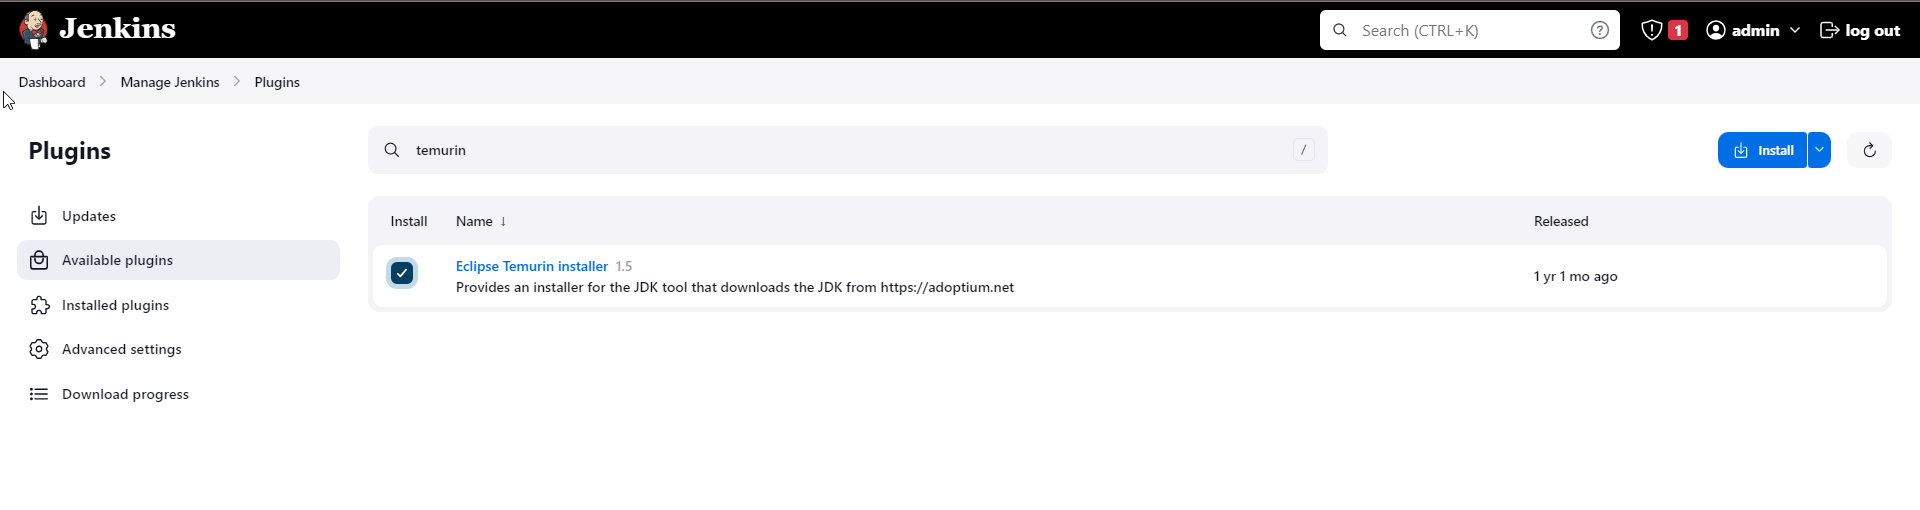
A. Install Below Plugins
Eclipse Temurin Installer *(Install without Restart)
SonarQube Scanner
OWASP Dependency-Check
Docker
Eclipse Temurin Installer *(Install without Restart)
SonarQube Scanner
OWASP Dependency-Check
Docker
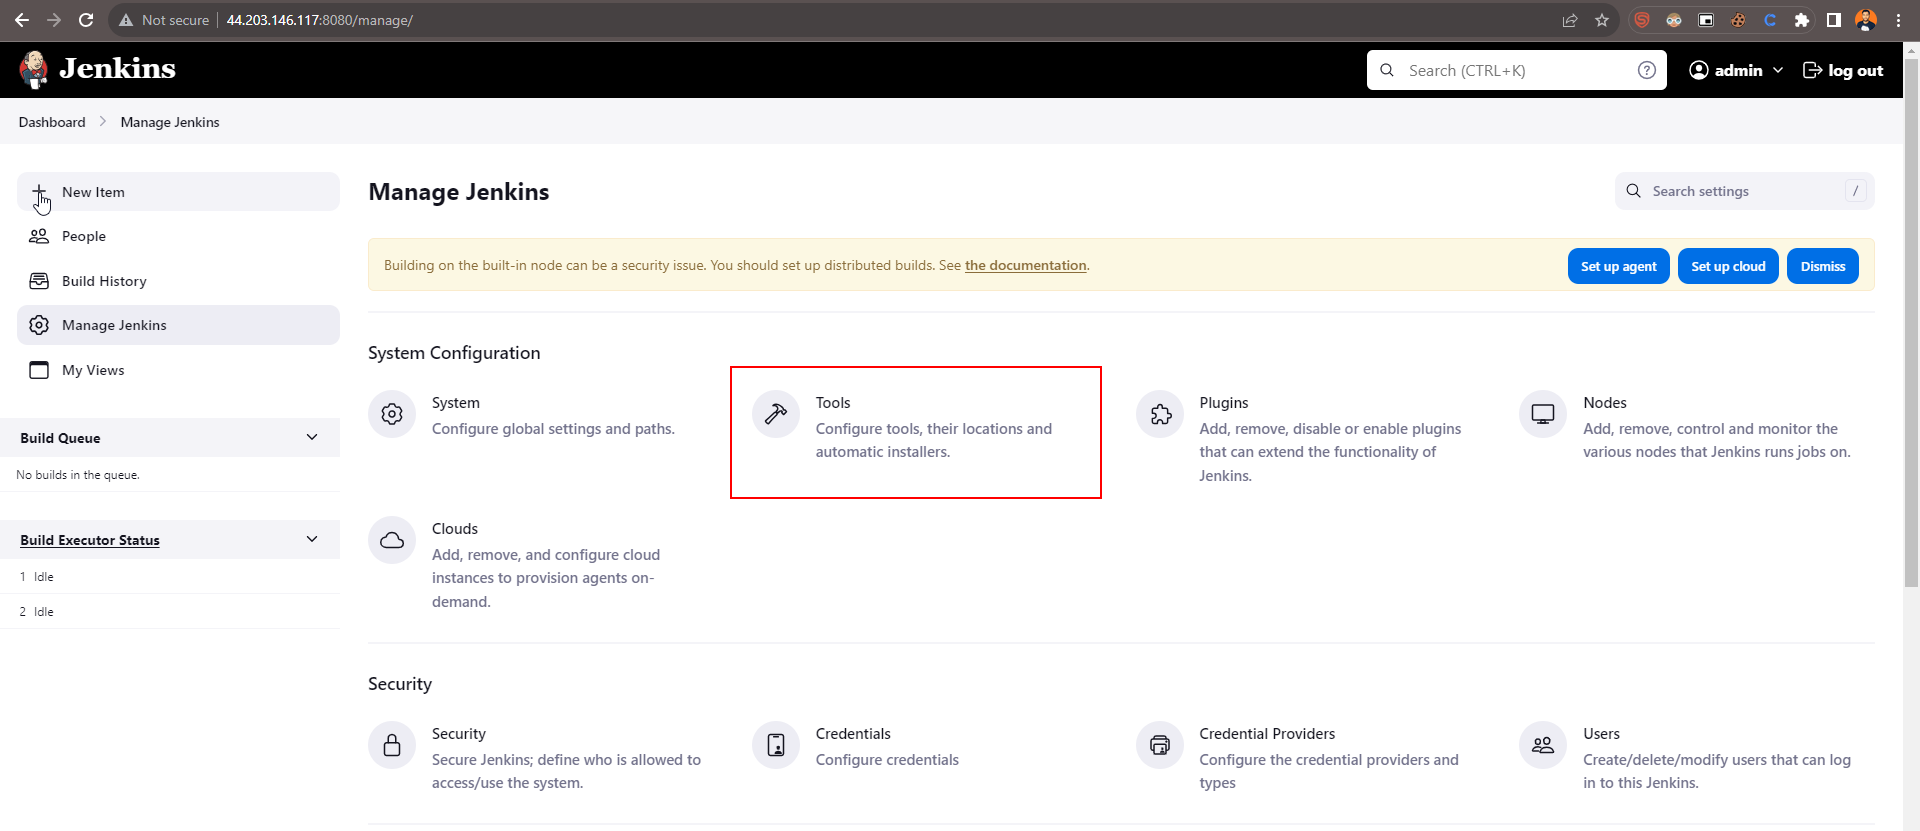
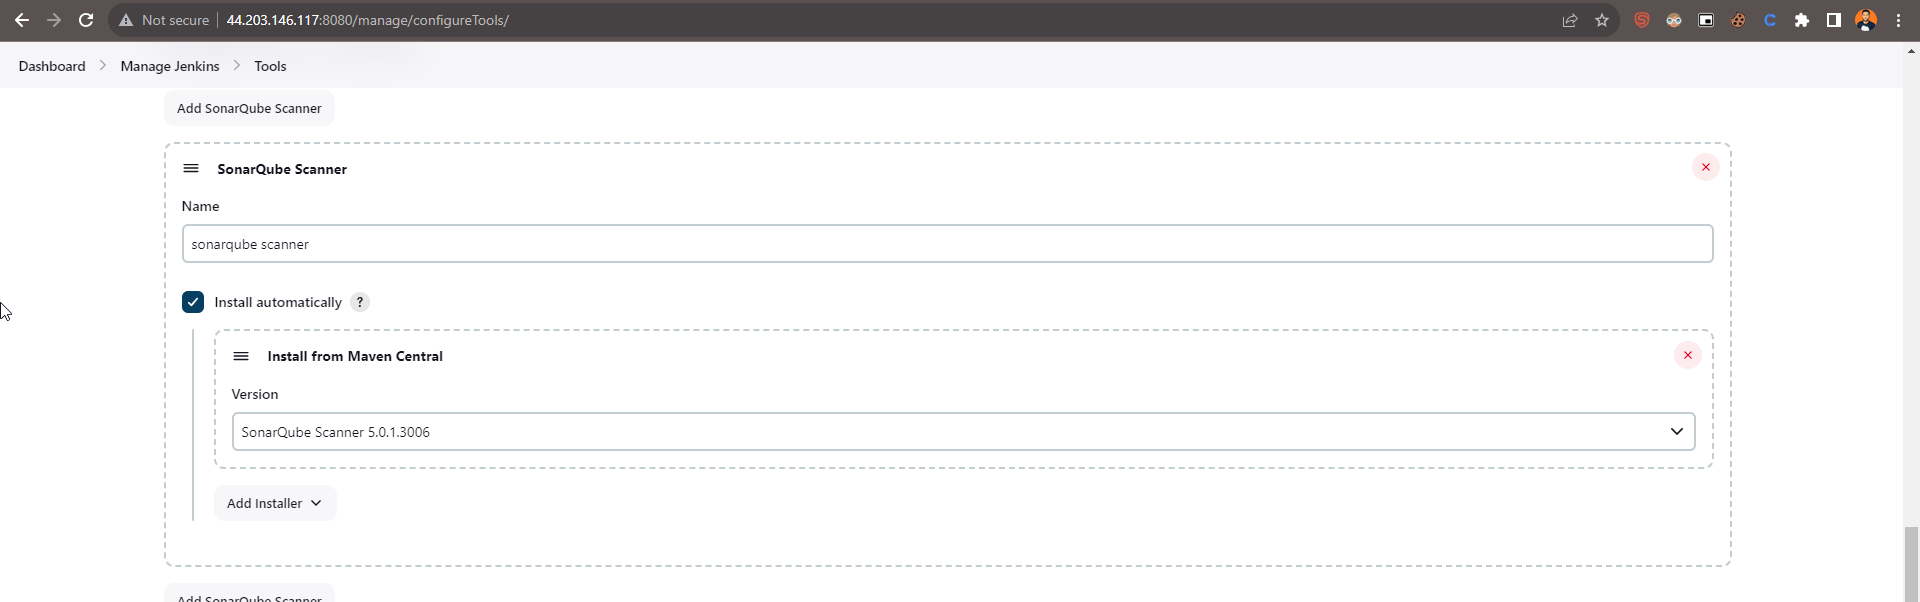
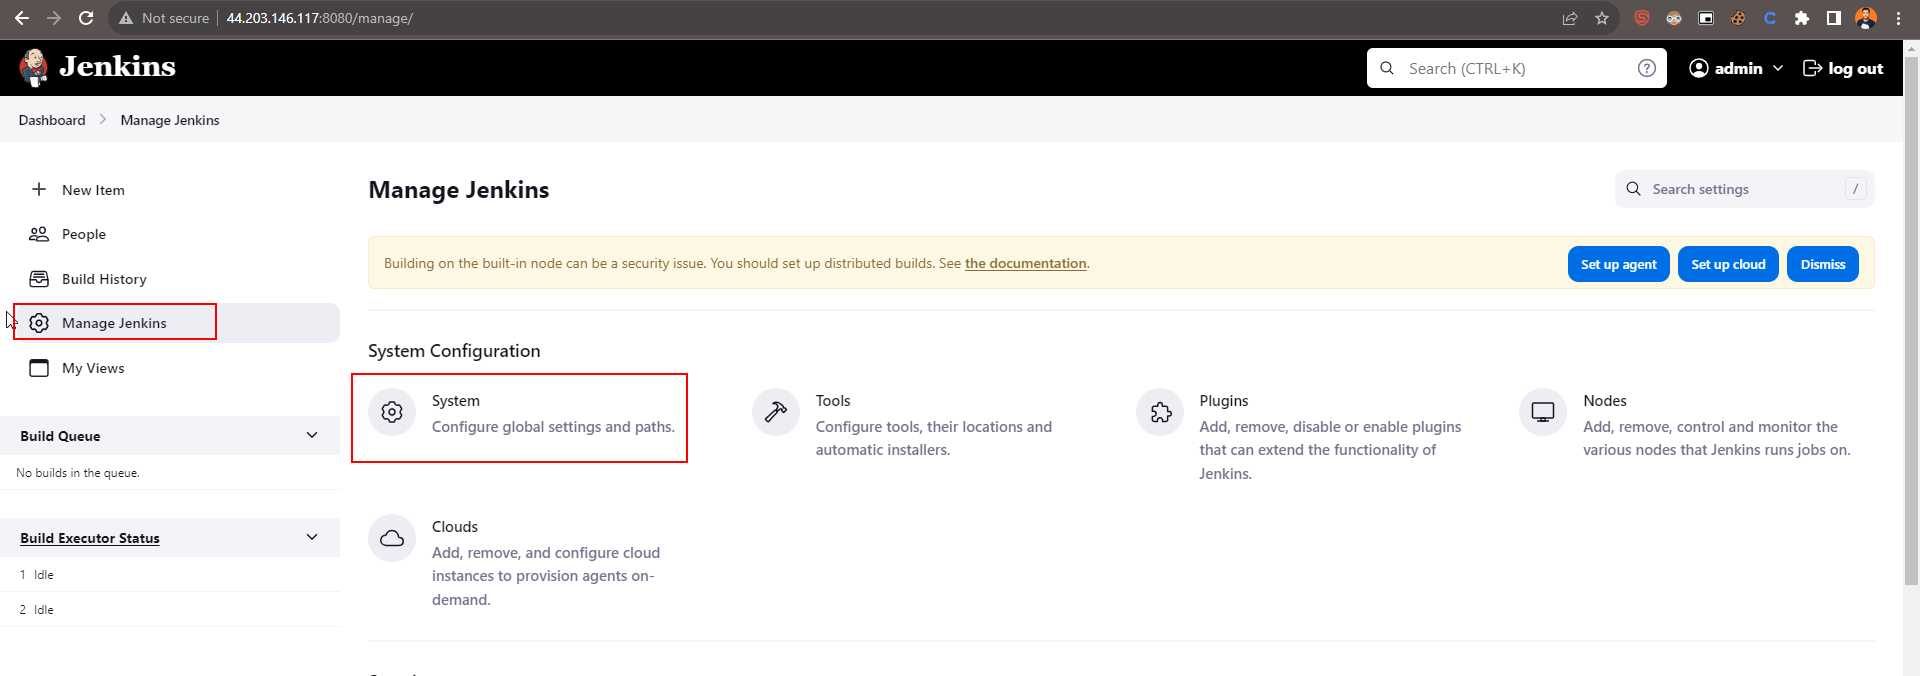
B. Tools Configuration
Go to Manage Jenkins and Click on tools section
Sonarqube ---> install automatically ---> version latest
Maven3 ---> Install automatically ---> Version ---> 3.6.0
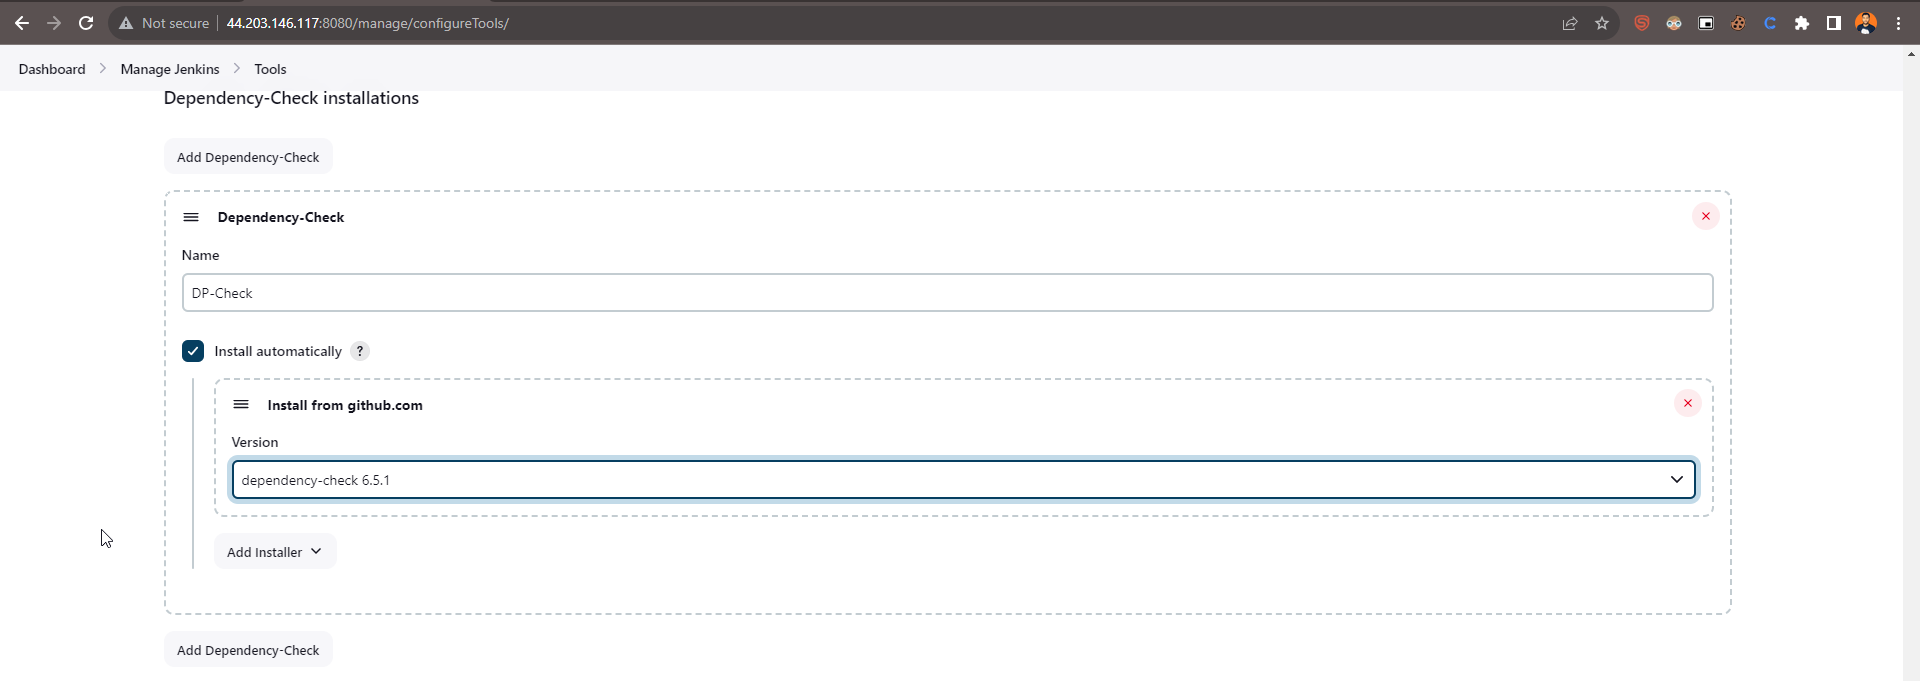
DP-Check ---> install from GitHub ---> version 6.5.1
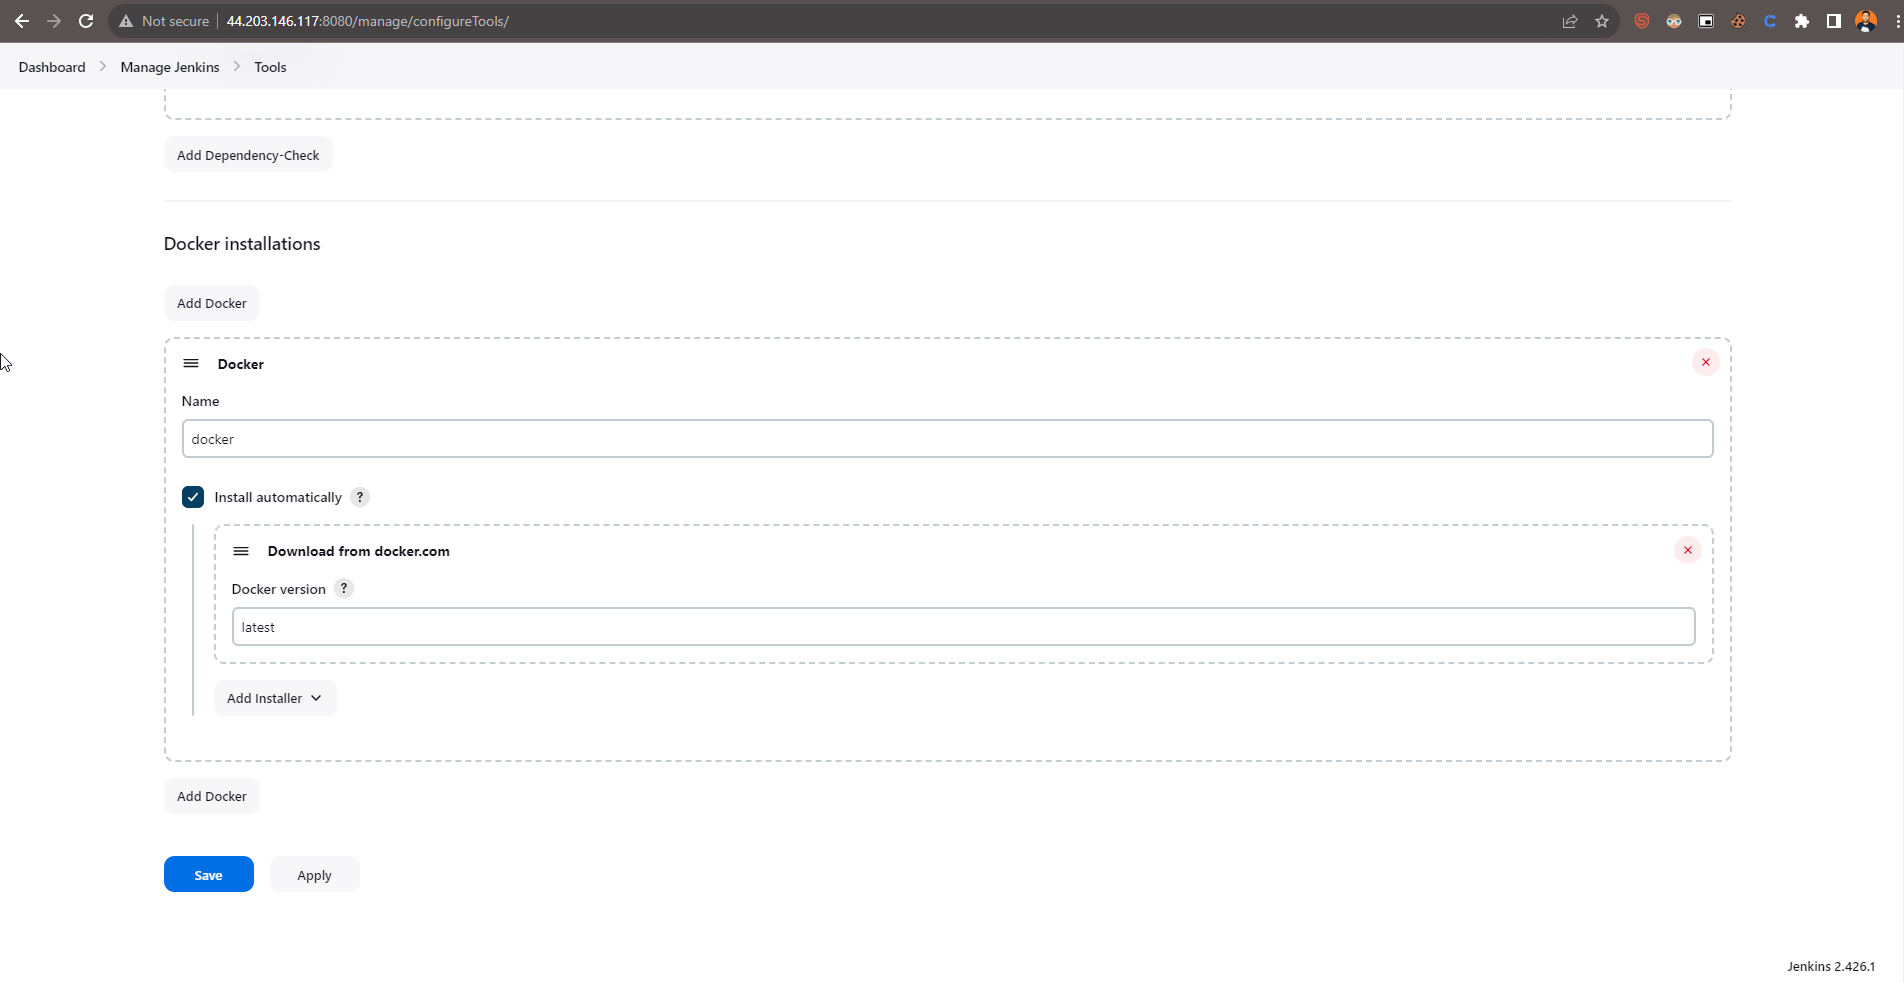
Docker ---> install from docker.com ---> version latest
jdk17 ---> install automatically ----> Version ---> 11.0.20.8

Sonarqube ---> install automatically ---> version latest
DP-Check ---> install from GitHub ---> version 6.5.1
Docker ---> install from docker.com ---> version latest
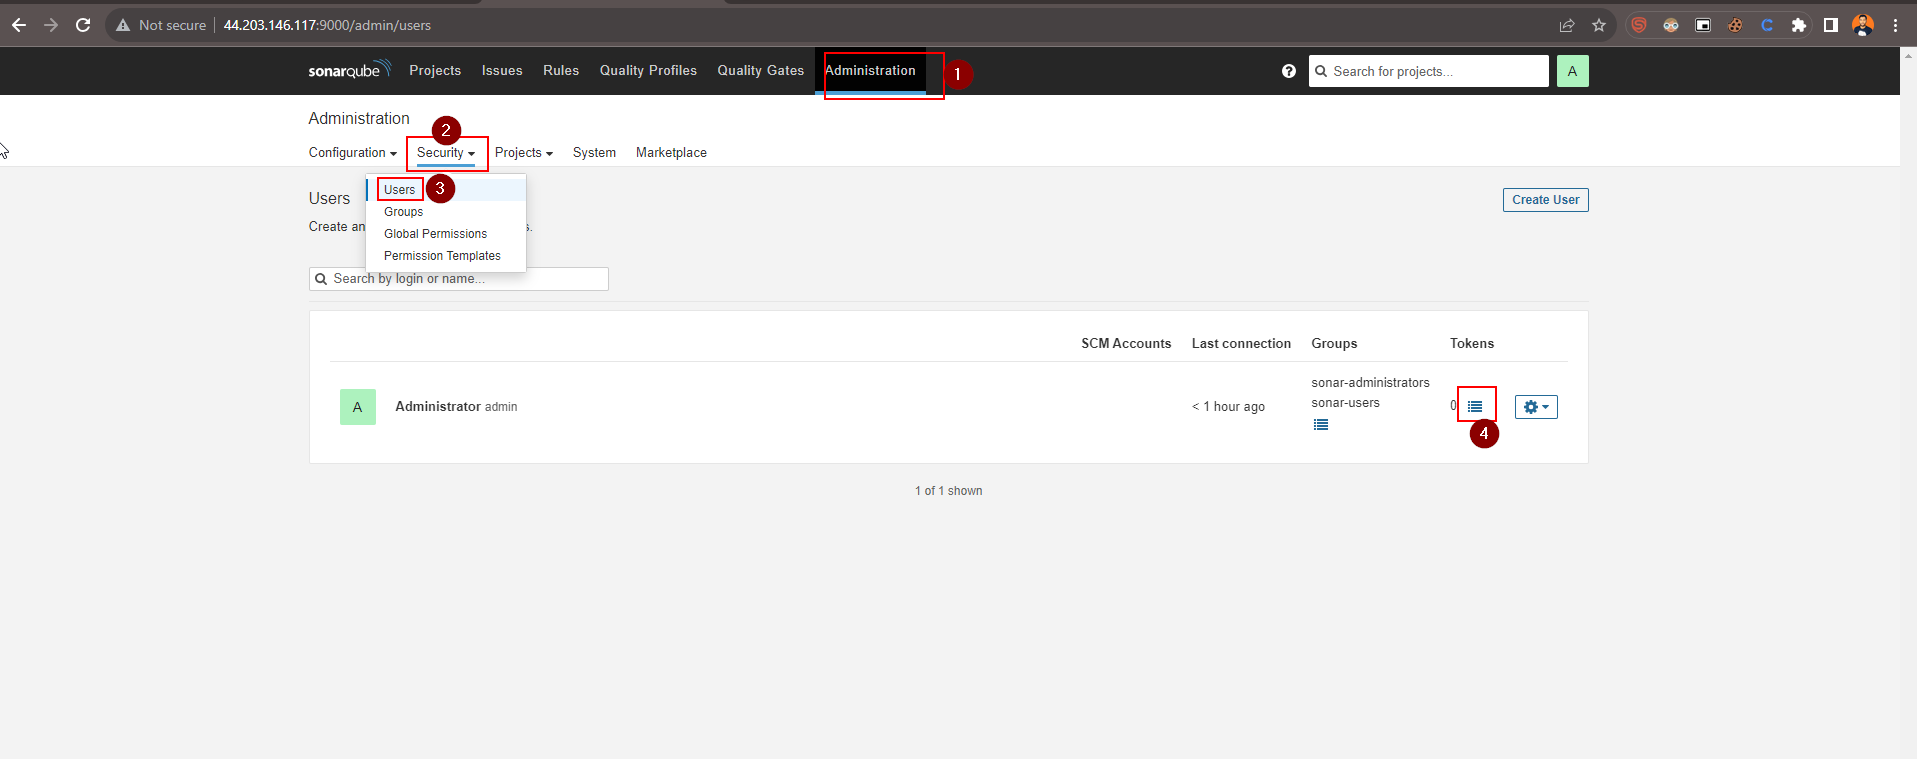
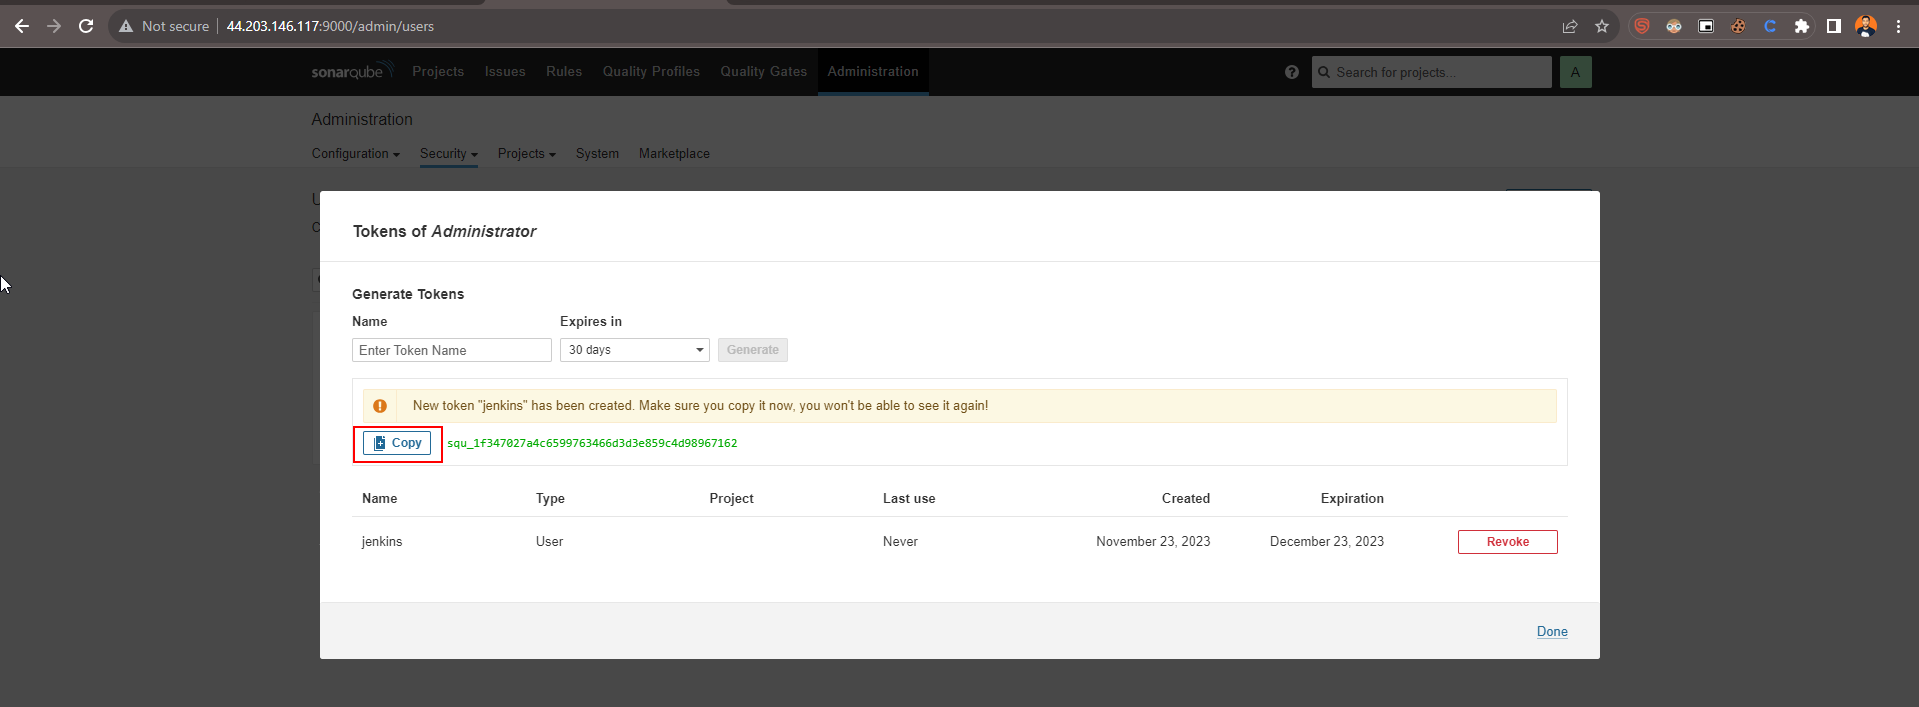
C. SonarQube Integrate with jenkins
Credentials
Sonarqube ---> Administration ---> user ---> create a token squ_1f347027a4c6599763466d3d3e859c4d98967162
Got to ---> manage jenkins ----> security ----> Credentials ----> add credentials ----> secret text ---> Id > Sonar-token

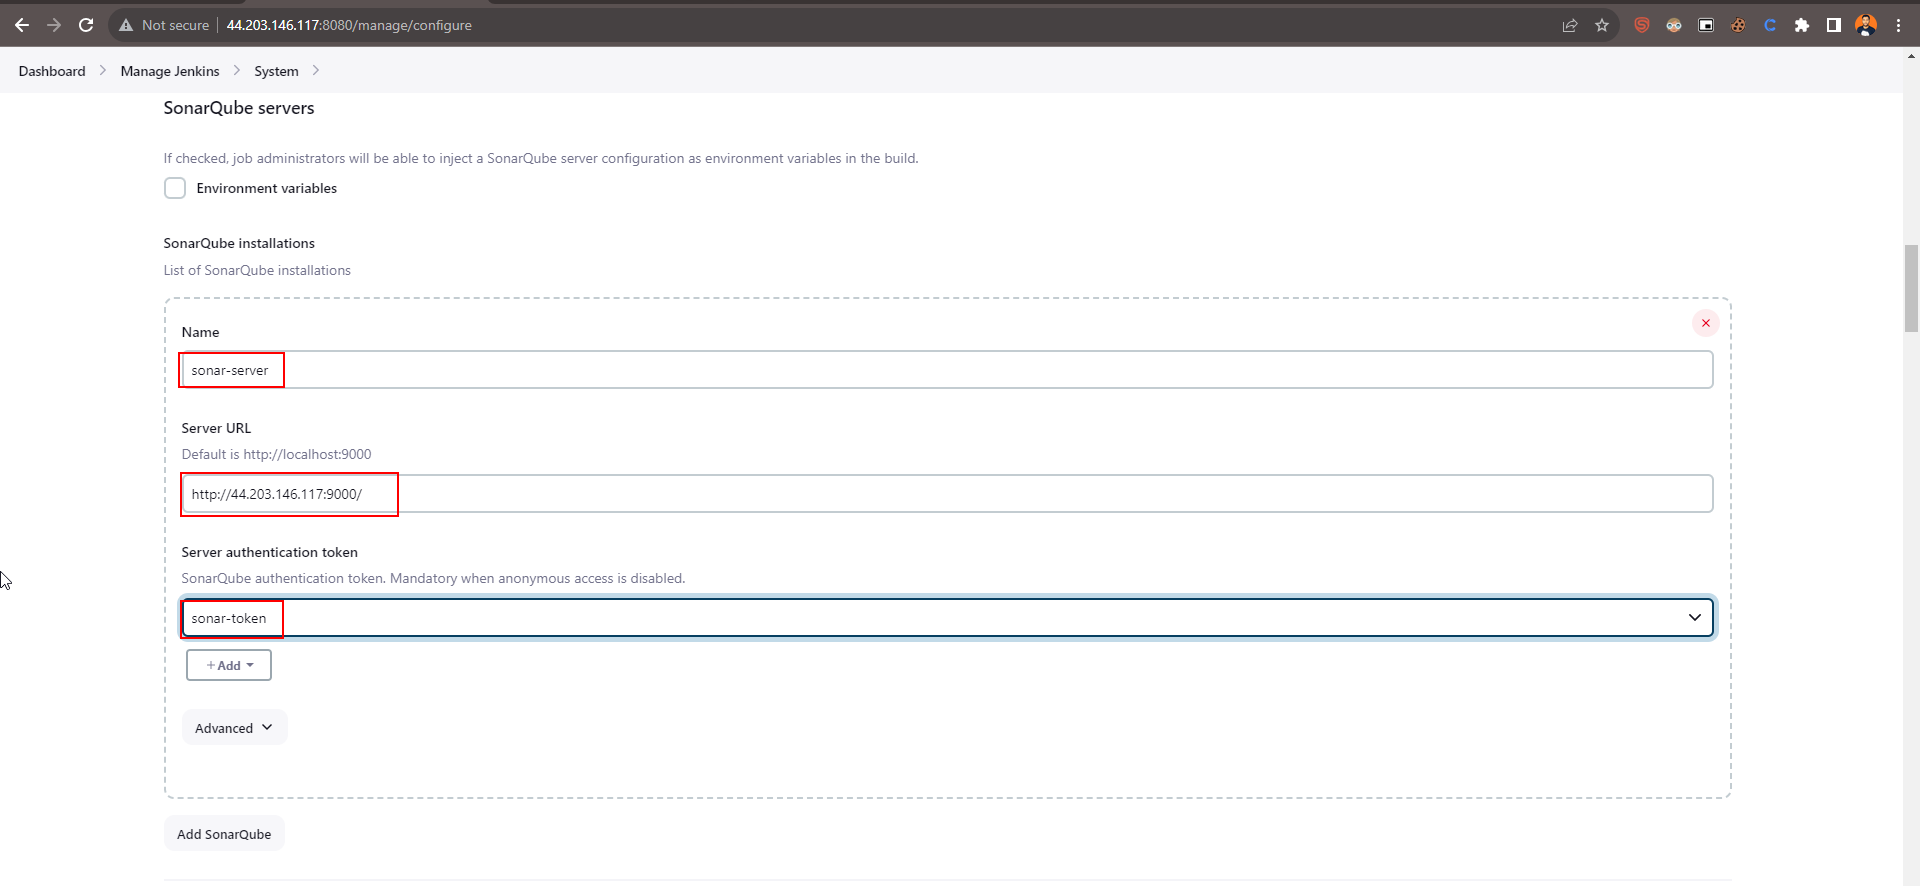
System
Integrate sonarqube ---> sonarqube installation --->name-sonar-server---> server-url ->IP:9000 ---> apply and save
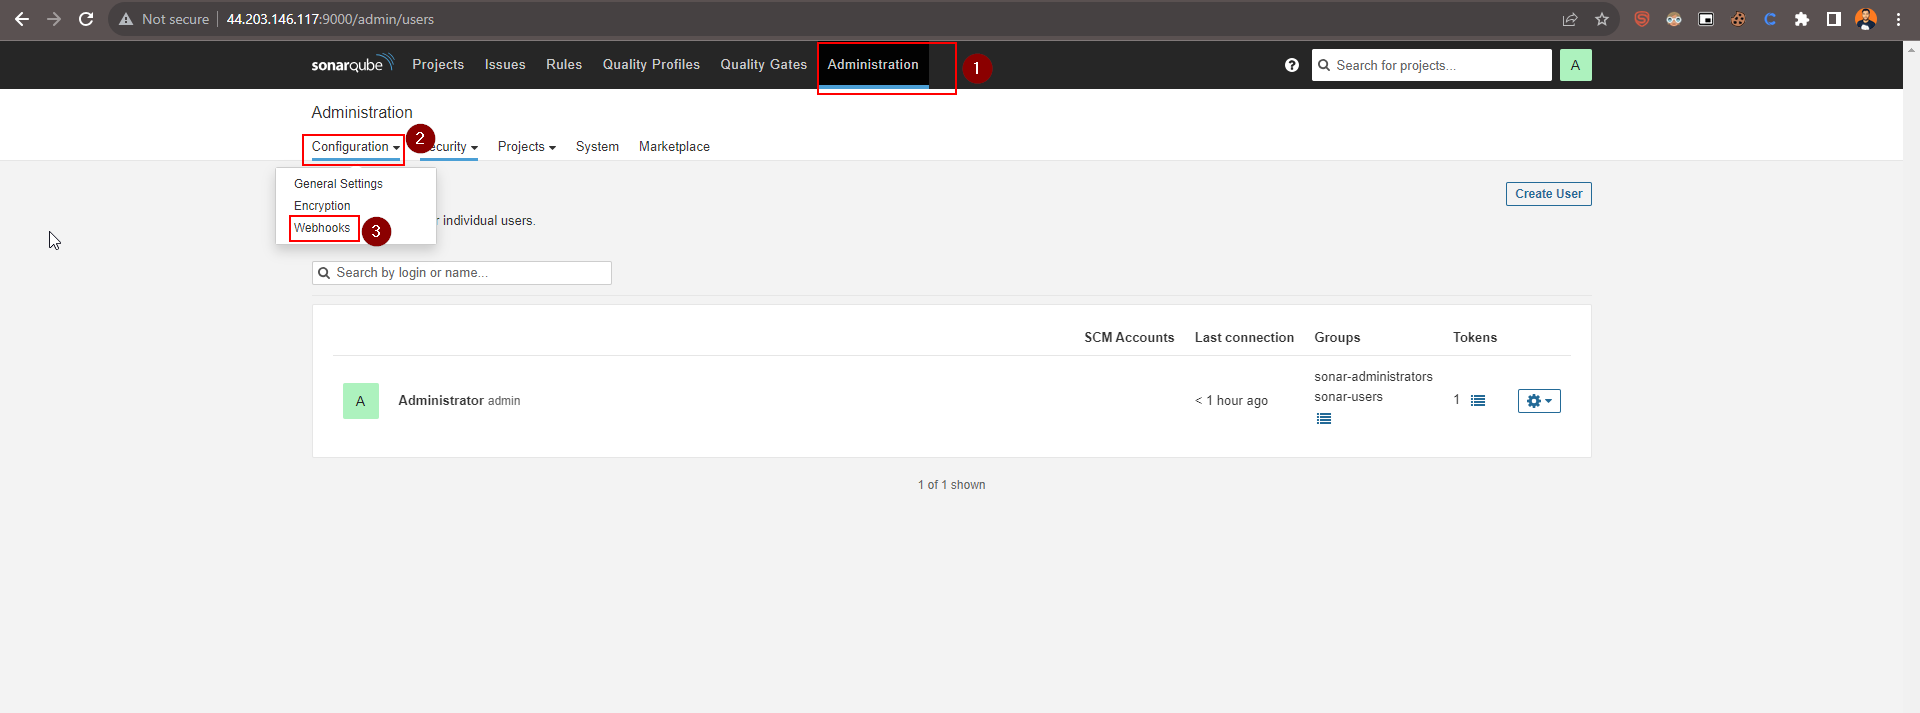
Jenkins Integrate with Sonarqube
Go to administration ---> configuration ---> webhook
Name> jenkins----> url > http://IP:8080/sonarqube-webhook/
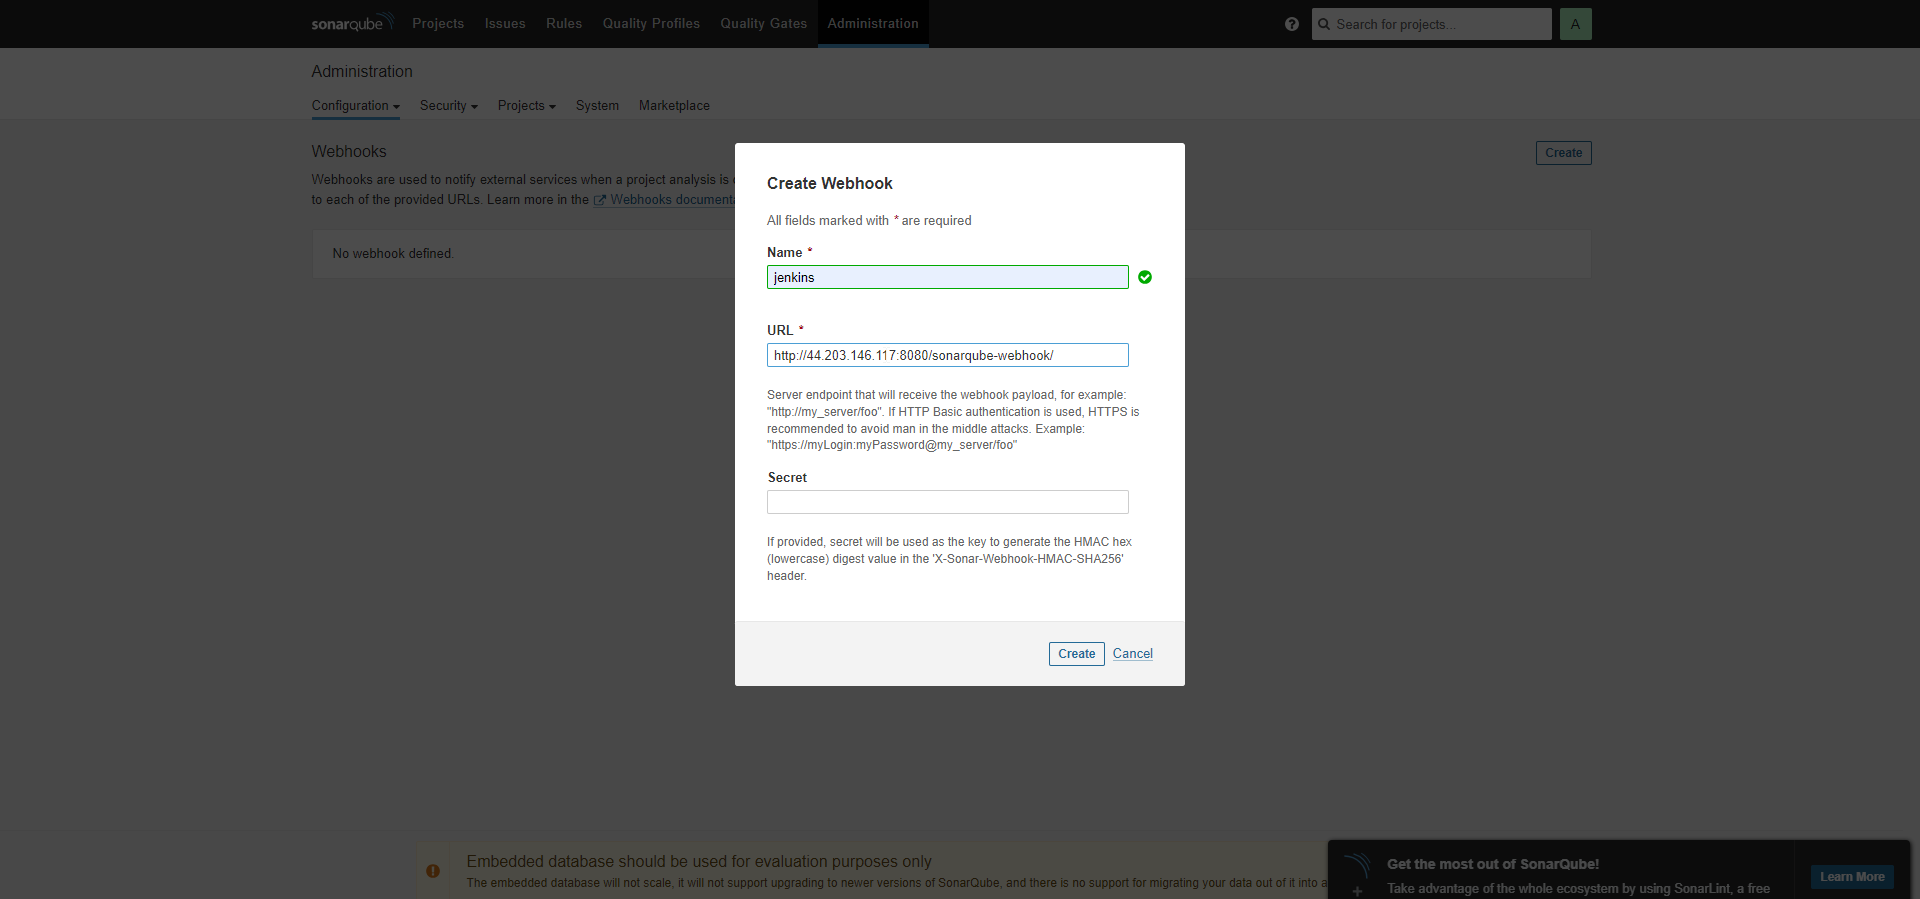
ALL are set :-)
Now Next....
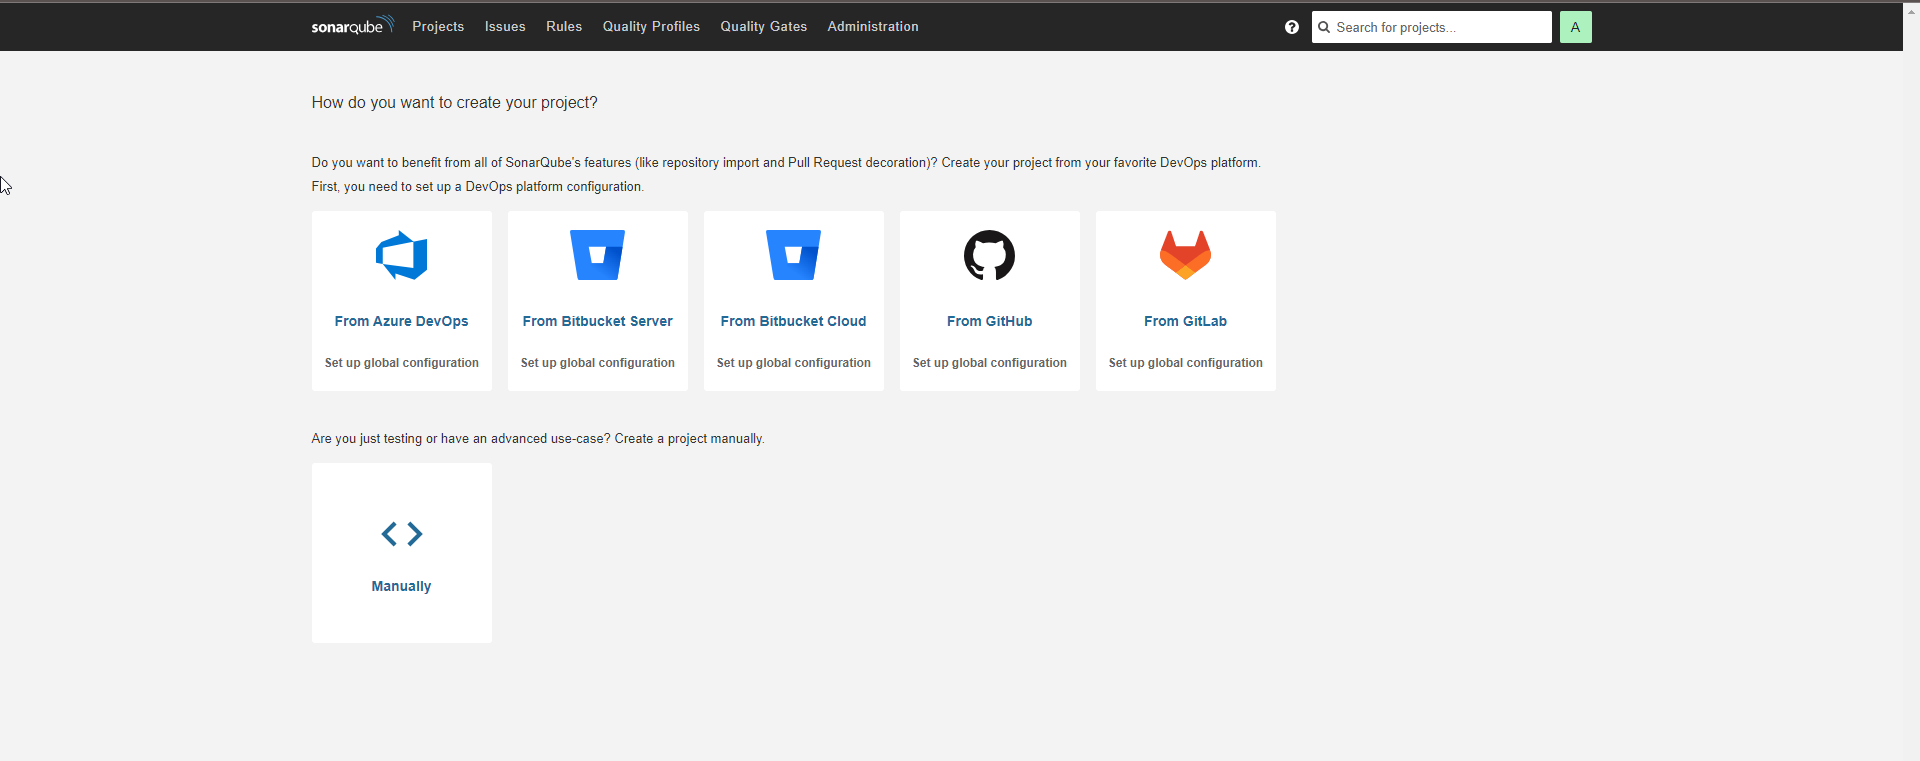
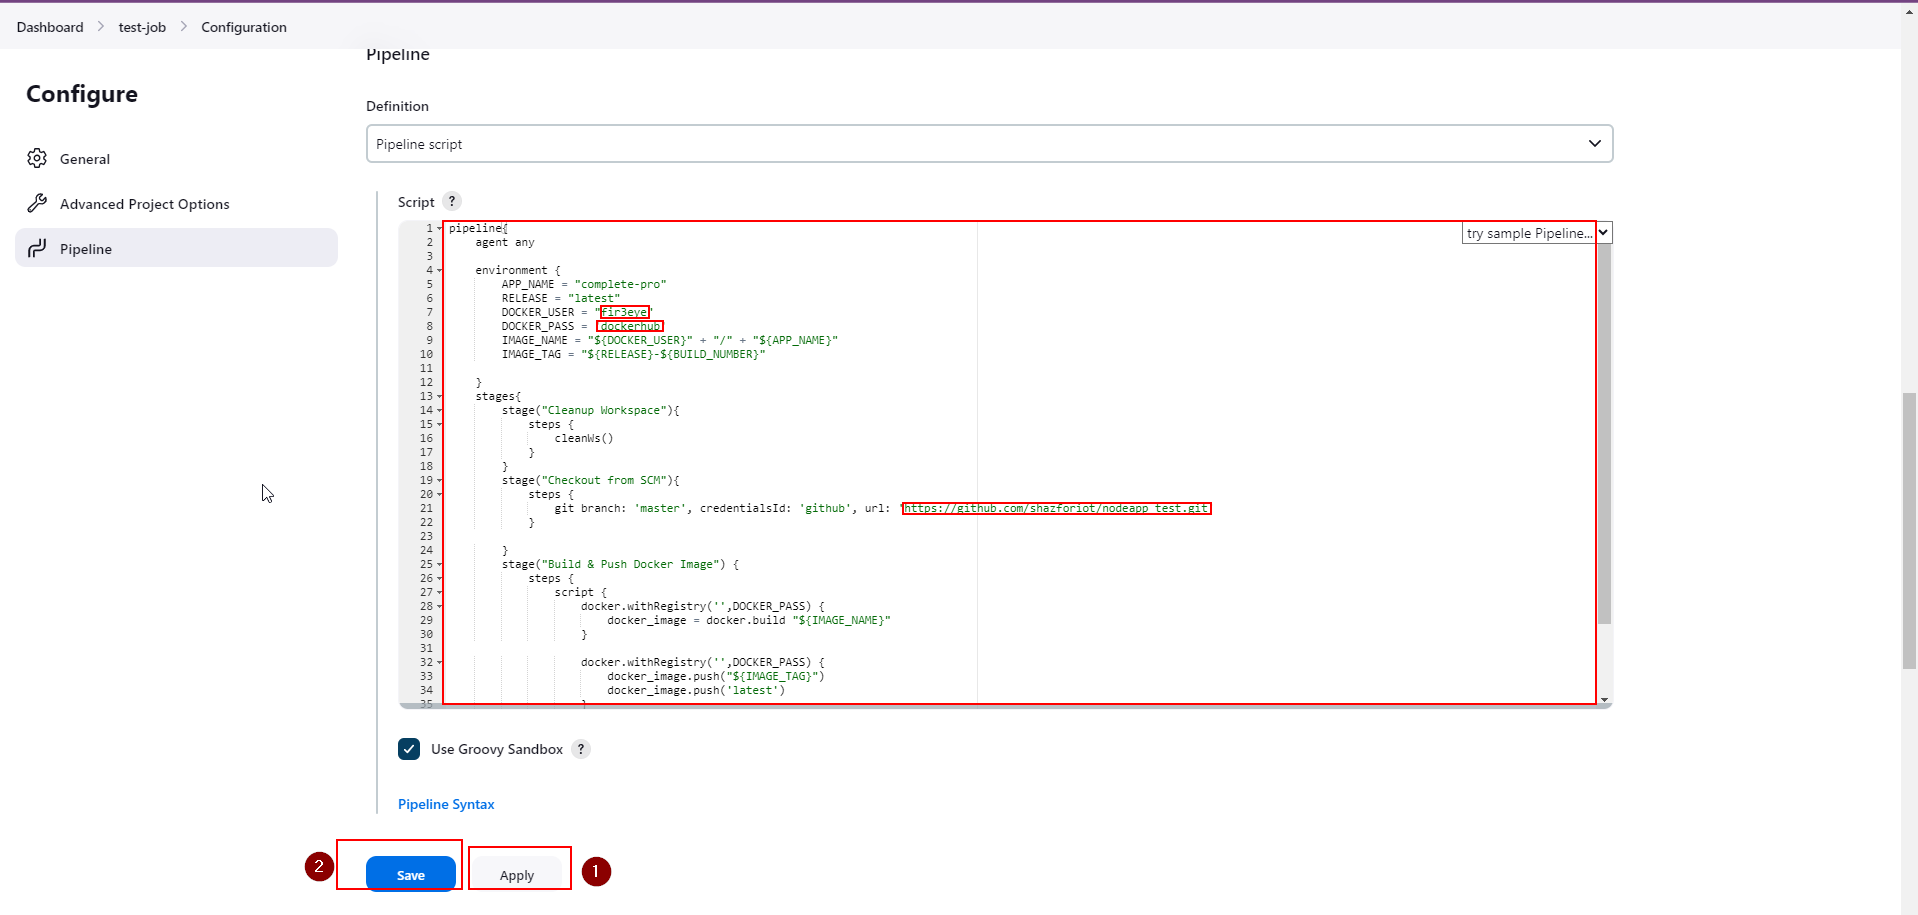
Step-4. Create a Pipeline Project in Jenkins Using a Declarative Pipeline
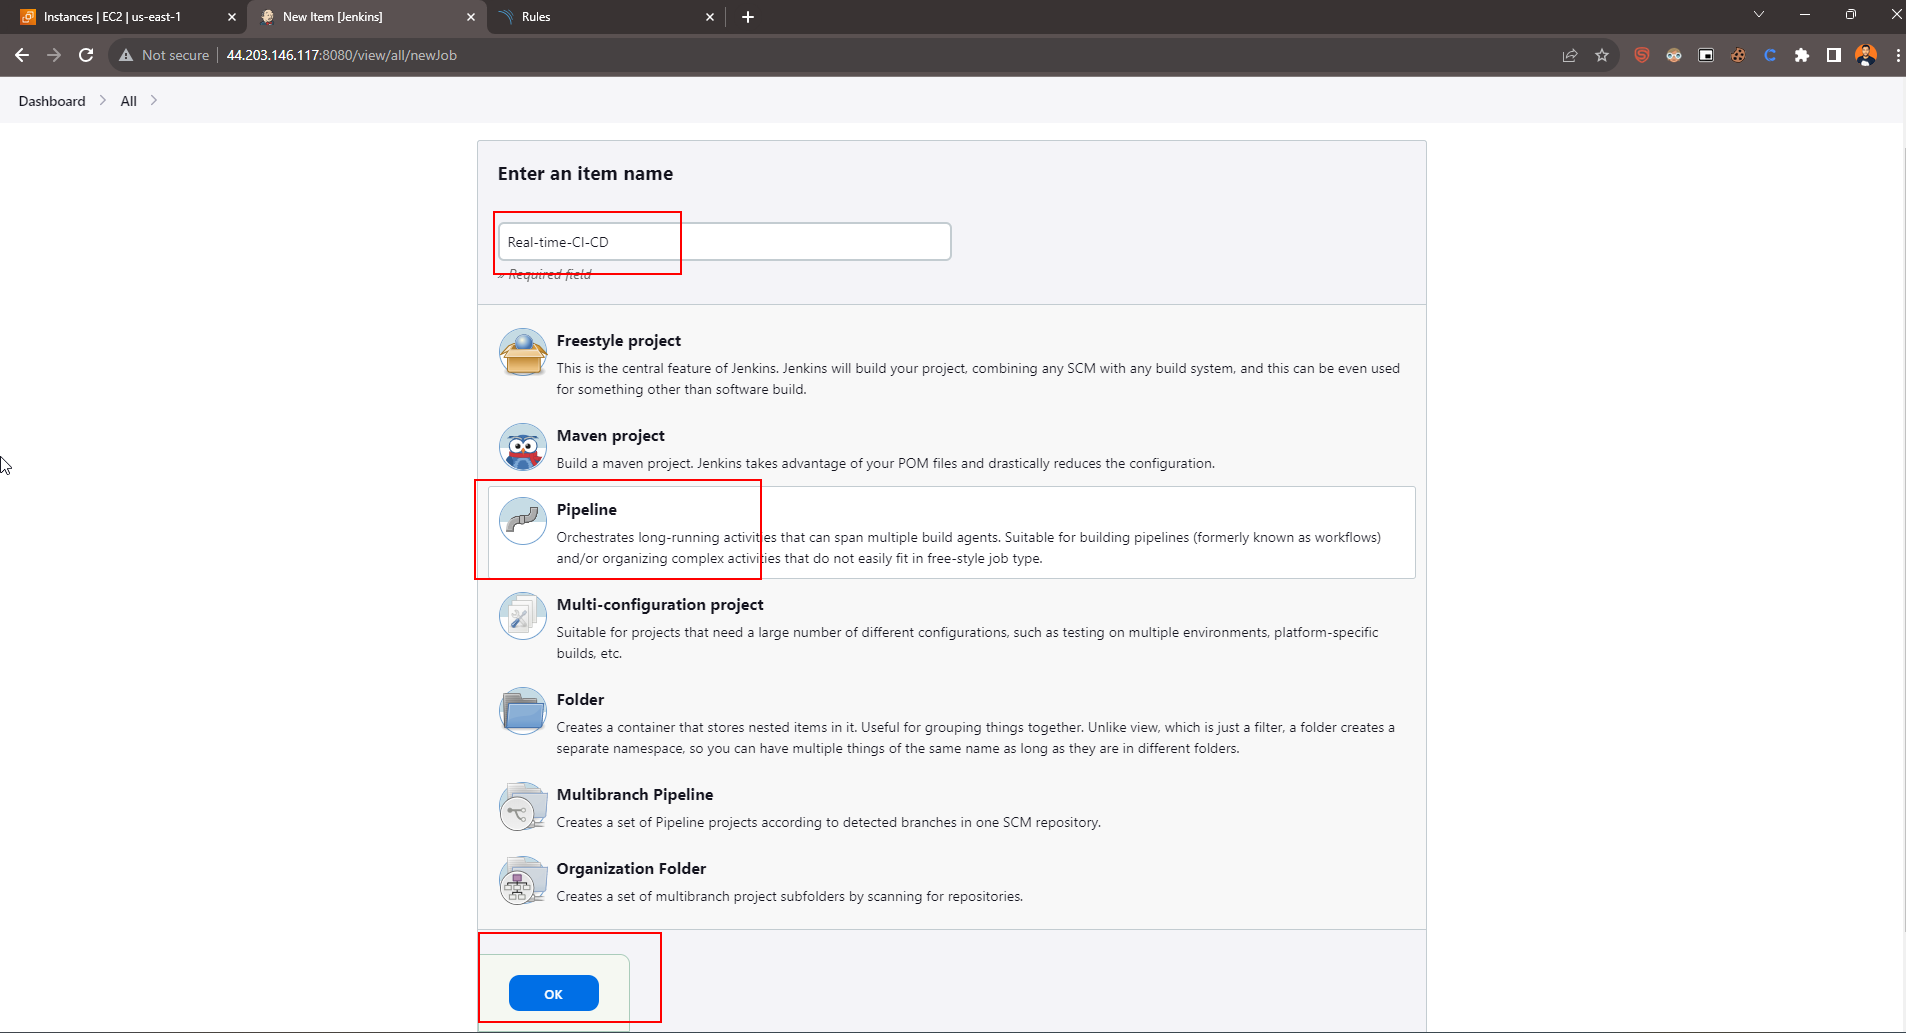
Pipeline
pipeline {
    agent any
    tools {
        jdk 'jdk11'
        maven 'maven3'
    }
    environment {
        APP_NAME = "image_name"
        RELEASE = "latest"
        DOCKER_USER = "fir3eye"
        DOCKER_PASS = 'dockerhub'
        IMAGE_NAME = "${DOCKER_USER}" + "/" + "${APP_NAME}"
        IMAGE_TAG = "${RELEASE}-${BUILD_NUMBER}"
    }
    stages{
        stage("Clean WorkSpace"){
            steps {
                cleanWs()
            }
        }
        stage("Checkout SCM"){
            steps {
                git 'https://github.com/Fir3eye/pr_03_amazon-eks-jenkins-terraform.git'
            }
        }
        stage("Maven Compile"){
            steps {
                sh 'mvn clean compile'
            }
        }
        stage("SonarQube Analysis"){
            steps{
                script{
                    withSonarQubeEnv(credentialsId: 'sonar-token') {
                        sh 'mvn sonar:sonar'
                    }
                }
            }
        }
        stage ('Build War file') {
            steps {
                sh 'mvn clean install package'
            }
        }
    }
}
Step -5. Build and push on Docker Hub
        stage("Build Docker Image"){
            steps{
                script {
                    docker.withRegistry('',DOCKER_PASS) {
                        //sh "docker images --format '{{.Repository}}:{{.Tag}}' | grep ${IMAGE_NAME} | grep -v ${RELEASE}-${BUILD_NUMBER} | grep -v latest | xargs -I {} docker rmi {} || true"
                        docker_image = docker.build "${IMAGE_NAME}"
                    }
                }
            }
        }
        stage("Push Docker Image"){
            steps{
                script {
                    docker.withRegistry('',DOCKER_PASS){
                        docker_image.push("${IMAGE_TAG}")
                        docker_image.push('latest')
                    }
                }
            }
        }
Step -6. Deploy on Docker
        stage ('Deploy to Container') {
            steps {
                sh 'docker run -d --name pet1 -p 8082:8080 fir3eye/image_name:latest'
            }
        }
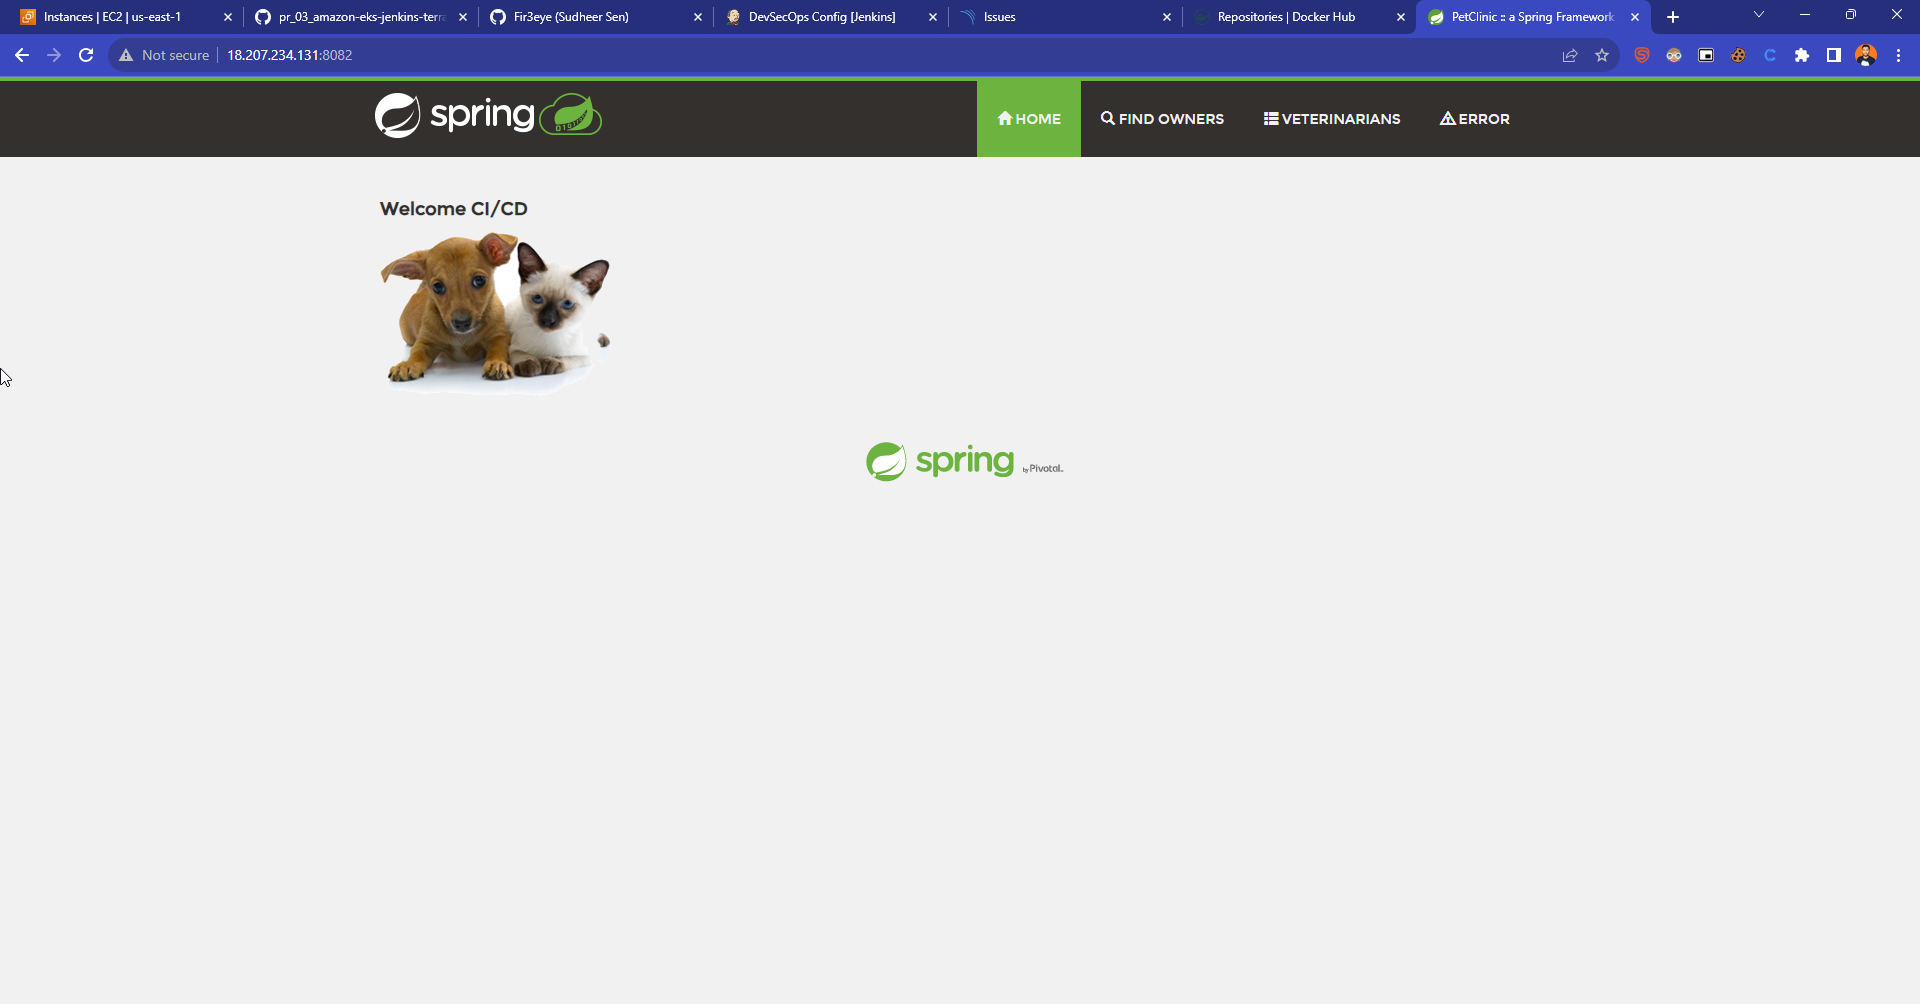
Step -7. Access the Real World Application
Copy server IP:8082 and paste on the browser
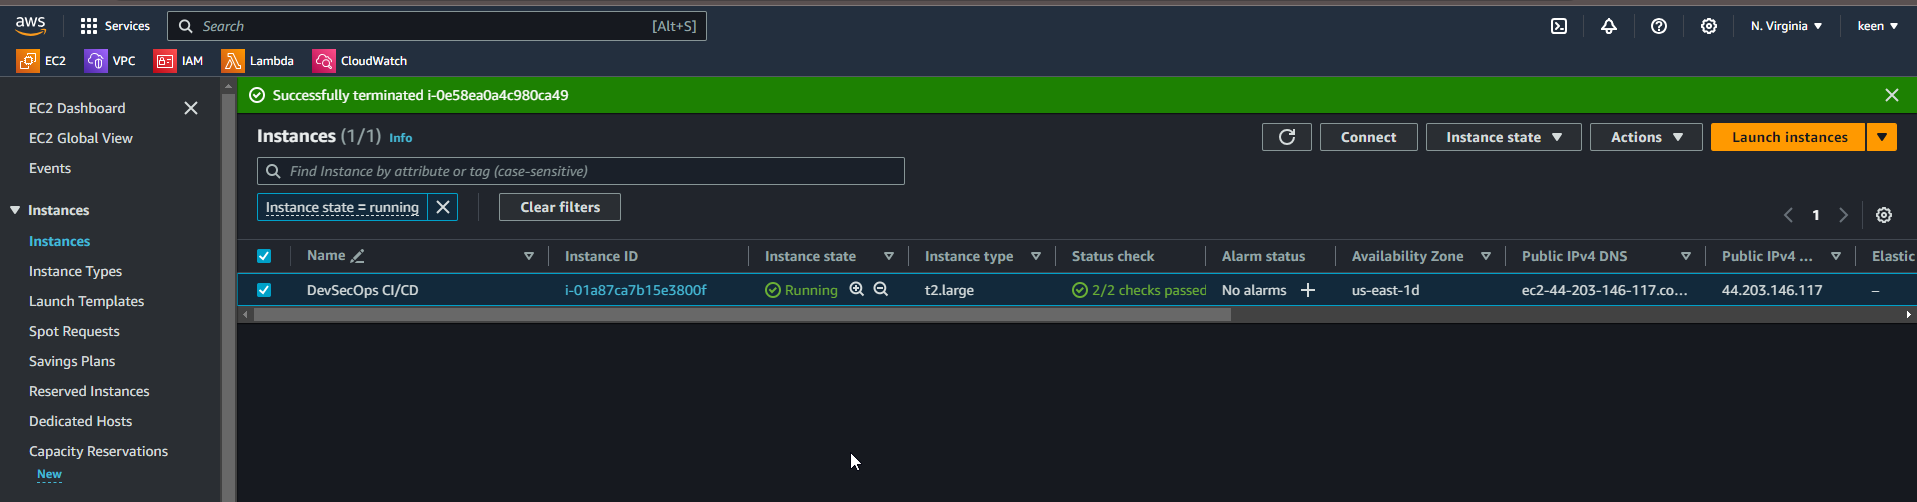
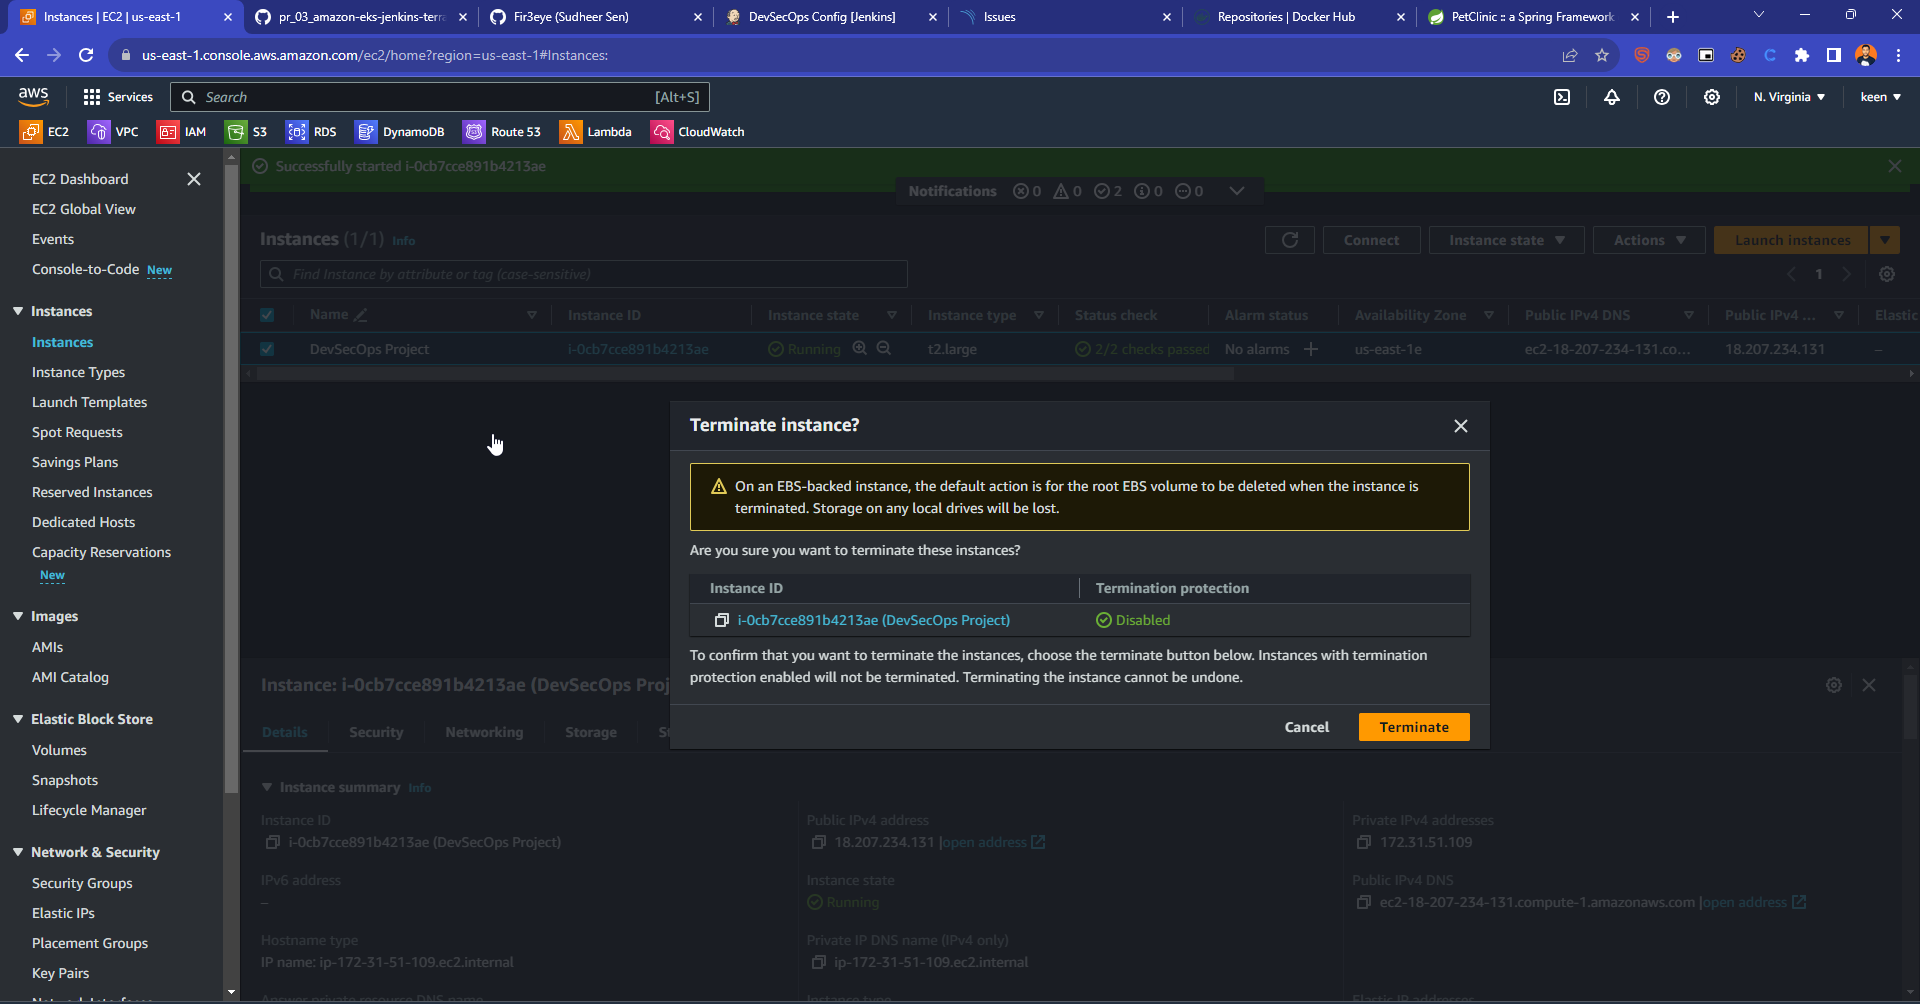
Step - 8. Terminate the AWS EC2 Instance

Subscribe to my newsletter
Read articles from Sudheer sen directly inside your inbox. Subscribe to the newsletter, and don't miss out.
Written by
Sudheer sen
Sudheer sen
👋 Hello! I'm passionate about DevOps & AWS Cloud. I have over 1.4 years of experience in IT Security and Cloud field. I'm proficient in a variety of cutting-edge technologies and always motivated to expand my knowledge and skills. Let's connect and grow together! OS: Linux/Unix, Mac, Windows Cloud: AWS Containers: Docker Version Control: GIT, GitHub, GitLab, Bitbucket. CI/CD Tools: Jenkins Container Orchestration: Kubernetes Languages: Python, PowerShell, Shell scripting IAC: Terraform, Ansible, Chef, AWS Cloud Formation Web: Apache, Nginx, Tomcat Open to opportunities. 🌱 #DevOps #AWS #CI/CD #Containers #Python #IaC #Cloud #Blogging #OpenToOpportunities