Kubernetes Cluster setup using Kubeadm on CentOS 7
 shubhlaxmi S
Table of contents
- COMMON STEPS FOR MASTER and WORKER-NODE
- Step 1: Launch EC2 Instances
- Step 2: Configure Security Groups
- Step 3: Set Hostname on Nodes
- Step 4: Disable SELinux
- STEP5: Install Required Packages
- Step 6: Manage and install Docker
- Step-7: Setup the Kubernetes Repo
- Step 8-Install Kubernetes components
- Step 9-Create docker daemon config file
- Step 10- Reload the Daemon , restart docker and restart Kubelet service
- STEPS FOR MASTER-NODE
- Step 11- Initialize Kubeadm
- Step 12: Install a Pod Network Addon
- DEMO
Kubernetes Overview:
Open-source platform for container orchestration.
Automates deployment, scaling, and management of containerized applications.
Key Features:
Streamlines cluster orchestration, optimizing resource utilization.
Enables seamless scaling and provides a portable solution for modern application deployment across diverse environments.
The combination of CentOS and Kubernetes provides a robust, scalable, and cost-efficient solution for container orchestration, making it an excellent choice for organizations seeking a versatile platform for managing containerized workloads.
PREREQUISITE
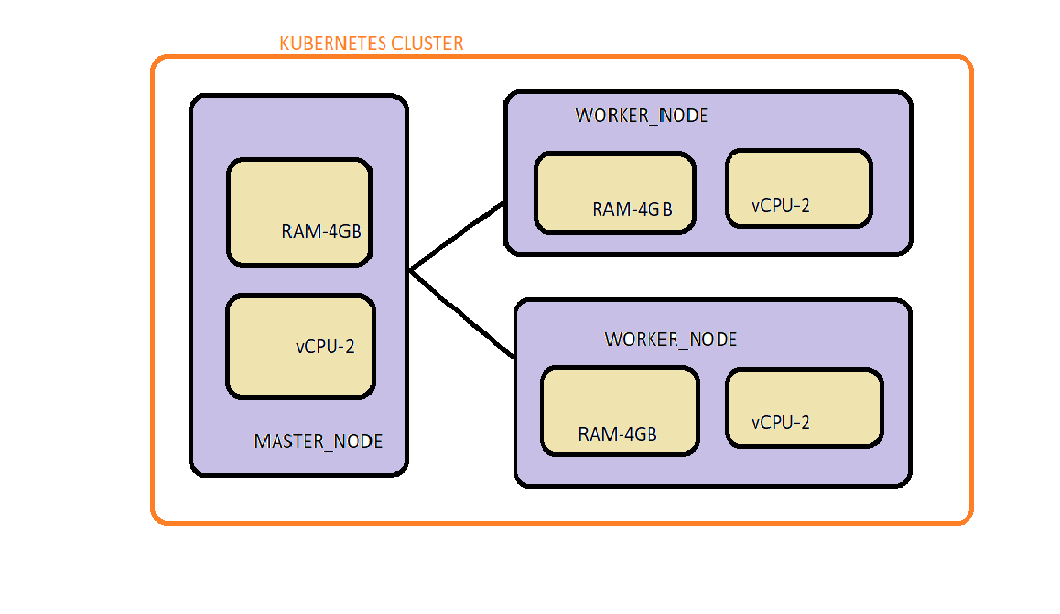
Set up CentOS 7 servers: 1 Master Node, 2 Worker Nodes.
Master Node should ideally have a minimum of 2 CPUs (not strictly required).
Ensure internet connectivity on all nodes for fetching Kubernetes and Docker packages.
Verify that the yum package manager is installed and can fetch packages remotely.
Access to an account with sudo or root privileges is necessary.
(Here I have taken one master and one worker node)


COMMON STEPS FOR MASTER and WORKER-NODE
Step 1: Launch EC2 Instances
Launch three EC2 instances(recommended)one for the master node and two for worker nodes. Choose a CentOS Amazon Machine Image (AMI) for instances.

Step 2: Configure Security Groups
Open all required Ports In AWS Security Groups. now we will open All traffic.
Step 3: Set Hostname on Nodes

Step 4: Disable SELinux

STEP5: Install Required Packages


Step 6: Manage and install Docker


Now Docker is installed, but the service is not yet running. Start and enable Docker using the commands


Step-7: Setup the Kubernetes Repo


Step 8-Install Kubernetes components
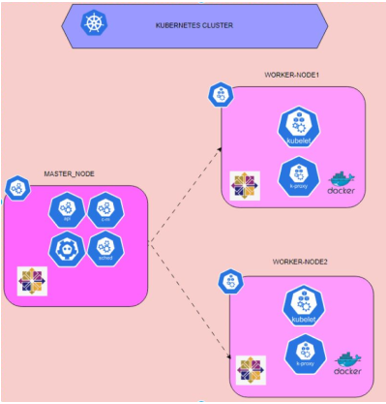
kubeadm: Facilitates Kubernetes cluster setup and initialization.
Kubelet: Node agent ensuring containers are running in a Pod.
kubectl: Command-line tool for interacting with the Kubernetes cluster.
→ Install kubeadm, Kubelet And Kubectl
yum install kubeadm-1.23.0-0 kubelet-1.23.0-0 kubectl-1.23.0-0 -y

Step 9-Create docker daemon config file


Step 10- Reload the Daemon , restart docker and restart Kubelet service


STEPS FOR MASTER-NODE
Step 11- Initialize Kubeadm


Set up local kubeconfig (both for regular user and root user):
need to run the following as a regular user

if you are the root user, run this

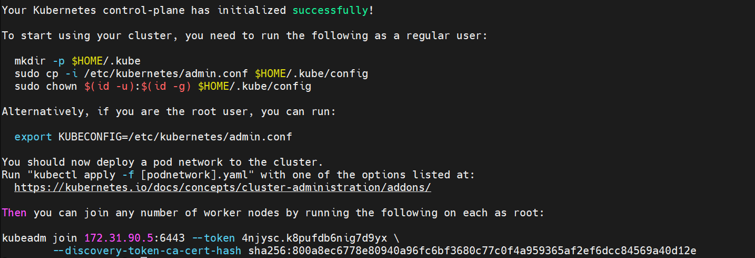
The process might take some minutes to complete. Once this command finishes, it displays a kubeadm join message.
NOTE: Save the output generated during the initialization of the Kubernetes master node, including the token and join command.This information is essential for connecting and adding worker nodes to the cluster during later stages of the deployment process.
On Worker node, Run the output command in your worker nodes


On master node,

The node is created and cluster is setup but not in ready state . This is due to there is no network package not set yet.
Step 12: Install a Pod Network Addon
On the master node, install a pod network add-on (It allows nodes within the cluster to communicate). here we use Calico:
https://docs.tigera.io/calico/latest/getting-started/kubernetes/self-managed-onprem/onpremises
Download the Calico networking manifest for the Kubernetes API datastore.
#curl https://raw.githubusercontent.com/projectcalico/calico/v3.26.4/manifests/calico.yaml -O

Apply the manifest using the following command
#kubectl apply -f calico.yaml


All the nodes in cluster is ready to use for deployment.

DEMO


Thanks for reading!! Keep Learning
Subscribe to my newsletter
Read articles from shubhlaxmi S directly inside your inbox. Subscribe to the newsletter, and don't miss out.
Written by
