"Simplifying AWS IAM with Alias: User and Group Management Alongside Multi-Factor Authentication "
 Sprasad Pujari
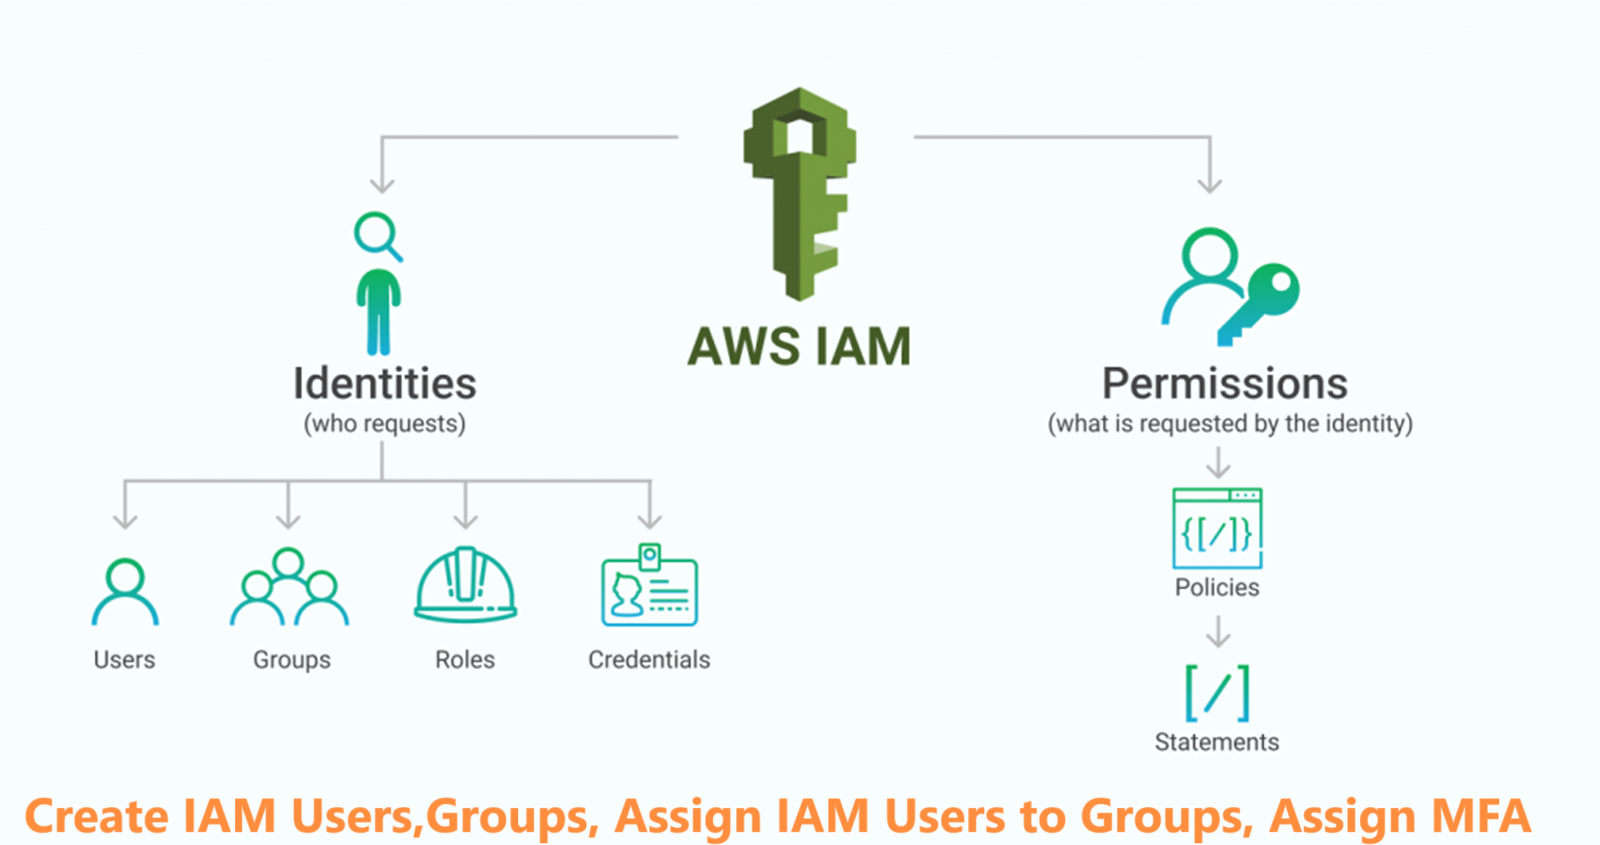
In the ever-evolving landscape of digital transformation, organizations face the challenge of securing their sensitive information while ensuring seamless access for authorized users. Identity and Access Management (IAM) emerges as a crucial component, providing a robust framework for managing user identities and controlling their access to resources. In this blog, we will delve into the key aspects of IAM, highlighting its importance, key points, and a mini project with a real-life example.
Key Points:
Definition of Identity and Access Management (IAM): Identity and Access Management refers to the policies, technologies, and processes that facilitate the management of digital identities and control access to systems and data. The primary goal is to ensure that the right individuals have the right access to the right resources at the right time.
Components of IAM:
Identification: Uniquely recognizing users and entities.
Authentication: Verifying the identity of users through various methods.
Authorization: Granting or denying access based on the authenticated user's permissions.
Accounting: Logging and monitoring user activities for security and compliance.
Importance of IAM:
Security Enhancement: IAM enhances overall security by preventing unauthorized access and minimizing the risk of data breaches.
Regulatory Compliance: Helps organizations comply with industry regulations and standards by ensuring controlled access to sensitive information.
Operational Efficiency: Streamlines user access management, reducing the administrative burden and minimizing errors.
IAM Best Practices:
Role-Based Access Control (RBAC): Assigning permissions based on job roles.
Multi-Factor Authentication (MFA): Adding an extra layer of security by requiring multiple forms of identification.
Regular Audits: Periodically reviewing and updating access permissions to align with organizational changes.
Key Concepts:
1. Users:
Users represent individuals or applications interacting with your AWS account. Each user has a unique set of security credentials.
Example: Sarah, a developer, needs access to EC2 instances for application development.
2. Groups:
Groups are collections of users. Policies are attached to groups, making it easier to manage permissions for multiple users collectively.
Example: The "Developers" group has permissions to launch EC2 instances and read from S3 buckets.
3. Policies:
Policies are documents defining permissions. They can be attached to users, groups, or roles and are written in JSON format.
Example:
 jsonCopy code{
   "Version": "2012-10-17",
   "Statement": [
     {
       "Effect": "Allow",
       "Action": ["s3:GetObject"],
       "Resource": "arn:aws:s3:::example-bucket/*"
     }
   ]
 }
This policy allows users to retrieve objects from an S3 bucket.
4. Roles:
Roles are IAM entities with policies attached. They are used to grant permissions to entities outside of your AWS account.
Example: An EC2 instance assumes a role to access an S3 bucket during automated backups.
Real-Life Example - IAM in Action: Consider a multinational corporation with various departments, each requiring different levels of access to company resources. IAM would facilitate the creation of roles such as "HR Manager," "Finance Analyst," and "IT Administrator," each with distinct permissions.
HR Manager: Access to employee records, recruitment databases.
Finance Analyst: Access to financial systems, budgetary information.
IT Administrator: Access to network configurations, server settings.
IAM ensures that employees within these roles only have access to the resources necessary for their job functions, minimizing the risk of unauthorized access.
Mini Project: Implementing IAM for a Small Business
Objective: Design and implement a basic IAM system for a small business.
Steps:
Identify Roles: Determine the key roles within the organization (e.g., Manager, Employee, Administrator).
Authentication Mechanism: Implement a secure authentication method, such as password-based authentication or MFA.
Role-Based Access Control: Assign specific permissions to each role based on job responsibilities.
User Provisioning and Deprovisioning: Develop processes for onboarding and offboarding employees, ensuring swift access adjustments.
Logging and Monitoring: Implement a system to log and monitor user activities for security and compliance purposes.
Testing and Evaluation: Conduct thorough testing to ensure the system's effectiveness and make any necessary adjustments.
Steps to Create an IAM User
1. Log in to the AWS Console
Visit the AWS Console and log in to your AWS account. If you don't have an account, you'll need to sign up first.
2. Navigate to IAM
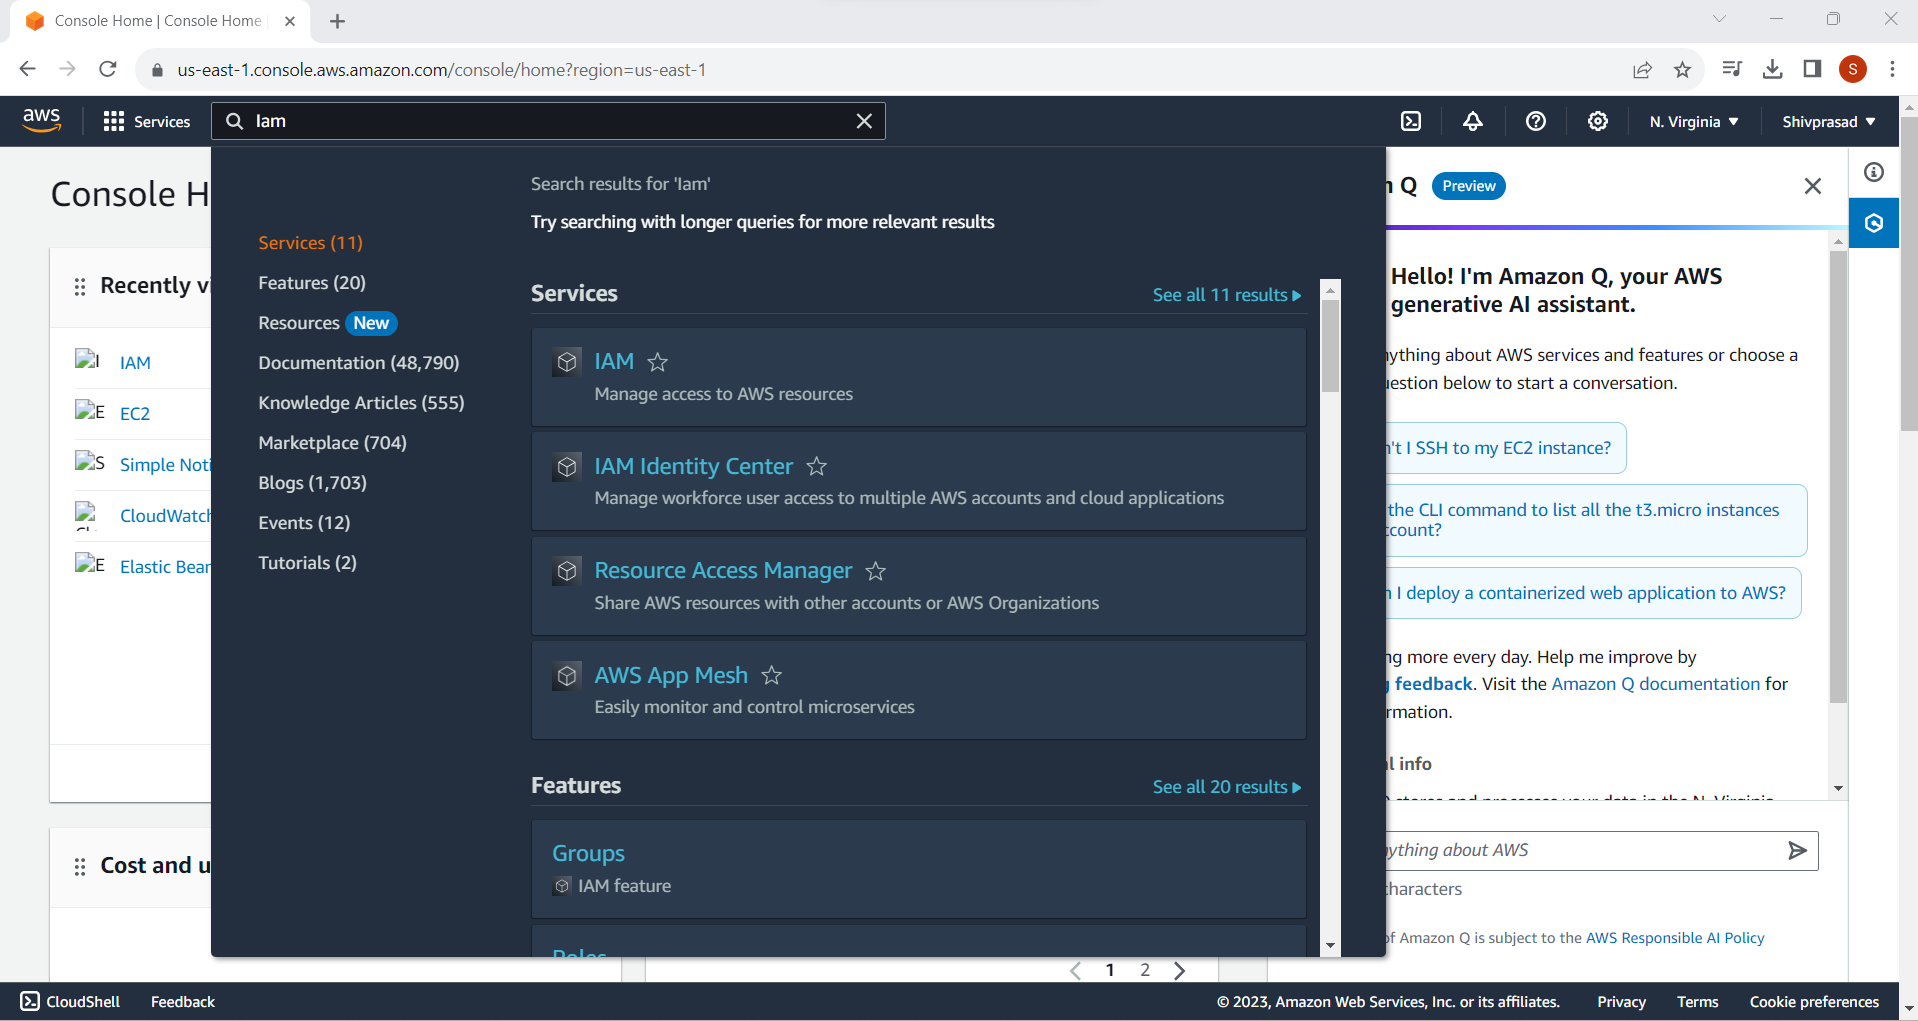
Once logged in, find the "Services " search bar at the top-left corner of the page. In the search bar search "IAM."
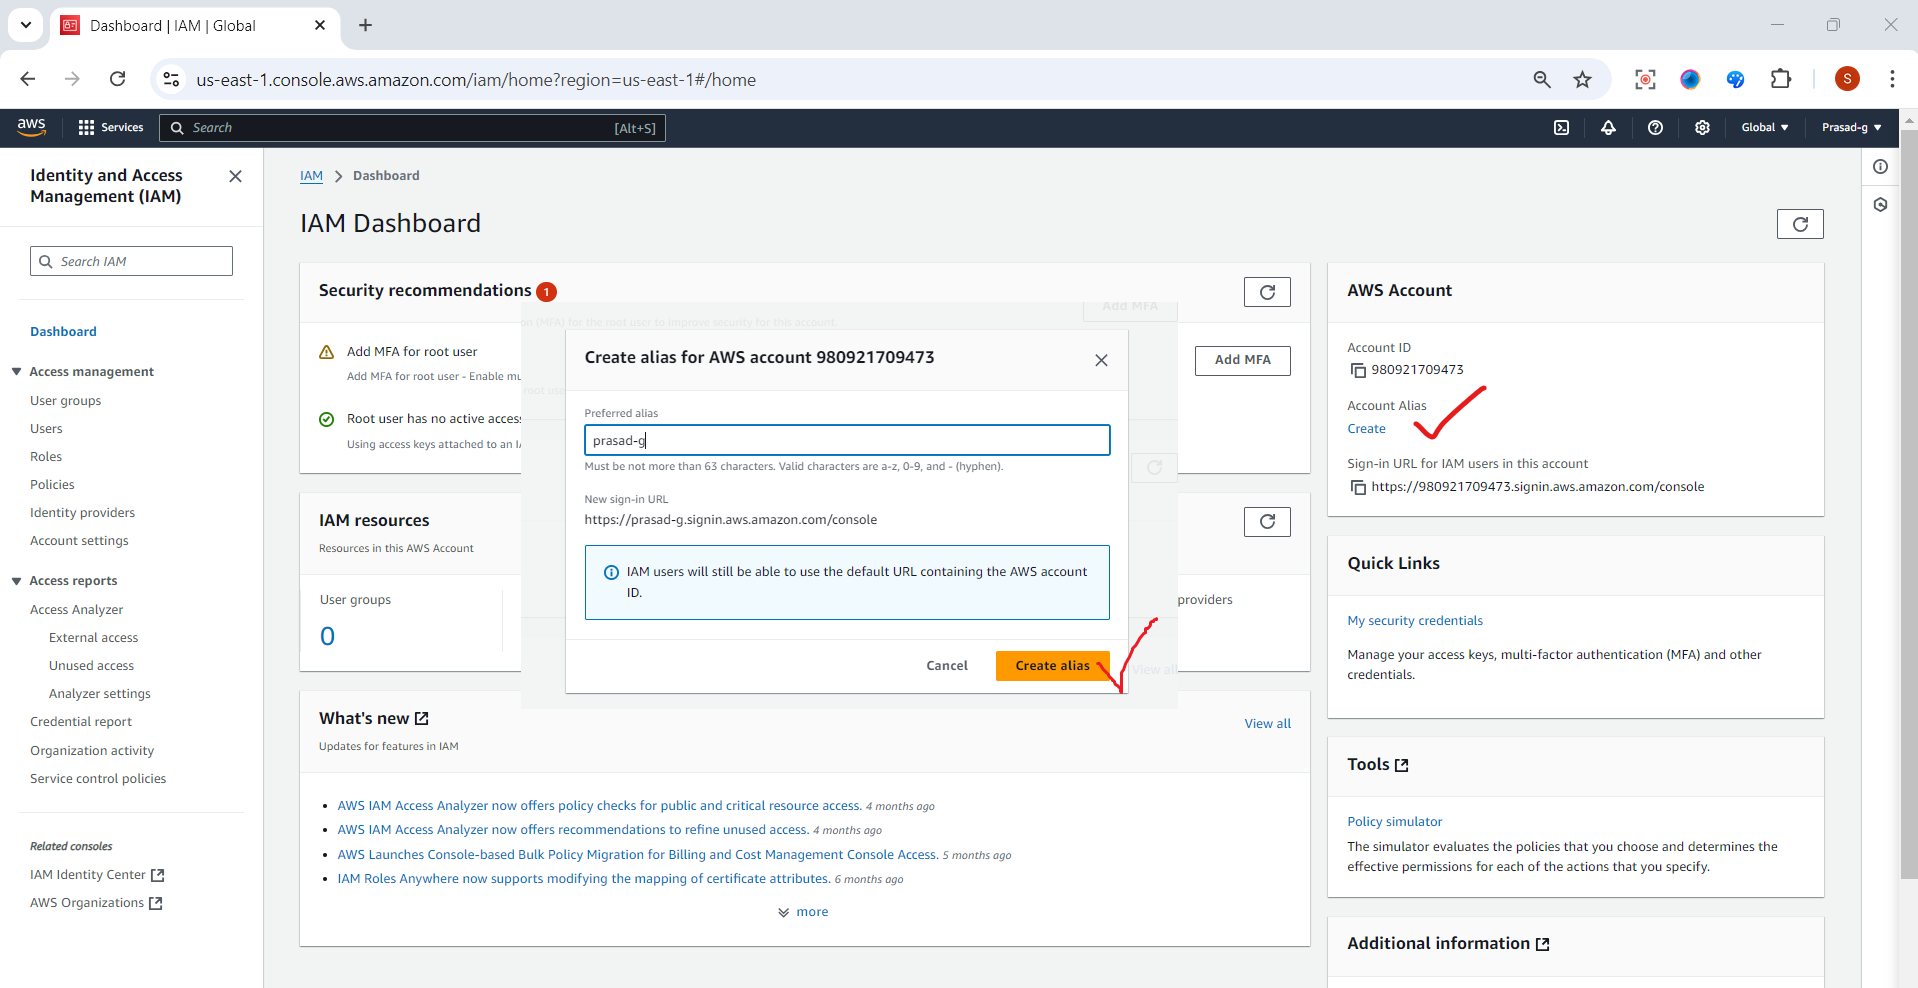
Create an Alias
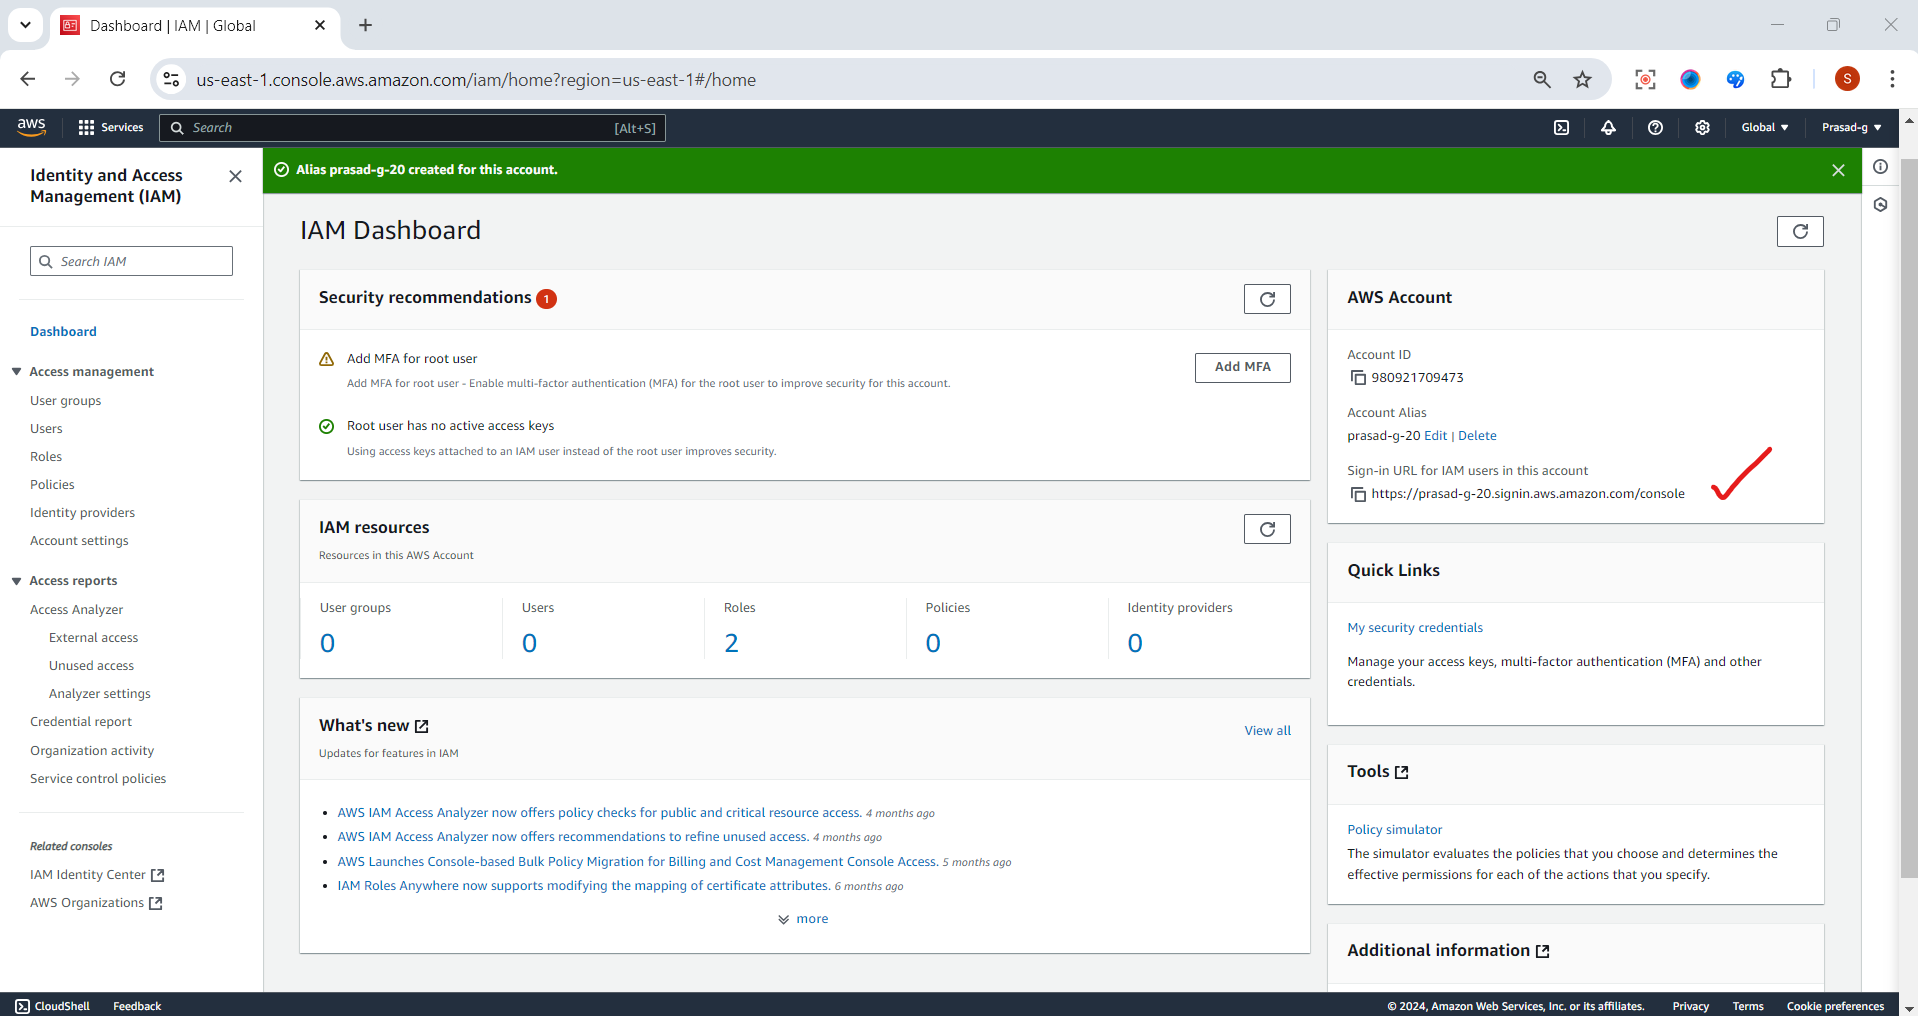
Just Copy this url ,it will help during login into IAM User
3. Access the IAM Dashboard
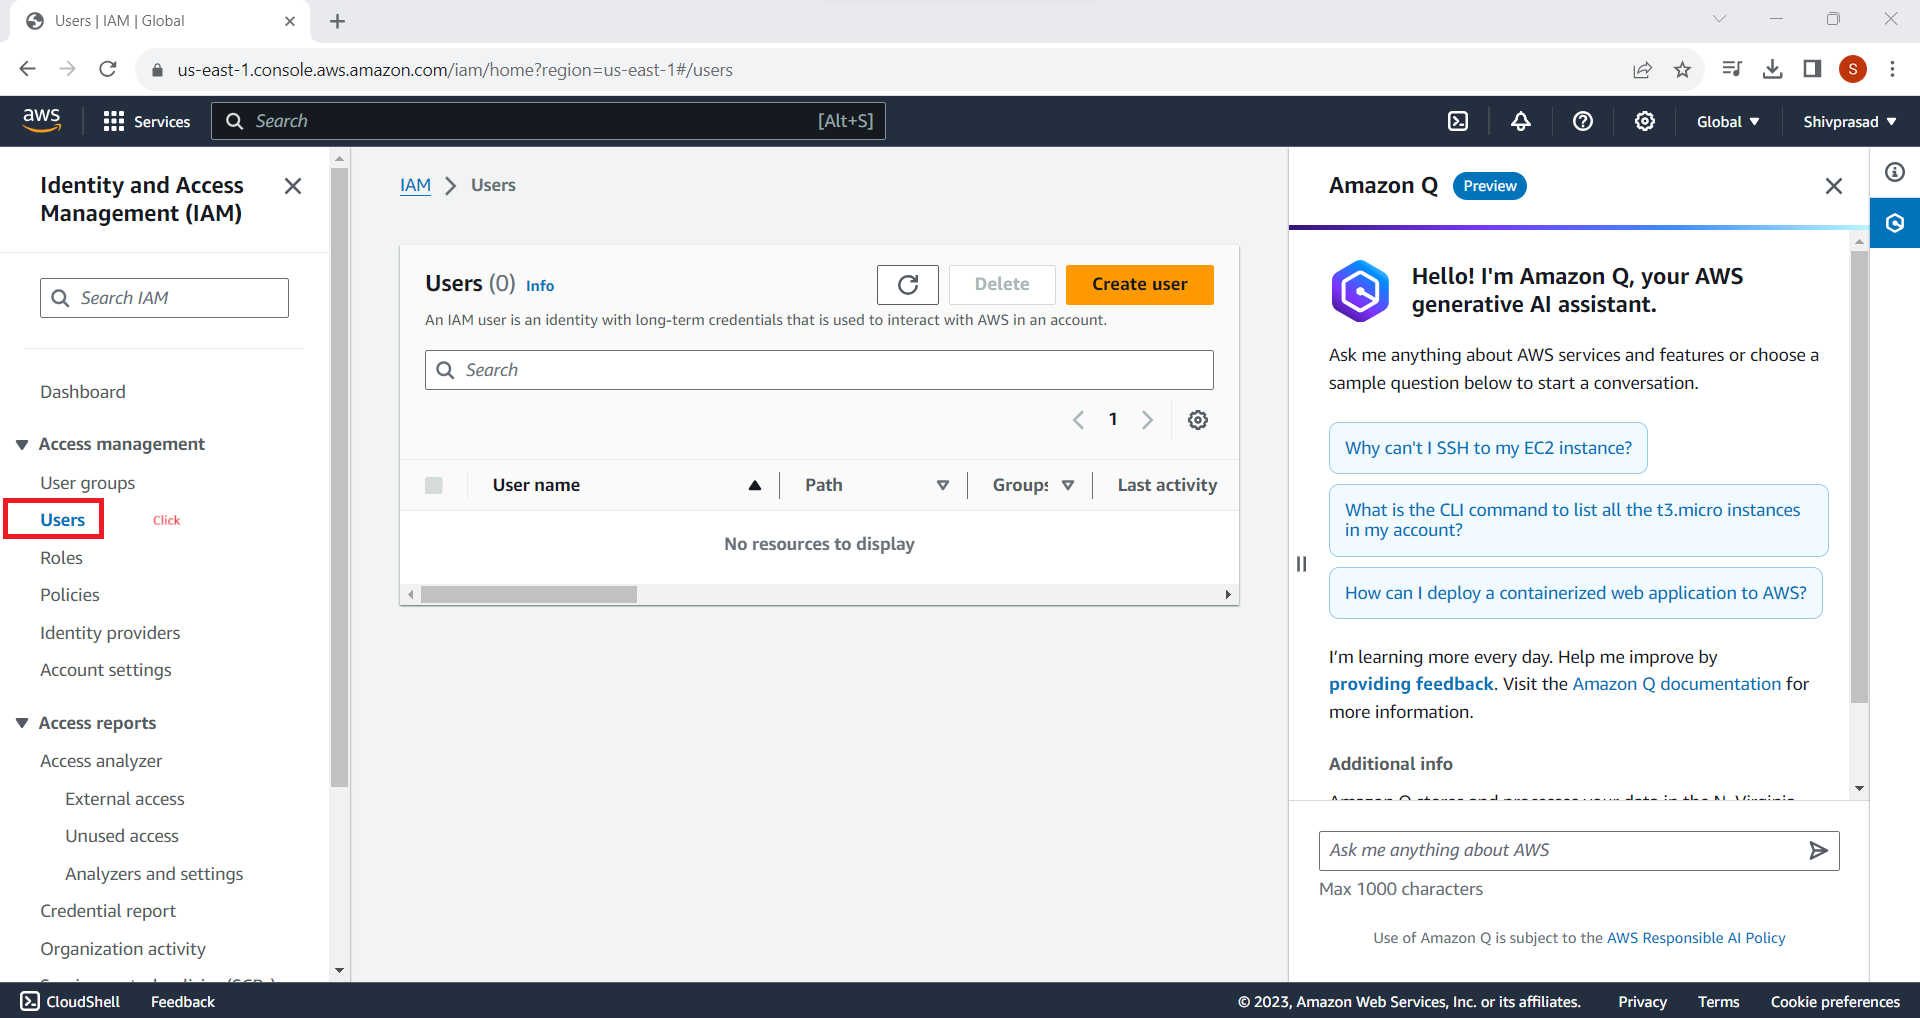
In the IAM dashboard, you'll see a left sidebar. Click on "Users" to access the user management section.
4. Add a New User
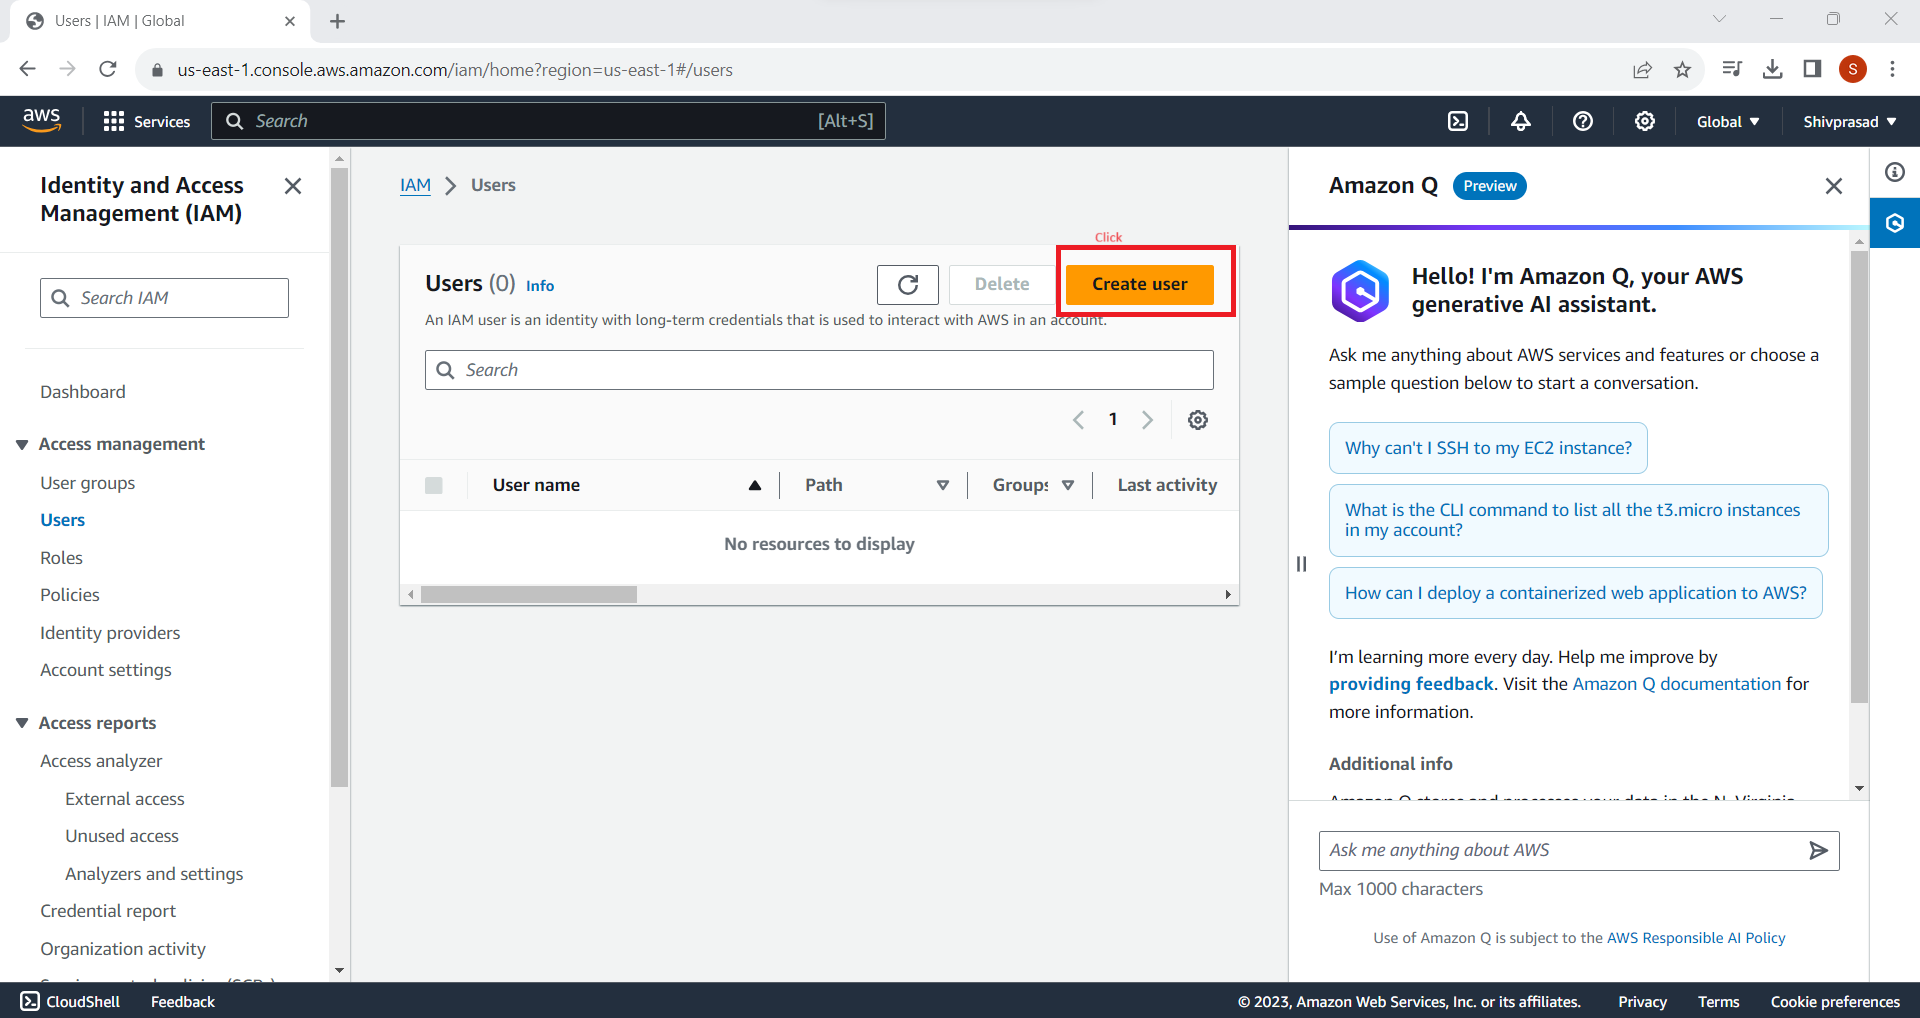
Click the "Add user" button to initiate the process of creating a new IAM user.
5. Enter User Details
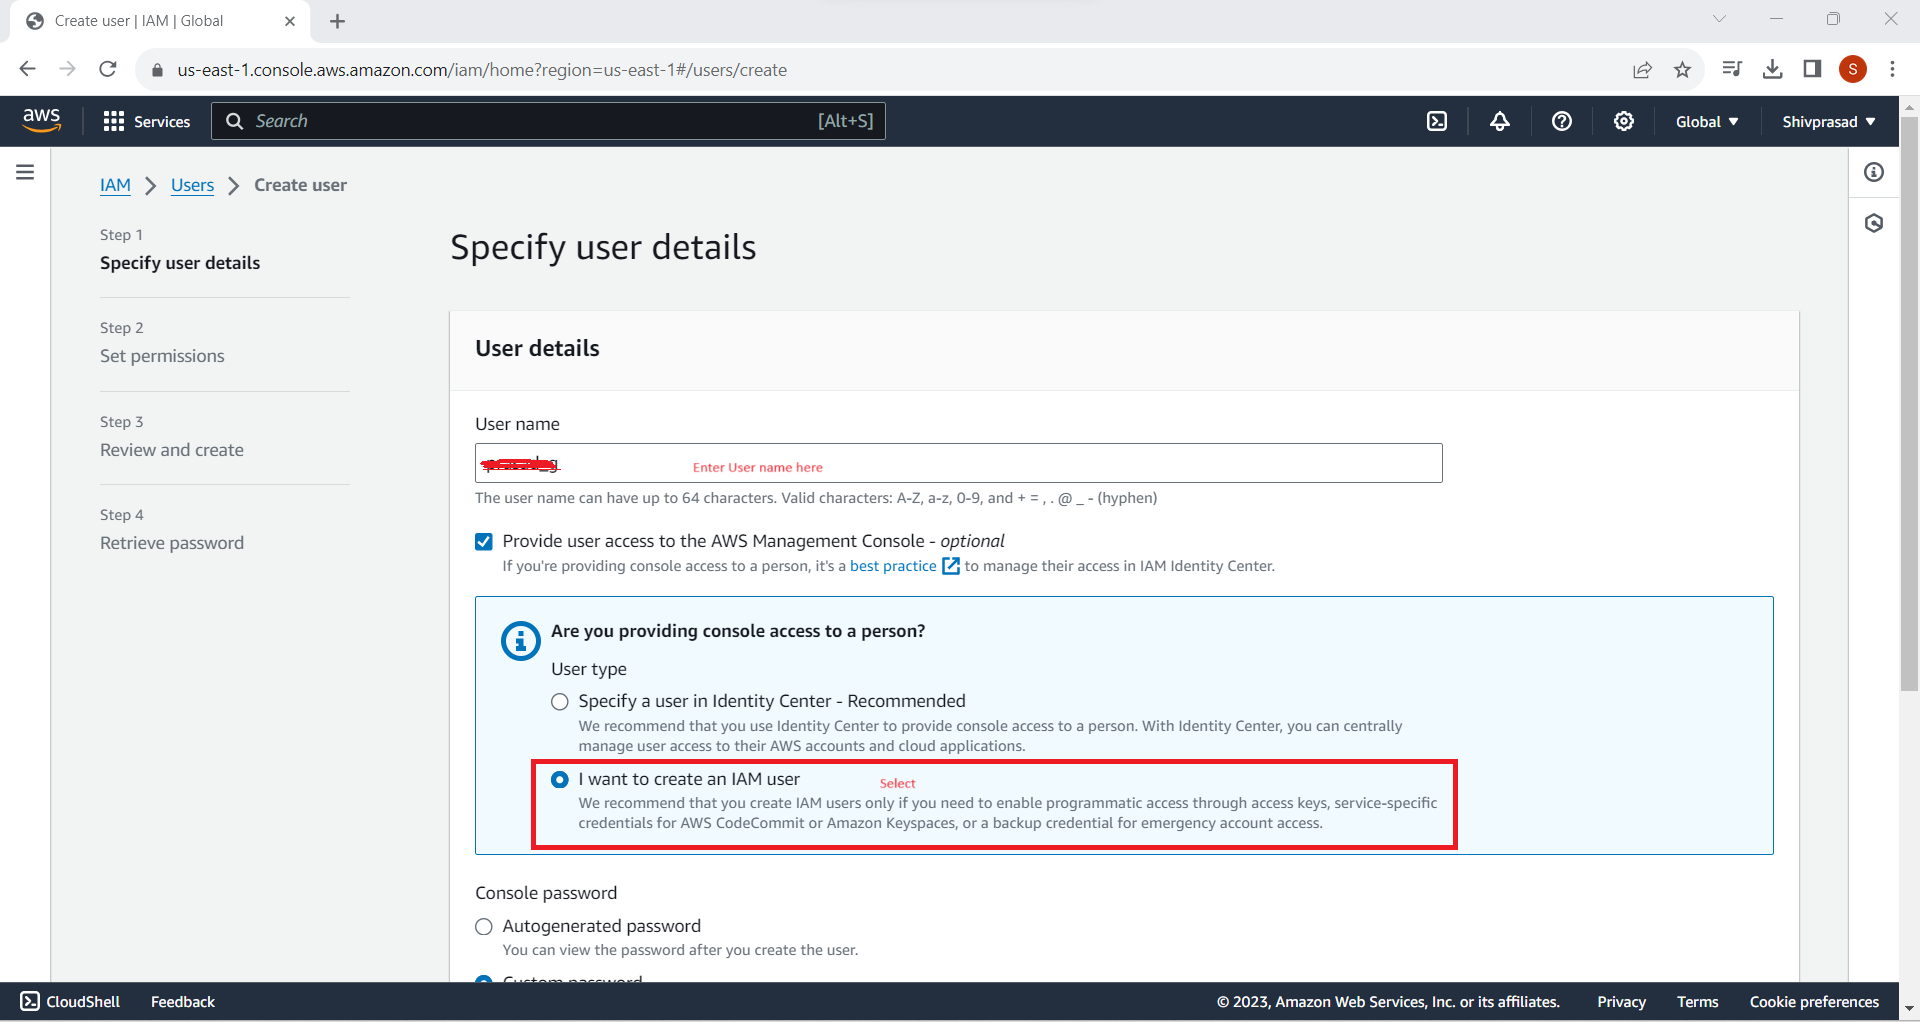
Fill in the username for the new IAM user. You can also enable programmatic access if you want to allow this user to interact with AWS programmatically via the AWS CLI, SDKs, or API.
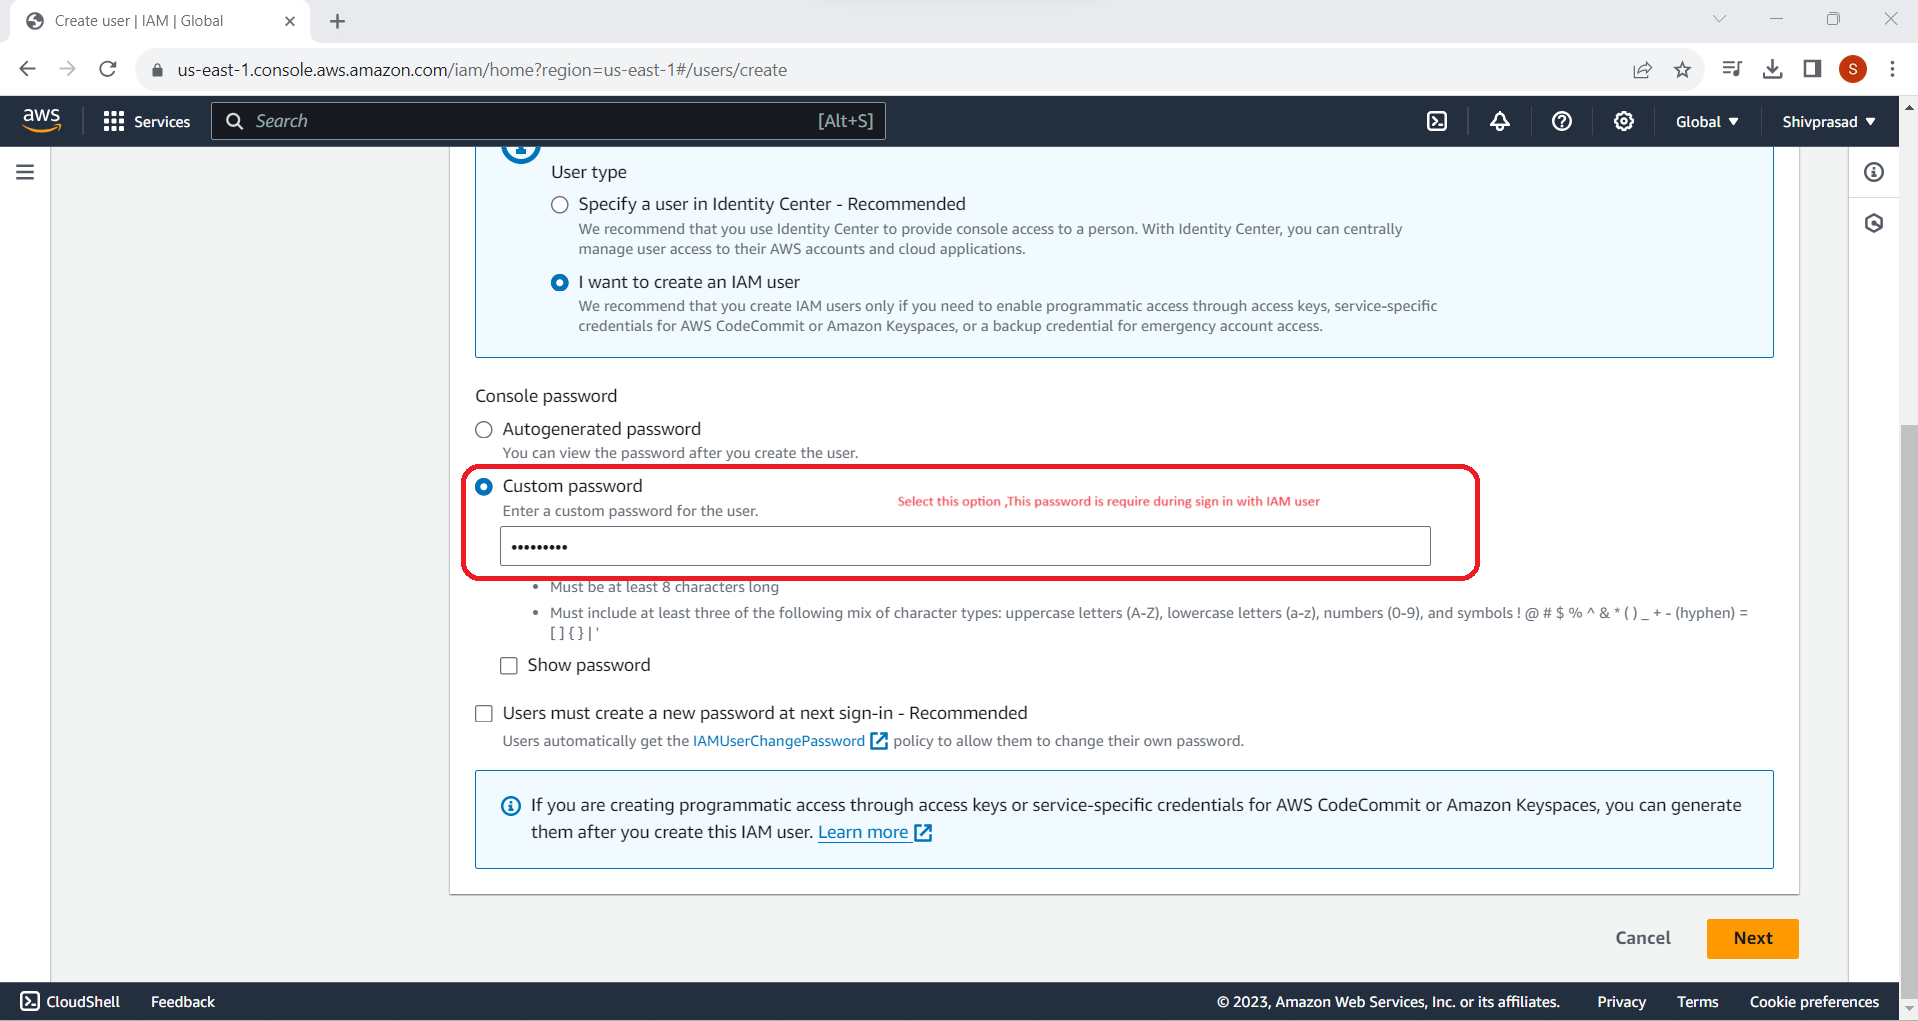
Set custom Password for IAM user
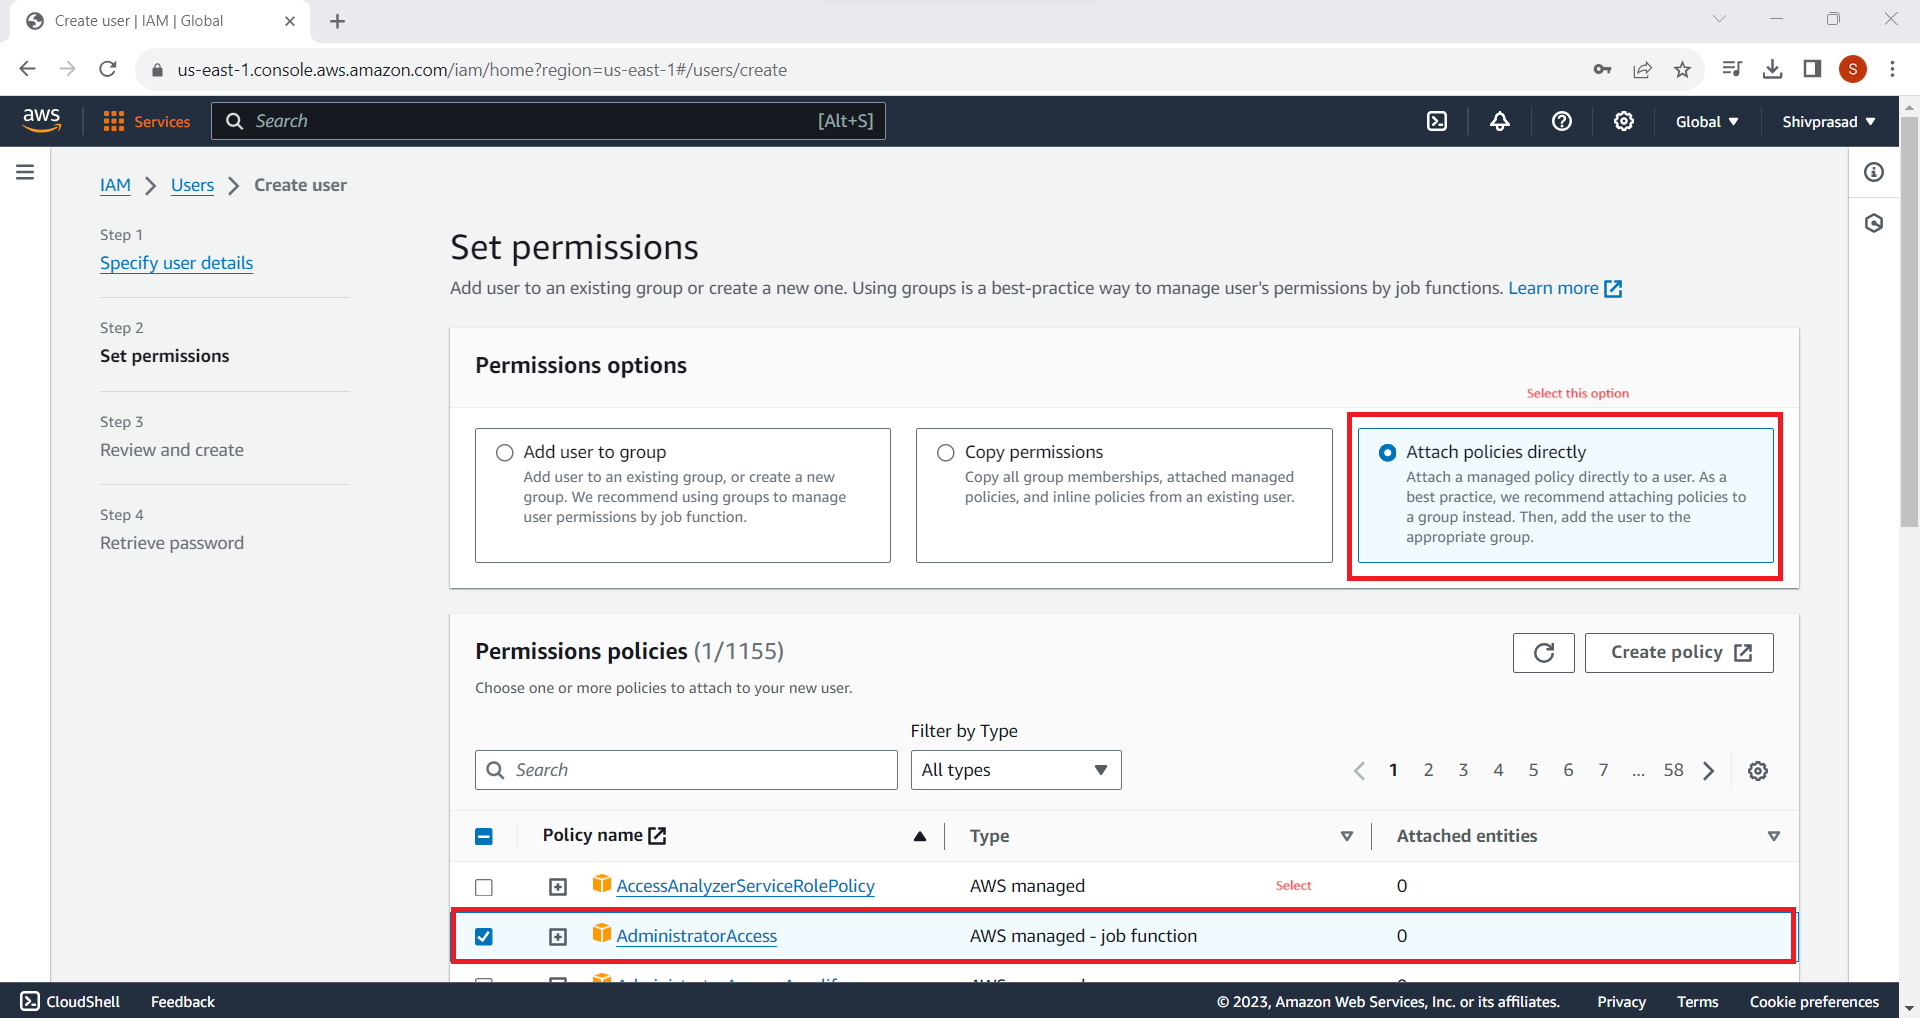
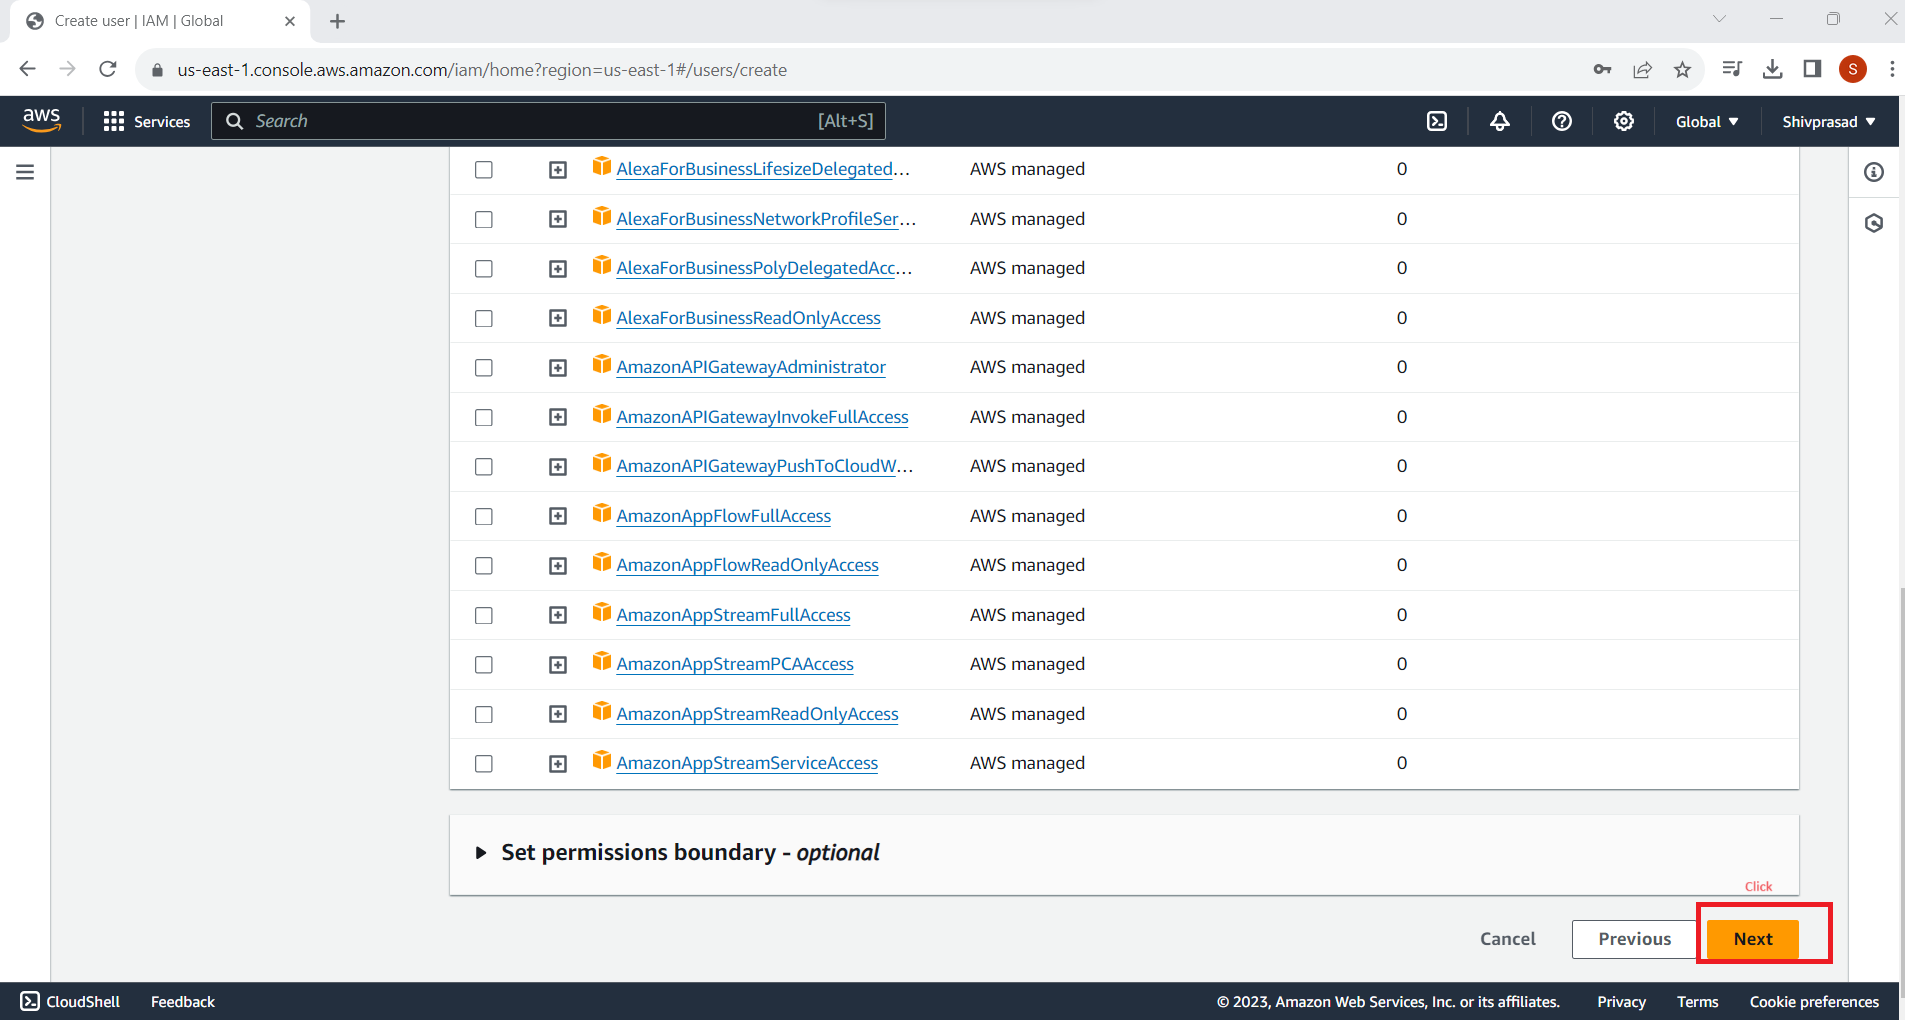
6. Set Permissions
Choose the type of access for the user. You can add the user to existing groups with predefined permissions or attach policies directly to the user.
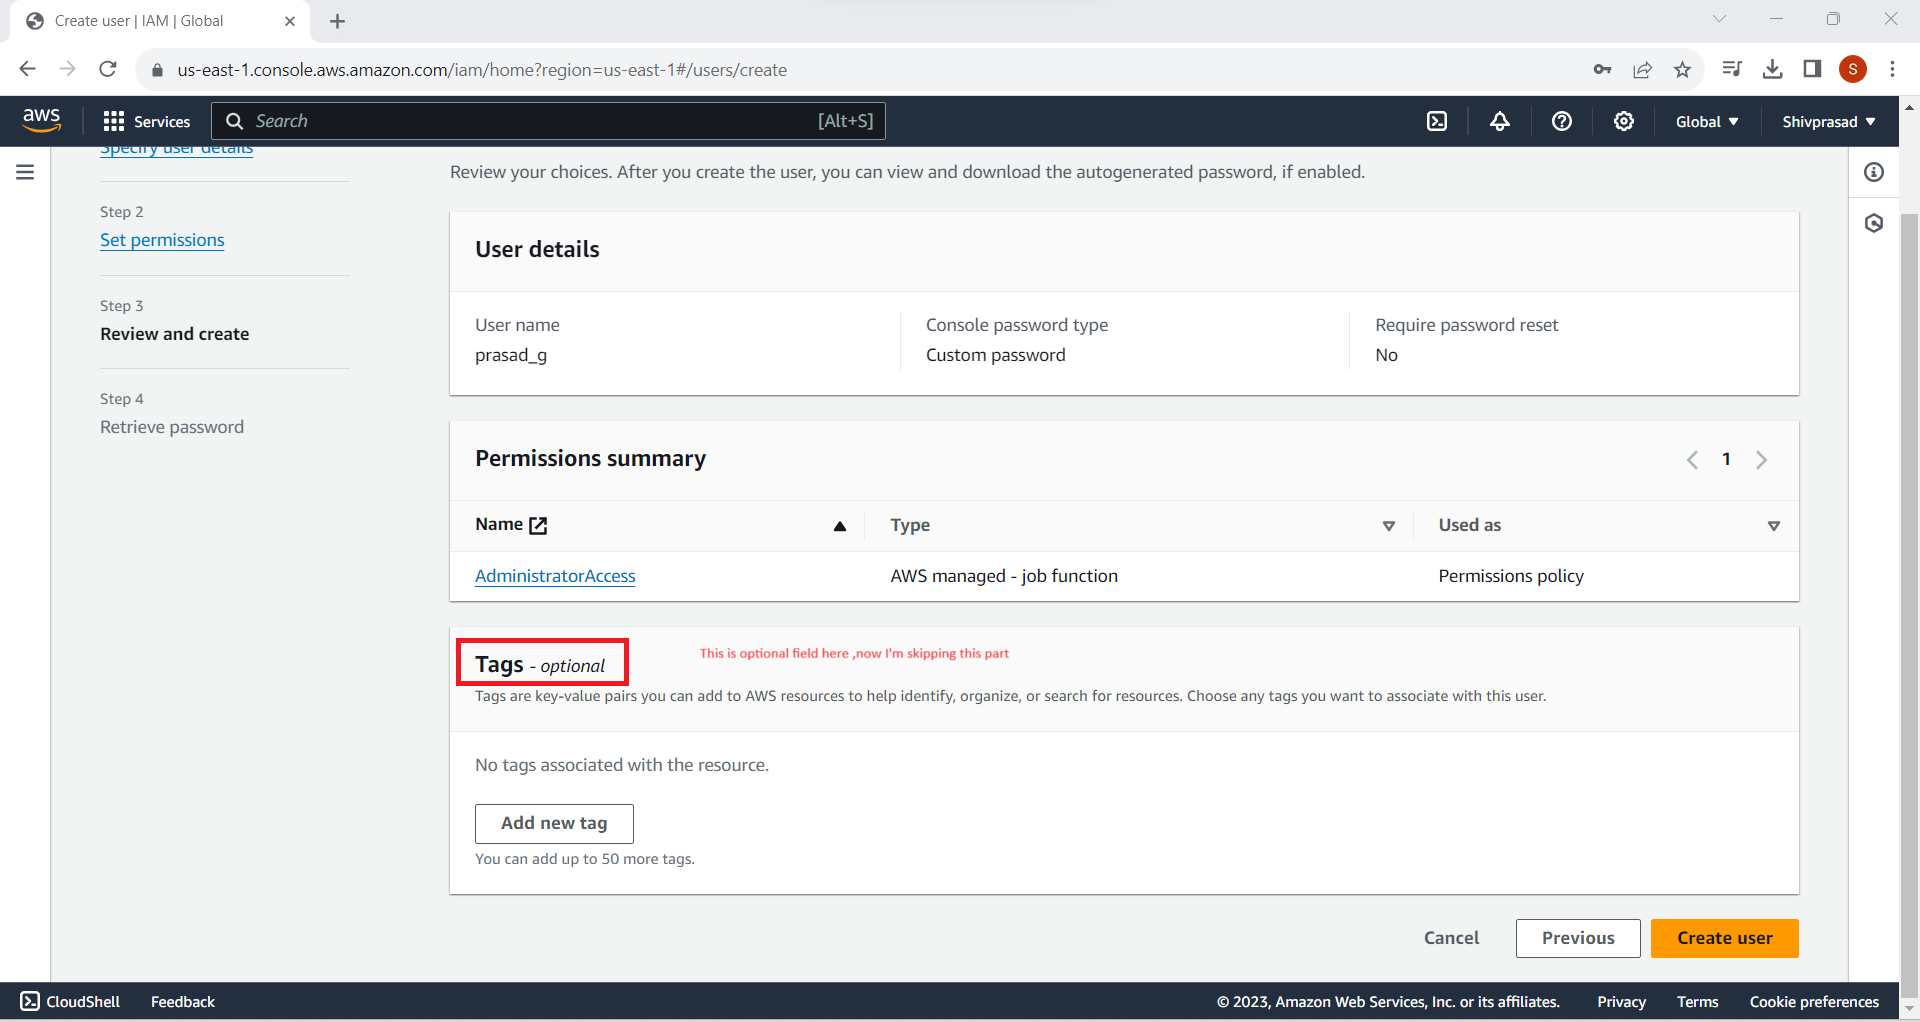
7. Configure Tags (Optional)
You can add tags to the user if you want to organize and track your AWS costs. This step is optional but can be helpful for large organizations with multiple users.
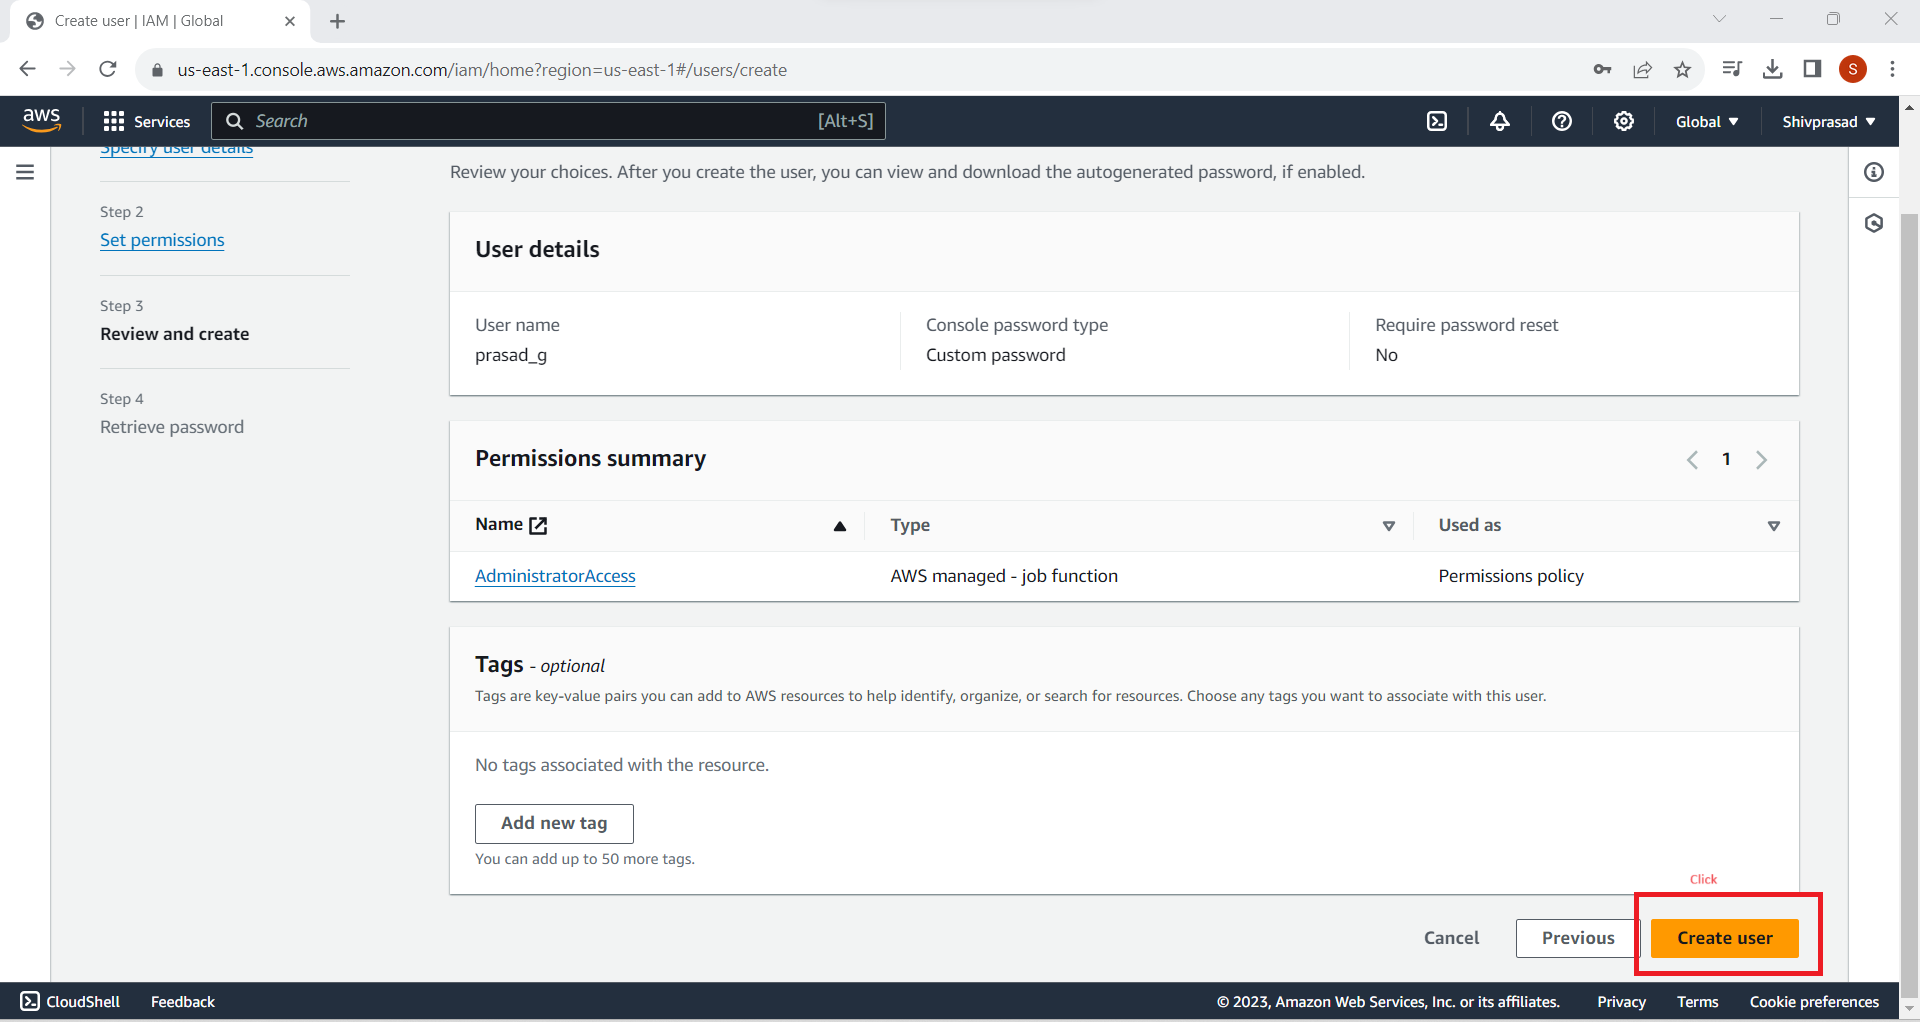
8. Review and Create
Review the user details, permissions, and tags. If everything looks good, click "Create user."
9. Access Key and Secret Access Key
After creating the user, you'll see a success message. Take note of the access key ID and secret access key. These are crucial for programmatic access to AWS services.
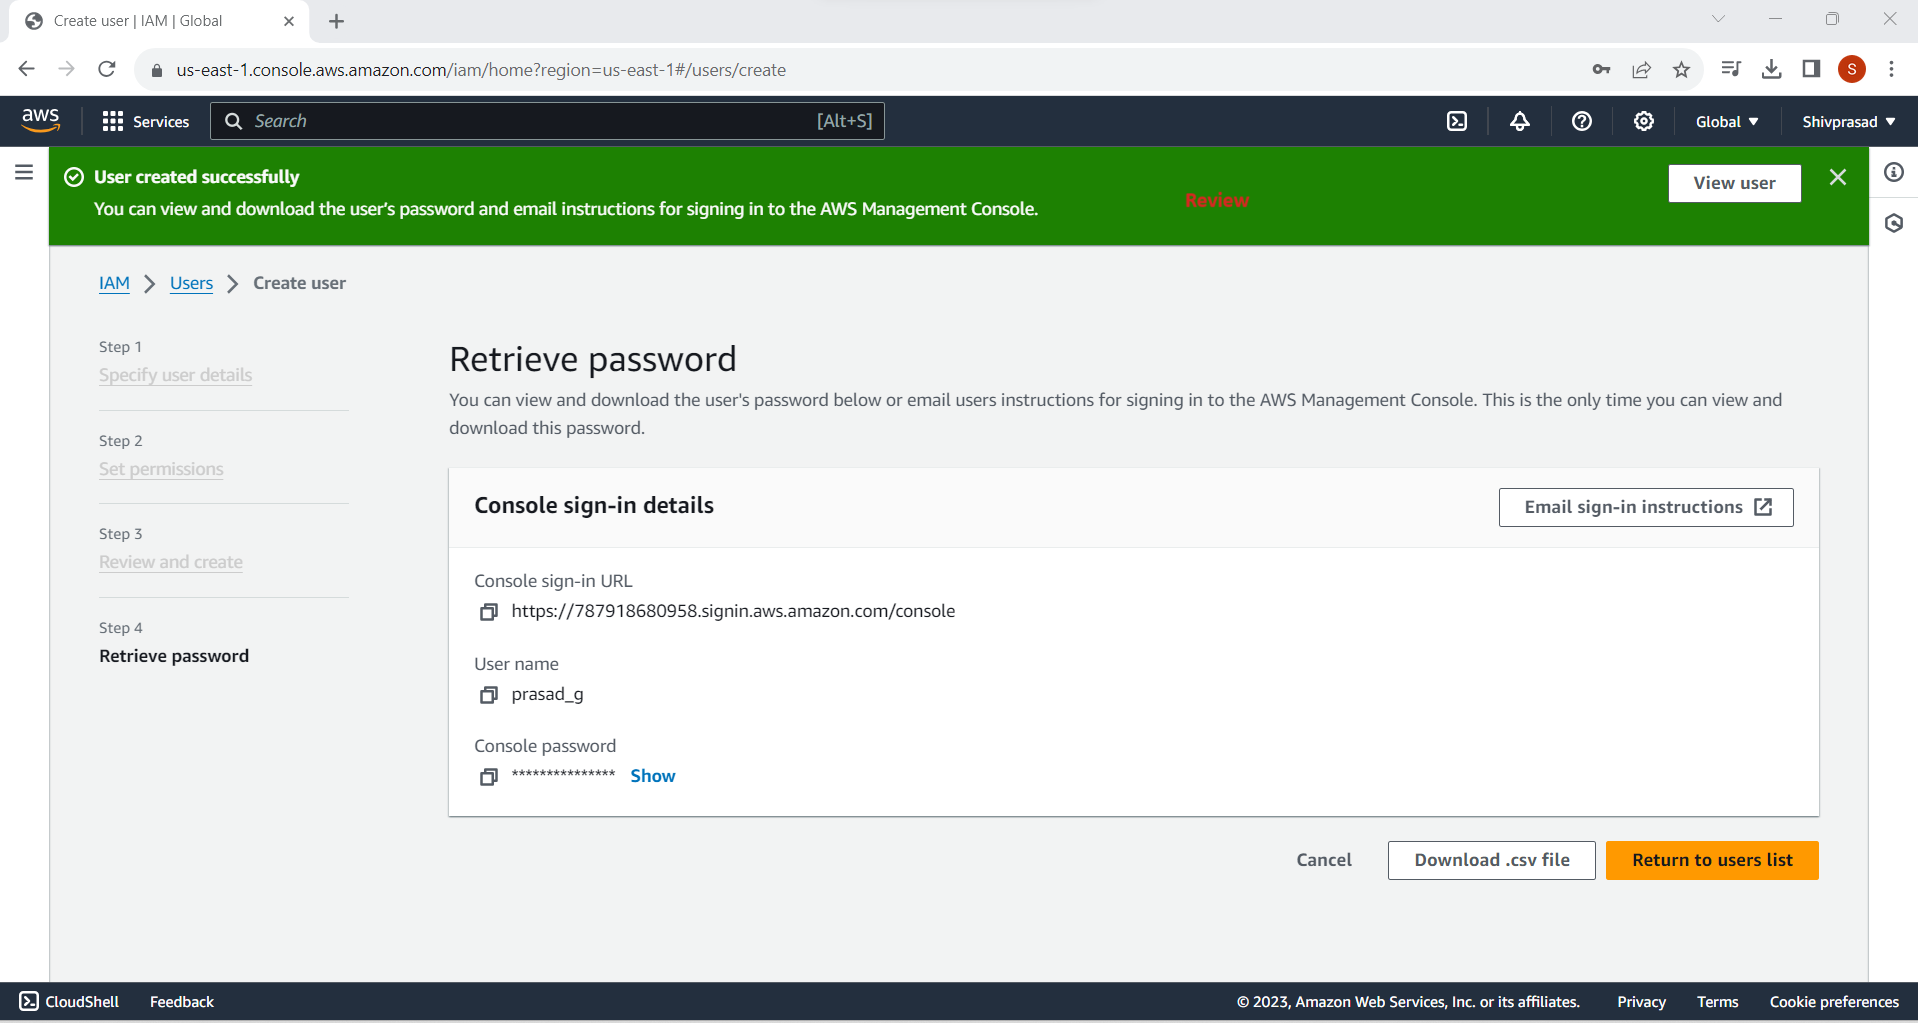
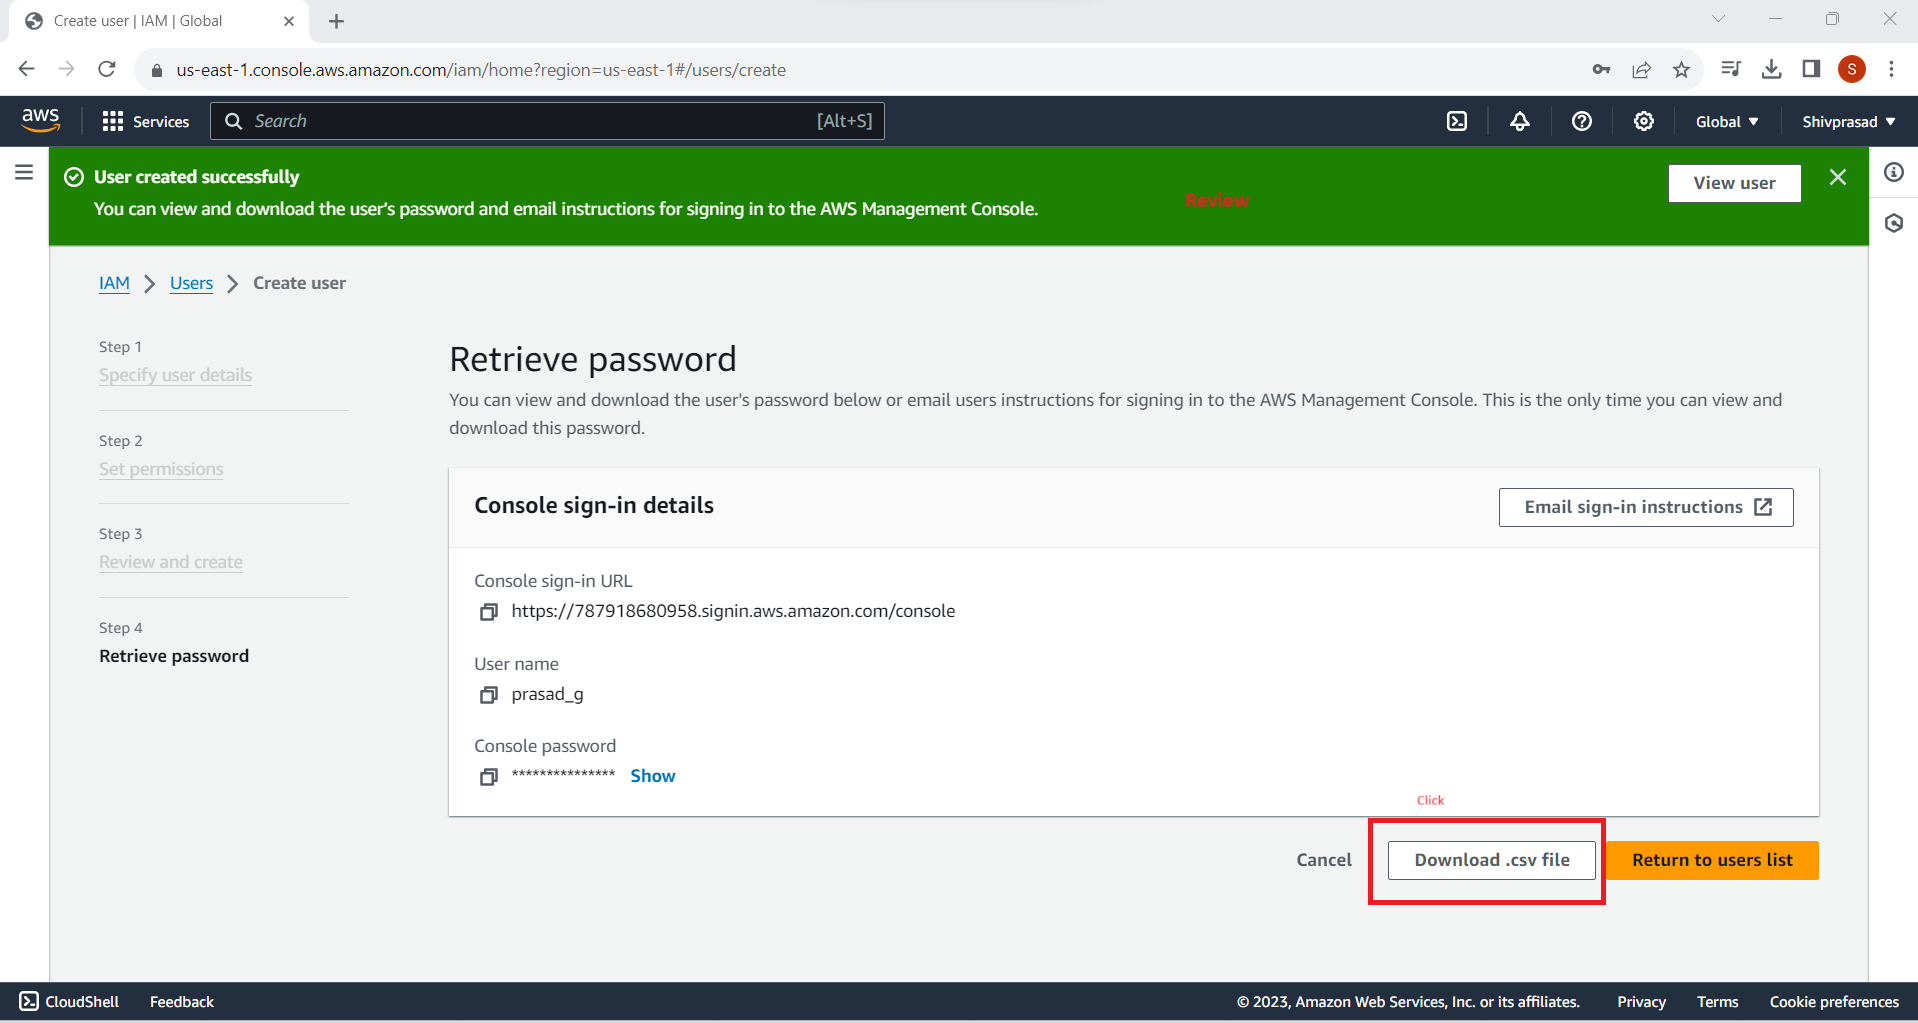
10. Save Credentials Securely
Download the CSV file containing the user's access credentials. Make sure to save this file securely, as it contains sensitive information.
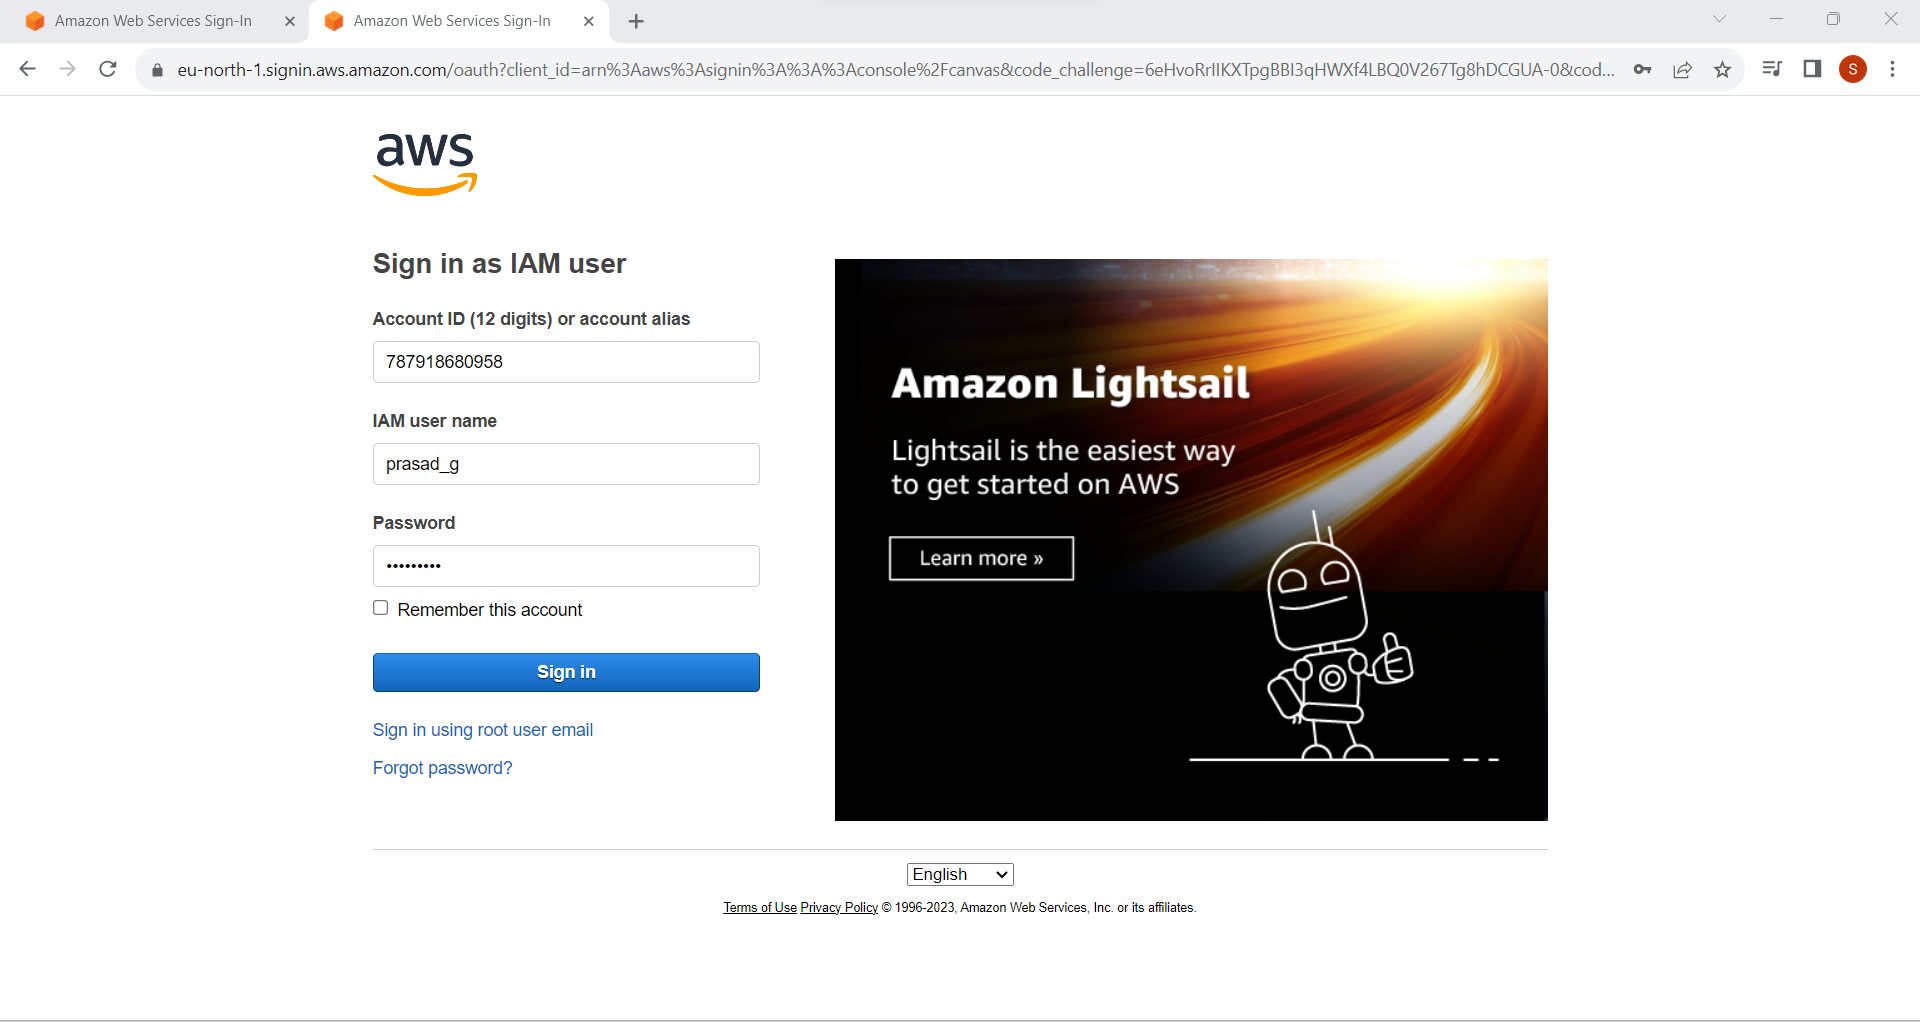
11. Sign in With IAM User Credentials
Copy sign-in URL ,and paste it any browser .
Enter IAM username
Enter Console password
Steps to Create an IAM Group
1.Sign in to the AWS Management Console:
Navigate to the IAM console at https://console.aws.amazon.com/iam/.
Sign in with your AWS account credentials.
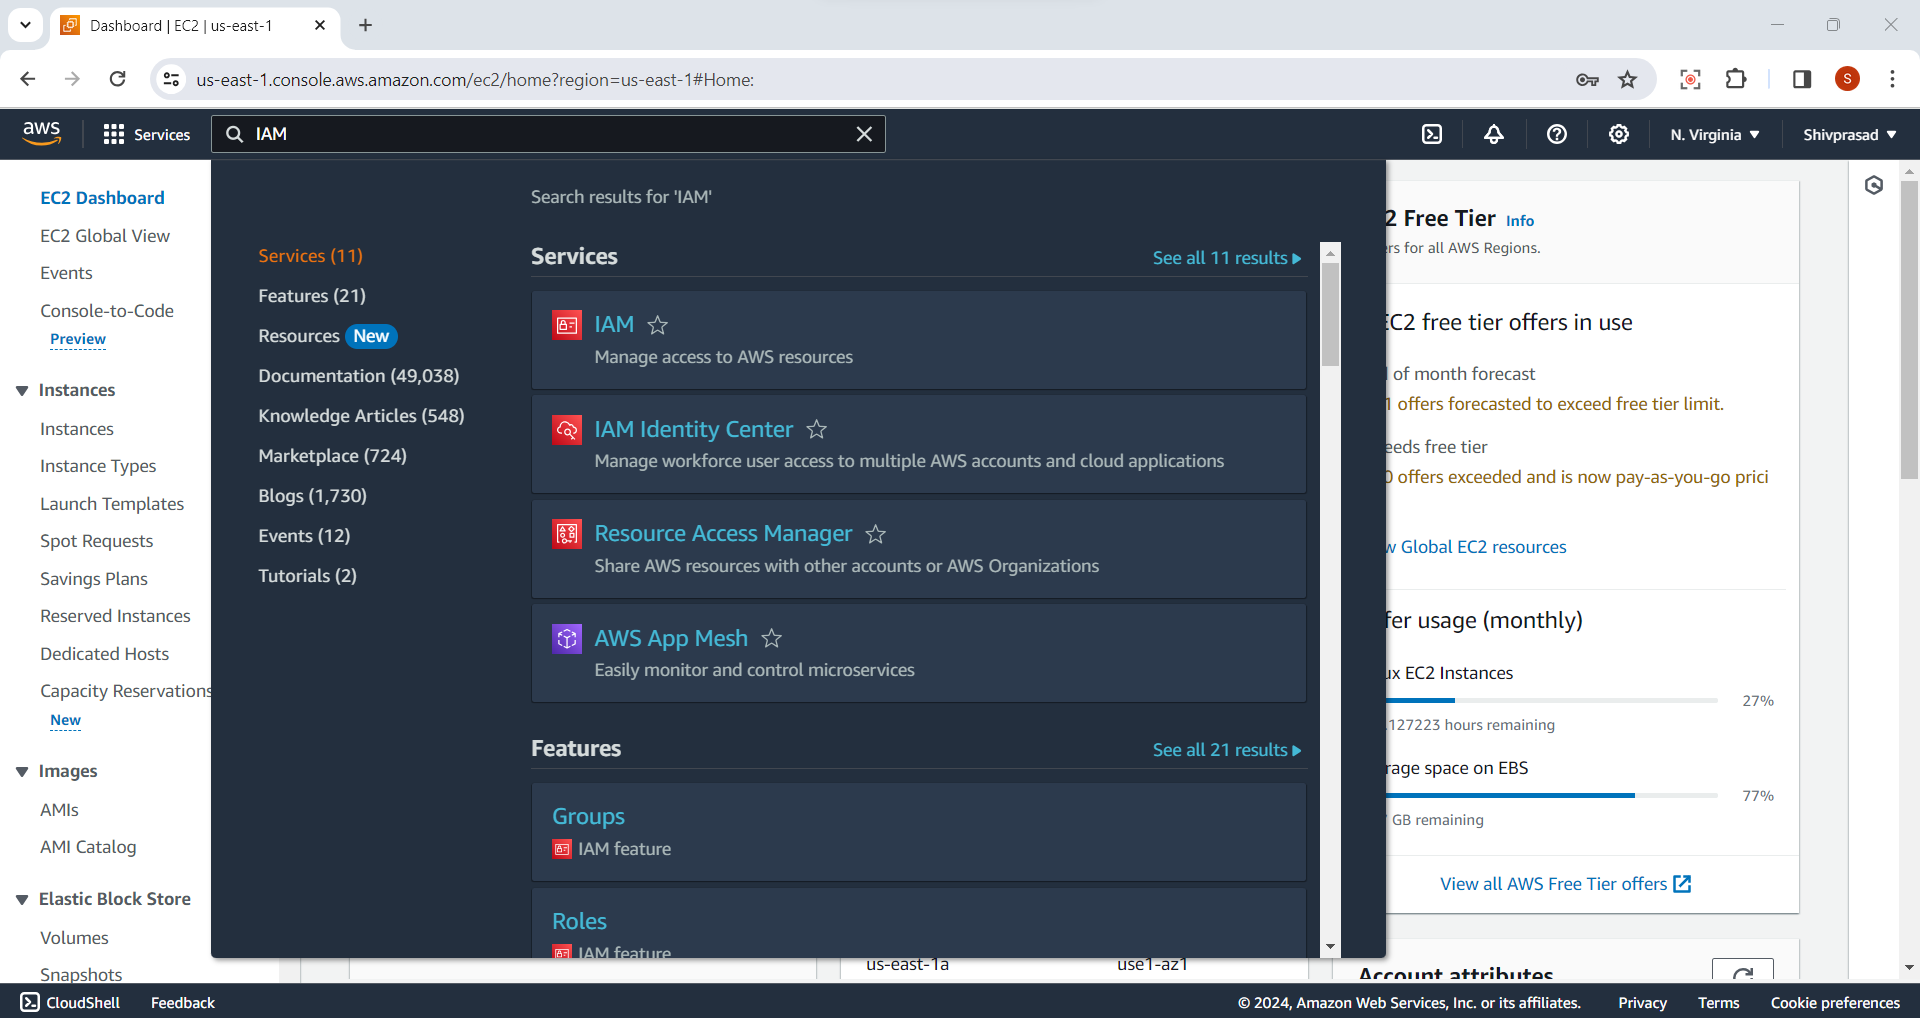
2.Access IAM Dashboard:
In the IAM console, click on "Groups" in the left navigation pane.
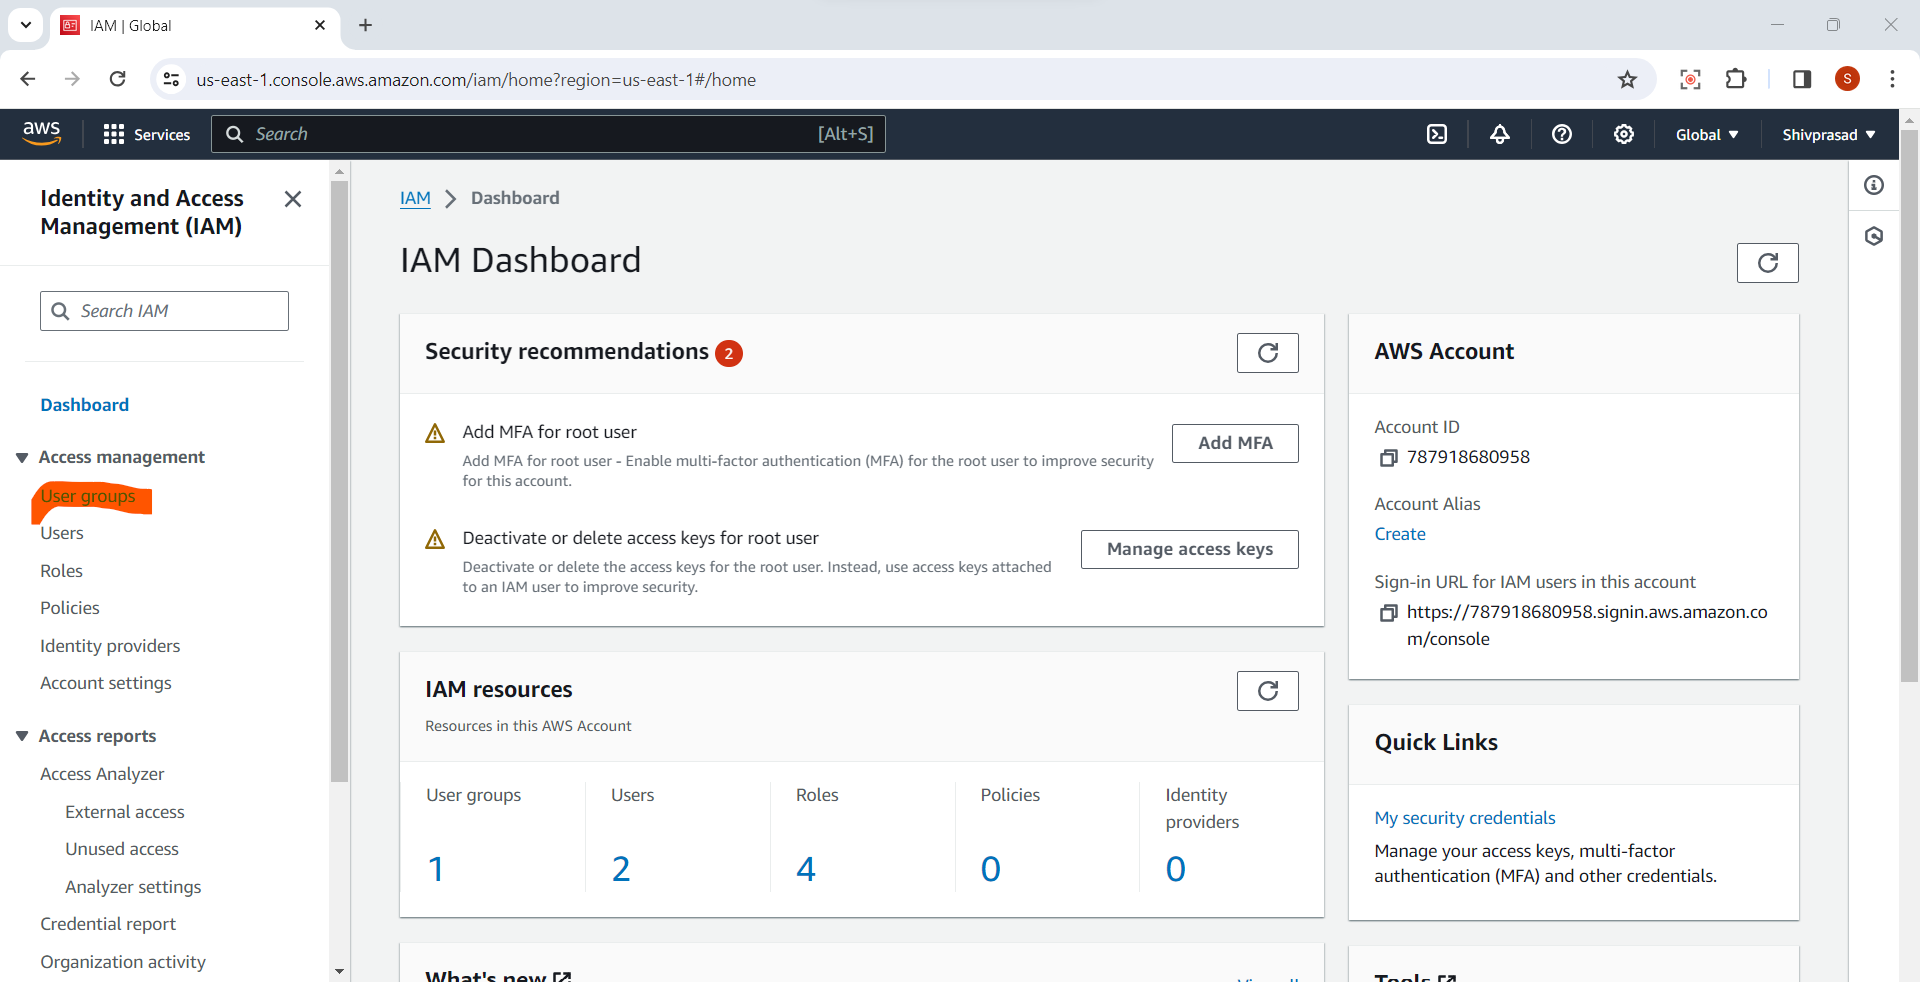
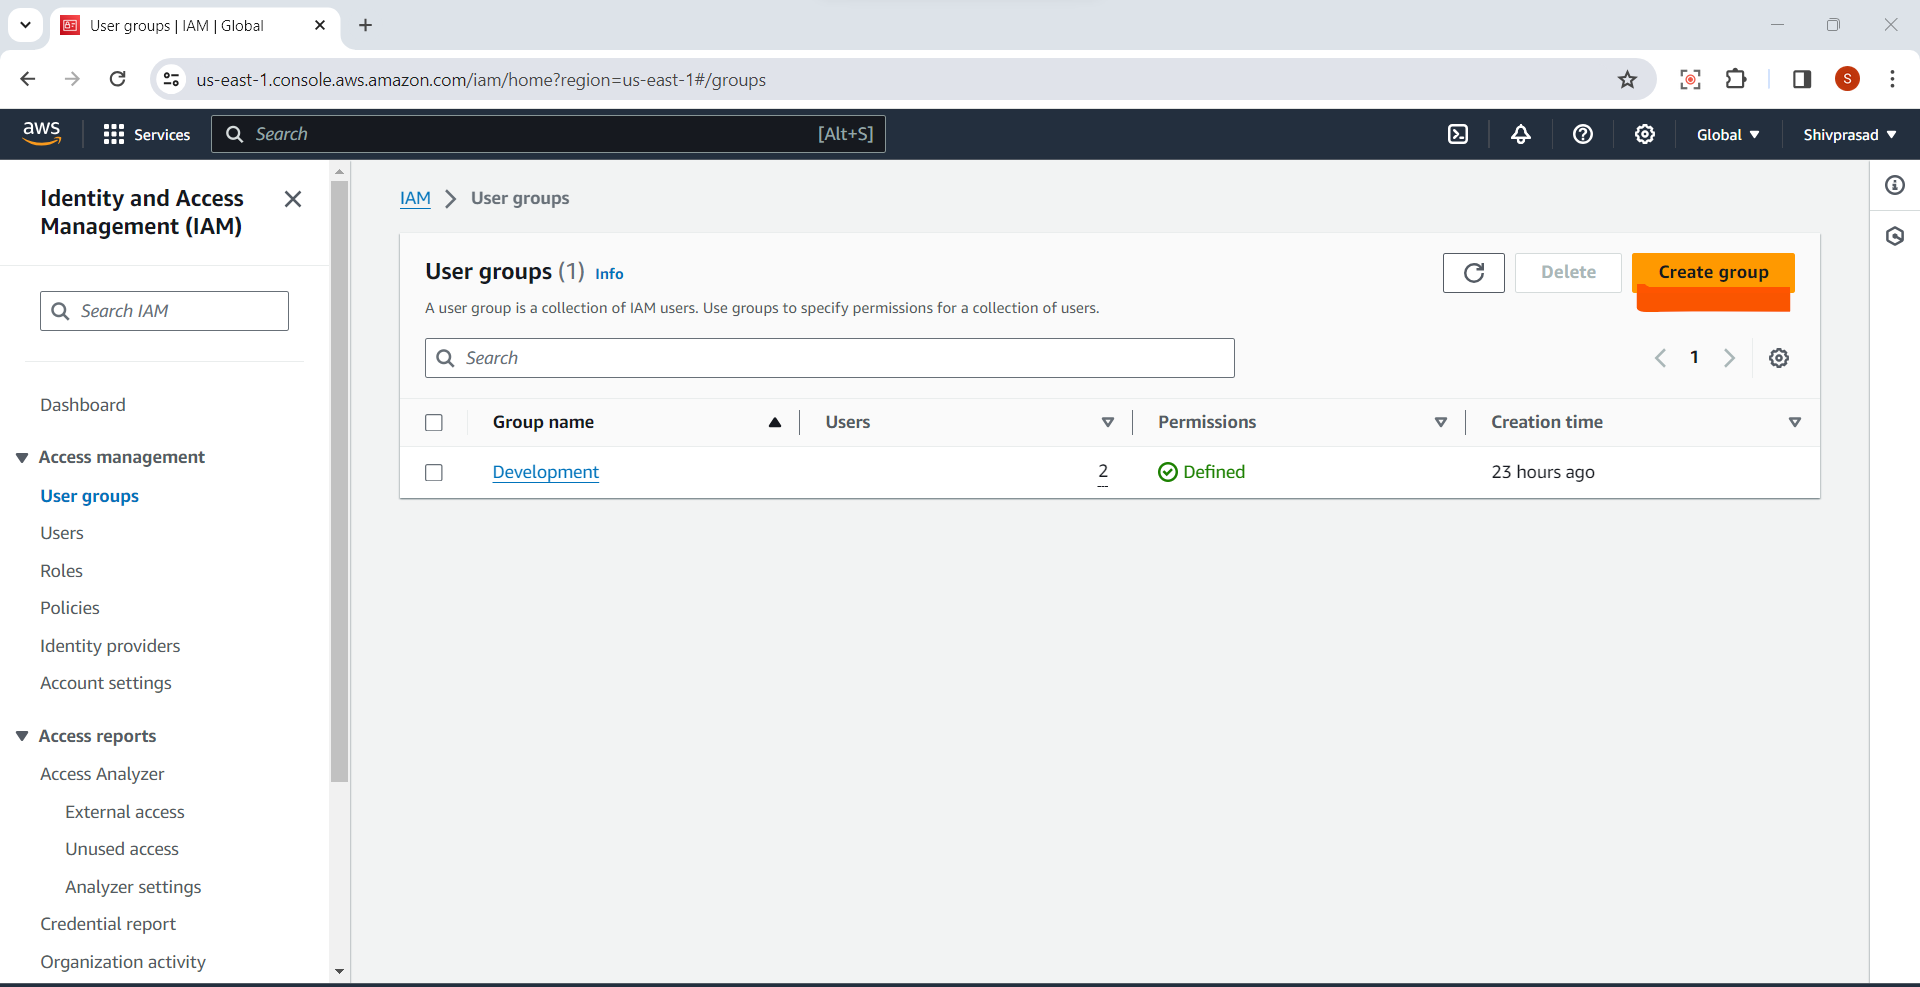
3.Create a New Group:
- Click the "Create Group" button.
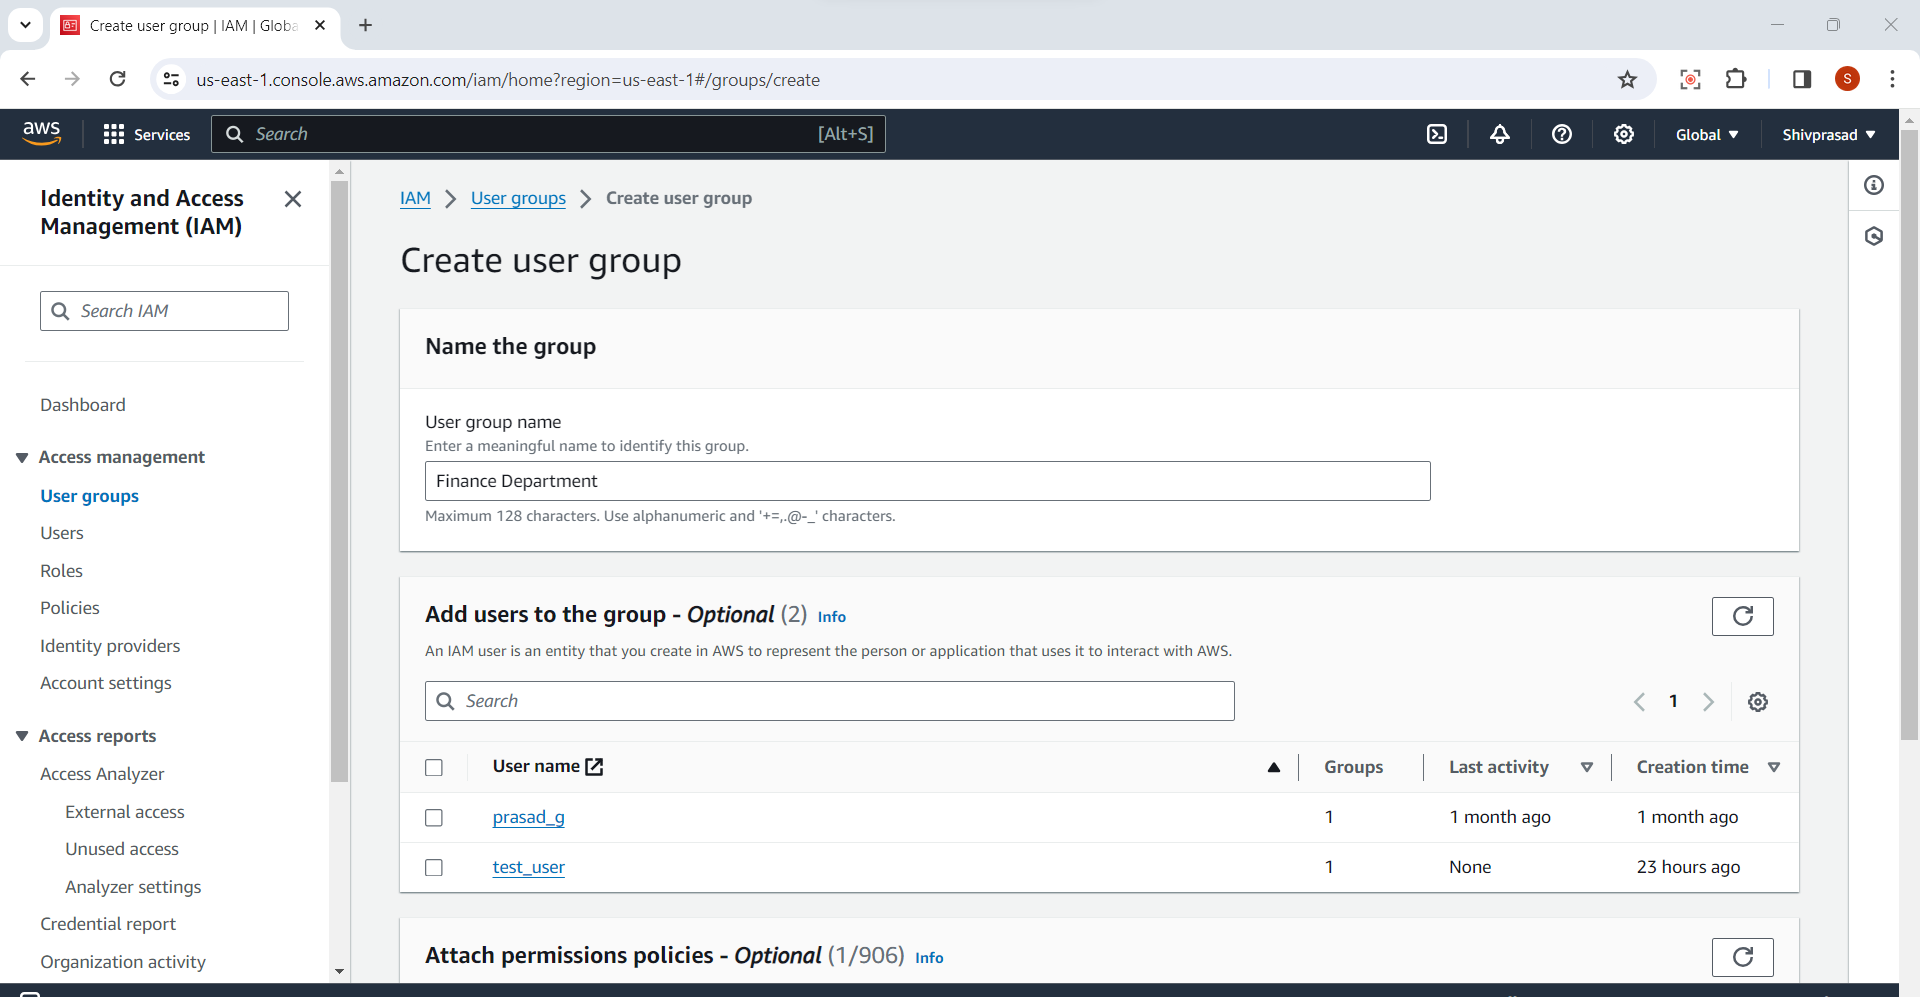
4.Specify Group Details:
Enter a unique name for the group in the "Group name" field.
Optionally, you can provide a description for the group.
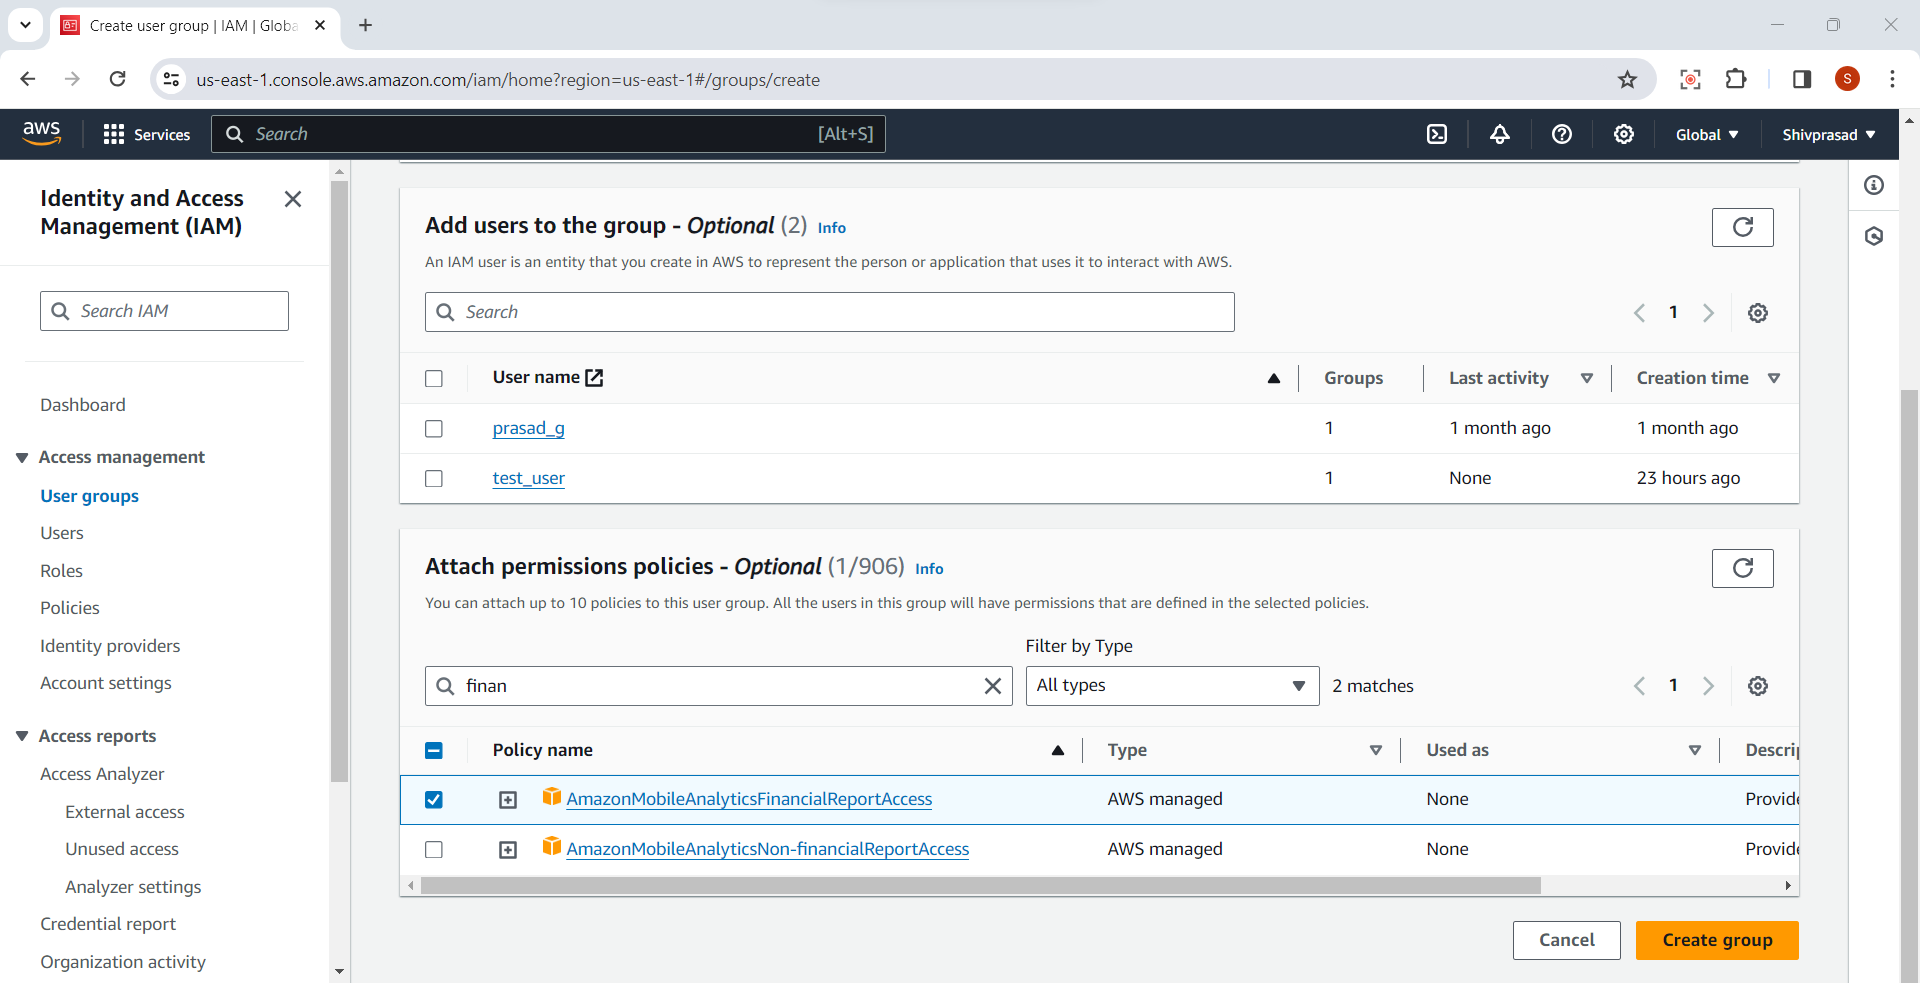
Attach Policies:
In the "Attach permissions policies" step, you can attach one or more policies to the group. Policies define the permissions for the group.
You can use the search box to find and select policies or browse through the policy list.
Click "Next" when you've attached the desired policies.
6.Review and Create:
Review the group details and attached policies.
Click "Create group" if everything is correct.
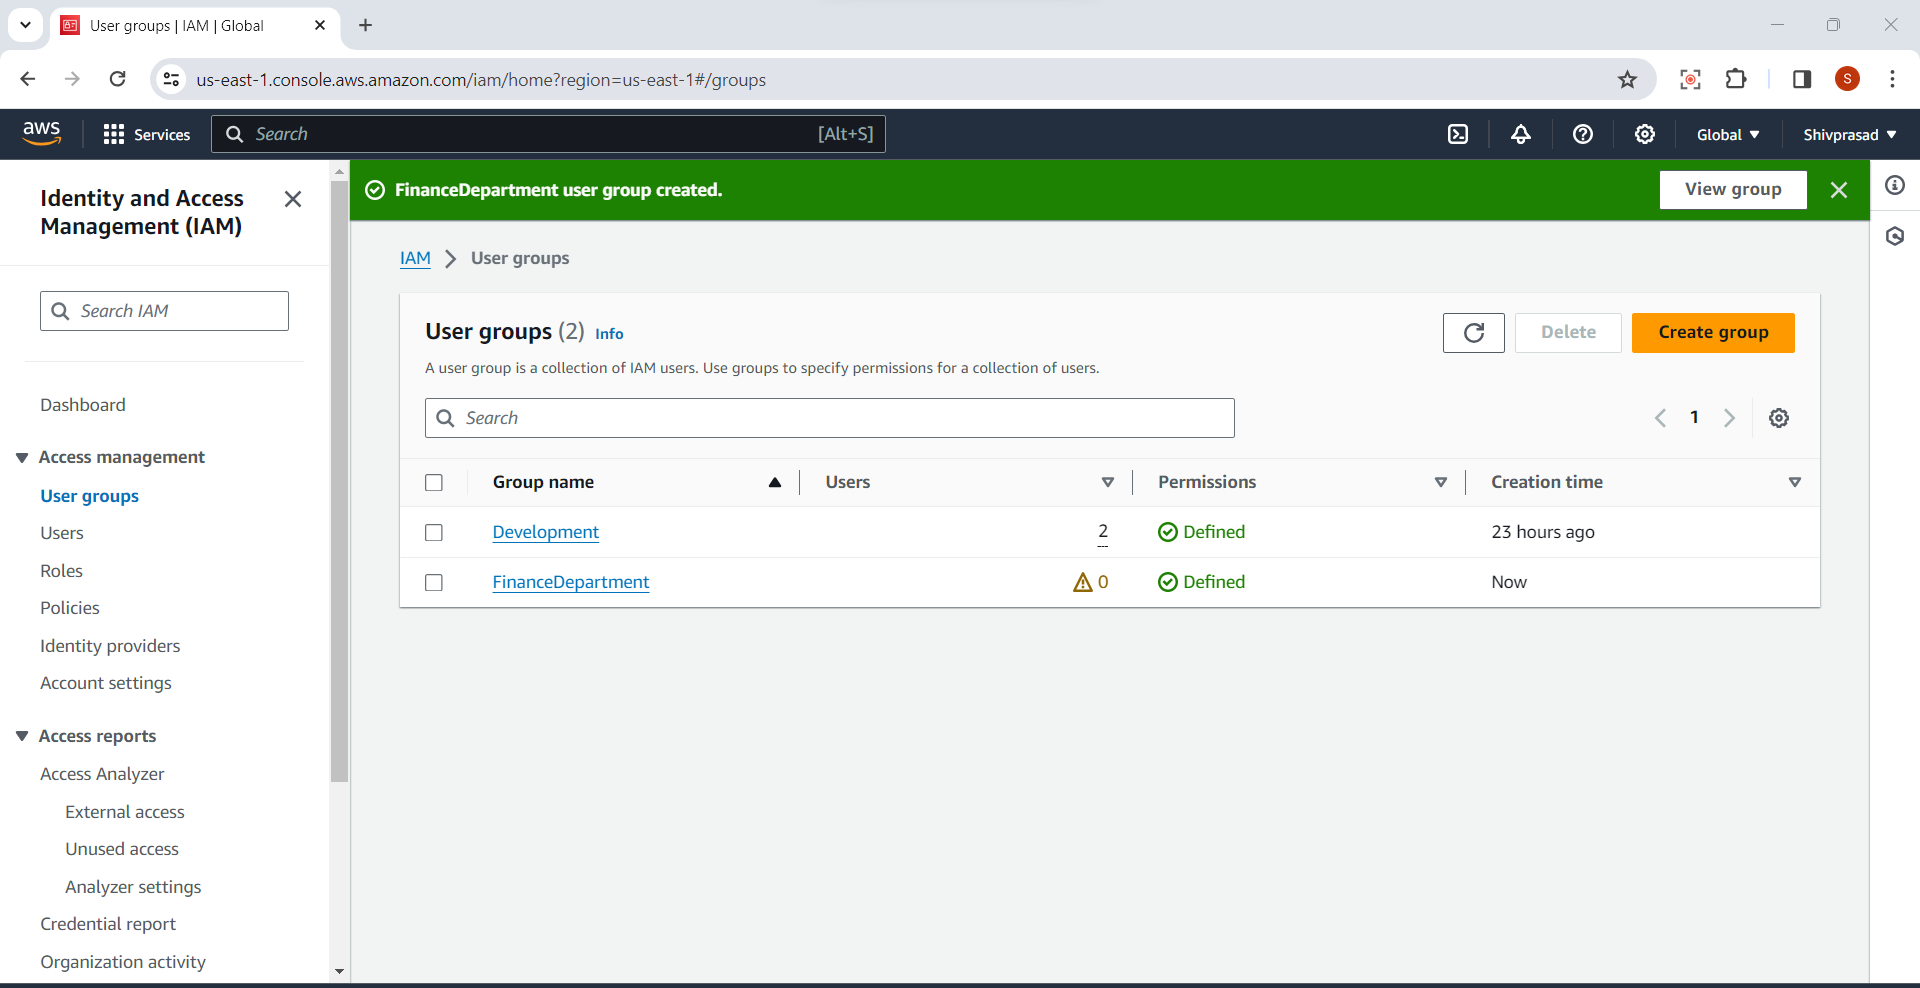
Confirmation:
- You'll see a confirmation screen indicating that the group has been created.
Steps to Assign IAM Users to Groups
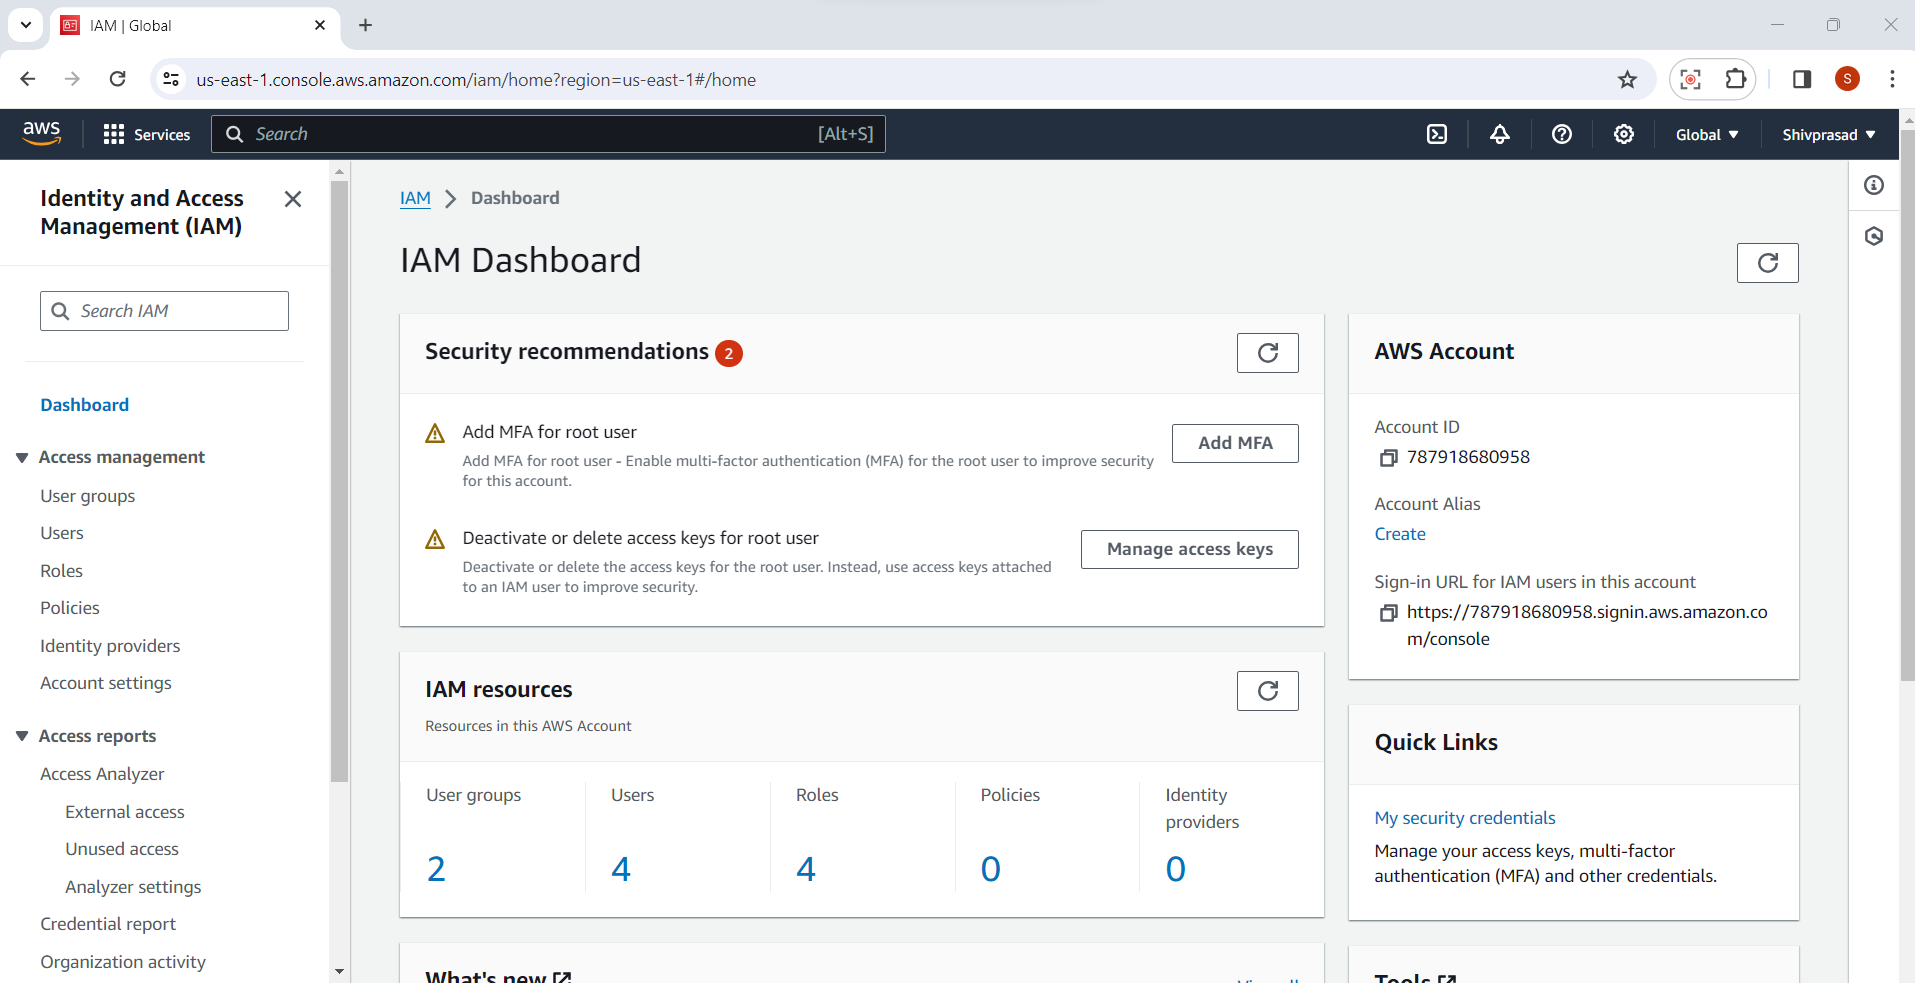
1.Access IAM Dashboard:
- In the IAM console, click on "Users" in the left navigation pane.
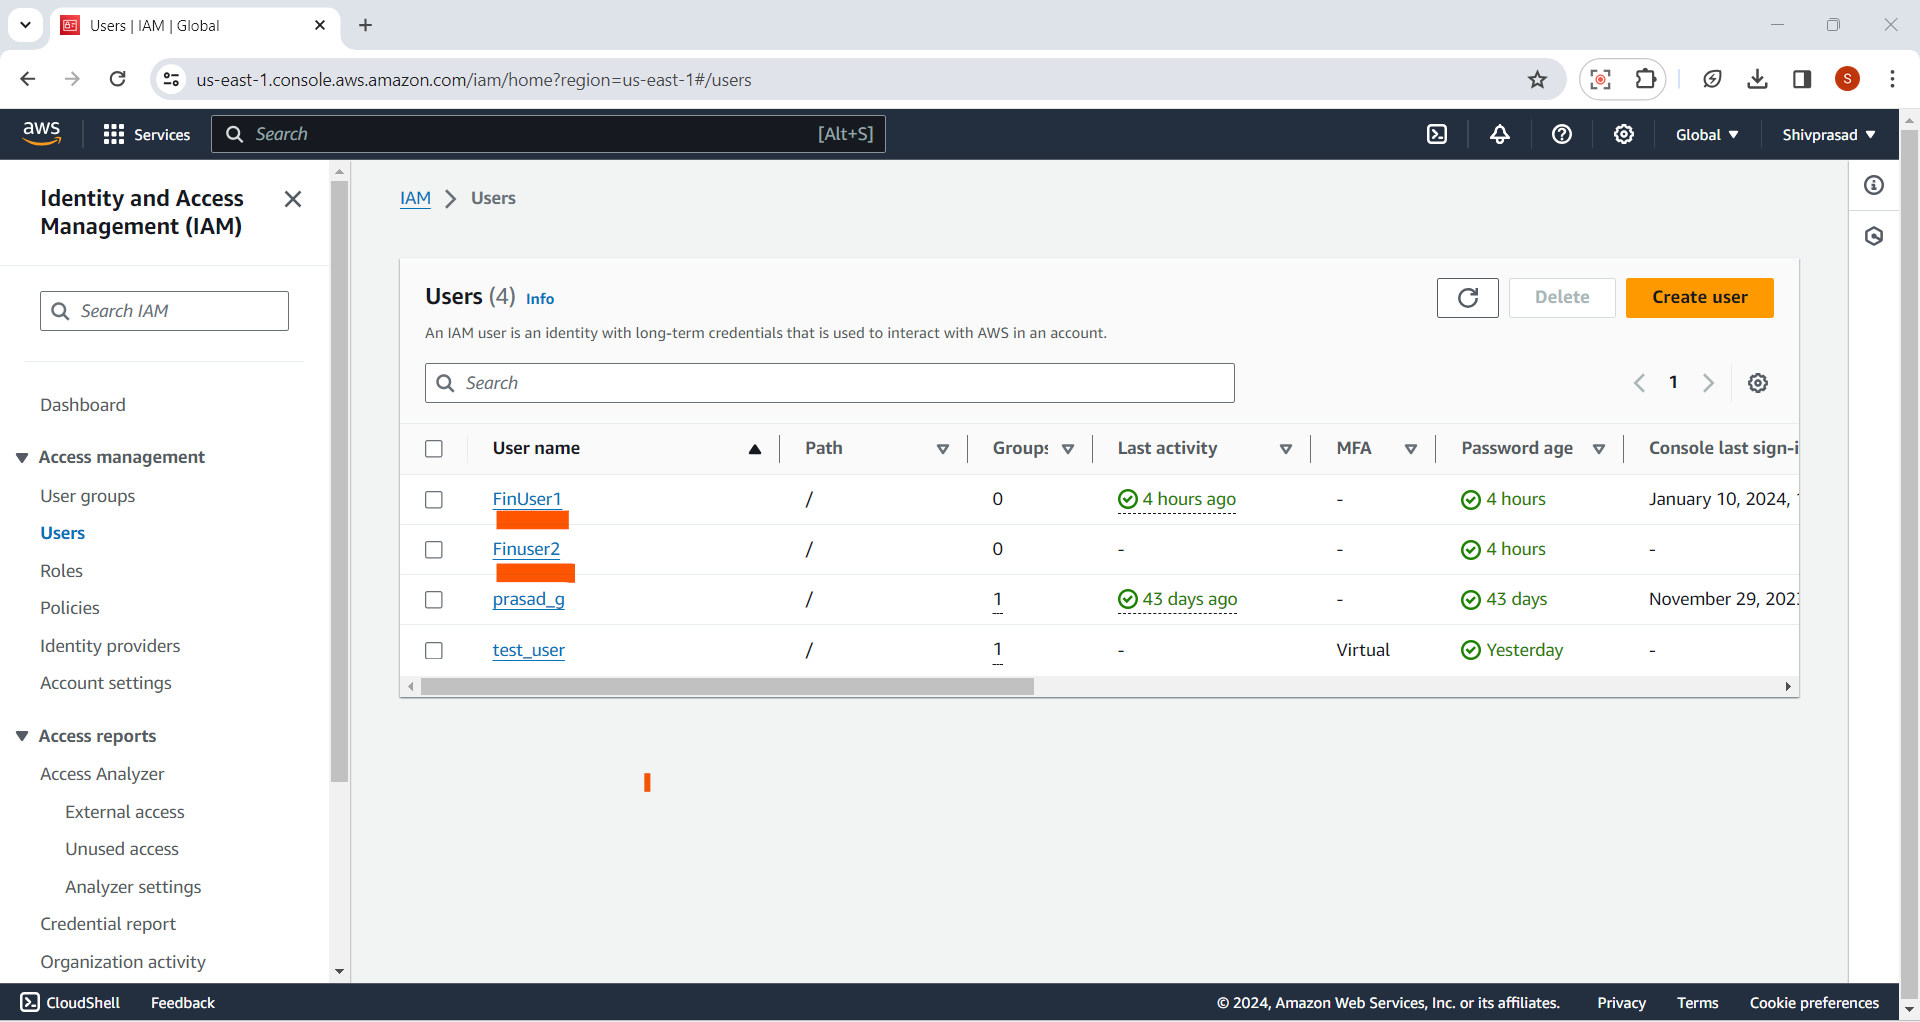
2.Select User:
Click on the username of the IAM user that you want to add to a group.
3.User Details Page:
- In the user details page, select the "Groups" tab.
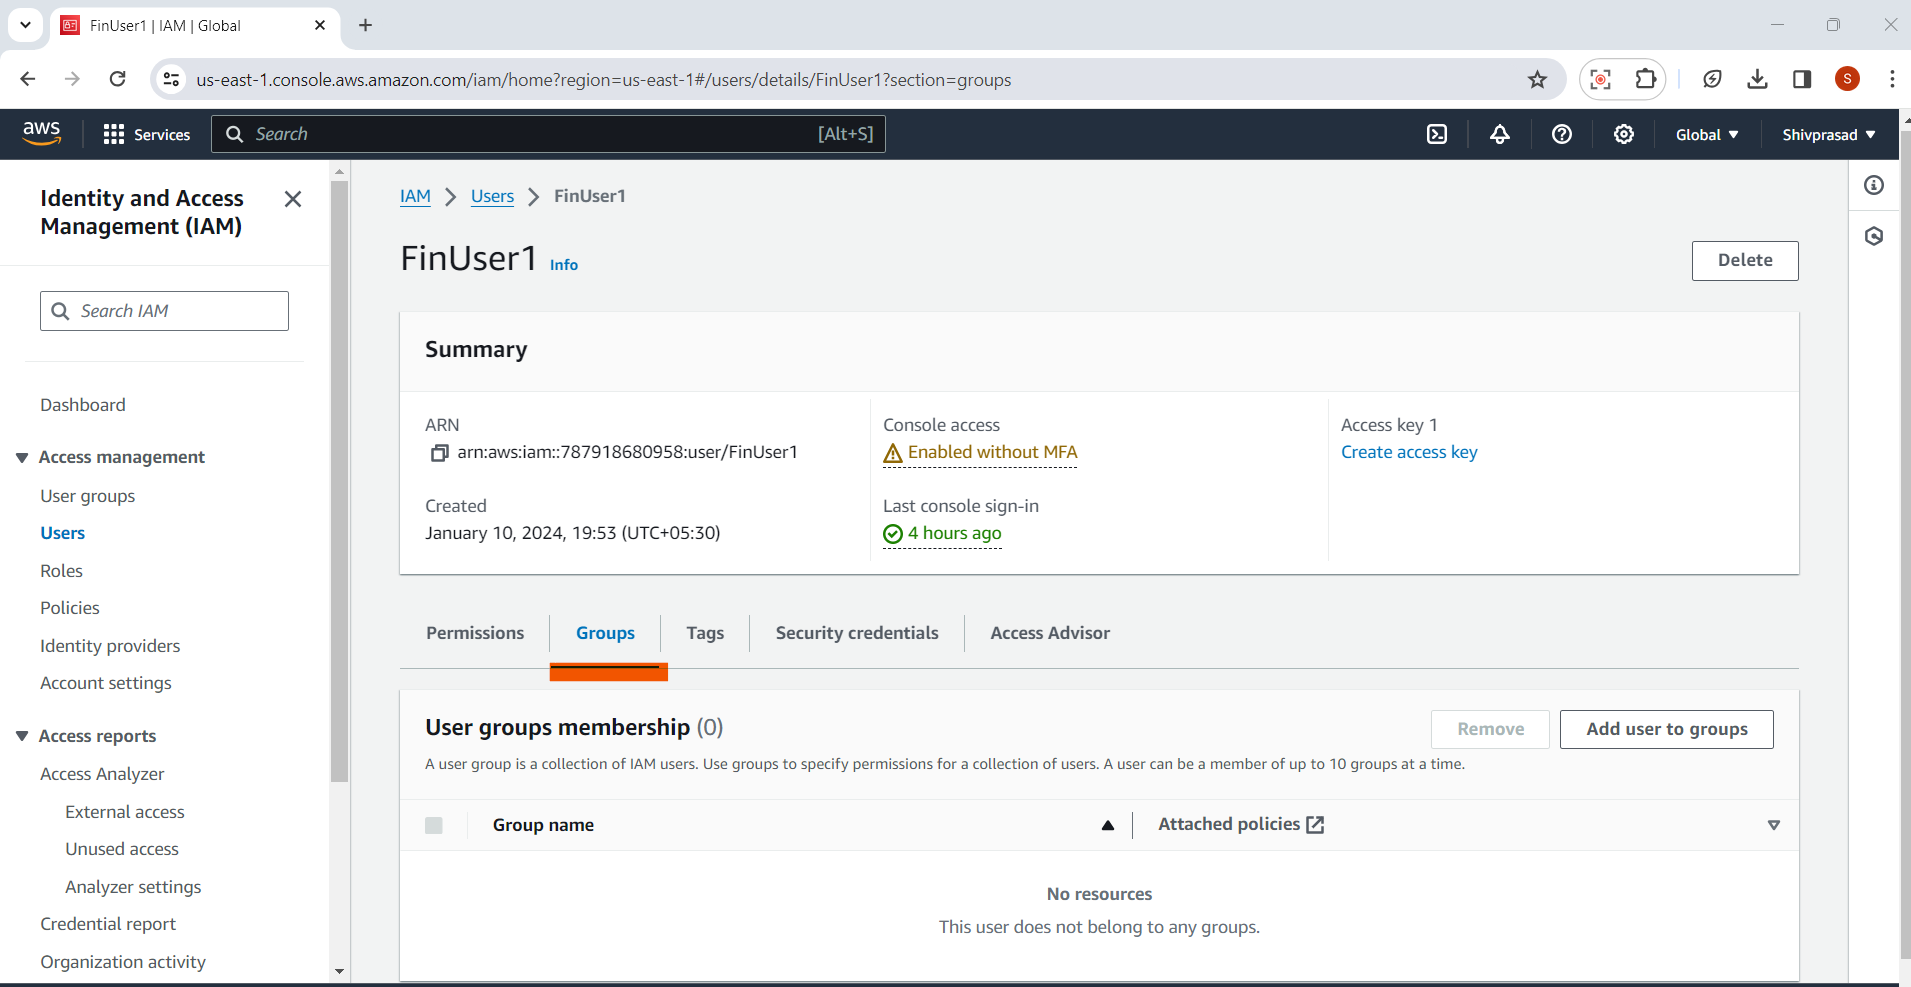
4.Add User to Groups:
- lick the "Add user to group" button.
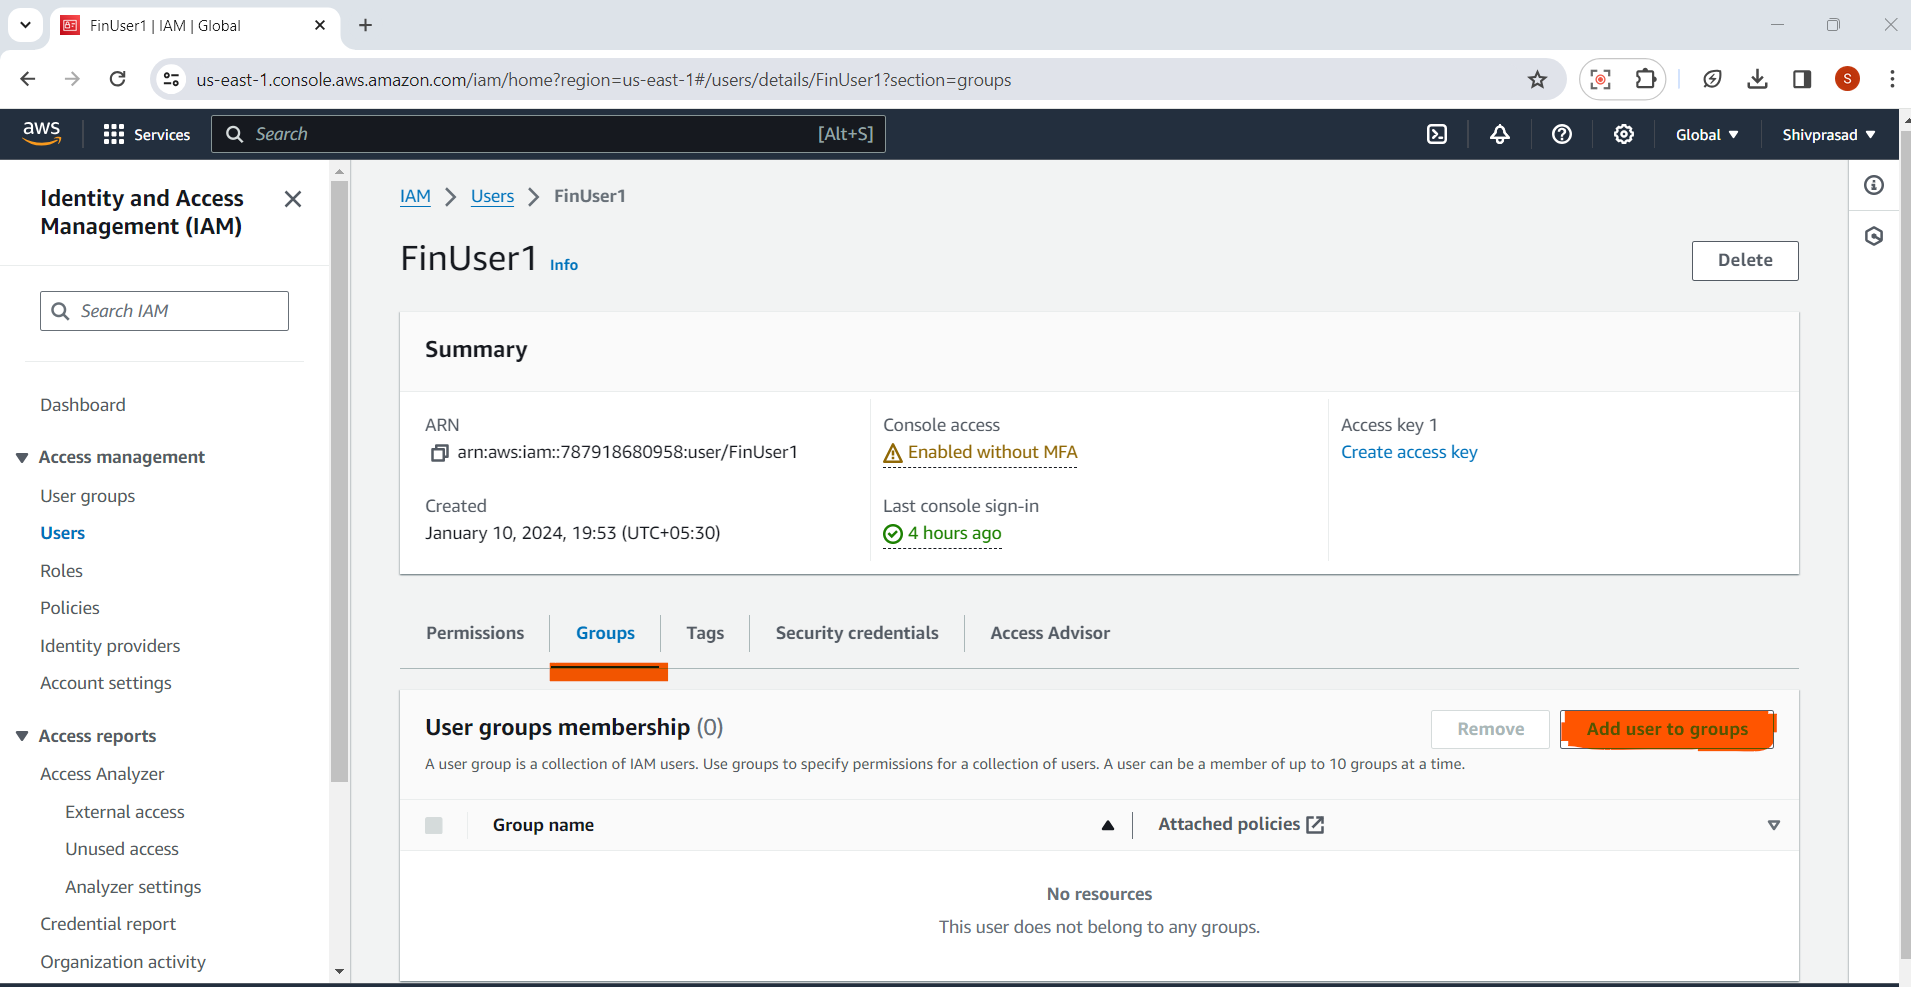
5.Choose Groups:
In the "Add user to groups" wizard, you'll see a list of available groups.
Select the checkbox next to each group you want to add the user to.
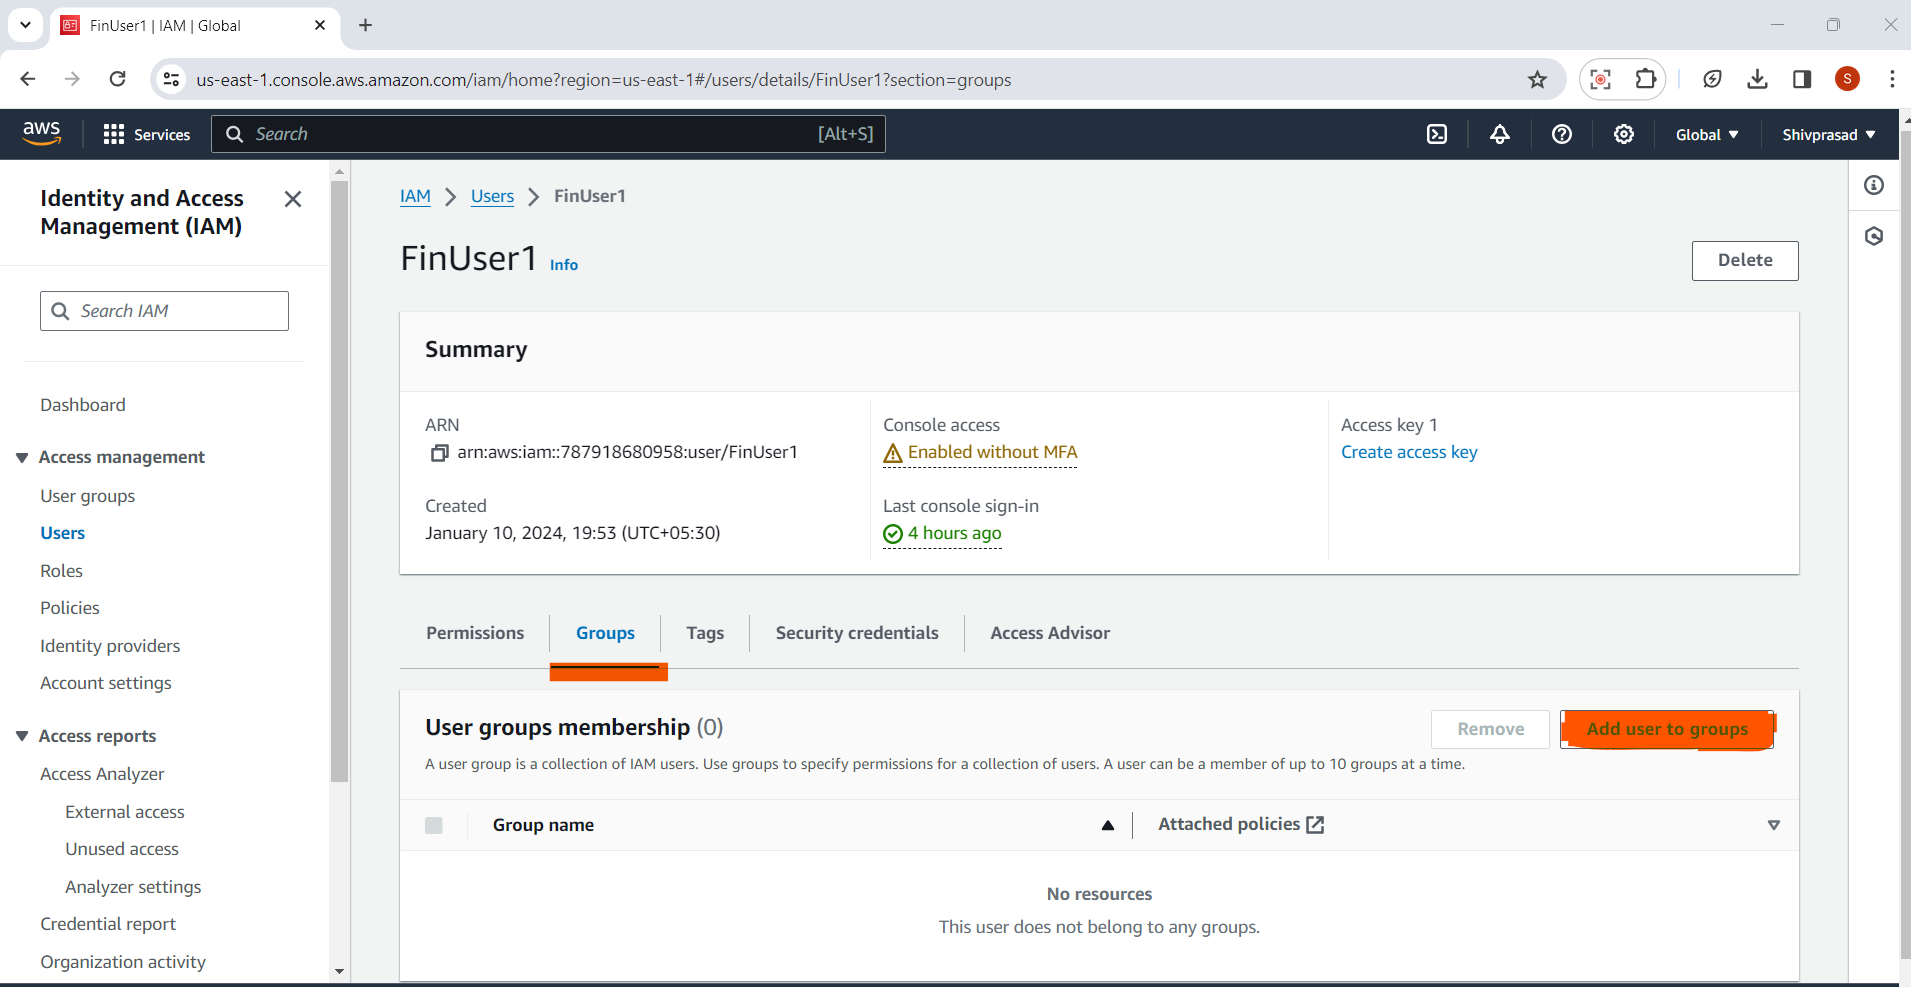
6.Choose Groups:
In the "Add user to groups" wizard, you'll see a list of available groups.
Select the checkbox next to each group you want to add the user to.
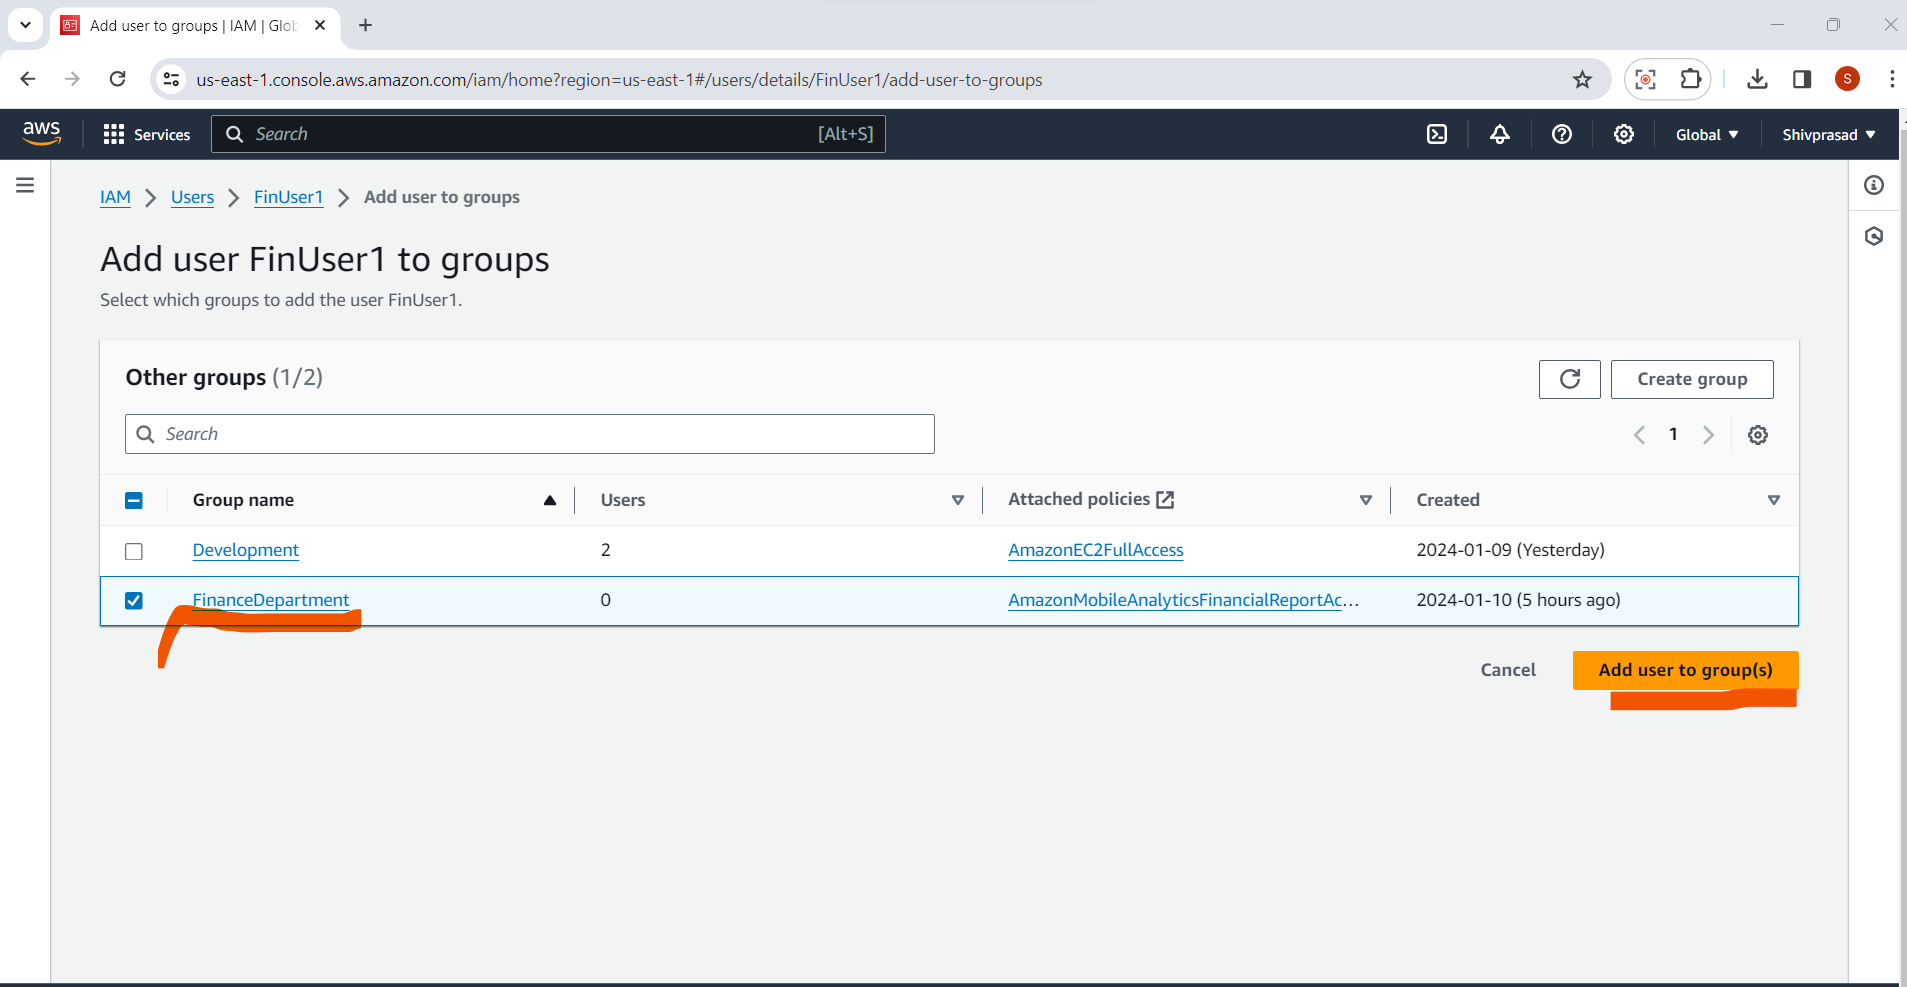
7.Review and Add:
Click the "Add to user groups" button.
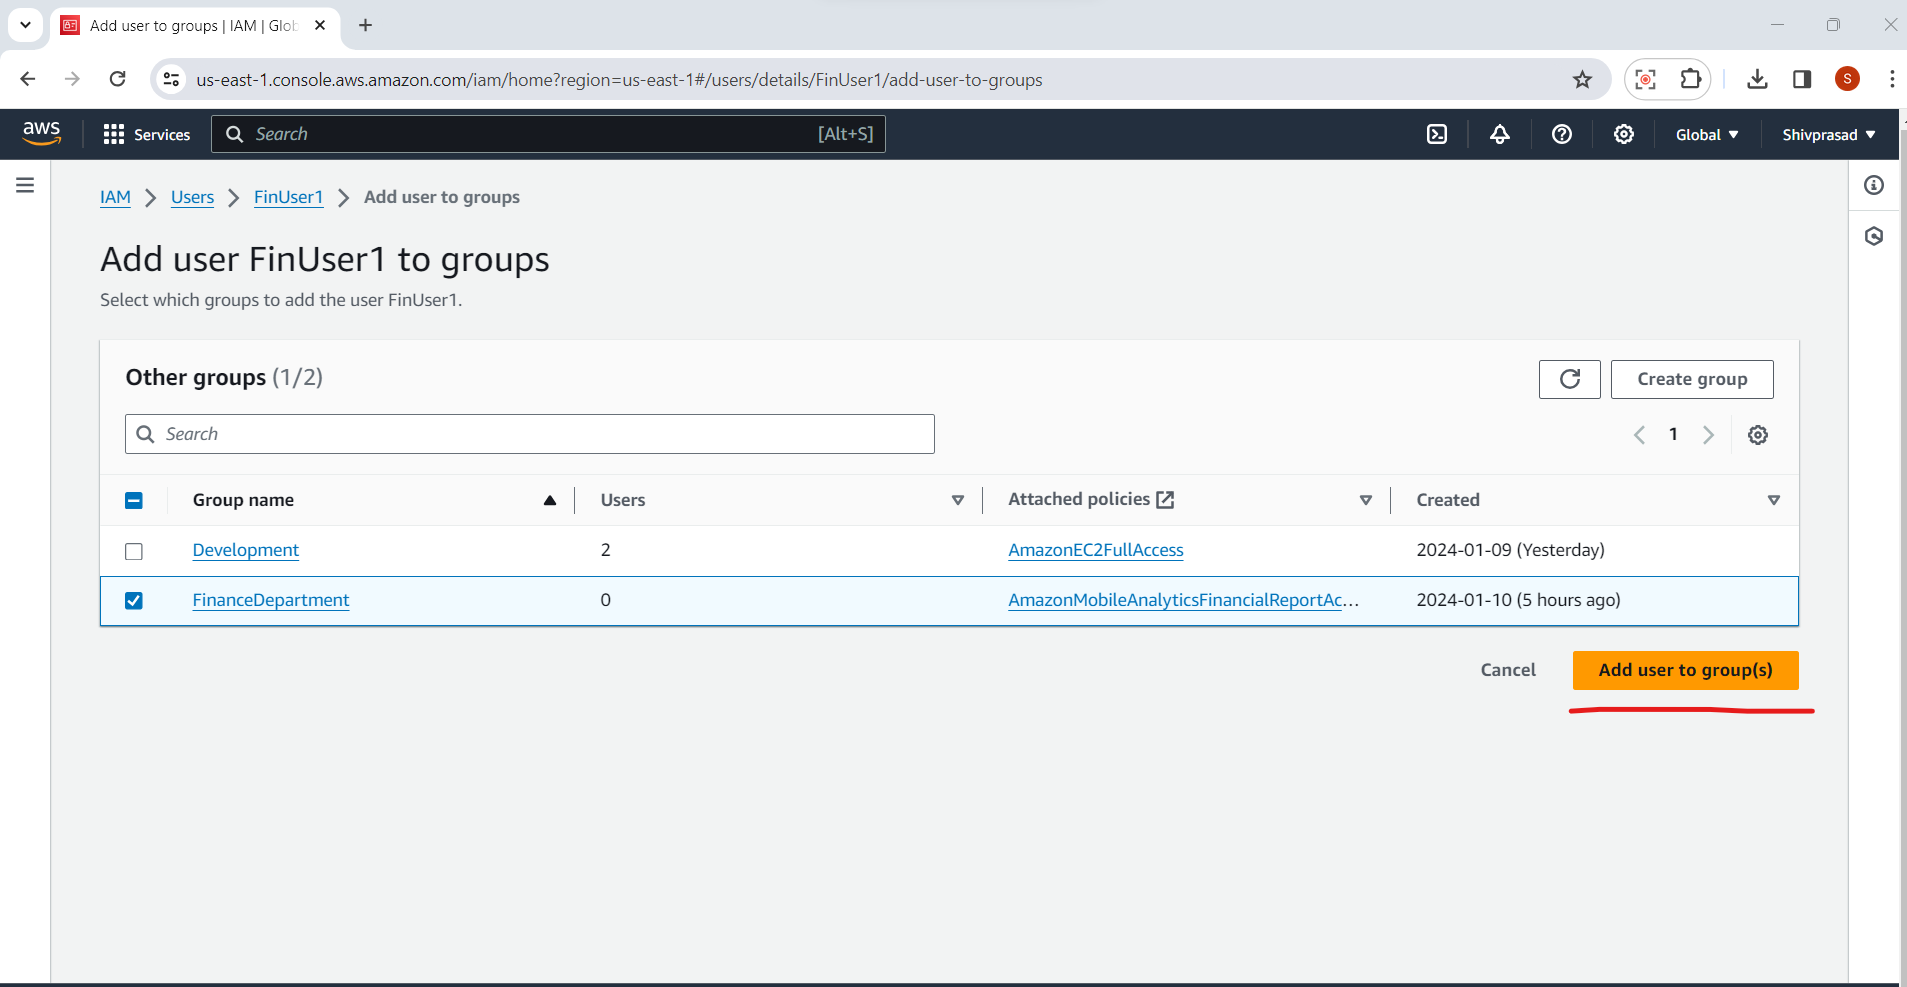
8.Confirmation:
- You'll see a confirmation message indicating that the user has been added to the selected groups.
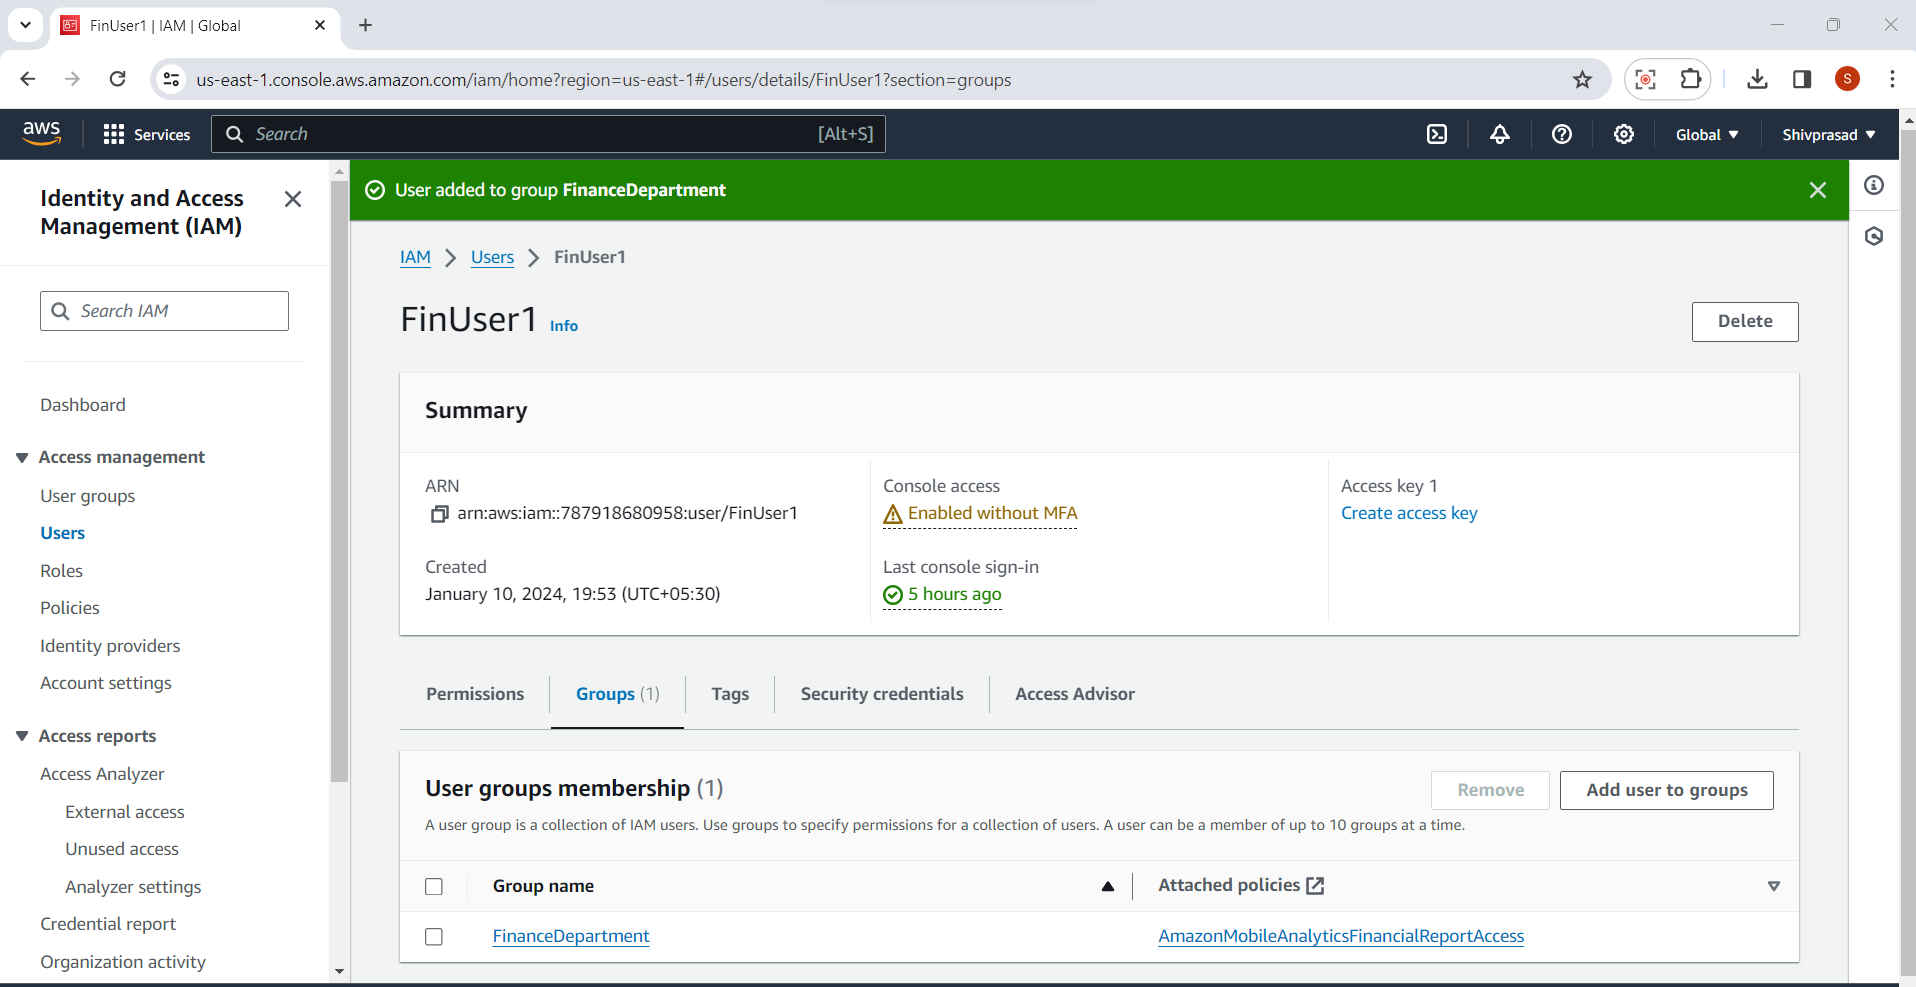
Repeat these steps for each IAM user you want to add to specific groups. Once users are added to groups, they inherit the permissions associated with those groups. This makes it easier to manage permissions at scale, especially if users have similar roles or responsibilities.
Remember that IAM users can belong to multiple groups, and the cumulative permissions from all the groups will be applied to the user. If you need to modify group memberships for a user later, you can do so by editing the user details and adjusting the group assignments.
Steps to Test User Access
1.Verify Initial Access:
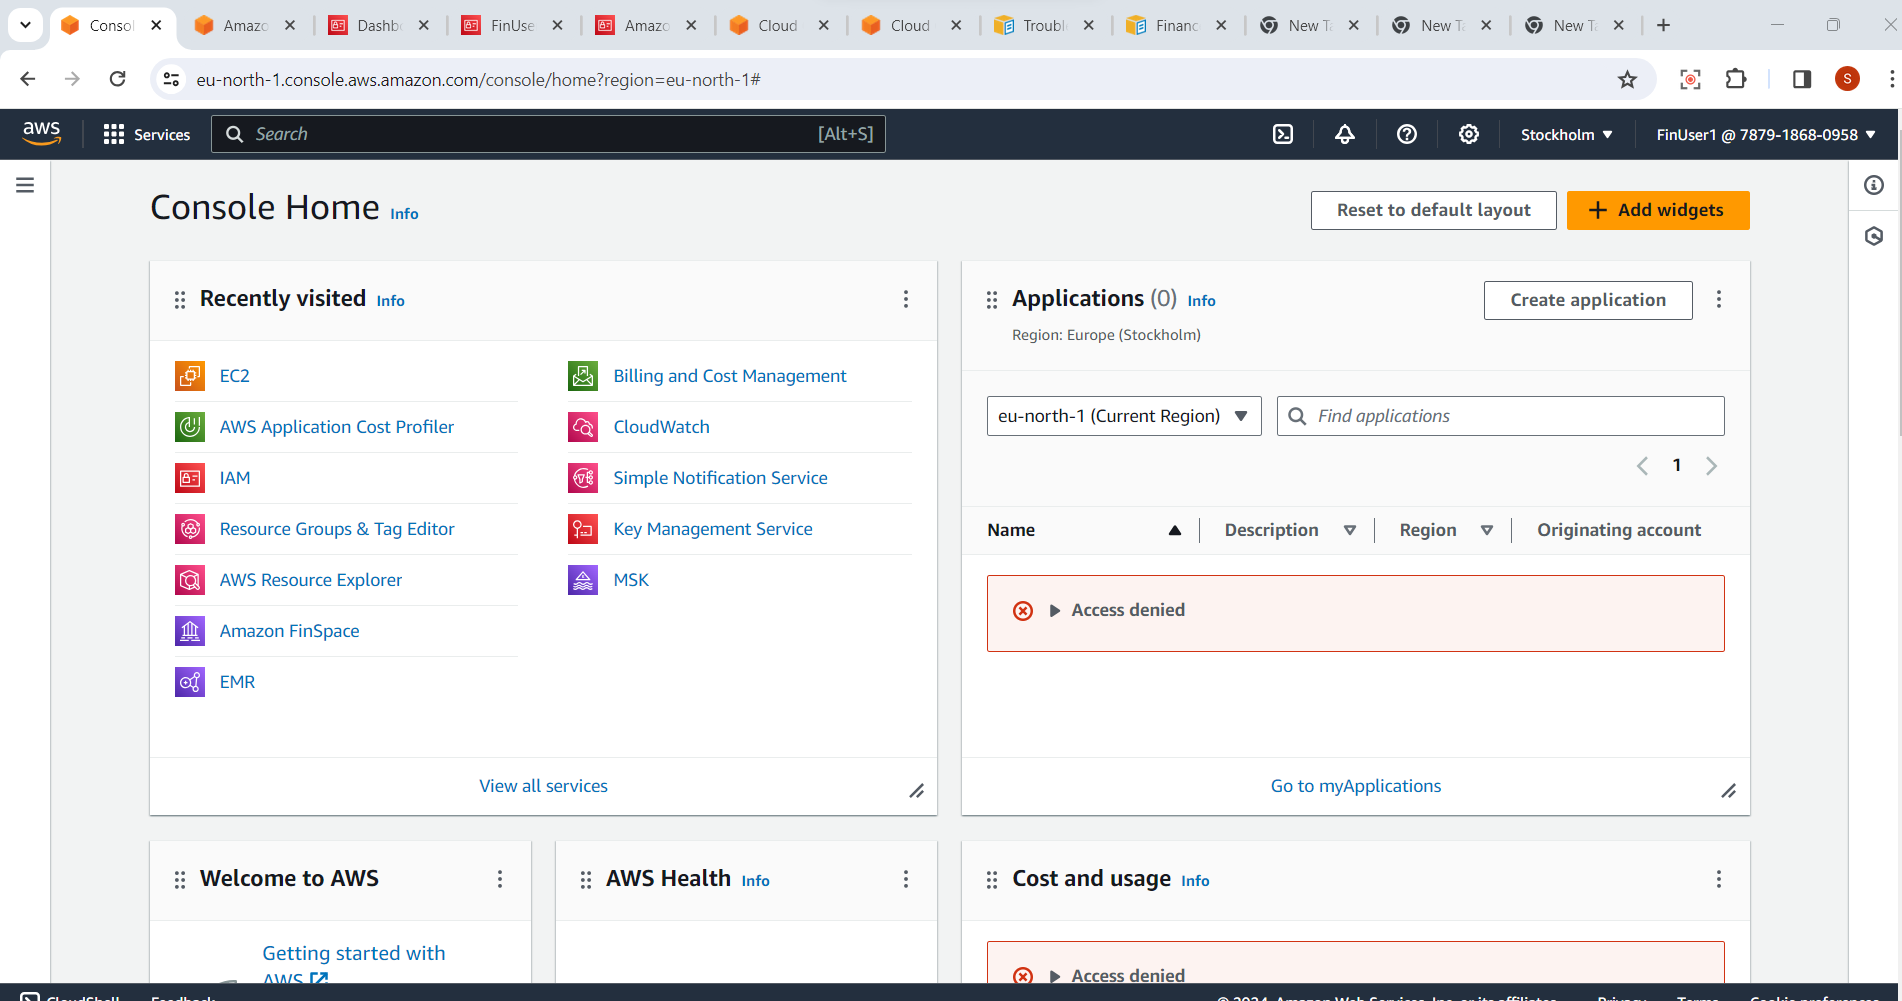
Confirm that the user can log in successfully.
Check if the user can view basic information in the AWS Management Console.
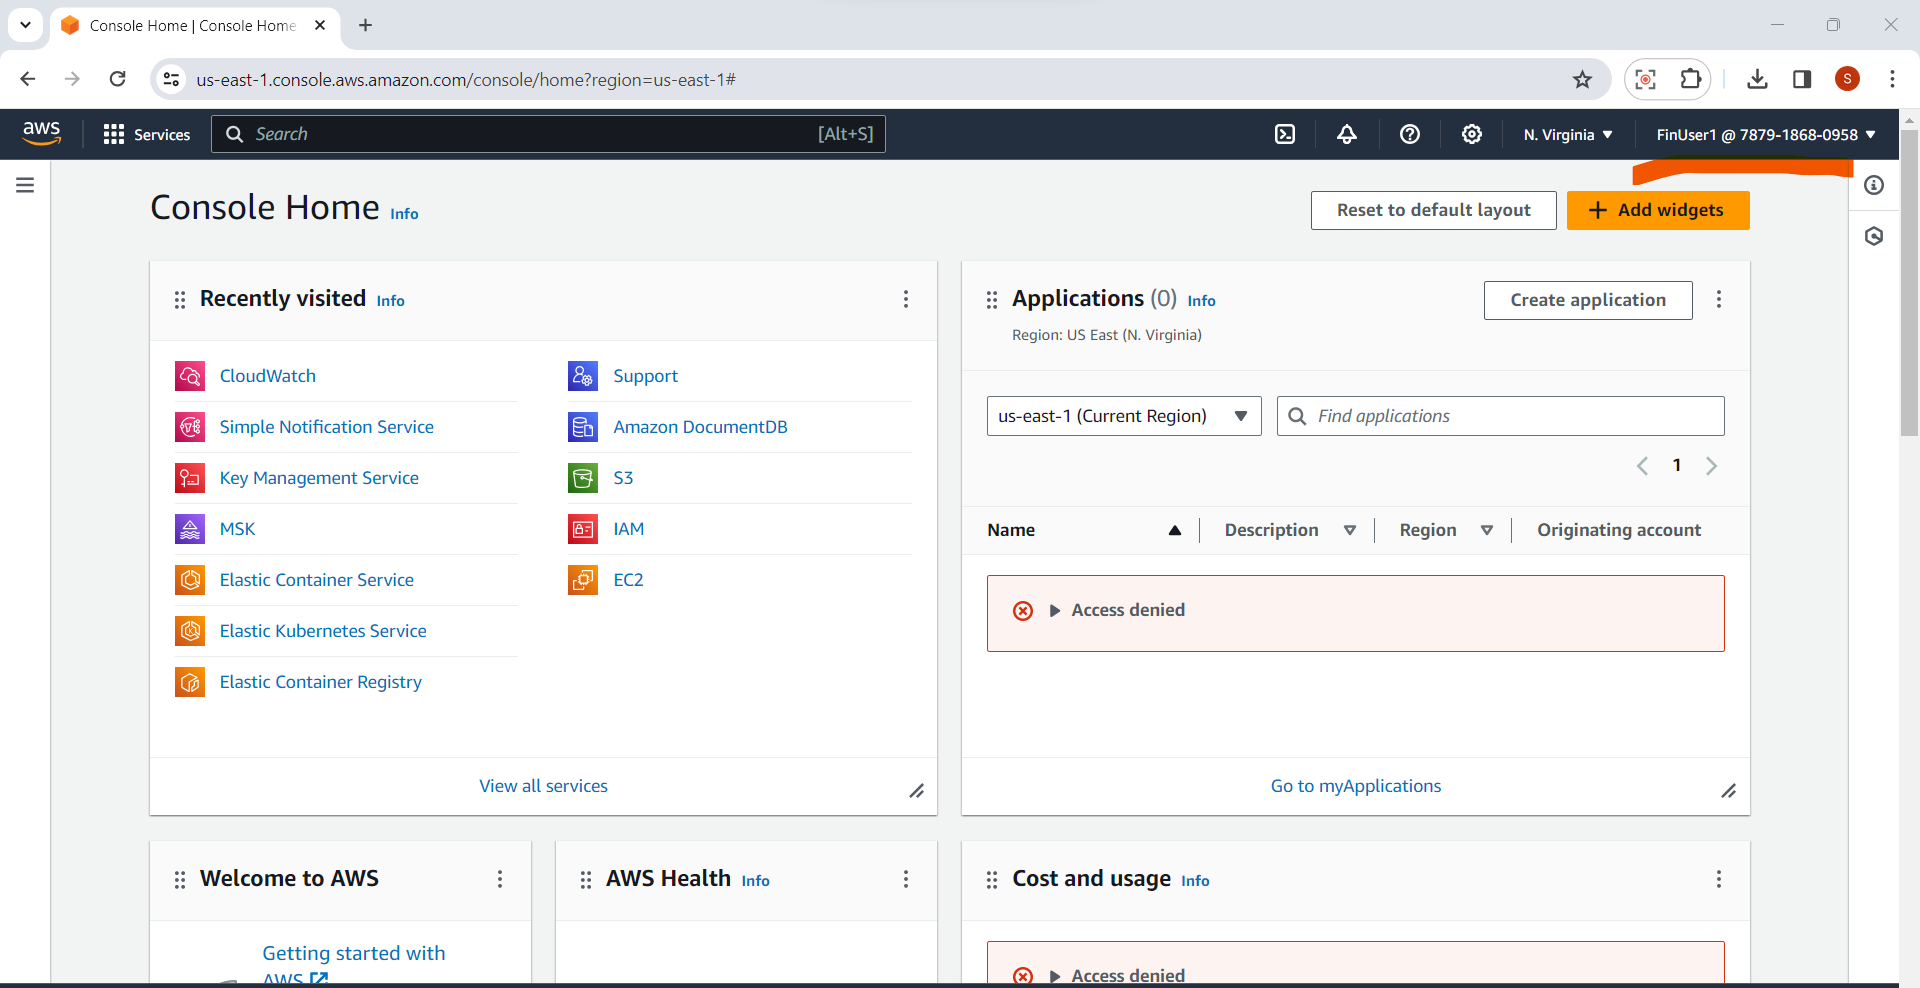
2.Test AWS Service Access:
Navigate to the AWS services relevant to the user's role.
Attempt to perform actions aligned with the user's permissions.
Example: If the user is part of the "Manager" group, verify access to financial reports or specific S3 buckets.
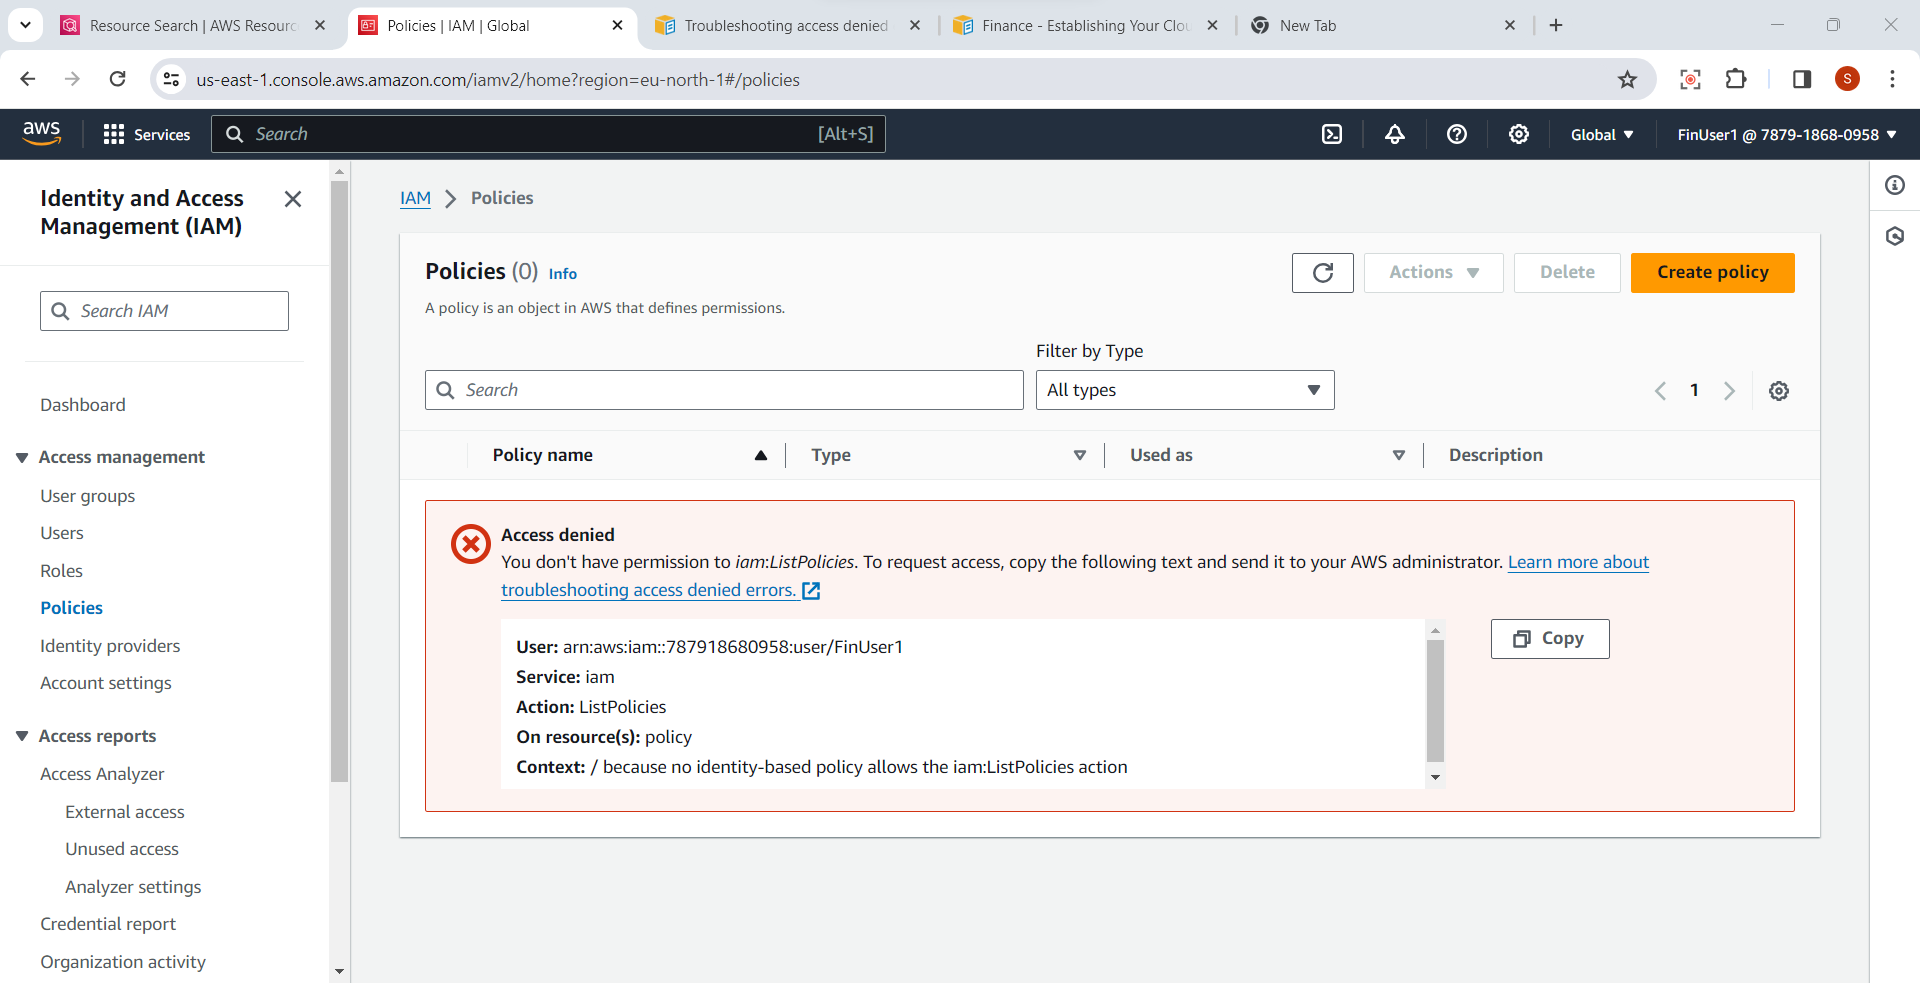
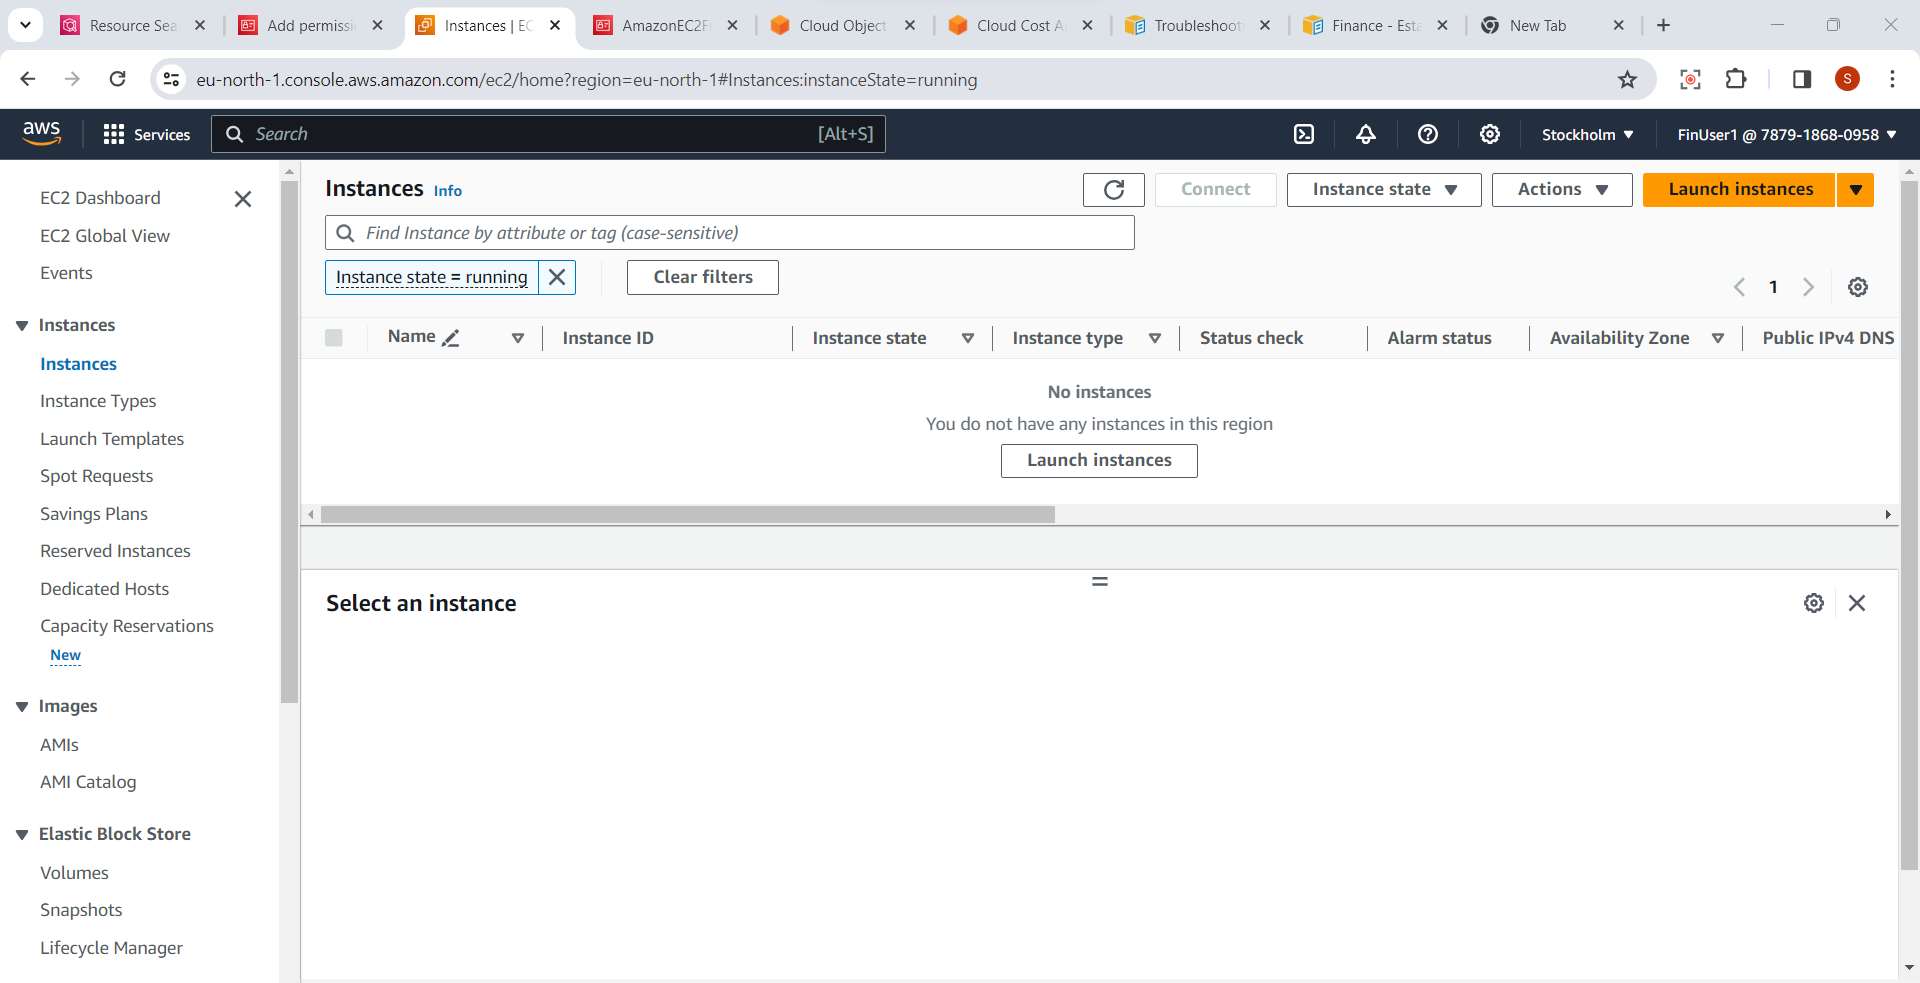
User has Access Report access
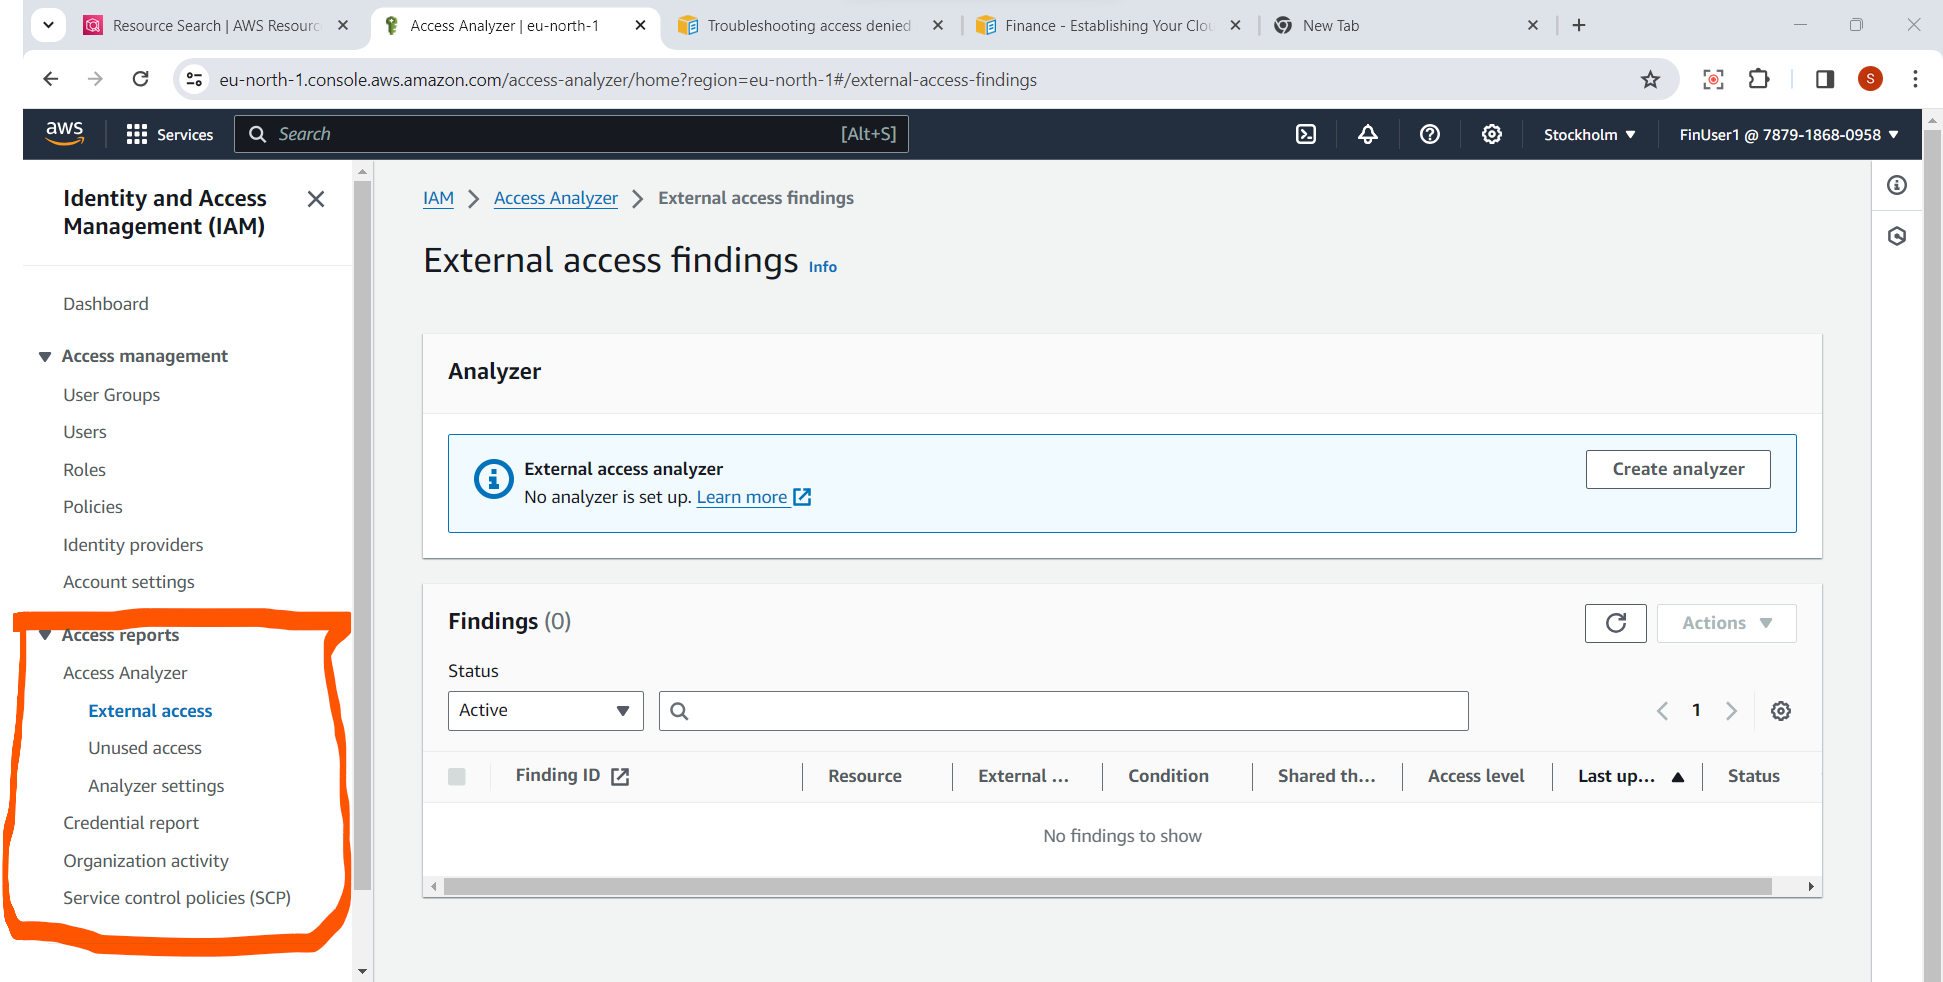
EC2 Access
Steps to Assign Multi-factor Authentication
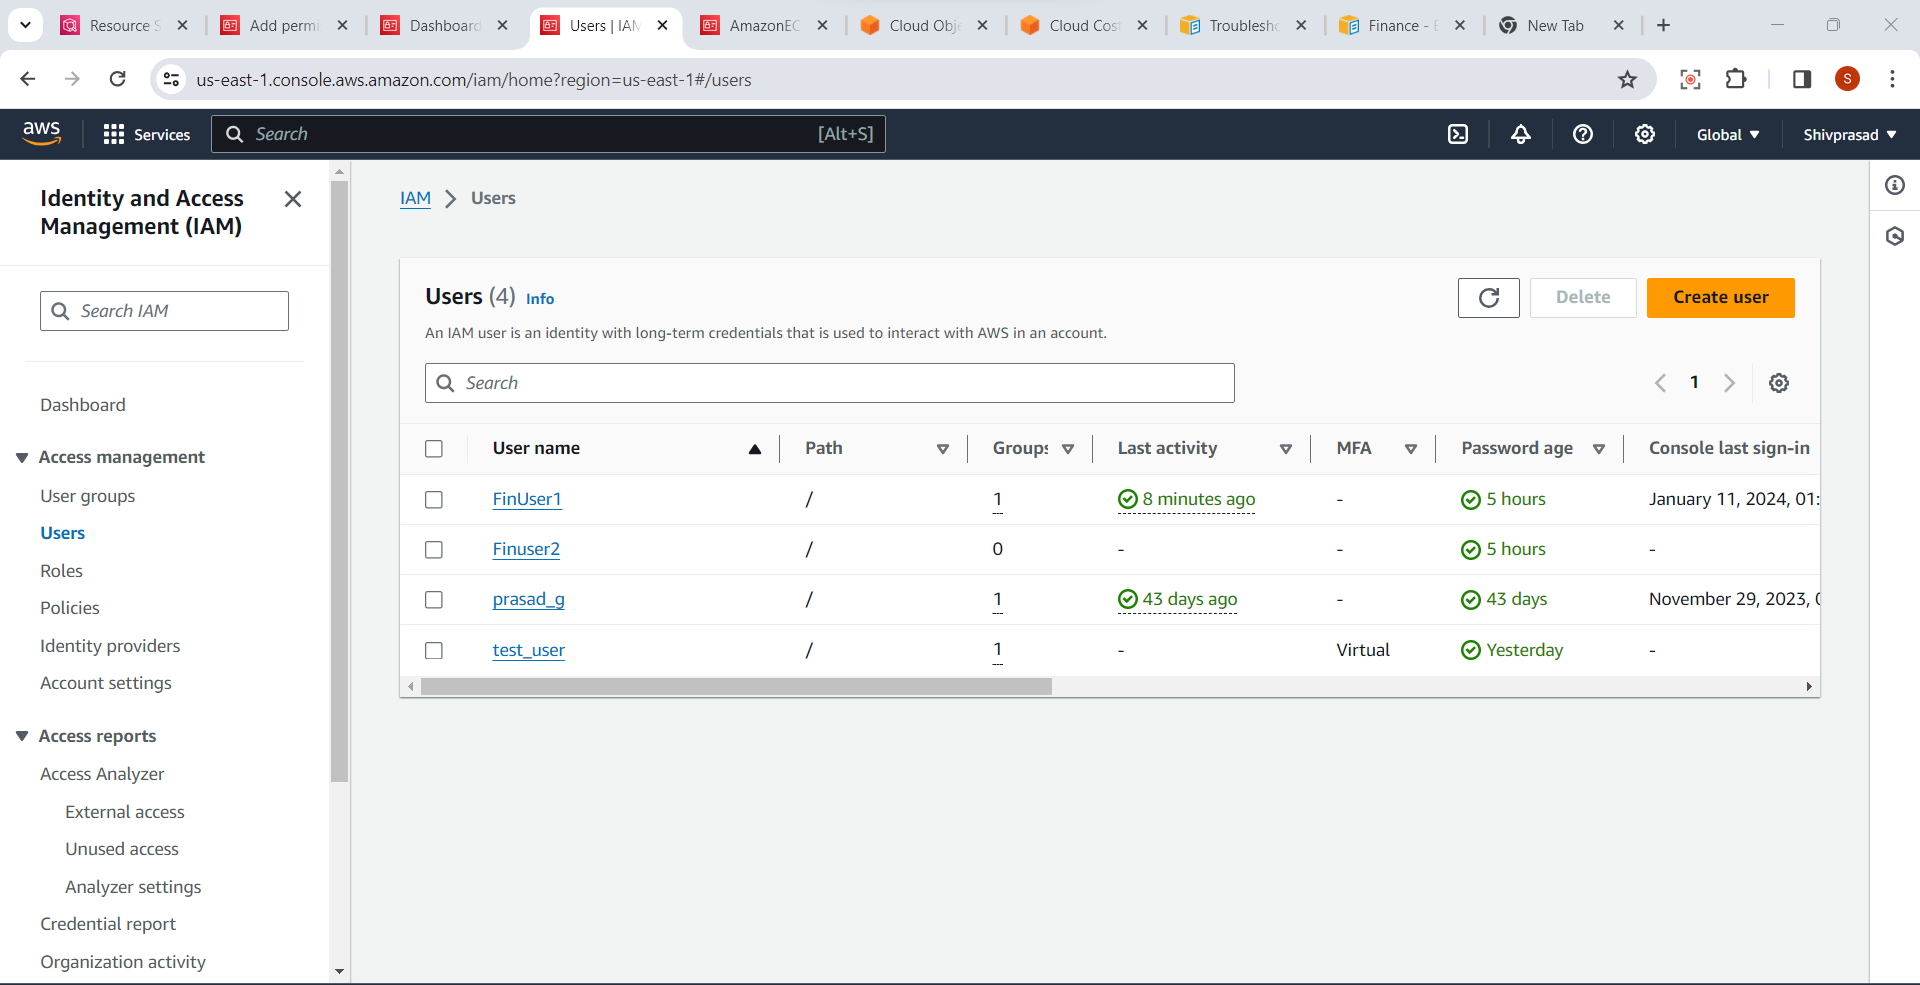
1.Select "Users" in the IAM Dashboard:
- In the left navigation pane, click on "Users" to view a list of existing IAM users.
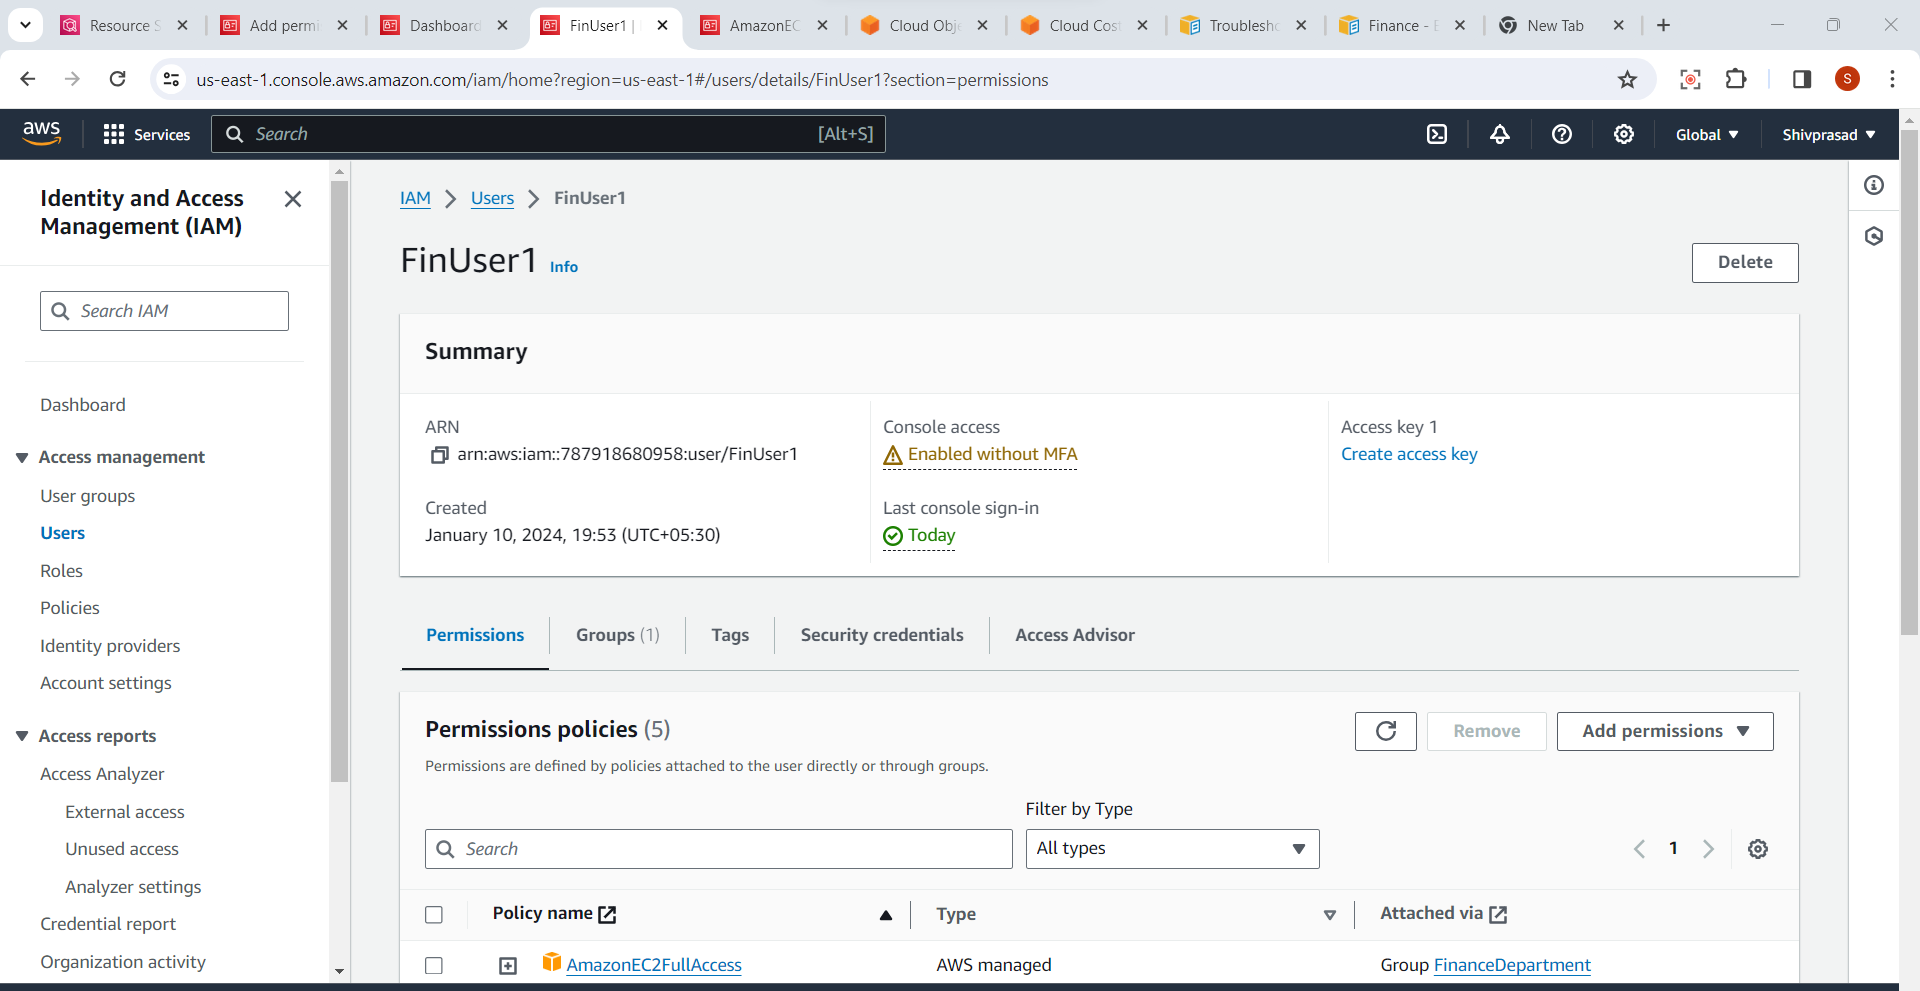
2.Choose the User to Enable MFA:
- Select the IAM user for whom you want to enable Multi-Factor Authentication.
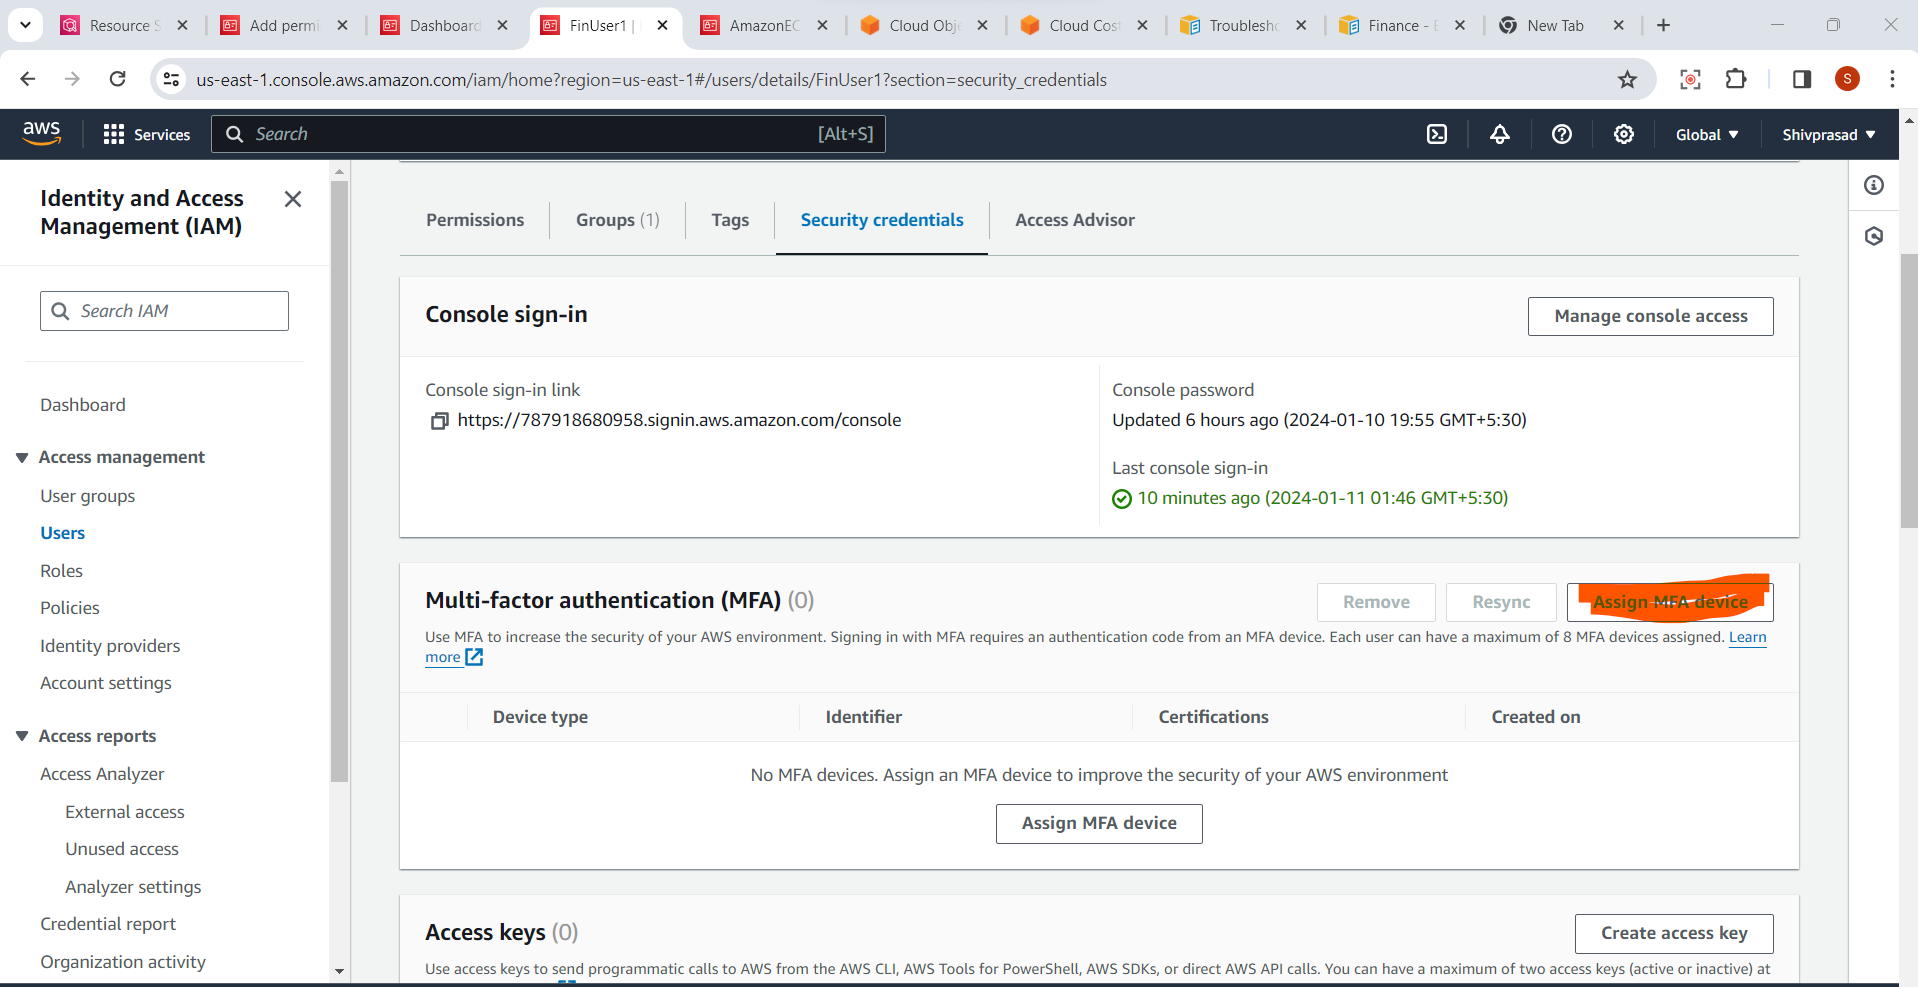
3. Navigate to "Security credentials" tab:
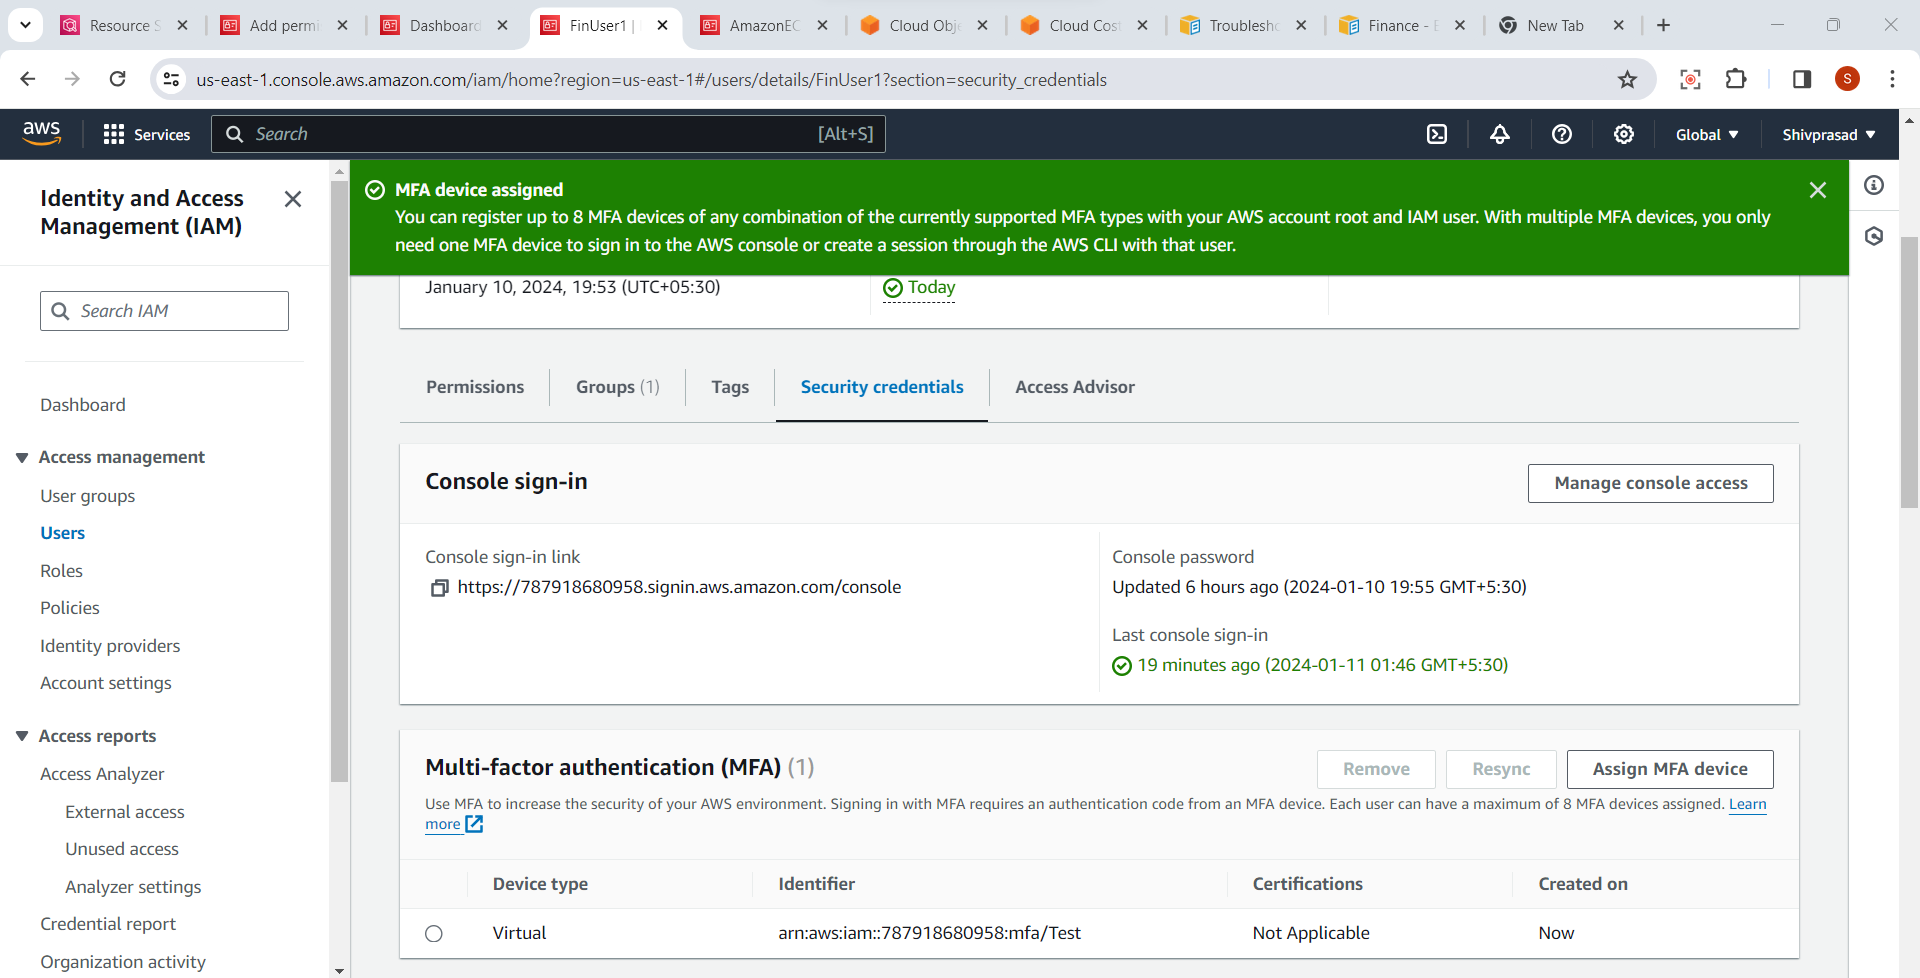
- In the user details page, click on the "Security credentials" tab.
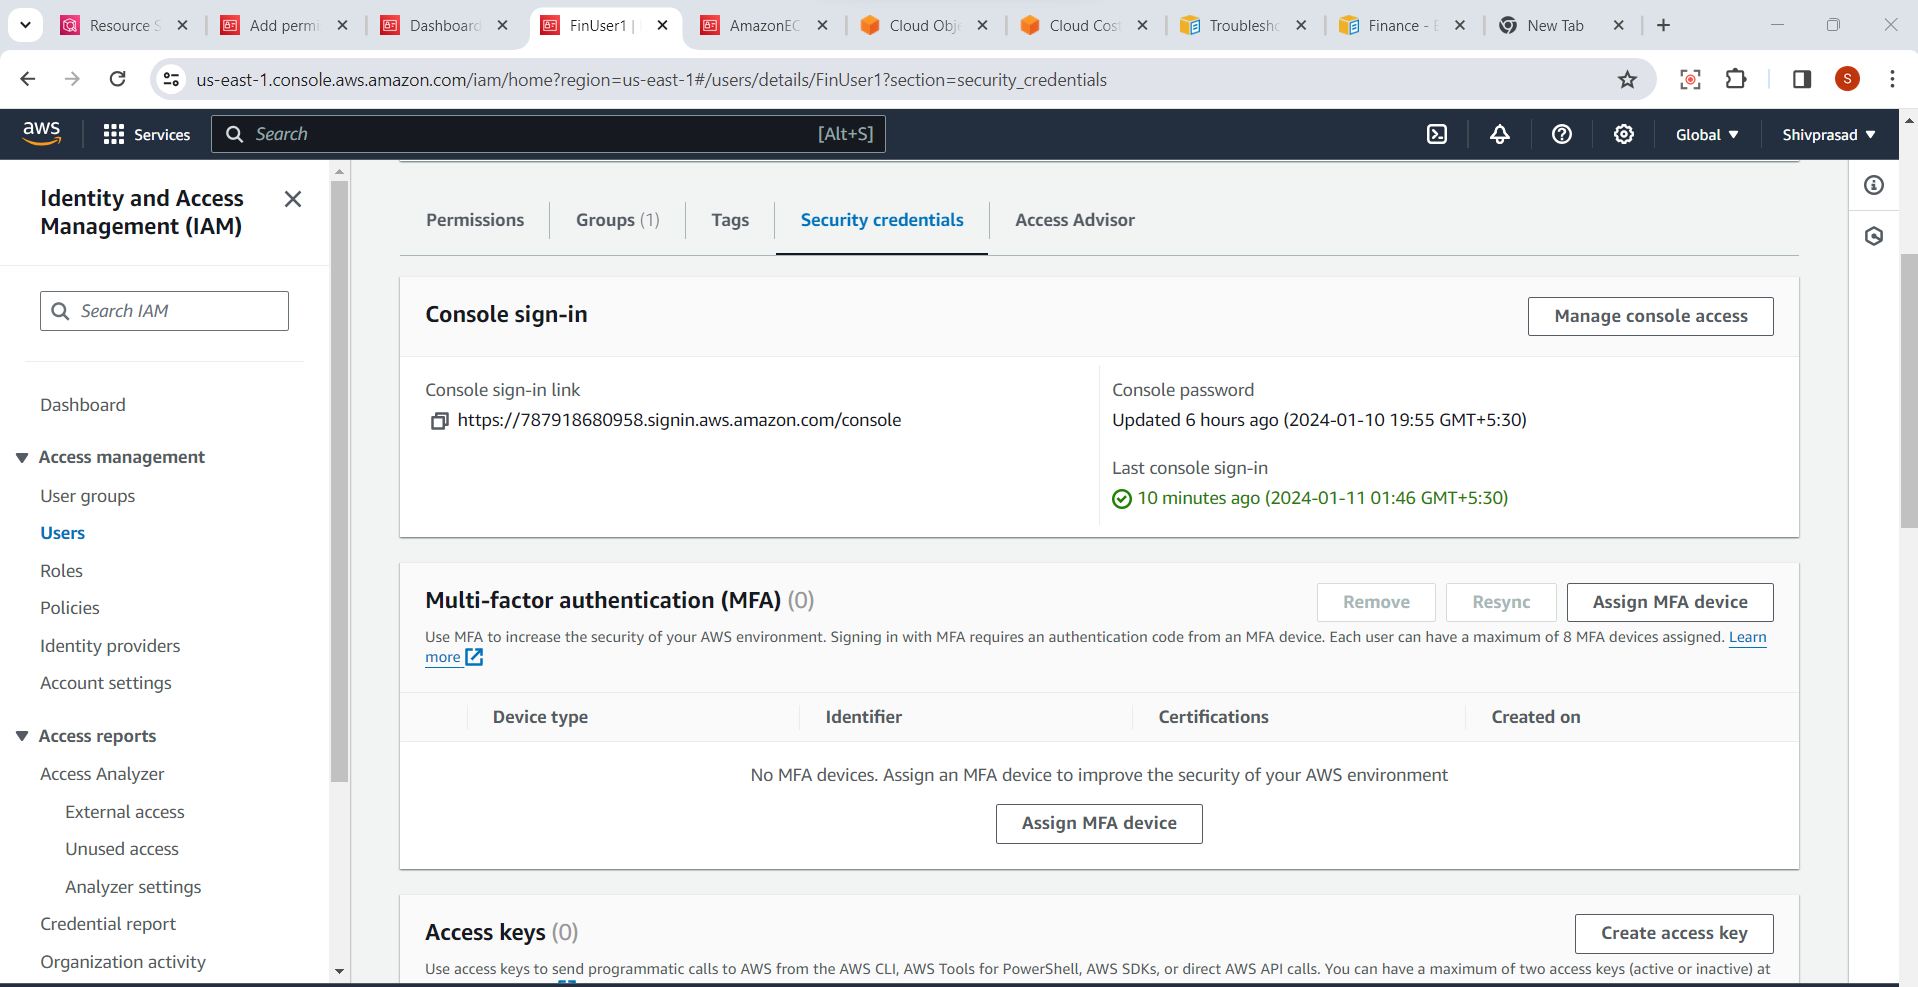
4.Click "Assign MFA Device":
- Click on the "Manage MFA device" button to initiate the process of assigning an MFA device.
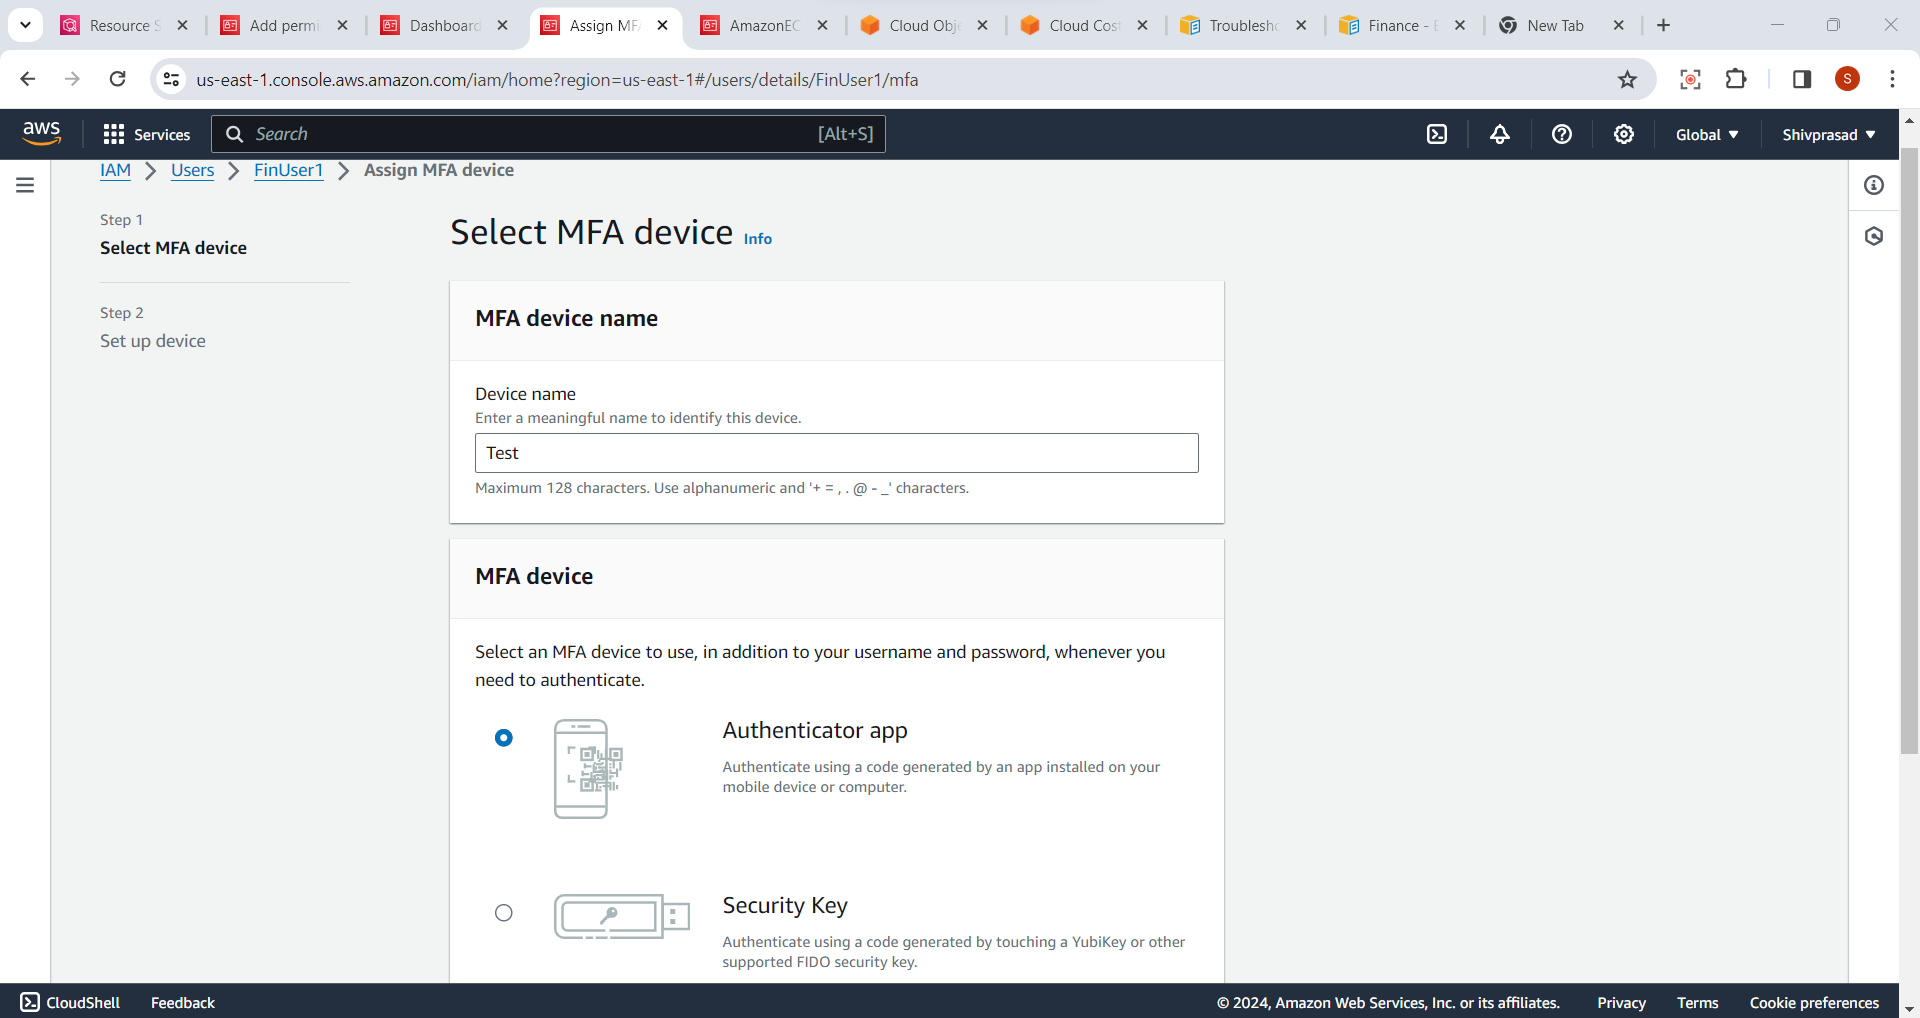
5.Choose MFA Device Type:
- Choose the type of MFA device you want to use: "Virtual MFA device" or "U2F security key" (if supported).
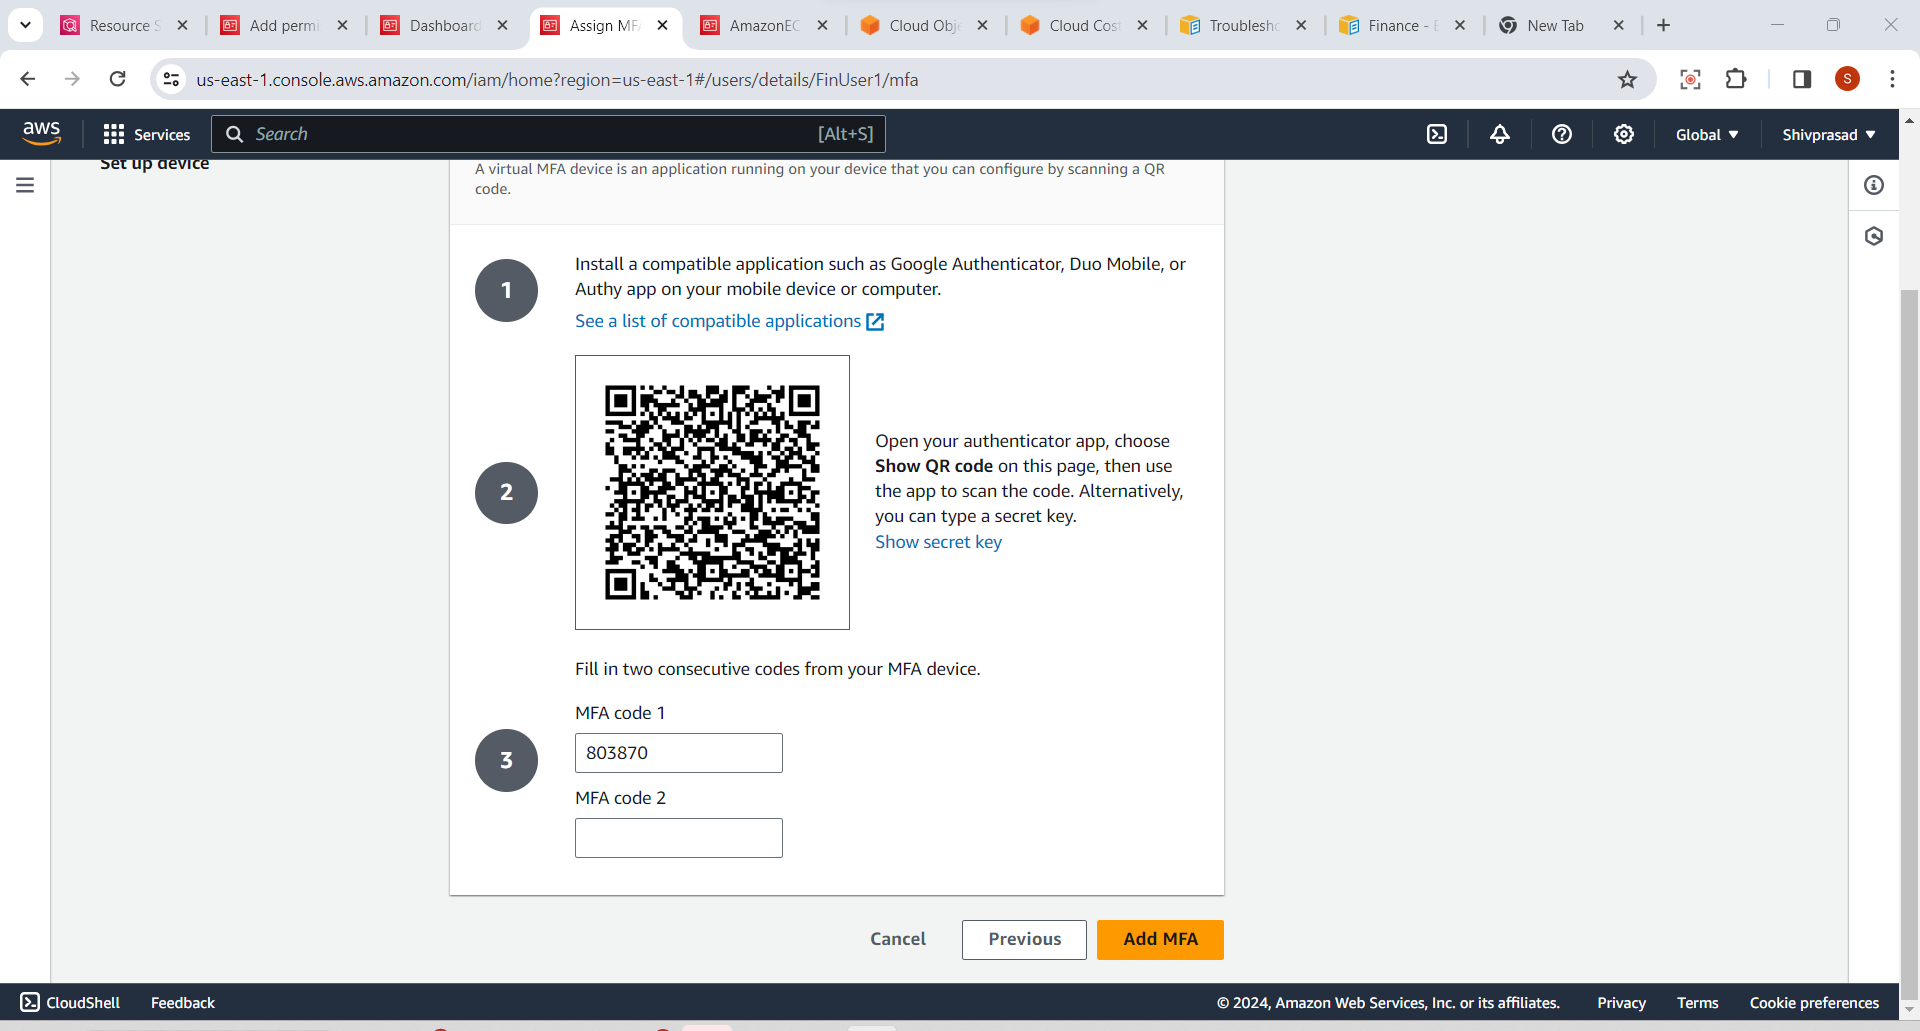
6.Set Up a Virtual MFA Device:
If you choose the "Virtual MFA device," follow the on-screen instructions to set up the virtual MFA device using a supported mobile app like Google Authenticator or Authy.
Scan the QR code or manually enter the key provided by the AWS console into the authenticator app.
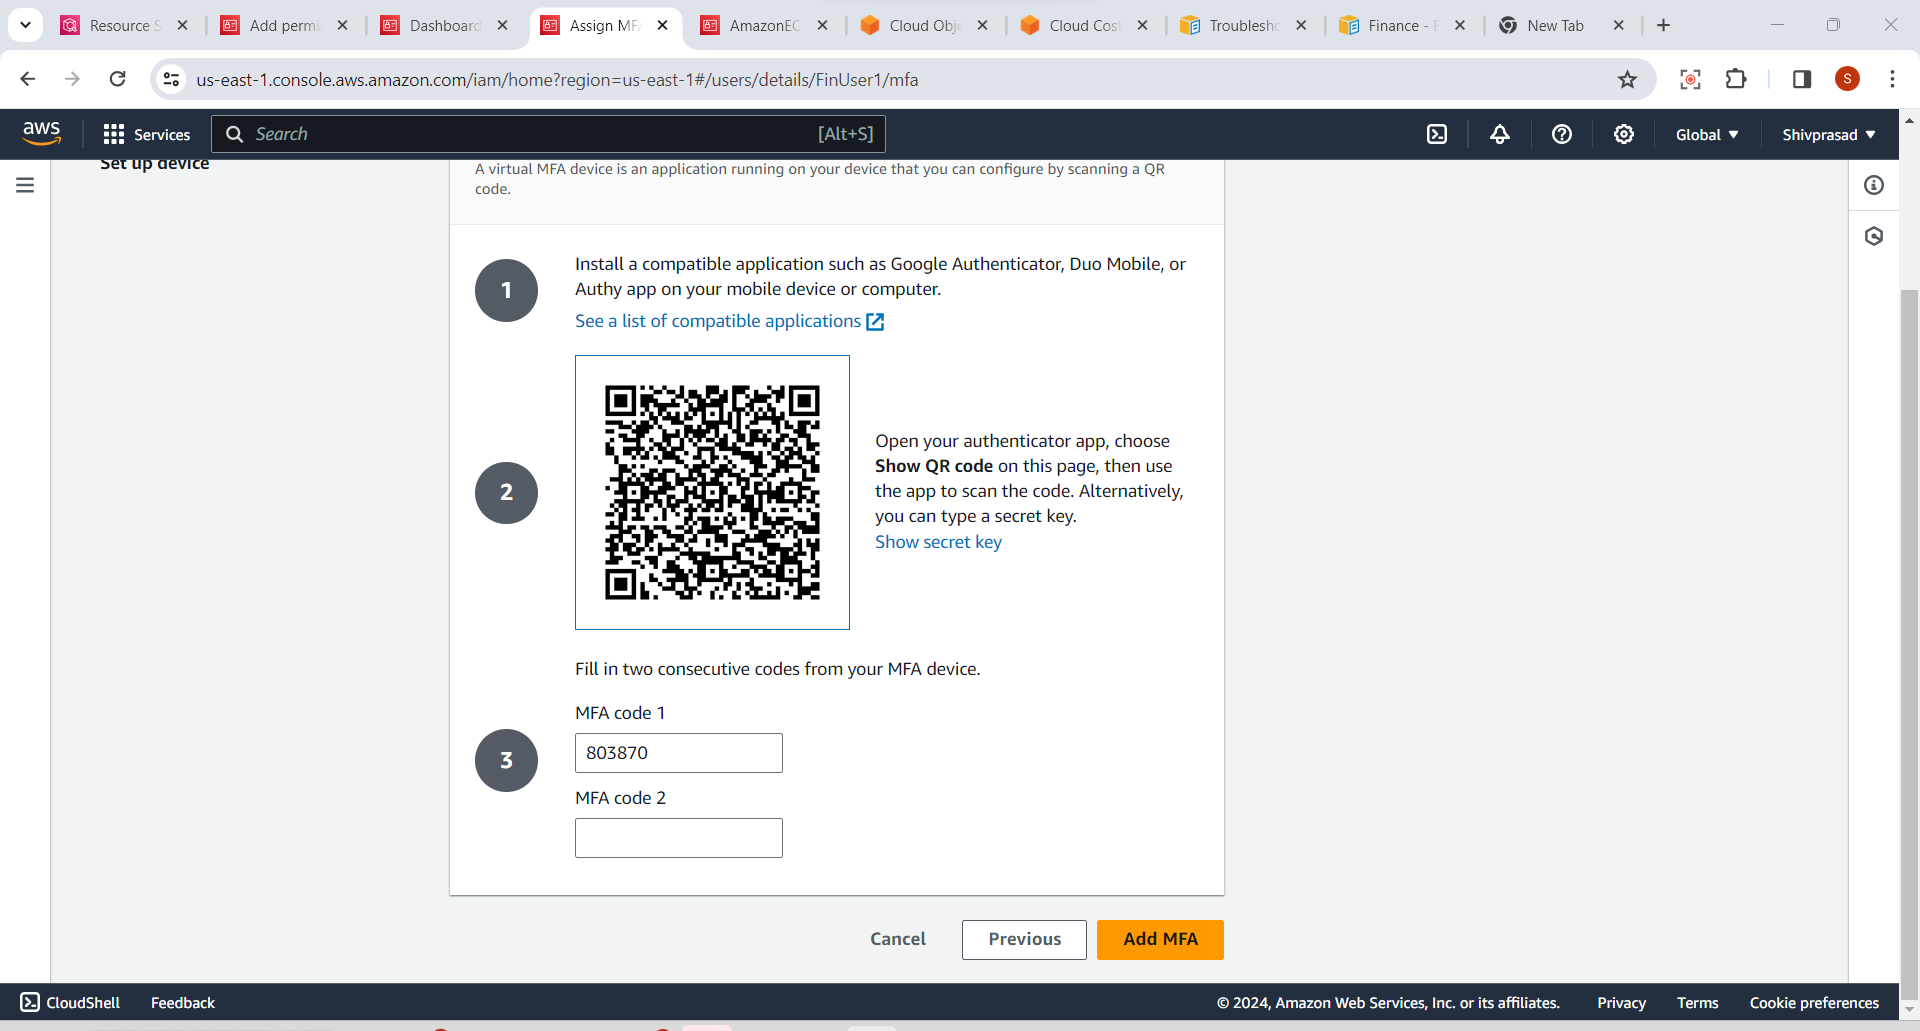
7.Verify MFA Setup:
- Once the virtual MFA device is set up, you will be prompted to enter the current code displayed in your authenticator app to verify the setup.
Complete MFA Device Setup:
- Follow any additional prompts to complete the MFA device setup process.
8.Test MFA Login:
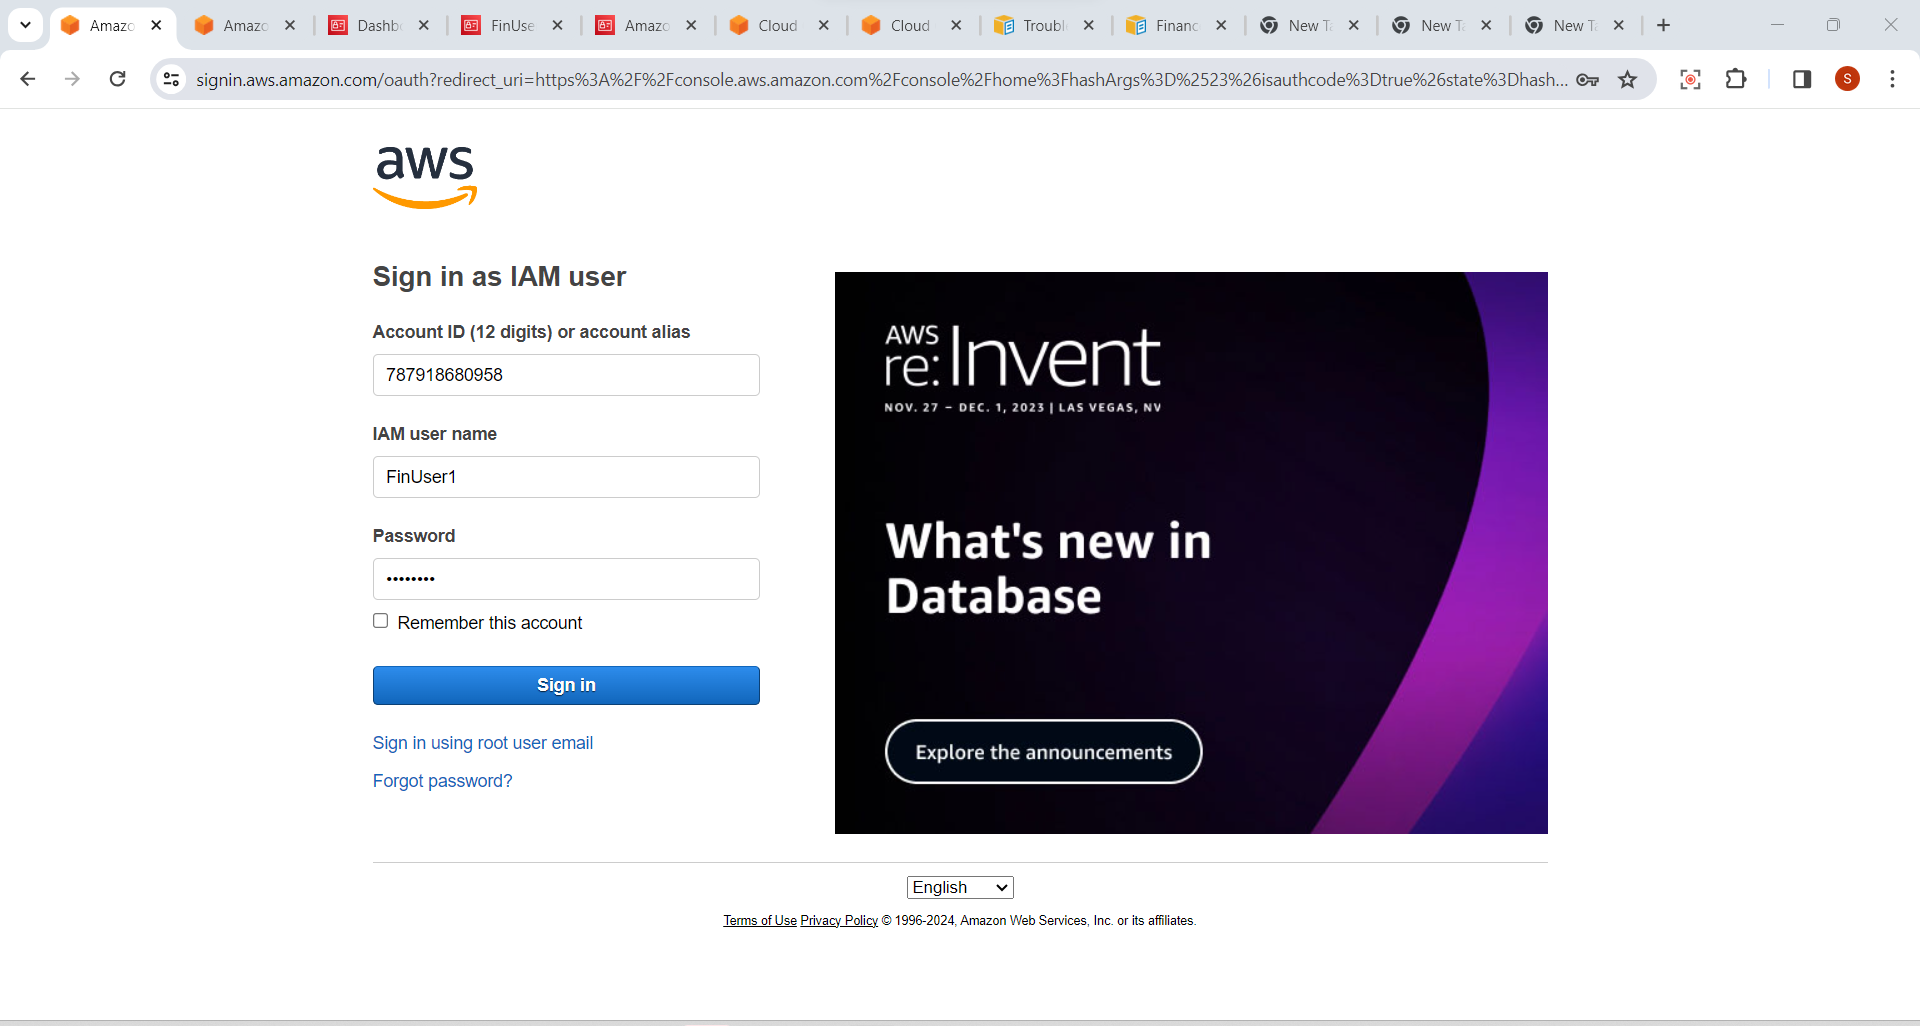
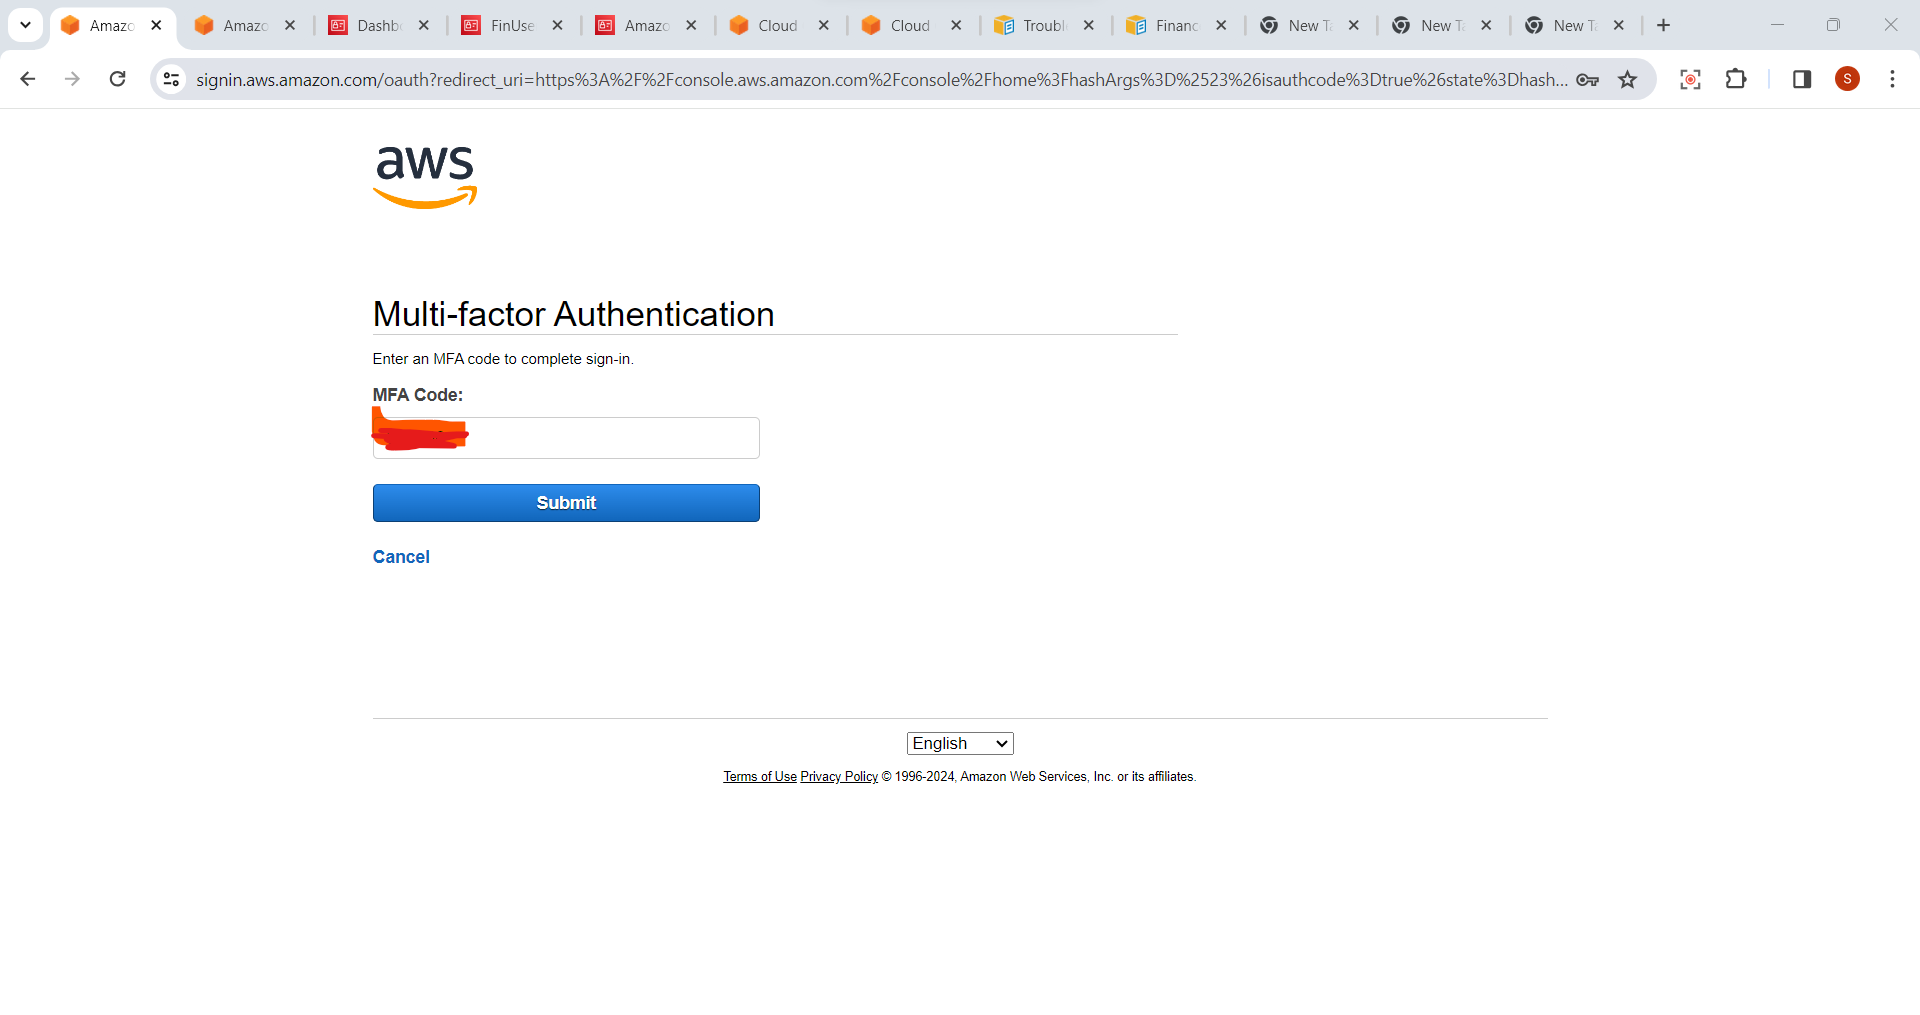
- Sign out of the AWS Management Console and sign in again using the IAM user's credentials. You will now be prompted to enter the MFA code in addition to your password.
Conclusion
Creating IAM users in AWS is a fundamental step towards securing your cloud infrastructure. By assigning unique credentials and permissions to each user, you ensure that your team can collaborate effectively while maintaining a strong security posture.
AWS IAM provides a robust framework for managing access, and understanding its principles is essential for anyone working with AWS services. Now that you've created an IAM user, you're better equipped to navigate the AWS cloud securely.
Remember, IAM is just one piece of the AWS security puzzle. Stay tuned for more insights into AWS best practices and cloud security tips. Happy cloud computing! ☁️🔒
If you found this post helpful, kindly consider following and hitting the like button below to express your support! 😄
Thank you for taking the time to read! 💚
Warm regards,
Sprasad 🌻✨
Subscribe to my newsletter
Read articles from Sprasad Pujari directly inside your inbox. Subscribe to the newsletter, and don't miss out.
Written by

Sprasad Pujari
Sprasad Pujari
Greetings! I'm Sprasad P, a DevOps Engineer with a passion for optimizing development pipelines, automating processes, and enabling teams to deliver software faster and more reliably.