Align Widget in Flutter
 Manav Sarkar
The Align widget in Flutter is used to align the child widget inside it on the main screen. It optionally sizes itself according to the child widget size. We need to set the alignment of its child widget which we will learn here.
Suppose we have an image and want it to align in the centre. It would look as follows:
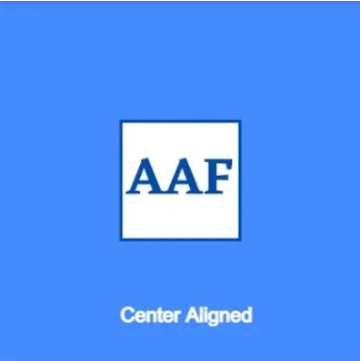
The Align widget provides a different coordinate system for the widget. To know more, check out this here.
Syntax: To use the Align widget, use it as follows:
Align(
  alignment: Alignment.center,
  child: Image.network(
'https://i.pinimg.com/564x/2d/1d/0c/2d1d0c17ecb30e266f2aaa29da8566a7.jpg',
    height: 120,
    width: 120,
  ),
),
Here we provide a NetworkImage widget as a child of Align widget and align it to the center by setting the alignment parameter to center.
Parameters: The different parameters are described as follows:
alignment(Alignment): This parameter asks for the alignment of the child widget.The default value is Alignment.center. The Alignment provides the following presets:
bottomCenter
bottomLeft
bottomRight
topLeft
topCenter
topRight
center
centerLeft
centerRight
child(widget): This takes the child widget which is to be aligned.
heightFactor(double): It takes a double value and it is used to set the height of Align widget as the factor multiplied by child height. The default value is 1.0.
widthFactor(double): It takes a double value and it is used to set the width of Align widget as the factor multiplied by child width. The default value is 1.0.
Example: In the following example, we have aligned the Image to the center of the container. For better demonstration, the container is painted with a background colour.
main.dart
import 'package:flutter/material.dart';

void main() {
  runApp(const MyApp());
}

class MyApp extends StatelessWidget {
  const MyApp({Key? key}) : super(key: key);
  @override
  Widget build(BuildContext context) {
    return MaterialApp(
      title: 'AllAboutFlutter',
      theme: ThemeData(
        primarySwatch: Colors.blue,
      ),
      debugShowCheckedModeBanner: false,
      home: const AlignTutorial(),
    );
  }
}

class AlignTutorial extends StatelessWidget {
  const AlignTutorial({Key? key}) : super(key: key);

  @override
  Widget build(BuildContext context) {
    return Scaffold(
      appBar: AppBar(
        title: const Text('Align Widget Tutorial'),
      ),
      body: Container(
        width: MediaQuery.of(context).size.width,
        height: MediaQuery.of(context).size.width,
        color: Colors.blueAccent,
        child: Align(
          alignment: Alignment.center,
          child: Image.network(
            'https://i.pinimg.com/564x/2d/1d/0c/2d1d0c17ecb30e266f2aaa29da8566a7.jpg',
            height: 120,
            width: 120,
          ),
        ),
      ),
    );
  }
}
Output
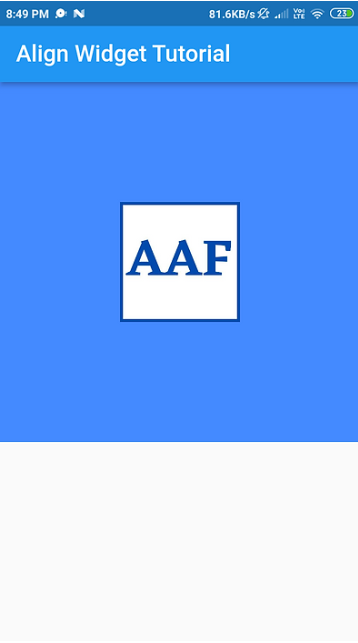
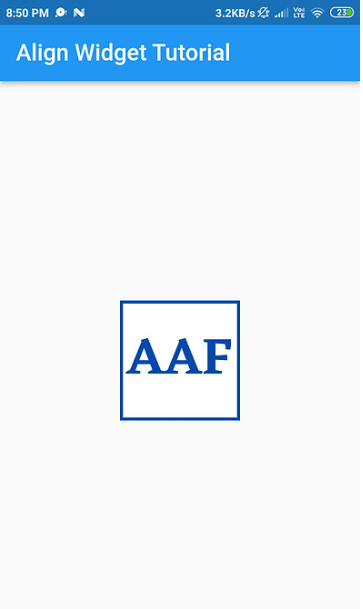
Example: In the following example, we have removed the container and aligned the image as it is.
main.dart
import 'package:flutter/material.dart';

void main() {
  runApp(const MyApp());
}

class MyApp extends StatelessWidget {
  const MyApp({Key? key}) : super(key: key);
  @override
  Widget build(BuildContext context) {
    return MaterialApp(
      title: 'AllAboutFlutter',
      theme: ThemeData(
        primarySwatch: Colors.blue,
      ),
      debugShowCheckedModeBanner: false,
      home: const AlignTutorial(),
    );
  }
}

class AlignTutorial extends StatelessWidget {
  const AlignTutorial({Key? key}) : super(key: key);

  @override
  Widget build(BuildContext context) {
    return Scaffold(
      appBar: AppBar(
        title: const Text('Align Widget Tutorial'),
      ),
      body: Align(
        alignment: Alignment.center,
        child: Image.network(
          'https://i.pinimg.com/564x/2d/1d/0c/2d1d0c17ecb30e266f2aaa29da8566a7.jpg',
          height: 120,
          width: 120,
        ),
      ),
    );
  }
}
Output
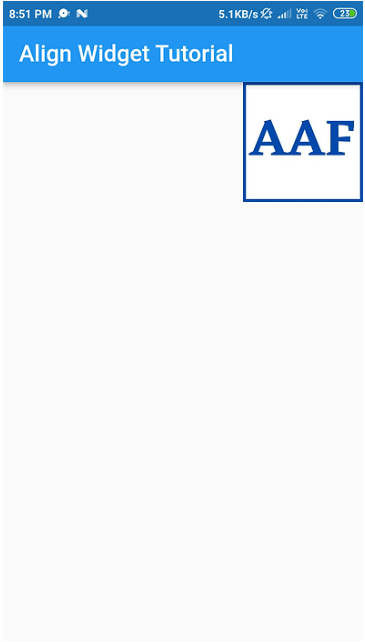
Example: In the following example, we have aligned the image to top right.
main.dart
import 'package:flutter/material.dart';

void main() {
  runApp(const MyApp());
}

class MyApp extends StatelessWidget {
  const MyApp({Key? key}) : super(key: key);
  @override
  Widget build(BuildContext context) {
    return MaterialApp(
      title: 'AllAboutFlutter',
      theme: ThemeData(
        primarySwatch: Colors.blue,
      ),
      debugShowCheckedModeBanner: false,
      home: const AlignTutorial(),
    );
  }
}

class AlignTutorial extends StatelessWidget {
  const AlignTutorial({Key? key}) : super(key: key);

  @override
  Widget build(BuildContext context) {
    return Scaffold(
      appBar: AppBar(
        title: const Text('Align Widget Tutorial'),
      ),
      body: Align(
        alignment: Alignment.topRight,
        child: Image.network(
          'https://i.pinimg.com/564x/2d/1d/0c/2d1d0c17ecb30e266f2aaa29da8566a7.jpg',
          height: 120,
          width: 120,
        ),
      ),
    );
  }
}
Output
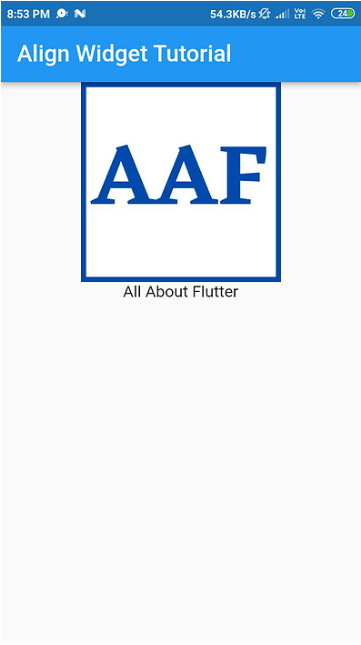
Example: In the following example, we have used the alignment inside the Column widget as follows.
main.dart
import 'package:flutter/material.dart';

void main() {
  runApp(const MyApp());
}

class MyApp extends StatelessWidget {
  const MyApp({Key? key}) : super(key: key);
  @override
  Widget build(BuildContext context) {
    return MaterialApp(
      title: 'AllAboutFlutter',
      theme: ThemeData(
        primarySwatch: Colors.blue,
      ),
      debugShowCheckedModeBanner: false,
      home: const AlignTutorial(),
    );
  }
}

class AlignTutorial extends StatelessWidget {
  const AlignTutorial({Key? key}) : super(key: key);

  @override
  Widget build(BuildContext context) {
    return Scaffold(
      appBar: AppBar(
        title: const Text('Align Widget Tutorial'),
      ),
      body: Column(
        children: [
          Align(
            alignment: Alignment.topRight,
            child: Image.network(
              'https://i.pinimg.com/564x/2d/1d/0c/2d1d0c17ecb30e266f2aaa29da8566a7.jpg',
              height: 120,
              width: 120,
            ),
          ),
          const Align(
            alignment: Alignment.center,
            child: Text("All About Flutter"),
          )
        ],
      ),
    );
  }
}
Output
Reference: https://api.flutter.dev/flutter/widgets/Align-class.html
Subscribe to my newsletter
Read articles from Manav Sarkar directly inside your inbox. Subscribe to the newsletter, and don't miss out.
Written by
