Container Box Shadow - Box Decoration - Flutter
 Manav Sarkar
The Flutter Container widget is one of the basic components and provides a lot of features such as background colouring, painting, positioning elements, etc.
In this tutorial, we are going to learn to add Box Shadow to Container. Box shadow is a list of different shadows applied to the Container. We can make any type of shadow we want.
Parameters: Here is the list of Parameters used for BoxShadow
color(Color): It takes the colour of the shadow.
offset(Offset): It is the offset of the shadow from its position. The default value is Offset.zero.
blurRadius(double): It takes the radius up to which it will blur the shadow. The default value is 0.0
spreadRadius(double): It takes the radius up to which it will spread the shadow. The default value is 0.0.
blurStyle(BlurStyle): It takes the blur style: The default value is BlurStyle.normal.
Syntax: Create box shadow as follows:
Container(
  width: 200,
  height: 200,
  decoration: BoxDecoration(
    boxShadow: [
      BoxShadow(
        color: Colors.grey.withOpacity(0.7),
        spreadRadius: 10,
        blurRadius: 5,
        offset: const Offset(2, 2),
      ),
    ],
  )
),
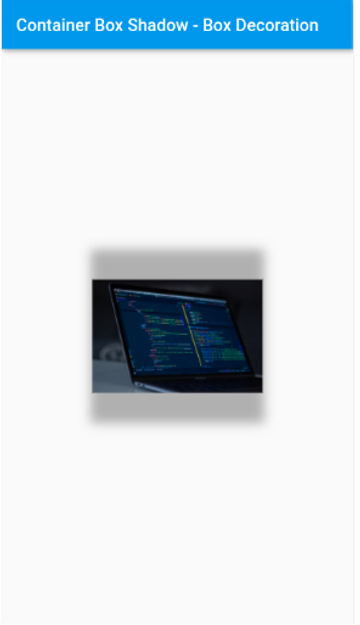
Example 1: In the following example, we have a box shadow around an image.
import 'package:flutter/material.dart';

void main() {
  runApp(const MyApp());
}

class MyApp extends StatelessWidget {
  const MyApp({Key? key}) : super(key: key);
  @override
  Widget build(BuildContext context) {
    return MaterialApp(
      title: 'AllAboutFlutter',
      theme: ThemeData(
        primarySwatch: Colors.blue,
      ),
      debugShowCheckedModeBanner: false,
      home: const ElevatedButtonTutorial(),
    );
  }
}

class ElevatedButtonTutorial extends StatelessWidget {
  const ElevatedButtonTutorial({Key? key}) : super(key: key);

  @override
  Widget build(BuildContext context) {
    return Scaffold(
      appBar: AppBar(
        title: const Text('Container Box Shadow - Box Decoration'),
      ),
      body: Center(
        child: Container(
          width: 200,
          height: 200,
          decoration: BoxDecoration(
            boxShadow: [
              BoxShadow(
                color: Colors.grey.withOpacity(0.8),
                spreadRadius: 2,
                blurRadius: 10,
                offset: const Offset(0, 0), // changes position of shadow
              ),
            ],
          ),
          child: Image.network(
              "https://images.unsplash.com/photo-1555066931-4365d14bab8c?ixlib=rb-1.2.1&ixid=MnwxMjA3fDB8MHxwaG90by1wYWdlfHx8fGVufDB8fHx8&auto=format&fit=crop&w=1470&q=80"),
        ),
      ),
    );
  }
}
Output

Example 2: In the following example, we have a list of box shadows
import 'package:flutter/material.dart';

void main() {
  runApp(const MyApp());
}

class MyApp extends StatelessWidget {
  const MyApp({Key? key}) : super(key: key);
  @override
  Widget build(BuildContext context) {
    return MaterialApp(
      title: 'AllAboutFlutter',
      theme: ThemeData(
        primarySwatch: Colors.blue,
      ),
      debugShowCheckedModeBanner: false,
      home: const ElevatedButtonTutorial(),
    );
  }
}

class ElevatedButtonTutorial extends StatelessWidget {
  const ElevatedButtonTutorial({Key? key}) : super(key: key);

  @override
  Widget build(BuildContext context) {
    return Scaffold(
      appBar: AppBar(
        title: const Text('Container Box Shadow - Box Decoration'),
      ),
      body: Center(
        child: Padding(
          padding: const EdgeInsets.all(48.0),
          child: Container(
            decoration: BoxDecoration(
              boxShadow: [
                BoxShadow(
                  color: Colors.blueAccent.shade700,
                  offset: const Offset(
                    5.0,
                    5.0,
                  ),
                  blurRadius: 10.0,
                  spreadRadius: 2.0,
                ),
                const BoxShadow(
                  color: Colors.white,
                  offset: Offset(0.0, 0.0),
                  blurRadius: 0.0,
                  spreadRadius: 0.0,
                ),
              ],
            ),
            child: Image.network(
                "https://images.unsplash.com/photo-1555066931-4365d14bab8c?ixlib=rb-1.2.1&ixid=MnwxMjA3fDB8MHxwaG90by1wYWdlfHx8fGVufDB8fHx8&auto=format&fit=crop&w=1470&q=80"),
          ),
        ),
      ),
    );
  }
}
Output

Hence in these ways, we can apply box shadows.
Subscribe to my newsletter
Read articles from Manav Sarkar directly inside your inbox. Subscribe to the newsletter, and don't miss out.
Written by
