How To Create A Custom VS Code Theme
 Arnab Dey
Would you like to make your own Visual Studio Code custom theme extension? This post will walk you through every step to create vscode theme!
I have released skandinaviska, a warm and ominous VS Code color theme that you can download and use right now for free.
Try Skandinaviska for free in Microsoft Marketplace!
Before anything else, you must install Git and Node.js in order to install the required packages.
Using the command npm install yo (yes, Yeoman is the real package name; that's how it works)
npm install -g yo generator-code
Open a Terminal and guide to the directory where you want to create your theme, and run the following command:
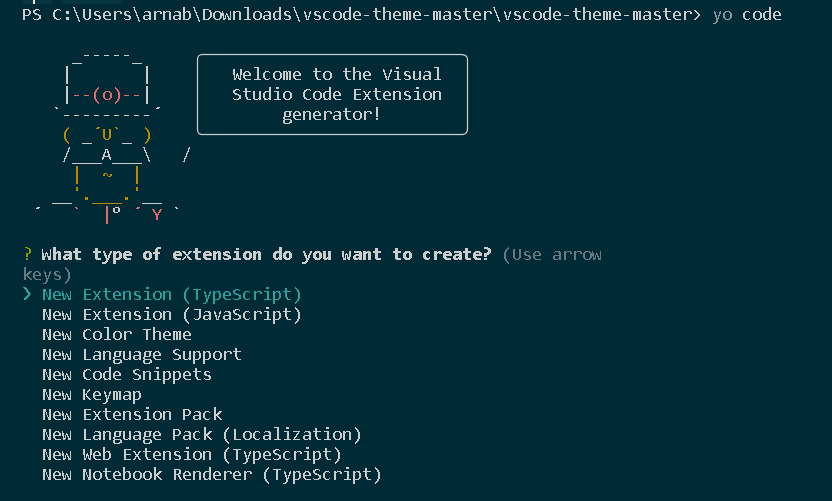
yo code
The Visual Studio Code Extension (vsce) generator will launch as a result. From there, use the up and down arrow keys to navigate and enter to select an option.

Select New Color Theme
Select No, start fresh
Type in your extension's name.
Enter your extension identifier (ex. of what a identifier is: {publisher-name}.{identifier} | just press enter and use the default)
Provide a brief explanation of the theme's meaning or underlying concept in your essay.
Enter the name exactly as you would like it to appear in the marketplace.
Select a base theme to be used as a starting point.
cd {theme-name}
code .
The best approach to modify the VS Code theme's custom styles
A take away suggestion is to use debug mode (F5 key) for a live
preview of the theme!
Previewing theme color changes using debug mode
A preview window will open with your VS Code editor that will reflect code changes from the original (where debug mode is enabled).
Additionally, you can also add custom gifs, images in the vs code workspace area.
Use the debug editor developer tools to identify the reference elements using class and id attributes.
Figuring out the VS Code theme API properties
Once you identify the item you want to affect, use the VS Code theme documentation API to figure out its property name.
Publish your custom theme on the VS Code marketplace
Once you are done and have created your theme, it’s time to publish and share with the world!
Note: You’ll need to create an account with Microsoft and
then register a new project in the VS Code marketplace before
publishing anything.
Using npm install vsce (Visual Studio Code Extensions)
npm install vsce -g
Create a git repository for your project and connect it. Push your whole theme and open up the package.json file.
The git repository, icon, author, and all of the marketplace data must be configured.

Now it’s time to package and publish the theme using vsce:
Head over to Azure DevOps and create your organization under which you will publish your extensions https://dev.azure.com/
Once you’ve done that, you’ll need to create your own Personal Access Token (PAT) for that organization.
or you can also run the following command and create it that way:
vsce create-publisher (publisher name)
Inside the Terminal, login to your publisher:
vsce login (publisher name)
Package the theme you created:
vsce package
and publish!
vsce publish
Customizing the theme’s marketplace landing page
There’s still one more step left to undertake and that’s customizing the marketplace landing page of the theme for presentation purposes.
adding a theme icon
setting a banner display to complement the icon
including screenshot images showcasing the theme styles and colors in the README body
🎉Thats it! You have just published your very own VSCode theme! 🧡
Your theme will be available on the Visual Studio Marketplace in just a few minutes!
🚀Check out Skandinaviska by visiting marketplace page The full package source code is available on GitHub.
Happy coding till the next adventure!
Subscribe to my newsletter
Read articles from Arnab Dey directly inside your inbox. Subscribe to the newsletter, and don't miss out.
Written by
