Scaling Safely: A Simple Guide to Autoscaling, Load Balancers, and Web Security
 Siddhartha Gaurav
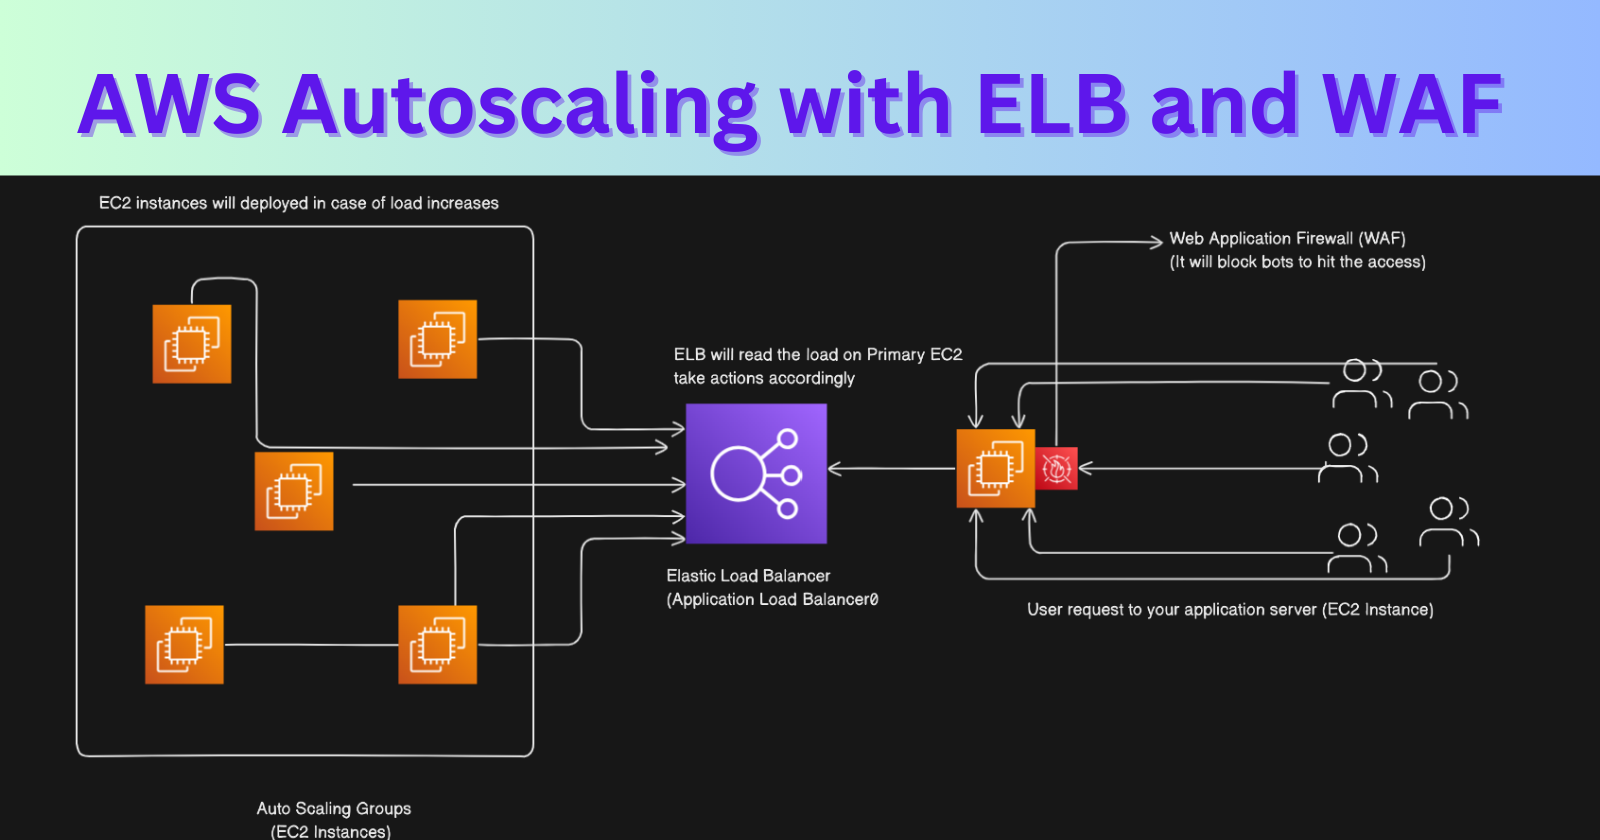
Introduction:
In today's digital age, ensuring a smooth online experience is crucial for businesses. In this blog post, we'll explore how Autoscaling Groups, Application Load Balancers (ALB), and Web Application Firewalls (WAF) work together to keep websites running smoothly, even during traffic spikes.
Section 1: Autoscaling Groups - Your Website's Safety Net
Imagine your website is like a virtual storefront. Sometimes, there's a surge in customers, and you want to ensure your "store" doesn't get overcrowded and crash. That's where Autoscaling Groups come in.
What is an Autoscaling Group?
An Autoscaling Group is like having an army of servers ready to help during busy times and gracefully step back during quieter moments. It dynamically adjusts the number of servers based on the current demand, ensuring your website remains responsive and available.
Section 2: Application Load Balancers - Traffic Directors
Now, think of an Application Load Balancer as a smart traffic director for your website.
What is an Application Load Balancer?
Just like a traffic cop directs cars on the road, an Application Load Balancer distributes incoming web traffic across multiple servers. This not only prevents any one server from getting overwhelmed but also ensures a faster and more reliable experience for your visitors.
Section 3: Web Application Firewall - Guardian at the Gate
Security is paramount, and that's where the Web Application Firewall steps in.
What is a Web Application Firewall?
Picture the Web Application Firewall as a shield that protects your website from potential threats. It analyzes incoming traffic and filters out malicious requests, safeguarding your website and its visitors from cyber attacks.
Section 4: The Power of Integration
Now, let's see how these three components work seamlessly together.
The Dynamic Trio: Autoscaling, Load Balancing, and WAF
Smooth Scaling: As traffic increases, Autoscaling Groups add more servers, while the Load Balancer distributes the load efficiently.
Security First: The Web Application Firewall keeps a watchful eye, ensuring only legitimate traffic reaches your servers, protecting against potential threats.
Continuous Balance: Even during fluctuations in traffic, this dynamic trio maintains a perfect balance, ensuring a reliable and secure user experience.
Section 5: Bringing It All Together - A Real-world Example
Now that we understand the basics, let's dive into a real-world project that demonstrates the power of Autoscaling Groups, Application Load Balancers, and Web Application Firewalls working together harmoniously.
Project Overview: Creating a Scalable and Secure Web Environment
In this project, we'll walk through the steps of setting up a scalable and secure web application using these three essential components.
Step 1: Setting up Autoscaling Groups
Navigate to the AWS dashboard, go to the EC2 section, and at the bottom, select "Auto Scaling Groups.
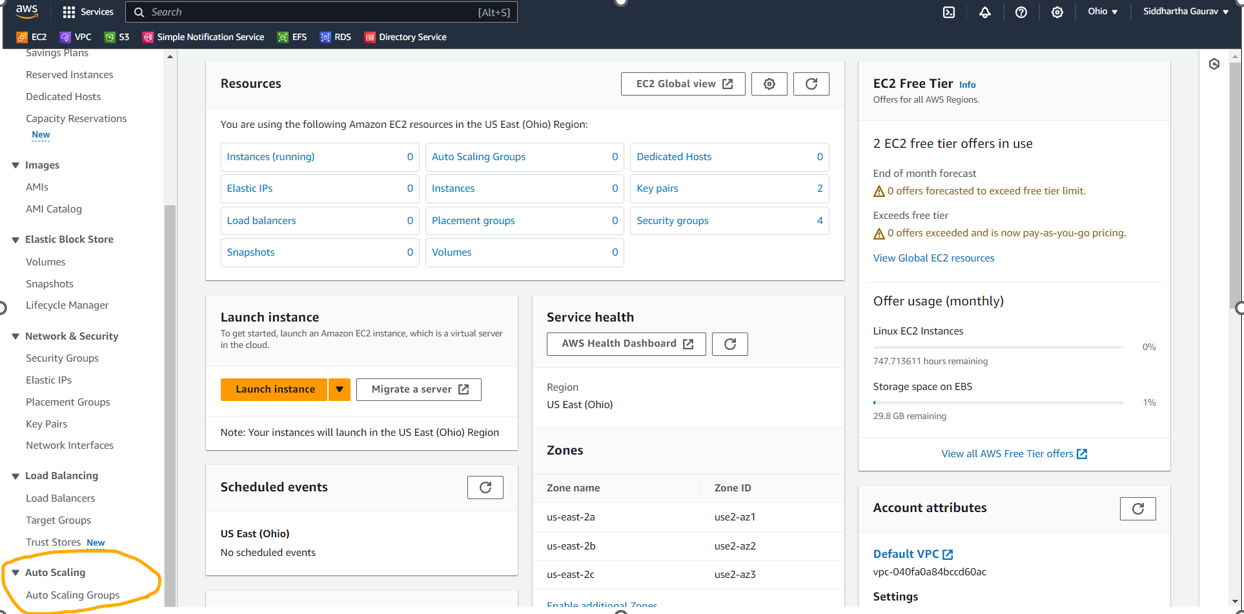
Upon selecting "Auto Scaling Groups," you will be directed to the Amazon EC2 Auto Scaling page.
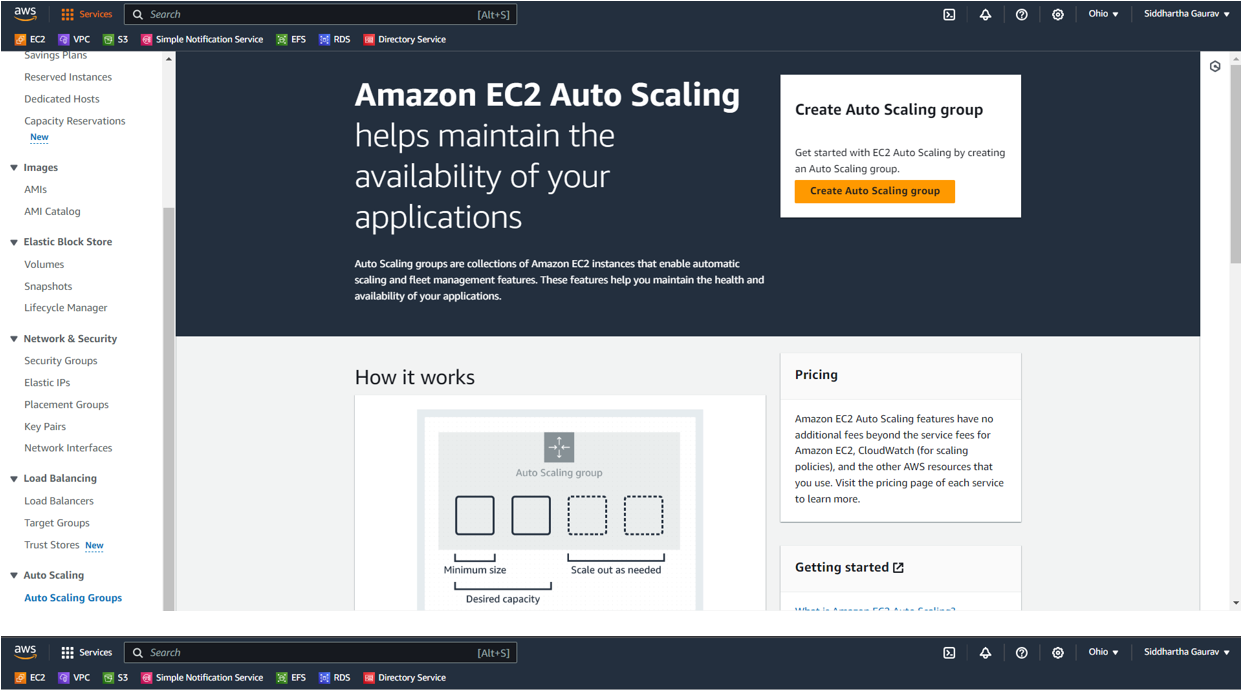
Select "Create Auto Scaling Group" from the options presented on the Amazon EC2 Auto Scaling page.
After clicking it, you will be presented with a template to fill out, including the Autoscaling group name. Additionally, select your Launch template, which we previously discussed in our blog https://sgaurav.hashnode.dev/simplified-aws-ec2-templates-launch-modify-and-deploy-with-ease.
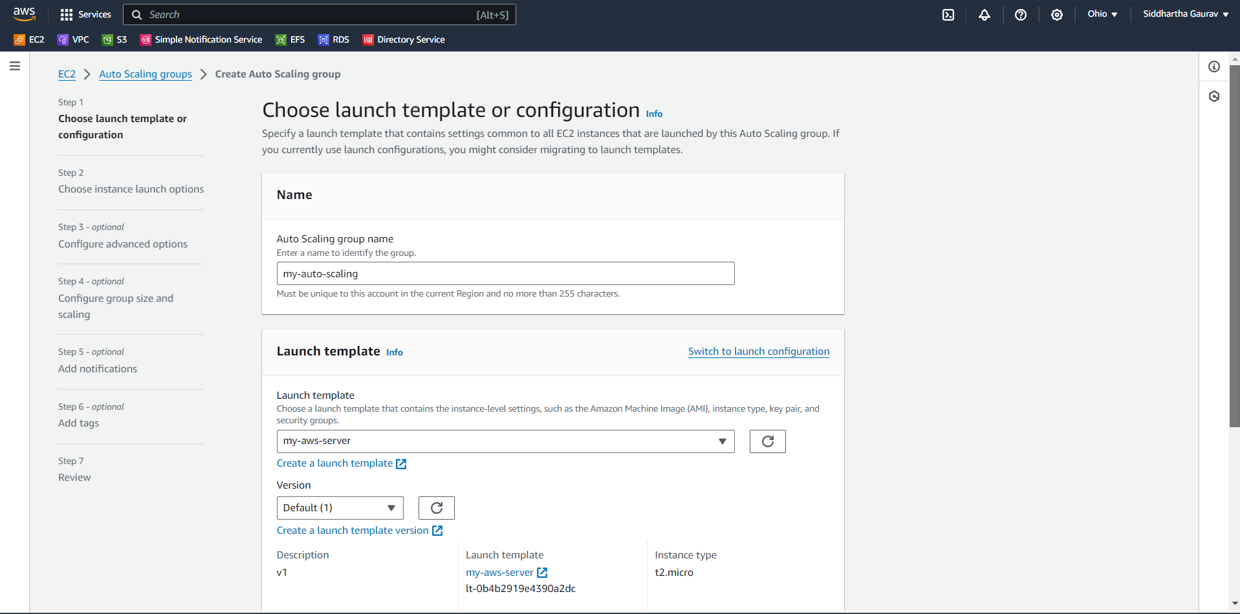
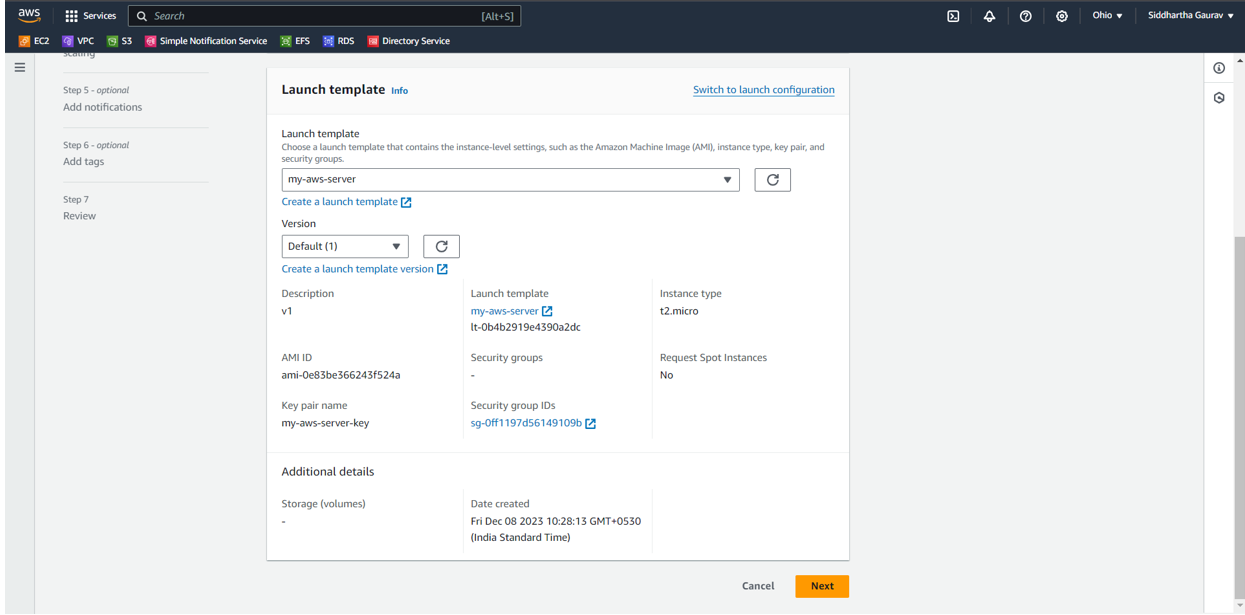
Following these steps, click on "Next" to proceed with the configuration.
In the "Choose instance launch options" section, select your network, including the VPC and subnets.
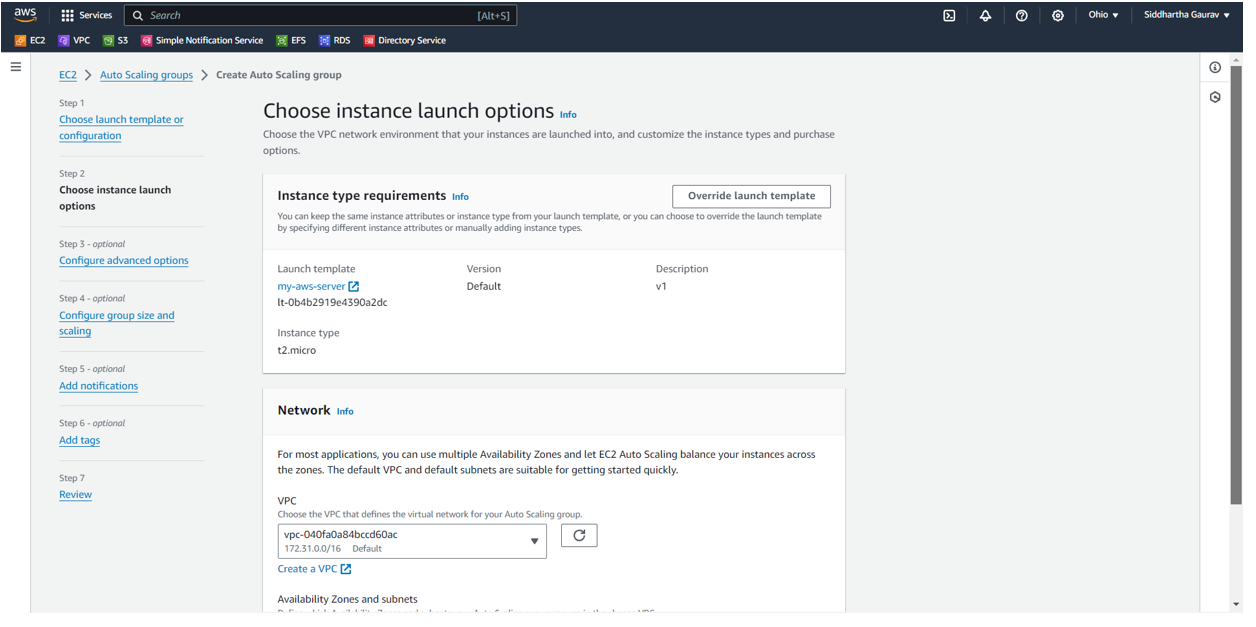
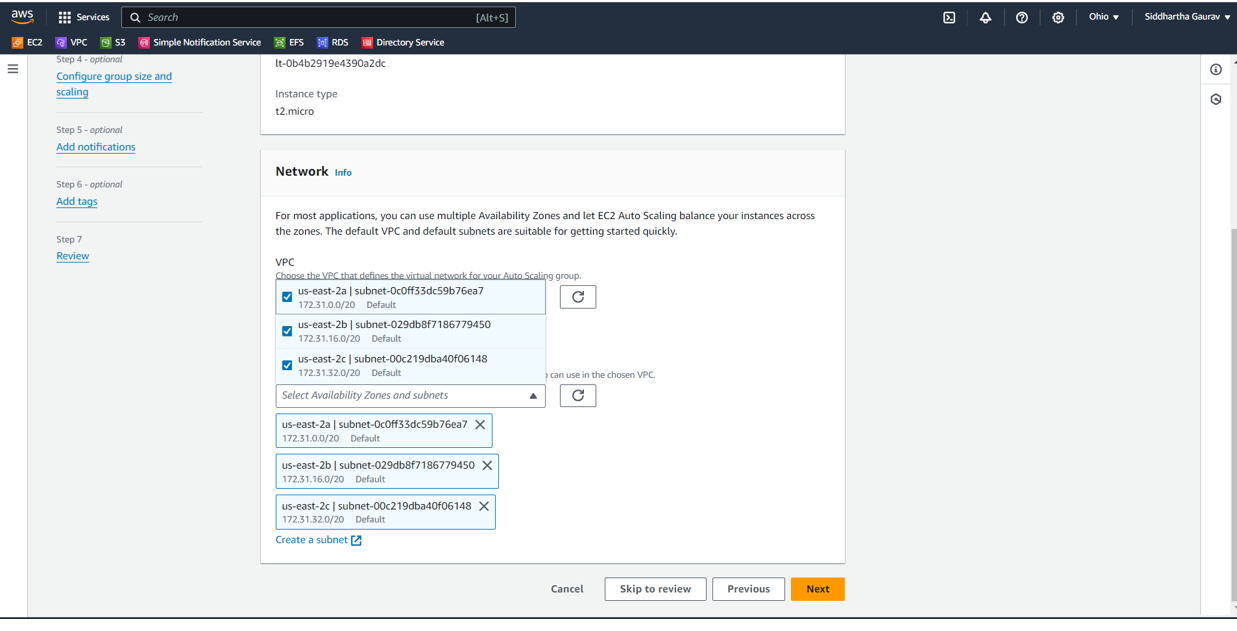
Once you have selected your network options, proceed by clicking on "Next."
Step 2: Configuring the Application Load Balance
In the "Configure advanced options" section, configure your load balancer. In this scenario, select "Application Load Balancer" and provide a name for the load balancer.
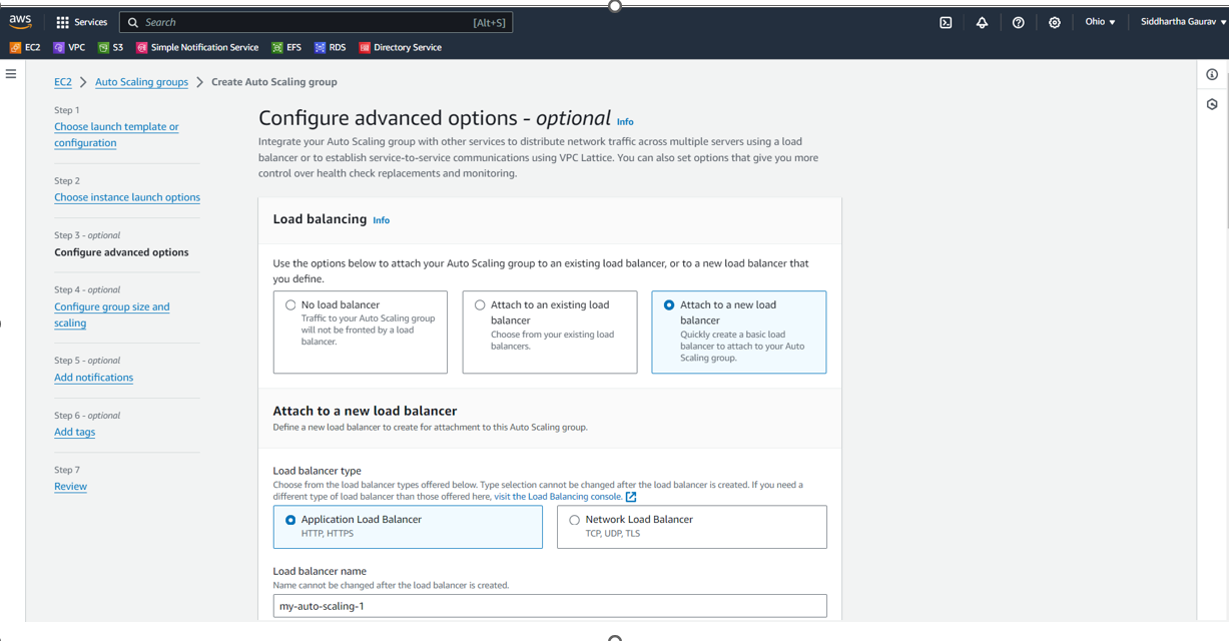
Review and verify all your VPC and subnet settings to ensure they are accurate and aligned with your configuration.
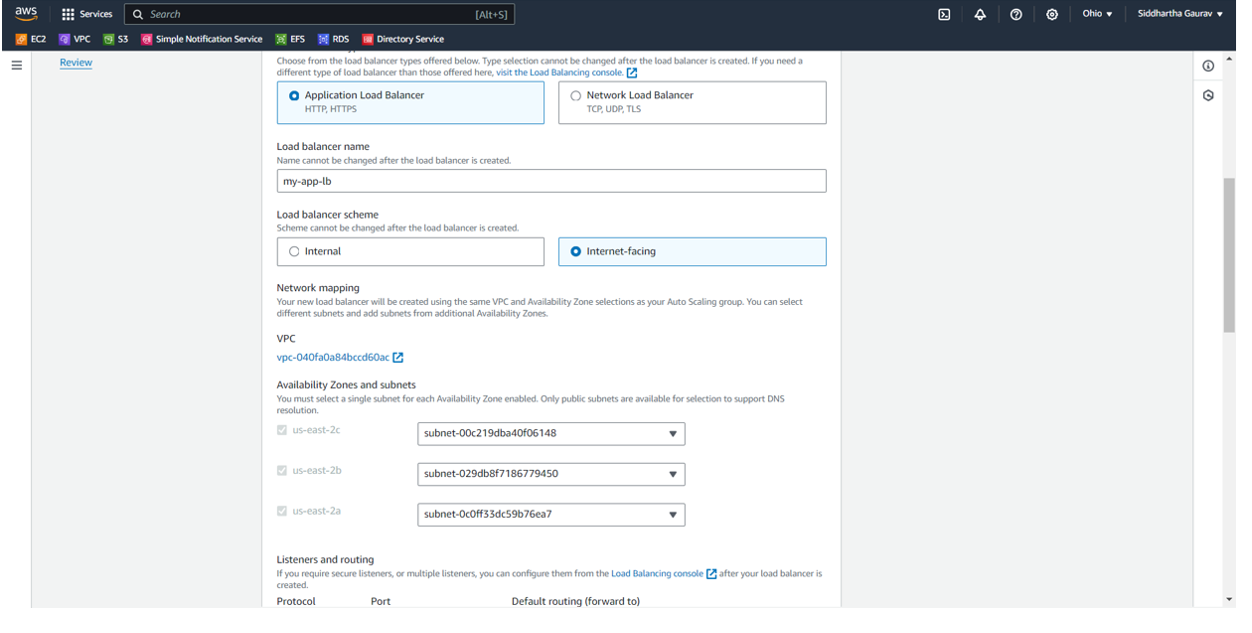
Adjust the "Listeners and routing" settings by selecting port 80 since our application operates on that port. For routing the traffic from the internet to specific target groups, create a new target group by clicking on the option "Create a target group."
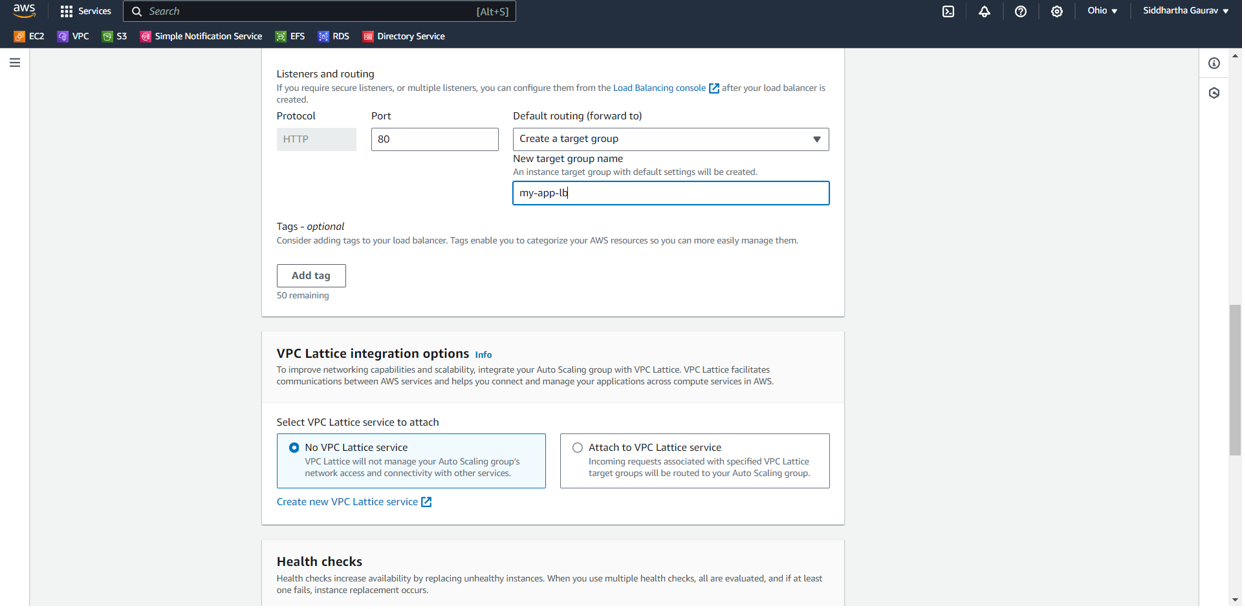
Skip the VPC Lattice Integration options if they are not applicable to your current configuration or project requirements.
- Configure a health check for your application load balancer to ensure the health and responsiveness of your application.
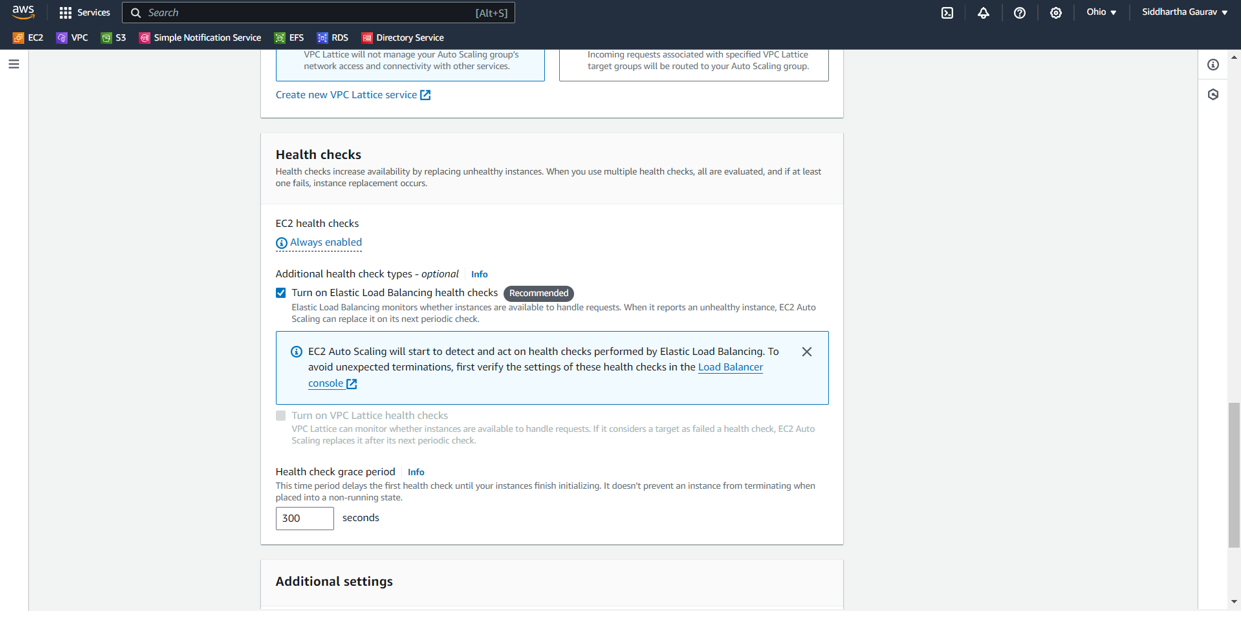
Here, choose "Turn on Elastic Load Balancing health checks" to enable regular checks on your EC2 instances. If any issues are detected, the system will automatically launch another instance. Additionally, set the Health Check grace period to 300 seconds, allowing the load balancer sufficient time to assess the health of its resources (EC2 instances).
- If desired, enable CloudWatch to monitor and collect metrics for your setup. This step allows you to keep track of various performance metrics and gain insights into the behavior of your resources.
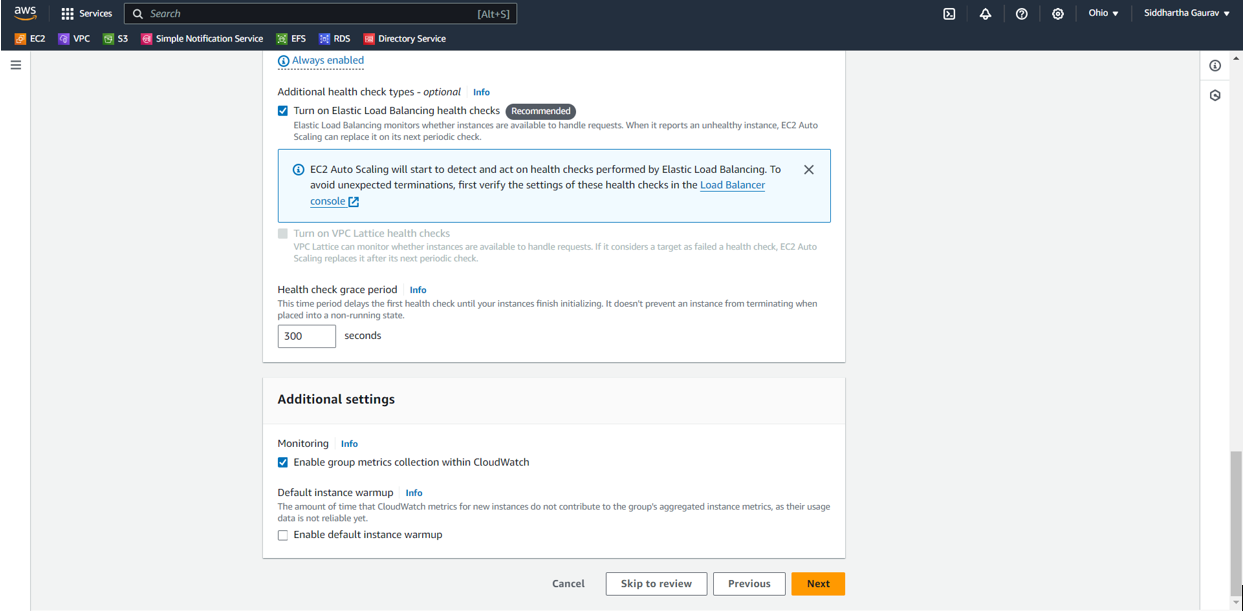
After configuring CloudWatch settings, proceed by clicking on "Next."
In this crucial section, configure your Load Balancer to initiate the Desired Capacity (for normal operation), set the Min Desired Capacity (ensuring at least this number of EC2 instances are up and running), and specify the Max Desired Capacity (allowing for the launch of instances up to this maximum when there's an increase in load).
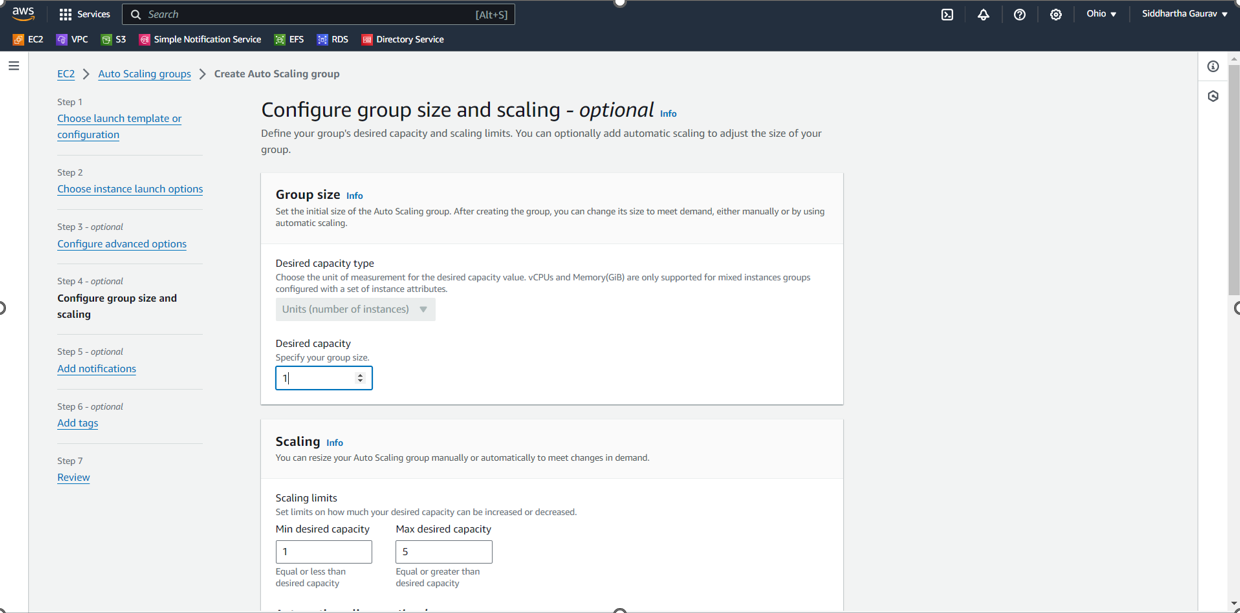
Configure the scaling policy to determine when to monitor, distribute, launch, and take necessary actions based on the specified conditions. This policy ensures dynamic adjustments to your resources in response to changing demands.
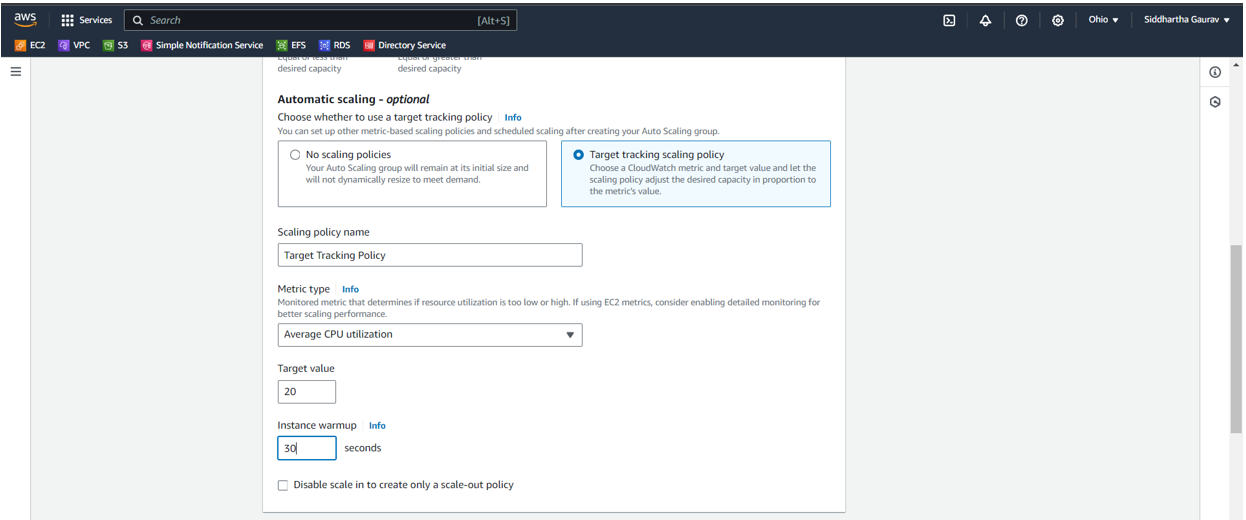
In this step, opt for the Target Tracking scaling policy. Specify the policy to monitor the Average CPU utilization, and when it exceeds 20% (target value), initiate the launch of the necessary number of instances. The Instance Warmup option determines the time it takes to bring the new EC2 servers into operation.
- Choose the Instance Maintenance Policy based on your requirements. This policy defines how instances are replaced during routine maintenance, providing flexibility to balance cost and availability.
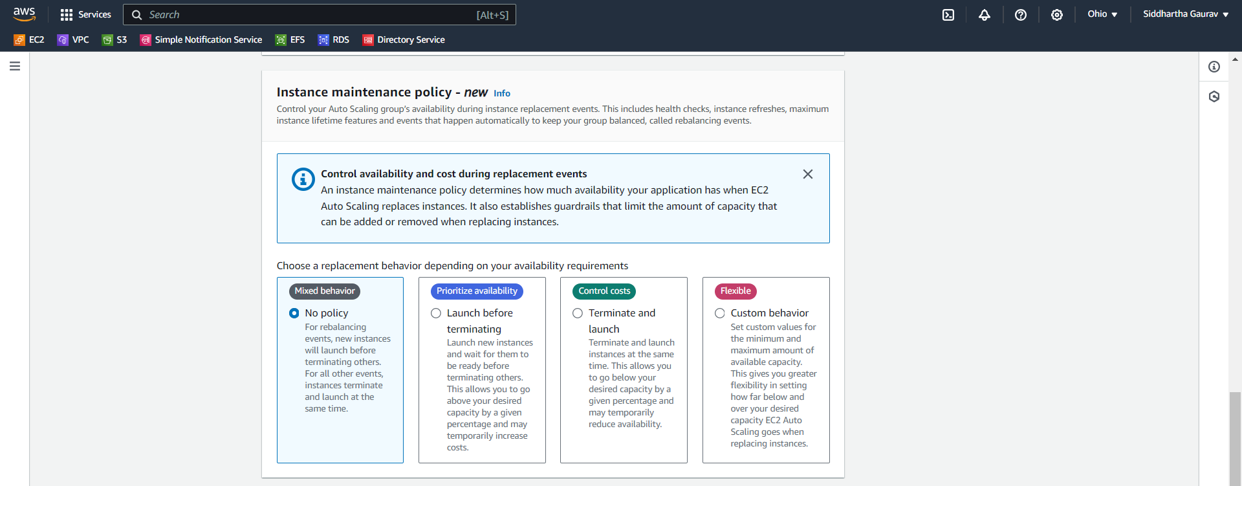
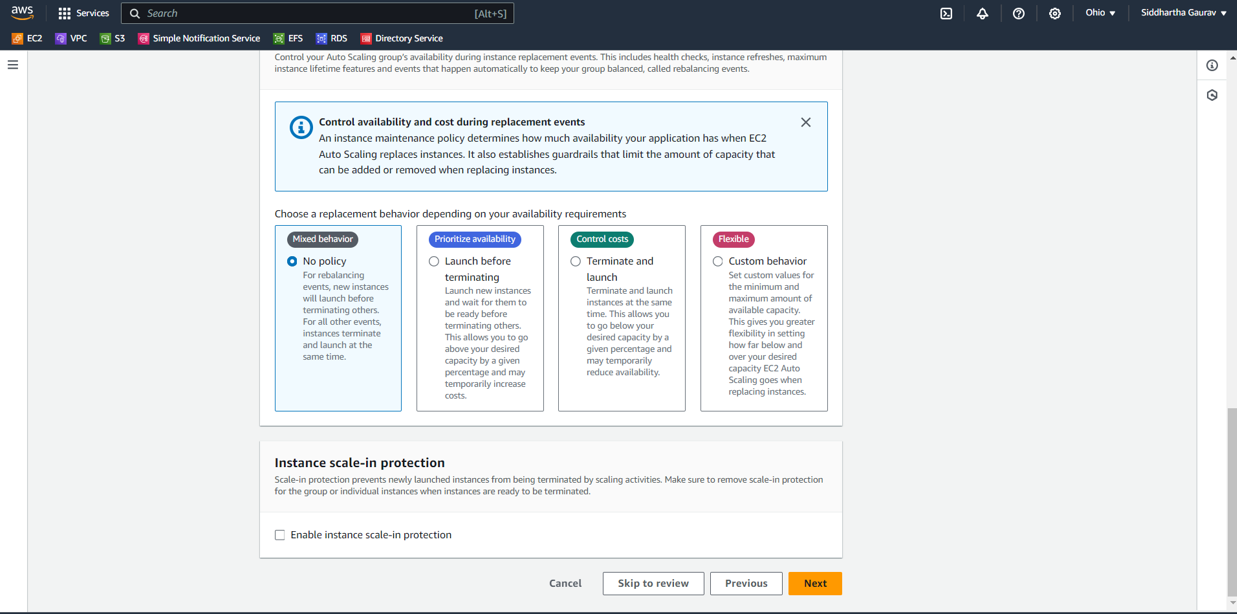
Skip the remaining options and proceed by clicking on "Next." This will take you to the final steps for reviewing and confirming your configurations before completing the setup.
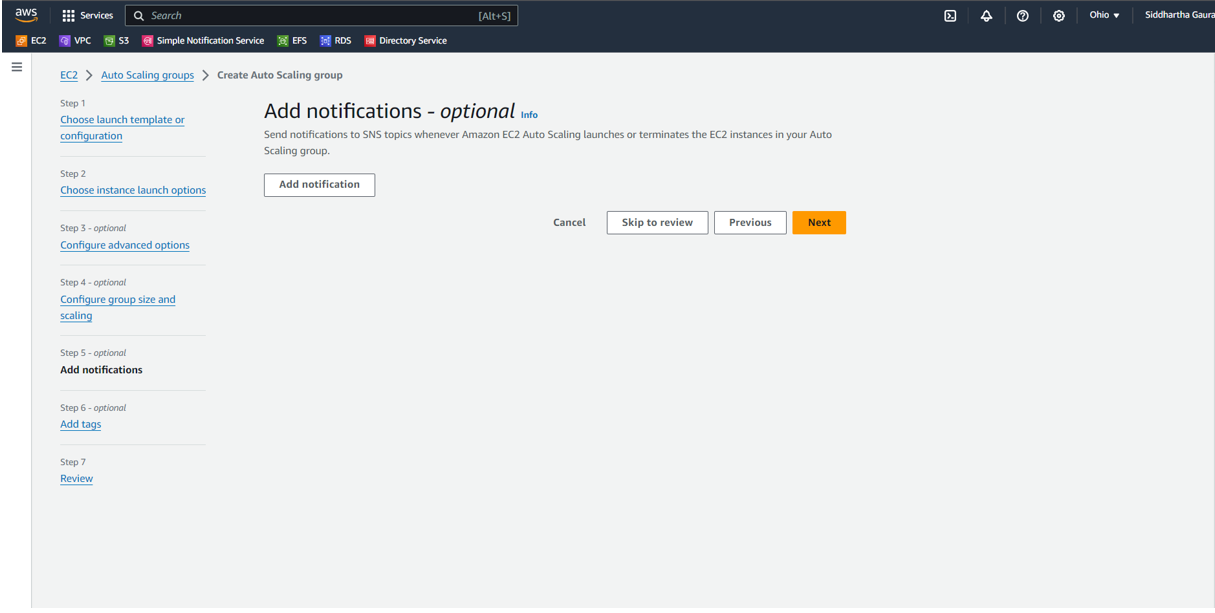
Configure a notification service for your load balancer and autoscaling group if needed. This service will keep you informed about important events and changes in your environment.
Assign tags if deemed necessary. Tags are useful for organizing and categorizing resources, providing an additional layer of organization and identification.
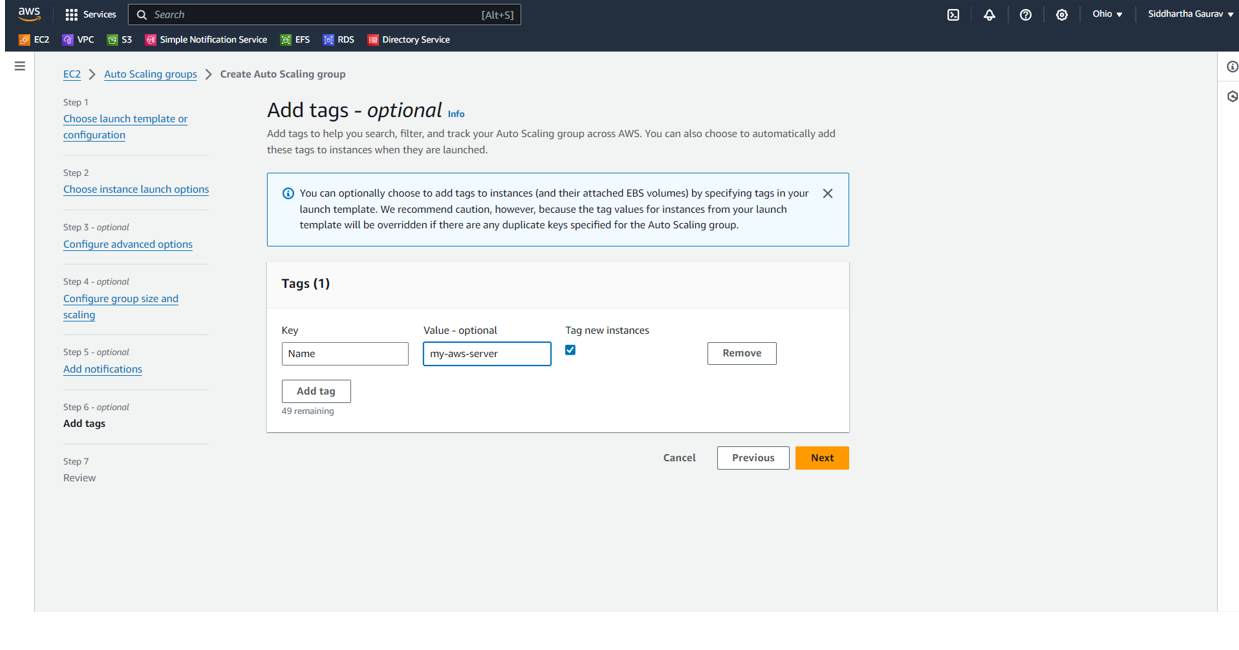
Great! By assigning the name tag with the value "my-aws-server," each new instance launched as per the load will be identified with the name "my-aws-server." This makes it easier to manage and distinguish instances in your environment.
- Take a moment to review all your configurations, ensuring that each setting aligns with your intended setup. Verify that the specified parameters for the autoscaling group, load balancer, notifications, and tags are accurate and meet your requirements.
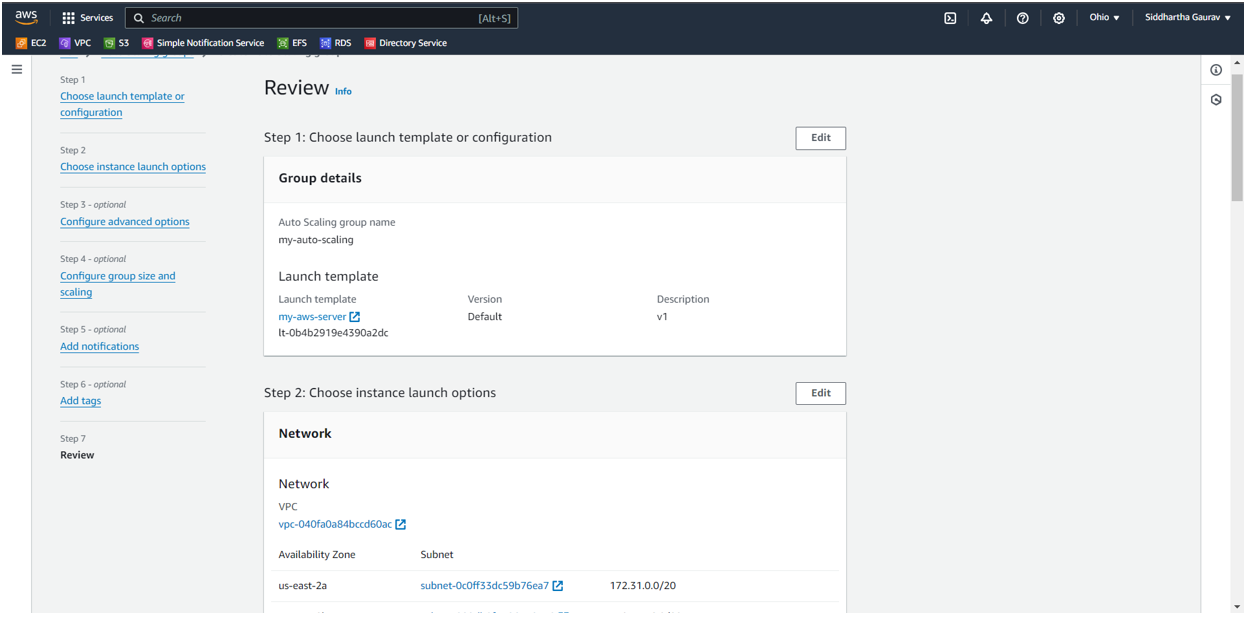
Once you've thoroughly reviewed all the configurations and ensured they align with your requirements, proceed by clicking on "Create Auto Scaling group." This will initiate the creation process based on your defined settings.
Congratulations! Your autoscaling group is now successfully created. You can verify this by checking the dashboard, where you should see relevant information and status indicators confirming the creation of the autoscaling group.
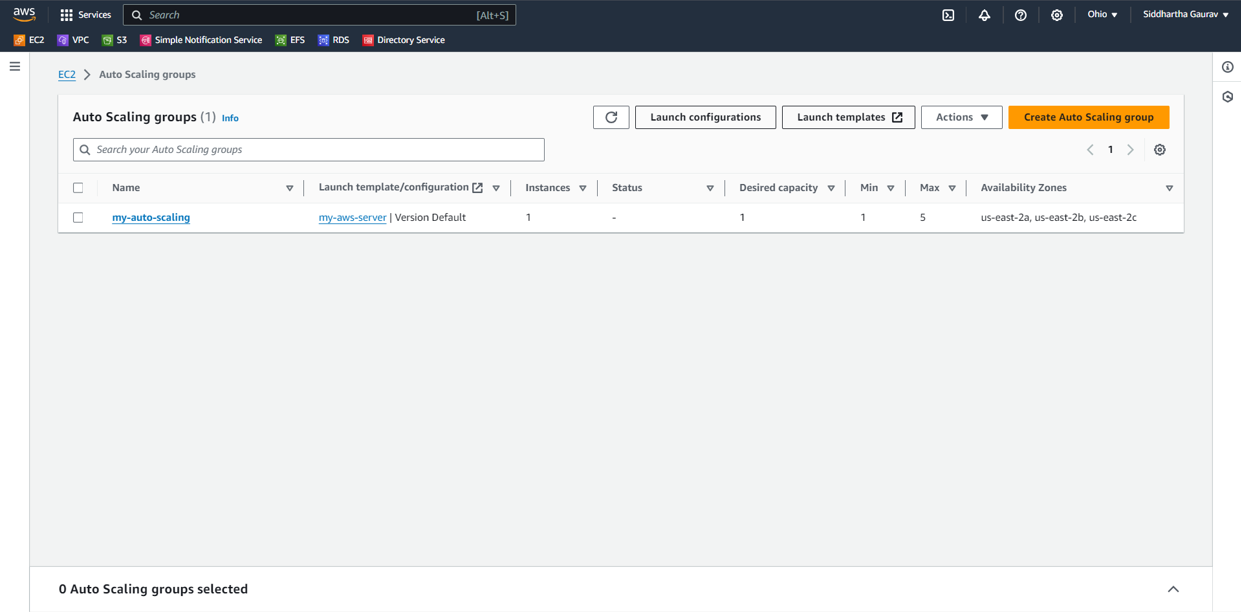
Fantastic! Your configuration is working seamlessly. In just seconds of creating the autoscaling group, an instance named "my-aws-server" was launched, aligning with the desired instance setting configured earlier for the load balancer. This dynamic scaling demonstrates the flexibility and responsiveness of your autoscaling setup.
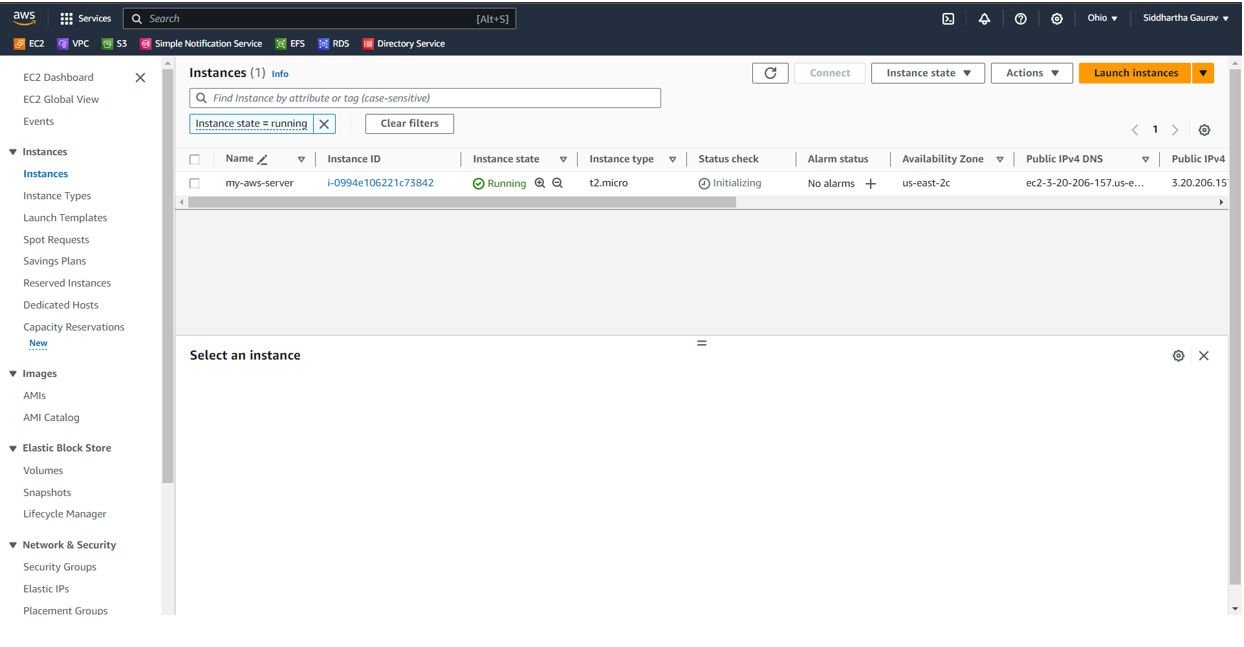
Excellent news! With the successful launch of the "my-aws-server" instance, your application is now up and running, demonstrating the effectiveness of your autoscaling group and load balancer configuration. This setup ensures that your application remains responsive and available, adapting to changing demands.
Step 3: Implementing Web Application Firewall
Navigate to the AWS dashboard and use the search function to find "WAF." From the search results, select "WAF and Shield."
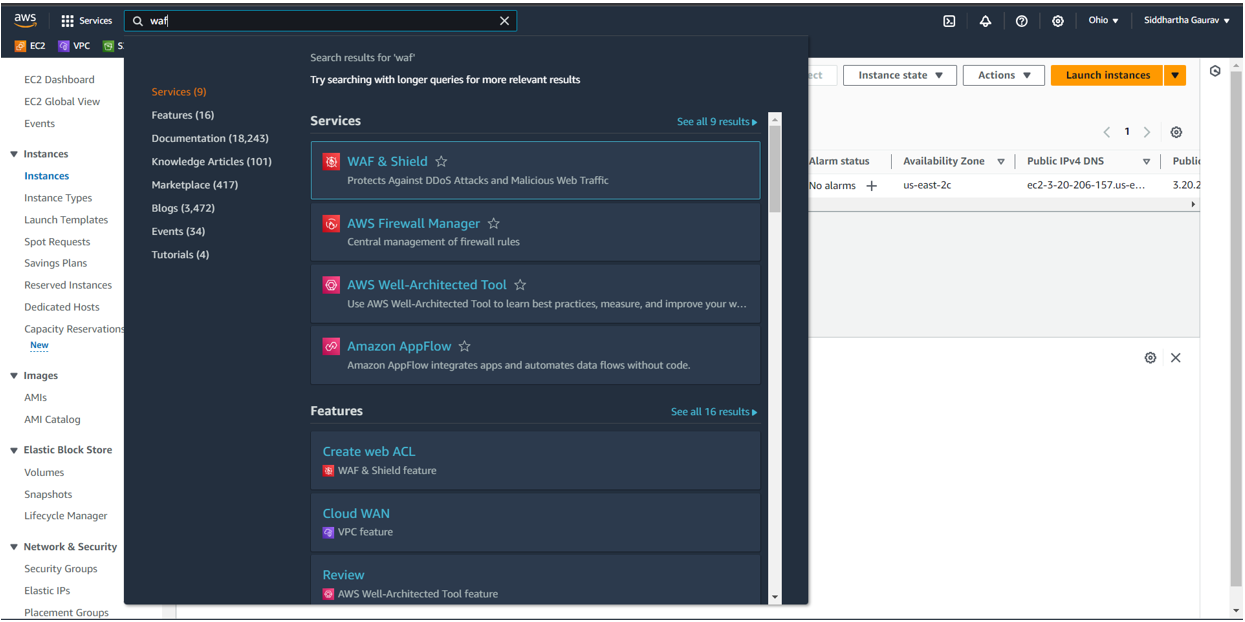
Upon selecting "WAF and Shield," you will be directed to the Web Application Firewall (WAF) dashboard.
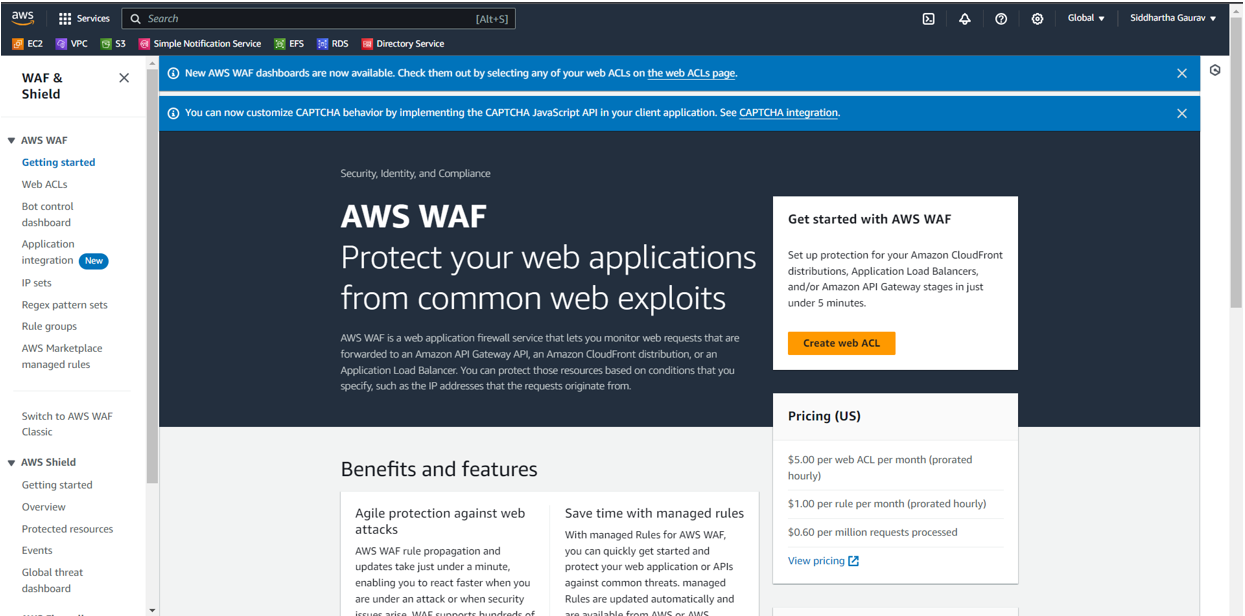
Click on "Create Web ACL" to initiate the process of creating a Web Application Firewall Access Control List (Web ACL).
Upon clicking, you'll be presented with a template form. Fill in the required details, including selecting the region and providing a name for your Web ACL.
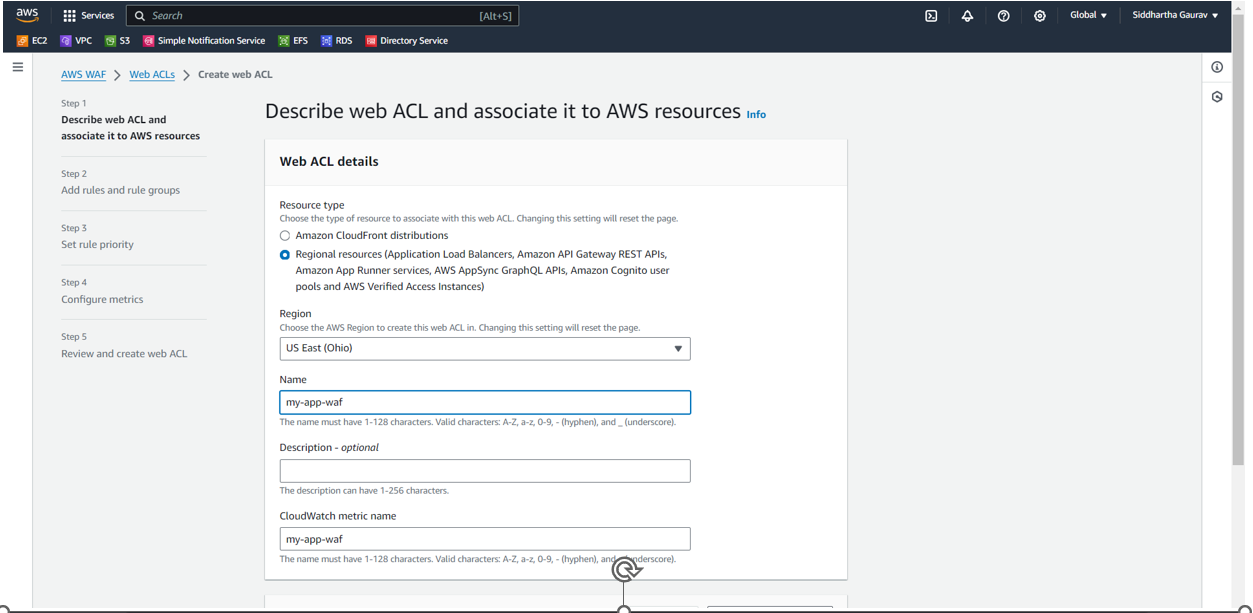
Choose the AWS resource to which you want to configure security by specifying the appropriate details in the Web ACL configuration. This could include selecting the resource type, such as an Application Load Balancer or CloudFront distribution.
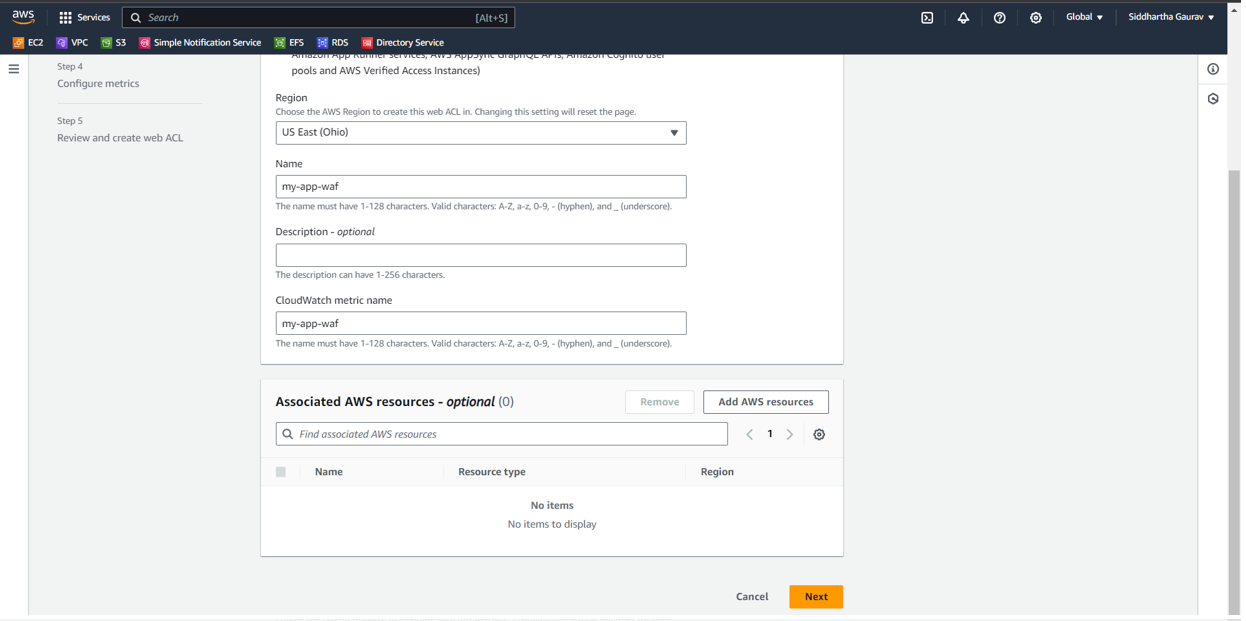
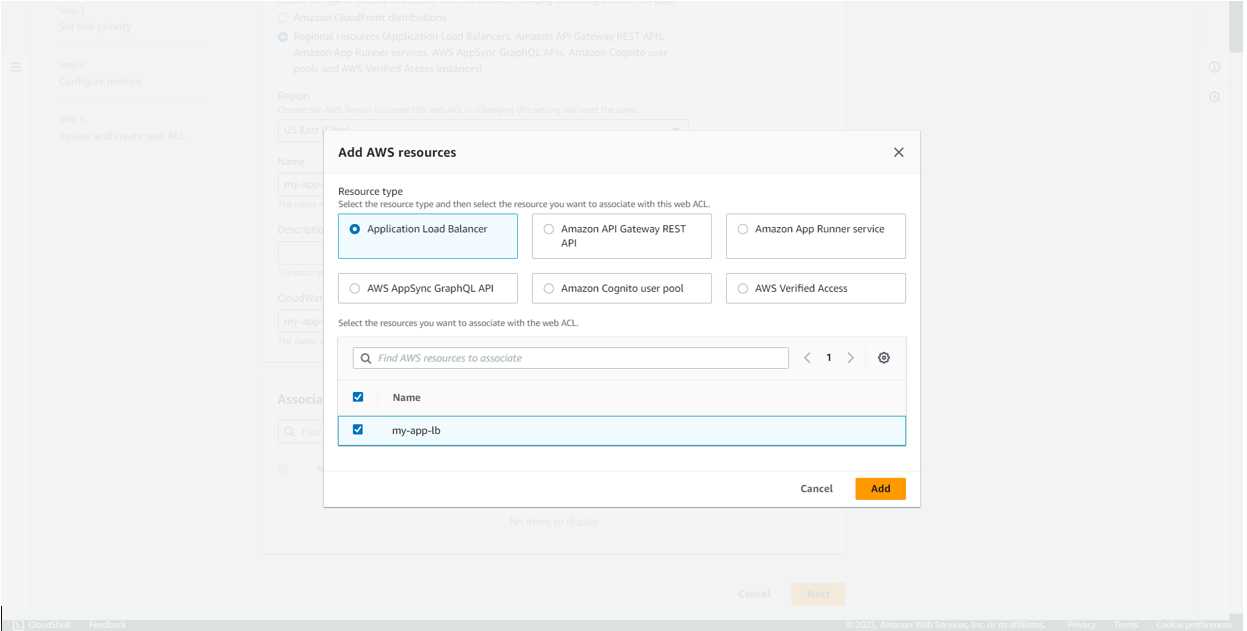
Choose "Application Load Balancer" as the resource type, and it should automatically display your application load balancer name. Select the appropriate load balancer and click on "Add" to include it in the Web ACL configuration.
Great! With the successful selection of your Application Load Balancer as the resource, your configuration is on track. This resource is now integrated into the Web ACL for security configuration.
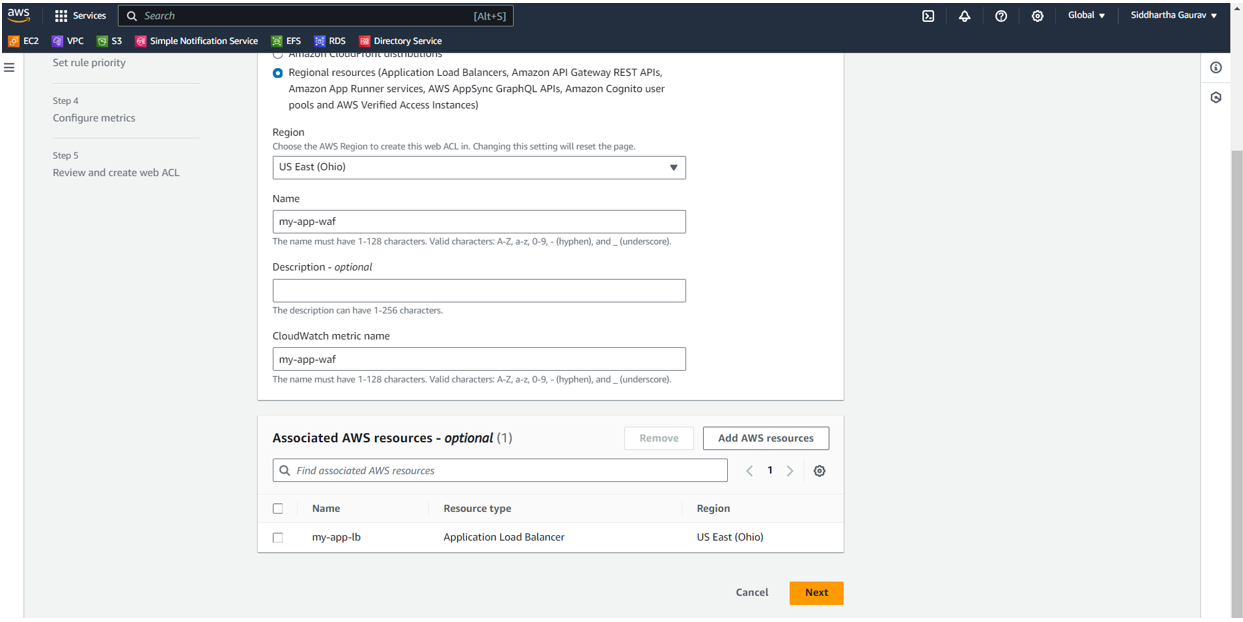
Proceed to the next step by clicking on "Next." This will take you through the additional configurations and settings to tailor the Web ACL according to your security requirements.
Select rules for your Web ACL to define the security policies and actions that should be enforced. This step allows you to specify the criteria and conditions under which traffic is allowed or blocked.
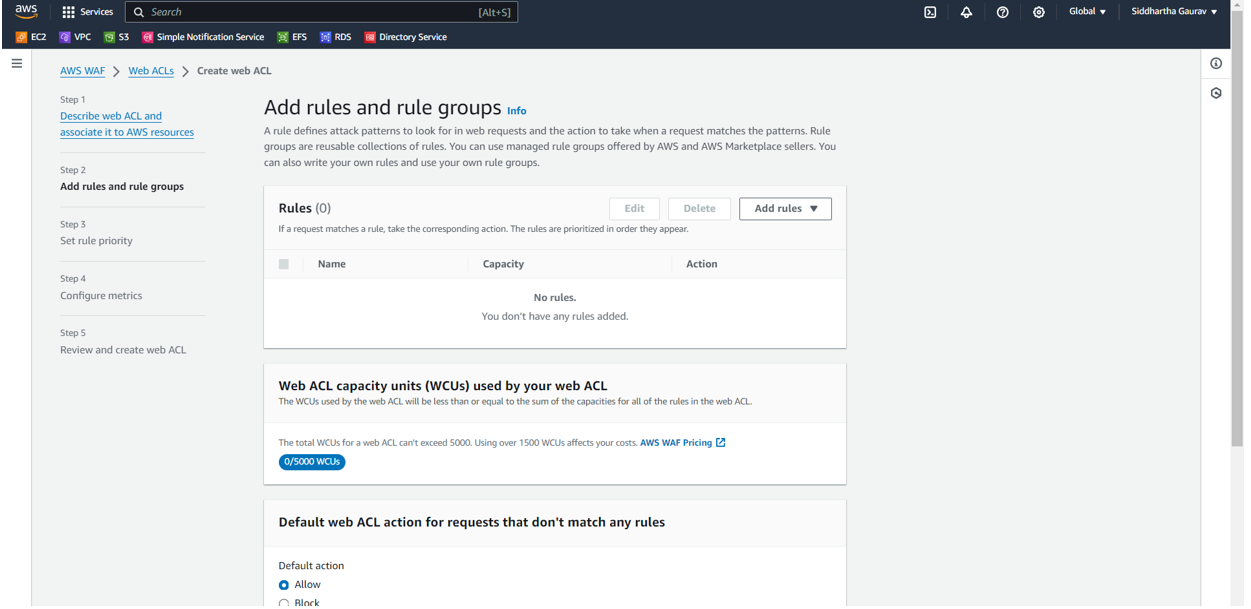
Click on "Add rules" and choose "Add managed rule groups" to include predefined rule sets that can help protect your web application against common security threats and vulnerabilities.

Upon selecting "Add managed rule groups," you will be presented with options for managed rule groups.
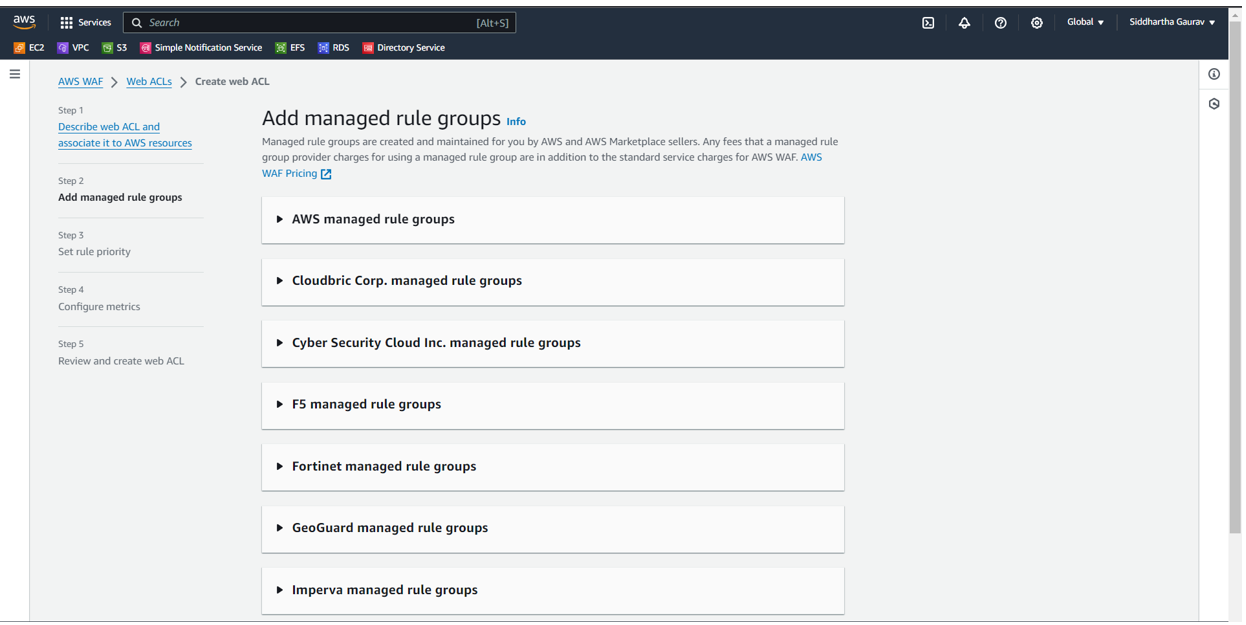
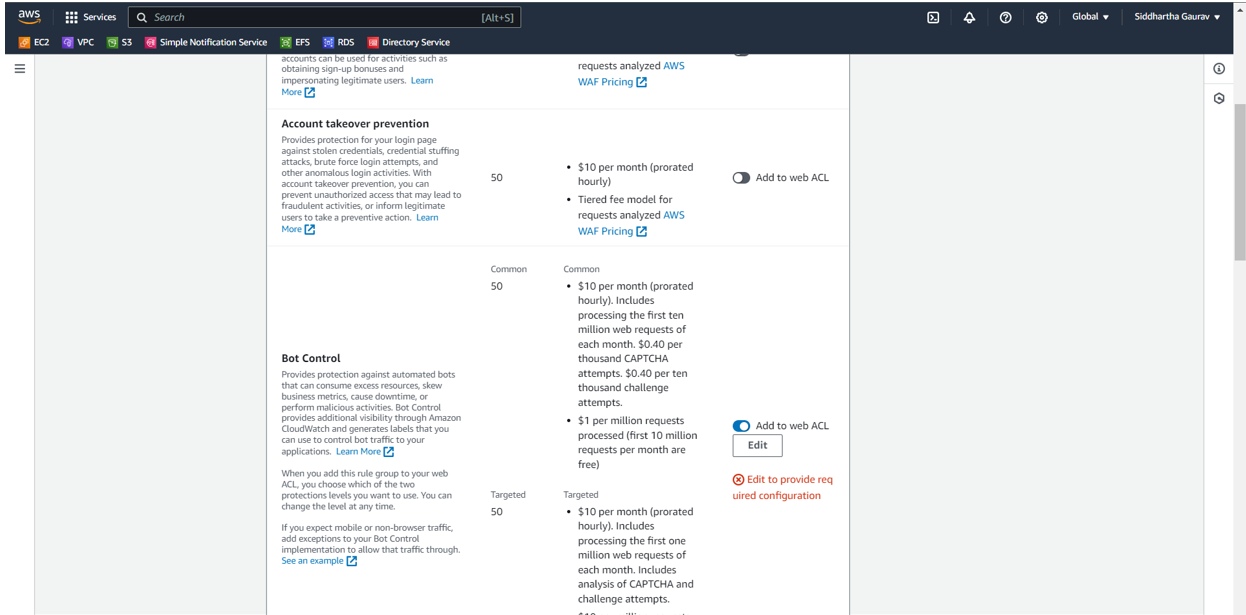
Under the AWS managed rule groups, search for options related to bot protection. Look for rules specifically designed to enhance security against bot-related threats. This could include rules targeting bot behavior, scraping, or other malicious activities. Select the appropriate bot-related rules to bolster your application's security against automated threats.
Upon locating the bot-related rules, select the option and choose "Edit." This will allow you to customize and fine-tune the settings for bot protection according to your specific requirements and the nature of your application traffic.
After selecting "Edit," you'll be directed to another screen for "Add managed rule groups." This is where you can further refine and customize the settings for the selected managed rule groups, particularly the ones related to bot protection.
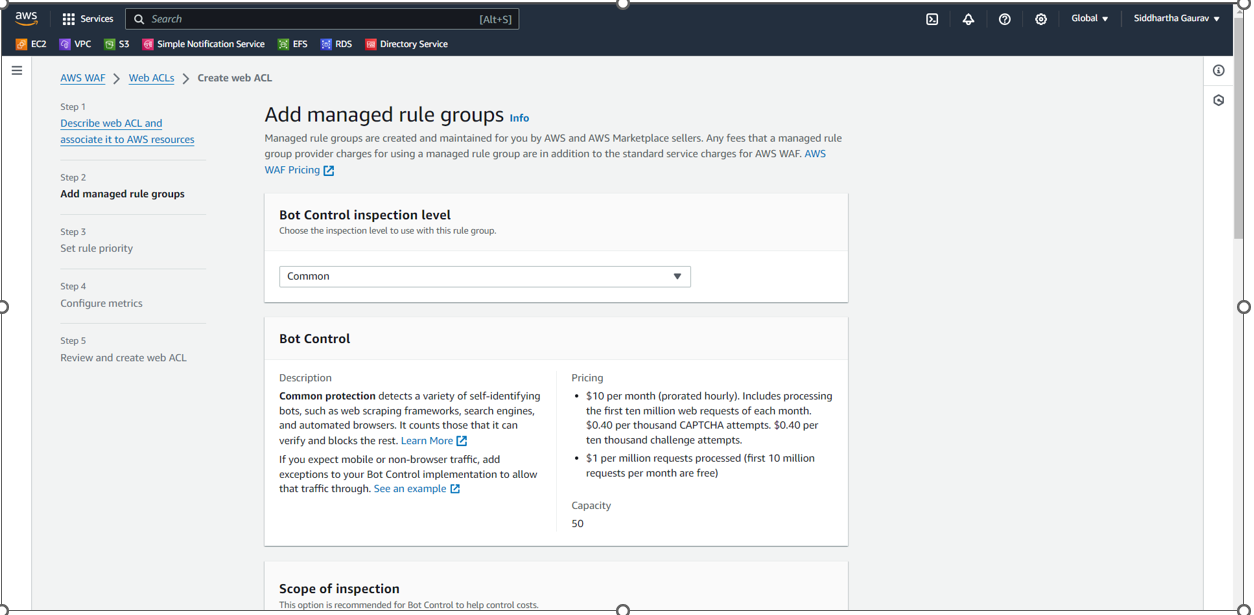
For the Bot Control Inspection level configuration, choose the common option that aligns with your security needs. This level determines the depth of inspection applied to incoming traffic to identify and mitigate potential bot-related threats. Select an appropriate inspection level based on your application's requirements and sensitivity to automated traffic.
Select the scope for Inspection and Bot control rules. This involves defining the extent to which the inspection and bot control rules should be applied. Consider the specific requirements and characteristics of your application traffic when configuring the scope.
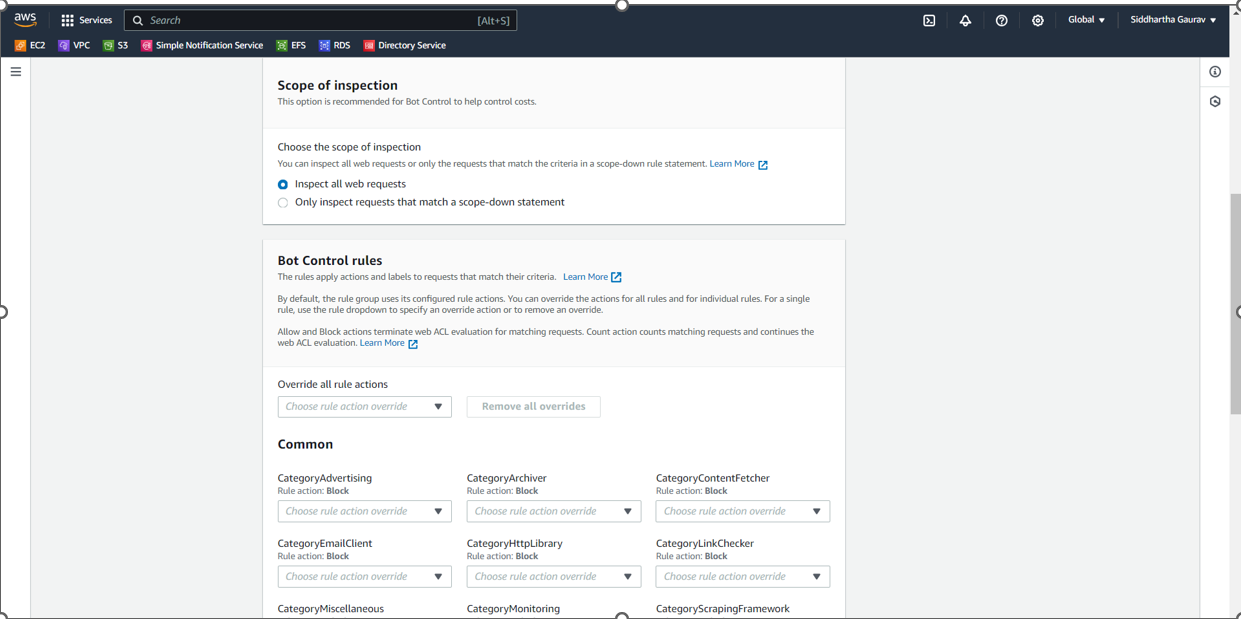
Specify the scope to "Inspect all web requests" to comprehensively analyze all incoming traffic. As for the Bot Control rules, you can leave them as default if they align with your security objectives. This configuration ensures a thorough inspection of web requests while applying default bot control rules to enhance security.
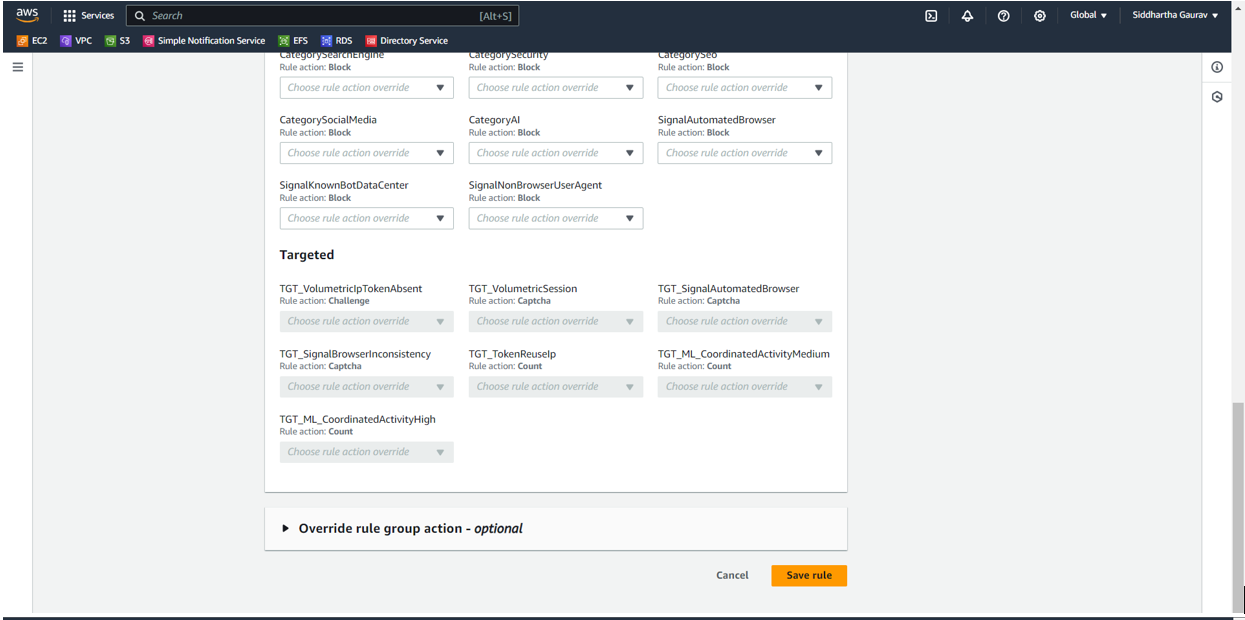
Once you have configured the Inspection level and Bot Control rules scope, scroll down and click on "Save rule" to apply the changes. This step finalizes the customization of the bot-related rules within your Web ACL.
Great job! By clicking "Save rule," you have successfully saved the customized rules for bot protection within your Web ACL. This enhances the security posture of your application against automated threats and ensures a more robust defense mechanism.
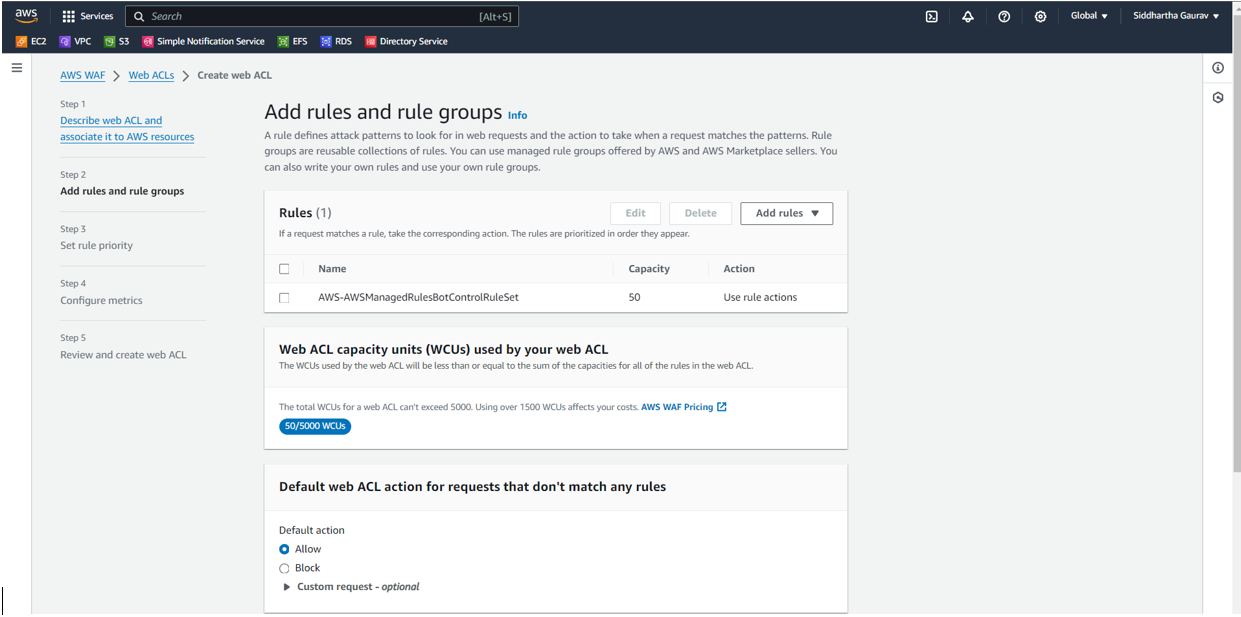
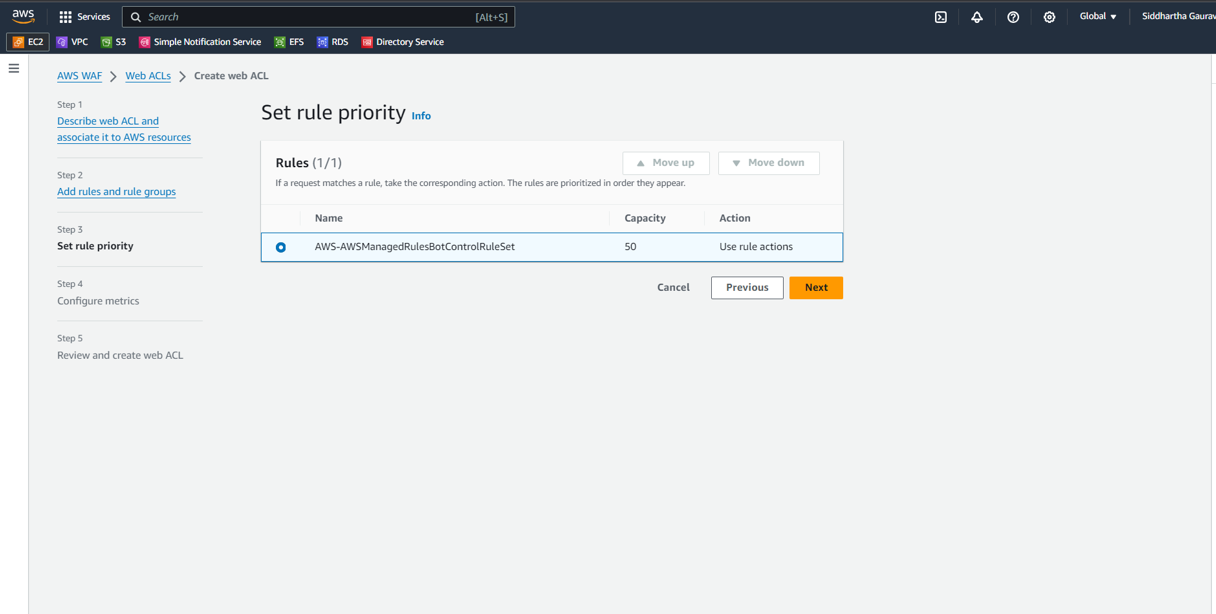
In the "Set rule priority" section, click on your rule, and then proceed to the next step by clicking on "Next." This allows you to prioritize and organize the rules within your Web ACL to ensure effective enforcement of security policies.
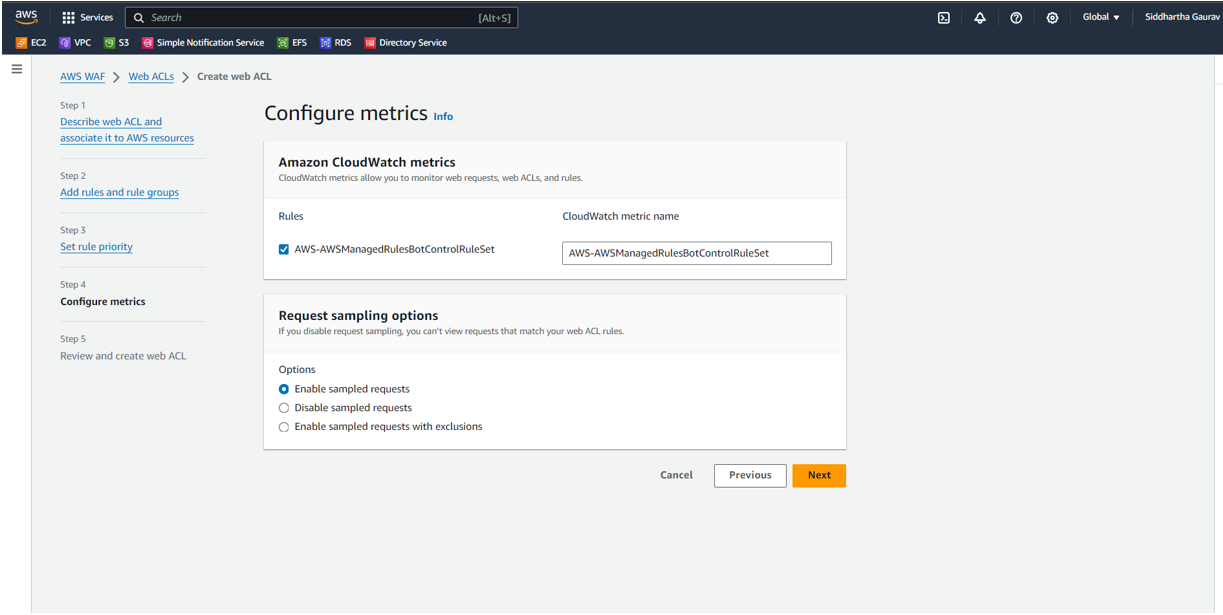
In the "Configure metrics" section, choose the metrics you want to configure based on your monitoring needs. After making your selections, proceed by clicking on "Next" to move forward in the configuration process.
Take a moment to review your Web ACL configuration, ensuring that all settings, rules, and priorities align with your security requirements. This review step is crucial to confirming that your Web ACL is properly configured to protect your application against various threats.
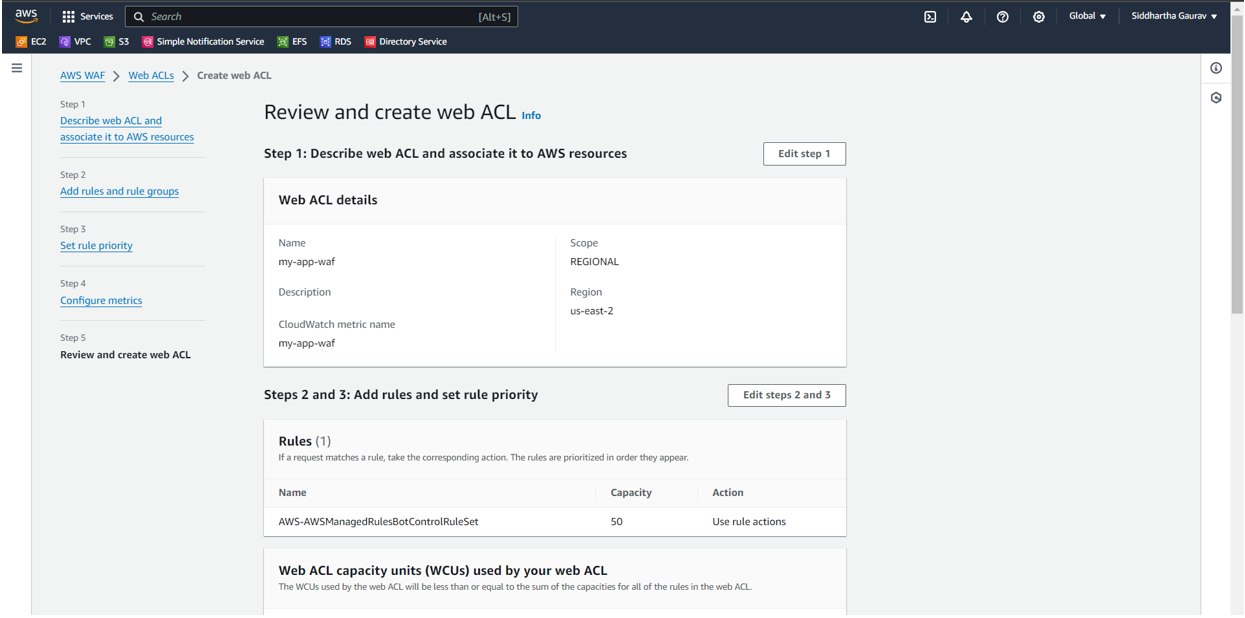
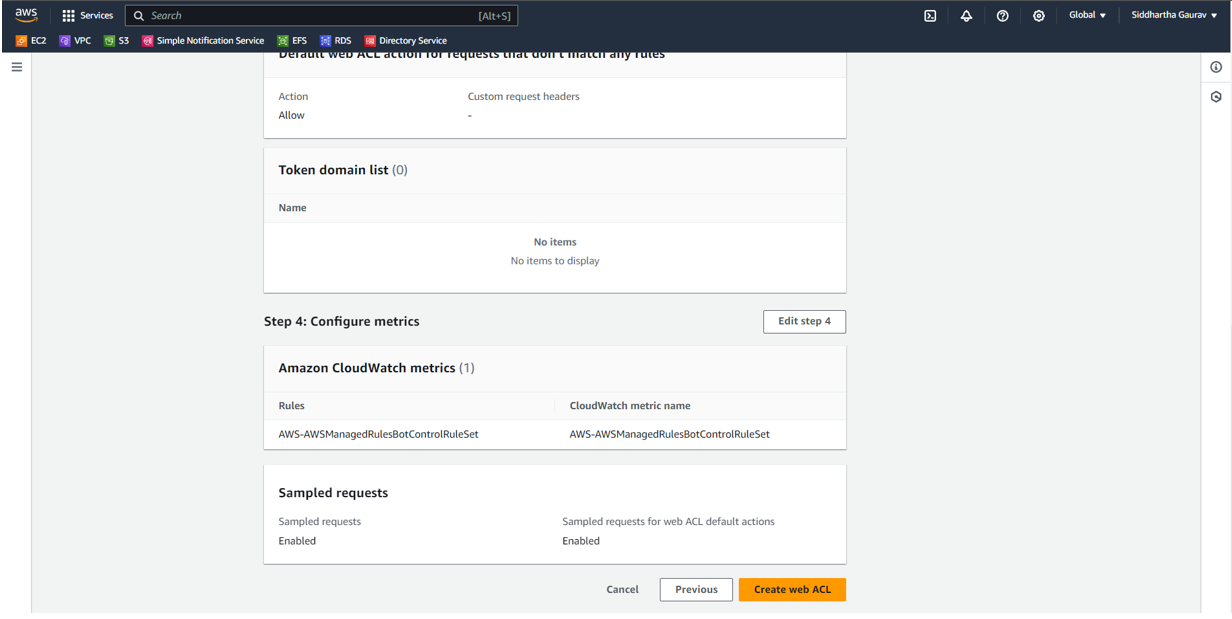
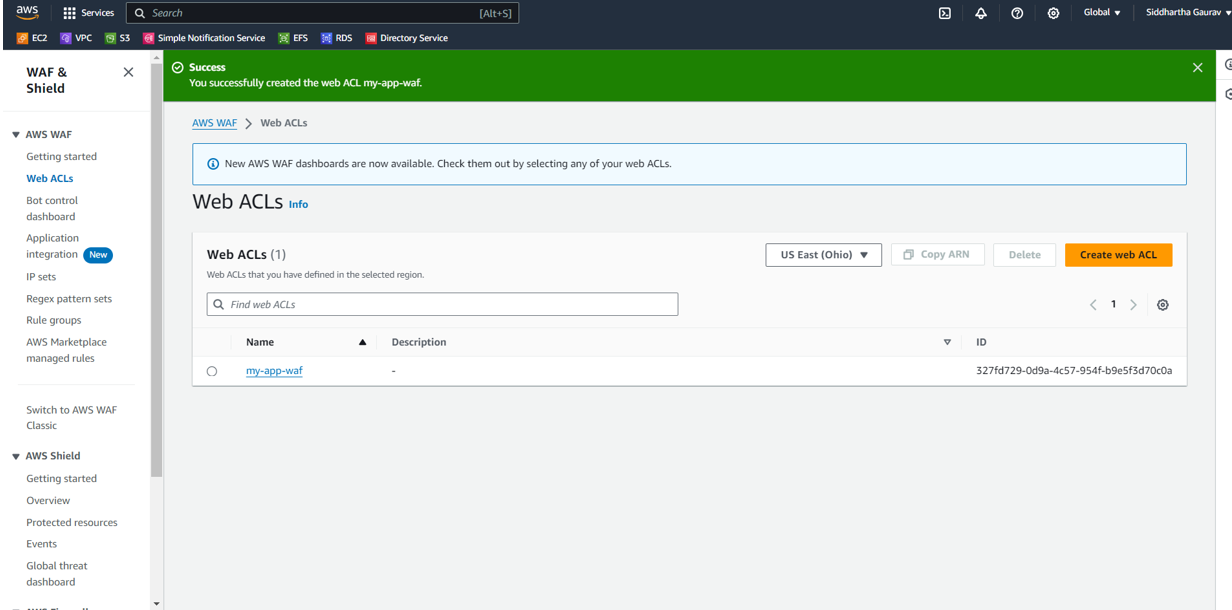
After reviewing your Web ACL configuration, click on "Create web ACL" to finalize and deploy the Web Application Firewall settings for your specified resource. This action completes the setup of your Web ACL with the configured security rules.
Congratulations! With the successful creation and configuration of your Web ACL, your application is now equipped with an additional layer of security, particularly against bot-related threats. This proactive measure enhances the overall resilience of your web application and contributes to a more secure online environment.
Step 4: Testing and Observing
Log in to your application EC2 instance which was by default launched after creating an autoscaling group.
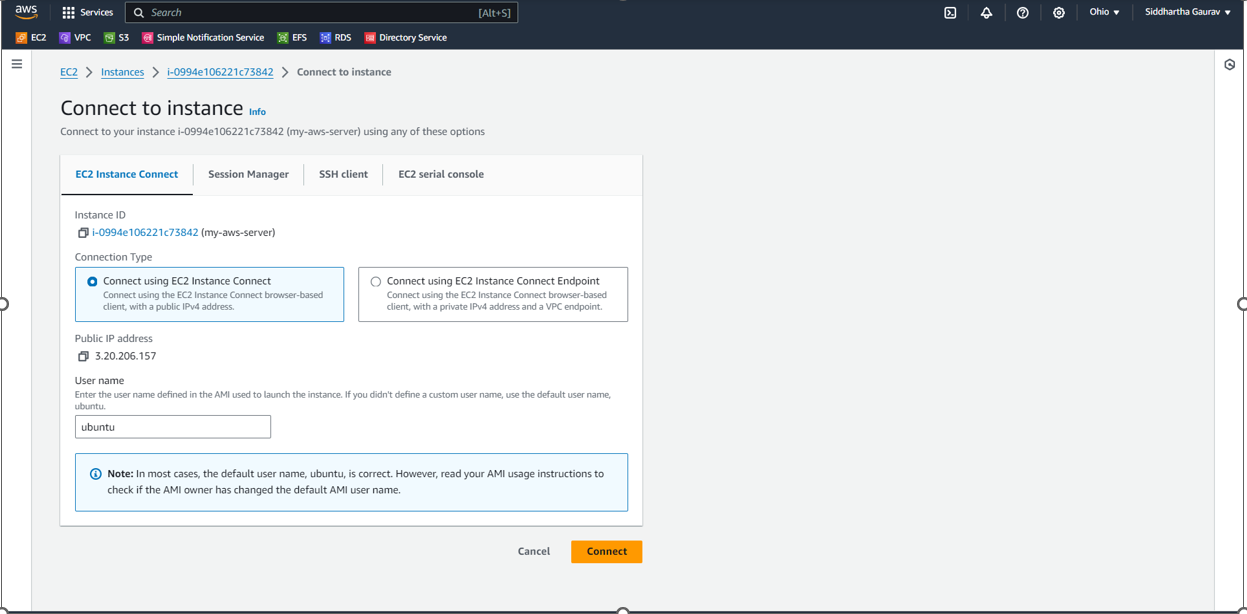
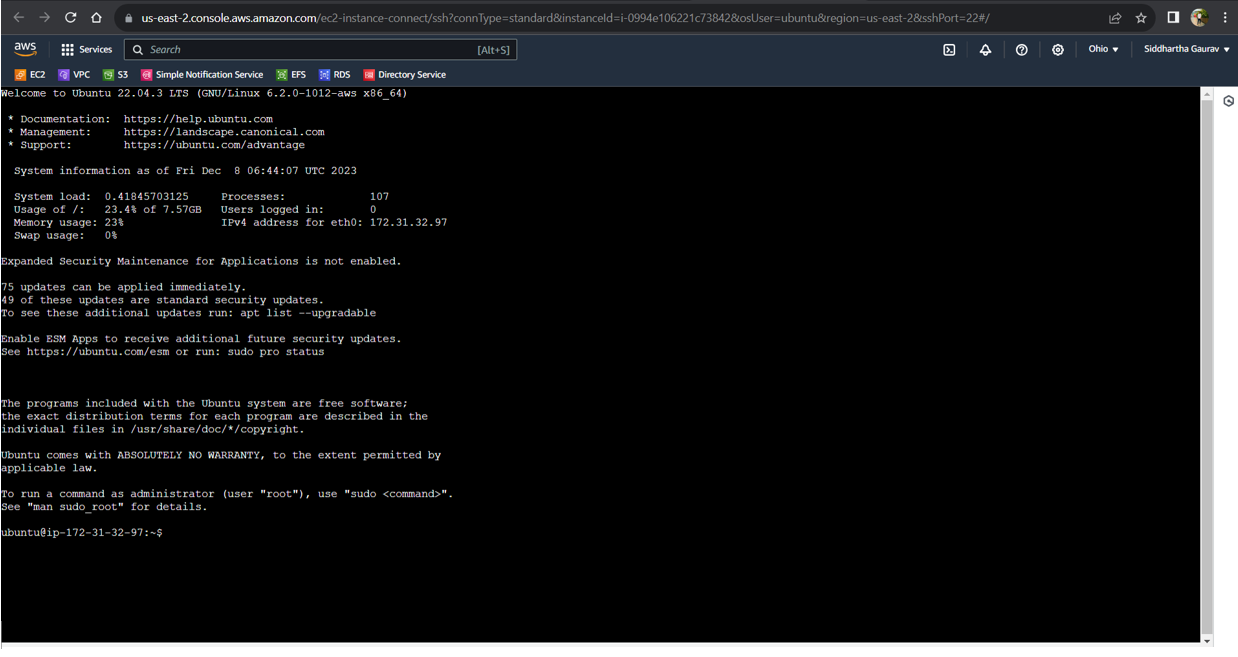
We are conducting testing, and as it may not be feasible to generate organic traffic on our server, we will simulate increased CPU load manually. According to our configured rule, if the CPU utilization exceeds 20%, the autoscaling group will initiate the launch of additional EC2 instances for the same application, up to a maximum of 5 servers (Max Desired Capacity).
To simulate CPU load, we will use the 'stress' command. Let's begin by installing this command and imposing a 50% CPU load on the server

We have successfully installed the 'stress' package. Now, let's intentionally increase the CPU load on our server for testing purposes.

After some time, as the load increases, we can observe on the EC2 dashboard that new instances are automatically launched in response to the heightened demand.
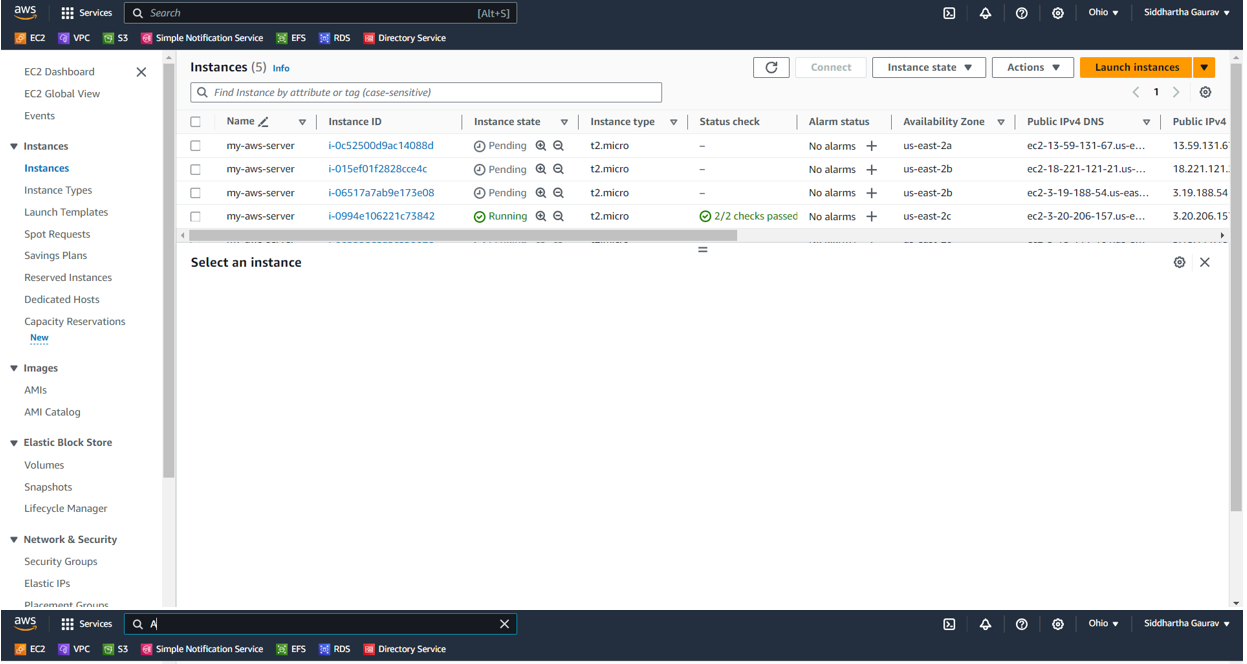
And within a few seconds, all the instances are up and running, effectively scaling to accommodate the increased load.
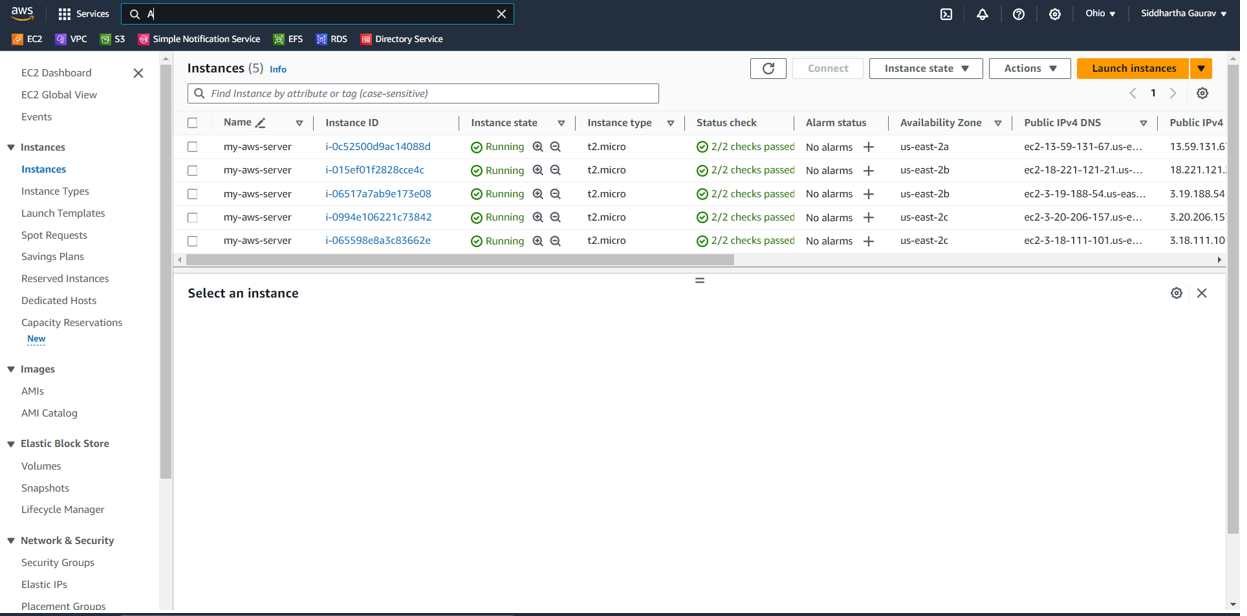
So, it's confirmed that our Autoscaling and load balancer are functioning as expected. Now, let's simulate a decrease in load by terminating the stress command and observe the system's response.
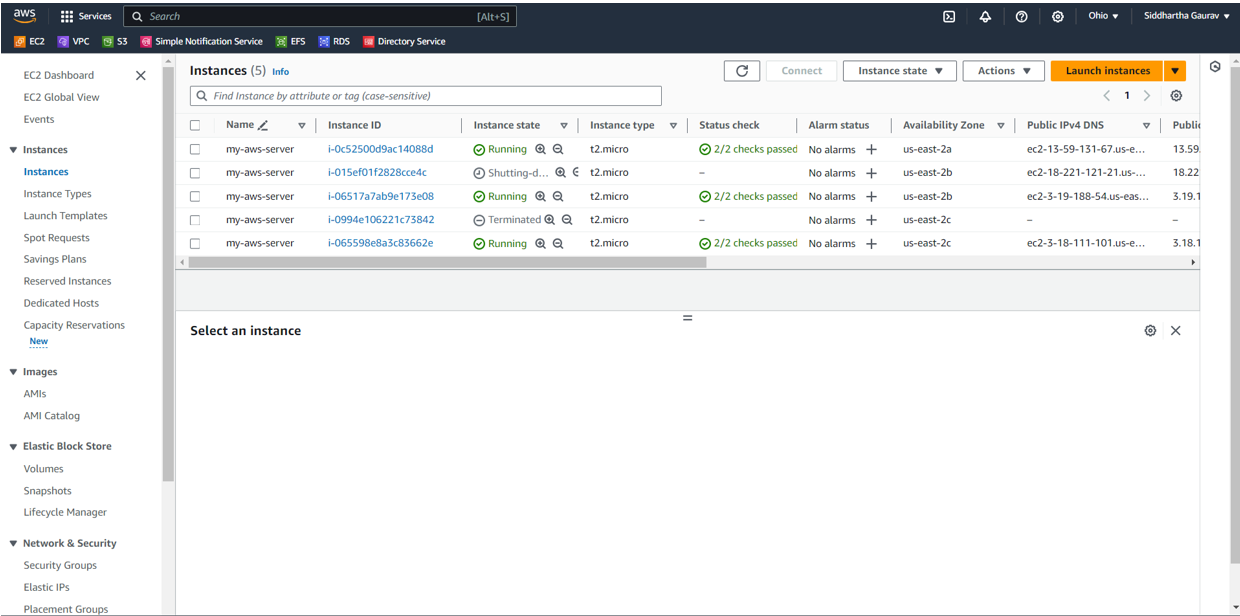
And as the load decreased, the EC2 instances automatically began to terminate, demonstrating the dynamic nature of the autoscaling group in response to varying workloads.
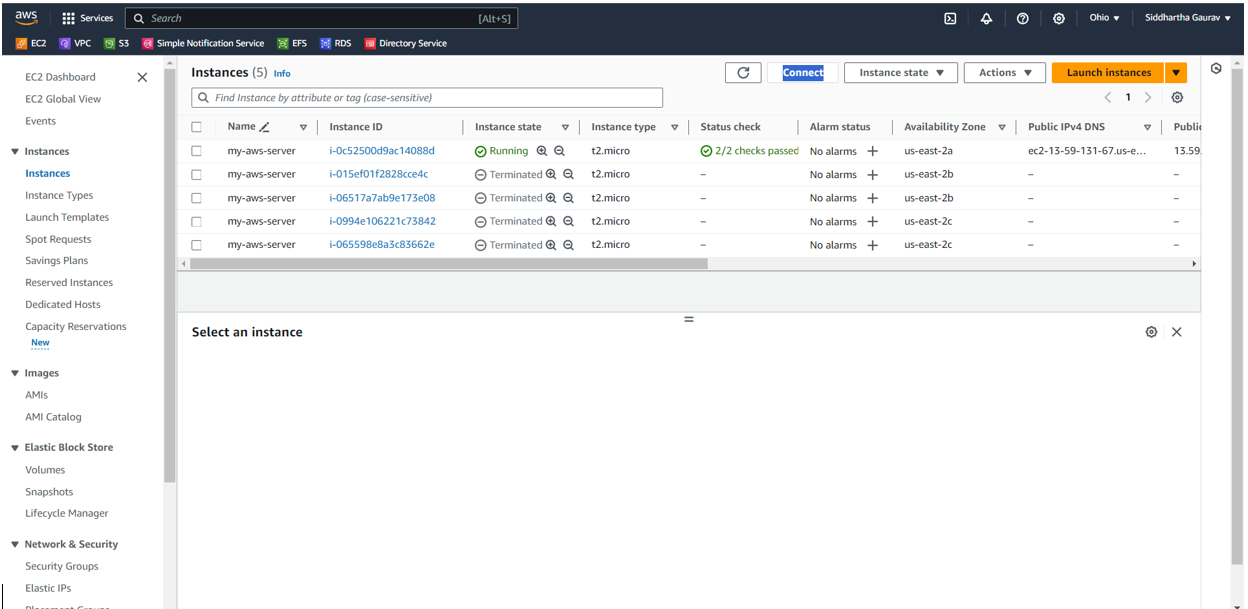
After a few minutes, as there was no load on the initial server, all the other four EC2 instances were automatically terminated. This successful outcome indicates that our lab, including the autoscaling group and load balancer, has been configured and tested effectively.😊😊.
Cleaning up your environment:
As our lab scenario is successful, let's delete all the resources we created.
First delete the load balancer.
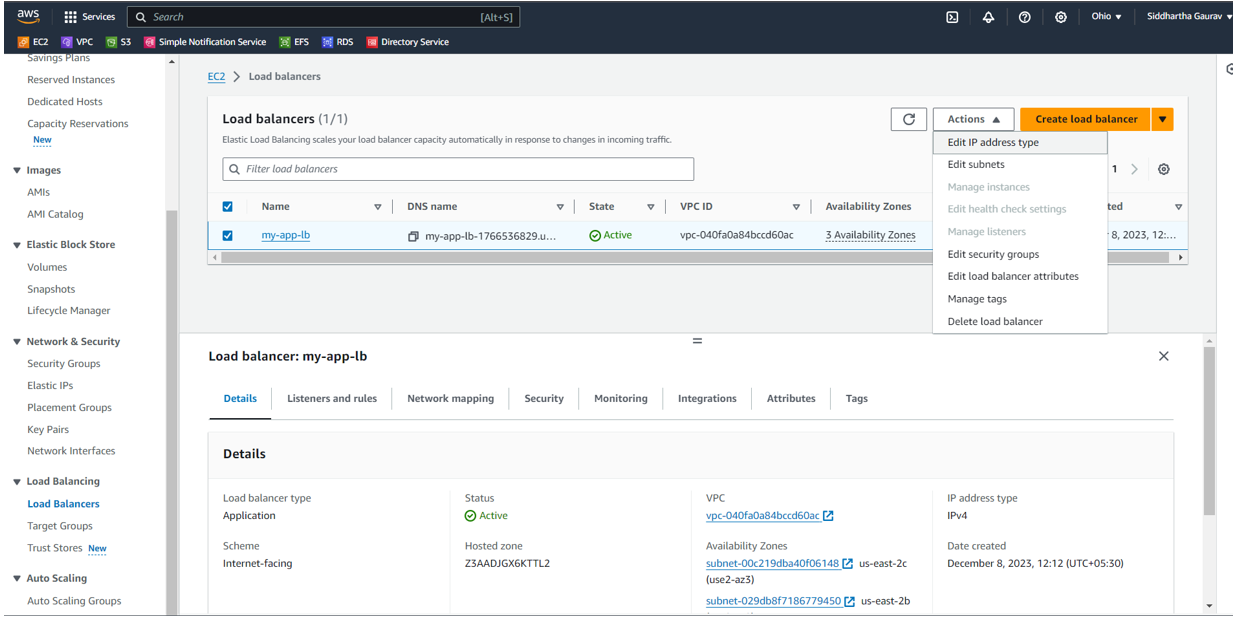
Select your load balancer, click on "Actions," and then choose "Delete Load Balancer."
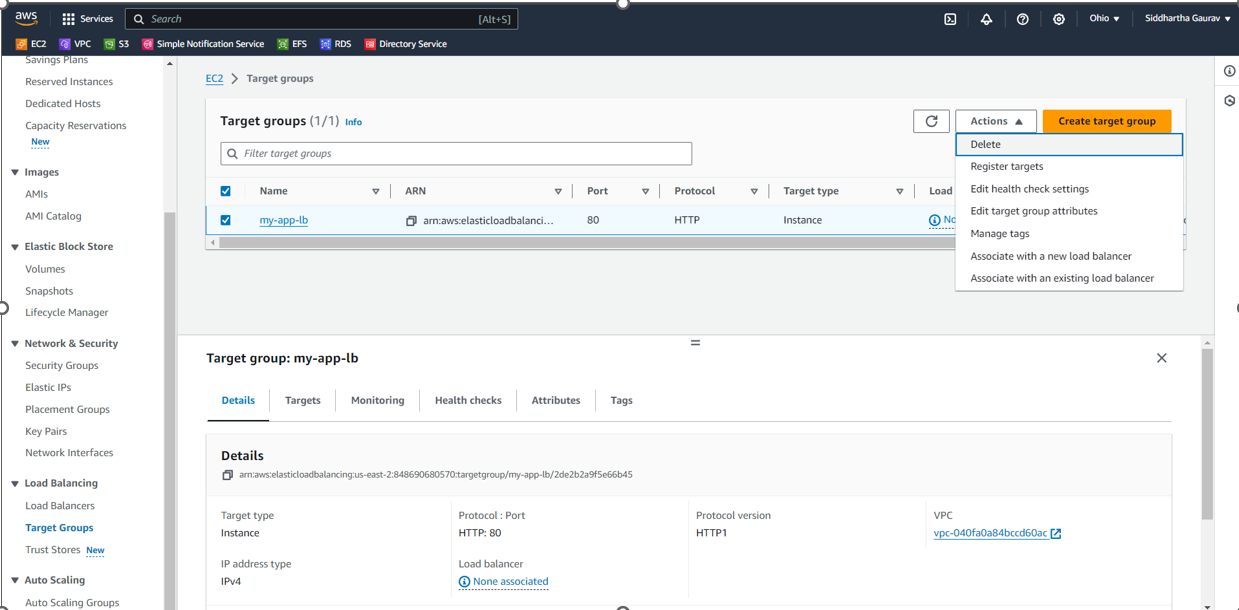
Now, let's delete our target groups as well.
And finally, delete the autoscaling group.
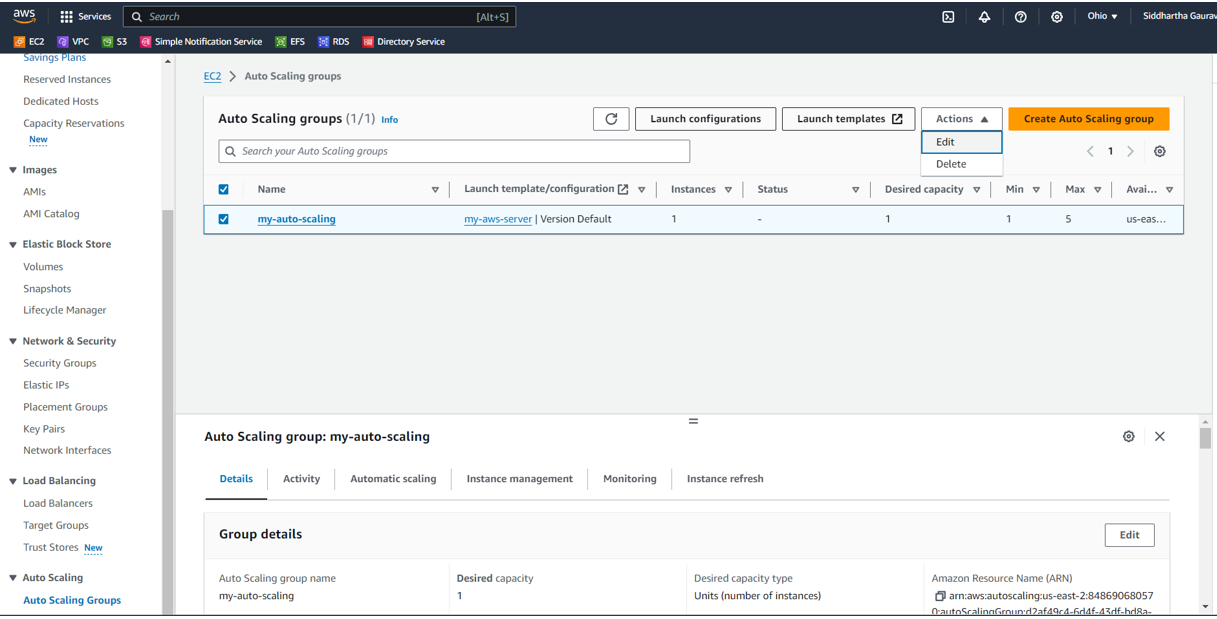
Select you autoscaling group, click on actions and then click on Delete.
Once we delete our Autoscaling group, the initial instance that was automatically initiated will now terminate itself, as the Autoscaling group responsible for its management has been removed.
Conclusion:
In this project, we've witnessed how Autoscaling Groups, Application Load Balancers, and Web Application Firewalls work together to create a resilient, scalable, and secure web environment. As we embrace the dynamic nature of web traffic, these technologies play a pivotal role in ensuring a seamless and protected user experience.
By understanding the importance of these components and witnessing their collaboration in action, we're better equipped to build and maintain web applications that can scale with the demands of the digital landscape while prioritizing the safety of both data and users.
Subscribe to my newsletter
Read articles from Siddhartha Gaurav directly inside your inbox. Subscribe to the newsletter, and don't miss out.
Written by

Siddhartha Gaurav
Siddhartha Gaurav
I'm a passionate DevOps engineer with a knack for streamlining development workflows and ensuring seamless deployment pipelines. With experience in managing cloud infrastructure, implementing DevOps best practices, and leveraging automation tools, I thrive on tackling complex challenges and driving efficiency in software delivery. Let's connect and explore how I can contribute to your projects!