Deploying Super Mario Game on AWS Elastic Container Service (AWS ECS) | Step-by-Step Guide | DevOps Tutorial
 Ajay S Nair
In this turial we are going to deploy Super Game using AWS ECS. In the previous article, we have deployed the application on Docker with AWS EC2. Check out that here, Super Mario with Docker.
Thanks to the one who created and updated the Docker image (kaminskypavel/mario) on Docker Hub.
Please be aware that the services involved in the tasks may incur charges.
Before beginning, I would like to tell you that basic understanding of AWS Cloud is recommended to get this project properly.
We will be using Fargate here for deploying Super Mario. As you know, in fargate we don’t need to be concerned about the server and stuffs. Let’s begin.
Initially, I am going to create two security groups. One will be for the ECS Container and the next one will be for the ALB. Yes, you heard it right. We will be using an AWS Application LoadBalancer to drive traffic to our containers.
First create a security group for the AWS ALB with just the http port opened to the public, just like the below snap.
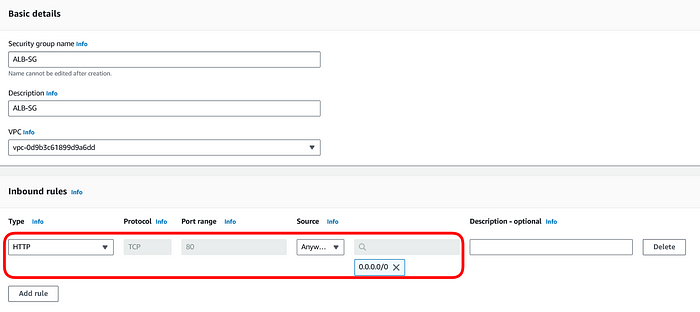
LoadBalancer Security Group
Next create a security group for the ECS Container. Here we will be opening the port 8080, that too we are just allowing the LoadBalancer group to access the port. All other entries will be restricted.
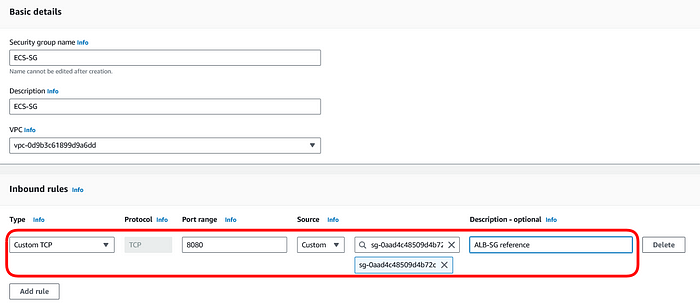
ECS Security Group
We are done with the security groups. Now we are starting with building the infrastructure. Creating a LoadBalancer is our next goal.
For creating a LoadBalancer we will need a target group. Click on create target group and make sure to select IP Addresses from the Basic Configuration.
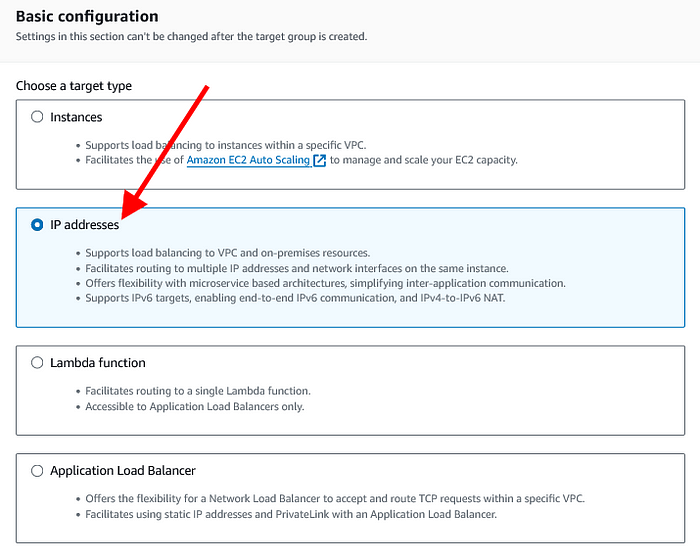
Basic Configuration of Target Group
Don’t forget to name your Target Group. In the protocol select http, so that it will be listening to 80 Port requests.
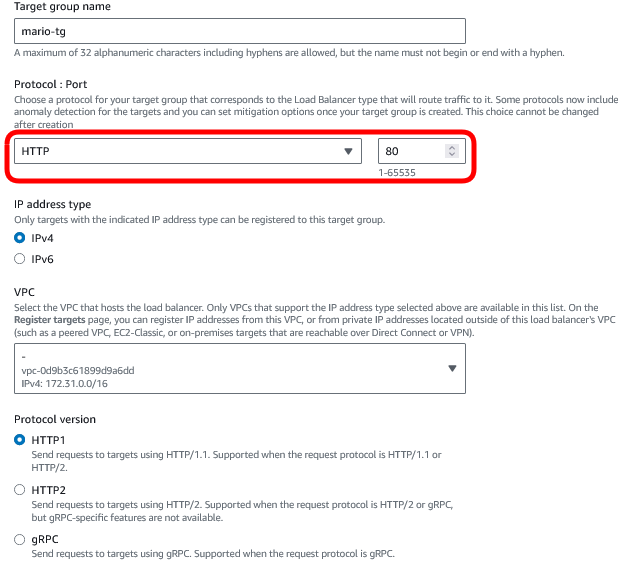
http Protocol for target group
Keeping the rest as it is, move further and click on Create Target Group.
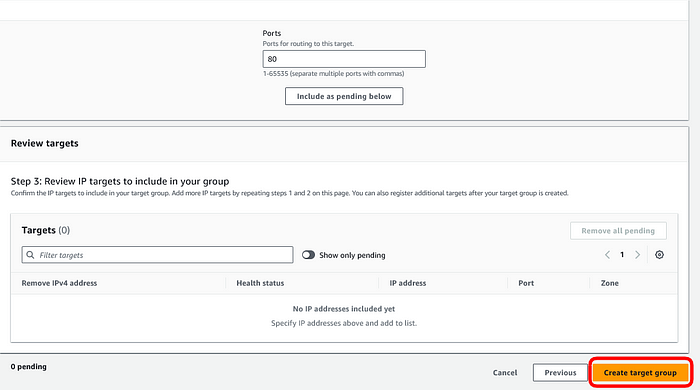
targets
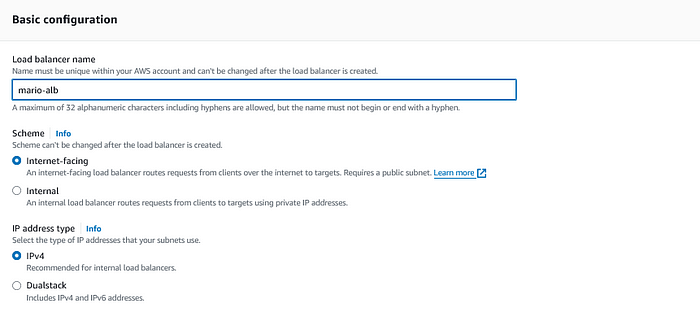
Time for the LoadBalancer. Go ahead with creating a LoadBalancer. Please remember, Application LoadBalancer is our man here.
It should be internet facing and IPv4 type.
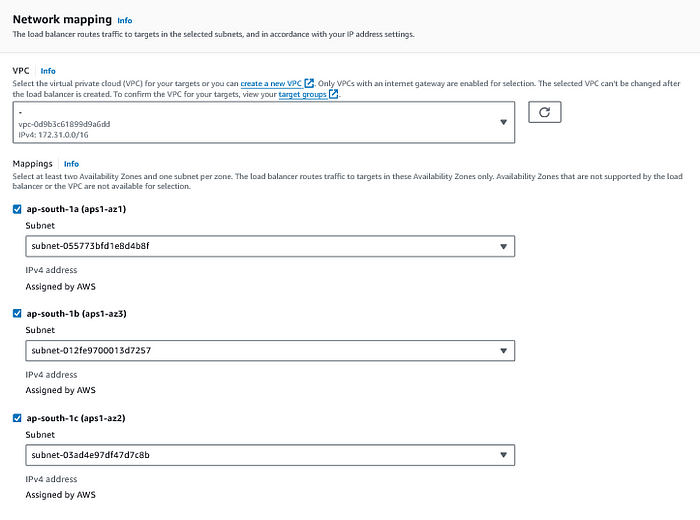
Select our VPC and don’t exclude a single subnet.
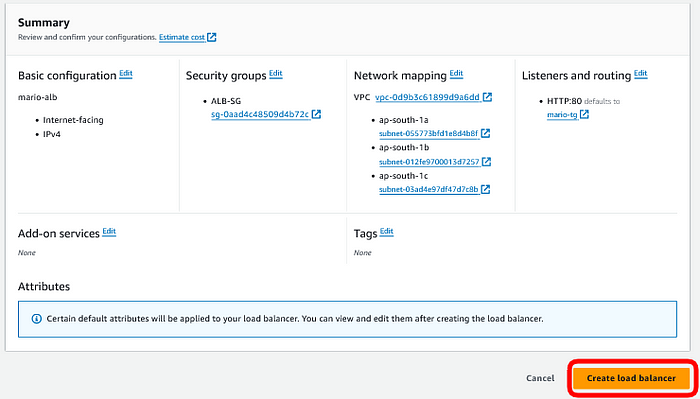
Select the security group which we created for the LoadBalancer and the Target Group should be the one which we created a moment before.
Click on Create LoadBalancer.
LoadBalancer section is complete and we are inching to the prime point. Let us create the ECS Cluster.

Give a name to your Cluster and select AWS Fargate.
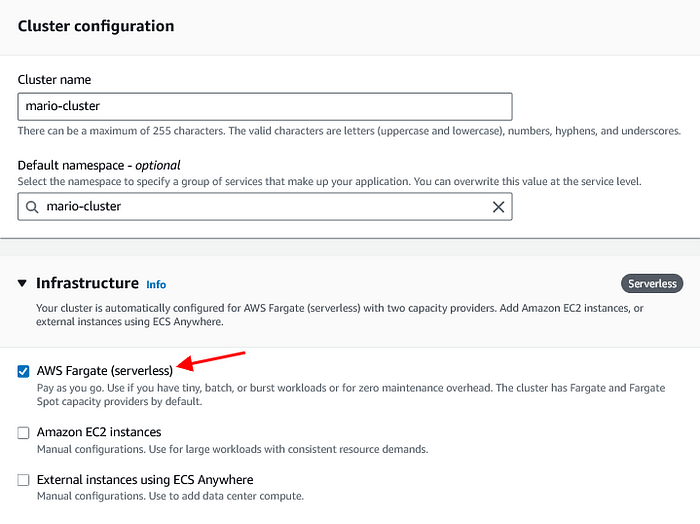
Click on Create cluster.
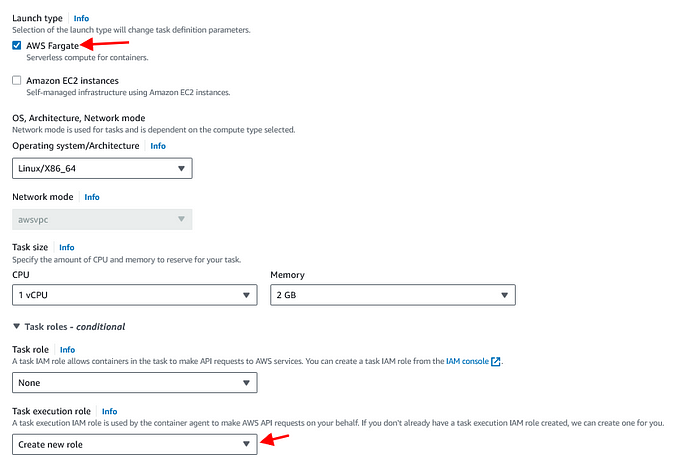
It will take some time to complete the creation of the Cluster. In the meantime, let us proceed with creating the Task Definition. This one will be the base of the containers. As internet says, Task Definition is considered as the blue print of containers.

Selecting AWS Fargate and proceeding with the base setup.
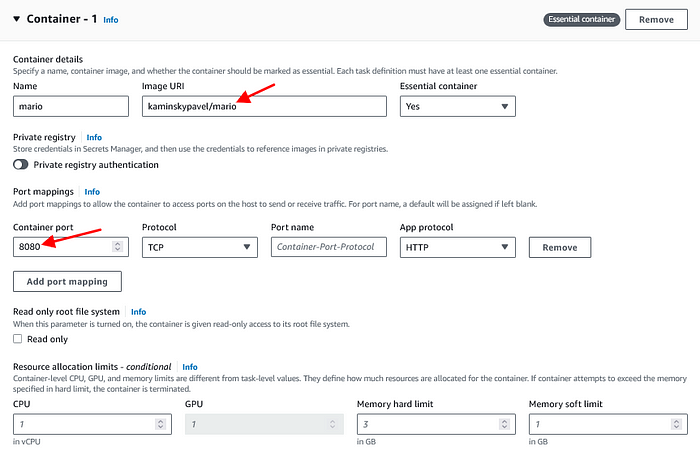
Name your container, in the image URI give the image we selected earlier. That is kaminskypavel/mario.
In the Container port, enter the value 8080. Click on Create task definition.
By this time the cluster creation will be completed. Then select the Task Definition and in the Deploy drop down menu go with Create service.
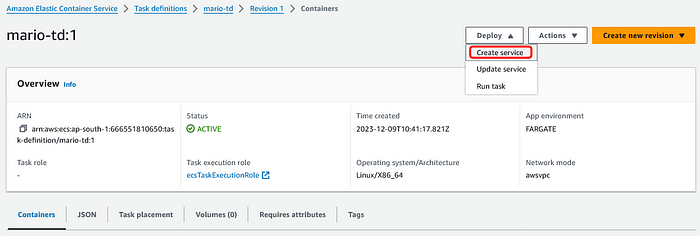
Name the Service. In the Desired tasks, I am giving two which means there will be two tasks running always. Take tasks as containers.
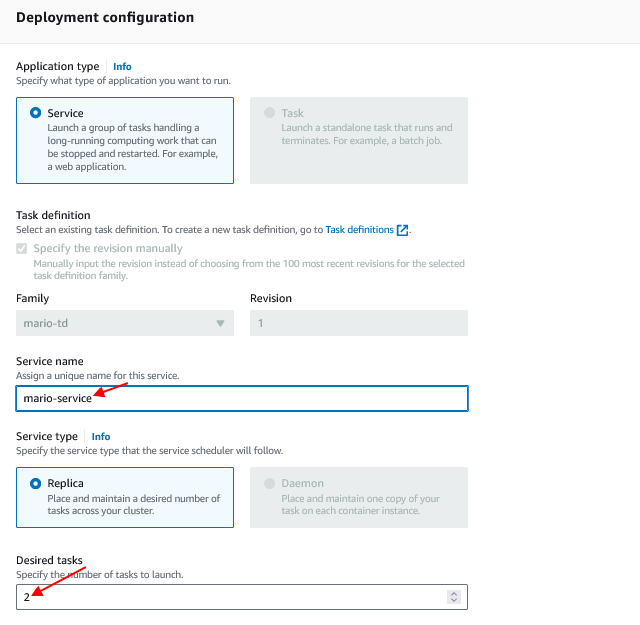
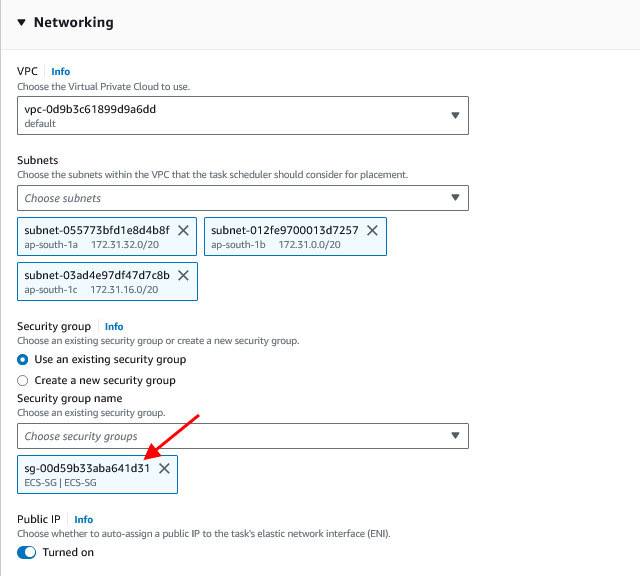
In the Network Settings, select the security group which we created for ECS first.
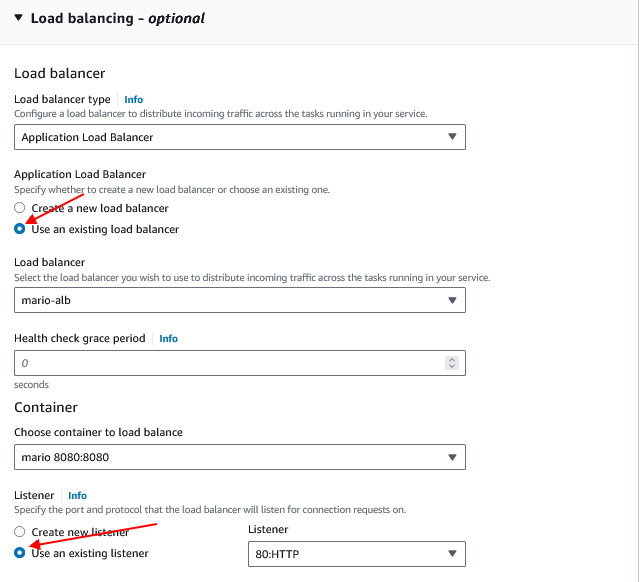
From the Load balancing option, we will select the existing load balancer we created.
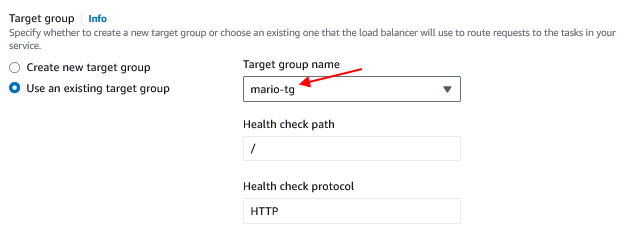
In the Target Group section, select the target group we created.
Click on Create Service.
In the Cluster section, go to the services.
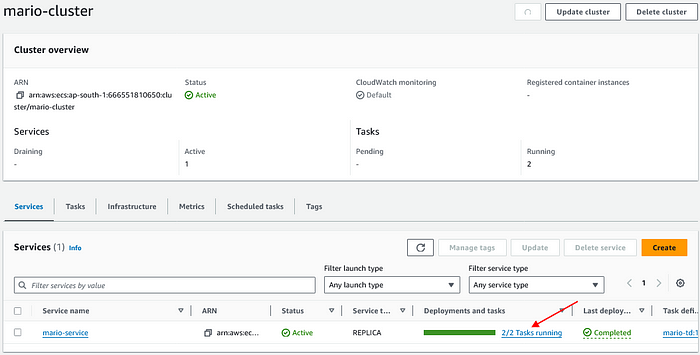
As you can see, two tasks are running.
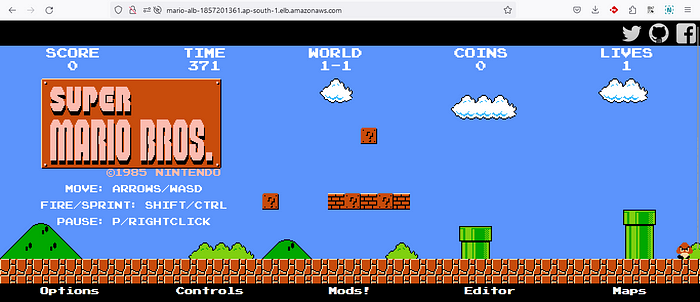
Now we are all good to go. Let us copy the LoadBalancer DNS and browse it.

Here it is. We have Super Mario game deployed with AWS ECS.
Hope this tutorial was able to get you through the steps properly.
You can watch this Deployment live in the below video;
If you have any doubts, feel free to comment below.
Subscribe to my newsletter
Read articles from Ajay S Nair directly inside your inbox. Subscribe to the newsletter, and don't miss out.
Written by
