React Native Permissions: A Guide to Implementation
 Prem Kumar
When it comes to handling permissions in a React Native app, developers have a couple of options: the default React Native package (react-native) and the specialized package (react-native-permissions). In this guide, we'll explore the key differences between the two and dive into the implementation details of each approach.

1. React Native (Default Package):
Overview:
Default package that encompasses various modules, including permission-related features.
Offers good performance and is suitable for handling a range of functionalities.
Implementation:
Permissions are requested using the
PermissionsAndroidmodule.Before implementation, ensure that the required permissions are enabled in the app settings (AndroidManifest.xml).

1. Essential Permissions:
Ensure the following permissions are included in your AndroidManifest.xml file to access camera, gallery, and related functionalities:
<uses-permission android:name="android.permission.CAMERA"/>
<uses-permission android:name="android.permission.READ_EXTERNAL_STORAGE"/>
<uses-permission android:name="android.permission.READ_MEDIA_IMAGES" />
<uses-permission android:name="android.permission.READ_MEDIA_VIDEO" />
<uses-permission android:name="android.permission-group.CAMERA"/>
2. Camera Permissions:
- Applicable for Android API > 31, and it may work for some versions < 31 as well.
android.permission-group.CAMERA:
- For Android API 31 and above,
android.permission.CAMERAis not supported. The recommended alternative is to use the group permission.
3. External Storage Access:
READ_EXTERNAL_STORAGE:
- Required for accessing the gallery in Android API < 31.
READ_MEDIA_IMAGES:
- For Android API > 31, use this permission to read media images.
4. Permission Group Consideration:
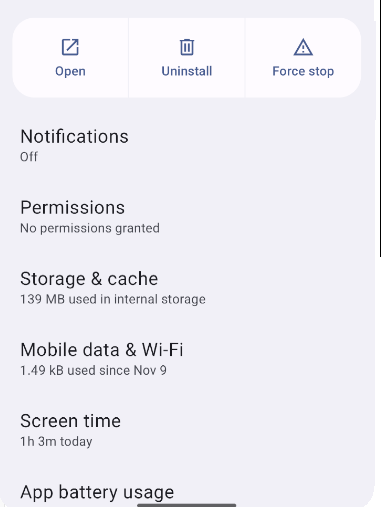
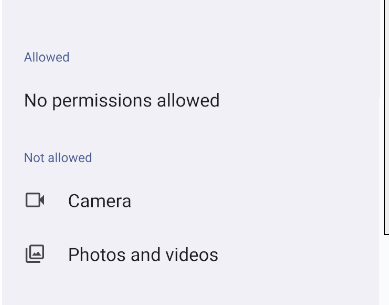
If the specified permissions are not added to your app’s AndroidManifest.xml, the necessary permissions won't be present in the app settings, leading to potential issues in functionality.
By ensuring the inclusion of these permissions, your React Native app will be equipped to interact seamlessly with device features, providing a better user experience.

Permission
Example for requesting camera permission:
:
import { PermissionsAndroid, Linking } from 'react-native';

const requestCameraPermission = async () => {
  const granted = await PermissionsAndroid.requestMultiple([
    PermissionsAndroid.PERMISSIONS.READ_EXTERNAL_STORAGE,
    PermissionsAndroid.PERMISSIONS.READ_MEDIA_IMAGES,
    PermissionsAndroid.PERMISSIONS.CAMERA,
  ]);

  console.log('granted', granted);
  return granted;
};

const permissionStatus = await requestCameraPermission();
console.log('permissionStatus', permissionStatus);

if (permissionStatus[PermissionsAndroid.PERMISSIONS.CAMERA] === 'granted') {
  // Code to access the camera
} else if (permissionStatus[PermissionsAndroid.PERMISSIONS.CAMERA] === 'never_ask_again') {
  Linking.openSettings();
}
2. React Native Permissions Package:
Overview:
Specialized package designed specifically for managing permissions in React Native.
Offers good performance and is focused solely on permission-related functionalities.
Implementation:
Permissions are handled using the
react-native-permissionspackage.Example for requesting multiple permissions:
import { checkMultiple, requestMultiple, PERMISSIONS, RESULTS } from 'react-native-permissions';

requestMultiple([
  PERMISSIONS.ANDROID.CAMERA,
  PERMISSIONS.ANDROID.READ_EXTERNAL_STORAGE,
  PERMISSIONS.ANDROID.READ_MEDIA_IMAGES,
]).then((statuses) => {
  console.log('CAMERA', statuses[PERMISSIONS.ANDROID.CAMERA]);

  if (statuses[PERMISSIONS.ANDROID.CAMERA] === 'granted') {
    // Code to access the camera
  } else if (statuses[PERMISSIONS.ANDROID.READ_MEDIA_IMAGES] === 'granted') {
    console.log('READ_MEDIA_IMAGES', statuses[PERMISSIONS.ANDROID.READ_MEDIA_IMAGES]);
    // Code to access the gallery
  }
});
Choosing the Right Method:
Both methods achieve the same goal, but the preferred approach is Method 1 (React Native’s default package) due to its simplicity and the fact that it eliminates the need for an additional package. This leads to cleaner code and potentially better performance.
In conclusion, when dealing with permissions in React Native, consider your specific use case and choose the method that aligns with your project’s requirements and coding practices.
Happy coding! 🚀
Reference: Check my YouTube.
Subscribe to my newsletter
Read articles from Prem Kumar directly inside your inbox. Subscribe to the newsletter, and don't miss out.
Written by

Prem Kumar
Prem Kumar
Full Stack Software Engineer | Web and mobile Application Developer | Angular | React Native | AWS | Node