Best Way To Create React Native Button
 Swati Priya
If you are new to react native and you are confused whether you should use Button ,TouchableOpacity or Pressable component in react-native. Then you are at right place, I am going to give you a reason which one should you use and why.
React Native provides you several ways to create buttons.
Button - Use build-in
<Button/>component which renders a basic button which works on any(android/ios) platform but the twist is, it support minimal customization. Even it doesn't allows you to writestyleprops. It only allowscolorprops to change the look of default buttonimport React from "react"; import { View, Button, StyleSheet } from "react-native"; const App = () => { return ( <View style={styles.screenContainer}> <Button title="Click me!" color="red" onPress={() => console.log("Button pressed")}></Button> </View> ); }; const styles = StyleSheet.create({ screenContainer: { flex: 1, justifyContent: "center", alignItems: "center", }, }); export default App

TouchableOpacity Vs Pressable
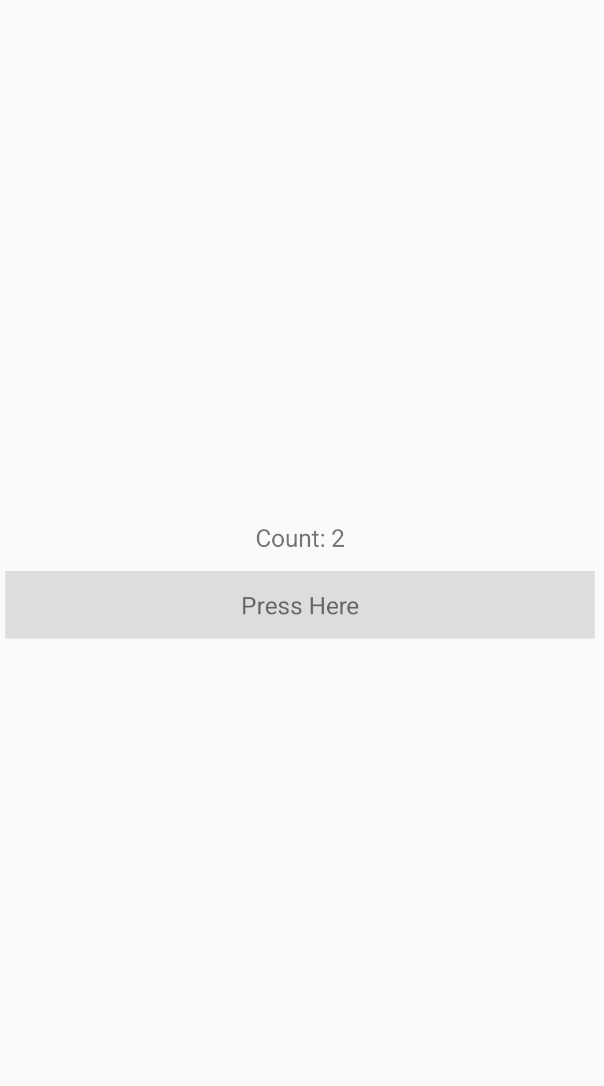
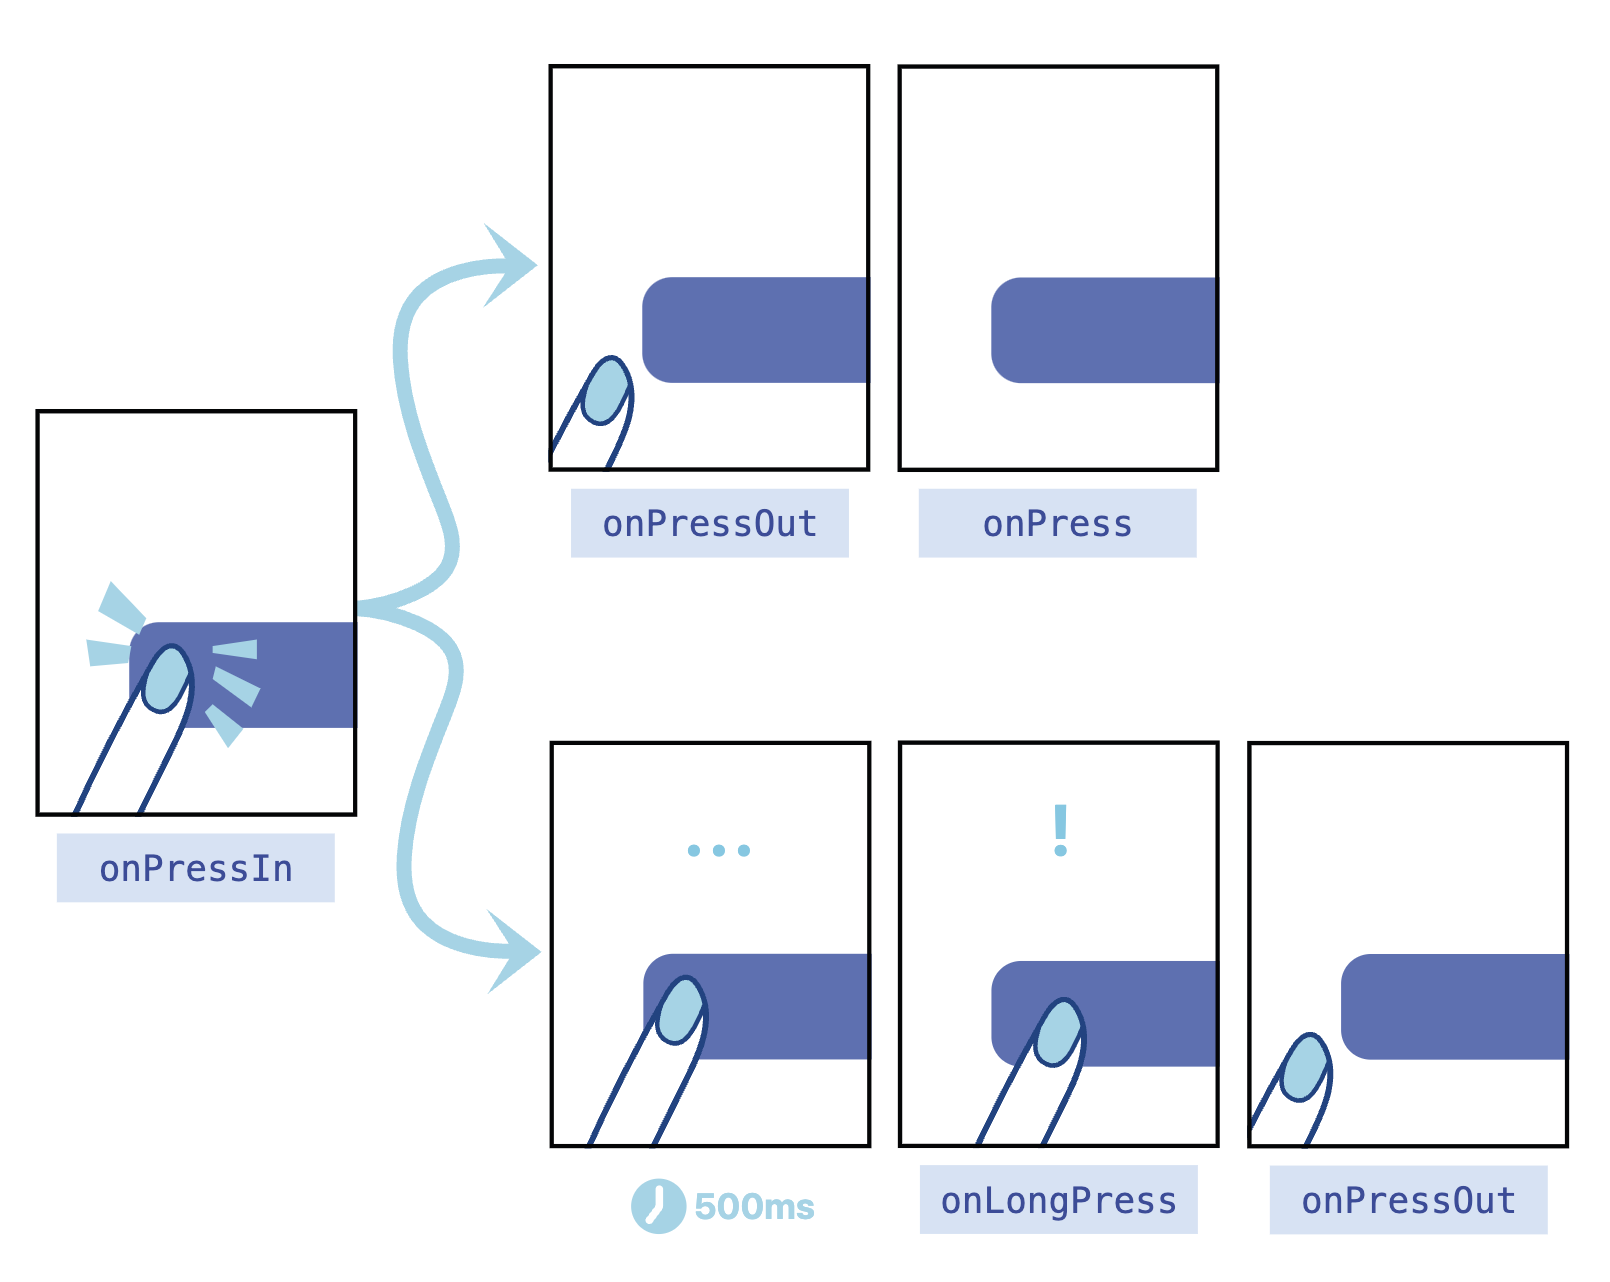
TouchableOpacityis a high Level component which provides you a simple way to create touchable element where asPressableis a low level component provides you more control over your touchable's element apperance & behaviour. Styling of both the component is done throughstyleprops.Pressablecomponent has the props likeonHoverIn,onHoverOut,onLongPress,onPress,onPressIn,onPressOutto make the button's presence more better.In summary, if you want a simple way to create a touchable button without worrying about the underlying implementation, use
TouchableOpacity. If you need more control over the touchable element's appearance and behavior, usePressable. Both components can be used to create touchable buttons in your React Native app, and they can be styled using their respectivestyleprops.
import React, {useState} from 'react';
import {StyleSheet, Text, TouchableOpacity, View} from 'react-native';

const App = () => {
  const [count, setCount] = useState(0);
  const onPress = () => setCount(prevCount => prevCount + 1);

  return (
    <View style={styles.container}>
      <View style={styles.countContainer}>
        <Text>Count: {count}</Text>
      </View>
      <TouchableOpacity style={styles.button} onPress={onPress}>
        <Text>Press Here</Text>
      </TouchableOpacity>
    </View>
  );
};

const styles = StyleSheet.create({
  container: {
    flex: 1,
    justifyContent: 'center',
    paddingHorizontal: 10,
  },
  button: {
    alignItems: 'center',
    backgroundColor: '#DDDDDD',
    padding: 10,
  },
  countContainer: {
    alignItems: 'center',
    padding: 10,
  },
});

export default App;

import React from 'react';
import { Pressable, Text,StyleSheet, View } from 'react-native';

const App = () => {
  const onPressHandler = () => {
    console.log('Pressed!');
  };

  const onLongPressHandler = () => {
    console.log('Long Pressed!');
  };

  const onPressInHandler = () => {
    console.log('Press In!');
  };

  const onPressOutHandler = () => {
    console.log('Press Out!');
  };

  return (
   <View style={styles.container}>
     <Pressable
      onPress={onPressHandler}
      onLongPress={onLongPressHandler}
      onPressIn={onPressInHandler}
      onPressOut={onPressOutHandler}
      style={({ pressed }) => ([{ backgroundColor: pressed ? 'gray' : 'pink' },styles.button])}
    >
      <Text>Press me!</Text>
    </Pressable>
   </View>
  );
};

const styles = StyleSheet.create({
  container: {
    flex:1,
    justifyContent: 'center',
    alignItems:'center',
    paddingHorizontal: 10,
  },
  button:{
    borderRadius:10,
    width:'50%',
    height:40,
    alignItems:'center',
    justifyContent:'center'
  }
})

export default App;

Subscribe to my newsletter
Read articles from Swati Priya directly inside your inbox. Subscribe to the newsletter, and don't miss out.
Written by
