Unified Protection: S3 Cross-Account Backups Simplified with AWS Backup
 Mahesh Upreti
You might have heard about AWS Backup which provides a comprehensive solution for managing backups across various services including S3, databases, and compute resources. When it comes to S3, AWS Backup allows for continuous backups and offers the convenience of restoring application data stored in S3 to a specific point in time with just a single click. This centralized management of backups, regardless of the diverse sources of data, makes it easier to maintain and recover your application's information. In this post, we will be talking about backing up our AWS S3 bucket and objects using a cross-account policy.
The cross-account backup involves running two jobs; the backup job and the copy job. First, the backup job is rune and a recovery point is created in the source account's vault and then that vault's recovery point is copied to the destination account. This cross-account helps to restore application in a different account from a specific point in time even though the source account backup have been destroyed. Before moving on to practical, consider the following prerequisites needed for the cross-account backups in s3.
What do you need to create cross-account backups?
A source account
A destination account
A management account in AWS Organizations
Enable cross-account backup in the AWS Backup console
Enable cross-account backup
Log in to AWS using your AWS Organizations management account credentials. Cross-account backup can only be enabled or disabled using these credentials.
Open the AWS Backup console at https://console.aws.amazon.com/backup.
In My Account, choose Settings.
For Cross-account backup, choose Enable.
In Backup Vaults, choose your destination vault.
In the Access policy section, "Allow"
backup:CopyIntoBackupVault. For an example, choose Add permissions and then Allow access to a Backup vault from the organization.
Schedule cross-account backup
We will not be creating the on-demand jobs. Instead, we will focus on creating the backup plan and schedule the job to run at a specific time of each day.
Open the AWS Backup console at https://console.aws.amazon.com/backup.
In My account, choose Backup plans, and then choose Create Backup plan.
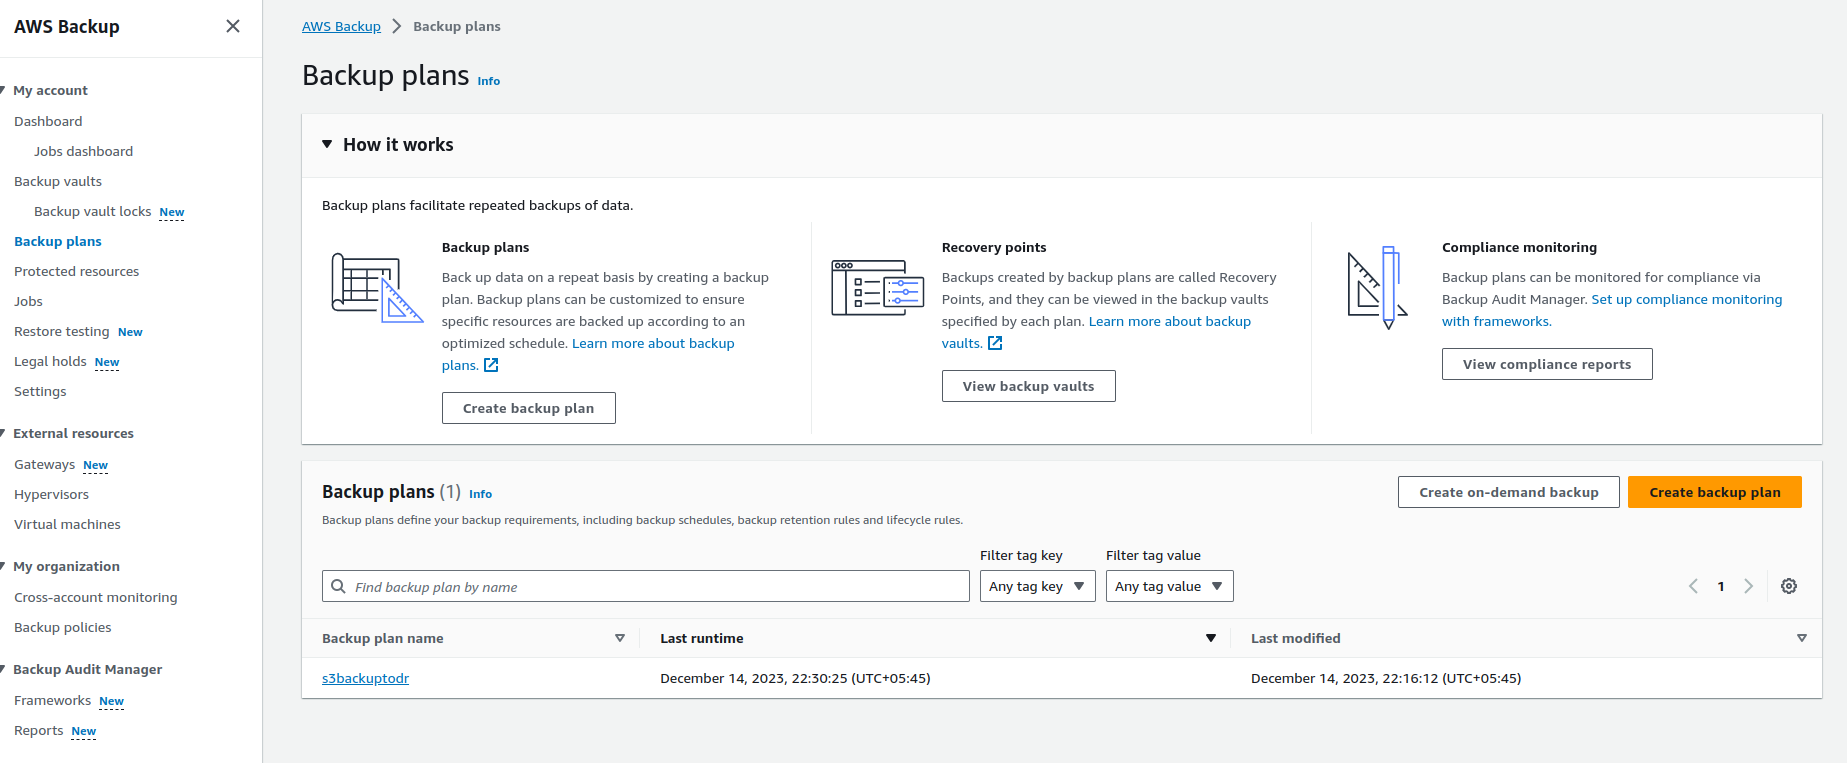
On the Create Backup plan page, choose Build a new plan.
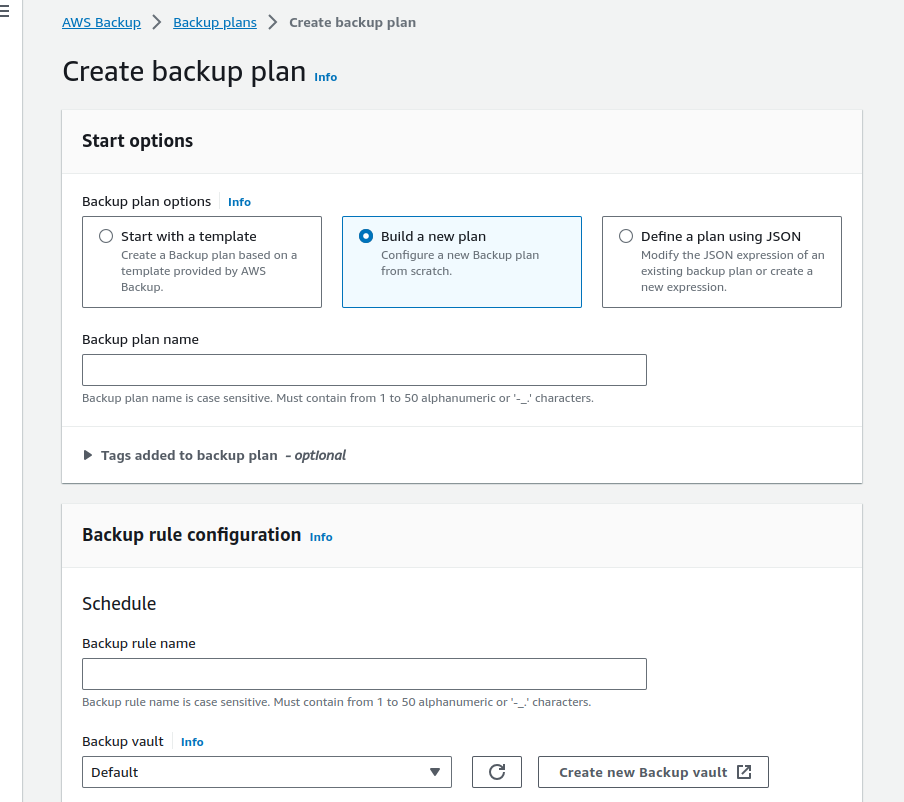
For the Backup plan name, enter a name for your backup plan.
In the Backup rule configuration section, add a backup rule that defines a backup schedule, backup window, and lifecycle rules. You can add more backup rules later.
In the Schedule section under Frequency, choose how often you want the backup to be taken.
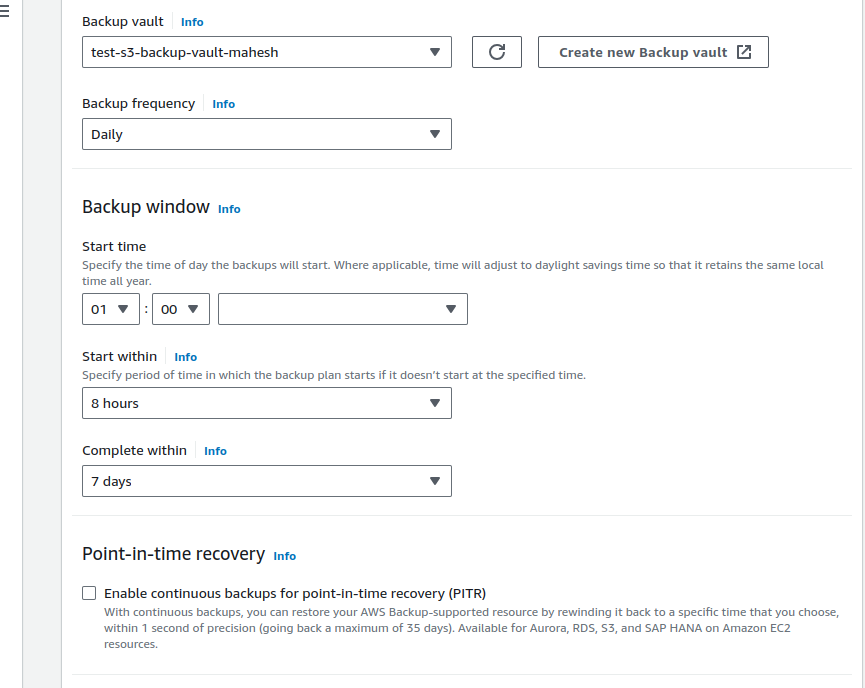
For the Backup window, choose Use backup window defaults (recommended). You can customize the backup window.
Start time: It refers to the exact time at which you want to start running the job.
Start Within: This specifies the period in which the backup plan starts if it doesn't start at the specified time.
Complete within: It specifies the period within which the job must be completed.
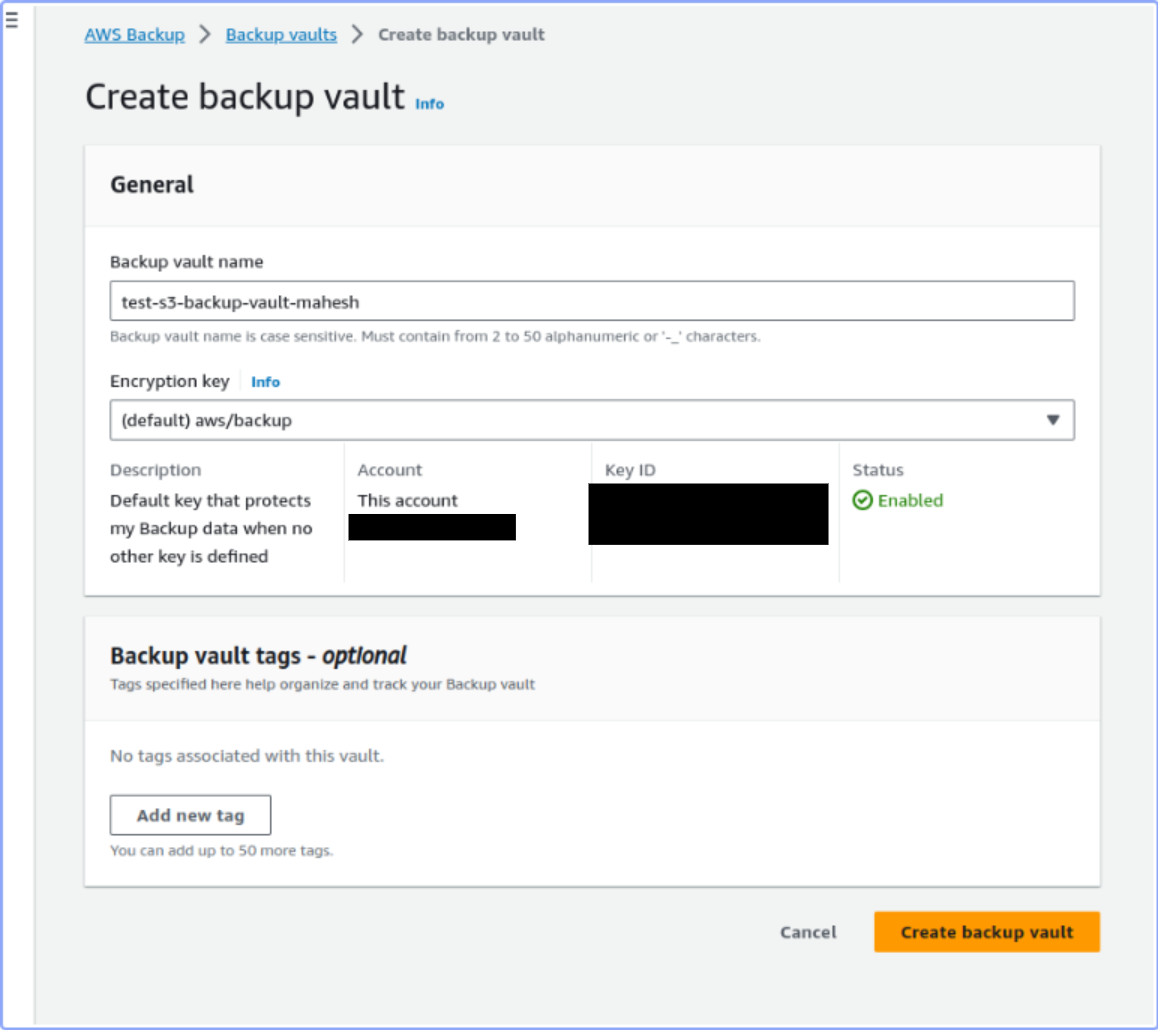
For the Backup vault, choose a vault from the list. Recovery points for this backup will be saved in this vault. You can create a new backup vault. This backup vault will be created in the source account to store the recovery point before copying it to the destination account. For now, you can use the default encryption key.
In the Generate copy - optional section, enter the following values:
Destination Region
Choose the destination AWS Region for your backup copy. Your backup will be copied to this Region. You can add a new copy rule per copy to a new destination.
Copy to another account's vault
Toggle to choose this option. The option turns blue when selected. The External Vault ARN option will appear.
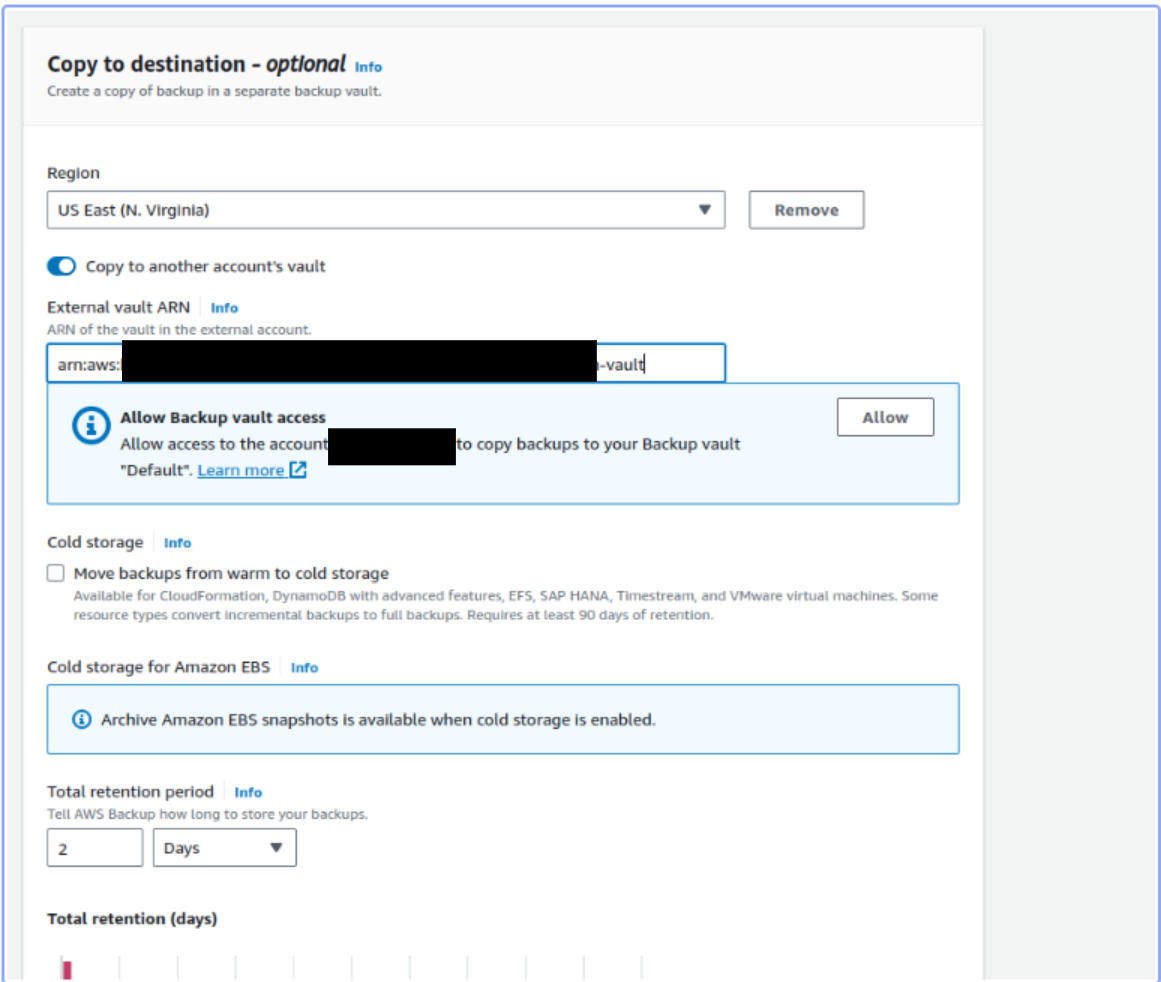
External vault ARN
Enter the Amazon Resource Name (ARN) of the destination account. AWS Backup will copy the backup to the destination account's vault. The Destination region list automatically updates to the Region in the external vault ARN.
For Allow Backup vault access, choose to Allow. Then choose Allow in the wizard that opens.
Note: AWS Backup needs permission to access the external account to copy the backup to the specified value. The wizard shows the following example policy that provides this access.
 {
   "Version": "2012-10-17",
   "Statement": [
     {
       "Sid": "Allow account to copy into backup vault",
       "Effect": "Allow",
       "Action": "backup:CopyIntoBackupVault",
       "Resource": "*",
       "Principal": {
         "AWS": "arn:aws:iam::account-id:root"
       }
     }
   ]
 }
Choose Tags added to recovery points to add tags to your recovery points.
For Advanced backup settings, choose Windows VSS to enable application-aware snapshots for the selected third-party software running on EC2.
Choose Create plan.
Resource assignment
Resource assignment specifies which resources AWS Backup will protect using your backup plan. AWS Backup gives you both simple default settings and fine-grained controls to assign resources to your backup plan.
To navigate to the Assign resources page:
Open the AWS Backup console at https://console.aws.amazon.com/backup.
Choose Backup plans.
Choose Create Backup plan.
Select any template in the Choose template dropdown list, then choose Create plan.
Type in a Backup plan name.
Choose Create plan.
Choose Assign resources.
To begin your resource assignment, in the General section:
Type in a Resource assignment name.
Choose the Default role or Choose an IAM role.
Note
If you choose an IAM role, verify that it has permission to back up all the resources you are about to assign. If your role encounters a resource that it doesn't have permission to back up, your backup plan will fail.
To assign your resources, in the Assign resources section, choose one of the two options under Define resource selection:
Include all resource types
Include specific resource types
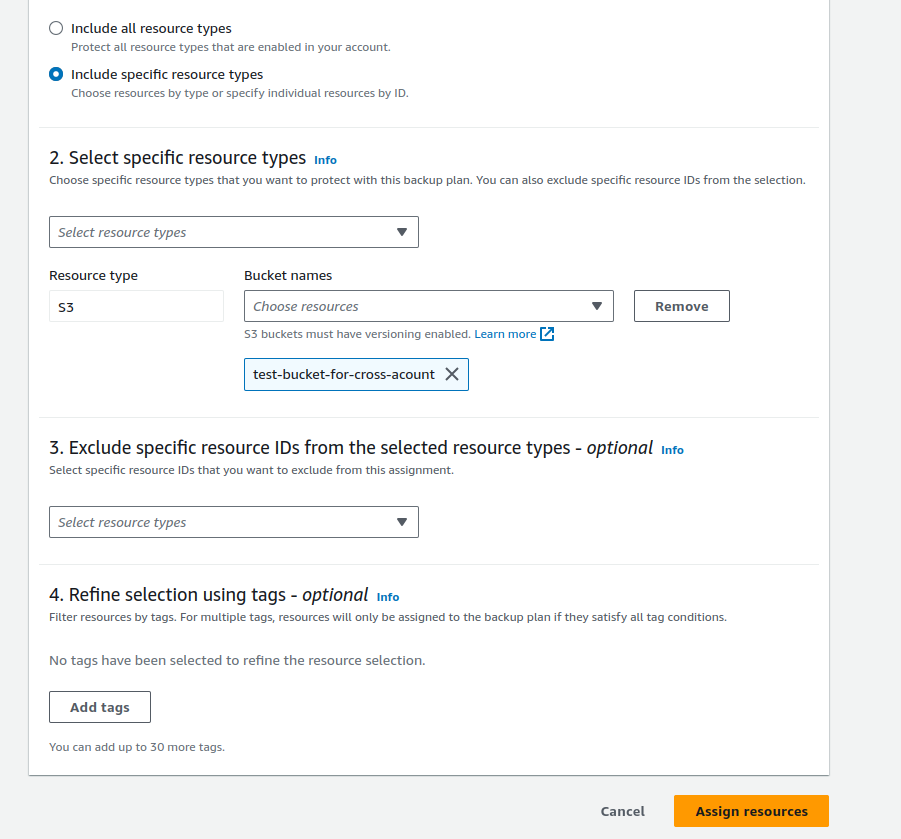
You can also exclude specific resource IDs from the selected resource types.
To refine your selection using tags:
Under Refine selection using tags, choose a Key from the dropdown list.
Choose a Condition for value from the dropdown list.
Value refers to the next input, the value of your key-value pair.
Condition can be
Equals,Contains,Begins with, orEnds with, or their inverse:Does not equal,Does not contain,Does not begin with, orDoes not end with.
Choose a Value from the dropdown list.
To further refine using another tag, choose Add tag.
Note: You must provide an access policy to the destination vault to copy from the source vault.

In the destination backup vault's access policy section, you must allow access to a Backup vault from the organization. If that doesn't work, allow access to a Backup vault from the organizational unit too.
Conclusion
After assigning resources to the AWS Backup, the job starts to run at the provided schedule.
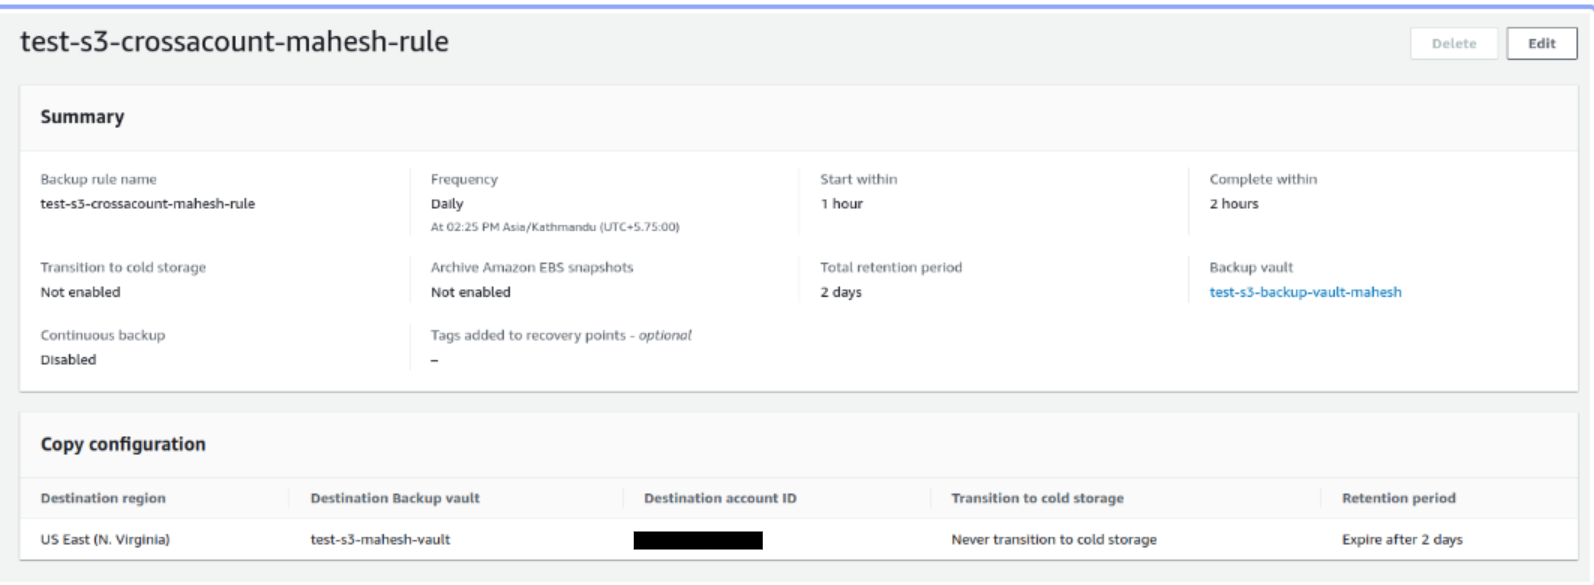
As you can see in the above picture, there are two configurations. One is for the backup rule and another for the copy configuration. The bucket is first backed up in the source account and then it is copied to the respective destination account.


The above images show the completion of one job after another. The backup job is completed and then the copy job is completed.

Our destination account vault now consists of a recovery point through which we can restore our bucket with specific or all objects.
We will discuss about restore job in another post.
Subscribe to my newsletter
Read articles from Mahesh Upreti directly inside your inbox. Subscribe to the newsletter, and don't miss out.
Written by

Mahesh Upreti
Mahesh Upreti
I am a DevOps and Cloud enthusiast currently exploring different AWS services and DevOps tools.